Lichmassacre (talk | contribs) m (Lichmassacre moved page MvCI/Nemesis to Marvel VS Capcom: Infinite/Nemesis) |
|||
| (15 intermediate revisions by 5 users not shown) | |||
| Line 1: | Line 1: | ||
[[File:Mvci_logo.png|link=MvCI]] | [[File:Mvci_logo.png|link=MvCI]] | ||
{| | {{MVC2 Character Intro|char=Nemesis|full=Nemesis|short=NM|content= | ||
| | {{2 Column Flex|flex1=6|flex2=4 | ||
| | |content1= | ||
== Story == | |||
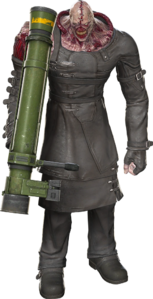
Nemesis is a bioengineered mutation designed to take hits and deal them the same. He was created and designed by Umbrella to wipe out the members of S.T.A.R.S., more specifically, Jill Valentine. He put up one hell of a fight, going through several mutation stages, before finally being wiped from the face of the Earth. | |||
== | == Gameplay == | ||
Nemesis is a big, hulking wall of flesh. Like in Resident Evil, he has all the tools he needs to try and beat his opponent senselessly. Making use of his long limbs and armor, it can be incredibly hard to find an opening against him. His advantage state is absolutely devastating and can often kill his opponent off of only 2-3 openings. He has pretty much everything he needs to be strong and makes a good partner for anyone. | |||
{{ | <!-- '''TODO:''' Write an expanded gameplay description --> | ||
|content2= | |||
{{Content Box|content= | |||
<center><youtube><v=Ma585JdARqY></youtube></center> | |||
}} | |||
}} | |||
{{ProConTable | |||
= | |pros= | ||
*'''Damage:''' Even from light starters, Nemesis can easily break 6k damage from one combo by himself (about half health), pushing 7k from the right starters. | |||
*'''Big Limbs:''' Using his tentacles, rocket launcher, and even just his arm, Nemesis has a plethora of long reaching normals and specials that can convert into full combos. | |||
*'''Armor:''' Most of Nemesis' normals have armor against light attacks and low durability projectiles, making it hard to just play neutral when he's anywhere near you. | |||
*'''BIONIC AAAAAAARM:''' Biohazard Rush is not only invincible, but also does great damage and works as a great lockdown tool. There's almost never a bad time to use it. | |||
*'''Command Grab:''' Although command grabs are all generally bad in this game, Nemesis arguably has the best one. It does decent damage, can snag opponents out of the air, and leads to a followup. | |||
|cons= | |||
*'''Mobility:''' Nemesis can't easily get around zoning or keep up with quicker characters. | |||
*'''Frame Data:''' Although his normals have armor against lights, they're very slow compared to other characters and will lose to an opponent who catches on and starts using more heavies. | |||
*'''Midscreen Combos:''' Since most of his combo extension tools utilize wall bounces, ground bounces, and sliding knockdowns, he often has to cut his midscreen combos short since all extension will get used fairly quickly. | |||
}} | |||
}} | |||
{{ MvCICharacterDataBox | 11,000 | No | No | 0 | - }} | {{ MvCICharacterDataBox | 11,000 | No | No | 0 | - }} | ||
| Line 25: | Line 42: | ||
=== Normals === | === Normals === | ||
{{UMvC3MoveListRow2.0 | {{UMvC3MoveListRow2.0 | ||
|photo= | |photo= [[File:Nemesis_LP_Hitbox.png|200px|]] | ||
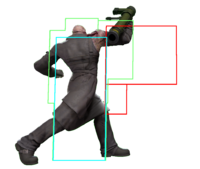
|name=Standing Light Punch | |name=Standing Light Punch | ||
|command=[[File:Mvci_lp.png]] | |command=[[File:Mvci_lp.png]] | ||
|damage= | |damage=600 | ||
|guard= | |guard=Mid | ||
|properties= | |properties= | ||
|startup= | |startup=9 | ||
|active= | |active= | ||
|recovery= | |recovery= | ||
|hit= | |hit=-10 | ||
|block= | |block=-13 | ||
|notes= | |notes=- | ||
}} | }} | ||
{{UMvC3MoveListRow2.0 | {{UMvC3MoveListRow2.0 | ||
|photo= | |photo=[[File:5HP-fixed.png|200px|]] | ||
|name=Standing Heavy Punch | |name=Standing Heavy Punch | ||
|command=[[File:Mvci_hp.png]] | |command=[[File:Mvci_hp.png]] | ||
|damage= | |damage=800 | ||
|guard= | |guard=Mid | ||
|properties= | |properties= | ||
|startup= | |startup=17 | ||
|active= | |active= | ||
|recovery= | |recovery= | ||
|hit= | |hit=-22 | ||
|block= | |block=-27 | ||
|notes= | |notes=Has better reach vs. standing opponents than crouching ones, but can still hit even the tiniest crouching characters up-close. | ||
}} | }} | ||
{{UMvC3MoveListRow2.0 | {{UMvC3MoveListRow2.0 | ||
|photo= | |photo=[[File:Nem 5LK Hit.png|200px]] | ||
|name=Standing Light Kick | |name=Standing Light Kick | ||
|command=[[File:Mvci_lk.png]] | |command=[[File:Mvci_lk.png]] | ||
|damage= | |damage=800 | ||
|guard= | |guard=Mid | ||
|properties= | |properties= | ||
|startup= | |startup=10 | ||
|active= | |active= | ||
|recovery= | |recovery= | ||
|hit= | |hit=-7 | ||
|block= | |block=-12 | ||
|notes= | |notes=- | ||
}} | }} | ||
{{UMvC3MoveListRow2.0 | {{UMvC3MoveListRow2.0 | ||
|photo= | |photo=[[File:Nem 5HK Hit.png|200px]] | ||
|name=Standing Heavy Kick | |name=Standing Heavy Kick | ||
|command=[[File:Mvci_hk.png]] | |command=[[File:Mvci_hk.png]] | ||
|damage= | |damage=800 | ||
|guard= | |guard=Mid | ||
|properties= | |properties= | ||
|startup= | |startup=13 | ||
|active= | |active= | ||
|recovery= | |recovery= | ||
|hit= | |hit=-11 | ||
|block= | |block=-16 | ||
|notes= | |notes=- | ||
}} | }} | ||
{{UMvC3MoveListRow2.0 | {{UMvC3MoveListRow2.0 | ||
| Line 84: | Line 101: | ||
|name=Crouching Light Punch | |name=Crouching Light Punch | ||
|command=[[File:Mvci_down.png]][[File:Mvci_lp.png]] | |command=[[File:Mvci_down.png]][[File:Mvci_lp.png]] | ||
|damage= | |damage=600 | ||
|guard= | |guard=Mid | ||
|properties= | |properties= | ||
|startup= | |startup=12 | ||
|active= | |active= | ||
|recovery= | |recovery= | ||
|hit= | |hit=-10 | ||
|block= | |block=-13 | ||
|notes= | |notes=- | ||
}} | }} | ||
{{UMvC3MoveListRow2.0 | {{UMvC3MoveListRow2.0 | ||
| Line 98: | Line 115: | ||
|name=Crouching Heavy Punch | |name=Crouching Heavy Punch | ||
|command=[[File:Mvci_down.png]][[File:Mvci_hp.png]] | |command=[[File:Mvci_down.png]][[File:Mvci_hp.png]] | ||
|damage= | |damage=800 | ||
|guard= | |guard=Mid | ||
|properties=Launch | |properties=Launch | ||
|startup= | |startup=16 | ||
|active= | |active= | ||
|recovery= | |recovery= | ||
|hit= | |hit= | ||
|block= | |block=-16 | ||
|notes= | |notes=Nemesis's launcher. | ||
}} | }} | ||
{{UMvC3MoveListRow2.0 | {{UMvC3MoveListRow2.0 | ||
| Line 112: | Line 129: | ||
|name=Crouching Light Kick | |name=Crouching Light Kick | ||
|command=[[File:Mvci_down.png]][[File:Mvci_lk.png]] | |command=[[File:Mvci_down.png]][[File:Mvci_lk.png]] | ||
|damage= | |damage=800 | ||
|guard= | |guard=Low | ||
|properties= | |properties= | ||
|startup= | |startup=10 | ||
|active= | |active= | ||
|recovery= | |recovery= | ||
|hit= | |hit=-2 | ||
|block= | |block=-7 | ||
|notes= | |notes=Nemesis's only low. | ||
}} | }} | ||
{{UMvC3MoveListRow2.0 | {{UMvC3MoveListRow2.0 | ||
| Line 126: | Line 143: | ||
|name=Crouching Heavy Kick | |name=Crouching Heavy Kick | ||
|command=[[File:Mvci_down.png]][[File:Mvci_hk.png]] | |command=[[File:Mvci_down.png]][[File:Mvci_hk.png]] | ||
|damage= | |damage=800 | ||
|guard= | |guard=Mid | ||
|properties= | |properties=Soft Knockdown | ||
|startup= | |startup=19 | ||
|active= | |active= | ||
|recovery= | |recovery= | ||
|hit= | |hit= | ||
|block= | |block=-42 | ||
|notes= | |notes=This shoulder tackle makes Nemesis move forward quite far, and it moves even farther when you cancel it on hit/block into 6HK. | ||
}} | }} | ||
{{UMvC3MoveListRow2.0 | {{UMvC3MoveListRow2.0 | ||
|photo= | |photo= | ||
|name=Jumping Light Punch | |name=Jumping Light Punch | ||
|command= | |command=j.[[File:Mvci_lp.png]] | ||
|damage= | |damage=600 | ||
|guard=High | |guard=High | ||
|properties= | |properties= | ||
|startup= | |startup=10 | ||
|active= | |active= | ||
|recovery= | |recovery= | ||
|hit= | |hit=- | ||
|block= | |block=- | ||
|notes= | |notes=- | ||
}} | }} | ||
{{UMvC3MoveListRow2.0 | {{UMvC3MoveListRow2.0 | ||
|photo= | |photo= | ||
|name=Jumping Heavy Punch | |name=Jumping Heavy Punch | ||
|command= | |command=j.[[File:Mvci_hp.png]] | ||
|damage= | |damage=800 | ||
|guard=High | |guard=High | ||
|properties= | |properties= | ||
|startup= | |startup=17 | ||
|active= | |active= | ||
|recovery= | |recovery= | ||
|hit= | |hit=- | ||
|block= | |block=- | ||
|notes= | |notes=- | ||
}} | }} | ||
{{UMvC3MoveListRow2.0 | {{UMvC3MoveListRow2.0 | ||
|photo= | |photo= | ||
|name=Jumping Light Kick | |name=Jumping Light Kick | ||
|command= | |command=j.[[File:Mvci_lk.png]] | ||
|damage= | |damage=800 | ||
|guard=High | |guard=High | ||
|properties= | |properties= | ||
|startup= | |startup=18 | ||
|active= | |active= | ||
|recovery= | |recovery= | ||
|hit= | |hit=- | ||
|block= | |block=- | ||
|notes= | |notes=Has a very wide hitbox that allows you to easily cross-up, especially on a short hop. | ||
}} | }} | ||
{{UMvC3MoveListRow2.0 | {{UMvC3MoveListRow2.0 | ||
|photo= | |photo= | ||
|name=Jumping Heavy Kick | |name=Jumping Heavy Kick | ||
|command= | |command=j.[[File:Mvci_hk.png]] | ||
|damage= | |damage=200+400+800 (1320) | ||
|guard= | |guard=Mid | ||
|properties=Groundbounce Hardknockdown | |properties=Groundbounce Hardknockdown | ||
|startup= | |startup=16 | ||
|active= | |||
|recovery= | |||
|hit=- | |||
|block=- | |||
|notes=This long-reaching air normal pays the price for its reach by being a mid instead of a high. Its multiple hits do make it useful for confirming, however. | |||
}} | |||
=== Command Normals === | |||
{{UMvC3MoveListRow2.0 | |||
|photo= | |||
|name=Deadly Reach | |||
|command=[[File:Mvci_fwd.png]][[File:Mvci_hk.png]] | |||
|damage=200+400+800 (1320) | |||
|guard=Mid | |||
|properties= | |||
|startup=16 | |||
|active= | |||
|recovery= | |||
|hit=-26 | |||
|block=-31 | |||
|notes=-Only last hit connects vs. standing: Arthur, Rocket Raccoon, X, Zero<br>-Last 2 hits connect vs. crouching: Nemesis<br>-All 3 hits connect vs. crouching: Hulk<br><br>This long-reaching tentacle attack has an unfortunate deadzone from Nemesis's shoulder to his hand, but you're meant to use it from afar anyway. | |||
}} | |||
{{UMvC3MoveListRow2.0 | |||
|photo= | |||
|name=Air Deadly Reach | |||
|command=j.[[File:Mvci_fwd.png]][[File:Mvci_hk.png]] | |||
|damage=200+400+800 (1320) | |||
|guard=Mid | |||
|properties= | |||
|startup=16 | |||
|active= | |active= | ||
|recovery= | |recovery= | ||
|hit= | |hit=- | ||
|block= | |block=- | ||
|notes= | |notes=Essentially a horizontally-angled version of Nemesis's j.HK. Only hits the tallest characters standing. | ||
}} | }} | ||
| Line 198: | Line 244: | ||
|name=Throw | |name=Throw | ||
|command=[[File:Mvci_fwd.png]] or [[File:Mvci_back.png]][[File:Mvci_hp.png]] | |command=[[File:Mvci_fwd.png]] or [[File:Mvci_back.png]][[File:Mvci_hp.png]] | ||
|damage= | |damage=1500 | ||
|guard= | |guard=Throw | ||
|properties= | |properties= | ||
|startup=3 | |startup=3 | ||
|active=1 | |active=1 | ||
|recovery= | |recovery=- | ||
|hit= | |hit=- | ||
|block= | |block=- | ||
|notes=Additional damage scales by 50% | |notes=Additional damage scales by 50%. Very difficult to combo off of solo mid-screen, but trivial in the corner. Mid-screen, generally a tag to a partner with a fast full-screen option (likely a hyper) is necessary. | ||
}} | }} | ||
{{UMvC3MoveListRow2.0 | {{UMvC3MoveListRow2.0 | ||
| Line 212: | Line 258: | ||
|name=Air Throw | |name=Air Throw | ||
|command=[[File:Mvci_fwd.png]] or [[File:Mvci_back.png]][[File:Mvci_hp.png]] | |command=[[File:Mvci_fwd.png]] or [[File:Mvci_back.png]][[File:Mvci_hp.png]] | ||
|damage= | |damage=1500 | ||
|guard= | |guard=Throw | ||
|properties= | |properties= | ||
|startup=3 | |startup=3 | ||
|active=1 | |active=1 | ||
|recovery= | |recovery=- | ||
|hit= | |hit=- | ||
|block= | |block=- | ||
|notes=Additional damage scales by 50% | |notes=Additional damage scales by 50%. Very difficult to combo off of solo mid-screen, but trivial in the corner. Mid-screen, a tag and then forward dash should let many characters get an OTG into a full combo. | ||
}} | }} | ||
{{UMvC3MoveListRow2.0 | {{UMvC3MoveListRow2.0 | ||
| Line 227: | Line 273: | ||
|command=[[File:Mvci_tag.png]] | |command=[[File:Mvci_tag.png]] | ||
|damage=500 | |damage=500 | ||
|guard= | |guard=Mid | ||
|properties= | |properties= | ||
|startup=6 | |startup=6 | ||
| Line 234: | Line 280: | ||
|hit=+33 | |hit=+33 | ||
|block=+28 | |block=+28 | ||
|notes=Hit/Block adv is dependent on when you {{cancel}} your tag-in | |notes=Hit/Block adv is dependent on when you {{cancel}} your tag-in. | ||
}} | }} | ||
| Line 240: | Line 286: | ||
{{MvCIMoveListRow2.1 | {{MvCIMoveListRow2.1 | ||
|photo= | |photo= | ||
|name= | |name=Clothesline Rocket | ||
|command=[[File:Mvci_qcf.png]][[File:Mvci_lp.png]] or [[File:Mvci_hp.png]] | |command=[[File:Mvci_qcf.png]][[File:Mvci_lp.png]] or [[File:Mvci_hp.png]] | ||
|ldamage= | |ldamage=1200 | ||
|lguard= | |lguard=Mid | ||
|lstartup=19 | |||
|lactive= | |||
|lrecovery= | |||
|lhit= | |||
|lblock=-32 | |||
|lproperties= | |||
|hdamage=1200+1000+350 (2350) | |||
|hguard=Mid | |||
|hstartup=23 | |||
|hactive= | |||
|hrecovery= | |||
|hhit= | |||
|hblock=-13 | |||
|hproperties= | |||
|notes=- | |||
}} | |||
{{MvCIMoveListRow2.1 | |||
|photo= | |||
|name=Launcher Slam | |||
|command=[[File:Mvci_qcb.png]][[File:Mvci_lp.png]] or [[File:Mvci_hp.png]] | |||
|ldamage=1500 | |||
|lguard=Mid | |||
|lstartup=15 | |||
|lactive= | |||
|lrecovery= | |||
|lhit= | |||
|lblock=-12 | |||
|lproperties= | |||
|hdamage=1500 | |||
|hguard=Mid | |||
|hstartup=18 | |||
|hactive= | |||
|hrecovery= | |||
|hhit= | |||
|hblock=-18 | |||
|hproperties=Ground Bounce, Hard Knockdown | |||
|notes=- | |||
}} | |||
{{UMvC3MoveListRow2.0 | |||
|photo= | |||
|name=Rocket Launcher | |||
|command=[[File:Mvci_qcf.png]][[File:Mvci_lk.png]] | |||
(Can be charged) | |||
|damage=1000+500 (1450) | |||
|guard=Mid | |||
|properties=Hard Knockdown | |||
|startup=17 ~ 62 | |||
|active= | |||
|recovery= | |||
|hit= | |||
|block=-14 | |||
|notes=Startup indicates fastest firing time ~ longest possible charge. <br><br>Nemesis fires a rocket from his bazooka at a slight down-forward angle. Despite appearing to be two hits, the second one is actually the explosion, meaning the rocket itself is only one hit and can therefore be reflected. Additionally, although you can "charge" this move, it merely delays the firing, it does not add damage or change any of its properties. These properties apply to all 236K versions. | |||
}} | |||
{{MvCIMoveListRow2.2 | |||
|photo= | |||
|name=Reload | |||
|command=[[File:Mvci_lk.png]] or [[File:Mvci_hk.png]] | |||
During Rocket Launcher | |||
|ldamage=1000+500 (1450) | |||
|lguard=Mid | |||
|lstartup= | |lstartup= | ||
|lactive= | |lactive= | ||
| Line 249: | Line 355: | ||
|lhit= | |lhit= | ||
|lblock= | |lblock= | ||
|lproperties= | |lproperties=Hard Knockdown | ||
|hdamage= | |hdamage=1000+500 (1450) | ||
|hguard= | |hguard=Mid | ||
|hstartup= | |hstartup= | ||
|hactive= | |hactive= | ||
| Line 257: | Line 363: | ||
|hhit= | |hhit= | ||
|hblock= | |hblock= | ||
|hproperties= | |hproperties=Hard Knockdown | ||
|notes= | |notes=Nemesis fires again. The LK version is identical to 236LK, and the HK version is identical to 236HK. Faster than waiting for a standalone rocket shot to finish then inputting it again. The reload can be a different strength than the previous shot. | ||
}} | |||
{{UMvC3MoveListRow2.0 | |||
|photo= | |||
|name=Anti-Air Rocket Launcher | |||
|command=[[File:Mvci_qcf.png]][[File:Mvci_hk.png]] | |||
(Can be charged) | |||
|damage=1000+500 (1450) | |||
|guard=Mid | |||
|properties=Hard Knockdown | |||
|startup=17 ~ 62 | |||
|active= | |||
|recovery= | |||
|hit= | |||
|block=-14 | |||
|notes=Startup indicates fastest firing time ~ longest possible charge. <br><br>A diagonally up-forward-aimed version of the rocket shot. | |||
}} | }} | ||
{{MvCIMoveListRow2.2 | {{MvCIMoveListRow2.2 | ||
|photo= | |photo= | ||
|name= | |name=Reload | ||
|command= | |command=[[File:Mvci_lk.png]] or [[File:Mvci_hk.png]] | ||
|ldamage= | During Anti-Air Rocket Launcher | ||
|lguard= | |ldamage=1000+500 (1450) | ||
|lguard=Mid | |||
|lstartup= | |lstartup= | ||
|lactive= | |lactive= | ||
| Line 271: | Line 393: | ||
|lhit= | |lhit= | ||
|lblock= | |lblock= | ||
|lproperties= | |lproperties=Hard Knockdown | ||
|hdamage= | |hdamage=1000+500 (1450) | ||
|hguard= | |hguard=Mid | ||
|hstartup= | |hstartup= | ||
|hactive= | |hactive= | ||
| Line 279: | Line 401: | ||
|hhit= | |hhit= | ||
|hblock= | |hblock= | ||
|hproperties= | |hproperties=Hard Knockdown | ||
|notes= | |notes=Same as Reload during Rocket Launcher. | ||
}} | |||
{{MvCIMoveListRow2.2 | |||
|photo= | |||
|name=Tentacle Slam | |||
|command=[[File:Mvci_hcb.png]][[File:Mvci_lk.png]] or [[File:Mvci_hk.png]] | |||
|ldamage= | |||
|lguard=Throw | |||
|lstartup=7 | |||
|lactive= | |||
|lrecovery= | |||
|lhit= | |||
|lblock=- | |||
|lproperties=Ground Bounce, Hard Knockdown | |||
|hdamage= | |||
|hguard=Throw | |||
|hstartup=20 | |||
|hactive= | |||
|hrecovery= | |||
|hhit= | |||
|hblock=- | |||
|hproperties=Ground Bounce, Hard Knockdown | |||
|notes=Nemesis's command grab. Its ground bounce does leave the opponent open for a combo, but the damage scaling and hitstun decay are very severe. You're best off keeping the combo very short.<br>The LK version grabs grounded opponents in front of Nemesis, the HK version has the same horizontal reach as LK but points up-forward to grab airborne opponents. Useful for resets. | |||
}} | }} | ||
| Line 286: | Line 430: | ||
{{UMvC3MoveListRow2.0 | {{UMvC3MoveListRow2.0 | ||
|photo= | |photo= | ||
|name= | |name=Biohazard Rush | ||
|command=[[File:Mvci_qcf.png]][[File:Mvci_lp.png]][[File:Mvci_hp.png]] | |command=[[File:Mvci_qcf.png]][[File:Mvci_lp.png]][[File:Mvci_hp.png]] | ||
|damage= | |damage=1000x5 (3700) | ||
|guard= | |guard=Mid | ||
|properties=Wall Bounce, Hard Knockdown | |||
|startup=17 | |||
|active= | |||
|recovery= | |||
|hit= | |||
|block=-68 | |||
|notes=Nemesis rushes forward with a series of punches. Invincible before the super flash, but unlike in *Ultimate Marvel vs. Capcom 3*, this has no armor (or invulnerability) once it becomes active. | |||
}} | |||
{{UMvC3MoveListRow2.0 | |||
|photo= | |||
|name=Bioweapon Assault | |||
|command=[[File:Mvci_qcf.png]][[File:Mvci_lk.png]][[File:Mvci_hk.png]] | |||
|damage=1000+500+1000+500+1000+500+1000 (3950) | |||
|guard=Mid | |||
|properties= | |properties= | ||
|startup= | |startup=17 | ||
|active= | |active= | ||
|recovery= | |recovery= | ||
|hit= | |hit= | ||
|block= | |block=-63 | ||
|notes= | |notes=Nemesis fires a series of rockets at further and further ranges, then leaps off-screen, crashing down a ways from where he started. Despite these rockets visually resembling his 236K series, they cannot be reflected. The rocket shots do not track the opponent's position like they do in *Ultimate Marvel vs. Capcom 3*. | ||
}} | }} | ||
{{UMvC3MoveListRow2.0 | {{UMvC3MoveListRow2.0 | ||
|photo= | |photo= | ||
|name= | |name=Fatal Mutation | ||
|command=[[File: | Lvl 3 | ||
|damage= | |command=[[File:Mvci_qcb.png]][[File:Mvci_lp.png]][[File:Mvci_hp.png]] | ||
|guard= | |damage=5200 (6 hits) | ||
|guard=Throw | |||
|properties= | |properties= | ||
|startup= | |startup= | ||
| Line 309: | Line 468: | ||
|recovery= | |recovery= | ||
|hit= | |hit= | ||
|block= | |block=- | ||
|notes= | |notes=Nemesis grabs a nearby grounded opponent, subjecting them to a horrific fate, then leaves them poisoned. Reaches from somewhat farther than 5LK range. Invincible before the super flash.<br>Although it appears as though the opponent is crumpled and able to take follow-up hits, it's actually a unique type of knockdown where they're completely safe. Use this for set-up and oki instead. | ||
}} | }} | ||
| Line 346: | Line 505: | ||
[http://wiki.shoryuken.com/MvCI/Nemesis#Top Top of Page] | [http://wiki.shoryuken.com/MvCI/Nemesis#Top Top of Page] | ||
{{Navbox-MVCI}} | |||
[[Category:Marvel vs. Capcom Infinite]] | [[Category:Marvel vs. Capcom Infinite]] | ||
Latest revision as of 19:19, 12 September 2024
Story
Nemesis is a bioengineered mutation designed to take hits and deal them the same. He was created and designed by Umbrella to wipe out the members of S.T.A.R.S., more specifically, Jill Valentine. He put up one hell of a fight, going through several mutation stages, before finally being wiped from the face of the Earth.
Gameplay
Nemesis is a big, hulking wall of flesh. Like in Resident Evil, he has all the tools he needs to try and beat his opponent senselessly. Making use of his long limbs and armor, it can be incredibly hard to find an opening against him. His advantage state is absolutely devastating and can often kill his opponent off of only 2-3 openings. He has pretty much everything he needs to be strong and makes a good partner for anyone.
| Strengths | Weaknesses |
|---|---|
|
|
Character Vitals
Move List
Unique Trait
Bio Armor: Nemesis gains armor on all of his heavy attacks which can make it especially frustrating for opponents to counter attack. Deadly Reach is a long range multi-hitting armored attack that can help keep the opponent from running away.
Normals
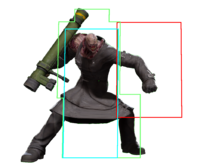
| Standing Light Punch |
Damage | Guard | Startup | Active | Recovery | On Hit | On Block | Properties |
|
600 | Mid | 9 | -10 | -13 | |||
| - | ||||||||
| Standing Light Kick |
Damage | Guard | Startup | Active | Recovery | On Hit | On Block | Properties |
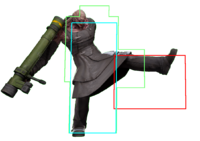
|
800 | Mid | 10 | -7 | -12 | |||
| - | ||||||||
| Standing Heavy Kick |
Damage | Guard | Startup | Active | Recovery | On Hit | On Block | Properties |
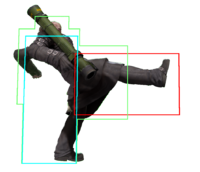
|
800 | Mid | 13 | -11 | -16 | |||
| - | ||||||||
| Crouching Light Punch |
Damage | Guard | Startup | Active | Recovery | On Hit | On Block | Properties |
| 600 | Mid | 12 | -10 | -13 | ||||
| - | ||||||||
| Crouching Heavy Punch |
Damage | Guard | Startup | Active | Recovery | On Hit | On Block | Properties |
| 800 | Mid | 16 | -16 | Launch | ||||
| Nemesis's launcher. | ||||||||
| Crouching Light Kick |
Damage | Guard | Startup | Active | Recovery | On Hit | On Block | Properties |
| 800 | Low | 10 | -2 | -7 | ||||
| Nemesis's only low. | ||||||||
| Jumping Light Punch j. |
Damage | Guard | Startup | Active | Recovery | On Hit | On Block | Properties |
| 600 | High | 10 | - | - | ||||
| - | ||||||||
| Jumping Heavy Punch j. |
Damage | Guard | Startup | Active | Recovery | On Hit | On Block | Properties |
| 800 | High | 17 | - | - | ||||
| - | ||||||||
| Jumping Light Kick j. |
Damage | Guard | Startup | Active | Recovery | On Hit | On Block | Properties |
| 800 | High | 18 | - | - | ||||
| Has a very wide hitbox that allows you to easily cross-up, especially on a short hop. | ||||||||
Command Normals
Misc
| Tag |
Damage | Guard | Startup | Active | Recovery | On Hit | On Block | Properties |
| 500 | Mid | 6 | 8 | 44 | +33 | +28 | ||
| Hit/Block adv is dependent on when you | ||||||||
Specials
| Clothesline Rocket |
Version | Damage | Guard | Startup | Active | Recovery | On Hit | On Block | Properties |
| 1200 | Mid | 19 | -32 | ||||||
| 1200+1000+350 (2350) | Mid | 23 | -13 | ||||||
| - | |||||||||
| Launcher Slam |
Version | Damage | Guard | Startup | Active | Recovery | On Hit | On Block | Properties |
| 1500 | Mid | 15 | -12 | ||||||
| 1500 | Mid | 18 | -18 | Ground Bounce, Hard Knockdown | |||||
| - | |||||||||
Hypers
| Fatal Mutation | Damage | Guard | Startup | Active | Recovery | On Hit | On Block | Properties |
| 5200 (6 hits) | Throw | - | ||||||
| Nemesis grabs a nearby grounded opponent, subjecting them to a horrific fate, then leaves them poisoned. Reaches from somewhat farther than 5LK range. Invincible before the super flash. Although it appears as though the opponent is crumpled and able to take follow-up hits, it's actually a unique type of knockdown where they're completely safe. Use this for set-up and oki instead. | ||||||||
Hitboxes
Videos
Technology
Combos
Strategy
Partner Selection
Stone Selection
Power
Time
Reality
Soul
Space
Mind
