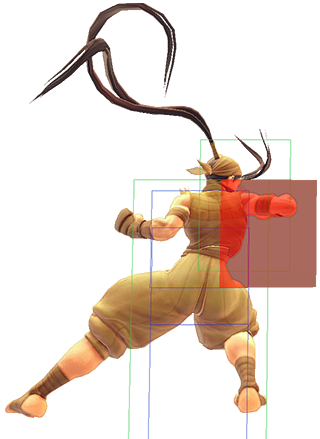
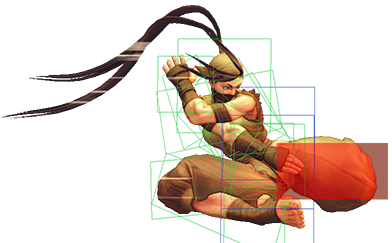
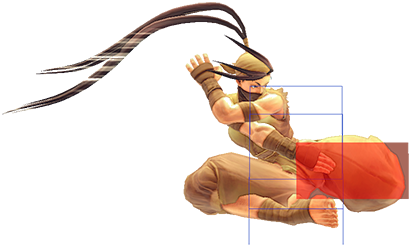
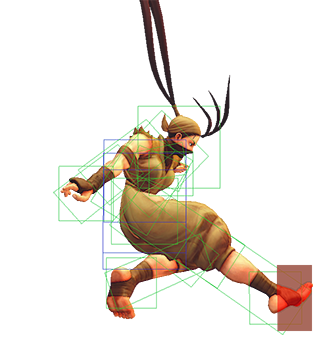
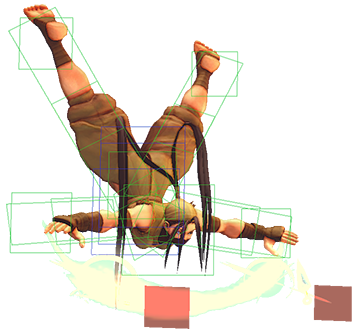
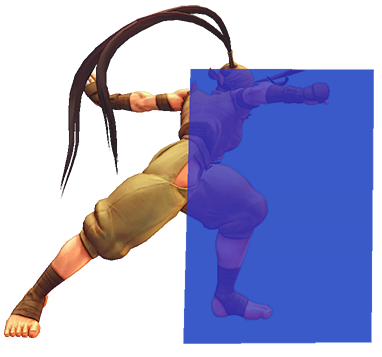
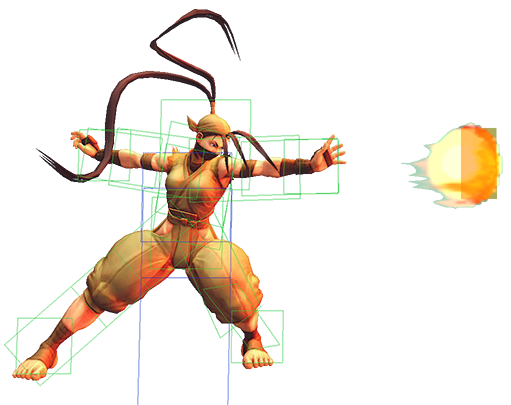
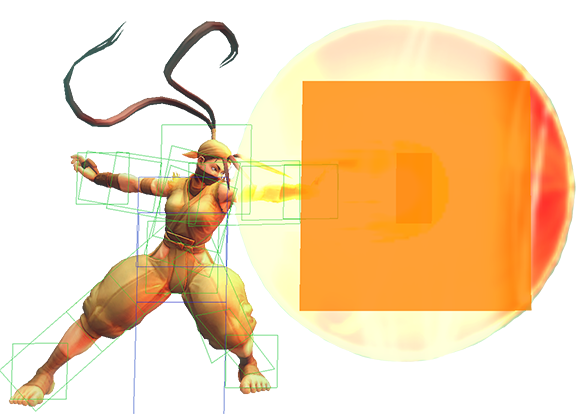
| Line 59: | Line 59: | ||
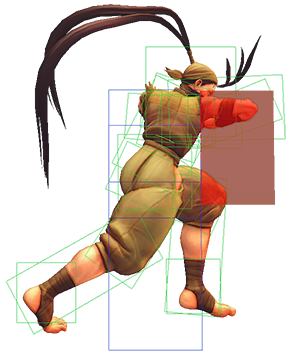
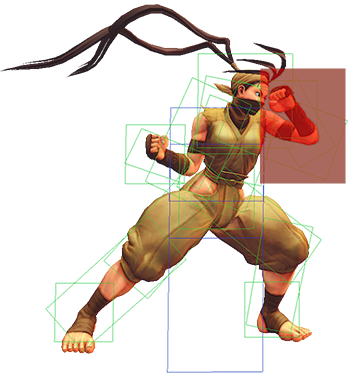
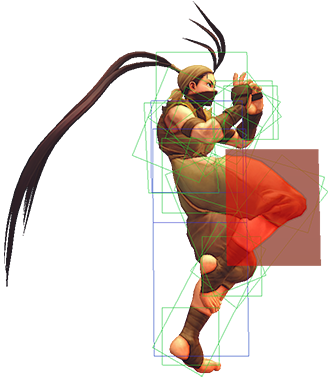
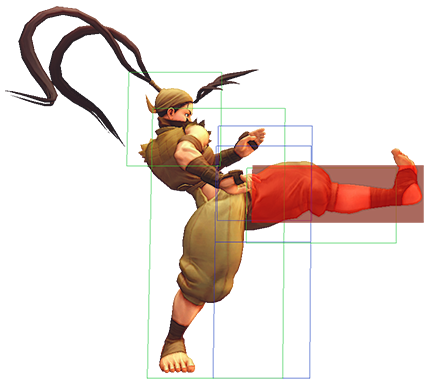
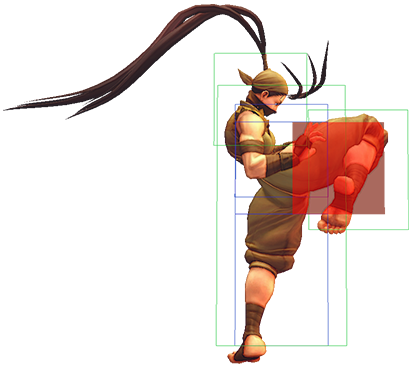
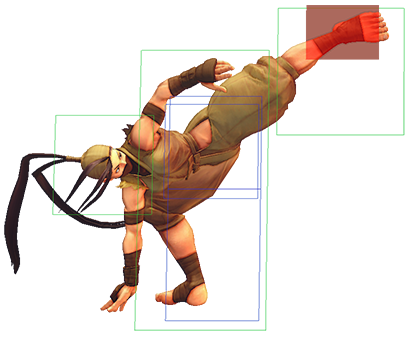
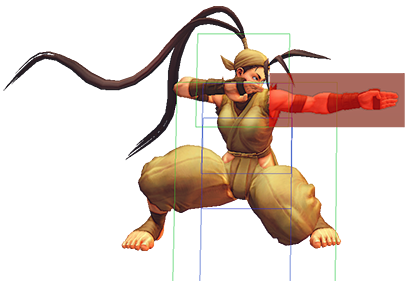
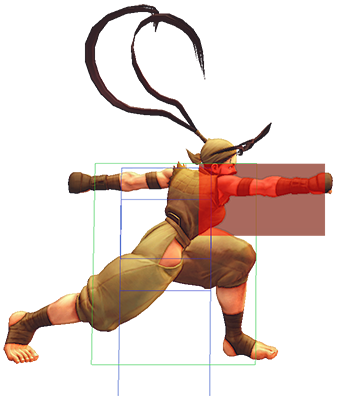
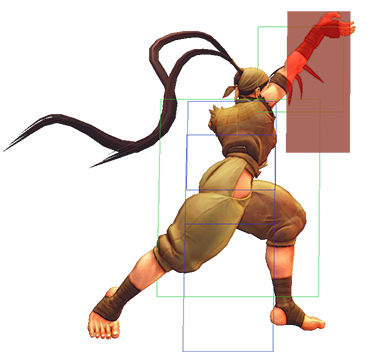
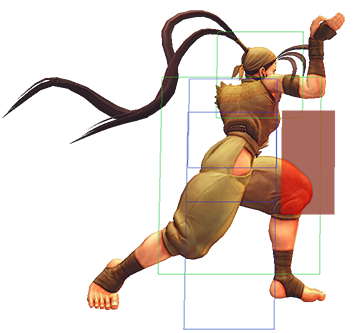
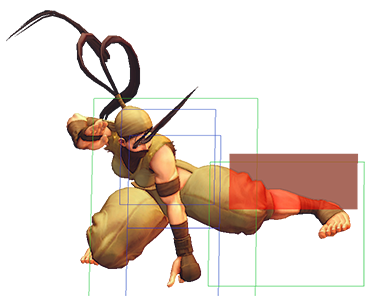
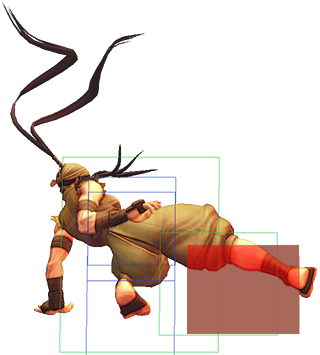
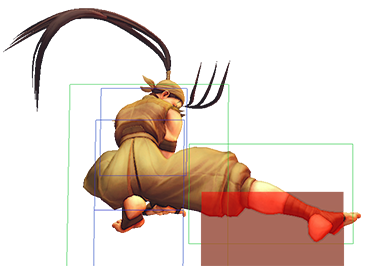
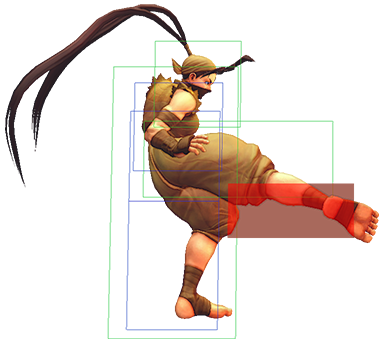
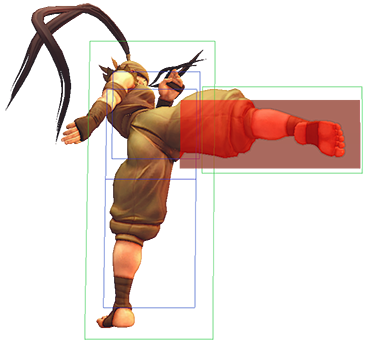
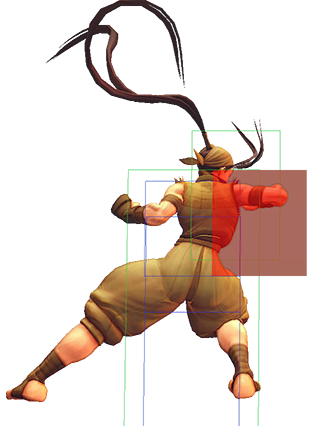
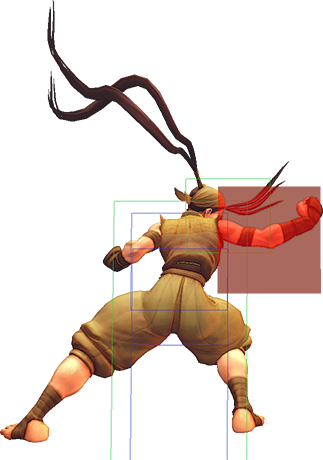
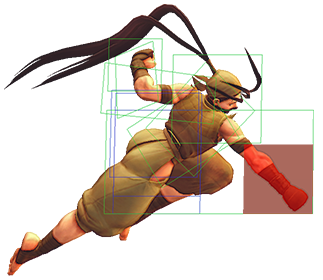
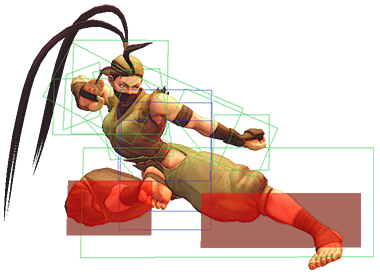
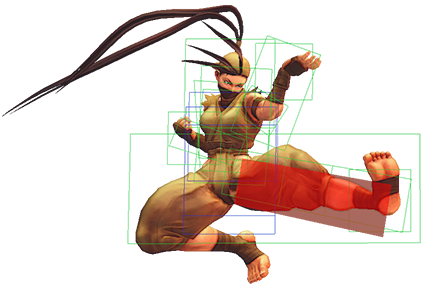
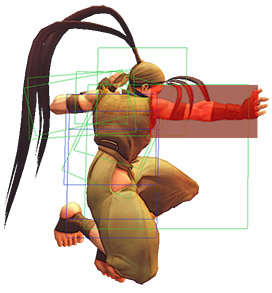
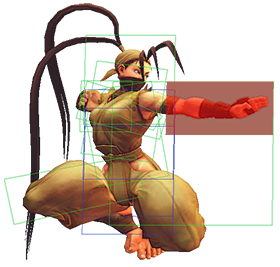
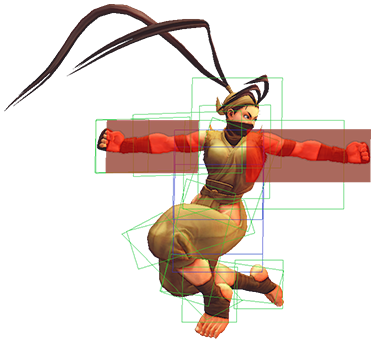
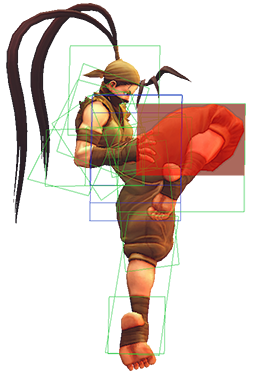
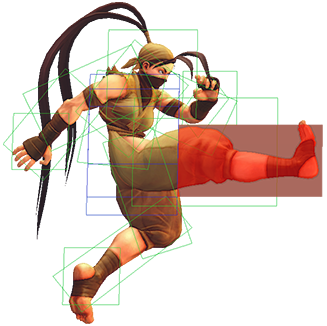
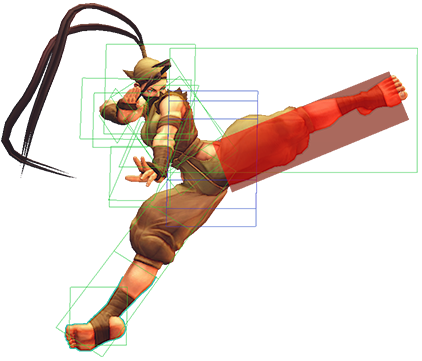
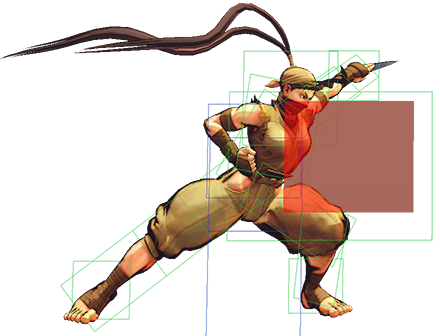
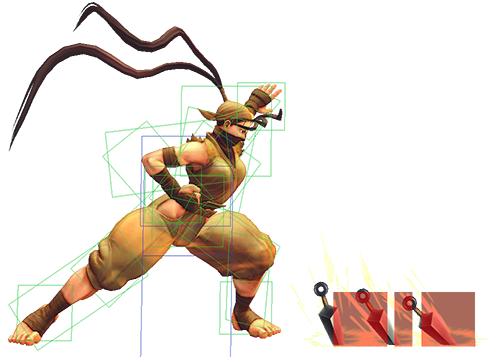
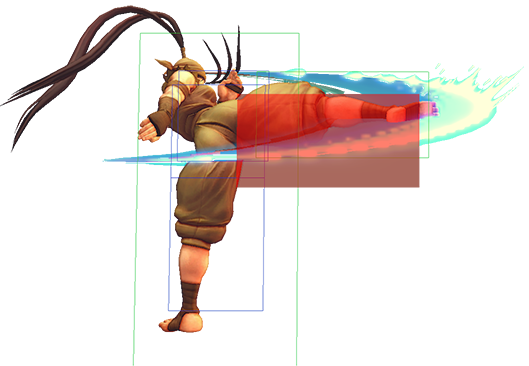
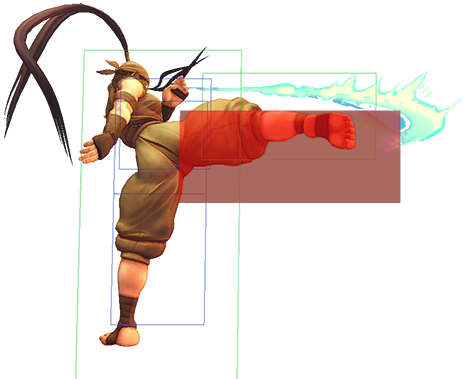
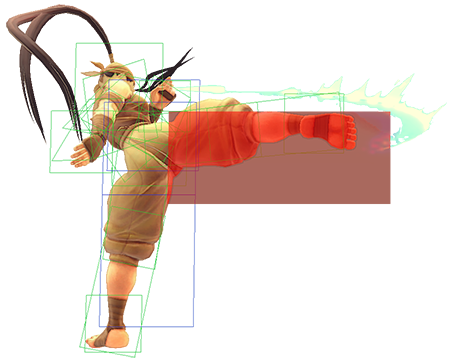
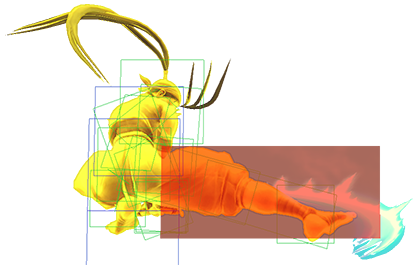
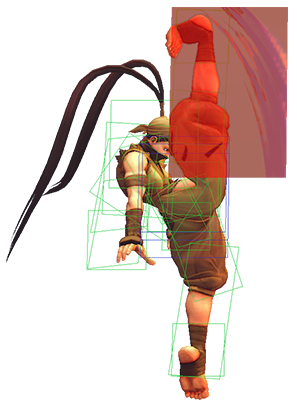
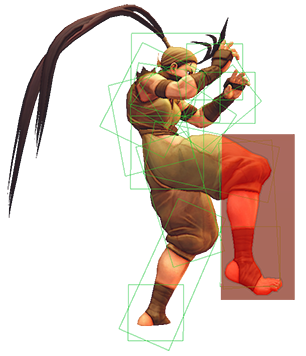
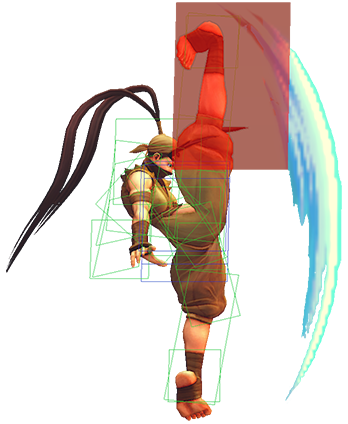
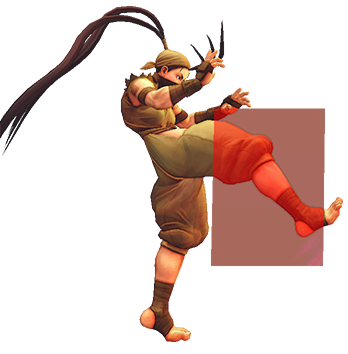
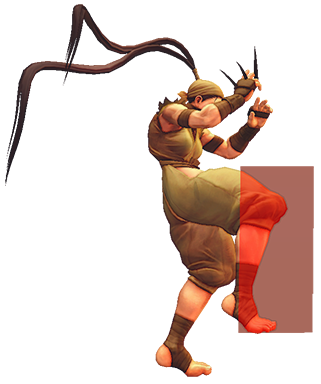
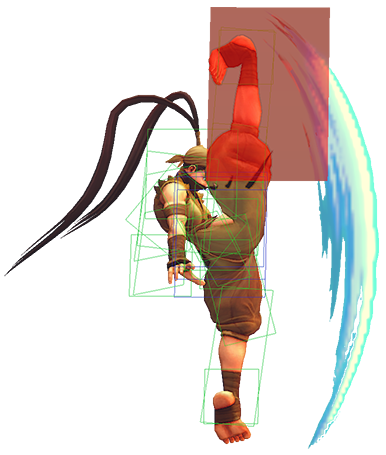
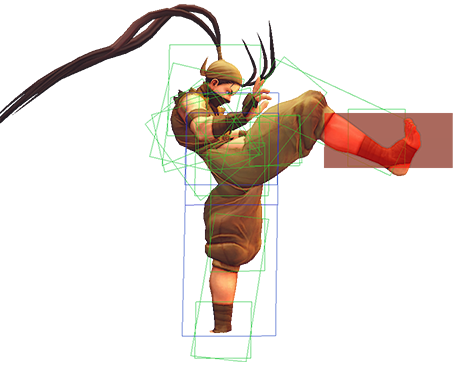
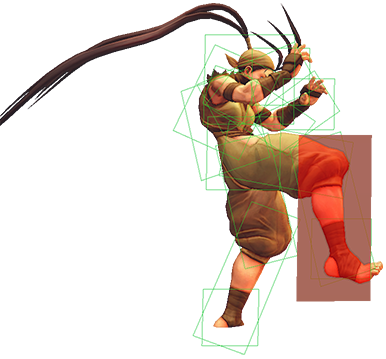
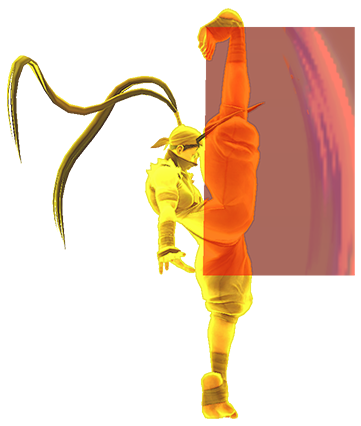
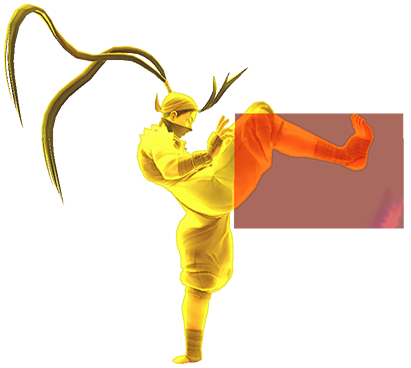
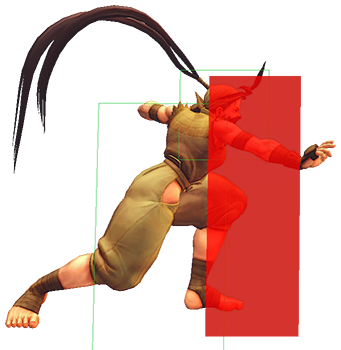
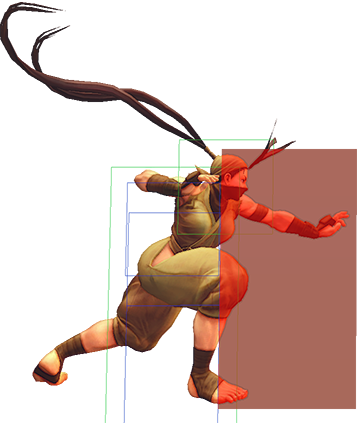
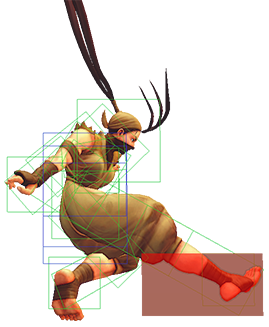
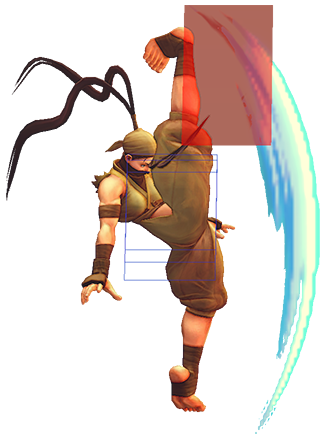
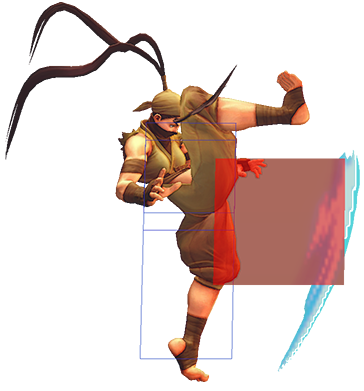
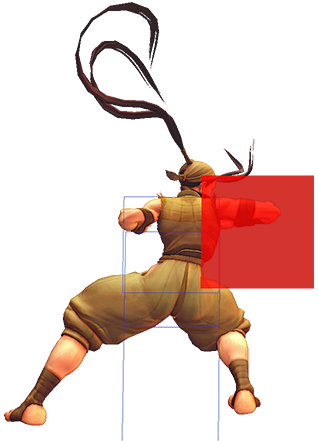
{{OSFIVFrameDataRow|'''5HP''' (Close)|cl. {{hp}}|7|2*2|18|-6|-2|60*70|125*75|M*M|Sp Su / TC|2 hits|{{OmegaHB2|O Ibuki Close5HP 1|O Ibuki Close5HP 2}}|}} | {{OSFIVFrameDataRow|'''5HP''' (Close)|cl. {{hp}}|7|2*2|18|-6|-2|60*70|125*75|M*M|Sp Su / TC|2 hits|{{OmegaHB2|O Ibuki Close5HP 1|O Ibuki Close5HP 2}}|}} | ||
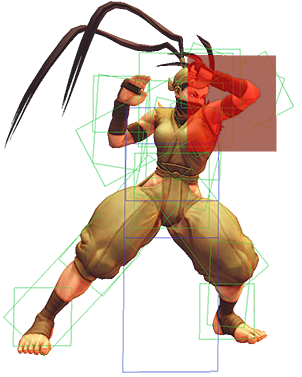
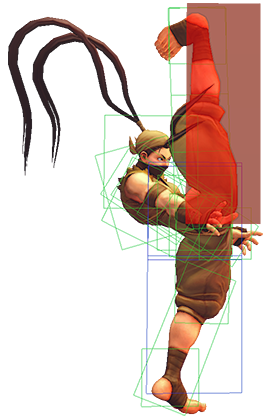
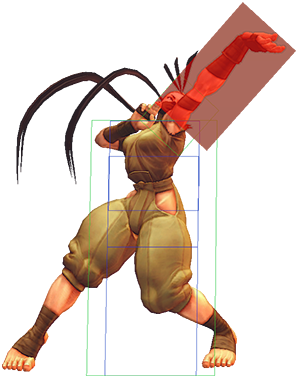
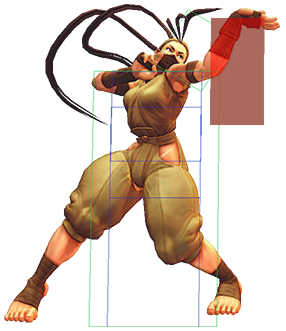
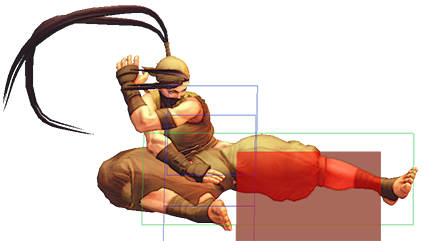
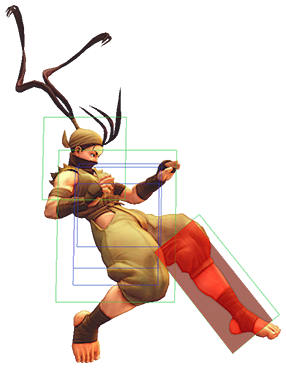
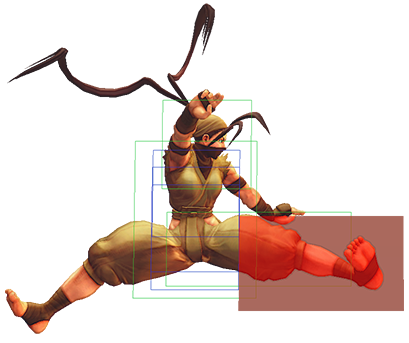
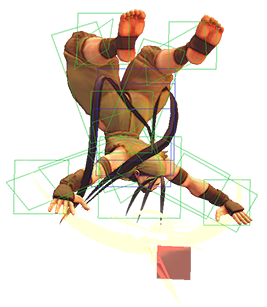
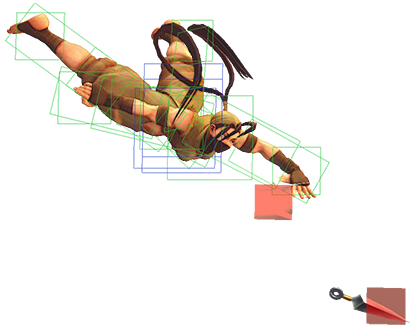
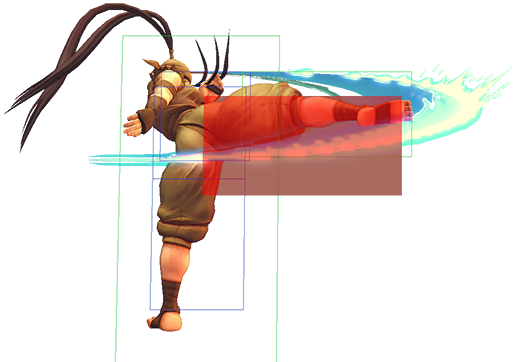
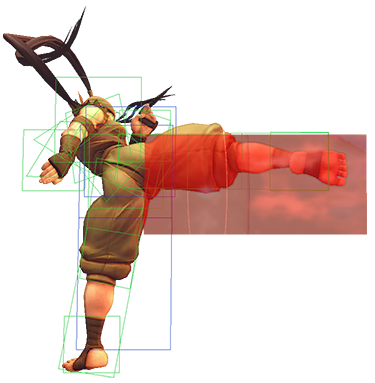
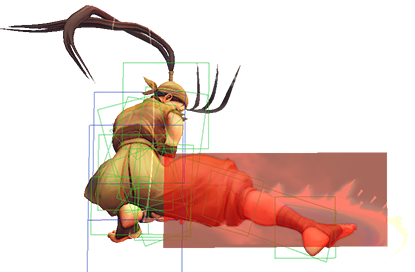
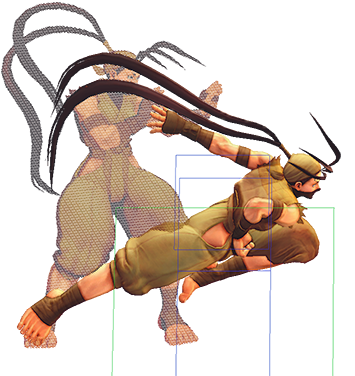
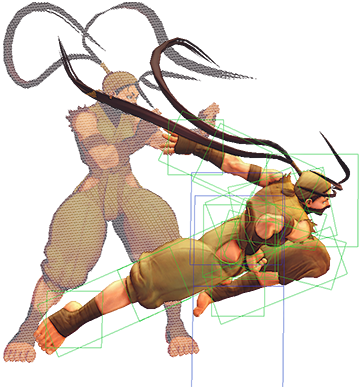
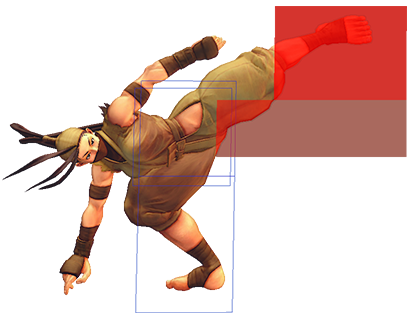
{{OSFIVFrameDataRow2|'''5HK''' (Close)|cl. {{hk}}|5|2*2|23|-5|KD|50*60|125*75|M*M|- / J SJ|2 hits; 2nd hit launches into juggle state, is jump cancellable. KD Adv: +53 (+77 after Jump Cancel)|{{OmegaHB2|O Ibuki Close5HK 1|O Ibuki Close5HK 2}}|}} | {{OSFIVFrameDataRow2|'''5HK''' (Close)|cl. {{hk}}|5|2*2|23|-5|KD|50*60|125*75|M*M|- / J SJ|2 hits; 2nd hit launches into juggle state, is jump cancellable. KD Adv: +53 (+77 after Jump Cancel)|{{OmegaHB2|O Ibuki Close5HK 1|O Ibuki Close5HK 2}}|}} | ||
{{OmegaSFIVFrameDataHeader}} | {{OmegaSFIVFrameDataHeader}} | ||
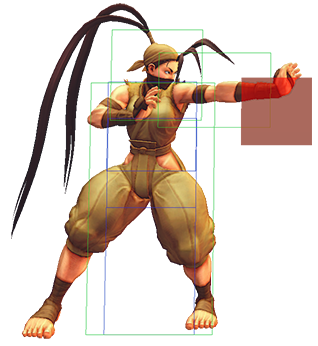
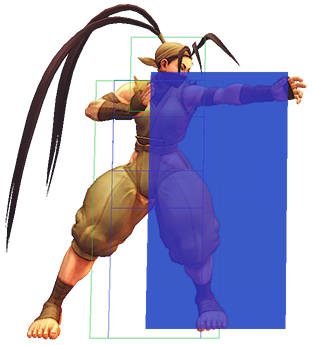
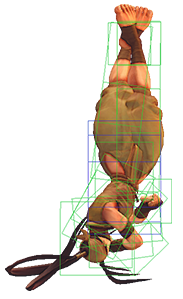
{{OSFIVFrameDataRow|'''5LP''' (Far)|far. {{lp}}|3|2|5|4|8|25|50|M|TC|Against some crouching characters, may whiff in combos at farther ranges|{{OmegaHB|O Ibuki Far5LP}}|}} | {{OSFIVFrameDataRow|'''5LP''' (Far)|far. {{lp}}|3|2|5|4|8|25|50|M|TC|Against some crouching characters, may whiff in combos at farther ranges|{{OmegaHB|O Ibuki Far5LP}}|}} | ||
| Line 66: | Line 67: | ||
{{OSFIVFrameDataRow|'''5MK'''|st. {{mk}}|5|4|12|-2|1|70|100|M|Sp Su|-|{{OmegaHB|O Ibuki 5MK}}}} | {{OSFIVFrameDataRow|'''5MK'''|st. {{mk}}|5|4|12|-2|1|70|100|M|Sp Su|-|{{OmegaHB|O Ibuki 5MK}}}} | ||
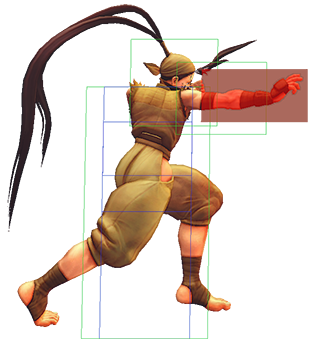
{{OSFIVFrameDataRow2|'''5HK''' (Far)|far. {{hk}}|10|3|17|-2|2|110|200|M|-|-|{{OmegaHB|O Ibuki Far5HK}}}} | {{OSFIVFrameDataRow2|'''5HK''' (Far)|far. {{hk}}|10|3|17|-2|2|110|200|M|-|-|{{OmegaHB|O Ibuki Far5HK}}}} | ||
{{OmegaSFIVFrameDataHeader}} | {{OmegaSFIVFrameDataHeader}} | ||
{{OSFIVFrameDataRow|'''2LP'''|{{Down}}{{lp}}|3|2|7|2|5|20|50|M|Ch Sp Su|-|{{OmegaHB|O Ibuki 2LP}}}} | {{OSFIVFrameDataRow|'''2LP'''|{{Down}}{{lp}}|3|2|7|2|5|20|50|M|Ch Sp Su|-|{{OmegaHB|O Ibuki 2LP}}}} | ||
| Line 73: | Line 75: | ||
{{OSFIVFrameDataRow|'''2MK'''|{{Down}}{{mk}}|6|5|9|0|3|70|100|L|-|-|{{OmegaHB|O Ibuki 2MK}}}} | {{OSFIVFrameDataRow|'''2MK'''|{{Down}}{{mk}}|6|5|9|0|3|70|100|L|-|-|{{OmegaHB|O Ibuki 2MK}}}} | ||
{{OSFIVFrameDataRow2|'''2HK'''|{{Down}}{{hk}}|6|2|25|-9|KD|90|100|L|TC|KD Adv: +19|{{OmegaHB|O Ibuki 2HK}}}} | {{OSFIVFrameDataRow2|'''2HK'''|{{Down}}{{hk}}|6|2|25|-9|KD|90|100|L|TC|KD Adv: +19|{{OmegaHB|O Ibuki 2HK}}}} | ||
{{OmegaSFIVFrameDataHeader}} | {{OmegaSFIVFrameDataHeader}} | ||
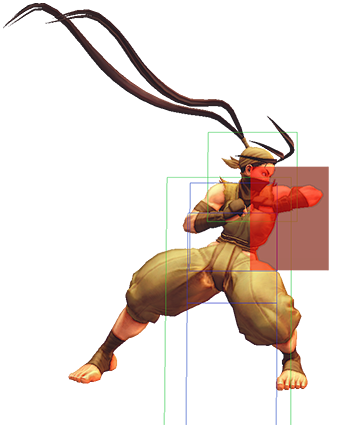
{{OSFIVFrameDataRow|Agemen|{{Left}}{{mp}}|6|1*2|10|0|4|30*50|50*50|M*M|TC Sp Su|Cancels on first hit only|{{OmegaHB2|O Ibuki 4MP 1|O Ibuki 4MP 2}}}} | {{OSFIVFrameDataRow|Agemen|{{Left}}{{mp}}|6|1*2|10|0|4|30*50|50*50|M*M|TC Sp Su|Cancels on first hit only|{{OmegaHB2|O Ibuki 4MP 1|O Ibuki 4MP 2}}}} | ||
| Line 82: | Line 85: | ||
{{OSFIVFrameDataRow|Spiral Elbow|{{Right}}{{hp}}|12|4|16|-2|3|100|100|M|TC|Ibuki's old Far 5HP|{{OmegaHB|O Ibuki 6HP}}}} | {{OSFIVFrameDataRow|Spiral Elbow|{{Right}}{{hp}}|12|4|16|-2|3|100|100|M|TC|Ibuki's old Far 5HP|{{OmegaHB|O Ibuki 6HP}}}} | ||
{{OSFIVFrameDataRow2|Backhand Punch|{{Right}}{{hp}}>{{hp}}|12|1<small>(4)</small>9|20|-11|KD|100*80|100*200|M*M|Sp Su|Ibuki's old Far 5HP>HP; KD Adv: +24|{{OmegaHB|O Ibuki 6HP-HP}}}} | {{OSFIVFrameDataRow2|Backhand Punch|{{Right}}{{hp}}>{{hp}}|12|1<small>(4)</small>9|20|-11|KD|100*80|100*200|M*M|Sp Su|Ibuki's old Far 5HP>HP; KD Adv: +24|{{OmegaHB|O Ibuki 6HP-HP}}}} | ||
{{OmegaSFIVFrameDataHeader}} | {{OmegaSFIVFrameDataHeader}} | ||
{{OmegaSFIVFrameDataRow|Target Combo 4<br>(starter)|cl. {{lp}} > {{mp}}|-|-|-|-1|3|30*30x2|50*50x2|M*M|Sp Su/TC|Only 1st hit of MP can special/super cancel, but both hits can continue TC|}} | {{OmegaSFIVFrameDataRow|Target Combo 4<br>(starter)|cl. {{lp}} > {{mp}}|-|-|-|-1|3|30*30x2|50*50x2|M*M|Sp Su/TC|Only 1st hit of MP can special/super cancel, but both hits can continue TC|}} | ||
| Line 98: | Line 102: | ||
{{OSFIVFrameDataRow|Target Combo 11|{{mp}} > {{Right}}{{lk}}|-|-|-|-1|3|70*50|100*50|M*M|-|-|}} | {{OSFIVFrameDataRow|Target Combo 11|{{mp}} > {{Right}}{{lk}}|-|-|-|-1|3|70*50|100*50|M*M|-|-|}} | ||
{{OSFIVFrameDataRow|Target Combo 12|{{Left}}{{mp}} > {{hp}}|-|-|-|1|4|30*50*60|50x2*60|M*M|Sp Su|-|}} | {{OSFIVFrameDataRow|Target Combo 12|{{Left}}{{mp}} > {{hp}}|-|-|-|1|4|30*50*60|50x2*60|M*M|Sp Su|-|}} | ||
{{OmegaSFIVFrameDataHeader}} | {{OmegaSFIVFrameDataHeader}} | ||
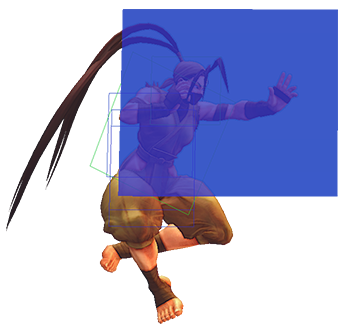
{{OSFIVFrameDataRow|'''j.LP''' (angled)|{{Upright}}{{lp}}|6|6|-|-|-|40|50|H|TC|-|{{OmegaHB|O Ibuki 9LP}}}} | {{OSFIVFrameDataRow|'''j.LP''' (angled)|{{Upright}}{{lp}}|6|6|-|-|-|40|50|H|TC|-|{{OmegaHB|O Ibuki 9LP}}}} | ||
| Line 114: | Line 119: | ||
{{OSFIVFrameDataRow|Target Combo 2|{{Upright}}{{lp}}>{{hp}}|-|-|-|-|-|40*70|50*150|H*H|-|Works from angled jumps only|}} | {{OSFIVFrameDataRow|Target Combo 2|{{Upright}}{{lp}}>{{hp}}|-|-|-|-|-|40*70|50*150|H*H|-|Works from angled jumps only|}} | ||
{{OSFIVFrameDataRow2|Target Combo 3|{{Upright}}{{lk}}>{{mk}}|-|-|-|-|-|40*40|50*50|H*M|-|Works from angled jumps only|}} | {{OSFIVFrameDataRow2|Target Combo 3|{{Upright}}{{lk}}>{{mk}}|-|-|-|-|-|40*40|50*50|H*M|-|Works from angled jumps only|}} | ||
{{OmegaSFIVFrameDataHeader}} | {{OmegaSFIVFrameDataHeader}} | ||
{{OSFIVFrameDataRow|Focus Attack Lv. 1|{{mp}}{{mk}}|21|2|34|-21|KD|85|150|M|Dash|KD Adv: +12; +30 after Forward Dash, +25 after Back Dash|{{OmegaHB|O Ibuki FA}}}} | {{OSFIVFrameDataRow|Focus Attack Lv. 1|{{mp}}{{mk}}|21|2|34|-21|KD|85|150|M|Dash|KD Adv: +12; +30 after Forward Dash, +25 after Back Dash|{{OmegaHB|O Ibuki FA}}}} | ||
{{OSFIVFrameDataRow|Focus Attack Lv. 2|{{mp}}{{mk}}|29|2|34|-15|crumple|80|150|M|Dash|-|{{OmegaHB|O Ibuki FA}}}} | {{OSFIVFrameDataRow|Focus Attack Lv. 2|{{mp}}{{mk}}|29|2|34|-15|crumple|80|150|M|Dash|-|{{OmegaHB|O Ibuki FA}}}} | ||
{{OSFIVFrameDataRow2|Focus Attack Lv. 3|{{mp}}{{mk}}|65|2|34|-|crumple|140|200|-|Dash|Unblockable|{{OmegaHB|O Ibuki FA}}}} | {{OSFIVFrameDataRow2|Focus Attack Lv. 3|{{mp}}{{mk}}|65|2|34|-|crumple|140|200|-|Dash|Unblockable|{{OmegaHB|O Ibuki FA}}}} | ||
{{OmegaSFIVFrameDataHeader}} | {{OmegaSFIVFrameDataHeader}} | ||
{{OSFIVFrameDataRow|Yami Kazura<br>(Forward Throw)|{{lp}}{{lk}}|3|2|24|-|KD|170|200|T|-|KD Adv: +6|{{OmegaHB|O Ibuki Throw}}}} | {{OSFIVFrameDataRow|Yami Kazura<br>(Forward Throw)|{{lp}}{{lk}}|3|2|24|-|KD|170|200|T|-|KD Adv: +6|{{OmegaHB|O Ibuki Throw}}}} | ||
{{OSFIVFrameDataRow|Uki Yami<br>(Back Throw)|{{Left}}+{{lp}}{{lk}}|3|2|24|-|KD|170|200|T|-|KD Adv: +2|{{OmegaHB|O Ibuki Throw}}}} | {{OSFIVFrameDataRow|Uki Yami<br>(Back Throw)|{{Left}}+{{lp}}{{lk}}|3|2|24|-|KD|170|200|T|-|KD Adv: +2|{{OmegaHB|O Ibuki Throw}}}} | ||
{{OSFIVFrameDataRow2|Tobizaru<br>(Air Throw)|{{Up}}+{{lp}}{{lk}}|3|2|4 land|-|KD|180|200|T|-|KD Adv: +7 (Min height) to +13 (Max height); No height restriction|{{OmegaHB|O Ibuki AirThrow}}}} | {{OSFIVFrameDataRow2|Tobizaru<br>(Air Throw)|{{Up}}+{{lp}}{{lk}}|3|2|4 land|-|KD|180|200|T|-|KD Adv: +7 (Min height) to +13 (Max height); No height restriction|{{OmegaHB|O Ibuki AirThrow}}}} | ||
{{OmegaSFIVFrameDataHeader}} | {{OmegaSFIVFrameDataHeader}} | ||
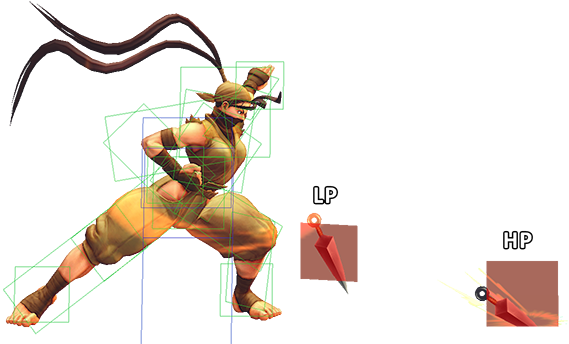
{{OSFIVFrameDataRow|Kagenui<br>(Kunai)|{{Rdp}}{{P}}<br>421+P|11|6|22|0|3|60|50|M|-|Strength determines distance; can lead to combo loops|{{OmegaHB|O Ibuki 421P}}}} | {{OSFIVFrameDataRow|Kagenui<br>(Kunai)|{{Rdp}}{{P}}<br>421+P|11|6|22|0|3|60|50|M|-|Strength determines distance; can lead to combo loops|{{OmegaHB|O Ibuki 421P}}}} | ||
{{OSFIVFrameDataRow2|Yami Shigure<br>({{ex}}{{ex}} Kunai)|{{Rdp}}{{2p}}<br>421+PP|11|10|24|-6(-7)|KD|20x3*250|250|M|-|Uses 2 bars; KD Adv: +43; Initial hit throws 3 kunai, only one must connect for full animation|{{OmegaHB|O Ibuki 421PP}}}} | {{OSFIVFrameDataRow2|Yami Shigure<br>({{ex}}{{ex}} Kunai)|{{Rdp}}{{2p}}<br>421+PP|11|10|24|-6(-7)|KD|20x3*250|250|M|-|Uses 2 bars; KD Adv: +43; Initial hit throws 3 kunai, only one must connect for full animation|{{OmegaHB|O Ibuki 421PP}}}} | ||
{{OSFIVFrameDataRow|Air Kunai|Air {{Qcf}}{{P}}<br>Air 236+P|7|-|12 land|-12(8)|-8(12)|30|60|M|Su|Forward/Neutral jump only; Frame Adv depends on angle|{{OmegaHB|O Ibuki Air 236P}}}} | {{OSFIVFrameDataRow|Air Kunai|Air {{Qcf}}{{P}}<br>Air 236+P|7|-|12 land|-12(8)|-8(12)|30|60|M|Su|Forward/Neutral jump only; Frame Adv depends on angle|{{OmegaHB|O Ibuki Air 236P}}}} | ||
{{OSFIVFrameDataRow2|{{ex}} Air Kunai|Air {{Qcf}}{{2p}}<br>Air 236+PP|8|-|7 land|-3(13)|6(22)|40*40|50*50|M|-|Works from any jump|{{OmegaHB|O Ibuki Air 236PP}}}} | {{OSFIVFrameDataRow2|{{ex}} Air Kunai|Air {{Qcf}}{{2p}}<br>Air 236+PP|8|-|7 land|-3(13)|6(22)|40*40|50*50|M|-|Works from any jump|{{OmegaHB|O Ibuki Air 236PP}}}} | ||
{{OSFIVFrameDataRow|LK Tsumuji<br>(Spin Kicks)|{{Qcb}}{{lk}}<br>214+LK|11|2|15|-3|KD|100|100|M|Su|Great neutral tool, can safely fish for Super confirms|{{OmegaHB|O Ibuki 214LK}}}} | {{OSFIVFrameDataRow|LK Tsumuji<br>(Spin Kicks)|{{Qcb}}{{lk}}<br>214+LK|11|2|15|-3|KD|100|100|M|Su|Great neutral tool, can safely fish for Super confirms|{{OmegaHB|O Ibuki 214LK}}}} | ||
{{OSFIVFrameDataRow|MK Tsumuji<br>(Spin Kicks)|{{Qcb}}{{mk}}<br>214+MK|15|2|15|-1|3|60|50|M|Su|Can link afterward like Ground Kunai, or confirm into followup|{{OmegaHB|O Ibuki 214MK 1}}}} | {{OSFIVFrameDataRow|MK Tsumuji<br>(Spin Kicks)|{{Qcb}}{{mk}}<br>214+MK|15|2|15|-1|3|60|50|M|Su|Can link afterward like Ground Kunai, or confirm into followup|{{OmegaHB|O Ibuki 214MK 1}}}} | ||
| Line 137: | Line 147: | ||
{{OSFIVFrameDataRow| + Low 2nd/3rd|Hold {{Down}}|-|-|-|-|-|45|50|L|-|Can switch back to mid kicks by letting go of down; each low kick adds a hit of damage scaling|{{OmegaHB|O Ibuki 214KK_Low}}}} | {{OSFIVFrameDataRow| + Low 2nd/3rd|Hold {{Down}}|-|-|-|-|-|45|50|L|-|Can switch back to mid kicks by letting go of down; each low kick adds a hit of damage scaling|{{OmegaHB|O Ibuki 214KK_Low}}}} | ||
{{OSFIVFrameDataRow2| + Low ender|Hold {{Down}}|7|2|11|-2|KD|70|70|L|-|KD Adv: +29|{{OmegaHB|O Ibuki 214KK_Low}}}} | {{OSFIVFrameDataRow2| + Low ender|Hold {{Down}}|7|2|11|-2|KD|70|70|L|-|KD Adv: +29|{{OmegaHB|O Ibuki 214KK_Low}}}} | ||
{{OSFIVFrameDataRow|LK Kazekiri<br>(Upkicks)|{{Dp}}{{lk}}<br>623+LK|5|9|16+9 land|-23|KD|50*20*65|40x3|M|Su FA*|'''1-6f throw invuln;''' On block, can only late Super cancel; KD Adv: +35|{{OmegaHB2|O Ibuki 623LK 1|O Ibuki 623LK 2}}}} | {{OSFIVFrameDataRow|LK Kazekiri<br>(Upkicks)|{{Dp}}{{lk}}<br>623+LK|5|9|16+9 land|-23|KD|50*20*65|40x3|M|Su FA*|'''1-6f throw invuln;''' On block, can only late Super cancel; KD Adv: +35|{{OmegaHB2|O Ibuki 623LK 1|O Ibuki 623LK 2}}}} | ||
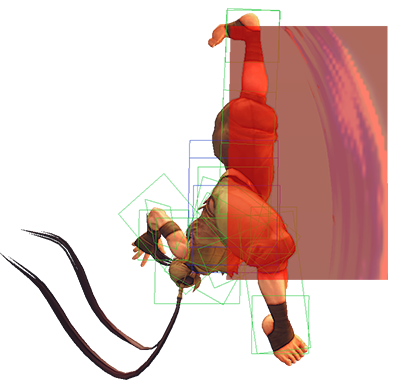
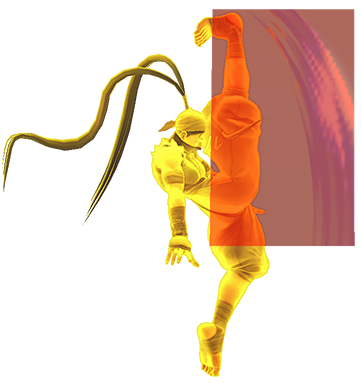
{{OSFIVFrameDataRow|MK Kazekiri<br>(Upkicks)|{{Dp}}{{mk}}<br>623+MK|5|13|18+17 land|-37|KD|50*20*75|40x3|M|Su FA*|'''1-6f full invuln;''' On block, can only late Super cancel; KD Adv: +21|{{OmegaHB3|O Ibuki 623MK 1|O Ibuki 623MK 2|O Ibuki 623MK 3}}}} | {{OSFIVFrameDataRow|MK Kazekiri<br>(Upkicks)|{{Dp}}{{mk}}<br>623+MK|5|13|18+17 land|-37|KD|50*20*75|40x3|M|Su FA*|'''1-6f full invuln;''' On block, can only late Super cancel; KD Adv: +21|{{OmegaHB3|O Ibuki 623MK 1|O Ibuki 623MK 2|O Ibuki 623MK 3}}}} | ||
{{OSFIVFrameDataRow|HK Kazekiri<br>(Upkicks)|{{Dp}}{{hk}}<br>623+HK|9|19|21+10 land|-39|KD|50*20*90|40x3|M|Su FA*|'''1-10f throw invuln;''' On block, can only late Super cancel; KD Adv: +19|{{OmegaHB3|O Ibuki 623HK 1|O Ibuki 623HK 2|O Ibuki 623HK 3}}}} | {{OSFIVFrameDataRow|HK Kazekiri<br>(Upkicks)|{{Dp}}{{hk}}<br>623+HK|9|19|21+10 land|-39|KD|50*20*90|40x3|M|Su FA*|'''1-10f throw invuln;''' On block, can only late Super cancel; KD Adv: +19|{{OmegaHB3|O Ibuki 623HK 1|O Ibuki 623HK 2|O Ibuki 623HK 3}}}} | ||
{{OSFIVFrameDataRow2|{{ex}} Kazekiri<br>(Upkicks)|{{Dp}}{{2k}}<br>623+KK|4|4<small>(5)</small>1|19+12 land|-31|KD|60x2*20*50|50x2*0*100|M|FA|'''1-13f full invuln;''' KD Adv: +27; No more kunai followup|{{OmegaHB4|O Ibuki 623KK 1|O Ibuki 623KK 2|O Ibuki 623KK 3|O Ibuki 623KK 4}}}} | {{OSFIVFrameDataRow2|{{ex}} Kazekiri<br>(Upkicks)|{{Dp}}{{2k}}<br>623+KK|4|4<small>(5)</small>1|19+12 land|-31|KD|60x2*20*50|50x2*0*100|M|FA|'''1-13f full invuln;''' KD Adv: +27; No more kunai followup|{{OmegaHB4|O Ibuki 623KK 1|O Ibuki 623KK 2|O Ibuki 623KK 3|O Ibuki 623KK 4}}}} | ||
{{OmegaSFIVFrameDataHeader}} | {{OmegaSFIVFrameDataHeader}} | ||
{{OSFIVFrameDataRow|LP Raida<br>(Energy Grab)|{{Hcb}}{{lp}}<br>63214+LP|6|5|25|-14|KD|180|200|M|-|'''1-10f throw invuln'''|{{OmegaHB|O Ibuki 63214P}}}} | {{OSFIVFrameDataRow|LP Raida<br>(Energy Grab)|{{Hcb}}{{lp}}<br>63214+LP|6|5|25|-14|KD|180|200|M|-|'''1-10f throw invuln'''|{{OmegaHB|O Ibuki 63214P}}}} | ||
| Line 146: | Line 158: | ||
{{OSFIVFrameDataRow|HP Raida<br>(Energy Grab)|{{Hcb}}{{hp}}<br>63214+HP|7|5|29|-18|KD|180|200|M|-|'''1-11f throw invuln'''|{{OmegaHB|O Ibuki 63214P}}}} | {{OSFIVFrameDataRow|HP Raida<br>(Energy Grab)|{{Hcb}}{{hp}}<br>63214+HP|7|5|29|-18|KD|180|200|M|-|'''1-11f throw invuln'''|{{OmegaHB|O Ibuki 63214P}}}} | ||
{{OSFIVFrameDataRow2|{{ex}} Raida<br>(Energy Grab)|{{Hcb}}{{2p}}<br>63214+PP|10|4<small>(5)</small>1|25|-10|KD|60*140|0*250|M|FA/-|1st hit is FA cancellable; Hard KD if only 1st hit connects vs. airborne (but not worth the lost damage/stun)|{{OmegaHB2|O Ibuki 63214PP 1|O Ibuki 63214PP 2}}}} | {{OSFIVFrameDataRow2|{{ex}} Raida<br>(Energy Grab)|{{Hcb}}{{2p}}<br>63214+PP|10|4<small>(5)</small>1|25|-10|KD|60*140|0*250|M|FA/-|1st hit is FA cancellable; Hard KD if only 1st hit connects vs. airborne (but not worth the lost damage/stun)|{{OmegaHB2|O Ibuki 63214PP 1|O Ibuki 63214PP 2}}}} | ||
{{OSFIVFrameDataRow|LP Neckbreaker|{{Hcf}}{{lp}}<br>41236+LP|15|10|16|-13|KD|150|300|L|-|-|{{OmegaHB|O Ibuki 41236P}}}} | {{OSFIVFrameDataRow|LP Neckbreaker|{{Hcf}}{{lp}}<br>41236+LP|15|10|16|-13|KD|150|300|L|-|-|{{OmegaHB|O Ibuki 41236P}}}} | ||
{{OSFIVFrameDataRow|MP Neckbreaker|{{Hcf}}{{mp}}<br>41236+MP|15|12|17|-13|KD|150|300|L|-|-|{{OmegaHB|O Ibuki 41236P}}}} | {{OSFIVFrameDataRow|MP Neckbreaker|{{Hcf}}{{mp}}<br>41236+MP|15|12|17|-13|KD|150|300|L|-|-|{{OmegaHB|O Ibuki 41236P}}}} | ||
{{OSFIVFrameDataRow|HP Neckbreaker|{{Hcf}}{{hp}}<br>41236+HP|15|21|19|-13|KD|150|300|L|-|-|{{OmegaHB|O Ibuki 41236P}}}} | {{OSFIVFrameDataRow|HP Neckbreaker|{{Hcf}}{{hp}}<br>41236+HP|15|21|19|-13|KD|150|300|L|-|-|{{OmegaHB|O Ibuki 41236P}}}} | ||
{{OSFIVFrameDataRow2|{{ex}} Neckbreaker|{{Hcf}}{{2p}}<br>41236+PP|15|14|19|-13|KD|160|350|L|-|'''1-28f projectile invuln;''' On hit, Ibuki recoils backward and the final recovery frame is vulnerable (careful vs. Dhalsim/Decapre U1)|{{OmegaHB|O Ibuki 41236PP}}}} | {{OSFIVFrameDataRow2|{{ex}} Neckbreaker|{{Hcf}}{{2p}}<br>41236+PP|15|14|19|-13|KD|160|350|L|-|'''1-28f projectile invuln;''' On hit, Ibuki recoils backward and the final recovery frame is vulnerable (careful vs. Dhalsim/Decapre U1)|{{OmegaHB|O Ibuki 41236PP}}}} | ||
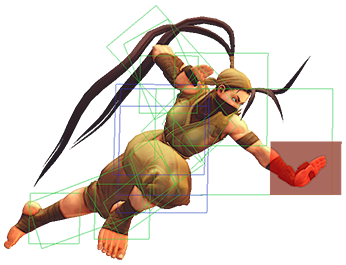
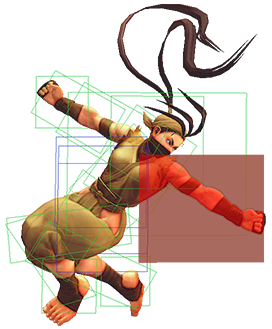
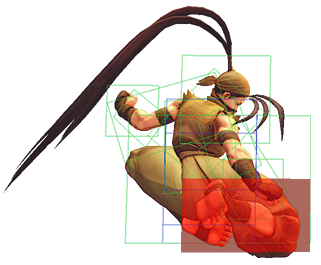
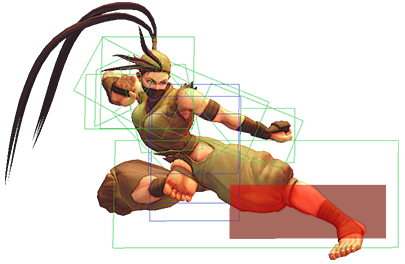
{{OSFIVFrameDataRow|LK Hien|{{Rdp}}{{lk}}<br>421+LK|25|5|18 land<br>[8/2 land]|-26|KD|100|200|H|*Sp Su|2 hits, [refers to recoil after block/hit]; *Air Kunai only, hits meaty after KD; KD Adv: +6|{{OmegaHB|O Ibuki 421K}}}} | {{OSFIVFrameDataRow|LK Hien|{{Rdp}}{{lk}}<br>421+LK|25|5|18 land<br>[8/2 land]|-26|KD|100|200|H|*Sp Su|2 hits, [refers to recoil after block/hit]; *Air Kunai only, hits meaty after KD; KD Adv: +6|{{OmegaHB|O Ibuki 421K}}}} | ||
{{OSFIVFrameDataRow|MK Hien|{{Rdp}}{{mk}}<br>421+MK|26|5|18 land<br>[8/2 land]|-28|KD|100|200|H|*Sp Su|2 hits, [refers to recoil after block/hit]; *Air Kunai only, hits meaty after KD; KD Adv: +5|{{OmegaHB|O Ibuki 421K}}}} | {{OSFIVFrameDataRow|MK Hien|{{Rdp}}{{mk}}<br>421+MK|26|5|18 land<br>[8/2 land]|-28|KD|100|200|H|*Sp Su|2 hits, [refers to recoil after block/hit]; *Air Kunai only, hits meaty after KD; KD Adv: +5|{{OmegaHB|O Ibuki 421K}}}} | ||
{{OSFIVFrameDataRow|HK Hien|{{Rdp}}{{hk}}<br>421+HK|27|5|19 land<br>[8/2 land]|-28|KD|100|200|H|*Sp Su|2 hits, [refers to recoil after block/hit]; *Air Kunai only, hits meaty after KD; KD Adv: +5|{{OmegaHB|O Ibuki 421K}}}} | {{OSFIVFrameDataRow|HK Hien|{{Rdp}}{{hk}}<br>421+HK|27|5|19 land<br>[8/2 land]|-28|KD|100|200|H|*Sp Su|2 hits, [refers to recoil after block/hit]; *Air Kunai only, hits meaty after KD; KD Adv: +5|{{OmegaHB|O Ibuki 421K}}}} | ||
{{OSFIVFrameDataRow2|{{ex}} Hien|{{Rdp}}{{2k}}<br>421+KK|39|8|30 land<br>[8/8 land]|-9|KD|170|270|H|*Sp|Side switches; [refers to recoil after block/hit]; *Air Kunai only; KD Adv: +3|{{OmegaHB|O Ibuki 421KK}}}} | {{OSFIVFrameDataRow2|{{ex}} Hien|{{Rdp}}{{2k}}<br>421+KK|39|8|30 land<br>[8/8 land]|-9|KD|170|270|H|*Sp|Side switches; [refers to recoil after block/hit]; *Air Kunai only; KD Adv: +3|{{OmegaHB|O Ibuki 421KK}}}} | ||
{{OSFIVFrameDataRow|LK Kasumi Gake<br>(Command Dash)|{{Qcf}}{{lk}}<br>236+LK|-|-|20|-|-|-|-|-|Su|'''1-11f low profile''' (goes under most projectiles)|{{OmegaHB|O Ibuki 236LKMK}}}} | {{OSFIVFrameDataRow|LK Kasumi Gake<br>(Command Dash)|{{Qcf}}{{lk}}<br>236+LK|-|-|20|-|-|-|-|-|Su|'''1-11f low profile''' (goes under most projectiles)|{{OmegaHB|O Ibuki 236LKMK}}}} | ||
{{OSFIVFrameDataRow|MK Kasumi Gake<br>(Command Dash)|{{Qcf}}{{mk}}<br>236+MK|-|-|22|-|-|-|-|-|Su|'''1-12f low profile''' (goes under most projectiles)|{{OmegaHB|O Ibuki 236LKMK}}}} | {{OSFIVFrameDataRow|MK Kasumi Gake<br>(Command Dash)|{{Qcf}}{{mk}}<br>236+MK|-|-|22|-|-|-|-|-|Su|'''1-12f low profile''' (goes under most projectiles)|{{OmegaHB|O Ibuki 236LKMK}}}} | ||
{{OSFIVFrameDataRow|HK Kasumi Gake<br>(Command Dash)|{{Qcf}}{{hk}}<br>236+HK|-|-|24|-|-|-|-|-|Su|Can pass through opponent|{{OmegaHB|O Ibuki 236HK}}}} | {{OSFIVFrameDataRow|HK Kasumi Gake<br>(Command Dash)|{{Qcf}}{{hk}}<br>236+HK|-|-|24|-|-|-|-|-|Su|Can pass through opponent|{{OmegaHB|O Ibuki 236HK}}}} | ||
{{OSFIVFrameDataRow2|Tsujigoe<br>(Flip)|{{Dp}}{{P}}<br>623+P|45/47/46<br>(L/M/H)|-|7 land|-|-|-|-|-|Sp Su|'''8f airborne'''; strength determines distance; can use neutral jump normals during descent; kunai or super will face opposite of original direction|{{OmegaHB|O Ibuki 623P}}}} | {{OSFIVFrameDataRow2|Tsujigoe<br>(Flip)|{{Dp}}{{P}}<br>623+P|45/47/46<br>(L/M/H)|-|7 land|-|-|-|-|-|Sp Su|'''8f airborne'''; strength determines distance; can use neutral jump normals during descent; kunai or super will face opposite of original direction|{{OmegaHB|O Ibuki 623P}}}} | ||
{{OmegaSFIVFrameDataHeader}} | {{OmegaSFIVFrameDataHeader}} | ||
{{OSFIVFrameDataRow|Kasumi Suzaku<br>(Ground Super)|{{Qcf}}{{Qcf}}{{K}}<br>236236+K|1+6|96 total|8 land|-3|-3(0)|65x6|-|M|-|'''1-6f full invuln'''|{{OmegaHB|O Ibuki Super}}}} | {{OSFIVFrameDataRow|Kasumi Suzaku<br>(Ground Super)|{{Qcf}}{{Qcf}}{{K}}<br>236236+K|1+6|96 total|8 land|-3|-3(0)|65x6|-|M|-|'''1-6f full invuln'''|{{OmegaHB|O Ibuki Super}}}} | ||
Revision as of 20:31, 15 April 2022

Ibuki
In a nutshell
With the removal of the knockdown vortex in Omega, Ibuki has had her neutral and pressure buffed tremendously to compensate. Her walk and dash speeds are among the best in the game, and her new ground kunai gives her extensive pressure sequences that are difficult to escape due to Omega's system changes. Many normals have faster startup and better frame advantage, giving her pressure reminiscent of her 3rd Strike days. Ibuki's defense, meanwhile, has been buffed with the addition of a meterless invincible MK Kazekiri, which can be late-cancelled into a safe Super on block (a feature that is almost non-existent among Omega characters). Yami Shigure massively increases Ibuki's damage output from neutral buffers, and sets up a sort of pseudo-vortex scenario of the opponent quick rises (or if you predict their delay rise). And with the ability to cancel into Super from the ground, any poke into a safe LK Tsumuji can instantly drain half the opponent's life, or sets up for an easy chip kill.
Notable Changes from USF4 to Omega
- Throw: slightly shorter range
- Air Throw: no height restriction, can now combo in air juggles
- Movement Changes:
- Walk speed increased (Forward: 0.045 > 0.053, Back: 0.03125 > 0.040)
- Forward Dash: 3f faster (18f > 15f), slightly shorter distance
- Back Dash: 3f faster (28f > 25f), much shorter distance
- Jumps: 3f faster, slightly shorter distance and height. Super jumps are unaffected.
- Normal Move Changes:
- Far 5HP is a new, forward-moving attack that knocks down on hit
- 2MP (d+MP) is much faster, but has less range and fewer active frames. Works like 5MK with a lower hitbox.
- 2HP (d+HP) hits twice
- j.MK is a much better air normal, easy to cross up using Ibuki's new jump arc
- Command Normal Changes:
- Sazan (slide) is now 3LK (df+LK), formerly 3MK
- Hammer Kick (overhead) is now 3MK (df+MK), formerly 6MK. The Target Combo from Reverse Spin Kick still uses the 6MK input.
- Reverse Spin Kick is now 4HK (b+HK), formerly 4MK. Faster and +5/+2, making it a strong neutral button.
- Backhand Punch is now 6HP > HP, formerly Far HP > HP; The initial 6HP (Spiral Elbow) is comparable to Ibuki's old Far 5HP
- Target Combos:
- All TCs into 2HK > HK no longer launch for a juggle state
- Air TCs (j.HP>MK, j.LP>HP, j.LK>MK) no longer require a forward input on the 2nd hit
- 5MP > 6LK (st.MP > f.LK) - taken from 3S, it's TC5 without the initial Far 5LP
- 4MP > HP (b+MP > HP) - another 3S combo
- Special Move Changes:
- Kagenui (Ground Kunai, 421P) - new move - Button strength determines distance, allows for combo loops
- Yami Shigure (EX Ground Kunai - 421PP) - new move - Referencing 3S Ibuki's SA3. Costs 2 bars, sets up a strong mixup.
- Tsumuji (214K) - LK version hits once, MK hits once with optional 2nd followup, HK hits twice with optional 3rd followup. Low enders are now unsafe.
- EX Kazekiri (623KK) - 1f faster and more invincible, but no longer has a kunai followup
- EX Raida (63214PP) - now a forward moving 2-hit attack. The first hit can FADC.
- Neckbreaker (41236P) - Now do much more stun to compensate for their lack of mixup potential
- Hien (421K) - shorter trajectories, knock down on hit
- Tsujigoe (623P) - can now use neutral jump normals during the flip, which can set up very ambiguous crossups
- Kasumi Gake (236K) - LK/MK Command Dashes can low profile under most projectiles for a short time. Dashes are also Super/Focus cancellable.
- Super/Ultra Changes:
- Ground Super (236236+K / 2xQCF+K) - new version of Super that can be used while grounded. Allows new combo routes, like Tsumuji xx Super. Also can be used as a safe invincible reversal.
- Air Super also uses the K input, making it less likely to use accidentally while attempting instant jump kunai. Damage increased to 390 max (from 330).
Character Specific Data
Ibuki
| VITALS | |||||
|---|---|---|---|---|---|
| Health: | 900 | Stun: | 950 | ||
| WALKING | |||||
| Forward Walk Speed: | 0.053 | Back Walk Speed: | 0.040 | ||
| JUMPING | |||||
| Jump Total Frames: | 4+36+4 (SJ: 3+41+11) |
Jump Distance: | 2.1 Forward/Back (SJ: 2.87 Forward, 2.85 Back) | ||
| DASHING | |||||
| Forward Dash Frames: | 15 | Forward Dash Distance: | 1.66 | ||
| Back Dash Frames: | 25 | Back Dash Distance: | 1.18 | ||
| FA + Forward Dash Frames: | 17 | FA + Back Dash Frames: | 22 | ||
| Back Dash Invincibility: | 1-9 | FA + Back Dash Invincibility: | 0 | ||
| Back Dash Airborne: | 9-20 | FA + Back Dash Airborne: | 6-17 | ||
| FOCUS ATTACK DATA | |||||
| Lv1 FA + Forward Dash (Block): | -2 | Lv1 FA + Back Dash (Block): | -7 | ||
| Lv2 FA + Forward Dash (Block): | +4 | Lv2 FA + Back Dash (Block): | -1 | ||
Frame Data
| Move Name | Input | Startup | Active | Recovery | On Block | On Hit | Damage | Stun | Hit Lv | Cancel | Notes |
|---|---|---|---|---|---|---|---|---|---|---|---|
| 5LP (Close) | cl. |
3 | 2 | 7 | 2 | 5 | 30 | 50 | M | TC Sp Su | - |
| 5HP (Close) | cl. |
7 | 2*2 | 18 | -6 | -2 | 60*70 | 125*75 | M*M | Sp Su / TC | 2 hits |
| 5HK (Close) | cl. |
5 | 2*2 | 23 | -5 | KD | 50*60 | 125*75 | M*M | - / J SJ | 2 hits; 2nd hit launches into juggle state, is jump cancellable. KD Adv: +53 (+77 after Jump Cancel) |
| Move Name | Input | Startup | Active | Recovery | On Block | On Hit | Damage | Stun | Hit Lv | Cancel | Notes |
| 5LP (Far) | far. |
3 | 2 | 5 | 4 | 8 | 25 | 50 | M | TC | Against some crouching characters, may whiff in combos at farther ranges |
| 5MP | st. |
5 | 4 | 6 | 2 | 6 | 70 | 100 | M | TC Sp Su | Can whiff in combos against some crouching characters |
| 5HP (Far) | far. |
8 | 7 | 14 | -3 | KD | 100 | 200 | M | Sp Su | KD Adv: +28; moves forward, causing juggle state on hit |
| 5LK | st. |
4 | 5 | 9 | -2 | 1 | 20 | 50 | M | TC | - |
| 5MK | st. |
5 | 4 | 12 | -2 | 1 | 70 | 100 | M | Sp Su | - |
| 5HK (Far) | far. |
10 | 3 | 17 | -2 | 2 | 110 | 200 | M | - | - |
| Move Name | Input | Startup | Active | Recovery | On Block | On Hit | Damage | Stun | Hit Lv | Cancel | Notes |
| 2LP | 3 | 2 | 7 | 2 | 5 | 20 | 50 | M | Ch Sp Su | - | |
| 2MP | 5 | 2 | 11 | 1 | 4 | 70 | 100 | M | Sp Su | - | |
| 2HP | 9 | 1*3 | 18 | -3 | 2 | 40*60 | 50*150 | M | J SJ | Jump cancellable through entire animation on hit/block | |
| 2LK | 4 | 2 | 8 | 1 | 4 | 20 | 50 | L | Sp Su | - | |
| 2MK | 6 | 5 | 9 | 0 | 3 | 70 | 100 | L | - | - | |
| 2HK | 6 | 2 | 25 | -9 | KD | 90 | 100 | L | TC | KD Adv: +19 | |
| Move Name | Input | Startup | Active | Recovery | On Block | On Hit | Damage | Stun | Hit Lv | Cancel | Notes |
| Agemen | 6 | 1*2 | 10 | 0 | 4 | 30*50 | 50*50 | M*M | TC Sp Su | Cancels on first hit only | |
| Spin Kick | 4 | 4 | 9 | -1 | 2 | 30 | 50 | M | Sp Su | - | |
| Sazan (Slide) | 7 | 11 | 11 | -11(-1) | -5(5) | 70 | 100 | L | - | 5-17f low profile (can slide under projectiles) | |
| Hammer Kick (Overhead) | 25 | 4 | 8 | 3 | 5 | 65 | 100 | H | - | 3-31f airborne, 8-28f lower body strike/projectile invuln | |
| Bonsho Kick | 13 | 2 | 18 | -2 | 2 | 100 | 250 | M | - | 5-26f airborne, 4-14f lower body strike/projectile invuln; +5 on Counterhit | |
| Reverse Spin Kick | 7 | 2 | 16 | 1 | 5 | 80 | 150 | M | TC | Strong neutral poke | |
| Spiral Elbow | 12 | 4 | 16 | -2 | 3 | 100 | 100 | M | TC | Ibuki's old Far 5HP | |
| Backhand Punch | 12 | 1(4)9 | 20 | -11 | KD | 100*80 | 100*200 | M*M | Sp Su | Ibuki's old Far 5HP>HP; KD Adv: +24 | |
| Move Name | Input | Startup | Active | Recovery | On Block | On Hit | Damage | Stun | Hit Lv | Cancel | Notes |
| Target Combo 4 (starter) |
cl. |
- | - | - | -1 | 3 | 30*30x2 | 50*50x2 | M*M | Sp Su/TC | Only 1st hit of MP can special/super cancel, but both hits can continue TC |
| + TC4 (full) |
> |
- | - | - | 1 | 4 | *80 | *60 | M | Sp Su | Damage/Stun does not factor in scaling |
| Target Combo 5 (starter) |
far |
- | - | - | 1 | 4 | 25*40 | 50*50 | M*M | TC | On some wide characters, this can loop into itself a couple times |
| + TC5 (full) |
> |
- | - | - | -1 | 3 | *50 | *50 | M | - | - |
| Target Combo 6 (starter) |
cl. |
- | - | - | -1 | 3 | 30*30x2 | 50*50x2 | M*M | Sp Su/TC | Same starter as TC4 |
| + TC6 (partial) | > |
- | - | - | -9 | KD | *60 | *60 | L | TC | KD Adv: +21 |
| + TC6 (full) | > |
- | - | - | -3 | Reset | *60 | *60 | M | J SJ | Reset Adv: +12 if no JC/SJC +32 from moment of JC/SJC |
| Target Combo 7 | - | - | - | 1 | 3 | [80]*65 | [150]*100 | M*H | - | Combos on counterhit only [100*65 Dmg, 188*100 stun]; good approach tool, but can be punished if used too predictably | |
| Target Combo 8 (starter) |
cl. |
- | - | - | -9 | KD | 60*70*60 | 125*75*60 | M*L | TC | KD Adv: +21 |
| + TC8 (full) | > |
- | - | - | -7 | Reset | *60 | *60 | M | J SJ | Reset Adv: +12 if no JC/SJC +32 from moment of JC/SJC |
| Target Combo 9 (starter) |
- | - | - | -4 | 1 | 20*40 | 50*50 | M*M | Sp TC | Can be used for easier SJC into U2, but otherwise is a fairly weak starter | |
| + TC9 (full) | > |
- | - | - | -3 | 1 | *60 | *60 | M | - | Mostly useless ender, special cancels from MK are stronger |
| Target Combo 10 | - | - | - | -8 | Reset | 90*60 | 100*60 | L*M | J SJ | Reset Adv: +11 if no JC/SJC +31 from moment of JC/SJC | |
| Target Combo 11 | - | - | - | -1 | 3 | 70*50 | 100*50 | M*M | - | - | |
| Target Combo 12 | - | - | - | 1 | 4 | 30*50*60 | 50x2*60 | M*M | Sp Su | - | |
| Move Name | Input | Startup | Active | Recovery | On Block | On Hit | Damage | Stun | Hit Lv | Cancel | Notes |
| j.LP (angled) | 6 | 6 | - | - | - | 40 | 50 | H | TC | - | |
| j.MP (angled) | 7 | 8 | - | - | - | 70 | 50 | H | - | - | |
| j.HP (angled) | 11 | 5 | - | - | - | 100 | 200 | H | TC | - | |
| j.LK (angled) | 4 | 8 | - | - | - | 40 | 50 | H | TC | Weak crossup | |
| j.MK (angled) | 8 | 5 [7] | - | - | - | 70 | 100 | H | - | Crossup hitbox [5 active], forward hitbox 7 active | |
| j.HK (angled) | 8 | 5 | - | - | - | 100 | 200 | H | - | KD vs. airborne opponents; has juggle potential | |
| j.LP (neutral) | 6 | 7 | - | - | - | 50 | 50 | H | - | - | |
| j.MP (neutral) | 6 | 7 | - | - | - | 80 | 100 | H | - | - | |
| j.HP (neutral) | 9 | 5 | - | - | - | 100 | 200 | H | TC | Hits on both sides, can crossup after Tsujigoe flip | |
| j.LK (neutral) | 6 | 12 | - | - | - | 50 | 50 | H | - | - | |
| j.MK (neutral) | 6 | 7 | - | - | - | 80 | 100 | H | - | - | |
| j.HK (neutral) | 7 | 3 | - | - | - | 110 | 200 | H | - | - | |
| Target Combo 1 | - | - | - | - | - | 100*40 | 200*50 | H*H | - | Works from angled/neutral jumps | |
| Target Combo 2 | - | - | - | - | - | 40*70 | 50*150 | H*H | - | Works from angled jumps only | |
| Target Combo 3 | - | - | - | - | - | 40*40 | 50*50 | H*M | - | Works from angled jumps only | |
| Move Name | Input | Startup | Active | Recovery | On Block | On Hit | Damage | Stun | Hit Lv | Cancel | Notes |
| Focus Attack Lv. 1 | 21 | 2 | 34 | -21 | KD | 85 | 150 | M | Dash | KD Adv: +12; +30 after Forward Dash, +25 after Back Dash | |
| Focus Attack Lv. 2 | 29 | 2 | 34 | -15 | crumple | 80 | 150 | M | Dash | - | |
| Focus Attack Lv. 3 | 65 | 2 | 34 | - | crumple | 140 | 200 | - | Dash | Unblockable | |
| Move Name | Input | Startup | Active | Recovery | On Block | On Hit | Damage | Stun | Hit Lv | Cancel | Notes |
| Yami Kazura (Forward Throw) |
3 | 2 | 24 | - | KD | 170 | 200 | T | - | KD Adv: +6 | |
| Uki Yami (Back Throw) |
3 | 2 | 24 | - | KD | 170 | 200 | T | - | KD Adv: +2 | |
| Tobizaru (Air Throw) |
3 | 2 | 4 land | - | KD | 180 | 200 | T | - | KD Adv: +7 (Min height) to +13 (Max height); No height restriction | |
| Move Name | Input | Startup | Active | Recovery | On Block | On Hit | Damage | Stun | Hit Lv | Cancel | Notes |
| Kagenui (Kunai) |
421+P |
11 | 6 | 22 | 0 | 3 | 60 | 50 | M | - | Strength determines distance; can lead to combo loops |
| Yami Shigure ( |
421+PP |
11 | 10 | 24 | -6(-7) | KD | 20x3*250 | 250 | M | - | Uses 2 bars; KD Adv: +43; Initial hit throws 3 kunai, only one must connect for full animation |
| Air Kunai | Air Air 236+P |
7 | - | 12 land | -12(8) | -8(12) | 30 | 60 | M | Su | Forward/Neutral jump only; Frame Adv depends on angle |
| Air Air 236+PP |
8 | - | 7 land | -3(13) | 6(22) | 40*40 | 50*50 | M | - | Works from any jump | |
| LK Tsumuji (Spin Kicks) |
214+LK |
11 | 2 | 15 | -3 | KD | 100 | 100 | M | Su | Great neutral tool, can safely fish for Super confirms |
| MK Tsumuji (Spin Kicks) |
214+MK |
15 | 2 | 15 | -1 | 3 | 60 | 50 | M | Su | Can link afterward like Ground Kunai, or confirm into followup |
| + High followup | + |
6 | 2 | 16 | -4 | 3 | 60 | 80 | M | Su | - |
| + Low followup | + |
8 | 2 | 20 | -8 | KD | 50 | 60 | L | - | KD Adv: +20 |
| HK Tsumuji (Spin Kicks) |
214+HK |
15 | 2(13)2 | 20 | -4 | 0 | 50*30 | 70*60 | M | Su | Can FADC the first hit for extension, +3 on hit |
| + High followup | + |
6 | 2 | 18 | -6 | 1 | 60 | 80 | M | Su | - |
| + High followup | + |
7 | 2 | 24 | -12 | KD | 50 | 60 | L | - | - |
(Spin Kicks) |
214+KK |
12 | 2(10)2(10) 2(10)2 |
9 | -2 | KD | 40*30x3 | 60x3*70 | M | - | KD Adv: +47; Allows corner juggles; If first hit connects vs. airborne, entire sequence juggles; On hit/block, hold down to switch to low kicks |
| + Low 2nd/3rd | Hold |
- | - | - | - | - | 45 | 50 | L | - | Can switch back to mid kicks by letting go of down; each low kick adds a hit of damage scaling |
| + Low ender | Hold |
7 | 2 | 11 | -2 | KD | 70 | 70 | L | - | KD Adv: +29 |
| LK Kazekiri (Upkicks) |
623+LK |
5 | 9 | 16+9 land | -23 | KD | 50*20*65 | 40x3 | M | Su FA* | 1-6f throw invuln; On block, can only late Super cancel; KD Adv: +35 |
| MK Kazekiri (Upkicks) |
623+MK |
5 | 13 | 18+17 land | -37 | KD | 50*20*75 | 40x3 | M | Su FA* | 1-6f full invuln; On block, can only late Super cancel; KD Adv: +21 |
| HK Kazekiri (Upkicks) |
623+HK |
9 | 19 | 21+10 land | -39 | KD | 50*20*90 | 40x3 | M | Su FA* | 1-10f throw invuln; On block, can only late Super cancel; KD Adv: +19 |
(Upkicks) |
623+KK |
4 | 4(5)1 | 19+12 land | -31 | KD | 60x2*20*50 | 50x2*0*100 | M | FA | 1-13f full invuln; KD Adv: +27; No more kunai followup |
| Move Name | Input | Startup | Active | Recovery | On Block | On Hit | Damage | Stun | Hit Lv | Cancel | Notes |
| LP Raida (Energy Grab) |
63214+LP |
6 | 5 | 25 | -14 | KD | 180 | 200 | M | - | 1-10f throw invuln |
| MP Raida (Energy Grab) |
63214+MP |
6 | 5 | 27 | -16 | KD | 180 | 200 | M | - | 1-10f throw invuln |
| HP Raida (Energy Grab) |
63214+HP |
7 | 5 | 29 | -18 | KD | 180 | 200 | M | - | 1-11f throw invuln |
(Energy Grab) |
63214+PP |
10 | 4(5)1 | 25 | -10 | KD | 60*140 | 0*250 | M | FA/- | 1st hit is FA cancellable; Hard KD if only 1st hit connects vs. airborne (but not worth the lost damage/stun) |
| LP Neckbreaker | 41236+LP |
15 | 10 | 16 | -13 | KD | 150 | 300 | L | - | - |
| MP Neckbreaker | 41236+MP |
15 | 12 | 17 | -13 | KD | 150 | 300 | L | - | - |
| HP Neckbreaker | 41236+HP |
15 | 21 | 19 | -13 | KD | 150 | 300 | L | - | - |
41236+PP |
15 | 14 | 19 | -13 | KD | 160 | 350 | L | - | 1-28f projectile invuln; On hit, Ibuki recoils backward and the final recovery frame is vulnerable (careful vs. Dhalsim/Decapre U1) | |
| LK Hien | 421+LK |
25 | 5 | 18 land [8/2 land] |
-26 | KD | 100 | 200 | H | *Sp Su | 2 hits, [refers to recoil after block/hit]; *Air Kunai only, hits meaty after KD; KD Adv: +6 |
| MK Hien | 421+MK |
26 | 5 | 18 land [8/2 land] |
-28 | KD | 100 | 200 | H | *Sp Su | 2 hits, [refers to recoil after block/hit]; *Air Kunai only, hits meaty after KD; KD Adv: +5 |
| HK Hien | 421+HK |
27 | 5 | 19 land [8/2 land] |
-28 | KD | 100 | 200 | H | *Sp Su | 2 hits, [refers to recoil after block/hit]; *Air Kunai only, hits meaty after KD; KD Adv: +5 |
421+KK |
39 | 8 | 30 land [8/8 land] |
-9 | KD | 170 | 270 | H | *Sp | Side switches; [refers to recoil after block/hit]; *Air Kunai only; KD Adv: +3 | |
| LK Kasumi Gake (Command Dash) |
236+LK |
- | - | 20 | - | - | - | - | - | Su | 1-11f low profile (goes under most projectiles) |
| MK Kasumi Gake (Command Dash) |
236+MK |
- | - | 22 | - | - | - | - | - | Su | 1-12f low profile (goes under most projectiles) |
| HK Kasumi Gake (Command Dash) |
236+HK |
- | - | 24 | - | - | - | - | - | Su | Can pass through opponent |
| Tsujigoe (Flip) |
623+P |
45/47/46 (L/M/H) |
- | 7 land | - | - | - | - | - | Sp Su | 8f airborne; strength determines distance; can use neutral jump normals during descent; kunai or super will face opposite of original direction |
| Move Name | Input | Startup | Active | Recovery | On Block | On Hit | Damage | Stun | Hit Lv | Cancel | Notes |
| Kasumi Suzaku (Ground Super) |
236236+K |
1+6 | 96 total | 8 land | -3 | -3(0) | 65x6 | - | M | - | 1-6f full invuln |
| Kasumi Suzaku (Air Super) |
Air Air 236236+K |
1+7 | varies | 5 land | -3(3) | -3(0) | 65x6 | - | M | - | 1-7f full invuln; each pair of kunai is active until it reaches the ground |
| Yoroitoshi (Ultra 1 Throw) |
6321463214+PPP |
0+1 | 2 | - | - | KD | 501 | - | T | - | 1-2f full invuln; becomes fireball if throw whiffs |
| Yoroitoshi (Ultra 1 Fireball) |
6321463214+PPP |
0+13 | 59 | 31 | -5 | -1 | 240 | - | M | - | Knocks down airborne opponents; Damage distribution: 38*11*38x4*39 |
| Hashinsho (Ultra 2) |
236236+KKK |
0+9 | 2(2)2(15) 2(26)3(8)2 |
81 | -63 | KD | 30x6*[289] | - | M | - | 1-7f full invuln, 8f strike invuln, 8-71f projectile invuln; [cinematic damage vs. grounded opponents only] |
| Move Name | Input | Startup | Active | Recovery | On Block | On Hit | Damage | Stun | Hit Lv | Cancel | Notes |

