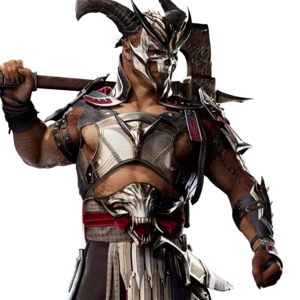
Mortal Kombat 1/General Shao

From SuperCombo Wiki

Introduction

Supreme Commander of Outworld’s Army

"Born into a proud military family, Shao was expected to become a soldier. But he was a sickly child who, though brilliant and eager, had an infirm body. Shao’s disability infuriated his father. He dismissed his son’s physicians and designed an extreme program to build his son’s strength and endurance. Years of toil molded Shao into a physical colossus and forged within him an iron will. And as his father had promised, Shao became the perfect soldier. His brilliant tactics and relentless effort won Outworld many victories and him much fame. Though General Shao is sworn to serve the Empress, his loyalty is to with Outworld. If Sindel’s rule ever endangers Outworld, he will be the first to try to end it."

General Shao is a stance character with strong mobility, primarily built around playing neutral and pouncing on opportunities. By default he stays in Axe Stance, patrolling neutral with a suite of long-reaching, disjoint normals. Once he finds an opening, he plants the axe with Power Strike (DF4) to enter Unarmed Stance, losing reach but temporarily gaining far superior speed, safety, mixups, and damage output. The General Shao player must be aware to operate within his current stance's strengths, as the two stances have limited overlap and major deficiencies on their own.

Strengths Weaknesses
  • Exceptional Health: At 1100 base HP, General Shao is tied with Havik as the highest HP characters in the game. This health value can be used to make -50 HP kameos less of a problem, or it can be combined with an HP boosting kameo for even more durability.
  • Supreme Reach: In his default Axe stance, many of General Shao's normals boast excellent reach with generous disjoints. Foremost among them are 22, a "jab"string with absurdly large coverage for its 8-frame startup, B1, a safe advancing disjoint mid with a natural overhead followup, and J2, a downward axe swipe with an enormous sweeping hitbox.
  • Dangerous Mix: General Shao has numerous overhead options in both stances, with the Unarmed stance boasting the best overhead in the game in F2 (on top of a command grab that ticks from D1 and D3). His low options aren't as solid but he still gets B3, a combo starting low in both stances.
  • Peculiar Speed: Like his MK11 predecessor, General Shao has unusually quick speed for his size. His blockdashing is among the best in the game, allowing him to close the gap and threaten mixups from a surprising distance.
  • Mano a Mano: Few characters can scrap like an unarmed Shao, where he is free to apply a massive suite of mixups and plus frames. His specials in particular gain an enormous boost, with three out of the five available specials gaining armor on EX and giving him an armored combo starter (with caveats), an armored command grab, and an armored plus mid.
  • Air Control: General Shao can easily antiair with Devastator (DB3), and his exceptional height makes his jabs excellent at antiairing. If all else fails, his highly vertical and disjoint D2 will work.
  • General Shao's Army: General Shao could be the most kameo-versatile character in the game, with the entire roster being viable choices. He works wonderfully with meta kameos Kung Lao and Stryker, while still effectively using off-meta choices like Frost and Motaro. His superior base health also makes health-penalizing kameos less of a problem.
  • Devastatingly Frustrating: Shao relies on Devastator (DB3) for both combo extensions and armored reversals, and it is a highly flawed move for both purposes, being easy to low profile and risking full combo punishment on drop. Though it is the only explicit armored launcher in the game by itself, armoring a move in both stance versions will disallow combo pickups under most circumstances.
  • Safety Third: Shao's options for offense in Axe stance are defined by two outcomes: his gapless options are unsafe, and his safe options leave a gap. His Power Strike (DF4), while mostly safe on regular block, is easily anticipated and punished on upblock and flawless block on top of creating a gap with nearly every cancel option. Even in Unarmed stance, he sometimes must swing with an unsafe move to complete a frametrap.
  • The Wrong Tool for the Job: While his Axe stance has excellent space control and his Unarmed stance can brawl up close, being forced to play outside of the stance's strength can have disastrous results. Among other issues, his Axe stance entirely lacks a confirmable mid without kameos (the closest being his 26 frame B2), and the Unarmed stance surrenders all of his disjoints.
  • Kameo Dependent: Though General Shao has numerous viable kameo choices, his gameplan is highly dictated by his current choice, making him less flexible once ingame and often necessitating a kameo switch mid-set. Kameo priorities include as covering the gap in a Power Strike (DF4) cancel on block, being able to combo from Axe F2, being able to confirm from his cancellable one-hit mids, and providing an alternate armored reversal to replace Devastator.
General Shao
Mk1 shao portrait.png
Base Health

Normals and Strings


Grounded

12

1
Standing Front Punch
Startup Active Recovery Cancel Damage Chip Guard On Hit On Block On Flawless Block Cost
- - - - - - H - - {{{flawlessBlockAdv}}} -

Short but useful jabstring, and General Shao's point blank combo starter if F122 would be too slow. 1 is his fastest standing attack, hitting high up for antiairs, though in most other situations 2 will be more useful due to its vastly improved hitbox and somehow quicker recovery. 12 deals solid damage, comes out fast for a jabstring followup, and bounces for a combo. In Axe stance by itself Shao can follow up 12 with 22, but cancelling directly into Power Strike will create enough height to combo directly into B32 for less meter spent. Landing 12 on an airborne enemy will not bounce, instead giving an immediate knockdown.

  • The two stance versions appear to be entirely identical, differing only in sound and aesthetic.

12
Standing Front Punch
Startup Active Recovery Cancel Damage Chip Guard On Hit On Block On Flawless Block Cost
- - - - - - H - - {{{flawlessBlockAdv}}} -

Short but useful jabstring, and General Shao's point blank combo starter if F122 would be too slow. 1 is his fastest standing attack, hitting high up for antiairs, though in most other situations 2 will be more useful due to its vastly improved hitbox and somehow quicker recovery. 12 deals solid damage, comes out fast for a jabstring followup, and bounces for a combo. In Axe stance by itself Shao can follow up 12 with 22, but cancelling directly into Power Strike will create enough height to combo directly into B32 for less meter spent. Landing 12 on an airborne enemy will not bounce, instead giving an immediate knockdown.

  • The two stance versions appear to be entirely identical, differing only in sound and aesthetic.


B12, B1

1
Standing Front Punch
Startup Active Recovery Cancel Damage Chip Guard On Hit On Block On Flawless Block Cost
- - - - - - H - - {{{flawlessBlockAdv}}} -

Shao's primary mid in Axe stance. Disjointed with great range for its speed, and bolstered by strong forward advancement and surprisingly short recovery. Has a natural overhead followup in B12, which is safe but creates a gap. Back input also makes it easier to use in backdash anti-mashing traps. The attack is sometimes cancelled directly into Power Strike, which will be safe on block while putting General Shao into unarmed stance. This cancel will widen the gap to mashable degrees, but this is less of a problem if the B1 is properly spaced. To eliminate this gap, use a kameo.

1
Standing Front Punch
Startup Active Recovery Cancel Damage Chip Guard On Hit On Block On Flawless Block Cost
- - - - - - H - - {{{flawlessBlockAdv}}} -

Fast, advancing mid that starts combos. Excellent as a high reward check from spacing traps and plus frames, though the fastest attacks can still interrupt when done on block - check with D1 instead if this is proving troublesome. If blocked, mashing is not a terrible idea as it is only -3, unless the enemy is someone like Li Mei or Johnny who has a <10 frame combo starting mid. Side switches on hit unless done with extremely high gravity, allowing General Shao to position himself relative to the corner more effectively. While Shao lacks a confirmable mid string in both stances, B1 and his other safe combo starters in unarmed stance can fulfill a similar utility.


F122

f1
Standing Front Punch
Startup Active Recovery Cancel Damage Chip Guard On Hit On Block On Flawless Block Cost
- - - - - - H - - {{{flawlessBlockAdv}}} -

Aggressive, advancing, and highly committal string. Shao's punish of choice in Axe stance for enemies within reach, and his best option for point blank blockstrings, though greatly overshadowed by 22 in most footsies situations due to its slower speed, worse range, and much higher commitment. The string is best used as a confirm from F12 - despite its long recovery giving it limited use as a stagger, it inflicts lengthy blockstun for strong cancel advantage, leaving no upblockable gap with Power Strike and fully jailing from most kameo moves. The third hit causes a bounce and can be special cancelled, allowing Shao to cancel into Power Strike on hit for excellent meterless damage. F122 on block is Shao's best option for chip damage and corner carry but Shao needs to have a cancel plan in mind before attempting this - simply cancelling into Power Strike for the -10 with pushback will leave you mostly safe on regular block, but is very easy to adapt to and punish with upblock. Safer options include Jax Energy Wave (which also gives meterless combos in the corner), Stryker baton, or an early Sektor Missile to land during the Power Strike gap.

f12
Standing Front Punch
Startup Active Recovery Cancel Damage Chip Guard On Hit On Block On Flawless Block Cost
- - - - - - H - - {{{flawlessBlockAdv}}} -

Aggressive, advancing, and highly committal string. Shao's punish of choice in Axe stance for enemies within reach, and his best option for point blank blockstrings, though greatly overshadowed by 22 in most footsies situations due to its slower speed, worse range, and much higher commitment. The string is best used as a confirm from F12 - despite its long recovery giving it limited use as a stagger, it inflicts lengthy blockstun for strong cancel advantage, leaving no upblockable gap with Power Strike and fully jailing from most kameo moves. The third hit causes a bounce and can be special cancelled, allowing Shao to cancel into Power Strike on hit for excellent meterless damage. F122 on block is Shao's best option for chip damage and corner carry but Shao needs to have a cancel plan in mind before attempting this - simply cancelling into Power Strike for the -10 with pushback will leave you mostly safe on regular block, but is very easy to adapt to and punish with upblock. Safer options include Jax Energy Wave (which also gives meterless combos in the corner), Stryker baton, or an early Sektor Missile to land during the Power Strike gap.

f122
Standing Front Punch
Startup Active Recovery Cancel Damage Chip Guard On Hit On Block On Flawless Block Cost
- - - - - - H - - {{{flawlessBlockAdv}}} -

Aggressive, advancing, and highly committal string. Shao's punish of choice in Axe stance for enemies within reach, and his best option for point blank blockstrings, though greatly overshadowed by 22 in most footsies situations due to its slower speed, worse range, and much higher commitment. The string is best used as a confirm from F12 - despite its long recovery giving it limited use as a stagger, it inflicts lengthy blockstun for strong cancel advantage, leaving no upblockable gap with Power Strike and fully jailing from most kameo moves. The third hit causes a bounce and can be special cancelled, allowing Shao to cancel into Power Strike on hit for excellent meterless damage. F122 on block is Shao's best option for chip damage and corner carry but Shao needs to have a cancel plan in mind before attempting this - simply cancelling into Power Strike for the -10 with pushback will leave you mostly safe on regular block, but is very easy to adapt to and punish with upblock. Safer options include Jax Energy Wave (which also gives meterless combos in the corner), Stryker baton, or an early Sektor Missile to land during the Power Strike gap.


D1

d1
Crouching Front Punch
Startup Active Recovery Cancel Damage Chip Guard On Hit On Block On Flawless Block Cost
- - - - - - - - - {{{flawlessBlockAdv}}} -

Somewhat typical D1, though of elevated importance to Shao due to the sluggishness of his other crouching pokes. Shao lacks a checking mid in Axe stance to cancel into after D1, so get ready to block after attacking with this. In Unarmed stance, the presence of B1 and the greater speed of his universal low options give him other solutions for checking and interrupting, and D1 shifts into a more aggressive role, giving pickups from Axe Quake and tick throws into the command grab. EX Treechopper also becomes an attractive anti-mashing option to cancel out of D1.


222, 224

2
Standing Back Punch
Startup Active Recovery Cancel Damage Chip Guard On Hit On Block On Flawless Block Cost
- - - - - - - - - {{{flawlessBlockAdv}}} -

One of the best normals in the game, and the rest of the string isn't bad either. Standing 2 is the foundation of Shao's neutral in Axe stance, boasting absolutely unreasonable reach and recovery for its 8-frame startup (somehow it has less recovery than 1). Combined with Shao's strong speed, 2 can whiff punish from an uncommon distance. Large hitbox and disjoint also make it strong for front-leaning antiairs, where a simple forward dash ~ 22 ~ EX DB3 will connect in most situations. Being his fastest recovery disjoint in Axe stance, S2 is a perfect choice for buffer OS, giving him a remarkably rewarding move for contesting neutral with next to no risk on whiff. The string followups are mostly just to confirm into a combo (and thus enter Unarmed stance) on hit, and while they aren't as singularly powerful as 2, they suffice in driving its reward and giving another possible action on block.

Properly establishing the spacing threat from 2 is perhaps the most important aspect of Shao's entire gameplan - it is the entire goal of his Axe stance, and it lets him safely access the power of his Unarmed stance. Unless facing significant zoning, retreating back to neutral and controlling space with S2 is a solid choice to make, especially with Shao's superior health.

  • Has a gap between 22 and 222.

22
Standing Back Punch
Startup Active Recovery Cancel Damage Chip Guard On Hit On Block On Flawless Block Cost
- - - - - - - - - {{{flawlessBlockAdv}}} -

One of the best normals in the game, and the rest of the string isn't bad either. Standing 2 is the foundation of Shao's neutral in Axe stance, boasting absolutely unreasonable reach and recovery for its 8-frame startup (somehow it has less recovery than 1). Combined with Shao's strong speed, 2 can whiff punish from an uncommon distance. Large hitbox and disjoint also make it strong for front-leaning antiairs, where a simple forward dash ~ 22 ~ EX DB3 will connect in most situations. Being his fastest recovery disjoint in Axe stance, S2 is a perfect choice for buffer OS, giving him a remarkably rewarding move for contesting neutral with next to no risk on whiff. The string followups are mostly just to confirm into a combo (and thus enter Unarmed stance) on hit, and while they aren't as singularly powerful as 2, they suffice in driving its reward and giving another possible action on block.

Properly establishing the spacing threat from 2 is perhaps the most important aspect of Shao's entire gameplan - it is the entire goal of his Axe stance, and it lets him safely access the power of his Unarmed stance. Unless facing significant zoning, retreating back to neutral and controlling space with S2 is a solid choice to make, especially with Shao's superior health.

  • Has a gap between 22 and 222.

222
Standing Back Punch
Startup Active Recovery Cancel Damage Chip Guard On Hit On Block On Flawless Block Cost
- - - - - - - - - {{{flawlessBlockAdv}}} -

One of the best normals in the game, and the rest of the string isn't bad either. Standing 2 is the foundation of Shao's neutral in Axe stance, boasting absolutely unreasonable reach and recovery for its 8-frame startup (somehow it has less recovery than 1). Combined with Shao's strong speed, 2 can whiff punish from an uncommon distance. Large hitbox and disjoint also make it strong for front-leaning antiairs, where a simple forward dash ~ 22 ~ EX DB3 will connect in most situations. Being his fastest recovery disjoint in Axe stance, S2 is a perfect choice for buffer OS, giving him a remarkably rewarding move for contesting neutral with next to no risk on whiff. The string followups are mostly just to confirm into a combo (and thus enter Unarmed stance) on hit, and while they aren't as singularly powerful as 2, they suffice in driving its reward and giving another possible action on block.

Properly establishing the spacing threat from 2 is perhaps the most important aspect of Shao's entire gameplan - it is the entire goal of his Axe stance, and it lets him safely access the power of his Unarmed stance. Unless facing significant zoning, retreating back to neutral and controlling space with S2 is a solid choice to make, especially with Shao's superior health.

  • Has a gap between 22 and 222.

2
Standing Back Punch
Startup Active Recovery Cancel Damage Chip Guard On Hit On Block On Flawless Block Cost
- - - - - - - - - {{{flawlessBlockAdv}}} -

224 in Unarmed stance is a souped-up hybrid of 22 and F122, a committal but powerful jabstring. Extraordinary forward advancement, exceptional damage, and most of the attacks being plus gives it broad utility. Unarmed 22 is more committal than Axe 22 (especially Axe 2 by itself) and abandons the disjoint, but gains vastly superior frame data, with Unarmed 2 being the second fastest recovering move in Shao's moveset. While Shao will mostly be trying to go for mixups and frame traps in Unarmed stance, 22 still gives him a degree of neutral and whiff punish gameplay. 224 is more similar to Axe F122, but it deals more damage, gives even more corner carry, and is +2 on block instead of -13. Going for a D1 afterwards will frametrap, and once the enemy doesn't mash Shao can instead follow with his numerous Unarmed mixup options. Being his highest damage cancellable string, 224 is also an important part of combo construction, and 2 ~ command grab is fast and advancing enough to work in extreme gravity.

Unarmed 224, while not the neutral beast that is Axe 22, is his premium choice for close range aggression. Though lacking the disjoints of his Axe strings, it still has the range and advancement to be used as a footsies tool, and as a pressure string it gives all the gapless corner carry and chip of F122 on top of plus frames. The damage on hit is better than any of his other grounded cancel strings, and the height from the third hit will allow the Devastator cancel to bounce the enemy high enough for continuation with Unarmed B32.


B2

b2
Standing Back Punch
Startup Active Recovery Cancel Damage Chip Guard On Hit On Block On Flawless Block Cost
- - - - - - - - - {{{flawlessBlockAdv}}} -

Massive advancing axe swing. Slow, but plus and starts combos. Strong as a high-reward attack for starting offense and approaching in neutral, though the slow startup makes it vulnerable to being preemptively stuffed - a kameo can cover this approach. Shao's most optimal combo starter, though relatively impractical to apply compared to his faster strings. Kameos that allow Shao to confirm into a B2 from a standing string provide a massive boost to his damage, such as Sareena and Sub-Zero (with Sub in particular giving Shao enough time to hit Dark Energy before continuing with the B2). Long suspension also allows Shao to loop B2 into itself on it multiple times, especially in the corner.

On block, B2 is +3 and creates some space. Though the attack is exceptionally active at 6 frames, the late active frames are high in the hair and thus difficult to apply as a meaty. Swinging with D1 will stop enemy mashing, but it is generally better to take advantage of the space created by backdashing into a B1. Once the enemy respects the plus frames from B2, he can use it to lead directly into other options.

b2
Standing Back Punch
Startup Active Recovery Cancel Damage Chip Guard On Hit On Block On Flawless Block Cost
- - - - - - - - - {{{flawlessBlockAdv}}} -

Unarmed B2 is much smaller than Axe B2, but it keeps all the plus frames on block - while shortening its startup to an absurd 15 frames. An incredible offensive tool by itself, especially on oki where applying the move is nearly guaranteed, but bolstered even further by Shao's numerous high reward options to take full advantage of the plus frames in Unarmed stance. Even swinging with another B2 on block isn't a bad idea, as it will catch most mid confirm strings.

The reaction on hit spins the enemy in a slow-falling somersault instead of the horizontal stance of most juggles, making it much easier to follow up the combo. This is especially helpful after F2 combos in the corner, where B2 can turn the normally low bounce into a suspend that is allows for easy B32 pickups.


F21+3, F2

f2
Standing Back Punch
Startup Active Recovery Cancel Damage Chip Guard On Hit On Block On Flawless Block Cost
- - - - - - - - - {{{flawlessBlockAdv}}} -

A fast, short ranged overhead. The singular hit version has low damage and extremely long recovery, but the hitstun is surprisingly long, potentially letting Shao jail into a B2 on hit. The followup greatly improves the damage, but the safety is not exactly improved (though the attack is -15 instead of -32 with the followup, the enemy has even more time to react and punish) and the side switch can prove troublesome. Where F2 really shines is with kameo teleports, which will allow Shao to follow up the attack with substantial combos. Of his two options the Motaro teleport is the better one by far, giving less damage scaling while being safer on block.

Though Axe stance is primarily focused on spacing, F2 is still important to keep the enemy on their toes and remind them that a fast overhead can come in both stances. When point-blank with the enemy and on your turn, swinging with F2 is not a bad idea.

f21+3
Standing Back Punch
Startup Active Recovery Cancel Damage Chip Guard On Hit On Block On Flawless Block Cost
- - - - - - - - - {{{flawlessBlockAdv}}} -

A fast, short ranged overhead. The singular hit version has low damage and extremely long recovery, but the hitstun is surprisingly long, potentially letting Shao jail into a B2 on hit. The followup greatly improves the damage, but the safety is not exactly improved (though the attack is -15 instead of -32 with the followup, the enemy has even more time to react and punish) and the side switch can prove troublesome. Where F2 really shines is with kameo teleports, which will allow Shao to follow up the attack with substantial combos. Of his two options the Motaro teleport is the better one by far, giving less damage scaling while being safer on block.

Though Axe stance is primarily focused on spacing, F2 is still important to keep the enemy on their toes and remind them that a fast overhead can come in both stances. When point-blank with the enemy and on your turn, swinging with F2 is not a bad idea.

f2
Standing Back Punch
Startup Active Recovery Cancel Damage Chip Guard On Hit On Block On Flawless Block Cost
- - - - - - - - - {{{flawlessBlockAdv}}} -

The best overhead in the game, period. 16 frames, starts combos, long forward advancement, and somehow only -6 on block. The threat of F2 once in Unarmed stance is so substantial that many enemies will simply neutrally block high, opening them up to a world of pain from the rest of unarmed Shao's arsenal. Unarmed B4 on block is Shao's best friend for swinging with the attack, as the space created will make most D1s whiff while still leaving Shao plus to bait respect from more patient players. On midscreen hit, Shao must follow up with forward dash ~ 224, but in the corner he can swing with B2 > B32 > B32 for much better damage and more ender options.


D2

b2
Standing Back Punch
Startup Active Recovery Cancel Damage Chip Guard On Hit On Block On Flawless Block Cost
- - - - - - - - - {{{flawlessBlockAdv}}} -

Specialized D2 with a highly vertical antiair hitbox. Though the horizontal hitbox is substantially larger than most bareknuckle D2s, it's still nowhere near the size of the most dangerous D2s. In practice, Shao's D2 sees limited use as he has other, more rewarding antiairs, but for people with weak antiairs or attacks with large aerial hitboxes (like Johnny Cage's jump kick) a D2 will suffice. Shao's strong dashes also make it easy to pick up with a 22 ~ Devastator.

d2
Crouching Back Punch
Startup Active Recovery Cancel Damage Chip Guard On Hit On Block On Flawless Block Cost
- - - - - - - - - {{{flawlessBlockAdv}}} -

Possibly the only Unarmed normal that is simply and straightforwardly inferior to its Axe version. Unarmed D2 has the exact same frame data as Axe D2, but without the, you know, enormous axe sweeping the sky. Still slightly better at antiairing than most other bareknuckle D2s due to Shao's great height, but in Unarmed stance Shao should rely on his other antiairs.


3

3
Standing Front Kick
Startup Active Recovery Cancel Damage Chip Guard On Hit On Block On Flawless Block Cost
- - - - - - - - - {{{flawlessBlockAdv}}} -

Probably the lowest "high" in the game. Technically the fastest way for Shao to make himself plus in Axe stance and his fastest recovering move, but even then it sees limited use in both stances; it cannot be special cancelled, it has no string followups, and the startup is too slow for its limited range and high directionality. The knockdown is very long, giving it niche use as a combo ender for specific kameo setups when F4 would whiff, but these are rare.


B31+3, B32

b3
Standing Front Kick
Startup Active Recovery Cancel Damage Chip Guard On Hit On Block On Flawless Block Cost
- - - - - - - - - {{{flawlessBlockAdv}}} -

Universal combo starting low in both stances, and an important if unsafe part of his mixup game. Not the fastest low at 20 frames, but the advancement isn't bad. Normally it cannot be hit confirmed by itself, but cancelling into a safe combo starter will allow him to to do so and as such broadly improve his offense - notable examples include Jax Energy Wave and Sareena Flipkick. While the first attack is identical in both stances, the followups differ significantly:

  • B32 in Axe stance will follow up with an overhead pommel bop, representing the most straightforward way to make B3 safe. Gives a lengthy knockdown on hit while being mostly safe on block, but it leaves a gap and gives somewhat low damage. Being an overhead, cancelling into a kameo low will create a 50/50 against this option.
  • B31+3 will follow up with a mid hitgrab that leaves no gap and deals significantly more damage, but is vastly unsafe at -17 on block and gives a shorter knockdown. The hitgrab has a lengthy animation that allows for an easy ambush kameo setup, but this followup is rarely seen; it surrenders the mix and safety of B32 for marginal reward on hit. Possibly usable in tandem with a kameo to create a gapless blockstring, but Shao has better normals for that.
  • B32 in Unarmed stance appears to be a similar but souped up version of Axe B32 on the surface, boasting better startup and thus no gap, but it also has a new property of bouncing the enemy for combo continuation if they are in the air when hit. This can loop into itself, giving Shao access to new routes and lengthy combos. A central aspect of Shao's combo construction is being able to route into Unarmed B32s for solid damage, strong corner carry, and more ender options - alongside 224 and Reverse Treechopper (the command grab), B32 is one of the most important sources of Shao's damage. Certain Axe Stance combo starters will suspend the enemy, allowing him to immediately combo into B32 with a Power Strike cancel to save meter. Axe 22 normally cannot be routed into Unarmed B32, but certain kameos will allow it.

b32
Lua error in Module:MoveDataParser at line 119: attempt to index field '?' (a nil value).
Lua error in Module:MoveDataParser at line 117: attempt to index field '?' (a nil value).
Hitboxes Off
Hitboxes On

                  No results

Universal combo starting low in both stances, and an important if unsafe part of his mixup game. Not the fastest low at 20 frames, but the advancement isn't bad. Normally it cannot be hit confirmed by itself, but cancelling into a safe combo starter will allow him to to do so and as such broadly improve his offense - notable examples include Jax Energy Wave and Sareena Flipkick. While the first attack is identical in both stances, the followups differ significantly:

  • B32 in Axe stance will follow up with an overhead pommel bop, representing the most straightforward way to make B3 safe. Gives a lengthy knockdown on hit while being mostly safe on block, but it leaves a gap and gives somewhat low damage. Being an overhead, cancelling into a kameo low will create a 50/50 against this option.
  • B31+3 will follow up with a mid hitgrab that leaves no gap and deals significantly more damage, but is vastly unsafe at -17 on block and gives a shorter knockdown. The hitgrab has a lengthy animation that allows for an easy ambush kameo setup, but this followup is rarely seen; it surrenders the mix and safety of B32 for marginal reward on hit. Possibly usable in tandem with a kameo to create a gapless blockstring, but Shao has better normals for that.
  • B32 in Unarmed stance appears to be a similar but souped up version of Axe B32 on the surface, boasting better startup and thus no gap, but it also has a new property of bouncing the enemy for combo continuation if they are in the air when hit. This can loop into itself, giving Shao access to new routes and lengthy combos. A central aspect of Shao's combo construction is being able to route into Unarmed B32s for solid damage, strong corner carry, and more ender options - alongside 224 and Reverse Treechopper (the command grab), B32 is one of the most important sources of Shao's damage. Certain Axe Stance combo starters will suspend the enemy, allowing him to immediately combo into B32 with a Power Strike cancel to save meter. Axe 22 normally cannot be routed into Unarmed B32, but certain kameos will allow it.

b31+3
Standing Front Kick
Startup Active Recovery Cancel Damage Chip Guard On Hit On Block On Flawless Block Cost
- - - - - - - - - {{{flawlessBlockAdv}}} -

Universal combo starting low in both stances, and an important if unsafe part of his mixup game. Not the fastest low at 20 frames, but the advancement isn't bad. Normally it cannot be hit confirmed by itself, but cancelling into a safe combo starter will allow him to to do so and as such broadly improve his offense - notable examples include Jax Energy Wave and Sareena Flipkick. While the first attack is identical in both stances, the followups differ significantly:

  • B32 in Axe stance will follow up with an overhead pommel bop, representing the most straightforward way to make B3 safe. Gives a lengthy knockdown on hit while being mostly safe on block, but it leaves a gap and gives somewhat low damage. Being an overhead, cancelling into a kameo low will create a 50/50 against this option.
  • B31+3 will follow up with a mid hitgrab that leaves no gap and deals significantly more damage, but is vastly unsafe at -17 on block and gives a shorter knockdown. The hitgrab has a lengthy animation that allows for an easy ambush kameo setup, but this followup is rarely seen; it surrenders the mix and safety of B32 for marginal reward on hit. Possibly usable in tandem with a kameo to create a gapless blockstring, but Shao has better normals for that.
  • B32 in Unarmed stance appears to be a similar but souped up version of Axe B32 on the surface, boasting better startup and thus no gap, but it also has a new property of bouncing the enemy for combo continuation if they are in the air when hit. This can loop into itself, giving Shao access to new routes and lengthy combos. A central aspect of Shao's combo construction is being able to route into Unarmed B32s for solid damage, strong corner carry, and more ender options - alongside 224 and Reverse Treechopper (the command grab), B32 is one of the most important sources of Shao's damage. Certain Axe Stance combo starters will suspend the enemy, allowing him to immediately combo into B32 with a Power Strike cancel to save meter. Axe 22 normally cannot be routed into Unarmed B32, but certain kameos will allow it.

b3
Standing Front Kick
Startup Active Recovery Cancel Damage Chip Guard On Hit On Block On Flawless Block Cost
- - - - - - - - - {{{flawlessBlockAdv}}} -

Universal combo starting low in both stances, and an important if unsafe part of his mixup game. Not the fastest low at 20 frames, but the advancement isn't bad. Normally it cannot be hit confirmed by itself, but cancelling into a safe combo starter will allow him to to do so and as such broadly improve his offense - notable examples include Jax Energy Wave and Sareena Flipkick. While the first attack is identical in both stances, the followups differ significantly:

  • B32 in Axe stance will follow up with an overhead pommel bop, representing the most straightforward way to make B3 safe. Gives a lengthy knockdown on hit while being mostly safe on block, but it leaves a gap and gives somewhat low damage. Being an overhead, cancelling into a kameo low will create a 50/50 against this option.
  • B31+3 will follow up with a mid hitgrab that leaves no gap and deals significantly more damage, but is vastly unsafe at -17 on block and gives a shorter knockdown. The hitgrab has a lengthy animation that allows for an easy ambush kameo setup, but this followup is rarely seen; it surrenders the mix and safety of B32 for marginal reward on hit. Possibly usable in tandem with a kameo to create a gapless blockstring, but Shao has better normals for that.
  • B32 in Unarmed stance appears to be a similar but souped up version of Axe B32 on the surface, boasting better startup and thus no gap, but it also has a new property of bouncing the enemy for combo continuation if they are in the air when hit. This can loop into itself, giving Shao access to new routes and lengthy combos. A central aspect of Shao's combo construction is being able to route into Unarmed B32s for solid damage, strong corner carry, and more ender options - alongside 224 and Reverse Treechopper (the command grab), B32 is one of the most important sources of Shao's damage. Certain Axe Stance combo starters will suspend the enemy, allowing him to immediately combo into B32 with a Power Strike cancel to save meter. Axe 22 normally cannot be routed into Unarmed B32, but certain kameos will allow it.


D3

d3
Crouching Front Kick
Startup Active Recovery Cancel Damage Chip Guard On Hit On Block On Flawless Block Cost
- - - - - - - - - {{{flawlessBlockAdv}}} -

Crouching poke for dedicated use in the midrange, having slow startup but solid range. Disjoint also makes it useful for smothering enemy pokes, though he keeps his arms extended during most of the recovery time. Compared to D4 it has faster startup and recovery, but almost no pushback on block and a more vulnerable recovery animation. For both normals, make sure to only use them at a distance - D1 is better in almost every way when up close.

d3
Lua error in Module:MoveDataParser at line 119: attempt to index field '?' (a nil value).
Lua error in Module:MoveDataParser at line 117: attempt to index field '?' (a nil value).
Hitboxes Off
Hitboxes On

                  No results

Unarmed D3 abandons the disjoint for improved frame data and slightly better range. Generally a better poke than its Axe counterpart, though the loss of the disjoint can prove troublesome in some situations and the massively improved Unarmed D4 can impede on its niche in neutral. Like D1 it shines as an offensive tool, as its solid range works well with the significant forward advancement of the command grab to give a tick throw from surprisingly far away.


4

4
Standing Back Kick
Startup Active Recovery Cancel Damage Chip Guard On Hit On Block On Flawless Block Cost
- - - - - - - - - {{{flawlessBlockAdv}}} -

A common 4 in basically every way. Like most 4 normals, its use is relegated almost entirely to combo filling as it deals decent damage for a single hit, while being too slow and stubby for neutral use. For Shao, 4 will knock the enemy too far away to use midscreen, but the sudden height and early cancel frames make it a nearly guaranteed pickup into the command grab in the corner.


B4

b4
Standing Back Kick
Startup Active Recovery Cancel Damage Chip Guard On Hit On Block On Flawless Block Cost
- - - - - - - - - {{{flawlessBlockAdv}}} -

Not a great sweep at first glance, having very short range, longer recovery than average, and no low profile. What it actually brings to the table is the pushback on block, synergizing excellently with his Axe gameplan. From a point blank block, B4 will create just enough space to keep the enemy within 2 range, also letting him backdash into a spacing trap. As it is Shao's fastest standing non-high he must often rely on it to stop mashing, but be cautious about doing backdash into B4 - the short range combined with Shao's fast dashes can often cause it to whiff.

b4
Standing Back Kick
Startup Active Recovery Cancel Damage Chip Guard On Hit On Block On Flawless Block Cost
- - - - - - - - - {{{flawlessBlockAdv}}} -

Far deadlier version of his Axe B4, with similar range but quicker startup and vastly superior recovery. On top of the spacing that Axe B4 gives, Unarmed B4 also makes Shao +3 on block instead of -3, and gives him enough advantage on hit to guarantee his most crucial normals. The strength of this move cannot be understated; the frame advantage combined with the space created allows it to be used for both frame traps and spacing traps, and give it applications as a litmus test to gauge the enemy's playstyle. When combined with B2 it gives Shao options for point blank vs. spaced frame advantage, and as a counterpart to F2 it drives the mix by creating the ideal circumstances for an F2 on both block and hit. B4 may not start combos, but it is still one of the most crucial parts of Shao's Unarmed offense.

  • Also has the best move name in the game.


F4

f4
Standing Back Kick
Startup Active Recovery Cancel Damage Chip Guard On Hit On Block On Flawless Block Cost
- - - - - - - - - {{{flawlessBlockAdv}}} -

An interesting advancing mid. Similar range to B2 while starting up faster, but with much less immediate reward on hit and block. Can be used as a safe mid to close the distance in neutral, though this cannot be confirmed into a full combo in most circumstances - Shao is better off cancelling F4 into a safe ender if used in this fashion. The real strength of the move is its lengthy hit advantage combined with its special cancel property, giving it extraordinary advantage on cancel. This is most often applied as a combo ender to set up a lengthy summon kameo attack, such as Motaro Tail Turret or Sonya Energy Ring Charge (Motaro is of particular note here, as the advantage is so great that Shao can still meaty with B2). The attack itself is a little slow to be easily applied as a combo ender, but with the right routes it unlocks a new setplay angle to Shao's toolkit.


D4

d4
Crouching Back Kick
Startup Active Recovery Cancel Damage Chip Guard On Hit On Block On Flawless Block Cost
- - - - - - - - - {{{flawlessBlockAdv}}} -

Slow crouching poke. Mostly used as a crouching alternative to B4 when trying to create space, exchanging speed and reward on hit for the low profile. For the purposes of interruption, D3 and especially D1 are much easier to apply while being less committal overall.

d4
Crouching Back Kick
Startup Active Recovery Cancel Damage Chip Guard On Hit On Block On Flawless Block Cost
- - - - - - - - - {{{flawlessBlockAdv}}} -

Shao's best crouching poke, and possibly the best crouching poke in the game. Unarmed D4 keeps all the pushback from Axe D4, but gives it to an 8-frame attack with far greater range than most D1s. The result is a ridiculously juiced normal that can perform nearly any application of a crouching poke at once, while somehow being only -6 on block. Pretty much the only thing it can't do is tick into the command grab, but a blocked D4 already gives him all kinds of options for spacing traps. Unarmed D3 is already a solid crouching kick by itself, but the presence of D4 vastly overshadows it.


Aerial

J122

j1
Standing Back Kick
Startup Active Recovery Cancel Damage Chip Guard On Hit On Block On Flawless Block Cost
- - - - - - - - - {{{flawlessBlockAdv}}} -

Solid normal for air-to-airs, with slightly lower speed but a favorable hitbox. J12 is important for combo construction from his optimal starters, giving Shao some of this best Axe damage when followed up with a ground 22. The whole string will ground bounce, but it's a rather poor example of one despite its cool animation - the ground bounce is too low to continue in most circumstances, and in nearly all combos the J12 path will deal more damage.

The Unarmed version of J122 has less range, but starts up quicker. The string is rarely seen in Unarmed stance, as it removes the Axe B2 route to combo into it and most kameo routes use Unarmed B32 in its place.

j12
Standing Back Kick
Startup Active Recovery Cancel Damage Chip Guard On Hit On Block On Flawless Block Cost
- - - - - - - - - {{{flawlessBlockAdv}}} -

Solid normal for air-to-airs, with slightly lower speed but a favorable hitbox. J12 is important for combo construction from his optimal starters, giving Shao some of this best Axe damage when followed up with a ground 22. The whole string will ground bounce, but it's a rather poor example of one despite its cool animation - the ground bounce is too low to continue in most circumstances, and in nearly all combos the J12 path will deal more damage.

The Unarmed version of J122 has less range, but starts up quicker. The string is rarely seen in Unarmed stance, as it removes the Axe B2 route to combo into it and most kameo routes use Unarmed B32 in its place.

j122
Standing Back Kick
Startup Active Recovery Cancel Damage Chip Guard On Hit On Block On Flawless Block Cost
- - - - - - - - - {{{flawlessBlockAdv}}} -

Solid normal for air-to-airs, with slightly lower speed but a favorable hitbox. J12 is important for combo construction from his optimal starters, giving Shao some of this best Axe damage when followed up with a ground 22. The whole string will ground bounce, but it's a rather poor example of one despite its cool animation - the ground bounce is too low to continue in most circumstances, and in nearly all combos the J12 path will deal more damage.

The Unarmed version of J122 has less range, but starts up quicker. The string is rarely seen in Unarmed stance, as it removes the Axe B2 route to combo into it and most kameo routes use Unarmed B32 in its place.


J22

j2
Standing Back Kick
Startup Active Recovery Cancel Damage Chip Guard On Hit On Block On Flawless Block Cost
- - - - - - - - - {{{flawlessBlockAdv}}} -

Designated jump-in normal that exchanges startup for size, sweeping an absolutely massive area. The wide, disjoint hitbox is exceedingly difficult to antiair if done early, often forcing the enemy to upblock to punish and opening them up to empty jump > B3 for massive damage. When combined with a kameo to provide covering fire, J2 is nearly incontestable. Already one of Shao's best tools for offense in Axe stance, the massive area also makes it unexpectedly useful on defense - neutral jump or jump back if expecting an enemy approach, and then use J2 to cover both air and ground.

Before going hog wild with this attack, the Shao player has to consider a few things. First, the attack has more startup than any other immediate air normal by a mile - its slowest competition has 11 startup instead of 16. As such, it has to be input extremely early (along with any grounded followups), disallowing him from being able to jump and choose between J1 for air-to-airs or J2 to jump-ins. The early input also makes it nearly guaranteed to land as a mid instead of an overhead, greatly reducing its usage for kameo HTBs. Shao's choices for followups once grounded are also somewhat thin, as he lacks a confirmable mid string. Swinging with B2 can work as it will also combo on hit, but it requires an exceptionally respectful enemy on block. His best choice is to hit J2 late enough to jail into his high strings, but this makes it easier to antiair.

The attack has a followup in J22, which is not commonly seen but has a niche as a high-reward read on an air-to-air. To land it, the Shao player must do J2 very early (generally while rising). J12 is faster and fits mid-combo, but J22 will deal much more damage while having easier grounded pickups. For kameos that give midair pickups, J122 remains the better choice for the ground bounce.

j2
Standing Back Kick
Startup Active Recovery Cancel Damage Chip Guard On Hit On Block On Flawless Block Cost
- - - - - - - - - {{{flawlessBlockAdv}}} -

Miniaturized version of Axe J2, starting up much faster but entirely losing the range and disjoint. The horizontal range is absolutely abysmal, though it does have more vertical coverage than J1. While the missing disjoint means that it cannot be used as aggressively as Axe J2, the options of Unarmed stance vastly improve the reward for landing it. Among other things, Shao can frametrap a blocked J2 into F2 and B2, jail into B4, or do a conventional tick throw into the command grab (a cancel tick throw will whiff). If Shao is certain that this will land, J2 is still his best jump-in option in Unarmed stance.

Unarmed J22 is also similar to Axe J22, though the vastly reduced hitbox makes it much harder to apply. Keep it in mind for when you are certain that the enemy is going to jump, but for the most part it should not be significantly relied upon.

j22
Standing Back Kick
Startup Active Recovery Cancel Damage Chip Guard On Hit On Block On Flawless Block Cost
- - - - - - - - - {{{flawlessBlockAdv}}} -

Miniaturized version of Axe J2, starting up much faster but entirely losing the range and disjoint. The horizontal range is absolutely abysmal, though it does have more vertical coverage than J1. While the missing disjoint means that it cannot be used as aggressively as Axe J2, the options of Unarmed stance vastly improve the reward for landing it. Among other things, Shao can frametrap a blocked J2 into F2 and B2, jail into B4, or do a conventional tick throw into the command grab (a cancel tick throw will whiff). If Shao is certain that this will land, J2 is still his best jump-in option in Unarmed stance.

Unarmed J22 is also similar to Axe J22, though the vastly reduced hitbox makes it much harder to apply. Keep it in mind for when you are certain that the enemy is going to jump, but for the most part it should not be significantly relied upon.


JK

j3 or j4
Jumping Front Kick
Startup Active Recovery Cancel Damage Chip Guard On Hit On Block On Flawless Block Cost
- - - - - - OH - - {{{flawlessBlockAdv}}} -

Unusual jump kick where Shao pulls his leg back immediately, giving it only three active frames. While this improves its safety against whiff punishes when done at a distance, it makes the attack much harder to land and forces Shao to attack very late, thus opening him up to antiairs. Mostly used for jump-ins on block if the J2 wouldn't come out in time, but most prepared jump-ins will stick with J2 for the superior hitbox and active frames.


Special Moves


Dark Energy (DF1)

df1
Jumping Front Kick
Startup Active Recovery Cancel Damage Chip Guard On Hit On Block On Flawless Block Cost
- - - - - - OH - - {{{flawlessBlockAdv}}} -

General Shao energizes his axe, improving the damage of all pertinent attacks by 20%. An important part of maximizing the reward from his Axe stance. Only available in Axe stance (for obvious reasons), and the EX version lasts twice as long. When using Power Strike to enter Unarmed stance the buff will apply to the initial hit and then vanish, so hitting the buff and entering Unarmed for more damage on Axe Quake doesn't work.

The startup is rather fast for its generous duration, and activating it in neutral can be difficult to punish, especially if the enemy is respecting Shao's superior range in Axe stance. Improvement in combo damage is highly dependent on the choice of route, with B2 combos seeing significant increases in damage while B3 starters get very limited benefit. Certain kameo combo tools, like Sub-Zero Freeze, will give him enough time to hit the buff and continue the combo with B2 for maximum damage. Shao can also cancel an advancing normal into Dark Energy on block and cover it with a kameo, letting him continue the blockstring with greater chip damage.

df1+block
Jumping Front Kick
Startup Active Recovery Cancel Damage Chip Guard On Hit On Block On Flawless Block Cost
- - - - - - OH - - {{{flawlessBlockAdv}}} -

General Shao energizes his axe, improving the damage of all pertinent attacks by 20%. An important part of maximizing the reward from his Axe stance. Only available in Axe stance (for obvious reasons), and the EX version lasts twice as long. When using Power Strike to enter Unarmed stance the buff will apply to the initial hit and then vanish, so hitting the buff and entering Unarmed for more damage on Axe Quake doesn't work.

The startup is rather fast for its generous duration, and activating it in neutral can be difficult to punish, especially if the enemy is respecting Shao's superior range in Axe stance. Improvement in combo damage is highly dependent on the choice of route, with B2 combos seeing significant increases in damage while B3 starters get very limited benefit. Certain kameo combo tools, like Sub-Zero Freeze, will give him enough time to hit the buff and continue the combo with B2 for maximum damage. Shao can also cancel an advancing normal into Dark Energy on block and cover it with a kameo, letting him continue the blockstring with greater chip damage.


Devastator / Klassic Kahn (DB3)

db3
Jumping Front Kick
Startup Active Recovery Cancel Damage Chip Guard On Hit On Block On Flawless Block Cost
- - - - - - OH - - {{{flawlessBlockAdv}}} -

Leaping knee lunge that can be cancelled into Power Strike on EX, immediately putting Shao into Unarmed stance and bouncing the enemy for combo continuation. Shao's primary armored reversal and combo starter, though with deficiencies for both purposes. Being a high it can easily be low profiled by crouching pokes, and the leaping animation will even cause some mids to low profile it. Shao will harmlessly sail over the enemy if trying to armor through certain gaps, such as Raiden's F434. The small hitbox and lack of horizontal reach also gives it nearly nonexistent threat on wakeup, forcing Shao to use a kameo wakeup or accept the enemy pressure. For combo starting, it can whiff on hit if cancelled from a significant distance (for instance, s2 catching an attack where the enemy's main body remains pulled back, causing them to reel from the position of their main body and not the point of impact), risking full combo punishment on drop. The short horizontal coverage also risks drops when trying to pick up from F122 and antiair S2. Though the only explicit armored combo starter in the game by itself on paper (other combo starters can be achieved through kameo usage), armoring a move will disallow the Power Strike followup and end the combo immediately.

Despite these weaknesses, there are two things that the move is unequivocally good at: antiairs and late combo pickups. The diagonal hitbox is highly favorable for antiairing, and while it's not the most rewarding antiair it is reliable, consistent, and can armor through the most troublesome air attacks on EX. Due to the on-hit reaction mostly ignoring gravity, Devastator is the key to Shao's biggest combos and his best tool for late combo damage, letting him end combos with Power Strike > 2 ~ Klassic Kahn in the longest, highest gravity sequences. The most common way to access this is through starting a combo in Unarmed stance and letting it expire, but certain kameos will also allow Shao to incorporate it into his B&Bs.

db3+block
Jumping Front Kick
Startup Active Recovery Cancel Damage Chip Guard On Hit On Block On Flawless Block Cost
- - - - - - OH - - {{{flawlessBlockAdv}}} -

Leaping knee lunge that can be cancelled into Power Strike on EX, immediately putting Shao into Unarmed stance and bouncing the enemy for combo continuation. Shao's primary armored reversal and combo starter, though with deficiencies for both purposes. Being a high it can easily be low profiled by crouching pokes, and the leaping animation will even cause some mids to low profile it. Shao will harmlessly sail over the enemy if trying to armor through certain gaps, such as Raiden's F434. The small hitbox and lack of horizontal reach also gives it nearly nonexistent threat on wakeup, forcing Shao to use a kameo wakeup or accept the enemy pressure. For combo starting, it can whiff on hit if cancelled from a significant distance (for instance, s2 catching an attack where the enemy's main body remains pulled back, causing them to reel from the position of their main body and not the point of impact), risking full combo punishment on drop. The short horizontal coverage also risks drops when trying to pick up from F122 and antiair S2. Though the only explicit armored combo starter in the game by itself on paper (other combo starters can be achieved through kameo usage), armoring a move will disallow the Power Strike followup and end the combo immediately.

Despite these weaknesses, there are two things that the move is unequivocally good at: antiairs and late combo pickups. The diagonal hitbox is highly favorable for antiairing, and while it's not the most rewarding antiair it is reliable, consistent, and can armor through the most troublesome air attacks on EX. Due to the on-hit reaction mostly ignoring gravity, Devastator is the key to Shao's biggest combos and his best tool for late combo damage, letting him end combos with Power Strike > 2 ~ Klassic Kahn in the longest, highest gravity sequences. The most common way to access this is through starting a combo in Unarmed stance and letting it expire, but certain kameos will also allow Shao to incorporate it into his B&Bs.

db3
Jumping Front Kick
Startup Active Recovery Cancel Damage Chip Guard On Hit On Block On Flawless Block Cost
- - - - - - OH - - {{{flawlessBlockAdv}}} -

Similar on the surface to Axe Devastator and nearly identical for the purposes of armor, but with some crucial differences in on-hit reaction. Where Devastator will put the enemy in a capture state with uniform hit advantage, Klassic Kahn will always bounce them. This is more advantageous at the start of a combo, where Klassic Kahn is a meterless starter, but worse at the end where the lower bounce will give shorter hit advantage and no provide guaranteed followups. Despite this, Shao must often rely on Klassic Kahn as an ender, especially if the axe is far away. Like Devastator, armoring a move will disallow combo continuation except through very accurate kameo use.

db3+block
Jumping Front Kick
Startup Active Recovery Cancel Damage Chip Guard On Hit On Block On Flawless Block Cost
- - - - - - OH - - {{{flawlessBlockAdv}}} -

Similar on the surface to Axe Devastator and nearly identical for the purposes of armor, but with some crucial differences in on-hit reaction. Where Devastator will put the enemy in a capture state with uniform hit advantage, Klassic Kahn will always bounce them. This is more advantageous at the start of a combo, where Klassic Kahn is a meterless starter, but worse at the end where the lower bounce will give shorter hit advantage and no provide guaranteed followups. Despite this, Shao must often rely on Klassic Kahn as an ender, especially if the axe is far away. Like Devastator, armoring a move will disallow combo continuation except through very accurate kameo use.


Death Quake / Axe Quake (DB4)

db4
Jumping Front Kick
Startup Active Recovery Cancel Damage Chip Guard On Hit On Block On Flawless Block Cost
- - - - - - OH - - {{{flawlessBlockAdv}}} -

Slow low projectile. Too slow to combo from Shao's normals on hit, except through kameos (though why you would do that is unclear). Its main use is as an anti-upblock tool against enemies anticipating Power Strike. On hit it gives a favorable knockdown and can be turned into a combo with kameos, and on block it is entirely safe against the entire cast except Johnny's shadow kick (flawless blocking does not appear to reduce the pushback). This will require establishing the Power Strike cancel on block first - don't expect the move to catch anyone up close on its own. EX Death Quake will immediately launch by itself, allowing the full combo threat from the upblock callout to be done without an applicable kameo.

It can also be used from fullscreen to zone, as long as Shao has some kind of plan to cover the sky with his kameo - by itself, it is easy to jump over and punish. The most effective choices for this are fast antiair ambushes like Sonya's Square Wave and Goro Raise the Roof who can immediately shut down the enemy's jump on a reaction, though they can only be continued into a combo on late hits. Slower air-covering ambushes, like Scorpion Flame Breath, Cyrax Chopper, and Tremor Ambush Eruption are much better for turning the antiair into a combo, but must be done preemptively. Khameleon's Mileena Air Sai is the best of both worlds and the absolute premium choice for this, being fast enough to be used reactively while keeping the enemy suspended long enough for combos at any height. Against overeager enemies who jump before seeing the startup of the Death Quake, even summon projectiles like Sareena's Old Moon can form the other half of a surprisingly robust zoning gameplan.

Death Quake's long knockdown, especially at maximum distance, allows it to swiftly end fireball wars - if he can find a way to avoid being hit during the long startup. While explicit anti-projectile kameos are the best for this, any kameo that sits in front of Shao to body block a projectile will work, especially Tremor who can be summoned as a shield on no cooldown and no meter spent. Shao also has enough reach to combo from EX Death Quake from any distance.

  • The shockwave does not travel forward until active frame 4.

db4+block
Jumping Front Kick
Startup Active Recovery Cancel Damage Chip Guard On Hit On Block On Flawless Block Cost
- - - - - - OH - - {{{flawlessBlockAdv}}} -

Slow low projectile. Too slow to combo from Shao's normals on hit, except through kameos (though why you would do that is unclear). Its main use is as an anti-upblock tool against enemies anticipating Power Strike. On hit it gives a favorable knockdown and can be turned into a combo with kameos, and on block it is entirely safe against the entire cast except Johnny's shadow kick (flawless blocking does not appear to reduce the pushback). This will require establishing the Power Strike cancel on block first - don't expect the move to catch anyone up close on its own. EX Death Quake will immediately launch by itself, allowing the full combo threat from the upblock callout to be done without an applicable kameo.

It can also be used from fullscreen to zone, as long as Shao has some kind of plan to cover the sky with his kameo - by itself, it is easy to jump over and punish. The most effective choices for this are fast antiair ambushes like Sonya's Square Wave and Goro Raise the Roof who can immediately shut down the enemy's jump on a reaction, though they can only be continued into a combo on late hits. Slower air-covering ambushes, like Scorpion Flame Breath, Cyrax Chopper, and Tremor Ambush Eruption are much better for turning the antiair into a combo, but must be done preemptively. Khameleon's Mileena Air Sai is the best of both worlds and the absolute premium choice for this, being fast enough to be used reactively while keeping the enemy suspended long enough for combos at any height. Against overeager enemies who jump before seeing the startup of the Death Quake, even summon projectiles like Sareena's Old Moon can form the other half of a surprisingly robust zoning gameplan.

Death Quake's long knockdown, especially at maximum distance, allows it to swiftly end fireball wars - if he can find a way to avoid being hit during the long startup. While explicit anti-projectile kameos are the best for this, any kameo that sits in front of Shao to body block a projectile will work, especially Tremor who can be summoned as a shield on no cooldown and no meter spent. Shao also has enough reach to combo from EX Death Quake from any distance.

  • The shockwave does not travel forward until active frame 4.

db4
Jumping Front Kick
Startup Active Recovery Cancel Damage Chip Guard On Hit On Block On Flawless Block Cost
- - - - - - OH - - {{{flawlessBlockAdv}}} -

Shao bids the axe to strike the ground, creating a fullscreen shockwave. Despite the slower startup on the ground shockwave, Axe Quake is much deadlier than Death Quake - the projectile is instant and goes in both directions, the suspension is long enough for Shao to pick up with a D1 in the corner, and the attack can be done while the axe is offscreen to greatly improve its surprise factor. The axe also has an additional property of striking overhead as it drops, which will trigger autoguard and thus prevent an HTB, but the additional attack will break armor and make resets much more effective, alongside the D1 pickups for full combo continuation. Shao can also do an early cancel to have the enemy avoid the overhead portion of the attack. The EX version will give an even longer bounce than EX Death Quake, which when combined with Shao's more damaging Unarmed options will net him much better reward.

  • The low shockwave will always hit the enemy on the ground if Shao can perform the move - if Shao is too far away, inputting the move will do nothing.

db4+block
Jumping Front Kick
Startup Active Recovery Cancel Damage Chip Guard On Hit On Block On Flawless Block Cost
- - - - - - OH - - {{{flawlessBlockAdv}}} -

Shao bids the axe to strike the ground, creating a fullscreen shockwave. Despite the slower startup on the ground shockwave, Axe Quake is much deadlier than Death Quake - the projectile is instant and goes in both directions, the suspension is long enough for Shao to pick up with a D1 in the corner, and the attack can be done while the axe is offscreen to greatly improve its surprise factor. The axe also has an additional property of striking overhead as it drops, which will trigger autoguard and thus prevent an HTB, but the additional attack will break armor and make resets much more effective, alongside the D1 pickups for full combo continuation. Shao can also do an early cancel to have the enemy avoid the overhead portion of the attack. The EX version will give an even longer bounce than EX Death Quake, which when combined with Shao's more damaging Unarmed options will net him much better reward.

  • The low shockwave will always hit the enemy on the ground if Shao can perform the move - if Shao is too far away, inputting the move will do nothing.


Power Strike (DF4)

df4
Jumping Front Kick
Startup Active Recovery Cancel Damage Chip Guard On Hit On Block On Flawless Block Cost
- - - - - - OH - - {{{flawlessBlockAdv}}} -

Shao swings in a disjoint overhead strike, planting the axe on the ground and entering Unarmed stance. If the enemy is airborne or under an EX Devastator pin, they will be bounced for immediate combo followups.

Shao's most important special, being his one and only path into Unarmed stance. Still, it is a generously available path - EX Devastator requires Shao to swing with Power Strike to continue the combo, and certain strings will give the bounce reaction on special cancel for meterless combos. In particular, Shao should get comfortable with the F122 and 12 ~ Power Strike pickups - they require good timing, but will reward him with superb meterless damage and corner carry. Power Strike is also Shao's most common blockstring ender, being mostly safe on block while giving him space to start his Unarmed gameplan, but it leaves a gap from all his cancellable normals and can be punished on upblock. Kameos can be used to cover the gap or prevent punishment, thus letting Shao safely enter Unarmed Stance on block, but there are very few that can do both at the same time.

EX Power Strike will deal more damage and recover faster on block (on hit the recovery appears to be identical), allowing him to immediately begin offense on block (though it remains very unsafe on upblock). A solid and decently rewarding cancel option from midrange pokes like F4 and B3, but mid-combo it's generally not necessary to spend the meter unless trying to squeeze out damage.

df4+block
Jumping Front Kick
Startup Active Recovery Cancel Damage Chip Guard On Hit On Block On Flawless Block Cost
- - - - - - OH - - {{{flawlessBlockAdv}}} -

Shao swings in a disjoint overhead strike, planting the axe on the ground and entering Unarmed stance. If the enemy is airborne or under an EX Devastator pin, they will be bounced for immediate combo followups.

Shao's most important special, being his one and only path into Unarmed stance. Still, it is a generously available path - EX Devastator requires Shao to swing with Power Strike to continue the combo, and certain strings will give the bounce reaction on special cancel for meterless combos. In particular, Shao should get comfortable with the F122 and 12 ~ Power Strike pickups - they require good timing, but will reward him with superb meterless damage and corner carry. Power Strike is also Shao's most common blockstring ender, being mostly safe on block while giving him space to start his Unarmed gameplan, but it leaves a gap from all his cancellable normals and can be punished on upblock. Kameos can be used to cover the gap or prevent punishment, thus letting Shao safely enter Unarmed Stance on block, but there are very few that can do both at the same time.

EX Power Strike will deal more damage and recover faster on block (on hit the recovery appears to be identical), allowing him to immediately begin offense on block (though it remains very unsafe on upblock). A solid and decently rewarding cancel option from midrange pokes like F4 and B3, but mid-combo it's generally not necessary to spend the meter unless trying to squeeze out damage.


Treechopper (DF1)

df1
Jumping Front Kick
Startup Active Recovery Cancel Damage Chip Guard On Hit On Block On Flawless Block Cost
- - - - - - OH - - {{{flawlessBlockAdv}}} -

Plus, advancing mid swing that puts Shao back into Axe stance. Shao must be next to the axe to perform the move, but he will step a surprising distance to grab it (including backwards, which may cause it to whiff). Excellent as a blockstring ender to take full advantage of the stance before it expires, but also useful for an alternate gameplan where Shao repeatedly jumps between the stances to maximize chip damage and keep the enemy on their toes. EX Treechopper will deal more damage and add armor, adding an extraordinary wakeup and anti-stagger dimension to the move - even if the enemy calls out the armored option, they will still be at disadvantage, and this option can be forced though any available gap.

Combo extending kameos will pair fantastically with Treechopper. In the corner, cancelling B3 into Treechopper and calling a kameo will turn what is normally a risky mix option into a plus on block launcher. EX Treechopper becomes a proper armored launcher, on top of its frame advantage on block. Structuring combos to start with Power Strike and an early Treechopper will let Shao do a late Devastator to fully take advantage of its gravity-alleviating properties, maximizing his damage and Unarmed stance time.

df1+block
Jumping Front Kick
Startup Active Recovery Cancel Damage Chip Guard On Hit On Block On Flawless Block Cost
- - - - - - OH - - {{{flawlessBlockAdv}}} -

Plus, advancing mid swing that puts Shao back into Axe stance. Shao must be next to the axe to perform the move, but he will step a surprising distance to grab it (including backwards, which may cause it to whiff). Excellent as a blockstring ender to take full advantage of the stance before it expires, but also useful for an alternate gameplan where Shao repeatedly jumps between the stances to maximize chip damage and keep the enemy on their toes. EX Treechopper will deal more damage and add armor, adding an extraordinary wakeup and anti-stagger dimension to the move - even if the enemy calls out the armored option, they will still be at disadvantage, and this option can be forced though any available gap.

Combo extending kameos will pair fantastically with Treechopper. In the corner, cancelling B3 into Treechopper and calling a kameo will turn what is normally a risky mix option into a plus on block launcher. EX Treechopper becomes a proper armored launcher, on top of its frame advantage on block. Structuring combos to start with Power Strike and an early Treechopper will let Shao do a late Devastator to fully take advantage of its gravity-alleviating properties, maximizing his damage and Unarmed stance time.


Reverse Treechopper (DF2)

df2
Jumping Front Kick
Startup Active Recovery Cancel Damage Chip Guard On Hit On Block On Flawless Block Cost
- - - - - - OH - - {{{flawlessBlockAdv}}} -

The best command grab in the game (of the few that are present). Fast, advancing, ticks from D1 and D3, and deals tremendous damage for no meter spent. An important part of the mixup threat that Unarmed stance must display, especially for immediately punishing enemies that are expecting the F2 overhead. While the animation is rather long, Shao can use it to set up any ambush kameo he wants. Of particular note are Stryker, Jax, and Sektor, who are given all the time in the world to start their useful but slow attacks.

Despite the attack putting Shao back into Axe stance, it is still his best ender in most situations. The damage it gives dwarfs any of his other ender options (except Fatal Blow, which will not work unless the rest of the combo is significantly compromised), and the attack resists breaker by only being breakable on the initial hit - the majority of the damage comes from the rest of the animation, which cannot be broken. The fast startup and advancement will catch in high gravity, allowing Shao to path into 2 ~ Reverse Treechopper for a consistent pickup if the player is unsure about the route to take. In the corner, 4 ~ Reverse Treechopper can be used to similar effect but greater damage.

Like EX Treechopper, EX Reverse Treechopper will add armor to the move, giving him an absurdly powerful tool for exploiting gaps and calling out staggers. Combined with Treechopper, Shao goes from being one of the least threatening characters on wakeup to one of the most dangerous, being able to choose between an armored plus combo starting mid or a 170 damage armored command grab that gives him a free kameo setup (as long as he's near the axe).

  • Despite being a high, it can catch crouching pokes when cancelled into at close range.

df2+block
Jumping Front Kick
Startup Active Recovery Cancel Damage Chip Guard On Hit On Block On Flawless Block Cost
- - - - - - OH - - {{{flawlessBlockAdv}}} -

The best command grab in the game (of the few that are present). Fast, advancing, ticks from D1 and D3, and deals tremendous damage for no meter spent. An important part of the mixup threat that Unarmed stance must display, especially for immediately punishing enemies that are expecting the F2 overhead. While the animation is rather long, Shao can use it to set up any ambush kameo he wants. Of particular note are Stryker, Jax, and Sektor, who are given all the time in the world to start their useful but slow attacks.

Despite the attack putting Shao back into Axe stance, it is still his best ender in most situations. The damage it gives dwarfs any of his other ender options (except Fatal Blow, which will not work unless the rest of the combo is significantly compromised), and the attack resists breaker by only being breakable on the initial hit - the majority of the damage comes from the rest of the animation, which cannot be broken. The fast startup and advancement will catch in high gravity, allowing Shao to path into 2 ~ Reverse Treechopper for a consistent pickup if the player is unsure about the route to take. In the corner, 4 ~ Reverse Treechopper can be used to similar effect but greater damage.

Like EX Treechopper, EX Reverse Treechopper will add armor to the move, giving him an absurdly powerful tool for exploiting gaps and calling out staggers. Combined with Treechopper, Shao goes from being one of the least threatening characters on wakeup to one of the most dangerous, being able to choose between an armored plus combo starting mid or a 170 damage armored command grab that gives him a free kameo setup (as long as he's near the axe).

  • Despite being a high, it can catch crouching pokes when cancelled into at close range.


Axe Recall (DF4)

df4
Jumping Front Kick
Startup Active Recovery Cancel Damage Chip Guard On Hit On Block On Flawless Block Cost
- - - - - - OH - - {{{flawlessBlockAdv}}} -

Shao summons the axe back into his hands, ending Unarmed stance. Slow speed and safer alternatives mean that it is rarely used - even just letting it expire has no additional recovery animation. If Shao is next to the axe, he can instead use one of the Treechopper moves to reenter Axe stance in a much more rewarding way. Generally used only in specific kameo combo routes.


War God (SS+Block)

ss+block
Jumping Front Kick
Startup Active Recovery Cancel Damage Chip Guard On Hit On Block On Flawless Block Cost
- - - - - - OH - - {{{flawlessBlockAdv}}} -

An absolutely horrendous Fatal Blow. Unbearably slow, but unlike other characters with slow Fatal Blows (like Kitana or Reptile), Shao lacks the long suspends or capturing normals that make it easier to combo into - he has exactly two definitive routes to use it with. The attack comes from above, causing it to hit the ground extremely late, and the nonexistent horizontal reach leaves him wide upon for severe punishment. The extreme badness of Shao's Fatal Blow is one of the biggest incentives for him to pick Motaro, who gives Shao some much needed options in applying it.

  • Do not hesitate to combo into FB. It's nearly impossible to get it from pickups or antiairs, so if the route presents itself, take it while you can.


MK1 Navigation

General
FAQ
HUD
Kameo
Characters
Ashrah
Baraka
Ermac
Geras
Havik
Johnny Cage
Kenshi
Kitana
Kung Lao
Li Mei
Liu Kang
Mileena
Nitara
Omni-Man
Peacemaker
Quan Chi
Raiden
Rain
Reiko
Reptile
Scorpion
Shang Tsung
General Shao
Sindel
Smoke
Sub-Zero
Tanya
Kameo
Cyrax
Darrius
Frost
Goro
Jax
Janet Cage
Kano
Khameleon
Kung Lao
Motaro
Sareena
Scorpion
Sektor
Shujinko
Sonya
Stryker
Sub-Zero
Tremor
Roster Data
Ermac
Geras
Havik
Rain
Reiko
Smoke
Kameo Data
Cyrax
Frost
Goro
Jax
Kano
Sonya