mNo edit summary |
m (Quan Chi D1) |
||
| Line 20: | Line 20: | ||
<br> | <br> | ||
=====<font style="visibility:hidden; float:right">D1</font>===== | |||
<!--d1--> | <!--d1--> | ||
{{MoveDataCargo | {{MoveDataCargo | ||
| Line 31: | Line 32: | ||
| info = | | info = | ||
{{AttackDataCargo-MK1/Query|quan_chi_d1}} | {{AttackDataCargo-MK1/Query|quan_chi_d1}} | ||
The main reason why Quan's defense is terrible. Long recovery and nine frame startup make this the worst D1 in the game. Disjoint is nice but being -10 on block will nearly guarantee the counterpoke punish, regardless of the enemy character. Also hampers his offensive capability, as he is much more likely to get counterpoked if trying to interrupt on offense.<br>br> | |||
D1s are generally a non-optional move to use - being the character's fastest mid while low profiling and being special cancellable, it must be applied in certain situations. Do not entirely neglect Quan's D1, but be judicious with its usage. | |||
}} | }} | ||
<br> | |||
=====<font style="visibility:hidden; float:right">2</font>===== | =====<font style="visibility:hidden; float:right">2</font>===== | ||
Revision as of 14:57, 14 February 2024
Introduction
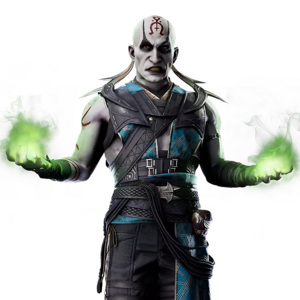
Netherrealm Sorcerer
"Quan Chi was born into hard labor in an Outworld mine. He had no future, just the guarantee of certain death in its dark tunnels. To curry favor with the mine’s owner, Quan Chi informed on fellow workers who were planning a strike. It was broken and many strikers killed. The survivors were not going to forgive and forget. They plotted to kill Quan Chi. Quan Chi’s life was saved by a mysterious benefactor. In exchange for his service, she offered to free him from the mines and train him in dark magic. Quan Chi eagerly accepted. Now a master of the Netherrealm's most vile sorcery, Quan Chi plots with Shang Tsung to conquer the realms. He will not be denied."
Quan Chi is an unorthodox Zoner/Setplay sorcerer with the lowest health in the game (900 HP) as a trade-off for having various oppressive projectile/trap options as well as mixup potential; his S4 is an unsafe but tracking High boot that hits directly behind the opponent at any point onscreen and can be used to convert into kombos/projectiles. Although most of his strings have gaps vulnerable to armor reversals, he has several safe, disjointed and/or long-reaching attacks that can still hit opponents for trying to kounter his various mixups without armor; some of his tools include a jab with a safe Overhead launcher (S13), another jab string full of disjointed Low/Overhead options (213/2144) that can lead to kombos, and a safe forward-advancing Low B3 starter. Unsafe specials such as his armor reversal (EX BF4) and Low 2-bar launch (EX DB4) can also be covered by Kameo assists to remain safe and/or convert into kombos. Quan Chi’s gameplan is built on setting up various “Zone” portals that buff his powers and/or control the screen; two different portals can be placed onscreen and be moved forward or backward. Zone Of Power (DB3) alters his projectile properties, Zone Of Fear (EX DB3) repels the opponent, and Zone Of Waste (DF3) grants him armor by draining their meter; when EX Waste is properly set up, Quan's gap-filled offense closes completely and puts the opponent in an extremely unfavorable position. He can also trap opponents with his directable Field Of Bones (BDF2) which restricts their forward/backward movement even on block and can lead to resets, setups, and/or kombos on hit.
| Strengths | Weaknesses |
|---|---|
|
|
Normals and Strings
Grounded
1
| Startup | Active | Recovery | Cancel | Damage | Chip | Guard | On Hit | On Block | On Flawless Block | Cost |
|---|---|---|---|---|---|---|---|---|---|---|
| 8 | 2 | 20 | 17 | 20 | 3.00 | H | 16 | 0 | 0 | - |
A mediocre jab by itself, with average range and recovery but slightly longer startup. Mostly hampered by its abject lack of gapless followups - every single cancel option will leave an armorable gap, including kameo summons. Has two followup routes:
- 122 follows up with slow but massive claw attacks, creating enormous pushback (with a gap). The third hit is a high, but it jails from the mid second hit. Flawless blocking does not appear to affect the pushback or frame data in any way, only mitigating the chip. Superb for creating some space on turn, as long as the enemy does not mash, and it leaves the fighters at 0 on block for a true neutral reset. 12 has curiously long cancel advantage on hit, allowing it to combo into nearly anything. In particular, 12 is the only string that can combo into Cyrax Net by itself, giving Quan all the time he needs for setups. Without Cyrax, 12 can be confirmed into EX Psycho Skull for a less expensive route than EX From the Fog (low tentacle).
- 13 is an overhead that gives a meterless bounce. Crucial for close range punishes and combo construction. Eminently reactable on its own, but can be combined with From the Fog for a rewarding, if expensive and fuzzyable 50/50. Unlike Shao's 12 bounce string it will work on airborne opponents, but the second 13 in a combo will splat the enemy.
D1
| Startup | Active | Recovery | Cancel | Damage | Chip | Guard | On Hit | On Block | On Flawless Block | Cost |
|---|---|---|---|---|---|---|---|---|---|---|
| - | - | - | - | - | - | - | - | - | - | - |
The main reason why Quan's defense is terrible. Long recovery and nine frame startup make this the worst D1 in the game. Disjoint is nice but being -10 on block will nearly guarantee the counterpoke punish, regardless of the enemy character. Also hampers his offensive capability, as he is much more likely to get counterpoked if trying to interrupt on offense.
br>
D1s are generally a non-optional move to use - being the character's fastest mid while low profiling and being special cancellable, it must be applied in certain situations. Do not entirely neglect Quan's D1, but be judicious with its usage.
2
| Startup | Active | Recovery | Cancel | Damage | Chip | Guard | On Hit | On Block | On Flawless Block | Cost |
|---|---|---|---|---|---|---|---|---|---|---|
| - | - | - | - | - | - | - | - | - | - | - |
| Startup | Active | Recovery | Cancel | Damage | Chip | Guard | On Hit | On Block | On Flawless Block | Cost |
|---|---|---|---|---|---|---|---|---|---|---|
| - | - | - | - | - | - | - | - | - | - | - |
3
| Startup | Active | Recovery | Cancel | Damage | Chip | Guard | On Hit | On Block | On Flawless Block | Cost |
|---|---|---|---|---|---|---|---|---|---|---|
| - | - | - | - | - | - | - | - | - | - | - |
| Startup | Active | Recovery | Cancel | Damage | Chip | Guard | On Hit | On Block | On Flawless Block | Cost |
|---|---|---|---|---|---|---|---|---|---|---|
| - | - | - | - | - | - | - | - | - | - | - |
4
| Startup | Active | Recovery | Cancel | Damage | Chip | Guard | On Hit | On Block | On Flawless Block | Cost |
|---|---|---|---|---|---|---|---|---|---|---|
| - | - | - | - | - | - | - | - | - | - | - |
| Startup | Active | Recovery | Cancel | Damage | Chip | Guard | On Hit | On Block | On Flawless Block | Cost |
|---|---|---|---|---|---|---|---|---|---|---|
| - | - | - | - | - | - | - | - | - | {{{flawlessBlockAdv}}} | - |
Aerial
j1
| Startup | Active | Recovery | Cancel | Damage | Chip | Guard | On Hit | On Block | On Flawless Block | Cost |
|---|---|---|---|---|---|---|---|---|---|---|
| - | - | - | - | - | - | - | - | - | - | - |
j2
| Startup | Active | Recovery | Cancel | Damage | Chip | Guard | On Hit | On Block | On Flawless Block | Cost |
|---|---|---|---|---|---|---|---|---|---|---|
| - | - | - | - | - | - | - | - | - | - | - |
j3
| Startup | Active | Recovery | Cancel | Damage | Chip | Guard | On Hit | On Block | On Flawless Block | Cost |
|---|---|---|---|---|---|---|---|---|---|---|
| - | - | - | - | - | - | OH | - | - | - | - |
j4
| Startup | Active | Recovery | Cancel | Damage | Chip | Guard | On Hit | On Block | On Flawless Block | Cost |
|---|---|---|---|---|---|---|---|---|---|---|
| - | - | - | - | - | - | OH | - | - | - | - |

