|
|
| Line 674: |
Line 674: |
|
| |
|
| =====<font style="visibility:hidden; float:right">j2</font>===== | | =====<font style="visibility:hidden; float:right">j2</font>===== |
| | <tabber> |
| | |-|J2 (Axe)= |
| {{MoveDataCargo | | {{MoveDataCargo |
| | title = | | | title = |
| Line 684: |
Line 686: |
| | info = | | | info = |
| {{AttackDataCargo-MK1/Query|general_shao_j2}} | | {{AttackDataCargo-MK1/Query|general_shao_j2}} |
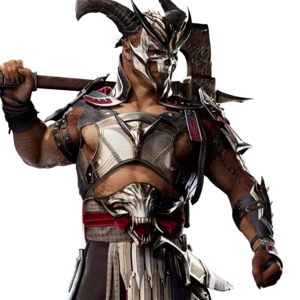
| | | Designated jump-in normal that exchanges startup for size, sweeping an absolutely massive area. The wide, disjoint hitbox is exceedingly difficult to antiair if done early, often forcing the enemy to upblock to punish and opening them up to empty jump > B3 for massive damage. When combined with a kameo to provide covering fire, J2 is nearly incontestable. Already one of Shao's best tools for offense in Axe stance, the massive area also makes it unexpectedly useful on defense - neutral jump or jump back if expecting an enemy approach, and then use J2 to cover both air and ground.<br><br> |
| | Before going hog wild with this attack, the Shao player has to consider a few things. First, the attack has more startup than any other immediate air normal by a mile - its slowest competition has 11 startup instead of 16. As such, it has to be input extremely early (along with any grounded followups), disallowing him from being able to jump and choose between J1 for air-to-airs or J2 to jump-ins. The early input also makes it nearly guaranteed to land as a mid instead of an overhead, greatly reducing its usage for kameo HTBs. Shao's choices for followups once grounded are also somewhat thin, as he lacks a confirmable mid string. Swinging with B2 can work as it will also combo on hit, but it requires an exceptionally respectful enemy on block. His best choice is to hit J2 late enough to jail into his high strings, but this makes it easier to antiair. |
| }} | | }} |
| | |-|J22= |
| | {{MoveDataCargo |
| | | title = |
| | | subtitle = |
| | | input = j2 |
| | | images = |
| | {{MoveDataCargoImage|imageHeight=180px|general_shao_j2|caption=}} |
| | | hitboxes = |
| | {{MoveDataCargoImage|hitbox=yes|imageHeight=180px|general_shao_j2|caption=}} |
| | | info = |
| | {{AttackDataCargo-MK1/Query|general_shao_j2}} |
| | Exceptionally rare air normal, despite following up Shao's most common air normal. As J2 is almost always applied against grounded enemies, Shao has no opportunity to continue into J22 in most usages of J2. Mid-combo and in air-to-airs, J12 gives more damage while being much easier to land. The conventional ground bounce of J122, while not great on its own, gives better damage and allows for easier kameo pickups than J22. Not a very useful attack overall. |
| | }} |
| | |-|J2 (Unarmed)= |
| | {{MoveDataCargo |
| | | title = |
| | | subtitle = |
| | | input = j2 |
| | | images = |
| | {{MoveDataCargoImage|imageHeight=180px|general_shao_uaj2|caption=}} |
| | | hitboxes = |
| | {{MoveDataCargoImage|hitbox=yes|imageHeight=180px|general_shao_uaj2|caption=}} |
| | | info = |
| | {{AttackDataCargo-MK1/Query|general_shao_uaj2}} |
| | Miniaturized version of Axe J2, starting up much faster but entirely losing the range and disjoint. The horizontal range is absolutely abysmal, though it does have more horizontal coverage than J1. While the missing disjoint means that it cannot be used as aggressively as Axe J2, the options of Unarmed stance vastly improve the reward for landing it. Among other things, Shao can frametrap a blocked J2 into F2 and B2, jail into B4, or do a conventional tick throw into the command grab (a cancel tick throw will whiff). If Shao is certain that this will land, J2 is still his best jump-in option in Unarmed stance. |
| | }} |
| | |-|J22= |
| | {{MoveDataCargo |
| | | title = |
| | | subtitle = |
| | | input = j22 |
| | | images = |
| | {{MoveDataCargoImage|imageHeight=180px|general_shao_uaj22|caption=}} |
| | | hitboxes = |
| | {{MoveDataCargoImage|hitbox=yes|imageHeight=180px|general_shao_uaj22|caption=}} |
| | | info = |
| | {{AttackDataCargo-MK1/Query|general_shao_uaj22}} |
| | Also similar to Axe J22, and while slightly more usable due to the faster startup of Unarmed J2, the grounded combo options of Unarmed stance greatly overshadow it. Also, with how Devastator (Klassic Kahn) works differently in Unarmed stance, his reward for landing it is significantly reduced. Possibly Shao's least useful move in his whole moveset. |
| | }} |
| | </tabber> |
| | <br> |
|
| |
|
| =====<font style="visibility:hidden; float:right">j3</font>===== | | =====<font style="visibility:hidden; float:right">j3</font>===== |
