|
|
| Line 291: |
Line 291: |
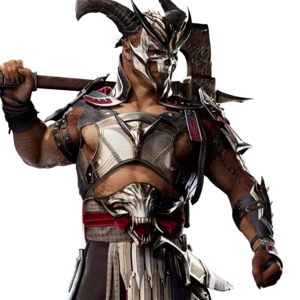
| Unarmed B2 is much smaller than Axe B2, but it keeps all the plus frames on block - while shortening its startup to an absurd 15 frames. An incredible offensive tool by itself, especially on oki where applying the move is nearly guaranteed, but bolstered even further by Shao's numerous high reward options to take full advantage of the plus frames in Unarmed stance. Even swinging with another B2 on block isn't a bad idea, as it will catch most mid confirm strings.<br><br> | | Unarmed B2 is much smaller than Axe B2, but it keeps all the plus frames on block - while shortening its startup to an absurd 15 frames. An incredible offensive tool by itself, especially on oki where applying the move is nearly guaranteed, but bolstered even further by Shao's numerous high reward options to take full advantage of the plus frames in Unarmed stance. Even swinging with another B2 on block isn't a bad idea, as it will catch most mid confirm strings.<br><br> |
| The reaction on hit spins the enemy in a slow-falling somersault instead of the horizontal stance of most juggles, making it much easier to follow up the combo. This is especially helpful after F2 combos in the corner, where B2 can turn the normally low bounce into a suspend that is allows for easy B32 pickups. | | The reaction on hit spins the enemy in a slow-falling somersault instead of the horizontal stance of most juggles, making it much easier to follow up the combo. This is especially helpful after F2 combos in the corner, where B2 can turn the normally low bounce into a suspend that is allows for easy B32 pickups. |
| | }} |
| | </tabber> |
| | <br> |
| | |
| | =====<font style="visibility:hidden; float:right">F21+3, F2</font>===== |
| | <tabber> |
| | |-|F2 (Axe) |
| | {{MoveDataCargo |
| | | title = |
| | | subtitle = |
| | | input = F2 |
| | | images = |
| | {{MoveDataCargoImage|imageHeight=180px|general_shao_f2|caption=}} |
| | | hitboxes = |
| | {{MoveDataCargoImage|hitbox=yes|imageHeight=180px|general_shao_f2|caption=}} |
| | | info = |
| | {{AttackDataCargo-MK1/Query|general_shao_f2}} |
| | A fast, short ranged overhead. The singular hit version has low damage and extremely long recovery, but the hitstun is surprisingly long, potentially letting Shao jail into a B2 on hit. The followup greatly improves the damage, but the safety is not exactly improved (though the attack is -15 instead of -32 with the followup, the enemy has even more time to react and punish) and the side switch can prove troublesome. Where F2 really shines is with kameo teleports, which will allow Shao to follow up the attack with substantial combos. Of his two options the Motaro teleport is the more rewarding one by far, giving him enough time to combo into a B2 for maximum damage while being much harder to punish on block than the Kung Lao teleport.<br><br> |
| | Though Axe stance is primarily focused on spacing, F2 is still important to keep the enemy on their toes and remind them that a fast overhead can come in both stances. When point-blank with the enemy and on your turn, swinging with F2 is not a bad idea. |
| | }} |
| | |-|F21+3 (Axe) |
| | {{MoveDataCargo |
| | | title = |
| | | subtitle = |
| | | input = F21+3 |
| | | images = |
| | {{MoveDataCargoImage|imageHeight=180px|general_shao_f21+3|caption=}} |
| | | hitboxes = |
| | {{MoveDataCargoImage|hitbox=yes|imageHeight=180px|general_shao_f21+3|caption=}} |
| | | info = |
| | {{AttackDataCargo-MK1/Query|general_shao_f21+3}} |
| | A fast, short ranged overhead. The singular hit version has low damage and extremely long recovery, but the hitstun is surprisingly long, potentially letting Shao jail into a B2 on hit. The followup greatly improves the damage, but the safety is not exactly improved (though the attack is -15 instead of -32 with the followup, the enemy has even more time to react and punish) and the side switch can prove troublesome. Where F2 really shines is with kameo teleports, which will allow Shao to follow up the attack with substantial combos. Of his two options the Motaro teleport is the more rewarding one by far, giving him enough time to combo into a B2 for maximum damage while being much harder to punish on block than the Kung Lao teleport.<br><br> |
| | Though Axe stance is primarily focused on spacing, F2 is still important to keep the enemy on their toes and remind them that a fast overhead can come in both stances. When point-blank with the enemy and on your turn, swinging with F2 is not a bad idea. |
| | }} |
| | |-|F2 (Unarmed) |
| | {{MoveDataCargo |
| | | title = |
| | | subtitle = |
| | | input = F2 |
| | | images = |
| | {{MoveDataCargoImage|imageHeight=180px|general_shao_uaf2|caption=}} |
| | | hitboxes = |
| | {{MoveDataCargoImage|hitbox=yes|imageHeight=180px|general_shao_uaf2|caption=}} |
| | | info = |
| | {{AttackDataCargo-MK1/Query|general_shao_uaf2}} |
| | The best overhead in the game, period. 16 frames, starts combos, long forward advancement, and somehow only -6 on block. The threat of F2 once in Unarmed stance is so substantial that many enemies will simply neutrally block high, opening them up to a world of pain from the rest of unarmed Shao's arsenal. Midscreen, Shao must follow up with forward dash ~ 224, but in the corner he can swing with B2 > B32 > B32 for much better damage and more ender options. |
| }} | | }} |
| </tabber> | | </tabber> |
