|
|
| Line 67: |
Line 67: |
| =====<font style="visibility:hidden; float:right">B12, B1</font>===== | | =====<font style="visibility:hidden; float:right">B12, B1</font>===== |
| <tabber> | | <tabber> |
| |-|Axe B1= | | |-|B1 (Axe)= |
| {{MoveDataCargo | | {{MoveDataCargo |
| | title = | | | title = |
| Line 80: |
Line 80: |
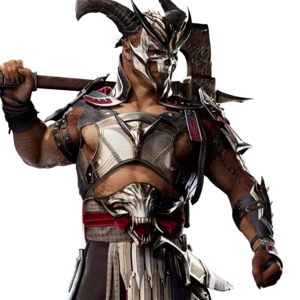
| Shao's primary mid in Axe stance. Disjointed with great range for its speed, and bolstered by strong forward advancement and surprisingly short recovery. Has a natural overhead followup in B12, which is safe but creates a gap. Back input also makes it easier to use in backdash anti-mashing traps. The attack is sometimes cancelled directly into Power Strike, which will be safe on block while putting General Shao into unarmed stance. This cancel will widen the gap to mashable degrees, but this is less of a problem if the B1 is properly spaced. To eliminate this gap, use a kameo. | | Shao's primary mid in Axe stance. Disjointed with great range for its speed, and bolstered by strong forward advancement and surprisingly short recovery. Has a natural overhead followup in B12, which is safe but creates a gap. Back input also makes it easier to use in backdash anti-mashing traps. The attack is sometimes cancelled directly into Power Strike, which will be safe on block while putting General Shao into unarmed stance. This cancel will widen the gap to mashable degrees, but this is less of a problem if the B1 is properly spaced. To eliminate this gap, use a kameo. |
| }} | | }} |
| |-|Axe B12= | | |-|B12= |
| {{MoveDataCargo | | {{MoveDataCargo |
| | title = | | | title = |
| Line 93: |
Line 93: |
| Shao's primary mid in Axe stance. Disjointed with great range for its speed, and bolstered by strong forward advancement and surprisingly short recovery. Has a natural overhead followup in B12, which is safe but creates a gap. Back input also makes it easier to use in backdash anti-mashing traps. The attack is sometimes cancelled directly into Power Strike, which will be safe on block while putting General Shao into unarmed stance. This cancel will widen the gap to mashable degrees, but this is less of a problem if the B1 is properly spaced. To eliminate this gap, use a kameo. | | Shao's primary mid in Axe stance. Disjointed with great range for its speed, and bolstered by strong forward advancement and surprisingly short recovery. Has a natural overhead followup in B12, which is safe but creates a gap. Back input also makes it easier to use in backdash anti-mashing traps. The attack is sometimes cancelled directly into Power Strike, which will be safe on block while putting General Shao into unarmed stance. This cancel will widen the gap to mashable degrees, but this is less of a problem if the B1 is properly spaced. To eliminate this gap, use a kameo. |
| }} | | }} |
| |-|Unarmed B1= | | |-|B1 (Unarmed)= |
| {{MoveDataCargo | | {{MoveDataCargo |
| | title = | | | title = |
