|
|
| (4 intermediate revisions by the same user not shown) |
| Line 208: |
Line 208: |
| | info = | | | info = |
| {{AttackDataCargo-MK1/Query|quan_chi_f2}} | | {{AttackDataCargo-MK1/Query|quan_chi_f2}} |
| Solid mid string, being disjoint, active, and decently ranged. Finishing the string into F21 is a superb defensive option and a critical part of his zoning, halting the enemy advance while causing a fullscreen knockdown and thus forcing them to retry their approach from scratch. The first hit by itself is also useful as a low commit oki option. F21 has no gap, but is unsafe at point blank and causes next to no pushback, and his natural cancel options are either unsafe or will not combo on hit. A safe, comboing kameo followup will give it a dependable cancel option, but some will whiff if done from too far away. Mid-combo, F21 can be used as a fullscreen ender if F44 would whiff, but the longer knockdown of F44 means that it is usually the better option if applicable - the exception being in some long combos where F21 will deal a tiny bit more damage for some unknown reason.
| | Quan's go-to mid, being disjoint, active, and decently ranged. One of only two normals that combos into EX Psycho Skull directly, being the fastest standing mid that gives him a combo. Fantastic for covering space when anticipating a grounded enemy approach, and also excellent on oki with EX Psycho Skull buffered behind it to safely convert on hit. Pushback on block also allows Quan to attempt a poke whiff punish with backdash into B3. The followup hit of F21 is a critical part of his zoning, covering a huge grounded area while causing a fullscreen knockdown and thus forcing them to retry their approach from scratch. F21 has no gap, but is unsafe at point blank and causes next to no pushback. A safe, comboing kameo followup will give it a dependable cancel option, but some will whiff if done from too far away. Mid-combo, F21 can be used as a fullscreen ender if F44 would whiff, but the longer knockdown of F44 means that it is usually the better option if applicable - the exception being in some long combos where F21 will deal a tiny bit more damage for some unknown reason.<br><br> |
| | As F2 can combo into EX Psycho Skull by itself, F2 buffered into EX Psycho Skull becomes an exceptional OS to apply when zoning. If the F2 whiffs the input will finish the string into F21, allowing Quan to still get the second hit of F21 out to cover the most space. On hit, it can be confirmed into a full combo, and on block the double hit of EX Psycho Skull will deal significant chip and pushback, leave Quan at only -3, and armor break the enemy if they try to block F2 and then swing with armor. To punish, the enemy can either jump forward or block the F2, dash forward to avoid the overhead projectile, and then armor through the mid blast. However, Quan can punish both options on a read by just inputting F2 and seeing the enemy action. The F2 ~ EX Psycho Skull OS superbly improves Quan's grounded presence, and should never be left on the table against enemies who know to stay grounded against Quan's dangerous antiairs. |
| }} | | }} |
| |-|F21= | | |-|F21= |
| Line 269: |
Line 270: |
| | info = | | | info = |
| {{AttackDataCargo-MK1/Query|quan_chi_b3}} | | {{AttackDataCargo-MK1/Query|quan_chi_b3}} |
| Extraordinarily important string: low, advancing, mostly safe, and confirmable. As such, it is Quan's go-to string for a number of situations - most notably in footsies, where it is Quan's second best whiff punisher behind S3 and the large and disjoint second hit make it itself difficult to whiff punish. Also important as a meaty, as compared to F2 it gives a full meterless combo on hit and plays around delayed getup better. When a Zone of Waste is up, B3 will give better damage than 13 while catching crouching pokes.<br><br> | | Extraordinarily important string: low, advancing, mostly safe, and confirmable. As such, it is Quan's most important string for a number of situations - most notably in footsies, where it is Quan's second best whiff punisher behind S3 and the large and disjoint second hit make it itself difficult to whiff punish. Also important as a meaty, as compared to F2 it gives a full meterless combo on hit and plays around delayed getup better. When a Zone of Waste is up, B3 will give better damage than 13 while catching crouching pokes.<br><br> |
| In the corner, the height from B31 will allow certain quick recharge kameo summons to combo, including Jax Energy Wave and Frost Ice Krash, fully giving Quan a safe or even plus combo starting blockstring. As Psycho Skull is very slow and interruptible on block, cancelling B31 into one of these summons is a much more attractive option. | | In the corner, the height from B31 will allow certain quick recharge kameo summons to combo, including Jax Energy Wave and Frost Ice Krash, fully giving Quan a safe or even plus combo starting blockstring. As Psycho Skull is very slow and interruptible on block, cancelling B31 into one of these summons is a much more attractive option. |
| }} | | }} |
| Line 465: |
Line 466: |
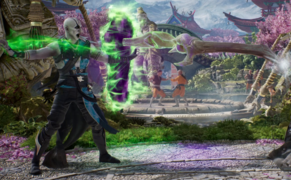
| As Bone Cage keeps the enemy standing, is exceptionally plus on hit, and has a lengthy animation, it is ideal for ambush kameo interactions. Motaro and Kung Lao allow Quan to combo from Bone Cage, giving him S4 pickups as well as cheap routes from 214, 12, B2, and F2. Jax is given plenty of time to land his Ground Pound, an interaction that's even better with an EX Zone of Waste up to either kill ample time for armor to appear, or armor through the pound itself. Frost is also given enough time to put up an Ice Wall.<br><br> | | As Bone Cage keeps the enemy standing, is exceptionally plus on hit, and has a lengthy animation, it is ideal for ambush kameo interactions. Motaro and Kung Lao allow Quan to combo from Bone Cage, giving him S4 pickups as well as cheap routes from 214, 12, B2, and F2. Jax is given plenty of time to land his Ground Pound, an interaction that's even better with an EX Zone of Waste up to either kill ample time for armor to appear, or armor through the pound itself. Frost is also given enough time to put up an Ice Wall.<br><br> |
| Bone Cage will stop forced movement abilities. In neutral, Quan can cast a Bone Cage in the ground between the two fighters to read an advancing move, and on oki he can put it in front of the opponent to catch their armored getup - he will not be able to punish their armored getup unless he uses EX Bone Cage or an ambush kameo was called beforehand, but it remains a low-risk move to restrict their options.<br><br> | | Bone Cage will stop forced movement abilities. In neutral, Quan can cast a Bone Cage in the ground between the two fighters to read an advancing move, and on oki he can put it in front of the opponent to catch their armored getup - he will not be able to punish their armored getup unless he uses EX Bone Cage or an ambush kameo was called beforehand, but it remains a low-risk move to restrict their options.<br><br> |
| EX Bone Cage transforms the move into another setup option beyond the portals. It remains on the ground until it erupts, where it will deals damage over time and allow combo followups on hit, on top of the behaviors of regular Bone Cage. Superb for oki and creating a lingering obstacle between the fighters. EX Bone Cage also allows the move to entice jumping in multiple forms; when placed on the ground, and when activated. Like Kitana's Wind Bomb, placing an EX Bone Cage just outside of the enemy's getup location will give Quan a throw combo. Certain lengthy kameo suspends like Cyrax Net or Sub-Zero Freeze will also use an EX Bone Cage in their combos for even more setup time. | | EX Bone Cage transforms the move into another setup option beyond the portals. It remains on the ground until it erupts, where it will deals damage over time and allows combo followups on hit, on top of the behaviors of regular Bone Cage. Superb for oki and creating a lingering obstacle between the fighters. EX Bone Cage also allows the move to entice jumping in multiple forms; when placed on the ground, and when activated. Like Kitana's Wind Bomb, placing an EX Bone Cage just outside of the enemy's getup location will give Quan a throw combo. Certain lengthy kameo suspends like Cyrax Net or Sub-Zero Freeze will also use an EX Bone Cage in their combos for even more setup time. |
| }} | | }} |
| <br> | | <br> |
