|
|
| (14 intermediate revisions by the same user not shown) |
| Line 208: |
Line 208: |
| | info = | | | info = |
| {{AttackDataCargo-MK1/Query|quan_chi_f2}} | | {{AttackDataCargo-MK1/Query|quan_chi_f2}} |
| Solid mid string, being disjoint, active, and decently ranged. Finishing the string into F21 is a superb defensive option and a critical part of his zoning, halting the enemy advance while causing a fullscreen knockdown and thus forcing them to retry their approach from scratch. The first hit by itself is also useful as a low commit oki option. F21 has no gap, but is unsafe at point blank and causes next to no pushback, and his natural cancel options are either unsafe or will not combo on hit. A safe, comboing kameo followup will give it a dependable cancel option, but some will whiff if done from too far away. Mid-combo, F21 can be used as a fullscreen ender if F44 would whiff, but the longer knockdown of F44 means that it is usually the better option if applicable - the exception being in some long combos where F21 will deal a tiny bit more damage for some unknown reason.
| | Quan's go-to mid, being disjoint, active, and decently ranged. One of only two normals that combos into EX Psycho Skull directly, being the fastest standing mid that gives him a combo. Fantastic for covering space when anticipating a grounded enemy approach, and also excellent on oki with EX Psycho Skull buffered behind it to safely convert on hit. Pushback on block also allows Quan to attempt a poke whiff punish with backdash into B3. The followup hit of F21 is a critical part of his zoning, covering a huge grounded area while causing a fullscreen knockdown and thus forcing them to retry their approach from scratch. F21 has no gap, but is unsafe at point blank and causes next to no pushback. A safe, comboing kameo followup will give it a dependable cancel option, but some will whiff if done from too far away. Mid-combo, F21 can be used as a fullscreen ender if F44 would whiff, but the longer knockdown of F44 means that it is usually the better option if applicable - the exception being in some long combos where F21 will deal a tiny bit more damage for some unknown reason.<br><br> |
| | As F2 can combo into EX Psycho Skull by itself, F2 buffered into EX Psycho Skull becomes an exceptional OS to apply when zoning. If the F2 whiffs the input will finish the string into F21, allowing Quan to still get the second hit of F21 out to cover the most space. On hit, it can be confirmed into a full combo, and on block the double hit of EX Psycho Skull will deal significant chip and pushback, leave Quan at only -3, and armor break the enemy if they try to block F2 and then swing with armor. To punish, the enemy can either jump forward or block the F2, dash forward to avoid the overhead projectile, and then armor through the mid blast. However, Quan can punish both options on a read by just inputting F2 and seeing the enemy action. The F2 ~ EX Psycho Skull OS superbly improves Quan's grounded presence, and should never be left on the table against enemies who know to stay grounded against Quan's dangerous antiairs. |
| }} | | }} |
| |-|F21= | | |-|F21= |
| Line 269: |
Line 270: |
| | info = | | | info = |
| {{AttackDataCargo-MK1/Query|quan_chi_b3}} | | {{AttackDataCargo-MK1/Query|quan_chi_b3}} |
| Extraordinarily important string: low, advancing, mostly safe, and confirmable. As such, it is Quan's go-to string for a number of situations - most notably in footsies, where it is Quan's second best whiff punisher behind S3 and the large and disjoint second hit make it itself difficult to whiff punish. Also important as a meaty, as compared to F2 it gives a full meterless combo on hit and plays around delayed getup better. When a Zone of Waste is up, B3 will give better damage than 13 while catching crouching pokes.<br><br> | | Extraordinarily important string: low, advancing, mostly safe, and confirmable. As such, it is Quan's most important string for a number of situations - most notably in footsies, where it is Quan's second best whiff punisher behind S3 and the large and disjoint second hit make it itself difficult to whiff punish. Also important as a meaty, as compared to F2 it gives a full meterless combo on hit and plays around delayed getup better. When a Zone of Waste is up, B3 will give better damage than 13 while catching crouching pokes.<br><br> |
| In the corner, the height from B31 will allow certain quick recharge kameo summons to combo, including Jax Energy Wave and Frost Ice Krash, fully giving Quan a safe or even plus combo starting blockstring. As Psycho Skull is very slow and interruptible on block, cancelling B31 into one of these summons is a much more attractive option. | | In the corner, the height from B31 will allow certain quick recharge kameo summons to combo, including Jax Energy Wave and Frost Ice Krash, fully giving Quan a safe or even plus combo starting blockstring. As Psycho Skull is very slow and interruptible on block, cancelling B31 into one of these summons is a much more attractive option. |
| }} | | }} |
| Line 442: |
Line 443: |
| | info = | | | info = |
| {{AttackDataCargo-MK1/Query|quan_chi_db1}} | | {{AttackDataCargo-MK1/Query|quan_chi_db1}} |
| Exceptionally important special move, applied for all offensive purposes. The main thing that drives it is the property that against airborne opponents, Psycho Skull causes a fixed ground bounce that can be followed up regardless of the combo gravity - and with S4, it can be picked up from any distance. This makes it a potent tool for discouraging jumping while zoning, as its lenient aim time means it can be properly directed regardless of if the enemy jumped or not, and an airborne catch will bring spectacular reward. In combos, it's too slow to combo from anything but 12 on the ground, but many kameo pickups will incorporate a Psycho Skull to squeeze out damage and guarantee the S4 for the special cancel.<br><br> | | Exceptionally important special move, applied for all offensive purposes. The main thing that drives it is the property that against airborne opponents, Psycho Skull causes a fixed ground bounce that can be followed up regardless of the combo gravity - and with S4, it can be picked up from any distance. This makes it a potent tool for discouraging jumping while zoning, as its lenient aim time means it can be properly directed regardless of if the enemy jumped or not, and an airborne catch will bring spectacular reward. As an overhead it can be upblocked, but this is hardly a concern in zoning, as an enemy looking to upblock will stay grounded and further the move's purpose. In combos, it's too slow to combo from anything but 12 on the ground, but many kameo pickups will incorporate a Psycho Skull to squeeze out damage and guarantee the S4 for the special cancel.<br><br> |
| EX Psycho Skull will automatically pick the correct distance and cause an additional explosion on the ground, allowing combo pickups against grounded enemies. The ground explosion is quick enough to cause an armor break, and the knockdown from F44 is perfectly timed to oki every armored getup in the game that only has one hit of armor. Delayed getup from F44 will avoid it entirely, but the recovery is quick enough to safely block.<br><br> | | EX Psycho Skull will automatically pick the correct distance and cause an additional explosion on the ground, allowing combo pickups against grounded enemies. The ground explosion is quick enough to cause an armor break, and the knockdown from F44 is perfectly timed to oki every armored getup in the game that only has one hit of armor. Delayed getup from F44 will avoid it entirely, but the recovery is quick enough to safely block.<br><br> |
| With a Zone of Power nearby, Psycho Skull becomes a barrage of mid projectiles - worse for HTBs, but far stronger for every other purpose, and also letting him armor break without needing to spend meter. Power Psycho Skull is his best zoning tool, covering a massive area in both the air and the ground, leaving Quan plus on block, and maintaining the bounce property against airborne opponents. Whenever Quan doesn't immediately need the fast startup of Power Head Rush, Power Psycho Skull is his go-to projectile. On EX, Power Psycho Skull retains the tracking overhead bouncing projectile on top of the mid barrage - a peerless zoning tool that smothers the screen in projectiles, breaks nearly any armored move, and forces them to react defensively.<br><br> | | With a Zone of Power nearby, Psycho Skull becomes a barrage of mid projectiles - worse for HTBs, but far stronger for every other purpose, and also letting him armor break without needing to spend meter. Power Psycho Skull is his best zoning tool, covering a massive area in both the air and the ground, leaving Quan plus on block, and maintaining the bounce property against airborne opponents. Whenever Quan doesn't immediately need the fast startup of Power Head Rush, Power Psycho Skull is his go-to projectile. On EX, Power Psycho Skull retains the tracking overhead bouncing projectile on top of the mid barrage - a peerless zoning tool that smothers the screen in projectiles, breaks nearly any armored move, and forces them to react defensively.<br><br> |
| The most recent development in the usage of Psycho Skull is combining it with Darrius low heelturn for a dangerous combo starting HTB. On a knockdown, call Darrius, and then hold the Kameo button while doing a Psycho Skull. The mixup lies in whether his low sweep or the overhead skull lands first; if the low sweep lands first, the overhead will bounce the enemy for a combo followup, and if the overhead lands first the sweep will give Quan a brief window to pick up. This is admittedly difficult to execute, as you need to be pressing down when you release the kameo button to get the sweep to come out, but Psycho Skull needs to be aimed. The way to do this is to move the Psycho Skull aiming to the very end of the allowed window and call the Darrius sweep with D+release K first - in sequence, the motions are DK (hold K, release D), DB1, press D while releasing K, hold the desired distance (usually D for closest). | | The most recent development in the usage of Psycho Skull is combining it with Darrius low heelturn for a dangerous combo starting HTB. On a knockdown, call Darrius, and then hold the Kameo button while doing a Psycho Skull. The mixup lies in whether his low sweep or the overhead skull lands first; if the low sweep lands first, the overhead will bounce the enemy for a combo followup, and if the overhead lands first the sweep will give Quan a brief window to pick up. This is admittedly difficult to execute, as you need to be pressing down when you release the kameo button to get the sweep to come out, but Psycho Skull needs to be aimed. The way to do this is to move the Psycho Skull aiming to the very end of the allowed window and call the Darrius sweep with D+release K first - in sequence, the motions are DK (hold K, release D), DB1, press D while releasing K, hold the desired distance (usually B for closest). |
| }} | | }} |
| <br> | | <br> |
| Line 460: |
Line 461: |
| | info = | | | info = |
| {{AttackDataCargo-MK1/Query|quan_chi_bdf2}} | | {{AttackDataCargo-MK1/Query|quan_chi_bdf2}} |
| A cage of bones that restricts enemy movement, summonable at any range. Highly active and plus on hit, and will erupt to restrict movement on both block and hit. No cooldown, so it can be spammed. Central for zoning, setups, and oki.<br><br> | | A cage of bones that restricts enemy movement, summonable at any range. Highly active and plus on hit, and will erupt to restrict movement on both block and hit. No cooldown, so it can be spammed. Central for zoning, setups, oki, and defense.<br><br> |
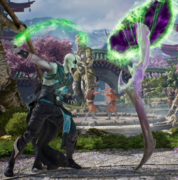
| Bone Cage (tbc) | | Bone Cage, being an important part of his zoner toolkit, is one of Quan's moves that entices the enemy to jump, allowing him to apply his dangerous antiairs. Compared to EX Head Rush, his primary other tool for this purpose, it is harder to apply but much more effective at forcing it as the enemy must either destroy the cage or leap out of it. One D2 will destroy the cage, but this is highly inadvisable, as Quan can notice the D2 and punish the lengthy recovery with S4. A much more advisable option is to sweep twice, which takes more time overall but will usually low profile Quan's S4.<br><br> |
| | S4 into Bone Cage is a central action - on hit it gives Quan enough time to put up any spell as well as most kameo summons (including another Bone Cage), and on block it will still restrict movement. The startup is long enough for the enemy to jump away, but if they start getting wise Quan can instead cancel into Psycho Skull to catch their jump.<br><br> |
| | As Bone Cage keeps the enemy standing, is exceptionally plus on hit, and has a lengthy animation, it is ideal for ambush kameo interactions. Motaro and Kung Lao allow Quan to combo from Bone Cage, giving him S4 pickups as well as cheap routes from 214, 12, B2, and F2. Jax is given plenty of time to land his Ground Pound, an interaction that's even better with an EX Zone of Waste up to either kill ample time for armor to appear, or armor through the pound itself. Frost is also given enough time to put up an Ice Wall.<br><br> |
| | Bone Cage will stop forced movement abilities. In neutral, Quan can cast a Bone Cage in the ground between the two fighters to read an advancing move, and on oki he can put it in front of the opponent to catch their armored getup - he will not be able to punish their armored getup unless he uses EX Bone Cage or an ambush kameo was called beforehand, but it remains a low-risk move to restrict their options.<br><br> |
| | EX Bone Cage transforms the move into another setup option beyond the portals. It remains on the ground until it erupts, where it will deals damage over time and allows combo followups on hit, on top of the behaviors of regular Bone Cage. Superb for oki and creating a lingering obstacle between the fighters. EX Bone Cage also allows the move to entice jumping in multiple forms; when placed on the ground, and when activated. Like Kitana's Wind Bomb, placing an EX Bone Cage just outside of the enemy's getup location will give Quan a throw combo. Certain lengthy kameo suspends like Cyrax Net or Sub-Zero Freeze will also use an EX Bone Cage in their combos for even more setup time. |
| }} | | }} |
| <br> | | <br> |
| Line 476: |
Line 481: |
| | info = | | | info = |
| {{AttackDataCargo-MK1/Query|quan_chi_db3}} | | {{AttackDataCargo-MK1/Query|quan_chi_db3}} |
| The first of Quan's three portals, and probably the weakest. As previously stated, Zone of Power improves Quan's fireballs (tbc) | | The first of Quan's three portals, and probably the weakest. As previously stated, Zone of Power transforms Quan's fireballs for improved zoning and setups. A nearby Zone of Power also lets Quan get substantial one-bar combos from 12 ~ EX Head Rush. Recovery is too long to be safely used at point blank on block, but at a distance, the presence of S4 allows it to be put up with minimal risk. In combos, F4 ~ Zone of Power is also plus unless in extreme gravity. Despite lacking the immediate impact of its other two peers, Zone of Power is still a crucial move to display whenever possible. |
| }} | | }} |
| <br> | | <br> |
| Line 491: |
Line 496: |
| | info = | | | info = |
| {{AttackDataCargo-MK1/Query|quan_chi_db3ex}} | | {{AttackDataCargo-MK1/Query|quan_chi_db3ex}} |
| A portal that shoves the enemy away. Quan's only way to safely get enemies off his back, and it still isn't airtight in certain matchups... (tbc) | | A portal that (imperfectly) shoves the enemy away. Always a strong tool, especially on oki, but especially worth it in matchups where the enemy lacks disjoints or projectiles, giving Quan space to create more distance or get things set up. Once up, it won't go away on hit, allowing Quan to disrupt combos by moving it and shoving the enemy off him. Enemies trying to move through the field can easily be caught by S4 or S3. Not actually that common in fullscreen zoning, as it only appears directly in front of Quan, and the time and meter cost at fullscreen is generally better spent on a Zone of Power or an EX projectile.<br><br> |
| | Zone of Fear is saddled with its odd, frustrating inconsistency at doing its job. Enemies are occasionally able to barely dashblock through the portal; this appears to be exacerbated by high ping, moving the portal, and having multiple portals up. This sucks, and it's not your fault, but keep it in mind whenever putting it down. |
| | * Zone of Fear with a Frost wall is very funny. |
| }} | | }} |
| <br> | | <br> |
| Line 506: |
Line 513: |
| | info = | | | info = |
| {{AttackDataCargo-MK1/Query|quan_chi_df3}} | | {{AttackDataCargo-MK1/Query|quan_chi_df3}} |
| One of the strongest lockdown tools in the game, if not the strongest by itself (tbc)
| | Extraordinary lockdown tool, infamous salt machine, and the foundation of Quan's up close game. Zone of Waste drains meter from the enemy, just enough to deny breaker, and grants Quan a hit of armor if the enemy has stayed long enough in it. As such, his goal is to kill time until the armor appears, while the enemy's goal is to interrupt him and leave the area. Mashing against Quan becomes an exceedingly dangerous option, with the possibility of an unbreakable combo if Quan has delayed the enemy for long enough. Delayed getup is also inadvisable, as it passively gives the portal time to generate armor without taking countermeasures.<br><br> |
| | To delay the enemy, Quan has a number of tools up his sleeve. 2144 is a lengthy string with a 50/50 to force attention, EX Psycho Skull won't combo from most strings but it forces a block against defensive opponents, and Sky Drop is unsafe but the enemy risks a drop into a counter-combo if the armor takes effect mid-punish. On hit, confirming a string into Bone Cage is ideal, as the lengthy hitstun will guarantee an armor tick. Many kameos also give superb options for delaying - Shujinko can do a universal attack into a steal for significant time used, Darrius can put a mixup on them alongside Quan's options, and even Sareena boomerangs on block are a great choice, boasting a lengthy animation and a punish that is rarely worse than a crouching poke (an ideal punish for Quan, as it denies a combo that could have taken the enemy out of the portal reach).<br><br> |
| | By himself, Quan cannot guarantee an armor tick on oki; without the assistance of kameos, the enemy will always have a brief window to fight back or jump out of the area. Throws are the most dangerous thing for Quan to look out for, as they can absorb an armor tick mid-animation without halting the throw, and often move Quan out of ideal distance. To avoid throws and whiff punish mashing, Quan can backdash and try to fill the space with B34, but if the enemy does a forward jump or an armored getup he will be caught - not the worst situation, as the armor will continue to tick and possibly give Quan a drop combo, but still less than ideal. Kameos that force an armor tick on oki like Sub-Zero will allow Quan to bypass this risky window entirely, vastly improving his pressure. Keep in mind that if the armor takes effect during the enemy's attacks, you don't need to wait for the enemy's blockstring to finish - let go of block and counterattack immediately.<br><br> |
| | Once Quan has properly established that the enemy cannot mash or armored reversal during Zone of Waste, he can use the enemy's defensive posture to spam spells - Zone of Power at point blank, Field of Bones on block, even slow kameo summons like Frost's Snowflakes become risky to interrupt. |
| | * Remember to keep the portal under the enemy during their combo with Block + Direction. |
| | * If you use Zone of Waste to beat someone who's complained about it before, you are legally obliged to teabag. |
| }} | | }} |
| <br> | | <br> |
