No edit summary |
m (Forgot to bolden Triple Whammy's subtitle) |
||
| (21 intermediate revisions by 3 users not shown) | |||
| Line 1: | Line 1: | ||
{{Character | {{Character Top MK1 | chara={{SUBPAGENAME}} }} | ||
== Kameo Moves == | |||
{{MoveDataCargo | |||
| title = Krotch Destroyer | |||
| subtitle = '''Summon''' | |||
| input = k | |||
| images = | |||
{{MoveDataCargoImage|imageHeight=180px|janet_cage_k|caption="DING!"}} | |||
| hitboxes = | |||
{{MoveDataCargoImage|hitbox=yes|imageHeight=180px|janet_cage_k|caption=}} | |||
| info = | |||
{{AttackDataCargo-MK1/Query|janet_cage_k}} | |||
'''- Has invulnerability when performed as a Getup or Reversal''' | |||
'''- Cooldown: 2 Second Delay + 10 Second Recharge Speed = 12 Seconds Total''' | |||
Janet's "Nut Punch" attack, Restands the opponent on an Airborne Hit and is primarily used as a combo ender due to its high Hit Advantage, useful for characters with strong Overhead-Low mixups like Noob Saibot or Havik | |||
Better than most Kameo Reversals because of Janet's low hurtbox on startup, range and its safety On Block, useful against mid ranged attacks like the ones in Ferra's Torr Stance | |||
}} | |||
{{MoveDataCargo | |||
| title = Mime Time | |||
| subtitle = '''Summon''' | |||
| input = u+k | |||
| images = | |||
{{MoveDataCargoImage|imageHeight=180px|janet_cage_uk|caption=}} | |||
| hitboxes = | |||
{{MoveDataCargoImage|hitbox=yes|imageHeight=180px|janet_cage_uk|caption=}} | |||
| info = | |||
{{AttackDataCargo-MK1/Query|janet_cage_uk}} | |||
'''- Absorbs Attacks (can take up to 9% damage before retreating)''' | |||
'''- Hold Kameo To Extend Duration (Last 10 seconds, drains 0.05 Kameo Meter per second)''' | |||
'''- Retreats After 45 Frames (0.75 seconds) Without Holding''' | |||
'''- Cooldown: 1 Second Delay + 10 Second Recharge Speed + Held Duration = 11/21 Seconds Total''' | |||
Janet puts herself between the Point Character and their opponent acting as a temporary wall until she retreats, she can tank either 3 attacks or a single attack that does >9% damage before going away, that or she automatically goes away after 0.75-10 seconds | |||
Because of it being a Summon it can be hard to use in neutral, making it mainly useful for characters that can put the opponent behind Janet to temporarily trap them in a makeshift corner, it can also be used to limit movement in the actual corner as it would not allow the opponent to dash or attack through | |||
Useful with characters like Quan Chi, Geras, Noob Saibot and Cyrax | |||
}} | |||
{{MoveDataCargo | |||
| title = Hop Punch | |||
| subtitle = '''Ambush''' | |||
| input = b+k, b+k, b+k | |||
| images = | |||
{{MoveDataCargoImage|imageHeight=180px|janet_cage_fk|caption=}} | |||
| hitboxes = | |||
{{MoveDataCargoImage|hitbox=yes|imageHeight=180px|janet_cage_fk|caption=}} | |||
| info = | |||
{{AttackDataCargo-MK1/Query|janet_cage_fk}} | |||
'''- Repeat Input During Startup to Repeat Attack Up To 2 More Times''' | |||
'''- Cooldown: 2 Second Delay + 10 Second Recharge Speed = 12 Seconds Total''' | |||
"Close" version of Janet's only Ambush, extends combos and can be used in setups because of it's long juggle time, Triple version is used to combo off Throws and Synchronized Attacks while the Single and Double versions are used to minimize Janet's time on screen for better repeated use possibilities | |||
To repeatedly do the move you must input Back+Kameo alongside every jump Janet does, only hits Airborne opponents | |||
}} | |||
{{MoveDataCargo | |||
| title = Hop Skip Punch | |||
| subtitle = '''Ambush''' | |||
| input = f+k, f+k, f+k | |||
| images = | |||
{{MoveDataCargoImage|imageHeight=180px|janet_cage_fkk|caption=}} | |||
| hitboxes = | |||
{{MoveDataCargoImage|hitbox=yes|imageHeight=180px|janet_cage_fkk|caption=}} | |||
| info = | |||
{{AttackDataCargo-MK1/Query|janet_cage_fkk}} | |||
'''- Repeat Input During Startup to Repeat Attack Up To 2 More Times''' | |||
'''- Cooldown: 2 Second Delay + 10 Second Recharge Speed = 12 Seconds Total''' | |||
"Far" version of Janet's only Ambush, extends combos and can be used in setups because of it's long juggle time, Triple version is used to combo off Throws and Synchronized Attacks while the Single and Double versions are used to minimize Janet's time on screen for better repeated use possibilities | |||
To repeatedly do the move you must input Back+Kameo alongside every jump Janet does, only hits Airborne opponents | |||
}} | |||
{{MoveDataCargo | |||
| title = Stunt Double | |||
| subtitle = '''Summon''' | |||
| input = d+k | |||
| images = | |||
{{MoveDataCargoImage|imageHeight=180px|janet_cage_dk|caption="SUPERSTAR"}} | |||
| hitboxes = | |||
{{MoveDataCargoImage|hitbox=yes|imageHeight=180px|janet_cage_dk|caption=}} | |||
| info = | |||
{{AttackDataCargo-MK1/Query|janet_cage_dk}} | |||
'''- Enters Stunt Double Stance''' | |||
'''- Drains 0.05 Kameo Meter Per Second''' | |||
'''- Gives Janet Access To Stunt Double Attacks''' | |||
'''- Press Forward/Back To Reposition Janet''' | |||
'''- Hold Block To Let Janet Move Independently From Point Character''' | |||
'''- Cooldown: 20 Second Delay + 20 Second Recharge Speed = 40 Seconds Total (Not Taking SD Attacks and Splits Into Account)''' | |||
Janet becomes a "Puppet" that the player can independently control as if she was a 2nd character, this gives her access to a plethora of new mixups, combo extensions, extended blockstrings and zoning options | |||
Kameo Meter will continously drain at 5% Meter Per Second (with the added drain from SD Attacks) until it is fully empty, at which point Janet will leave the screen and Kameo Meter will start to refill | |||
You can buffer Janet's attacks during the startup of the activation so that she will inmidiately do them as soon as she recovers (slightly before you do) | |||
The activation has a long recovery time so be creative when finding setup combos to it and maximize your Hit Advantage at the end of them to secure plus frames | |||
}} | |||
{{MoveDataCargo | |||
| title = Jane Diere | |||
| subtitle = '''Ambush''' | |||
| input = d+k, 1 | |||
| images = | |||
{{MoveDataCargoImage|imageHeight=180px|janet_cage_1|caption=}} | |||
| hitboxes = | |||
{{MoveDataCargoImage|hitbox=yes|imageHeight=180px|janet_cage_1|caption=}} | |||
| info = | |||
{{AttackDataCargo-MK1/Query|janet_cage_1}} | |||
'''- Only During Stunt Double''' | |||
'''- Drains 0.16 Kameo Meter Each Use''' | |||
'''- Mash 1 Repeatedly To Spam This Move''' | |||
"Caged And Konfused" outclasses "Jane Diere" in nearly every single way, only advantatge the latter has over the former is its lower hitbox making it easier to land on Crouch Blocking opponents | |||
So only use it for Extended Blockstrings | |||
}} | |||
{{MoveDataCargo | |||
| title = Caged And Konfused | |||
| subtitle = '''Ambush''' | |||
| input = d+k, 2 | |||
| images = | |||
{{MoveDataCargoImage|imageHeight=180px|janet_cage_2|caption=}} | |||
| hitboxes = | |||
{{MoveDataCargoImage|hitbox=yes|imageHeight=180px|janet_cage_2|caption=}} | |||
| info = | |||
{{AttackDataCargo-MK1/Query|janet_cage_2}} | |||
'''- Only During Stunt Double''' | |||
'''- Drains 0.16 Kameo Meter Each Use''' | |||
'''- Mash 2 Repeatedly To Spam This Move''' | |||
The better alternative to "Jane Diere" as it does higher damage, can Anti-Air and it vacuums opponents on an Airborne Hit | |||
So use it to catch jumpers or to extend Juggles and Grounded Combos | |||
}} | |||
{{MoveDataCargo | |||
| title = Box Office Bang | |||
| subtitle = '''Ambush''' | |||
| input = d+k, 3 | |||
| images = | |||
{{MoveDataCargoImage|imageHeight=180px|janet_cage_3|caption=}} | |||
| hitboxes = | |||
{{MoveDataCargoImage|hitbox=yes|imageHeight=180px|janet_cage_3|caption=}} | |||
| info = | |||
{{AttackDataCargo-MK1/Query|janet_cage_3}} | |||
'''- Only During Stung Double''' | |||
'''- Drains 0.16 Kameo Meter Each Use''' | |||
A long-ranged Mid strike, used to extend Grounded Combos and blockstrings, catch opponents trying to Low Profile out of pressure and just to keep the opponeng in check during neutral | |||
}} | |||
{{MoveDataCargo | |||
| title = Box Office Bomb | |||
| subtitle = '''Ambush''' | |||
| input = d+k, 4 | |||
| images = | |||
{{MoveDataCargoImage|imageHeight=180px|janet_cage_4|caption=}} | |||
| hitboxes = | |||
{{MoveDataCargoImage|hitbox=yes|imageHeight=180px|janet_cage_4|caption=}} | |||
| info = | |||
{{AttackDataCargo-MK1/Query|janet_cage_4}} | |||
'''- Only During Stunt Double''' | |||
'''- Drains 0.16 Kameo Meter Each Use''' | |||
A short-ranged vertical strike, able to Anti-Air and extend Juggle Combos, also used sometimes during Armour Break sequences or to guarantee a Combo Reset | |||
The odd hitbox angle makes it hard to use when you're not in the corner or your opponent isn't sandwiched between you and Janet | |||
}} | |||
{{MoveDataCargo | |||
| title = Forceball | |||
| subtitle = '''Ambush''' | |||
| input = d+k, f1 | |||
| images = | |||
{{MoveDataCargoImage|imageHeight=180px|janet_cage_f1|caption=}} | |||
| hitboxes = | |||
{{MoveDataCargoImage|hitbox=yes|imageHeight=180px|janet_cage_f1|caption=}} | |||
| info = | |||
{{AttackDataCargo-MK1/Query|janet_cage_f1}} | |||
'''- Only During Stunt Double''' | |||
'''- Drains 0.33 Kameo Meter Each Use''' | |||
Janet's only projectile move, used a lot in situations where Janet is far away from the Point Character and/or their opponent to zone or keep the Point Character safe, because of its high Hit Advantage it can also turn moves Punisheable On Hit | |||
Because of its high Kameo Meter cost it's recommended to keep Forceballs to a minimum or to use "Splits" right after them | |||
}} | |||
{{MoveDataCargo | |||
| title = Shadow Kick | |||
| subtitle = '''Ambush''' | |||
| input = d+k, f3 | |||
| images = | |||
{{MoveDataCargoImage|imageHeight=180px|janet_cage_f3|caption=}} | |||
| hitboxes = | |||
{{MoveDataCargoImage|hitbox=yes|imageHeight=180px|janet_cage_f3|caption=}} | |||
| info = | |||
{{AttackDataCargo-MK1/Query|janet_cage_f3}} | |||
'''- Only During Stunt Double''' | |||
'''- Drains 0.33 Kameo Meter Each Use''' | |||
Probably the worst move in Janet's arsenal, a slow advancing High Launcher that only serves as combo fodder | |||
Its slow speed, high cost, mediocre damage and low launch angle makes it worse at nearly every single function compared to other moves, the only advantage it has besides looking cool is that it doesn't scale as badly as the other combo extender moves meaning you can sneak it in the middle or end of combos for extra damage | |||
}} | |||
{{MoveDataCargo | |||
| title = Uppercut | |||
| subtitle = '''Ambush''' | |||
| input = d+k, d2 | |||
| images = | |||
{{MoveDataCargoImage|imageHeight=180px|janet_cage_d2|caption=}} | |||
| hitboxes = | |||
{{MoveDataCargoImage|hitbox=yes|imageHeight=180px|janet_cage_d2|caption=}} | |||
| info = | |||
{{AttackDataCargo-MK1/Query|janet_cage_d2}} | |||
'''- Only During Stunt Double''' | |||
'''- Drains 0.25 Kameo Meter Each Use''' | |||
A slow high damage launcher, this move may seem like just a worse version of "Roundhouse" at a first glance but it has some things going for it | |||
The higher launch angle and lower Gravity Scaling make it good to use after high recovery attacks such as Shove or some projectiles, it is also useful for setting up Sandwich situations because of the increased Air Time compared to "Roundhouse" and "Box Office Bomb" | |||
}} | |||
{{MoveDataCargo | |||
| title = Sweepstakes | |||
| subtitle = '''Ambush''' | |||
| input = d+k, b4 | |||
| images = | |||
{{MoveDataCargoImage|imageHeight=180px|janet_cage_b4|caption=}} | |||
| hitboxes = | |||
{{MoveDataCargoImage|hitbox=yes|imageHeight=180px|janet_cage_b4|caption=}} | |||
| info = | |||
{{AttackDataCargo-MK1/Query|janet_cage_b4}} | |||
'''- Only During Stunt Double''' | |||
'''- Drains 0.25 Kameo Meter Each Use''' | |||
Janet's main mixup tool, used to set up Overhead-Low Hard To Block situations where her Sweep and the Point Character's Overhead hit simultanously, depending on the order of the HTB it can also turn most mixups safe/plus due to its high Block Advantage | |||
This move can also turn into a Pseudo-Launcher because the opponent has a long amount of Air Time when hit, letting Point Characters combo after long recovery moves if it's timed well, however it is only recommended to use it this way if there's a mixup attatched | |||
}} | |||
{{MoveDataCargo | |||
| title = Roundhouse | |||
| subtitle = '''Ambush''' | |||
| input = d+k, f4 | |||
| images = | |||
{{MoveDataCargoImage|imageHeight=180px|janet_cage_f4|caption=}} | |||
| hitboxes = | |||
{{MoveDataCargoImage|hitbox=yes|imageHeight=180px|janet_cage_f4|caption=}} | |||
| info = | |||
{{AttackDataCargo-MK1/Query|janet_cage_f4}} | |||
'''- Only During Stunt Double''' | |||
'''- Drains 0.25 Kameo Meter Each Use''' | |||
A quick high damage launcher, its speed and launch angle allow it to let Point Characters combo off of nearly any move consistently up close on top of allowing repeated uses in combos | |||
It is Janet's main button used in Armour Break and Simultaneous Hit setups, which allows her to rack up veey high amounts of damage very quickly | |||
}} | |||
{{MoveDataCargo | |||
| title = Splits | |||
| subtitle = '''Ambush''' | |||
| input = d+k, ss | |||
| images = | |||
{{MoveDataCargoImage|imageHeight=180px|janet_cage_ss|caption=}} | |||
| hitboxes = | |||
{{MoveDataCargoImage|hitbox=yes|imageHeight=180px|janet_cage_ss|caption=}} | |||
| info = | |||
{{AttackDataCargo-MK1/Query|janet_cage_ss}} | |||
'''- Only During Stunt Double''' | |||
'''- Replenishes 0.5 Kameo Meter Each Used''' | |||
'''- Can Only Be Used Up To 3 Times Per Stunt Double Session''' | |||
Janet temporarily disengages to recharge 0.5 Kameo Meter, this move has very slow recovery so it's imperative for you to find combos long enough for her to use this move one or more times while still letting her extend them | |||
As this move increases Stunt Double time up to around 40 seconds or higher, you should always be looking for openings in which to use it, but this may be harder or easier to do depending on how long your attack animations are | |||
Characters with long animation moves like Ermac, Havik, Kitana, Mileena and Nitara all have the most opportunities to use this move while characters like Omni-Man, Reiko, and Johnny will find it harder to use this move | |||
}} | |||
{{MoveDataCargo | |||
|title = Triple Whammy | |||
|subtitle = '''Forward Throw''' | |||
|input = F1+3 | |||
|images = {{MoveDataCargoImage|imageHeight=180px|janet_cage_f1_3|caption="SMASH TO BLACK"}} | |||
|info = {{AttackDataCargo-MK1/Query|janet_cage_f1_3}} | |||
'''- Only Available When Kameo Is Not On Screen''' | |||
'''- Shove Performed Instead When Kameo Is Unavailable''' | |||
'''- Teched By Pressing 2 Or 4 Within Throw Tech Window''' | |||
Second most damaging Forward Throw in the game alongside Sonya's Forward Throw and behind Jax's EX Forward Throw | |||
Sends opponent Full-Screen On Hit | |||
}} | |||
{{Navbox-MK1}} | |||
[[Category:Mortal Kombat 1]] | |||
[[Category:Janet Cage]] | |||
Latest revision as of 13:25, 5 December 2024
Introduction
"A martial arts superstar trained by great masters from around the world, Cage uses her talents on the big screen. Box-office champ and star of such movies as Dragon Fist and Dragon Fist II as well as the award-winning Sudden Violence." - Mortal Kombat (1992) in an alternate timeline?
Janet Cage, an alternate version of Johnny Cage from another timeline wielding a moveset inspired by his incarnation from the 1992 original, is a rushdown/puppet archetype that specializes in kombo extension, as well as pressure with a slight focus on space control (especially with her “Stunt Double” stance that allows any character to act as a “puppet character”).
| Strengths | Weaknesses |
|---|---|
|
|
Kameo Moves
| Startup | Active | Recovery | Cancel | Damage | Chip | Guard | On Hit | On Block | On Flawless Block | Cost |
|---|---|---|---|---|---|---|---|---|---|---|
| 23 | 10 | 18 | 0 | 60 | 17.5 | M | +34 | -6 | -6 | 0.5 Kameo Meter |
- Has invulnerability when performed as a Getup or Reversal
- Cooldown: 2 Second Delay + 10 Second Recharge Speed = 12 Seconds Total
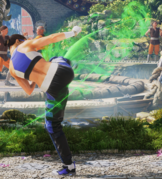
Janet's "Nut Punch" attack, Restands the opponent on an Airborne Hit and is primarily used as a combo ender due to its high Hit Advantage, useful for characters with strong Overhead-Low mixups like Noob Saibot or Havik
Better than most Kameo Reversals because of Janet's low hurtbox on startup, range and its safety On Block, useful against mid ranged attacks like the ones in Ferra's Torr Stance
| Startup | Active | Recovery | Cancel | Damage | Chip | Guard | On Hit | On Block | On Flawless Block | Cost |
|---|---|---|---|---|---|---|---|---|---|---|
| 25 | 45 | 9 | - | - | - | - | - | - | - | 0.5 Kameo Meter, 0.05 Per Second |
- Absorbs Attacks (can take up to 9% damage before retreating)
- Hold Kameo To Extend Duration (Last 10 seconds, drains 0.05 Kameo Meter per second)
- Retreats After 45 Frames (0.75 seconds) Without Holding
- Cooldown: 1 Second Delay + 10 Second Recharge Speed + Held Duration = 11/21 Seconds Total
Janet puts herself between the Point Character and their opponent acting as a temporary wall until she retreats, she can tank either 3 attacks or a single attack that does >9% damage before going away, that or she automatically goes away after 0.75-10 seconds
Because of it being a Summon it can be hard to use in neutral, making it mainly useful for characters that can put the opponent behind Janet to temporarily trap them in a makeshift corner, it can also be used to limit movement in the actual corner as it would not allow the opponent to dash or attack through
Useful with characters like Quan Chi, Geras, Noob Saibot and Cyrax
| Startup | Active | Recovery | Cancel | Damage | Chip | Guard | On Hit | On Block | On Flawless Block | Cost |
|---|---|---|---|---|---|---|---|---|---|---|
| 20 | 12 | - | - | 50 | - | Air | +59/89/119 | - | - | 0.5 Kameo Meter |
- Repeat Input During Startup to Repeat Attack Up To 2 More Times
- Cooldown: 2 Second Delay + 10 Second Recharge Speed = 12 Seconds Total
"Close" version of Janet's only Ambush, extends combos and can be used in setups because of it's long juggle time, Triple version is used to combo off Throws and Synchronized Attacks while the Single and Double versions are used to minimize Janet's time on screen for better repeated use possibilities
To repeatedly do the move you must input Back+Kameo alongside every jump Janet does, only hits Airborne opponents
| Startup | Active | Recovery | Cancel | Damage | Chip | Guard | On Hit | On Block | On Flawless Block | Cost |
|---|---|---|---|---|---|---|---|---|---|---|
| 20 | 35 | - | - | 40 | - | Air | +59/89/119 | - | - | 0.5 Kameo Meter |
- Repeat Input During Startup to Repeat Attack Up To 2 More Times
- Cooldown: 2 Second Delay + 10 Second Recharge Speed = 12 Seconds Total
"Far" version of Janet's only Ambush, extends combos and can be used in setups because of it's long juggle time, Triple version is used to combo off Throws and Synchronized Attacks while the Single and Double versions are used to minimize Janet's time on screen for better repeated use possibilities
To repeatedly do the move you must input Back+Kameo alongside every jump Janet does, only hits Airborne opponents
| Startup | Active | Recovery | Cancel | Damage | Chip | Guard | On Hit | On Block | On Flawless Block | Cost |
|---|---|---|---|---|---|---|---|---|---|---|
| 48 | - | 47 | - | - | - | - | - | - | - | 1 Kameo Meter, 0.05 Per Second |
- Enters Stunt Double Stance
- Drains 0.05 Kameo Meter Per Second
- Gives Janet Access To Stunt Double Attacks
- Press Forward/Back To Reposition Janet
- Hold Block To Let Janet Move Independently From Point Character
- Cooldown: 20 Second Delay + 20 Second Recharge Speed = 40 Seconds Total (Not Taking SD Attacks and Splits Into Account)
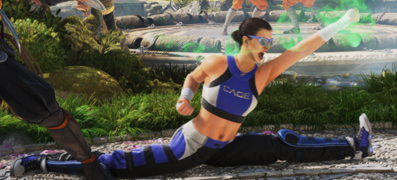
Janet becomes a "Puppet" that the player can independently control as if she was a 2nd character, this gives her access to a plethora of new mixups, combo extensions, extended blockstrings and zoning options
Kameo Meter will continously drain at 5% Meter Per Second (with the added drain from SD Attacks) until it is fully empty, at which point Janet will leave the screen and Kameo Meter will start to refill
You can buffer Janet's attacks during the startup of the activation so that she will inmidiately do them as soon as she recovers (slightly before you do)
The activation has a long recovery time so be creative when finding setup combos to it and maximize your Hit Advantage at the end of them to secure plus frames
| Startup | Active | Recovery | Cancel | Damage | Chip | Guard | On Hit | On Block | On Flawless Block | Cost |
|---|---|---|---|---|---|---|---|---|---|---|
| 11 | 4 | 30 | - | 39 | 25 | H | - | - | - | 0.16 Kameo Meter |
- Only During Stunt Double
- Drains 0.16 Kameo Meter Each Use
- Mash 1 Repeatedly To Spam This Move
"Caged And Konfused" outclasses "Jane Diere" in nearly every single way, only advantatge the latter has over the former is its lower hitbox making it easier to land on Crouch Blocking opponents
So only use it for Extended Blockstrings
| Startup | Active | Recovery | Cancel | Damage | Chip | Guard | On Hit | On Block | On Flawless Block | Cost |
|---|---|---|---|---|---|---|---|---|---|---|
| 12 | 4 | 30 | - | 58.5 | 27.5 | H | - | - | - | 0.16 Kameo Meter |
- Only During Stunt Double
- Drains 0.16 Kameo Meter Each Use
- Mash 2 Repeatedly To Spam This Move
The better alternative to "Jane Diere" as it does higher damage, can Anti-Air and it vacuums opponents on an Airborne Hit
So use it to catch jumpers or to extend Juggles and Grounded Combos
| Startup | Active | Recovery | Cancel | Damage | Chip | Guard | On Hit | On Block | On Flawless Block | Cost |
|---|---|---|---|---|---|---|---|---|---|---|
| 13 | 3 | 70 | - | 50 | 16.25 | M | - | - | - | 0.16 Kameo Meter |
- Only During Stung Double
- Drains 0.16 Kameo Meter Each Use
A long-ranged Mid strike, used to extend Grounded Combos and blockstrings, catch opponents trying to Low Profile out of pressure and just to keep the opponeng in check during neutral
| Startup | Active | Recovery | Cancel | Damage | Chip | Guard | On Hit | On Block | On Flawless Block | Cost |
|---|---|---|---|---|---|---|---|---|---|---|
| 13 | 3 | 44 | - | 70 | 18.75 | H | - | - | - | 0.16 Kameo Meter |
- Only During Stunt Double
- Drains 0.16 Kameo Meter Each Use
A short-ranged vertical strike, able to Anti-Air and extend Juggle Combos, also used sometimes during Armour Break sequences or to guarantee a Combo Reset
The odd hitbox angle makes it hard to use when you're not in the corner or your opponent isn't sandwiched between you and Janet
| Startup | Active | Recovery | Cancel | Damage | Chip | Guard | On Hit | On Block | On Flawless Block | Cost |
|---|---|---|---|---|---|---|---|---|---|---|
| 29 | 7 | 43 | - | 50 | 16.25 | H | - | - | - | 0.33 Kameo Meter |
- Only During Stunt Double
- Drains 0.33 Kameo Meter Each Use
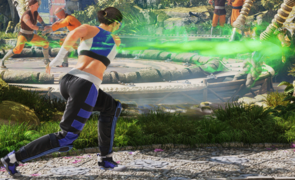
Janet's only projectile move, used a lot in situations where Janet is far away from the Point Character and/or their opponent to zone or keep the Point Character safe, because of its high Hit Advantage it can also turn moves Punisheable On Hit
Because of its high Kameo Meter cost it's recommended to keep Forceballs to a minimum or to use "Splits" right after them
| Startup | Active | Recovery | Cancel | Damage | Chip | Guard | On Hit | On Block | On Flawless Block | Cost |
|---|---|---|---|---|---|---|---|---|---|---|
| 20 | 10 | 50 | - | 60 | 17.5 | H | - | - | - | 0.33 Kameo Meter |
- Only During Stunt Double
- Drains 0.33 Kameo Meter Each Use
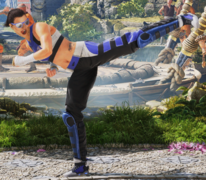
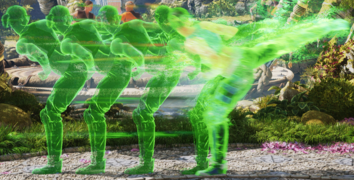
Probably the worst move in Janet's arsenal, a slow advancing High Launcher that only serves as combo fodder
Its slow speed, high cost, mediocre damage and low launch angle makes it worse at nearly every single function compared to other moves, the only advantage it has besides looking cool is that it doesn't scale as badly as the other combo extender moves meaning you can sneak it in the middle or end of combos for extra damage
| Startup | Active | Recovery | Cancel | Damage | Chip | Guard | On Hit | On Block | On Flawless Block | Cost |
|---|---|---|---|---|---|---|---|---|---|---|
| 18 | 5 | 48 | - | 90 | 21.25 | H | - | - | - | 0.25 Kameo Meter |
- Only During Stunt Double
- Drains 0.25 Kameo Meter Each Use
A slow high damage launcher, this move may seem like just a worse version of "Roundhouse" at a first glance but it has some things going for it
The higher launch angle and lower Gravity Scaling make it good to use after high recovery attacks such as Shove or some projectiles, it is also useful for setting up Sandwich situations because of the increased Air Time compared to "Roundhouse" and "Box Office Bomb"
| Startup | Active | Recovery | Cancel | Damage | Chip | Guard | On Hit | On Block | On Flawless Block | Cost |
|---|---|---|---|---|---|---|---|---|---|---|
| 23 | 6 | 31 | - | 70 | 18.75 | L | - | - | - | 0.25 Kameo Meter |
- Only During Stunt Double
- Drains 0.25 Kameo Meter Each Use
Janet's main mixup tool, used to set up Overhead-Low Hard To Block situations where her Sweep and the Point Character's Overhead hit simultanously, depending on the order of the HTB it can also turn most mixups safe/plus due to its high Block Advantage
This move can also turn into a Pseudo-Launcher because the opponent has a long amount of Air Time when hit, letting Point Characters combo after long recovery moves if it's timed well, however it is only recommended to use it this way if there's a mixup attatched
| Startup | Active | Recovery | Cancel | Damage | Chip | Guard | On Hit | On Block | On Flawless Block | Cost |
|---|---|---|---|---|---|---|---|---|---|---|
| 11 | 2 | 47 | - | 90 | 21.25 | H | - | - | - | .25 Kameo Meter |
- Only During Stunt Double
- Drains 0.25 Kameo Meter Each Use
A quick high damage launcher, its speed and launch angle allow it to let Point Characters combo off of nearly any move consistently up close on top of allowing repeated uses in combos
It is Janet's main button used in Armour Break and Simultaneous Hit setups, which allows her to rack up veey high amounts of damage very quickly
| Startup | Active | Recovery | Cancel | Damage | Chip | Guard | On Hit | On Block | On Flawless Block | Cost |
|---|---|---|---|---|---|---|---|---|---|---|
| 0 | 0 | 120 | - | - | - | - | - | - | - | +0.5 Kameo Meter |
- Only During Stunt Double
- Replenishes 0.5 Kameo Meter Each Used
- Can Only Be Used Up To 3 Times Per Stunt Double Session
Janet temporarily disengages to recharge 0.5 Kameo Meter, this move has very slow recovery so it's imperative for you to find combos long enough for her to use this move one or more times while still letting her extend them
As this move increases Stunt Double time up to around 40 seconds or higher, you should always be looking for openings in which to use it, but this may be harder or easier to do depending on how long your attack animations are
Characters with long animation moves like Ermac, Havik, Kitana, Mileena and Nitara all have the most opportunities to use this move while characters like Omni-Man, Reiko, and Johnny will find it harder to use this move
| Startup | Active | Recovery | Cancel | Damage | Chip | Guard | On Hit | On Block | On Flawless Block | Cost |
|---|---|---|---|---|---|---|---|---|---|---|
| 10 | 2 | 33 | - | 140.00 | 10.00 | T, H | +15 | N/A | - | - |
- Only Available When Kameo Is Not On Screen
- Shove Performed Instead When Kameo Is Unavailable
- Teched By Pressing 2 Or 4 Within Throw Tech Window
Second most damaging Forward Throw in the game alongside Sonya's Forward Throw and behind Jax's EX Forward Throw
Sends opponent Full-Screen On Hit

