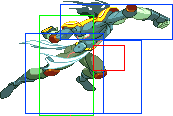
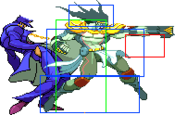
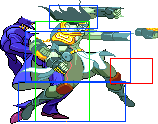
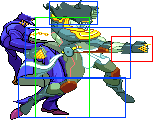
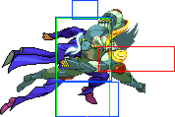
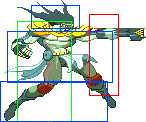
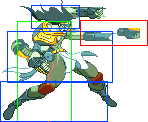
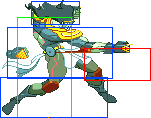
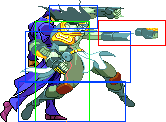
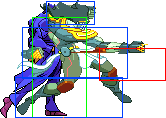
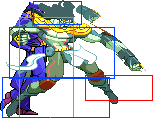
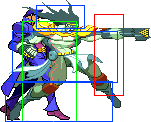
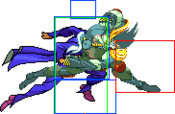
Normals
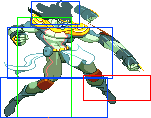
Stand Off
Startup | Active | Recovery | Base Damage | Stand Damage | Guard | Hit Adv. | Block Adv. | Pushblock Adv. | ||||||||||||
---|---|---|---|---|---|---|---|---|---|---|---|---|---|---|---|---|---|---|---|---|
3 | 3 | 3 | 4 | 3 | Mid | +6 | +5 | +2 | ||||||||||||
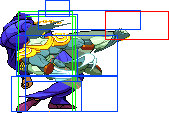
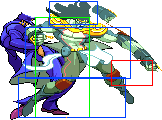
Fast, safe jab. Primarily used in combos and as a close-range poke. Because it doesn't hit as high as other characters' jabs, trying to use it as an emergency anti-air can be awkward, but possible. Really good move, but you have better options.
|
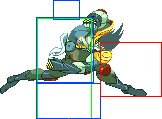
Startup | Active | Recovery | Base Damage | Stand Damage | Guard | Hit Adv. | Block Adv. | Pushblock Adv. | ||||||||||||
---|---|---|---|---|---|---|---|---|---|---|---|---|---|---|---|---|---|---|---|---|
7 | 5 | 17 | 7, 4 | 8×2 | Mid | -3 | -4 | -4 | ||||||||||||
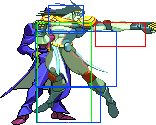
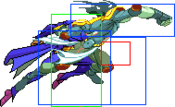
Despite not being very useful as a poke, this move is surprisingly good as an anti-air for jump-ins that are further away. Hits twice. Can combo into 236X.
|
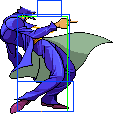
Startup | Active | Recovery | Base Damage | Stand Damage | Guard | Hit Adv. | Block Adv. | Pushblock Adv. | ||||||||||||
---|---|---|---|---|---|---|---|---|---|---|---|---|---|---|---|---|---|---|---|---|
7 | 2 | 20 | 12 | 20 | Low | Knockdown | -5 | -17 | ||||||||||||
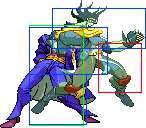
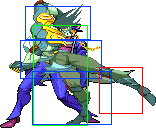
Sweep with respectable range. Has a lot of recovery and enlarges your hurtbox, so it's quite dangerous to whiff.
|
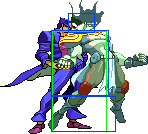
Startup | Active | Recovery | Base Damage | Stand Damage | Guard | Hit Adv. | Block Adv. | Pushblock Adv. | ||||||||||||
---|---|---|---|---|---|---|---|---|---|---|---|---|---|---|---|---|---|---|---|---|
6 | 6 | - | - | - | High | +12 | +11 | +8 | ||||||||||||
|
Stand On
Startup | Active | Recovery | Base Damage | Stand Damage | Guard | Hit Adv. | Block Adv. | Pushblock Adv. | ||||||||||||
---|---|---|---|---|---|---|---|---|---|---|---|---|---|---|---|---|---|---|---|---|
2 | 2 | 2 | - | - | Mid | +1 | +0 | -3 | ||||||||||||
|
Startup | Active | Recovery | Base Damage | Stand Damage | Guard | Hit Adv. | Block Adv. | Pushblock Adv. | ||||||||||||
---|---|---|---|---|---|---|---|---|---|---|---|---|---|---|---|---|---|---|---|---|
25 | 2 | 11 | - | - | High | -8 | -10 | -15 | ||||||||||||
|
Startup | Active | Recovery | Base Damage | Stand Damage | Guard | Hit Adv. | Block Adv. | Pushblock Adv. | ||||||||||||
---|---|---|---|---|---|---|---|---|---|---|---|---|---|---|---|---|---|---|---|---|
2 | 2 | Until you land | - | - | High | +12 | +11 | +8 | ||||||||||||
|
Startup | Active | Recovery | Base Damage | Stand Damage | Guard | Hit Adv. | Block Adv. | Pushblock Adv. | ||||||||||||
---|---|---|---|---|---|---|---|---|---|---|---|---|---|---|---|---|---|---|---|---|
5 | 4 | Until you land | - | - | High | +12 | +11 | +8 | ||||||||||||
|
Specials
Stand Off
214A | Startup | Active | Recovery | Base Damage | Stand Damage | Guard | Hit Adv. | Block Adv. | Pushblock Adv. | ||||||||||||
---|---|---|---|---|---|---|---|---|---|---|---|---|---|---|---|---|---|---|---|---|---|
14-18 | 2 | 15 Total [0] | 10 | - | Mid | +30-34 | +18-22 | +17-21 | |||||||||||||
214B | Startup | Active | Recovery | Base Damage | Stand Damage | Guard | Hit Adv. | Block Adv. | Pushblock Adv. | ||||||||||||
14-18 | 2 | 15 Total [0] | 10 | - | Mid | +30-34 | +18-22 | +17-21 | |||||||||||||
214C | Startup | Active | Recovery | Base Damage | Stand Damage | Guard | Hit Adv. | Block Adv. | Pushblock Adv. | ||||||||||||
14-18 | 2 | 15 Total [0] | 10 | - | Mid | +30-34 | +18-22 | +17-21 | |||||||||||||
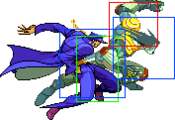
Star Platinum rushes forward before delivering a punch. A very useful special both in combos and pressure, as well as a rare neutral tool when used as a makeshift fireball. 214B will be the version you'll use the most and is the basis of your Stand OFF combos.
|
Startup | Active | Recovery | Base Damage | Stand Damage | Guard | Hit Adv. | Block Adv. | Pushblock Adv. | ||||||||||||
---|---|---|---|---|---|---|---|---|---|---|---|---|---|---|---|---|---|---|---|---|
28 (Can be held) | 3 | 45 | - | - | Mid | +41 | +43 | +18 | ||||||||||||
|
Stand On
Startup | Active | Recovery | Base Damage | Stand Damage | Guard | Hit Adv. | Block Adv. | Pushblock Adv. | ||||||||||||
---|---|---|---|---|---|---|---|---|---|---|---|---|---|---|---|---|---|---|---|---|
A=7 B=9 C=11 |
A=11 B=11 C=11 |
A=18 B=18 C=17 |
- | - | Mid | A=Launch B=Launch C=Launch |
A=-7 B=-2 C=-2 |
A=-13 B=-13 C=-13 | ||||||||||||
|
Startup | Active | Recovery | Base Damage | Stand Damage | Guard | Hit Adv. | Block Adv. | Pushblock Adv. | ||||||||||||
---|---|---|---|---|---|---|---|---|---|---|---|---|---|---|---|---|---|---|---|---|
A=11 B=15 C=23 |
A=3 B=3 C=3 |
A=6 B=5 C=5 |
- | - | Mid | A=-1 B=-1 C=-1 |
A=-5 B=-5 C=-5 |
A=-14 B=-14 C=-14 | ||||||||||||
|
Startup | Active | Recovery | Base Damage | Stand Damage | Guard | Hit Adv. | Block Adv. | Pushblock Adv. | ||||||||||||
---|---|---|---|---|---|---|---|---|---|---|---|---|---|---|---|---|---|---|---|---|
18 (Can be held) |
11 | 28 | - | - | Mid | +3 | +2 | -23 | ||||||||||||
|
Guard Cancel
Stand Off
Startup | Active | Recovery | Base Damage | Stand Damage | Guard | Hit Adv. | Block Adv. | Pushblock Adv. | ||||||||||||
---|---|---|---|---|---|---|---|---|---|---|---|---|---|---|---|---|---|---|---|---|
9 | 2 | 64 | - | - | Mid | Launch | +18 | -45 | ||||||||||||
|
Stand On
Startup | Active | Recovery | Base Damage | Stand Damage | Guard | Hit Adv. | Block Adv. | Pushblock Adv. | ||||||||||||
---|---|---|---|---|---|---|---|---|---|---|---|---|---|---|---|---|---|---|---|---|
10 | 3 | 28 | - | - | Mid | Launch | -7 | -13 | ||||||||||||
|
Supers
Stand Off
Startup | Active | Recovery | Base Damage | Stand Damage | Guard | Hit Adv. | Block Adv. | Pushblock Adv. | ||||||||||||
---|---|---|---|---|---|---|---|---|---|---|---|---|---|---|---|---|---|---|---|---|
28 | 94 | 60 | - | - | Mid | +185 | +159 | +154 | ||||||||||||
|
Startup | Active | Recovery | Base Damage | Stand Damage | Guard | Hit Adv. | Block Adv. | Pushblock Adv. | ||||||||||||
---|---|---|---|---|---|---|---|---|---|---|---|---|---|---|---|---|---|---|---|---|
14 | 3 | 39 | - | - | Mid | Launch | +25 | +14 | ||||||||||||
|
Startup | Active | Recovery | Base Damage | Stand Damage | Guard | Hit Adv. | Block Adv. | Pushblock Adv. | ||||||||||||
---|---|---|---|---|---|---|---|---|---|---|---|---|---|---|---|---|---|---|---|---|
- | - | - | - | - | - | - | - | - | ||||||||||||
|
Startup | Active | Recovery | Base Damage | Stand Damage | Guard | Hit Adv. | Block Adv. | Pushblock Adv. | ||||||||||||
---|---|---|---|---|---|---|---|---|---|---|---|---|---|---|---|---|---|---|---|---|
73 s.Off 78 s.On |
53 extra frames per full bar of meter | 152 | - | - | - | Wallbounce (if hit) / 0 (if not hit) | - | - | ||||||||||||
|
Stand On
Startup | Active | Recovery | Base Damage | Stand Damage | Guard | Hit Adv. | Block Adv. | Pushblock Adv. | ||||||||||||
---|---|---|---|---|---|---|---|---|---|---|---|---|---|---|---|---|---|---|---|---|
14 | 61 | 15 | - | - | Mid | Launch | -1 | -1 | ||||||||||||
|
Startup | Active | Recovery | Base Damage | Stand Damage | Guard | Hit Adv. | Block Adv. | Pushblock Adv. | ||||||||||||
---|---|---|---|---|---|---|---|---|---|---|---|---|---|---|---|---|---|---|---|---|
1 | 60 | 13 (not counting height) | - | - | Mid | -7 | -10 | -4 | ||||||||||||
|
Startup | Active | Recovery | Base Damage | Stand Damage | Guard | Hit Adv. | Block Adv. | Pushblock Adv. | ||||||||||||
---|---|---|---|---|---|---|---|---|---|---|---|---|---|---|---|---|---|---|---|---|
7 | 11 | 18 | - | - | Mid | Launch | -3 | -20 | ||||||||||||
|