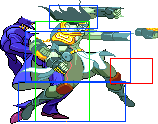
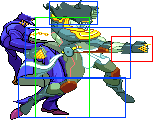
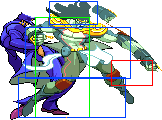
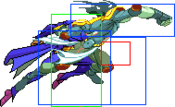
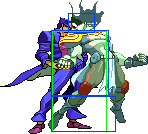
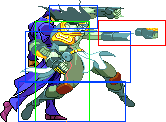
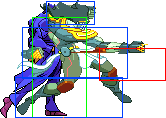
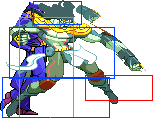
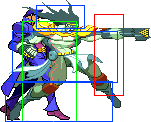
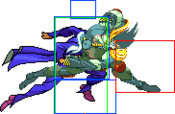
No edit summary |
No edit summary |
||
| Line 240: | Line 240: | ||
|pushblock=-45 | |pushblock=-45 | ||
|guard=Mid | |guard=Mid | ||
|damage= | |damage=8 | ||
|damage=16 | |||
|cancel=None | |cancel=None | ||
|properties=IPS=No Scales=No <br>Air-UB | |properties=IPS=No Scales=No <br>Air-UB | ||
| Line 247: | Line 248: | ||
*Star Platinum becomes usable 60 frames after recovering. | *Star Platinum becomes usable 60 frames after recovering. | ||
|invuln=1-9 Full | |invuln=1-9 Full | ||
|ips=No | |||
|scaling=No | |||
|meterwhiff=0 | |||
|meterhit=8 | |||
}} | }} | ||
}} | }} | ||
| Line 293: | Line 298: | ||
}} | }} | ||
}} | }} | ||
<br> | |||
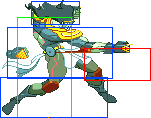
{{MoveData | |||
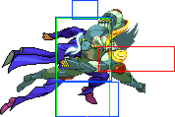
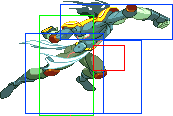
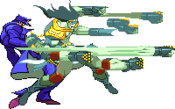
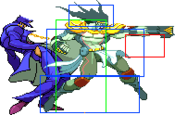
|image=Jotaro214abc.png|frameless | |||
|name=Guard Cancel | |||
|input=623X while blocking | |||
|data= | |||
{{AttackData-HFTF | |||
|startup=13 | |||
|active=3 | |||
|recovery=23 | |||
|hit=Launch | |||
|block=-10 | |||
|pushblock=-16 | |||
|guard=Mid | |||
|damage=8 | |||
|standdamage=16 | |||
|cancel=None | |||
|properties=IPS=No Scales=No <br>Air-UB | |||
|description= Very similar to the Stand OFF Guard Cancel, but Jotaro moves together with Star Platinum. Slightly more consistent than the former for this reason. | |||
|invuln=1-9 Full | |||
|ips=No | |||
|scaling=No | |||
|meterwhiff=0 | |||
|meterhit=8 | |||
}} | |||
}} | |||
==Specials== | ==Specials== | ||
===Stand OFF=== | ===Stand OFF=== | ||
Revision as of 16:03, 16 January 2025
Normals
Stand OFF
| Startup | Active | Recovery | Base Damage | Stand Damage | Guard | Hit Adv. | Block Adv. | Pushblock Adv. | ||||||||||||
|---|---|---|---|---|---|---|---|---|---|---|---|---|---|---|---|---|---|---|---|---|
| 3 | 3 | 3 | 4 | 3 | Mid | +6 | +5 | +2 | ||||||||||||
|
Fast, safe jab. Primarily used in combos and as a close-range poke. Because it doesn't hit as high as other characters' jabs, trying to use it as an emergency anti-air can be awkward, but possible. Really good move, but you have better options.
| ||||||||||||||||||||
| Startup | Active | Recovery | Base Damage | Stand Damage | Guard | Hit Adv. | Block Adv. | Pushblock Adv. | ||||||||||||
|---|---|---|---|---|---|---|---|---|---|---|---|---|---|---|---|---|---|---|---|---|
| 7 | 5 | 17 | 7, 4 | 8×2 | Mid | -3 | -4 | -4 | ||||||||||||
|
Despite not being very useful as a poke, this move is surprisingly good as an anti-air for jump-ins that are further away. Hits twice. Can combo into 236X.
| ||||||||||||||||||||
| Startup | Active | Recovery | Base Damage | Stand Damage | Guard | Hit Adv. | Block Adv. | Pushblock Adv. | ||||||||||||
|---|---|---|---|---|---|---|---|---|---|---|---|---|---|---|---|---|---|---|---|---|
| 7 | 2 | 20 | 12 | 20 | Low | Knockdown | -5 | -17 | ||||||||||||
|
Sweep with respectable range. Has a lot of recovery and enlarges your hurtbox, so it's quite dangerous to whiff.
| ||||||||||||||||||||
| Startup | Active | Recovery | Base Damage | Stand Damage | Guard | Hit Adv. | Block Adv. | Pushblock Adv. | ||||||||||||
|---|---|---|---|---|---|---|---|---|---|---|---|---|---|---|---|---|---|---|---|---|
| 6 | 6 | Until Landing | 9 | 5 | High | +12 | +11 | +8 | ||||||||||||
|
Jotaro's main jumpin button in Stand OFF, and a great one at that. Despite not looking very threatening this move can be surprisingly tricky to antiair, especially on shallow jumps. Occasionally crosses up some wider characters.
| ||||||||||||||||||||
Stand On
| Startup | Active | Recovery | Base Damage | Stand Damage | Guard | Hit Adv. | Block Adv. | Pushblock Adv. | ||||||||||||
|---|---|---|---|---|---|---|---|---|---|---|---|---|---|---|---|---|---|---|---|---|
| 2 | 2 | 12 | 5 | 4 | Mid | +1 | +0 | -3 | ||||||||||||
|
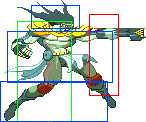
Contender for one of the best normals in the game. Extremely fast, strong hitbox in spite of being susceptible to low profile, and the reward on hit can range from a knockdown into 50/50 to near ToD combos. The lightning-fast startup lends itself to great uses both in offense and defense. Truly a jab befitting Star Platinum.
| ||||||||||||||||||||
| Startup | Active | Recovery | Base Damage | Stand Damage | Guard | Hit Adv. | Block Adv. | Pushblock Adv. | ||||||||||||
|---|---|---|---|---|---|---|---|---|---|---|---|---|---|---|---|---|---|---|---|---|
| 25 | 2 | 11 | 6 | 12 | High | -8 | -10 | -15 | ||||||||||||
|
Not useful. Slow to come out and quite disadvantageous even on hit so it's likely to get punished unless it kills. If an overhead is desperately needed, just use an IOH s.j.A instead since it's much faster.
| ||||||||||||||||||||
| Startup | Active | Recovery | Base Damage | Stand Damage | Guard | Hit Adv. | Block Adv. | Pushblock Adv. | ||||||||||||
|---|---|---|---|---|---|---|---|---|---|---|---|---|---|---|---|---|---|---|---|---|
| 2 | 2 | Until Landing | 6 | 12 | High | +12 | +11 | +8 | ||||||||||||
|
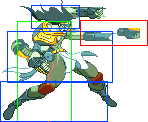
Excellent all-around air button. Extremely fast and hits from surprisingly far away, so it's great in nearly any aerial interaction except techchasing, where s.j.C is better. The angle of the punch makes it a very effective IOH, though the reward isn't great.
| ||||||||||||||||||||
Universal Mechanics
Stand OFF
| Startup | Active | Recovery | Base Damage | Stand Damage | Guard | Hit Adv. | Block Adv. | Pushblock Adv. | ||||||||||||
|---|---|---|---|---|---|---|---|---|---|---|---|---|---|---|---|---|---|---|---|---|
| 1 | 1 | Total 49 | 16 | - | Throw | Launch | - | - | ||||||||||||
|
Standard throw. Doesn't do anything exceptional, but it doesn't need to.
| ||||||||||||||||||||
| Startup | Active | Recovery | Base Damage | Stand Damage | Guard | Hit Adv. | Block Adv. | Pushblock Adv. | ||||||||||||
|---|---|---|---|---|---|---|---|---|---|---|---|---|---|---|---|---|---|---|---|---|
| 6 | 2 | 25 [11] | 12 | 24 | Mid | -11 [+4] | -12 [+2] | -19 [-5] | ||||||||||||
|
Excellent conversion tool that lets you transition nearly and Stand OFF normal into a combo. Uniquely, can be cancelled into s.214X as part of your BnB, but not very remarkable otherwise.
| ||||||||||||||||||||
| Startup | Active | Recovery | Base Damage | Stand Damage | Guard | Hit Adv. | Block Adv. | Pushblock Adv. | ||||||||||||
|---|---|---|---|---|---|---|---|---|---|---|---|---|---|---|---|---|---|---|---|---|
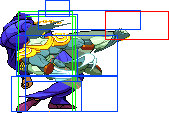
| 9-14 | 3 | Total 15 [0] | 16 | - | Mid | Launch | +18 | -45 | ||||||||||||
|
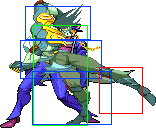
A solid guard cancel that can get you out of tight spots in a pinch. Not particularly noteworthy, but exercise caution when using it as having it baited will result in Star Finger.
| ||||||||||||||||||||
| Startup | Active | Recovery | Base Damage | Stand Damage | Guard | Hit Adv. | Block Adv. | Pushblock Adv. | ||||||||||||
|---|---|---|---|---|---|---|---|---|---|---|---|---|---|---|---|---|---|---|---|---|
| 1 | - | Total 36 | - | - | - | - | - | - | ||||||||||||
|
An exceptional roll and a big part of what makes fighting Jotaro so frustrating. The roll itself is average in terms of speed, but it's possible to extend the iframes by up to 11 frames by standing still after the roll is finished. This stand-still period can be interrupted at any time with any action other than standing, which allows Jotaro to bait out punish attempts. Just don't get grabbed.
| ||||||||||||||||||||
Stand ON
| Startup | Active | Recovery | Base Damage | Stand Damage | Guard | Hit Adv. | Block Adv. | Pushblock Adv. | ||||||||||||
|---|---|---|---|---|---|---|---|---|---|---|---|---|---|---|---|---|---|---|---|---|
| 1 | 1 | Total 49 | 16 | - | Throw | Launch | - | - | ||||||||||||
|
Identical to the Stand OFF version.
| ||||||||||||||||||||
| Startup | Active | Recovery | Base Damage | Stand Damage | Guard | Hit Adv. | Block Adv. | Pushblock Adv. | ||||||||||||
|---|---|---|---|---|---|---|---|---|---|---|---|---|---|---|---|---|---|---|---|---|
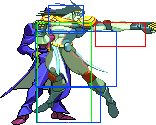
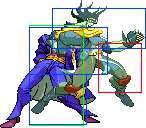
| 13 | 3 | 23 | 8 | 16 | Mid | Launch | -10 | -16 | ||||||||||||
|
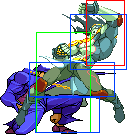
Very similar to the Stand OFF Guard Cancel, but Jotaro moves together with Star Platinum. Slightly more consistent than the former for this reason.
| ||||||||||||||||||||
Specials
Stand OFF
| 214A | Startup | Active | Recovery | Base Damage | Stand Damage | Guard | Hit Adv. | Block Adv. | Pushblock Adv. | ||||||||||||
|---|---|---|---|---|---|---|---|---|---|---|---|---|---|---|---|---|---|---|---|---|---|
| 14-18 | 2 | 15 Total [0] | 10 | 20 | Mid | +30-35 | +17-22 | +17-21 | |||||||||||||
| 214B | |||||||||||||||||||||
| 14-20 | 2 | 15 Total [0] | 10 | 20 | Mid | +30-41 | +17-24 | +17-24 | |||||||||||||
| 214C | |||||||||||||||||||||
| 18-26 | 2 | 15 Total [0] | 10 | 20 | Mid | +30-47 | +21-30 | +17-21 | |||||||||||||
|
Star Platinum rushes forward before delivering a punch. A very useful special both in combos and pressure, as well as a rare neutral tool when used as a makeshift fireball. 214B will be the version you'll use the most and is the basis of your Stand OFF combos.
| |||||||||||||||||||||
| Startup | Active | Recovery | Base Damage | Stand Damage | Guard | Hit Adv. | Block Adv. | Pushblock Adv. | ||||||||||||
|---|---|---|---|---|---|---|---|---|---|---|---|---|---|---|---|---|---|---|---|---|
| 21+7 | 3 | 15 Total [28] | 11 | 22 | Mid | - | - | - | ||||||||||||
|
Star Platinum pulls back its arm to charge an attack. Holding the button delays the attack while Jotaro is free to act, making this a powerful setup tool. Most combos that end in knockdowns will be followed up with setting up this move so Jotaro can meaty the opponent with either a 6B for a low or a rising j.C for an IOH before releasing Star Finger to convert into another combo into a knockdown. While this move isn't limited to oki, using it in neutral or pressure situations is quite risky as Jotaro can't block while his Stand is out.
| ||||||||||||||||||||
Stand On
| s.236A | Startup | Active | Recovery | Base Damage | Stand Damage | Guard | Hit Adv. | Block Adv. | Pushblock Adv. | ||||||||||||
|---|---|---|---|---|---|---|---|---|---|---|---|---|---|---|---|---|---|---|---|---|---|
| 7 | 11-62 | 19 | 12, 3×N, 3 | 24, 6xN, 6 | Mid | Launch (last hit) | -2* | -12* | |||||||||||||
| s.236B | |||||||||||||||||||||
| 9 | 11-62 | 19 | 12, 3×N, 3 | 24, 6xN, 6 | Mid | Launch (last hit) | -2* | -12* | |||||||||||||
| s.236C | |||||||||||||||||||||
| 11 | 11-62 | 19 | 12, 3×N, 3 | 24, 6xN, 6 | Mid | Launch (last hit) | -2* | -12* | |||||||||||||
|
Star Platinum unleashes a barrage of punches similar to the Stand OFF version, but Jotaro moves together with Star Platinum. This move is a big reason why Jotaro is so good at breaking Stands due to this move being very easy to combo into and dealing very high Stand damage. Cancels into your s.214X Rekka, which forms the basis of your BnB.
| |||||||||||||||||||||
| s.214A | Startup | Active | Recovery | Base Damage | Stand Damage | Guard | Hit Adv. | Block Adv. | Pushblock Adv. | ||||||||||||
|---|---|---|---|---|---|---|---|---|---|---|---|---|---|---|---|---|---|---|---|---|---|
| 9-11 | 3 | 19 | 16 | 32 | Mid | -2 | -6 | -17 | |||||||||||||
| s.214B | |||||||||||||||||||||
| 11-15 | 3 | 19 | 16 | 32 | Mid | -2 | -6 | -17 | |||||||||||||
| s.214C | |||||||||||||||||||||
| 18-23 | 3 | 19 | 16 | 32 | Mid | -2 | -6 | -17 | |||||||||||||
|
Jotaro follows Star Platinum as it delivers a rushing punch. Jotaro's most common combo ender, as its followups can either knock down for oki or launch for a techchase, both of which he excels at. Dangerous to throw out on block because it's very punishable if pushblocked, but the ludicrous Stand Damage can make this an enticing option regardless: breaking the opponent's Stand with this move can open up extremely damaging extensions.
| |||||||||||||||||||||
| Startup | Active | Recovery | Base Damage | Stand Damage | Guard | Hit Adv. | Block Adv. | Pushblock Adv. | ||||||||||||
|---|---|---|---|---|---|---|---|---|---|---|---|---|---|---|---|---|---|---|---|---|
| 11-13 | 5 | 25 | 6 | 0 | Low | Knockdown | -13 | -32 | ||||||||||||
|
Low kick that knocks down. Recovers fast enough to turn off your Stand and set up Star Finger, making this your ideal combo ender against most characters. Make sure to confirm your hit before canceling into this, as it's extremely punishable on pushblock.
| ||||||||||||||||||||
| Startup | Active | Recovery | Base Damage | Stand Damage | Guard | Hit Adv. | Block Adv. | Pushblock Adv. | ||||||||||||
|---|---|---|---|---|---|---|---|---|---|---|---|---|---|---|---|---|---|---|---|---|
| 11-15 | 6 | 22 | 6 | 20 | Mid | Unscaled Launch | -10 | -23 | ||||||||||||
|
Uppercut followup that looks similar to s.2C. Launches opponents up to set up Jotaro's powerful techchasing. Preferred over the A Ender if the opponent's Stand is ON or if a techchase would be better than knockdown, such as against characters like
| ||||||||||||||||||||
| Startup | Active | Recovery | Base Damage | Stand Damage | Guard | Hit Adv. | Block Adv. | Pushblock Adv. | ||||||||||||
|---|---|---|---|---|---|---|---|---|---|---|---|---|---|---|---|---|---|---|---|---|
| 7-14 | 3 | 32 | 6 | 0 | Mid | OFFscreen Launch | -35 | -54 | ||||||||||||
|
Probably the least useful ender. It's very fast, but doesn't deal very much damage and doesn't put Jotaro in any significant advantage after. Forcefully disables the opponent's Stand, but Jotaro's Stand damage is already so high that by the time you combo into this move they've probably already been Stand Crashed. This move can reach near-fullscreen very quickly, but the potential uses for this are dubious at best.
| ||||||||||||||||||||
Guard Cancel
Stand OFF
| Startup | Active | Recovery | Base Damage | Stand Damage | Guard | Hit Adv. | Block Adv. | Pushblock Adv. | ||||||||||||
|---|---|---|---|---|---|---|---|---|---|---|---|---|---|---|---|---|---|---|---|---|
| 9 | 2 | 64 | - | - | Mid | Launch | +18 | -45 | ||||||||||||
| ||||||||||||||||||||
Stand On
| Startup | Active | Recovery | Base Damage | Stand Damage | Guard | Hit Adv. | Block Adv. | Pushblock Adv. | ||||||||||||
|---|---|---|---|---|---|---|---|---|---|---|---|---|---|---|---|---|---|---|---|---|
| 10 | 3 | 28 | - | - | Mid | Launch | -7 | -13 | ||||||||||||
| ||||||||||||||||||||
Supers
Stand OFF
| Startup | Active | Recovery | Base Damage | Stand Damage | Guard | Hit Adv. | Block Adv. | Pushblock Adv. | ||||||||||||
|---|---|---|---|---|---|---|---|---|---|---|---|---|---|---|---|---|---|---|---|---|
| 28 | 94 | 60 | - | - | Mid | +185 | +159 | +154 | ||||||||||||
| ||||||||||||||||||||
| Startup | Active | Recovery | Base Damage | Stand Damage | Guard | Hit Adv. | Block Adv. | Pushblock Adv. | ||||||||||||
|---|---|---|---|---|---|---|---|---|---|---|---|---|---|---|---|---|---|---|---|---|
| 14 | 3 | 39 | - | - | Mid | Launch | +25 | +14 | ||||||||||||
| ||||||||||||||||||||
| Startup | Active | Recovery | Base Damage | Stand Damage | Guard | Hit Adv. | Block Adv. | Pushblock Adv. | ||||||||||||
|---|---|---|---|---|---|---|---|---|---|---|---|---|---|---|---|---|---|---|---|---|
| - | - | - | - | - | - | - | - | - | ||||||||||||
| ||||||||||||||||||||
| Startup | Active | Recovery | Base Damage | Stand Damage | Guard | Hit Adv. | Block Adv. | Pushblock Adv. | ||||||||||||
|---|---|---|---|---|---|---|---|---|---|---|---|---|---|---|---|---|---|---|---|---|
| 73 s.OFF 78 s.On |
53 extra frames per full bar of meter | 152 | - | - | - | Wallbounce (if hit) / 0 (if not hit) | - | - | ||||||||||||
| ||||||||||||||||||||
Stand On
| Startup | Active | Recovery | Base Damage | Stand Damage | Guard | Hit Adv. | Block Adv. | Pushblock Adv. | ||||||||||||
|---|---|---|---|---|---|---|---|---|---|---|---|---|---|---|---|---|---|---|---|---|
| 14 | 61 | 15 | - | - | Mid | Launch | -1 | -1 | ||||||||||||
| ||||||||||||||||||||
| Startup | Active | Recovery | Base Damage | Stand Damage | Guard | Hit Adv. | Block Adv. | Pushblock Adv. | ||||||||||||
|---|---|---|---|---|---|---|---|---|---|---|---|---|---|---|---|---|---|---|---|---|
| 1 | 60 | 13 (not counting height) | - | - | Mid | -7 | -10 | -4 | ||||||||||||
| ||||||||||||||||||||
| Startup | Active | Recovery | Base Damage | Stand Damage | Guard | Hit Adv. | Block Adv. | Pushblock Adv. | ||||||||||||
|---|---|---|---|---|---|---|---|---|---|---|---|---|---|---|---|---|---|---|---|---|
| 7 | 11 | 18 | - | - | Mid | Launch | -3 | -20 | ||||||||||||
| ||||||||||||||||||||

