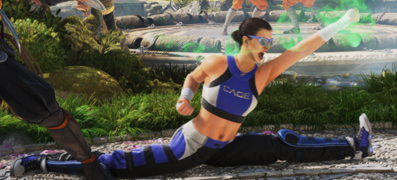
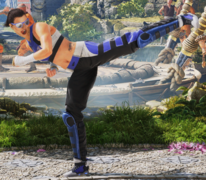
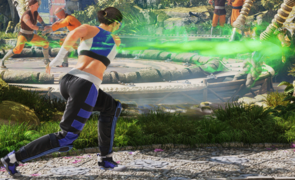
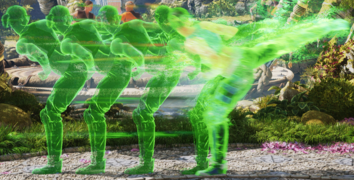
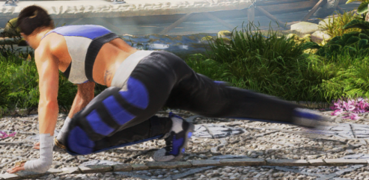
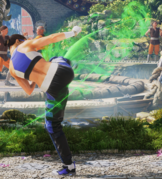
(Added move description for "Krotch Destroyer", gonna add more descriptions later or tomorrow) |
(Added move descriptions for "Mime Time", "Hop Punch" and "Hop Skip Punch") |
||
| Line 30: | Line 30: | ||
| info = | | info = | ||
{{AttackDataCargo-MK1/Query|janet_cage_uk}} | {{AttackDataCargo-MK1/Query|janet_cage_uk}} | ||
'''- Absorbs Attacks (can take up to 9% damage before retreating)''' | |||
'''- Hold Kameo To Extend Duration (Last 10 seconds, drains 0.05 Kameo Meter per second)''' | |||
'''- Retreats After 45 Frames (0.75 seconds) Without Holding''' | |||
Janet puts herself between the Point Character and their opponent acting as a temporary wall until she retreats, she can tank either 3 attacks or a single attack that does >9% damage before going away, that or she automatically goes away after 0.75-10 seconds | |||
Because of it being a Summon it can be hard to use in neutral, making it mainly useful for characters that can put the opponent behind Janet to temporarily trap them in a makeshift corner, it can also be used to limit movement in the actual corner as it would not allow the opponent to dash or attack through | |||
Useful with characters like Quan Chi, Geras, Noob Saibot and Cyrax | |||
}} | }} | ||
| Line 35: | Line 46: | ||
| title = Hop Punch | | title = Hop Punch | ||
| subtitle = '''Ambush''' | | subtitle = '''Ambush''' | ||
| input = | | input = b+k, b+k, b+k | ||
| images = | | images = | ||
{{MoveDataCargoImage|imageHeight=180px|janet_cage_fk|caption=}} | {{MoveDataCargoImage|imageHeight=180px|janet_cage_fk|caption=}} | ||
| Line 42: | Line 53: | ||
| info = | | info = | ||
{{AttackDataCargo-MK1/Query|janet_cage_fk}} | {{AttackDataCargo-MK1/Query|janet_cage_fk}} | ||
'''- Repeat Input During Startup to Repeat Attack Up To 2 More Times''' | |||
"Close" version of Janet's only Ambush, extends combos and can be used in setups because of it's long juggle time, Triple version is used to combo off Throws and Synchronized Attacks while the Single and Double versions are used to minimize Janet's time on screen for better repeated use possibilities | |||
To repeatedly do the move you must input Back+Kameo alongside every jump Janet does, only hits Airborne opponents | |||
}} | }} | ||
| Line 47: | Line 63: | ||
| title = Hop Skip Punch | | title = Hop Skip Punch | ||
| subtitle = '''Ambush''' | | subtitle = '''Ambush''' | ||
| input = f+k, f+k, f | | input = f+k, f+k, f+k | ||
| images = | | images = | ||
{{MoveDataCargoImage|imageHeight=180px|janet_cage_fkk|caption=}} | {{MoveDataCargoImage|imageHeight=180px|janet_cage_fkk|caption=}} | ||
| Line 54: | Line 70: | ||
| info = | | info = | ||
{{AttackDataCargo-MK1/Query|janet_cage_fkk}} | {{AttackDataCargo-MK1/Query|janet_cage_fkk}} | ||
'''- Repeat Input During Startup to Repeat Attack Up To 2 More Times''' | |||
"Far" version of Janet's only Ambush, extends combos and can be used in setups because of it's long juggle time, Triple version is used to combo off Throws and Synchronized Attacks while the Single and Double versions are used to minimize Janet's time on screen for better repeated use possibilities | |||
To repeatedly do the move you must input Back+Kameo alongside every jump Janet does, only hits Airborne opponents | |||
}} | }} | ||
Revision as of 23:14, 30 November 2024
Introduction
"A martial arts superstar trained by great masters from around the world, Cage uses her talents on the big screen. Box-office champ and star of such movies as Dragon Fist and Dragon Fist II as well as the award-winning Sudden Violence." - Mortal Kombat (1992) in an alternate timeline?
Janet Cage, an alternate version of Johnny Cage from another timeline wielding a moveset inspired by his incarnation from the 1992 original, is a rushdown/puppet archetype that specializes in kombo extension, as well as pressure with a slight focus on space control (especially with her “Stunt Double” stance that allows any character to act as a “puppet character”).
| Strengths | Weaknesses |
|---|---|
|
|
Kameo Moves
| Startup | Active | Recovery | Cancel | Damage | Chip | Guard | On Hit | On Block | On Flawless Block | Cost |
|---|---|---|---|---|---|---|---|---|---|---|
| 23 | 10 | 18 | 0 | 60 | 17.5 | M | +34 | -6 | -6 | 0.5 Kameo Meter |
- Has invulnerability when performed as a Getup or Reversal
Janet's "Nut Punch" attack, Restands the opponent on an Airborne Hit and is primarily used as a combo ender due to its high Hit Advantage, useful for characters with strong Overhead-Low mixups like Noob Saibot or Havik
Better than most Kameo Reversals because of Janet's low hurtbox on startup, range and its safety On Block, useful against mid ranged attacks like the ones in Ferra's Torr Stance
| Startup | Active | Recovery | Cancel | Damage | Chip | Guard | On Hit | On Block | On Flawless Block | Cost |
|---|---|---|---|---|---|---|---|---|---|---|
| 25 | 45 | 9 | - | - | - | - | - | - | - | 0.5 Kameo Meter, 0.05 Per Second |
- Absorbs Attacks (can take up to 9% damage before retreating)
- Hold Kameo To Extend Duration (Last 10 seconds, drains 0.05 Kameo Meter per second)
- Retreats After 45 Frames (0.75 seconds) Without Holding
Janet puts herself between the Point Character and their opponent acting as a temporary wall until she retreats, she can tank either 3 attacks or a single attack that does >9% damage before going away, that or she automatically goes away after 0.75-10 seconds
Because of it being a Summon it can be hard to use in neutral, making it mainly useful for characters that can put the opponent behind Janet to temporarily trap them in a makeshift corner, it can also be used to limit movement in the actual corner as it would not allow the opponent to dash or attack through
Useful with characters like Quan Chi, Geras, Noob Saibot and Cyrax
| Startup | Active | Recovery | Cancel | Damage | Chip | Guard | On Hit | On Block | On Flawless Block | Cost |
|---|---|---|---|---|---|---|---|---|---|---|
| 20 | 12 | - | - | 50 | - | Air | +59/89/119 | - | - | 0.5 Kameo Meter |
- Repeat Input During Startup to Repeat Attack Up To 2 More Times
"Close" version of Janet's only Ambush, extends combos and can be used in setups because of it's long juggle time, Triple version is used to combo off Throws and Synchronized Attacks while the Single and Double versions are used to minimize Janet's time on screen for better repeated use possibilities
To repeatedly do the move you must input Back+Kameo alongside every jump Janet does, only hits Airborne opponents
| Startup | Active | Recovery | Cancel | Damage | Chip | Guard | On Hit | On Block | On Flawless Block | Cost |
|---|---|---|---|---|---|---|---|---|---|---|
| 20 | 35 | - | - | 40 | - | Air | +59/89/119 | - | - | 0.5 Kameo Meter |
- Repeat Input During Startup to Repeat Attack Up To 2 More Times
"Far" version of Janet's only Ambush, extends combos and can be used in setups because of it's long juggle time, Triple version is used to combo off Throws and Synchronized Attacks while the Single and Double versions are used to minimize Janet's time on screen for better repeated use possibilities
To repeatedly do the move you must input Back+Kameo alongside every jump Janet does, only hits Airborne opponents
| Startup | Active | Recovery | Cancel | Damage | Chip | Guard | On Hit | On Block | On Flawless Block | Cost |
|---|---|---|---|---|---|---|---|---|---|---|
| 48 | - | 47 | - | - | - | - | - | - | - | 1 Kameo Meter, 0.05 Per Second |
| Startup | Active | Recovery | Cancel | Damage | Chip | Guard | On Hit | On Block | On Flawless Block | Cost |
|---|---|---|---|---|---|---|---|---|---|---|
| 11 | 4 | 30 | - | 39 | 25 | H | - | - | - | 0.16 Kameo Meter |
| Startup | Active | Recovery | Cancel | Damage | Chip | Guard | On Hit | On Block | On Flawless Block | Cost |
|---|---|---|---|---|---|---|---|---|---|---|
| 12 | 4 | 30 | - | 58.5 | 27.5 | H | - | - | - | 0.16 Kameo Meter |
| Startup | Active | Recovery | Cancel | Damage | Chip | Guard | On Hit | On Block | On Flawless Block | Cost |
|---|---|---|---|---|---|---|---|---|---|---|
| 13 | 3 | 70 | - | 50 | 16.25 | M | - | - | - | 0.16 Kameo Meter |
| Startup | Active | Recovery | Cancel | Damage | Chip | Guard | On Hit | On Block | On Flawless Block | Cost |
|---|---|---|---|---|---|---|---|---|---|---|
| 13 | 3 | 44 | - | 70 | 18.75 | H | - | - | - | 0.16 Kameo Meter |
| Startup | Active | Recovery | Cancel | Damage | Chip | Guard | On Hit | On Block | On Flawless Block | Cost |
|---|---|---|---|---|---|---|---|---|---|---|
| 29 | 7 | 43 | - | 50 | 16.25 | H | - | - | - | 0.33 Kameo Meter |
| Startup | Active | Recovery | Cancel | Damage | Chip | Guard | On Hit | On Block | On Flawless Block | Cost |
|---|---|---|---|---|---|---|---|---|---|---|
| 20 | 10 | 50 | - | 60 | 17.5 | H | - | - | - | 0.33 Kameo Meter |
| Startup | Active | Recovery | Cancel | Damage | Chip | Guard | On Hit | On Block | On Flawless Block | Cost |
|---|---|---|---|---|---|---|---|---|---|---|
| 18 | 5 | 48 | - | 90 | 21.25 | H | - | - | - | 0.25 Kameo Meter |
| Startup | Active | Recovery | Cancel | Damage | Chip | Guard | On Hit | On Block | On Flawless Block | Cost |
|---|---|---|---|---|---|---|---|---|---|---|
| 23 | 6 | 31 | - | 70 | 18.75 | L | - | - | - | 0.25 Kameo Meter |
| Startup | Active | Recovery | Cancel | Damage | Chip | Guard | On Hit | On Block | On Flawless Block | Cost |
|---|---|---|---|---|---|---|---|---|---|---|
| 11 | 2 | 47 | - | 90 | 21.25 | H | - | - | - | .25 Kameo Meter |
| Startup | Active | Recovery | Cancel | Damage | Chip | Guard | On Hit | On Block | On Flawless Block | Cost |
|---|---|---|---|---|---|---|---|---|---|---|
| 0 | 0 | 120 | - | - | - | - | - | - | - | +0.5 Kameo Meter |

