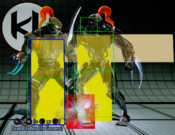
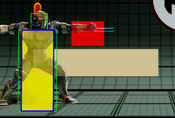
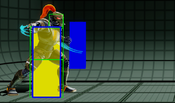
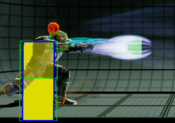
Introduction
Fulgore PLACEHOLDER CHARACTER STORY
Fulgore PLACEHOLDER GAMEPLAY OVERVIEW
| Strengths | Weaknesses |
|---|---|
|
|
Universal Mechanics
Instinct
Blast Core: Fulgore can cancel his special moves into other special moves without spending a pip, and can build a pip by pressing HP+HK.
Combat Traits
Auto-Triples: Fulgore can follow up an auto-double with a manual of the same strength. These manuals increase Fulgore's spin speed.
Reactor Gauge: Fulgore's shadow meter is uniquely divided into 10 pips that fill up over time. Fulgore gains pips faster by using physical hits, and gains pips slower by using projectiles or suffering a knockdown. Fulgore can use these pips to chain together special moves. Shadow moves cost 4 pips.
| Character Data | |
|---|---|
| Forward Walk Speed | 60f to cross two large training mode squares
|
| Backwards Walk Speed | 100f to cross two large training mode squares
|
| Forward Dash Duration | 18f |
| Backdash Duration | 18f |
| Pre-Jump Frames | 5f |
| Jump Duration | 37f |
| Landing Recovery | 4f |
| Advantage Post Grounded Combo Breaker | 0 |
Normal Moves
Standing Normals
| Damage | Counter-Hit Damage | Potential Damage | Shadow On Hit | Shadow On Block | Guard | Startup | Active | Recovery | Total Duration | On Hit | On Counter-Hit | On Block | Special Properties |
|---|---|---|---|---|---|---|---|---|---|---|---|---|---|
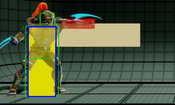
| 10(2%) | 14(3%) | -- | 1.6 | 2.4 | Mid | 5 | 2 | 10 | 16f | +3 | +5 | -1 | Chain |
To Do | |||||||||||||
| Damage | Counter-Hit Damage | Potential Damage | Shadow On Hit | Shadow On Block | Guard | Startup | Active | Recovery | Total Duration | On Hit | On Counter-Hit | On Block | Special Properties |
|---|---|---|---|---|---|---|---|---|---|---|---|---|---|
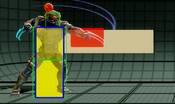
| 20(5%) | 26(7%) | -- | 2.4 | 4 | Mid | 7 | 2 | 18 | 26f | +2 | +5 | -1 | -- |
To Do | |||||||||||||
| Damage | Counter-Hit Damage | Potential Damage | Shadow On Hit | Shadow On Block | Guard | Startup | Active | Recovery | Total Duration | On Hit | On Counter-Hit | On Block | Special Properties |
|---|---|---|---|---|---|---|---|---|---|---|---|---|---|
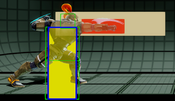
| 30(8%) | 40(11%) | -- | 4 | 4.5 | Mid | 11 | 4 | 25 | 39f | -2 | +2 | -5 | -- |
To Do | |||||||||||||
| Damage | Counter-Hit Damage | Potential Damage | Shadow On Hit | Shadow On Block | Guard | Startup | Active | Recovery | Total Duration | On Hit | On Counter-Hit | On Block | Special Properties |
|---|---|---|---|---|---|---|---|---|---|---|---|---|---|
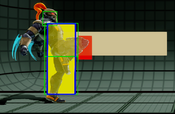
| 10(2%) | 14(3%) | -- | 1.6 | 2.4 | Mid | 5 | 3 | 10 | 17f | +5 | +10 | +2 | -- |
To Do | |||||||||||||
| Damage | Counter-Hit Damage | Potential Damage | Shadow On Hit | Shadow On Block | Guard | Startup | Active | Recovery | Total Duration | On Hit | On Counter-Hit | On Block | Special Properties |
|---|---|---|---|---|---|---|---|---|---|---|---|---|---|
| 20(5%) | 26(7%) | -- | 2.4 | 4 | Mid | 8 | 4 | 21 | 32f | +3 | +6 | -2 | -- |
To Do | |||||||||||||
| Damage | Counter-Hit Damage | Potential Damage | Shadow On Hit | Shadow On Block | Guard | Startup | Active | Recovery | Total Duration | On Hit | On Counter-Hit | On Block | Special Properties |
|---|---|---|---|---|---|---|---|---|---|---|---|---|---|
| 32(8%) | 38(10%) | -- | 4 | 4.5 | Mid | 12 | 4 | 19 | 34f | 0 / +24 (Wall Splat) | +4 / +25 | -6 | Wall Splat, HKD vs. airborne |
To Do | |||||||||||||
Crouching Normals
| Damage | Counter-Hit Damage | Potential Damage | Shadow On Hit | Shadow On Block | Guard | Startup | Active | Recovery | Total Duration | On Hit | On Counter-Hit | On Block | Special Properties |
|---|---|---|---|---|---|---|---|---|---|---|---|---|---|
| 10(2%) | 14(3%) | -- | 1.6 | 2.4 | Mid | 5 | 2 | 8 | 14f | +4 | +6 | +2 | Chain |
To Do | |||||||||||||
| Damage | Counter-Hit Damage | Potential Damage | Shadow On Hit | Shadow On Block | Guard | Startup | Active | Recovery | Total Duration | On Hit | On Counter-Hit | On Block | Special Properties |
|---|---|---|---|---|---|---|---|---|---|---|---|---|---|
| 20(5%) | 26(7%) | -- | 2.4 | 4 | Mid | 7 | 2 | 19 | 27f | +1 | +4 | -1 | -- |
To Do | |||||||||||||
| Damage | Counter-Hit Damage | Potential Damage | Shadow On Hit | Shadow On Block | Guard | Startup | Active | Recovery | Total Duration | On Hit | On Counter-Hit | On Block | Special Properties |
|---|---|---|---|---|---|---|---|---|---|---|---|---|---|
| 30(8%) | 38(10%) | -- | 4 | 4.5 | Mid | 9 | 5 | 16 | 29f | -4 | 0 | -7 | -- |
To Do | |||||||||||||
| Damage | Counter-Hit Damage | Potential Damage | Shadow On Hit | Shadow On Block | Guard | Startup | Active | Recovery | Total Duration | On Hit | On Counter-Hit | On Block | Special Properties |
|---|---|---|---|---|---|---|---|---|---|---|---|---|---|
| 10(2%) | 14(3%) | -- | 1.6 | 2.4 | Low | 5 | 2 | 10 | 16f | +4 | +6 | -1 | Chain |
To Do | |||||||||||||
| Damage | Counter-Hit Damage | Potential Damage | Shadow On Hit | Shadow On Block | Guard | Startup | Active | Recovery | Total Duration | On Hit | On Counter-Hit | On Block | Special Properties |
|---|---|---|---|---|---|---|---|---|---|---|---|---|---|
| 20(5%) | 26(7%) | -- | 2.4 | 4 | Low | 7 | 4 | 16 | 26f | +2 | +5 | -2 | -- |
To Do | |||||||||||||
| Damage | Counter-Hit Damage | Potential Damage | Shadow On Hit | Shadow On Block | Guard | Startup | Active | Recovery | Total Duration | On Hit | On Counter-Hit | On Block | Special Properties |
|---|---|---|---|---|---|---|---|---|---|---|---|---|---|
| 30(8%) | 38(10%) | -- | 4 | 4.5 | Low | 9 | 3 | 21 | 32f | +48 | +48 | -9 | Hard knockdown |
Standard sweep. | |||||||||||||
Close Normals
| Damage | Counter-Hit Damage | Potential Damage | Shadow On Hit | Shadow On Block | Guard | Startup | Active | Recovery | Total Duration | On Hit | On Counter-Hit | On Block | Special Properties |
|---|---|---|---|---|---|---|---|---|---|---|---|---|---|
| 20(5%) | 26(7%) | -- | 2.4 | 4 | Mid | 7 | 3 | 12 | 21f | +4 | +7 | +1 | -- |
To Do | |||||||||||||
| Damage | Counter-Hit Damage | Potential Damage | Shadow On Hit | Shadow On Block | Guard | Startup | Active | Recovery | Total Duration | On Hit | On Counter-Hit | On Block | Special Properties |
|---|---|---|---|---|---|---|---|---|---|---|---|---|---|
| 30(8%) | 38(10%) | -- | 4 | 4.5 | Mid | 9 | 3 | 15 | 26f | 0 | +4 | -4 | -- |
To Do | |||||||||||||
| Damage | Counter-Hit Damage | Potential Damage | Shadow On Hit | Shadow On Block | Guard | Startup | Active | Recovery | Total Duration | On Hit | On Counter-Hit | On Block | Special Properties |
|---|---|---|---|---|---|---|---|---|---|---|---|---|---|
| 20(5%) | 26(7%) | -- | 2.4 | 4 | Mid | 7 | 3 | 15 | 24f | +4 | +7 | +1 | -- |
To Do | |||||||||||||
Command Normals
| Damage | Counter-Hit Damage | Potential Damage | Shadow On Hit | Shadow On Block | Guard | Startup | Active | Recovery | Total Duration | On Hit | On Counter-Hit | On Block | Special Properties |
|---|---|---|---|---|---|---|---|---|---|---|---|---|---|
| 28.1 (8%) | 40.1 (11%) | 2.7 (0.7%) | 4 | 9 | Mid | 9 | 2 [12] 2 | 17 | 41f | +3 | +3 | +2 | -- |
To Do | |||||||||||||
| Damage | Counter-Hit Damage | Potential Damage | Shadow On Hit | Shadow On Block | Guard | Startup | Active | Recovery | Total Duration | On Hit | On Counter-Hit | On Block | Special Properties |
|---|---|---|---|---|---|---|---|---|---|---|---|---|---|
| 30 (8%) | 38 (10%) | -- | 4 | 9 | High | 19 | 2 | 20 | 40f | -2 | +2 | -6 | -- |
To Do | |||||||||||||
Air Normals
| Damage | Counter-Hit Damage | Potential Damage | Shadow On Hit | Shadow On Block | Guard | Startup | Active | Recovery | Total Duration | On Hit | On Counter-Hit | On Block | Special Properties |
|---|---|---|---|---|---|---|---|---|---|---|---|---|---|
| 20 (5%) | 24 (6%) | -- | 1.6 | 2.4 | High | 7 | 7 | 4 | 17+f | +15 | +17 | +8 | -- |
To Do | |||||||||||||
| Damage | Counter-Hit Damage | Potential Damage | Shadow On Hit | Shadow On Block | Guard | Startup | Active | Recovery | Total Duration | On Hit | On Counter-Hit | On Block | Special Properties |
|---|---|---|---|---|---|---|---|---|---|---|---|---|---|
| 24 (6%) | 30 (8%) | -- | 2.4 | 4 | High | 8 | 8 | 4 | 19+f | +16 | +19 | +12 | -- |
Fulgore's most-horizontally-reaching aerial. | |||||||||||||
| Damage | Counter-Hit Damage | Potential Damage | Shadow On Hit | Shadow On Block | Guard | Startup | Active | Recovery | Total Duration | On Hit | On Counter-Hit | On Block | Special Properties |
|---|---|---|---|---|---|---|---|---|---|---|---|---|---|
| 30 (8%) | 38 (10%) | -- | 4 | 4.5 | High | 10 | 4 | 4 | 17+f | +20 | +24 | +17 | -- |
To Do | |||||||||||||
| Damage | Counter-Hit Damage | Potential Damage | Shadow On Hit | Shadow On Block | Guard | Startup | Active | Recovery | Total Duration | On Hit | On Counter-Hit | On Block | Special Properties |
|---|---|---|---|---|---|---|---|---|---|---|---|---|---|
| 20 (5%) | 24 (6%) | -- | 1.6 | 2.4 | High | 8 | 8 | 4 | 19+f | +15 | +17 | +8 | -- |
To Do | |||||||||||||
| Damage | Counter-Hit Damage | Potential Damage | Shadow On Hit | Shadow On Block | Guard | Startup | Active | Recovery | Total Duration | On Hit | On Counter-Hit | On Block | Special Properties |
|---|---|---|---|---|---|---|---|---|---|---|---|---|---|
| 24 (6%) | 30 (8%) | -- | 2.4 | 4 | High | 9 | 9 | 4 | 21+f | +16 | +19 | +12 | Cross-up |
To Do | |||||||||||||
| Damage | Counter-Hit Damage | Potential Damage | Shadow On Hit | Shadow On Block | Guard | Startup | Active | Recovery | Total Duration | On Hit | On Counter-Hit | On Block | Special Properties |
|---|---|---|---|---|---|---|---|---|---|---|---|---|---|
| 30 (8%) | 38 (10%) | -- | 4 | 4.5 | High | 11 | 7 | 4 | 21+f | +20 | +24 | +17 | -- |
To Do | |||||||||||||
Throws
| Damage | Counter-Hit Damage | Potential Damage | Shadow On Hit | Shadow On Block | Guard | Startup | Active | Recovery | Total Duration | On Hit | On Counter-Hit | On Block | Special Properties |
|---|---|---|---|---|---|---|---|---|---|---|---|---|---|
| 40 (11%) | - | - | - | - | - | 5 | 2 | 29 | 35f | +65/ +52 | - | - | Hard Knockdown |
To Do | |||||||||||||
Special Moves
| Version | Damage | Counter-Hit Damage | Potential Damage | Shadow On Hit | Shadow On Block | Guard | Startup | Active | Recovery | Total Duration | On Hit | On Counter-Hit | On Block | Special Properties |
|---|---|---|---|---|---|---|---|---|---|---|---|---|---|---|
| LP | 20 (5%) | 20 (5%) | -- | ?? | ?? | Mid | 15 | -- | 26 | 41f | +3 | +3 | -5 | -- |
To Do | ||||||||||||||
| Version | Damage | Counter-Hit Damage | Potential Damage | Shadow On Hit | Shadow On Block | Guard | Startup | Active | Recovery | Total Duration | On Hit | On Counter-Hit | On Block | Special Properties |
| MP | 20 (5%) | 20 (5%) | -- | ?? | ?? | Mid | 15 | -- | 26 | 41f | +1 | +1 | -8 | -- |
To Do | ||||||||||||||
| Version | Damage | Counter-Hit Damage | Potential Damage | Shadow On Hit | Shadow On Block | Guard | Startup | Active | Recovery | Total Duration | On Hit | On Counter-Hit | On Block | Special Properties |
| HP | 20 (5%) | 20 (5%) | -- | ?? | ?? | Mid | 15 | -- | 26 | 41f | 0 | 0 | -5 | - |
To Do | ||||||||||||||
| Version | Damage | Counter-Hit Damage | Potential Damage | Shadow On Hit | Shadow On Block | Guard | Startup | Active | Recovery | Total Duration | On Hit | On Counter-Hit | On Block | Special Properties |
|---|---|---|---|---|---|---|---|---|---|---|---|---|---|---|
| LP | 20 (5%) | 20 (5%) | -- | ?? | ?? | Low | 13 | 4 | 11 | 27f | +3 | +3 | -6 | -- |
| Version | Damage | Counter-Hit Damage | Potential Damage | Shadow On Hit | Shadow On Block | Guard | Startup | Active | Recovery | Total Duration | On Hit | On Counter-Hit | On Block | Special Properties |
|---|---|---|---|---|---|---|---|---|---|---|---|---|---|---|
| MP | 26.8 (7%) | 26.8 (7%) | 2.3 (0.6%) | ?? | ?? | Low | 13 | 4[1]4 | 12 | 33f | +2 | +2 | -3 | -- |
To Do | ||||||||||||||
| Version | Damage | Counter-Hit Damage | Potential Damage | Shadow On Hit | Shadow On Block | Guard | Startup | Active | Recovery | Total Duration | On Hit | On Counter-Hit | On Block | Special Properties |
|---|---|---|---|---|---|---|---|---|---|---|---|---|---|---|
| HP | 20 (5%) | 20 (5%) | -- | ?? | ?? | Mid | 25 | 5 | 23 | 52f | +21 | +21 | -10 | Stagger |
To Do | ||||||||||||||
| Version | Damage | Counter-Hit Damage | Potential Damage | Shadow On Hit | Shadow On Block | Guard | Startup | Active | Recovery | Total Duration | On Hit | On Counter-Hit | On Block | Special Properties |
|---|---|---|---|---|---|---|---|---|---|---|---|---|---|---|
| LP | 40 (11%) | 46 (12%) | -- | ?? | ?? | Mid | 3 | 9 | 40 | 51f | +6 | +6 | -41 | -- |
To Do | ||||||||||||||
| Version | Damage | Counter-Hit Damage | Potential Damage | Shadow On Hit | Shadow On Block | Guard | Startup | Active | Recovery | Total Duration | On Hit | On Counter-Hit | On Block | Special Properties |
| MP | 37.4 (10%) | 39.4 (10%) | 3.1 (0.8%) | ?? | ?? | Mid | 3 | 9 | 44 | 55f | +11 | +11 | -39 | -- |
To Do | ||||||||||||||
| Version | Damage | Counter-Hit Damage | Potential Damage | Shadow On Hit | Shadow On Block | Guard | Startup | Active | Recovery | Total Duration | On Hit | On Counter-Hit | On Block | Special Properties |
| HP | 36.1 (10%) | 40.1 (11%) | 4.7 (1%) | ?? | ?? | Mid | 3 | 9 | 49 | 60f | +12 | +12 | -39 | -- |
To Do | ||||||||||||||
| Version | Damage | Counter-Hit Damage | Potential Damage | Shadow On Hit | Shadow On Block | Guard | Startup | Active | Recovery | Total Duration | On Hit | On Counter-Hit | On Block | Special Properties |
|---|---|---|---|---|---|---|---|---|---|---|---|---|---|---|
| LK | 18 (5%) / 26 (7%) Charged | 28 (7%) | -- | ?? | ?? | Mid | 8 / 71 | 9 / 7 | 29 | 45f/106f | +2/+4 | +8 | -4/+1 | -- |
To Do | ||||||||||||||
| Version | Damage | Counter-Hit Damage | Potential Damage | Shadow On Hit | Shadow On Block | Guard | Startup | Active | Recovery | Total Duration | On Hit | On Counter-Hit | On Block | Special Properties |
| MK | 20 (5%) / 30 (8%) Charged | 30 (8%) | -- | ?? | ?? | Mid | 10 / 73 | 13 / 11 | 29 | 51f/112f | +3/+5 | +9 | -6/0 | -- |
To Do | ||||||||||||||
| Version | Damage | Counter-Hit Damage | Potential Damage | Shadow On Hit | Shadow On Block | Guard | Startup | Active | Recovery | Total Duration | On Hit | On Counter-Hit | On Block | Special Properties |
| HK | 24 (6%) / 34 (9%) Charged | 34 (9%) | -- | ?? | ?? | Mid | 12 / 75 | 16 | 29 | 56f/119f | +4/+6 | +10 | -8/-1 | -- |
To Do | ||||||||||||||
| Version | Damage | Counter-Hit Damage | Potential Damage | Shadow On Hit | Shadow On Block | Guard | Startup | Active | Recovery | Total Duration | On Hit | On Counter-Hit | On Block | Special Properties |
|---|---|---|---|---|---|---|---|---|---|---|---|---|---|---|
| LK | -- | -- | -- | -- | -- | -- | 13 | 14 | 15 | 41f | -- | -- | -- | Invul 13-26f |
Teleports to the left. | ||||||||||||||
| Version | Damage | Counter-Hit Damage | Potential Damage | Shadow On Hit | Shadow On Block | Guard | Startup | Active | Recovery | Total Duration | On Hit | On Counter-Hit | On Block | Special Properties |
| MK | -- | -- | -- | -- | -- | -- | 13 | 14 | 15 | 41f | -- | -- | -- | Invul 13-26f |
Teleports to the center. | ||||||||||||||
| Version | Damage | Counter-Hit Damage | Potential Damage | Shadow On Hit | Shadow On Block | Guard | Startup | Active | Recovery | Total Duration | On Hit | On Counter-Hit | On Block | Special Properties |
| HK | -- | -- | -- | -- | -- | -- | 13 | 14 | 15 | 41f | -- | -- | -- | Invul 13-26f |
Teleports to the right. | ||||||||||||||
Shadow Moves
| Version | Damage | Counter-Hit Damage | Potential Damage | Shadow On Hit | Shadow On Block | Guard | Startup | Active | Recovery | Total Duration | On Hit | On Counter-Hit | On Block | Special Properties |
|---|---|---|---|---|---|---|---|---|---|---|---|---|---|---|
| S | 44 (12%) | 44 (12%) | 8 (2%) | 0 | 0 | Mid | 5+2(7) | -- | 37 | 43f | +90 | +90 | -11 | Hard Knockdown |
| ||||||||||||||
| Version | Damage | Counter-Hit Damage | Potential Damage | Shadow On Hit | Shadow On Block | Guard | Startup | Active | Recovery | Total Duration | On Hit | On Counter-Hit | On Block | Special Properties |
|---|---|---|---|---|---|---|---|---|---|---|---|---|---|---|
| S | 47.6 (13%) | 47.6 (13%) | 9.2 (2%) | 0 | 0 | Low | 5+2(7) | 2[3]2[3]
2[3]2[3]2 |
10 | 38f | +25 | +25 | -3 | Invul 1-4f |
To Do | ||||||||||||||
| Version | Damage | Counter-Hit Damage | Potential Damage | Shadow On Hit | Shadow On Block | Guard | Startup | Active | Recovery | Total Duration | On Hit | On Counter-Hit | On Block | Special Properties |
|---|---|---|---|---|---|---|---|---|---|---|---|---|---|---|
| S | 30 (8%) | 30 (8%) | 6 (1%) | 0 | 0 | Mid | 5+2(7) | 2[5]2[5]
2[5]2[5]2 |
25 | 61+f | ?? | ?? | ?? | Invul 1-4f, HKD |
| ||||||||||||||
| Version | Damage | Counter-Hit Damage | Potential Damage | Shadow On Hit | Shadow On Block | Guard | Startup | Active | Recovery | Total Duration | On Hit | On Counter-Hit | On Block | Special Properties |
|---|---|---|---|---|---|---|---|---|---|---|---|---|---|---|
| S | 47.4 (13%) | 57.4 (15%) | 9.8 (2.8%) | -- | -- | Mid | 3+0(3) | 3[2]1[1]
1[1]1 |
49 | 62f | +16 | +16 | -42 | Invul 1-5f, High Invul 6-9f, Throw Invul 6-11, Juggle Cashout |
To Do | ||||||||||||||
| Version | Damage | Counter-Hit Damage | Potential Damage | Shadow On Hit | Shadow On Block | Guard | Startup | Active | Recovery | Total Duration | On Hit | On Counter-Hit | On Block | Special Properties |
|---|---|---|---|---|---|---|---|---|---|---|---|---|---|---|
| S | 46.8 (13%) | 58.8 (16%) | 9.6 (2%) | 0 | 0 | Mid | 3+3(6) | 40 | 29 | 74f | +5 | +5 | +1 | Throw/Proj Invul 1-45f |
Throw invul, projectile invul, and plus OB? Yeah, it's pretty good. | ||||||||||||||
| Version | Damage | Counter-Hit Damage | Potential Damage | Shadow On Hit | Shadow On Block | Guard | Startup | Active | Recovery | Total Duration | On Hit | On Counter-Hit | On Block | Special Properties |
|---|---|---|---|---|---|---|---|---|---|---|---|---|---|---|
| S | 30.8 (8%) | 40.8 (11%) | 5.6 (1%) | 0 | 0 | Mid | 10+10(20) | 10 | 27 | 56f | +5 | +5 | -4 | Invul 1-9f |
An invincible reversal that homes in on the opponent, starts a grounded combo, and is safe on block. | ||||||||||||||
| Version | Damage | Counter-Hit Damage | Potential Damage | Shadow On Hit | Shadow On Block | Guard | Startup | Active | Recovery | Total Duration | On Hit | On Counter-Hit | On Block | Special Properties |
|---|---|---|---|---|---|---|---|---|---|---|---|---|---|---|
| S | 111 (30%) | 111 (30%) | 57 (15%) | 0 | 0 | Mid | 5+2(7) | 41 | 35 | 82f | +63 | +63 | -60 | Hard Knockdown |
| ||||||||||||||
Enders
| Version | Ender Type | On Hit | Special Properties | |||||||||
|---|---|---|---|---|---|---|---|---|---|---|---|---|
| Level 1 | Hard Knockdown | +72 | Launcher | |||||||||
Jugglable for 13 frames in the corner. | ||||||||||||
| Version | Ender Type | On Hit | Special Properties | |||||||||
| Level 2 | Hard Knockdown | +72 | Launcher | |||||||||
Jugglable for 9 frames in the corner. | ||||||||||||
| Version | Ender Type | On Hit | Special Properties | |||||||||
| Level 3 | Hard Knockdown | +83 | Launcher | |||||||||
Jugglable for 15 frames in the corner. | ||||||||||||
| Version | Ender Type | On Hit | Special Properties | |||||||||
| Level 4 | Hard Knockdown | +86 | Launcher | |||||||||
Jugglable for 15 frames in the corner. | ||||||||||||
| Version | Ender Type | On Hit | Special Properties | |||||||||
|---|---|---|---|---|---|---|---|---|---|---|---|---|
| Level 1 | Launcher | +49 | -- | |||||||||
Jugglable for 19 frames. | ||||||||||||
| Version | Ender Type | On Hit | Special Properties | |||||||||
| Level 2 | Launcher | +49 | -- | |||||||||
Jugglable for 19 frames. | ||||||||||||
| Version | Ender Type | On Hit | Special Properties | |||||||||
| Level 3 | Launcher | +52 | -- | |||||||||
Jugglable for 22 frames. | ||||||||||||
| Version | Ender Type | On Hit | Special Properties | |||||||||
| Level 1 | Launcher | +65 | -- | |||||||||
Jugglable for 35 frames. | ||||||||||||
| Version | Ender Type | On Hit | Special Properties | |||||||||
|---|---|---|---|---|---|---|---|---|---|---|---|---|
| Level 1 | Damage | +4 | -- | |||||||||
Increases spin speed. | ||||||||||||
| Version | Ender Type | On Hit | Special Properties | |||||||||
| Level 2 | Damage | +8 | -- | |||||||||
Increases spin speed on the final hit. | ||||||||||||
| Version | Ender Type | On Hit | Special Properties | |||||||||
| Level 3 | Damage | +17 | -- | |||||||||
Increases spin speed on the final hit. | ||||||||||||
| Version | Ender Type | On Hit | Special Properties | |||||||||
| Level 4 | Damage | +29 | -- | |||||||||
| Version | Ender Type | On Hit | Special Properties | |||||||||
| Shadow | Damage | +9 | -- | |||||||||
| Version | Ender Type | On Hit | Special Properties | |||||||||
|---|---|---|---|---|---|---|---|---|---|---|---|---|
| Level 1 | Wall Splat | -1/+15 (Splat) | -- | |||||||||
Increases spin speed. | ||||||||||||
| Version | Ender Type | On Hit | Special Properties | |||||||||
| Level 2 | Wall Splat | 0/+20 (Splat) | -- | |||||||||
Increases spin speed on the final hit. | ||||||||||||
| Version | Ender Type | On Hit | Special Properties | |||||||||
| Level 3 | Wall Splat | 0/+25 (Splat) | -- | |||||||||
Increases spin speed on the final hit. | ||||||||||||
| Version | Ender Type | On Hit | Special Properties | |||||||||
| Level 4 | Wall Splat | -2/+30 (Splat) | -- | |||||||||
Increases spin speed on the final hit. | ||||||||||||
Instinct
| Version | Damage | Counter-Hit Damage | Potential Damage | Shadow On Hit | Shadow On Block | Guard | Startup | Active | Recovery | Total Duration | On Hit | On Counter-Hit | On Block | Special Properties |
|---|---|---|---|---|---|---|---|---|---|---|---|---|---|---|
| -- | -- | -- | -- | -- | -- | -- | 33 | -- | 4 | 37f | -- | -- | -- | Builds Pip |
To Do | ||||||||||||||

