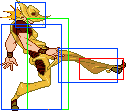
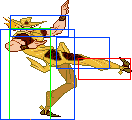
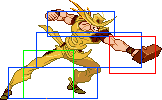
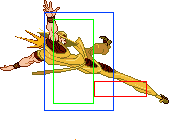
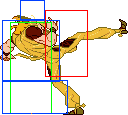
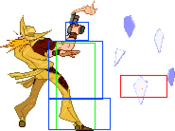
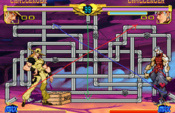
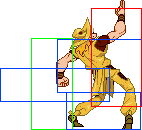
Normals
| Startup | Active | Recovery | Damage | Guard | ||||
|---|---|---|---|---|---|---|---|---|
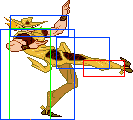
| 3 | 3 | 10 [8] | 4 (1 Stand) | Mid | ||||
| Hit Adv. | Block Adv. | Pushblock Adv. | Cancel | Properties | ||||
| +6 | +5 | +2 | Special/Super WC/CrC |
Air UB | ||||
|
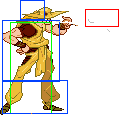
Short, fast kick. Okay to press after a roll, leads to decent damage and a knockdown by canceling into truck. Data in brackets is recovery on crouch cancel. | ||||||||
| Startup | Active | Recovery | Damage | Guard | ||||
|---|---|---|---|---|---|---|---|---|
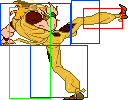
| 4 | 4 | 13 | 10 (4 Stand) | Mid | ||||
| Hit Adv. | Block Adv. | Pushblock Adv. | Cancel | Properties | ||||
| +3 | +1 | -7 | Special/Super | Air UB | ||||
|
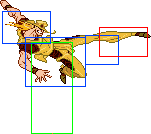
Balls kick. Is stupid quick and has a lot more range and damage than 5A. Very solid button all around, good at stopping reckless approaches and as a poke in neutral. Finds occasional use as an antiair. | ||||||||
| Startup | Active | Recovery | Damage | Guard | ||||
|---|---|---|---|---|---|---|---|---|
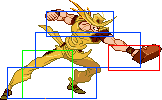
| 15 | 3 | 31 | 16 (5 Stand) | Mid | ||||
| Hit Adv. | Block Adv. | Pushblock Adv. | Cancel | Properties | ||||
| Launch (Knockdown at 3 hits) | -17 | -20 | Special/Super | Air UB Wallbounce | ||||
|
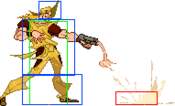
Slow, winding heel kick. Very slow to come out and recover, and the launch isn't too useful on a raw hit. Has an admittedly nice hitbox, but its speed prevents it from being an effective tool, relegating it to a niche antiair and pressure option. The forward movement on startup allows for kara cancels, which can be used to give Truck extra range. | ||||||||
| Startup | Active | Recovery | Damage | Guard | ||||
|---|---|---|---|---|---|---|---|---|
| 3 | 2 | 9 | 3 (6 Stand) | Low | ||||
| Hit Adv. | Block Adv. | Pushblock Adv. | Cancel | Properties | ||||
| +2 | 0 | -3 | Special/Super | Air UB | ||||
|
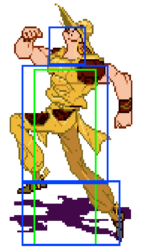
Pocket sand. Quick low, doesn't have much range. Fast startup can let you mash out of some things, but the long recovery makes that risky. Doesn't lead to much, but you can try going into truck if you're sure it'll land. Chaka, Khan, BPol and SDio can use their counter against 2A but Rubber Soul and Old Joseph can't. | ||||||||
| Startup | Active | Recovery | Damage | Guard | ||||
|---|---|---|---|---|---|---|---|---|
| 4 | 4 | 17 | 8 (4 Stand) | Mid | ||||
| Hit Adv. | Block Adv. | Pushblock Adv. | Cancel | Properties | ||||
| -1 | -3 | -11 | Block (Frame 1 only) Special/Super |
Air UB | ||||
|
Hol attacks with a brick that does NOT HIT LOW. This button is fucking godlike with a great horizontal hitbox. Use it as a poke, counterpoke, combo tool, panic press it, you wish you could eat and drink this button if you could. | ||||||||
| Startup | Active | Recovery | Damage | Guard | ||||
|---|---|---|---|---|---|---|---|---|
| 11 | 18 | 10 | 9 (5 Stand) | Low | ||||
| Hit Adv. | Block Adv. | Pushblock Adv. | Cancel | Properties | ||||
| Knockdown | -10 | -24 | Special/Super (Before frame 9) | Air UB | ||||
|
Sliding kick. Hits low. Causes hard knockdown, lowers your hurtbox significantly and travels a third of the screen. Cannot be canceled past startup and has long recovery, making it very unsafe on block. Don't use this button willy nilly. | ||||||||
| Startup | Active | Recovery | Damage | Guard | ||||
|---|---|---|---|---|---|---|---|---|
| 4 | 4 | Until landing | 4 (3 Stand) | High | ||||
| Hit Adv. | Block Adv. | Pushblock Adv. | Cancel | Properties | ||||
| - | - | - | Special/Super | - | ||||
|
Jumping knee attack. Decent air to air due to alright hitbox and fast startup. Can hit as an instant overhead, which you can convert off of with j.236AA for better damage. | ||||||||
| Startup | Active | Recovery | Damage | Guard | ||||
|---|---|---|---|---|---|---|---|---|
| 4 | 4 | Until landing | 4 (3 Stand) | High | ||||
| Hit Adv. | Block Adv. | Pushblock Adv. | Cancel | Properties | ||||
| - | - | - | Special/Super | - | ||||
|
Identical to j.A. | ||||||||
| Startup | Active | Recovery | Damage | Guard | ||||
|---|---|---|---|---|---|---|---|---|
| 6 | 4 | Until landing | 9 (5 Stand) | High | ||||
| Hit Adv. | Block Adv. | Pushblock Adv. | Cancel | Properties | ||||
| - | - | - | Special/Super | - | ||||
|
Jumping kick pointing downwards. Good for attacking opponents that are below you. Great combo starter and situational air-to-air, your main air button. | ||||||||
Dashing Normals
| Startup | Active | Recovery | Damage | Guard | ||||
|---|---|---|---|---|---|---|---|---|
| 2 | 3 | 10 | - | Mid | ||||
| Hit Adv. | Block Adv. | Pushblock Adv. | Cancel | Properties | ||||
| +3 | +1 | -2 | Special/Super | Air UB | ||||
|
Dashing version of 5A. Minimally faster than 5A, but has worse hitbox. Useful for setting up Hol's command grab super. | ||||||||
| Startup | Active | Recovery | Damage | Guard | ||||
|---|---|---|---|---|---|---|---|---|
| 8 | 5 | 14 | - | Mid | ||||
| Hit Adv. | Block Adv. | Pushblock Adv. | Cancel | Properties | ||||
| +2 | 0 | -8 | Special/Super | Air UB | ||||
|
Dashing version of 5B. It's much slower than the standing version and only does half the damage, probably just better to use d.2B over this. | ||||||||
| Startup | Active | Recovery | Damage | Guard | ||||
|---|---|---|---|---|---|---|---|---|
| 10 | 3 | 33 | - | Mid | ||||
| Hit Adv. | Block Adv. | Pushblock Adv. | Cancel | Properties | ||||
| Launch | -19 | -32 | Special/Super | Air UB | ||||
|
Dashing version of 5C that is much faster. It launches the opponent on hit instead of knocking them back, so there's no wall bounce. The blockstun of this move can prove very useful for cancels, and a scaled hit provides Boingo's best oki potential, as unlike 2C you can cancel the recovery. Can be a decent anti air, although tricky to utilize as it is dashing. Unfortunately can still be ducked under. | ||||||||
| Startup | Active | Recovery | Damage | Guard | ||||
|---|---|---|---|---|---|---|---|---|
| 3 | 2 | 9 | - | Low | ||||
| Hit Adv. | Block Adv. | Pushblock Adv. | Cancel | Properties | ||||
| 0 | -2 | -5 | Special/Super | Air UB | ||||
|
Dashing 2A, is similar to 5A in that it's good for tick supering, but slightly less damaging and the range is about as bad too. Since this is a sort-of projectile, it will not follow you as you dash, lessening its effective range when dashing forwards. | ||||||||
| Startup | Active | Recovery | Damage | Guard | ||||
|---|---|---|---|---|---|---|---|---|
| 7 | 4 | 13 | - | Mid | ||||
| Hit Adv. | Block Adv. | Pushblock Adv. | Cancel | Properties | ||||
| +3 | +1 | -7 | Special/Super | Air UB | ||||
|
A slower, dashing 2B with less recovery. Good for covering far off space whether you're dashing forwards or backwards, and can be riskily used to continue pressure on block should you get the time. | ||||||||
| Startup | Active | Recovery | Damage | Guard | ||||
|---|---|---|---|---|---|---|---|---|
| 16 | 24 | 13 | - | Low | ||||
| Hit Adv. | Block Adv. | Pushblock Adv. | Cancel | Properties | ||||
| Knockdown | -18 | -31 | - | Low | ||||
|
Somehow even slower than 2C and unlike normal Hol's d.2C, cannot be cancelled. No reason to ever use this move, dash cancel into 2C instead. | ||||||||
Command Normals
| Startup | Active | Recovery | Damage | Guard | ||||
|---|---|---|---|---|---|---|---|---|
| 1 | - | Total 70 | - | Throw | ||||
| Hit Adv. | Block Adv. | Pushblock Adv. | Cancel | Properties | ||||
| Launch (-19 on earliest tech) | - | - | - | Grab | ||||
|
Hol grabs the opponent by the nose and shoots them in the face. The opponent can recover right after getting hit by this grab, which can result in a fast punish, making it rather useless.. The only matchup it is safe in is against Rubber Soul, and Young Joseph can't punish it unless you grab him into the corner, but you can just grab him in the opposite direction if you're near it anyway. | ||||||||
| Startup | Active | Recovery | Damage | Guard | ||||
|---|---|---|---|---|---|---|---|---|
| 13 | 4 | 25 | - | Mid | ||||
| Hit Adv. | Block Adv. | Pushblock Adv. | Cancel | Properties | ||||
| -16 | -18 | -21 | Special/Super | Air UB | ||||
|
Hol puffs some cigarette smoke. Whiffs on most crouchers. Useless as a footsies normal due to bad startup, hitbox, and hitstun, but finds obscure use if cancelled. If you cancel after at least 5 frames of startup, its hitbox will still come out, potentially protecting you during the startup of your next move. This also allows it to combo into 5S if you want to pull off something stylish, but chances of that happening in a real match are very low. Trades with projectiles. Chaka, Khan, BPol and SDio can use their counter against 4A but Rubber Soul and Old Joseph can't. | ||||||||
| Startup | Active | Recovery | Damage | Guard | ||||
|---|---|---|---|---|---|---|---|---|
| 6 | 3 | 23 | - | Mid | ||||
| Hit Adv. | Block Adv. | Pushblock Adv. | Cancel | Properties | ||||
| -4 | -6 | -17 | Special/Super | Air UB | ||||
|
Enziguri style kick. Very fast and has good horizontal range, but it does low damage and has a high hitbox allowing it to be ducked under. Its primary use is as an anti-air, but some better jump-in attacks will beat it. It can also dodge some low attacks since it raises your hurtbox for a moment. | ||||||||
| Startup | Active | Recovery | Damage | Guard | ||||
|---|---|---|---|---|---|---|---|---|
| 11 | 4 frames per shot, 5 frame gap between shots | 15 | - | Low | ||||
| Hit Adv. | Block Adv. | Pushblock Adv. | Cancel | Properties | ||||
| -7 | -5 | -2 | Special/Super | - | ||||
|
Three downward shots that hit low. His main oki tool, and is also decent at stopping dash-ins and pressuring. Unfortunately has a slow startup and far, slightly random hitboxes. It is best to cancel this attack right after it connects because it's unsafe even on hit. This move counts as a projectile, and like 4A, can linger after you cancel it, though less noticeably as an individual bullet has little active frames. You can cancel the move after 3 frames and the first hitbox will still come out, after 11 frames and the second hitbox will still come out and after 20 frame for the last hitbox to still come out. Be careful about the input overlap with throw, since an accidental throw can get you killed. | ||||||||
Unique Moves
| Startup | Active | Recovery | Damage | Guard | ||||
|---|---|---|---|---|---|---|---|---|
| 22 (Ground) 26 (Air) |
Until offscreen | Total 33 | - | Mid | ||||
| Hit Adv. | Block Adv. | Pushblock Adv. | Cancel | Properties | ||||
| - | - | - | - | - | ||||
|
Hol Horse fires a single, delayed bullet from the Emperor which can have its path programmed by pressing directions during startup. The bullet can hit up to 10 times. Does no damage to stand bars. If 2 "S bullets" are on screen, only the newer one will deal damage. You can start inputting directions after 6 frames of startup. Then you have a 15 frame window to input up to 8 directions. You can't input twice the same direction in a row, the only way to delay a direction is to input more directions before, waiting doesn't work. If you're on keyboard/hitbox and revision 990913, pressing 8 and 2 simultaneously during the startup will have the bullet stop in place with glitchy sprites for some demented reason in FBA. (See Trivia section) | ||||||||
| Startup | Active | Recovery | Damage | Guard | ||||
|---|---|---|---|---|---|---|---|---|
| - | - | - | - | - | ||||
| Hit Adv. | Block Adv. | Pushblock Adv. | Cancel | Properties | ||||
| - | - | - | - | - | ||||
|
Hol Horse starts running. Running isn't unique to Hoingo, but it's so important to him that it deserves its own section. You'll be doing this a lot: running back and forth to keep your opponent guessing, running away for some breathing room to set up, as a defensive option, and simply to just reposition. As important as an option as this is, you should remember how much space there is behind you: running away isn't always possible, so you should try not to overuse this. | ||||||||
| Startup | Active | Recovery | Damage | Guard | ||||
|---|---|---|---|---|---|---|---|---|
| 10 | 3 | 19 | - | Mid | ||||
| Hit Adv. | Block Adv. | Pushblock Adv. | Cancel | Properties | ||||
| Launch | -10 | -18 | - | Air UB | ||||
|
Hol performs a fast version of his Yakuza kick, kicking the opponent away without a wall rush. It also has a vertically better hitbox that can hit most crouching characters. Be careful with using this GC: if it's properly baited, you'll do a 623x, which is insanely punishable. Very mediocre overall. | ||||||||
Specials
| Startup | Active | Recovery | Damage | Guard | ||||
|---|---|---|---|---|---|---|---|---|
| 9 (A/B) 11 (C) |
- | 36 (A/B) 33 (C) |
- | Mid Low (C) | ||||
| Hit Adv. | Block Adv. | Pushblock Adv. | Cancel | Properties | ||||
| -9 | -11 | -18 | - | - | ||||
|
Hol fires a single shot from the Emperor. Slightly longer recovery compared to the original version. Holding 8 or 2 will change the vertical trajectory of the bullet. | ||||||||
| Startup | Active | Recovery | Damage | Guard | ||||
|---|---|---|---|---|---|---|---|---|
| 9 (A) 11 (B/C) 5 (Air) |
- | 23 (A) 22 (B/C) |
- | Mid (Bullet) High (Glass) | ||||
| Hit Adv. | Block Adv. | Pushblock Adv. | Cancel | Properties | ||||
| - | - | - | - | - | ||||
|
Hol fires a single shot upwards at the ceiling, if the shot connects with the ceiling, glass shards will fall down, hitting multiple times. Hoingo shoots slightly later than normal Hol on his B and C variants but recovers at the same time as him regardless. The shards also have a smaller hitbox than normal Hol's. | ||||||||
Supers
| Startup | Active | Recovery | Damage | Guard | ||||
|---|---|---|---|---|---|---|---|---|
| 11 (AB) 13 (AC/BC) 7 (Air) |
- | 83 (AB) 73 (AC/BC) |
- | Mid (AB) Low (AC/BC) | ||||
| Hit Adv. | Block Adv. | Pushblock Adv. | Cancel | Properties | ||||
| - | - | - | - | - | ||||
|
Hol fires 10 shots rapidly. Hol will fire the gun while standing while the A+B is pressed. This version has a slower startup on the ground but can still be used in some combos. The A+C and B+C versions of the super will have Hol fire while crouching, lowering his hitbox and making the bullets hit low. When done in mid-air, Hol will fire 12 bullets in a wider spread as well as be propelled upwards and back slightly. The air version comes out noticeably faster than regular Hol's. Has decent iframes around superflash which can allow it to beat out some moves. Can beat raw tandems. One of the bullets will always cause a knockdown, but it might randomly miss, meaning the opponent won't drop to the floor sometimes as they normally should. Every version of this super doesn't combo Stand ON opponents well, and can be punished on hit, especially the jumping version. Due to a bug, when buffered the standing version can come out even when the low version is input. Damage is seemingly random, but still doesn't vary much. | ||||||||
| Startup | Active | Recovery | Damage | Guard | ||||
|---|---|---|---|---|---|---|---|---|
| 7 | 45 | 26 | - | Mid (Pipe) Unblockable (Bullets) | ||||
| Hit Adv. | Block Adv. | Pushblock Adv. | Cancel | Properties | ||||
| - | - | - | - | Air UB (Pipe) Unblockable (Bullets) | ||||
|
A pipe magically appears from the ground and Hol Horse shoots 7 bullets inside of it. Depending which combination of buttons was pressed while performing this super, the side from which they will come out will change. The pipe itself has a long air-unblockable hitbox which causes a Stand Crash but does no damage on its own. The bullets that fire from the pipe are all unblockable and build meter. It takes about 5 seconds for them to start firing from one of the ends, during that period Hol can freely walk around and perform any attack and special/super, with the exception of another Pipe Maze super. If Hol is hit before the bullets fire out from one of the sides of the pipe, the super will be canceled, which makes this super a big risk at times. Each version produces a different series of ricochet effects just before the bullets release. A+B version - bullets come from the left end 254 frames after the end of the recovery.(Red) B+C version - bullets come from the right end 226 frames after the end of the recovery. (Blue) A+C version - bullets come from the top end 265 frames after the end of the recovery. (Green) | ||||||||
| Startup | Active | Recovery | Damage | Guard | ||||
|---|---|---|---|---|---|---|---|---|
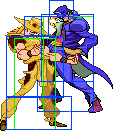
| 5 | 5 | 45 | - | Fusion Grab (still connects during hit/blockstun) | ||||
| Hit Adv. | Block Adv. | Pushblock Adv. | Cancel | Properties | ||||
| - | - | - | - | Fusion Grab | ||||
|
Once upon a time, there was a boy that could predict the future, so he told his friend to stick up his fingers in his nemesis' nose in order to defeat him. After doing so, the nemesis was hit by a truck. | ||||||||
