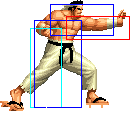
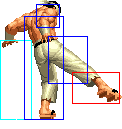
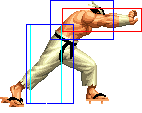
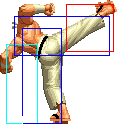
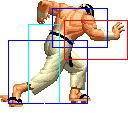
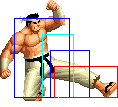
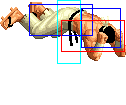
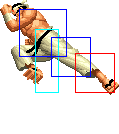
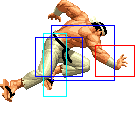
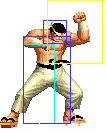
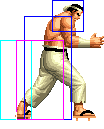
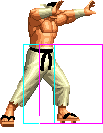
Introduction
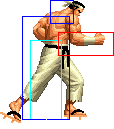
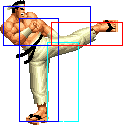
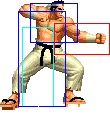
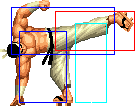
Goro Daimon was previously known as just "Daimon" before the King of Fighters tournament. The name means "Die, man".
Just before the first KOF tournament, he defeated Goro, prince of Shokan in hand-to-hand mortal combat, taking his namesake as a trophy.
Anyone who could defeat Goro is extremely strong, so as expected, Goro Daimon is a top tier character.
Colors

|

|

|

|
Gameplay Overview
Daimon does a ton of damage, has very high priority normals, very effective throw mixups, and is top-tier. Even from an anti-air he can do 30% or so thanks to ground pound OTGs and juggles. He has very good defense (ie takes less damage than average) and is basically a wall of pain. His only disadvantage is that he has a very large sprite. He has combos/tactics that vary from requiring nearly no execution skill to requiring godly execution. He is a decent character for a beginner.
In-depth Analysis
Movelist
Normal Throws
- b or f + C - Unbreakable (mashable), forward knockdown, face forward, un-rollable.
- b or f + D - Breakable, reverse knockdown, back turned, rollable.
- b or f + C (just outside of normal throw range) - Breakable, forward knockdown, back turned, un-rollable.
Special Moves
- hcf + A
See description on Movelist section.
- hcf + C
See description on Movelist section.
- dp + A
See description on Movelist section.
- dp + C
See description on Movelist section.
- hcb f + P
See description on Movelist section.
- qcf + K
See description on Movelist section.
- dp + K
See description on Movelist section.
- qcb + K
See description on Movelist section.
- hcb f + K
Desperation Moves
- hcb hcb + P
See description on Movelist section.
- hcf hcf + K
- hcf + K
- dp + K
- hcf + K
See description on Movelist section.
Fastest Attacks
- 0F: C throw; D throw; hcb f + P; (S)DM hcb hcb + P
- 1F: -
- 2F: qcf + K
- 3F: cr.A; df + C
- 4F: cl.A; cl.C; cl.D; st.A; st.B; cr.B; cr.D
- 5F: st.D; cr.C; hcf + A
- 6F: -
- 7F: cl.B
- 8F: dp + K
- 9F: st.C
- 10F: -
Combos
As I stated above, his combos range from easy to extremely difficult depending on what you're comboing into.
- Best jump-ins:
- j.D
- j.C (Can crossup.)
- cl.C / cl.D > df + C (optional) >
- (S)DM Super Ragdoll Toss (hcb hcb + P)
- Ragdoll Toss (hcb f + P)
- C Overhead Slam (hcf + C)
- cl.A, cl.A / cr.A >
- (S)DM Super Ragdoll Toss (hcb hcb + P)
- Ragdoll Toss (hcb f + P)
- cl.A / cr.A >
- df + C
- (S)DM Super Ragdoll Toss (hcb hcb + P)
- Ragdoll Toss (hcb f + P)
- C Overhead Slam (hcf + C)
- (S)DM Super Ragdoll Toss (hcb hcb + P)
- Ragdoll Toss (hcb f + P)
- dp + K (Point blank.)
- df + C
- cr.B,
- (S)DM Super Ragdoll Toss (hcb hcb + P)
- Ragdoll Toss (hcb f + P)
Link combo.
- st.B >
- (S)DM Super Ragdoll Toss (hcb hcb + P) (Not too far.)
- Ragdoll Toss (hcb f + P) (Not too far.)
- dp + A / f + A / Anti-air df + C / st.CD / j.CD / cr.D,
- hcf + C (OTG) (If not too far.)
Must not cancel the first move (if it is cancellable), otherwise hcf + C will miss because opponent will not be on the floor yet. Except for f + A, opponent may do a recovery roll and in this case the hcf + C will miss, however you have time to wait to see if they will do a recovery roll before using the hcf + C ;).
- Anti-air df + C > A Overhead Slam (hcf + A)
Depending on distance and height you don't need to cancel to combo, you may follow with hcf + A after recovering. In fact in some situations you can trade and still do the hcf + A after recovering :). Depending on spacing is easier to a st.D instead of hcf + A.
- Counter-hit: Anti-air df + C > qcb + B, df + C > A Overhead Slam (hcf + A)
The qcb + B is only to move close to opponent and may be skipped if you are already close or in the corner. On MAX, close to the corner, if first df + C hit high (second part animation) and second df + C hit low (first part animation), it's possible to do a third df + C (second part animation), but the timming is difficult, and it's even hard to follow with hcf + A after. If you are close to corner is easy to use hcf + C (OTG), as in the combo above, instead of hcf + A, but opponent may do a recovery roll to escape... Depending on spacing is easier to a st.D instead of hcf + A.
- Anti-air df + C / st.CD / cr.D >
- qcb + B / qcf + B (miss) / dp + K (miss) / hcb f + P (miss) / dp + C
- A Ground Pound (dp + A) (OTG)
- hcf + C (OTG) (Only if first move was st.CD or cr.D. If not too far.)
- A Ground Pound (dp + A) (OTG)
- qcb + B / qcf + B (miss) / dp + K (miss) / hcb f + P (miss) / dp + C
Ground Pound bug combo. You may use both (S)DM as the second move, but it is just for show off, as you will be spending metter with no benefits (acctually you will end up doing less damage if you use a SDM as MAX mode will end...). The hcf + C will always miss if the first move is an anti-air df + C (don't know why, because hcf + C will hit when the first move is an anti-air st.CD or cr.D...). If the first move is a st.CD you will normally only be close enough to do the hcf + C in the corner. Be aware that if the first move is cr.D, and the second move is qcb + B you may switch sides if you were too close, but this is the the only combination that normally enable the hcf + C out of the corner. On the previous combo instead of ending with A Overhead Slam (hcf + A), you may follow with this combo/bug (from the second move).
The cr.B link into super is a good way to combo into it without having godly execution. Just perform it like f df d db + B b hcb + P.
It is possible to perform his Ground Pound (dp + A) on the opponent's wakeup with such timing that it cannot be blocked. Here is a list of unblockable Ground Pound setups after various moves for different characters: unblockable Ground Pound setups
The df + C has less range than hcb f + P (for example, df + C miss after st.b but hcb f + P can combo), and df + C > hcf + C does just a tiny more damage than hcb f + P (almost the same out of MAX), so in general its better to just hcb f + P instead of df + C > hcf + C on combos.
Strategy Corner
- MAX: cl.D > hcb f + P
deals just a tiny less damage (~ 1/3 cl.A) than
- cl.D > DM hcb hcb + P
Keep this in mind, when you need to decide whether to trigger MAX or keep meter for a DM.
