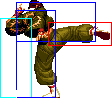
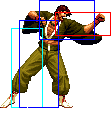
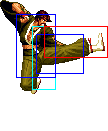
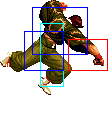
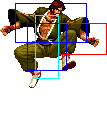
Introduction
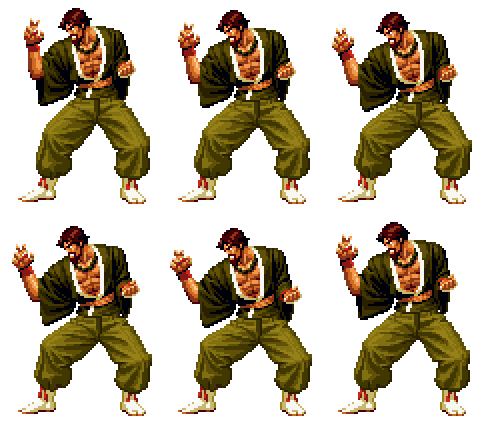
Also known as the M.O.B. (Master Of Beard), Saisyu's uses a secret form of Kung-Fu known as Beard-Fu. His Beard gives him special super powers that allow him to wield fire at his fingertips. He also celebrates Kwanzaa, which is referenced by his Horrid Kwanzaa super. It refers to a Kwanzaa one year where his son, Kyo, revealed that he wants to be a male model, much to the disdain of his father.
Colors

|

|

|

|
Gameplay Overview
Saisyu is a zoning/pressure/raw damage character. He lacks the options/normals of Iori or '95 Kyo, but he still has some great tools specific to him, the star of which is his outrageous super damage. His main weakness is the lack of fast short hop anti-airs and mid/long-range pokes. He is lighter on execution than most characters, the hardest things he has are f + A to super or cr.B, cr.A to dp. He is a great character for a beginner.
In-depth Overview
Movelist
Normal Throws
- b or f + C - Breakable, forward knockdown, face forward, un-rollable.
- b or f + D - Breakable, reverse knockdown, back turned, un-rollable.
D throw preferred, not only because of back turned wakeups, but because it takes longer for the blue grab 'effect' to appear, making it a bit harder to break on reaction.
Special Moves
- Fireball (qcf + P) - A little more recovery than Iori's, but still great. Cancel into this when your moves get blocked! Whiff cancel moves into it! It's a good fireball, not much more to say.
- Flame Uppers (qcb + P > qcb + P) - C version recommended since it goes further and allows you to combo after (look above for combos). Not safe any way you cut it, so please hit-confirm. Like I said before, I think this move sucks compared to his Slam Kick (dp + K).
- Dragon Punch (dp + P) - It's that time again. Time to do a DP. A version is invincible up to the hit (ie will trade with meaties), while C version is fully invincible at startup. The C version doesn't knock down on the first hit, so don't use it against a grounded opponent.
- Slam Kick (dp + K) - Main meterless combo move. D version combos from hard hits, B version combos from light hits. Slams them down and give you un-rollable wakeups, so you can do whatever you want. I recommend an ambiguous roll cross/anti-cross. Saisyu's roll is actually pretty bullshit here. Try rolling very close to them, when you are in a position where with any other character you'd expect to cross over, Saisyu magically stays on the same side. Honestly this is very hard to block, so your opponent better be able to reversal roll!
- Overhead Elbow (hcb + K) - Overhead attack. Both B and D are overhead, but D is slower.............sooooooo just use the B version. Very punishable on block, however, so pick your spots.
Desperation Moves
- Horrid Kwanzaa (qcb hcf + P) - Saisyu's bread and butter! You can charge it...if you want, I guess. Safe on block, too. Upper invincible while charging. You can do shenanigans on block with A strength DP after to stuff/trade whatever they try to do. MAX version does more damage and gives advantage on block. Even more shenanigans!
- Flame Pillar (qcf qcf + P) - The C version is actually invincible on startup, but is really slow. MAX version shares the same properties and does more damage.
Fastest Attacks
- 0F: C throw; D throw
- 1F: cl.C
- 2F: cl.A; cr.A; cr.B
- 3F: -
- 4F: cl.B; st.A
- 5F: cr.C
- 6F: st.B
- 7F: cl.D; st.D
- 8F: -
- 9F: st.C
- 10F: cr.D
Combos
- Best jump-ins:
- j.B (Can crossup.)
- cl.C (2 hits) > f + A >
- (S)DM Horrid Kwanzaa (qcb hcf + P)
- (S)DM qcf qcf + C (Point blank.)
- cl.C (2 hits) / (cl.C (1 hit) > f + A) >
- (S)DM Horrid Kwanzaa (qcb hcf + P)
- (S)DM qcf qcf + C
- C Flame Uppers (qcb + C > qcb + C), [jungler] (Close. Corner. Out of MAX.)
- D Slam Kick (dp + D)
- C Flame Uppers (qcb + C > qcb + C) (Out of MAX.)
- qcf + C
- cr.B, cr.A / cl.B > B Slam Kick (dp + B)
- cr.B, cl.C (2 hits) / (cl.C (1 hit) > f + A) >
- (S)DM Horrid Kwanzaa (qcb hcf + P)
- D Slam Kick (dp + D)
- cr.B, cl.C (1 hit) > C Flame Uppers (qcb + C > qcb + C), [junggler]
- st.C > (S)DM qcb hcf + P
- f + B,
- st.C > (S)DM qcb hcf + P
- st.D
- st.C
- dp + A
- cr.A
- st.B
- Close & Corner & out of MAX: ... C Flame Uppers (qcb + C > qcb + C),
- dp + A
- j.B (Timming required.)
- Simple buffers:
None
Always combo into super when you get a chance! That is Saisyu's main threat.
About Flame Uppers (qcb + C > qcb + C):
- It can combo only out of MAX (second hit will not combo on MAX if you do a hard attack before.)
- You can follow only if you are close and in the corner (You may follow out of the corner only if you do not do a hard attack before...).
- You can follow either with A Dragon Punch (dp + A) or a superjump B for a reset.
- The dp + D deals more damage than just qcb + C > qcb + C, but a tiny less damage than qcb + C > qcb + C, dp + A. So unless you are out MAX, in the corner and close, there is no much reason to use qcb + C > qcb + C over dp + D and even on that situation, the dp + D hard knockdown may be a better choice over a tiny more damage.
Note that generally, close C (1 hit) into f + A is your best bet. Close C (2 hits) by itself is easier to buffer motions from and does slight more damage, but the 2nd hit whiffs if your opponent is back turned + crouching. You can still use close C by itself, just be aware when things have the potential to hit back turned (ie after a crossup, certain knockdowns, etc.). Close C (2 hits) into f + A will only connect if you are very close, but does connect from a jump-in if you perform the jump-in early/close enough.
Crouching B links into close C, and the link is not as hard as Kyo's so make sure you can do it consistently so that you can do big damage from a low attack.
Strategy Corner
- MAX: cl.C (1 hit) >
 + A >
+ A >  + D
+ D
deals ??? than
- cl.C (2 hits) >
 + A >
+ A > 
 + P
+ P
Keep this in mind, when you need to decide whether to trigger MAX or keep meter for a DM.
