Introduction
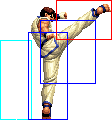
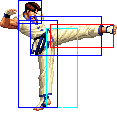
Kim was the strongest Tae Kwon Do master in the world. But then he got old, and even lost to this scrub called Freeman (who is literally quite a free man) so his sons started fighting in his name. However, Chang and Choi keep convincing him to join KOF tournaments so he keeps on truckin'.
Colors

|

|

|

|
Gameplay Overview
Kim is an in-your-face character who wants to keep hitting the opponent with moves until they make a mistake. Most of his specials are safe on block, and he can annoy with long pokes and divekicks. Adding to this is his good jump arc which allows him to crossup standing opponents with just a hop. While he has tools to deal with anti-air, his reversal options are not entirely threatening, and he can be forced into mixups on oki. With some meter, Kim is able to up his bnb damage to make him more threatening, so playing him second or last is a good option.
However, if Kim is put in the first position so that he has no meter, or rather played in EX Mode, he can utilize the stomp cancel glitch without worry of having a DM come out. His offensive prowess sharply increases, and the opponent will not have time to have built meter for a GC Roll, CD counter, or DM reversal which lets Kim really go for a guardbreak.
In-depth Analysis
Kim has a lot of ways to break down defenses. The first is simply by keeping an opponent trapped and unable to act long enough that they take a risky action, which you capitalize on. All of his good specials (aka all but the charge moves) are safe on block, or can be spaced to decrease the likelihood of being punished. Divekicks are deceptively good for throwing people off, especially considering you can do one off a backwards jump. The f + A's range, combined with its startup will fool opponents into trying to take an initiative, only to be hit by kim's foot. Even if you don't cancel Kim's stomp, you have a bit of frame advantage in which you could sweep, toss out a far A, hop, or reach to the opponent.
His solid set of normals lets him do a good part of the typical high/low mixup. cr.B pressure can be used to soften the opponent up for a hop-in, keep them blocking, allow you to go for a frametrap, or you can use the initiative for a crossup j.A. Crossup setups include:
- After landing qcb + A x 3, jump forward j.A
- After cr.D, run forward into hyperhop j.A or crossup "B" version divekick.
- cr.B, hyper/short hop j.A can crossup
If they crouch, a short jump is the better option. The setup can even cross up standing opponents, but sometimes a hyperhop is needed depending on their standing hitbox/spacing. A hop is usually safe though since if you don't cross up you can continue your pressure, and you can be ambiguous on whether or not you do cross them up.
- C Throw, run forward, Hyper Hop j.A. Can utilize the Player 1 crossup glitch in the corner by doing a normal jump which will have to be blocked as a crossup.
- D Throw, run forward, Hyper Hop j.A
On defense, he can combat offenses by sticking out the correct normals, or by relying on aerial tricks to frustrate/confuse the opponent. cr.C, along with j.CD, j.B, st.B and st.D will shut down jump attempts if you utilize the correct move for the correct jump, which is a matter of knowing hitboxes and spacing. Far A works here as a defensive tool to stop opponents from running in on you, as well as forming the start of your offense.
Finally, on stomp cancels: EX Mode makes for easier consistency and increases Kim's walk speed so you have to worry less about running forward each time or accidentally triggering his ranbu. However, this forces your entire team to play EX mode, and it's possible to do the loop in Advanced mode if you can grind the execution of running forward and canceling close C on the first hit. Either method will take practice to perform the loop.
Movelist
Normal Throws
- b or f + C - Kim does a spinning slam with his feet. Breakable, unrollable, back turned.
- b or f + D - Kim tosses the opponent backwards with his legs.
C throw preferable cause unrollable and back turned cross-up.
Special Moves
- Sanren Geki (qcb + P x 3) - Kim's rekka in '98. Always use the "A" version as the knockdown is better, hits more consistently, is safer on block, and the finisher is an overhead. Unlike other rekkas in this game, Kim does not move forward at all throughout his series, meaning you can't combo into it as easily or pressure as well with it. However, it is safe on block (only a GC roll can somewhat punish it depending on if you stop your series as they roll it) and works as a great pressure tool in that sense. Works best off a cl.C or cr.C, but the first two kicks will connect off a cr.A/cl.B.
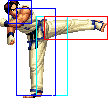
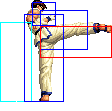
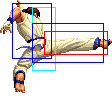
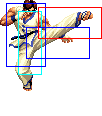
- Hangetsu Zan (qcb + K) - Kim does his signature wheeling kick, which is not an overhead and does not knock down. It can function as a psychic anti-air, but is generally a bad idea. Punishable if Kim strikes deep into the opponent, but safer if he tips them. Due to this, the "D" version should not be used. The "B" version is only going to combo off of a C move, or from a canceled into f.B. Overall it can be applied as a pressure move to cancel into when outside of Kim's rekka range.
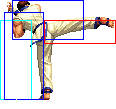
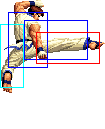
- Haki Kyaku (d d + K) - Ooh baybee. While this kick seems average at best, it's what can turn Kim into an offensive monster. First, the kick hits low and for a gimmick it will nullify grounded projectiles. The key to this move is that it is DM cancelable, but there is a programing glitch in that if Kim has no meter for a DM and inputs his (qcb,db,f + K) motion as it hits, he will cancel the Haki Kyaku, get pushed back only slightly, and have an enormous frame advantage. The frame advantage is large enough to allow Kim to run forward and do another cl.C into this move on block or hit. In fact, he can combo or blockstring three of these loops. If the opponent blocks this lockdown, they're forced to eat huge guardcrush potential, and if Kim lands a guardbreak he can continue his rep and guarantee damage from the situation.
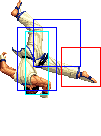
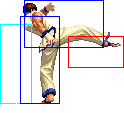
- Hishou Kyaku (air qcf + K) - Kim can perform his divekick any time in the air, although doing it instantly or "TK-ing" it is pointless since Kim hits multiple times on the way down and wont land any if you do immediately. This multi-hitter is the more offensive form of his divekick, and it works as a great move to annoy and pressure with. The "B version causes Kim to descend at a sharp angle downward, and the "D" version goes further forward on its descent. This move is safe on block, and gives a frame advantage on hit (enough to combo off a crossup divekick even). You can link a far A off the weak version of the divekick on hit, or at the very least it becomes a tight frametrap. Deals strong chip damage, but be careful to not whiff the divekick as the recovery can be punished.
- Ryuusei Raku ((b) f + K) - A really silly move that you should not be using much. Kim does a low-hitting slide, then follows it up with a downward kick which isn't an overhead nor does it connect consistantly on hit often.
- Kuu Sajin ((d) u + P) - You should only use this move off his low hitconfirm, and always use the "C" version for more damage.
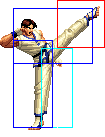
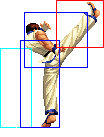
- Hien Zan ((d) u + B / (d) u + D > d + K) - Kim's razorkick. The "B" version is better as a reversal, but will still lose to large/deep hitboxes that reach deep into Kim on wakeup. Because of this, it's not a really solid reversal. If the enemy jumps in or does a sloppy aerial meaty, fire this bad boy off. The "D" version is easier to stuff, but you can follow it up with d + K for a hard knockdown.
Desperation Moves
- Hou'ou Kyaku (qcb db f + K) - Kim flies the full length of a screen and goes into a ranbu when he reaches the opponent. Adds on good damage as a combo ender, but is punishable on block. Also it's worth noting that it has a short amount of startup invulnerability up until the active hitbox comes out, so it can catch fast or poorly executed meaties to an extent as a reversal.
As soon as Kim touches the ground, run forward and you can cross under the opponent if they are not cornered. If they tech roll recover you force an ambiguous crossunder alone from the setup, or if not you have more time to set up your next mixup.
Note, can be activated if you omit the db motion; qcb f + K will register the DM.
This super may be done in the air.
- Hou'ou Tenbu Kyaku (air qcf hcb + K) - Divekick DM. Works as a good air to air if you're above the opponent, but nowhere near as good as Leona's V-slasher. However, you can buffer the motion on the ground to activate the DM faster and lower on the ground, usually to catch a poke. Hard to punish on block, so if you want to throw out a DM and try to snag the enemy pressing a button, go for this instead of his ranbu. On whiff the recovery is fierce, so watch out.
Fastest Attacks
- 0F: C throw; D throw
- 1F: -
- 2F: cl.C
- 3F: cl.D
- 4F: cl.A; st.A; cr.A; cr.B
- 5F: cl.B; st.B
- 6F: -
- 7F: st.D; cr.D
- 8F: -
- 9F: -
- 10F: CD; cr.C
Combos
- Best jump-ins:
- j.A (Can crossup.)
- air qcf + B (As a croossup.)
- cl.C (1 hit) / cr.C > d d + B > (S)DM qcb db f + K
A fancier version of the below combo that takes off slightly more damage, and involves the stomp cancel glitch timing (more on that later).
- cl.C (1 hit) / cr.C > f + A > (S)DM air qcb db f + K
With DM deals about 50% and sets up a mixup afterward (see DM section).
- f + A > (S)DM air qcb db f + K
Works even from the tip of f + A.
- cl.C (1 hit) / cr.C >
- qcb + A x 3 (Meterless combo, which scores a hard knockdown, sets up an easy crossup situation, and is safe on block)
- qcb + B
- f + A > air qcf + B (Miss) (The air qcf + B is just to make it safer - and gain a little meter)
- cr.B, cr.B, cr.B, cr.A > (d) u + C
Kim's low hitconfirm. Omit excess cr.B as needed based on spacing.
- cr.B, cl.B / cr.A >
- (S)DM qcb db f + K
- qcp + P x 2 (Stop on second part as the thrid will miss.)
Requires close proximity.
- (cl.C (1 hit) > d d + B > qcb db f + K, run) x N, any combo
Kim's stomp cancel loop. Only work without meter. Can be finished with a stomp canceled into a (S)DM if you built enough meter doing the loop, or finished with cl.C (1 hit) > qcb + A x 3.
- air qcf + B, st.A
- Simple buffers:
- cr.B, cl.A / cl.B > (S)DM qcb db f + K
- cr.B, qcb + A/B > db f + K (As cr.B is not cancelable, qcf + A/B will chain into a normal attack.)
- cr.B, cl.A / cl.B > (S)DM qcb db f + K
Strategy Corner
- MAX: cl.C (1 hit) >
 + A x 3
deals ??? than
- cl.C (1 hit) >
 + A > air

 + K
+ K
Keep this in mind, when you need to decide whether to trigger MAX or keep meter for a DM.

