|
|
Frames
|
Advantage
|
Cancel
|
Block
|
Hitbox
|
Notes
|
| Standing Close
|

|
3/4/4
|
+4/+2
|
|
HL
|
|
|

|
3/5/9
|
-2/-4
|
|
HL
|
|
Good move to use if you want to combo into hcf + P. Not bad as a meaty, either (ie good for CD counter baits with hcf + P).
|

|
3/3+4/15
|
-2/-4
|
|
HL
|
|
|
Fast, cancelable.
|

|
3/5/21
|
-6/-8
|
|
HL
|
|
Same as above except does more damage but pushes back further.
|
| Standing Far
|

|
3/4/7
|
+1/-1
|
|
HL
|
|
Good long range poke. Generally Standing B is better, but this one is cancelable, so you can cancel into f + A to bait someone mashing or maybe cancel into hcf + D (very risky).
|

|
4/8/13
|
-9/-11
|
|
HL
|
|
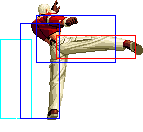
One of the godliest pokes in the game. Fast, long range, stops short hop...stops a lot of other shit too!
|

|
10/3/32
|
-15/-17
|
|
HL
|
|
Slow recovery, but it is whiff cancelable (f + B preferred) and connects against crouchers. Still, crouching C has all this move's got and more.
|

|
8/4/33
|
-17/-19
|
|
HL
|
|
Uncancelable and super slow recovery, but it is notable that it beats some things. I see Chinese players use it sometimes in specific situations. Mess around with it if you're feeling experimental.
|
 + +
|
15/5/24
|
KD/-7
|
S,Su
|
HL
|
|
Great long range poke with nice priority, cancelable of course.
|
| Crouching
|

|
3/4/6
|
+2/0
|
|
HL
|
|
Nice and long range for a cr.A. Cancelable into f + A as an anti-mash setup (mix up with cr.A, hcf + P tick).
|

|
6/3/10
|
-1/-3
|
|
L
|
|
It's a fast low! And it's chainable into other lights other than itself as you'd expect (timing is a little slower than other characters).
|

|
3/2+3/28
|
-13/-15
|
|
HL
|
|
|
One of the best ground pokes and a fantastic anti-air. The first part when his arm isn't fully extended is cancelable. As I noted above, you can use this to hit limbs and cancel into hcf + B (ie at a range where the cr.C will whiff and the hcf + B won't execute if they don't do anything).
|

|
9/3(5)5/22
|
KD/-9
|
|
L
|
|
|
Very long range sweep, cancelable and easily cancelable on whiff for safety.
|
| Jump
|

|
6/9/-
|
-/-
|
|
H
|
|
Awesome jump-in. Similar to Kyo's j.B. Can be used as an instant overhead on large characters (short hop only).
|

|
7/9
|
-/-
|
|
H
|
|
Okay air-to-air or as a jump-in I guess. There are better jump attacks for those specific uses, though.
|

|
8/5
|
-/-
|
|
H
|
|
Good jump-in, excellent crossup to be used with O.Yashiro's many setups. Experiment to find the crossup hitbox, it's a little weird.
|

|
7/7
|
-/-
|
|
H
|
|
Awesome air-to-air and air-to-ground from long range. Short hop up/back with this is a great poke.
|
 + +
|
11/4
|
KD/-
|
|
HL
|
|
Great air-to-air when they are slightly above you obviously. Good anti-air vs Choi.
|
| Command Normals
|
f + 
|
22/3/24
|
KD/-9
|
|
H
|
|
Overhead and knocks down when done alone. Fast, cancelable, and non-overhead when chained.
|
f +  (cancel) (cancel)
|
12/3/24
|
-7/-9
|
S,Su
|
HL
|
f + 
|
11/5/28
|
-13/-15
|
S,Su
|
HL
|
|
Always fast and cancelable, does more damage than f + A but doesn't travel as far. This is the move of choice to cancel into on your opponent's wakeup, since if they reversal roll backwards, you can still whiff cancel into f + B with the same timing (close C/D > f + B) and catch their roll anyway.
|
| Special Moves
|
qcb + 
|
15/20/19
|
15
|
|
Grab
|
|
|
Crushing Earth (qcb + P)
Jumping throw that you can combo anything from. Separates scrubs from good players. In beginner play, you'll see this used often and connect often. In intermediate play, you'll see this move used less and miss about 90% of the time, sometimes being punished really badly. In high level play, you'll see this move used almost never, and every time it gets used whoever uses it loses 50% or more on the spot. I can't blame anyone for using this move if it works a lot, but don't be surprised when it gets owned if you play someone good.
|
qcb + 
|
19/24/22
|
15
|
|
Grab
|
hcf + 
|
6+10+3/22
|
|
|
Grab
|
|
Dancing Earth (hcf + K)
Mostly used for comboing off of cr.C as noted above. You can use the D version to 'tick' off of a light attack, but that's just as risky as using qcb + A.
|
hcb f + 
|
0/1/34
|
|
|
Grab
|
|
Smothering Earth (hcb f + P)
Instant, good range command throw. Good for combos and run-ins.
|
hcf + 
|
8/1/27
|
|
|
Grab
|
|
Tempering Earth (hcf + P)
An invincible throw with some startup. It can be canceled into to go through and grab CD counters (on reaction, even). It does no damage at the beginning but you can followup with your own attack or let the opponent hit the ground for max damage ( make sure you do a hcf + D or a couple hcb f + P's for meter). This is one of O.Yashiro's scariest mixup tools because of all the setups afterwards:
- The most basic would be super jump D, then walk under them and mixup which side to attack from as they fall.
- A more flashy and awkward to block mixup would be super jump D, then wait a moment and short hop C in the same direction you super jumped. This will make you jump backwards but towards your opponent. If you do it early, you will jump back over the opponent and cross them up. If you wait a movement, you will stay on the same side (but be facing away from them) and hit with a 'backwards' but non-crossup j.C for a deep combo.
The mixups get even crazier if you have them in the corner and even crazier still if you're the 2nd player and can use the 2p side corner crossup bug. Experiment!
|
| DMs
|
hcb hcb + 
|
0/1/34
|
|
|
Grab
|
|
Dark Hell Paradise Trap (hcb hcb + P)
Instant super command throw. Can be comboed into from just about anything. Good after empty short hop, etc. Like all instant throws, you can use it as a reversal, but if they hop you're boned.
|
qcf qcf + 
|
|
|
|
HL
|
|
|
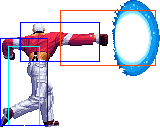
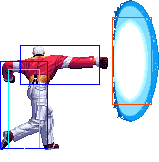
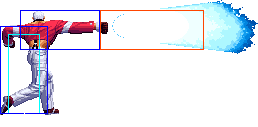
Ultra Laser Blast Palm (qcf qcf + P)
You can charge it to be unblockable, but the only setup is off of hcf + P, and it's not meaty anyway so whatever.
|
qcf qcf + 
|
|
|
|
HL
|
|
qcf qcf + 
|
9+4/20/31
|
|
|
Grab
|
|
Malevolent God of the Earth (qcf qcf + K)
Kind of like the qcb + A move, but it does less damage and has a nifty super freeze so your opponent has all day to think of which cool combo they're gonna use to punish it. Use if you like seeing cool combos.
|
qcf qcf + 
|
|
|
|
Grab
|
![]() + A at all ever in your life. He requires average-to-good execution.
+ A at all ever in your life. He requires average-to-good execution.


 + A >
+ A > 
 + P
+ P + A > DM
 + P
+ P


