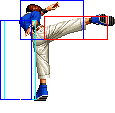
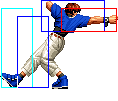
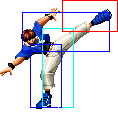
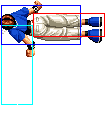
Colors

|

|

|

|
Gameplay Overview
O.Chris is a fast, top-tier pressure/mixup/lockdown character with high priority air/ground moves and great combo damage.
He even is considered like the best character of game by chinese top players except Omega Rugal of course.
His mixup options are almost unparalleled; he has a high/low game either from short hop or from blocked attacks, he has a scary crossup game with j.D, and he has a proximity unblockable (ie un-whiffable command throw) that can be used for attack/throw games as well as combos.
In top of that he has some of the highest priority moves in the game in j.CD, df + B, and cr.C.
He has the fastest short hop in the game, and if you pick him in Extra mode, he has the fastest dash in the game as well. His run in Advanced mode is similar to Leona/Heidern's run, in that he can run under some of the higher traveling fireballs in the game (ie the old Art of Fighting team fireballs and Takuma's).
He is a great character for a beginner, though he requires just a bit better execution than normal Chris because he gets his big damage from comboing into super rather than MAX mode.
In-depth Analysis
Movelist
Normal Throws
- b or f + C - Breakable, front knockdown, face forward, rollable.
- b or f + D - Breakable, reverse knockdown, back turned, un-rollable.
D throw is preferred. Sets up a meaty qcf + A fireball, into so many mixups I lost count. Examples are short hop D -> whatever, empty short hop -> land cr.B, or hyper hop CD for blockstun and pressure.
Other Normal Moves
- Run: Chris has a short hurtbox during his run and is able to pass below high moves and fireballs - similar to Iori's Maiden Masher super (qcf hcb + P).
List of low profileable fireballs:
EX Ryo 236A/C
EX Yuri 236A/C
EX Robert 236A/C
EX Andy 214A/C
Takuma 236A/C
Heidern [4]6A/C
Leona [4]6A/C
Orochi Shermie 214A/C and 41236A/B/C/D
Yamazaki 214]B[
Chin 214A/214C first portion of the move and 236236A
Special Moves
- Fire Balls (qcf + P) - A pseudo-fireball, it creates 3 flame spots that appear in sequence moving forward. A version creates them close together, C version spaces them further apart and reaches fullscreen. This is good for a lot of things; general zoning and blockstun, canceling off of cr.C as an anti-air, as a meaty wakeup, or just to simply cancel ground moves into (though you can be hit before the fireball executes so be careful). As noted above, any time it hits and you're in range, you can combo off of it.
- Flaming Uppercut (dp + P) - Has upper body invincibility, but is nowhere near a true reversal. C version does lots of stupid hits and generally sucks, so stick to the A version if you're going to use it.
- Flame Swipe (qcb + P) - C version is a little slower than A, but they combo from the same things. Won't combo at all on a crouching opponent, as it takes longer for the hitbox to reach low. Pretty much only for long-range punishing from f + A or comboing off of fireball from f + A when you have no meter.
- Flame Throw (hcf + K) - Proximity unblockable. Chris's fast run/short hop makes this a very good asset in mixups. Also serves as his main meterless combo ender as explained above.
Desperation Moves
- Orochinagi (qcb hcf + P) - A version is faster and combos from hard hits; his source of damage when he has meter. C version doesn't combo, so don't use it. MAX mode version is even slower and does more damage.
- Hamster Flame Ball (qcf qcf + P) - Stupid move with slow startup, weird hitbox but enough active frames and bad recovery, who cares?.
Fastest Attacks
- 0F: C throw; D throw
- 1F: -
- 2F: cr.C
- 3F: cl.C; cl.D; cr.B
- 4F: cl.A; cl.B; st.A; cr.A
- 5F: -
- 6F: -
- 7F: st.B; st.C
- 8F: st.D; cr.D; df + B
- 9F: -
- 10F: f + A; f + B
Combos
- (cr.B, cr.A) / cl.B >
- f + A >
- DM A Orochinagi (qcb hcf + A)
- (S)DM qcf qcf + A (Close.)
- Flame Throw (hcf + K) > [junggler] (Omit the cr.B if done from a front jump-in.)
- Flame Swipe (qcb + P) (Standing.)
- dp + C (Close.)
- Flame Throw (hcf + K) > [junggler]
- dp + C
- dp + A
- df + B
- f + B
- f + A >
- cl.C / cr.C / st.C (1 hit) >
- f + A >
- DM A Orochinagi (qcb hcf + A)
- (S)DM qcf qcf + A (Close.)
- Flame Throw (hcf + K) > [junggler] (Point blank, in the corner and out of MAX.)
- Flame Swipe (qcb + P) (Standing.)
- dp + C (Close.)
- DM A Orochinagi (qcb hcf + A)
- (S)DM qcf qcf + A (Close.)
- Flame Throw (hcf + K) > [junggler] (Close.)
- Flame Swipe (qcb + P) (Standing)
- dp + C (Close.)
- df + B
- f + B
- f + A >
- f + A >
- DM A Orochinagi (qcb hcf + A)
- Flame Swipe (qcb + P) (Standing.)
To punish certain moves that require a fast, long range move.
- cr.C > df + B (whiff cancel timing in case it misses)
- cr.B, cr.B, cr.B, st.B
- Fire Balls (fireball) (qcf + P), f + A (optional) >
- DM A Orochinagi (qcb hcf + A)
- Flame Swipe (qcb + P) (Standing.)
- ... hcf + K,
- dp + A (Out of MAX.) (Must cancel from previous move.)
- j.D (Reset)
- cl.D > hcf + AB
Option select.
- Simple buffers:
- cl.D > DM qcb hcf + A
- qcb + D > hcf + A
- cl.D > (S)DM qcf qcf + A
- qcf + D > qcf + A
- cl.D > DM qcb hcf + A
About (S)DM qcf qcf + A: the DM does little less damage than DM qcb hcf + A. The SDM is comboable (and it is the most damaging MAX combo) but will almost always miss the third hit (never see the full 3 hits out of TAS combo videos...), which will leave you vulnerable.
The first combo is really all you need.
Anytime you land a Flame Throw (hcf + K), you have 2 options. Either cancel the last kick into A Dragon Punch (dp + A), or wait until it recovers and super jump + D. The dp + A does more damage and knocks down, while the sj.D does less and resets.
Anytime you land a fireball from close-ish range, Orochinagi (qcb hcf + A) is guaranteed. You can do other stuff like jump-in CD or jump-in combos, but Orochinagi (qcb hcf + A) is reliable and does great damage.
The last combo listed isn't really a combo, but an option select between fireball (qcf + P) and command throw (hcf + K). If the cl.D hits, you will combo into his Flame Throw (hcf + K). If it gets blocked, you will cancel into the qcf + A fireball. You can still be hit between the cl.D and fireball, so this isn't the be-all-end-all of strings, but it's a nice tactic to be aware of.
O.Chris's combo ability gets much worse in MAX mode. He can only combo a command throw (hcf + K) off of cl.D, and the sj.D is the only option afterwards. He can't combo into Orochinagi (qcb hcf + A) at all.
Generally all combos should lead into either his command throw (hcf + K) or DM Orochinagi (qcb hcf + A).
Strategy Corner
- MAX: cl.C >
 + K, j.D
deals ??? than
- cl.C >
 + A >
+ A > 
 + A
+ A
Keep this in mind, when you need to decide whether to trigger MAX or keep meter for a DM.


