Introduction
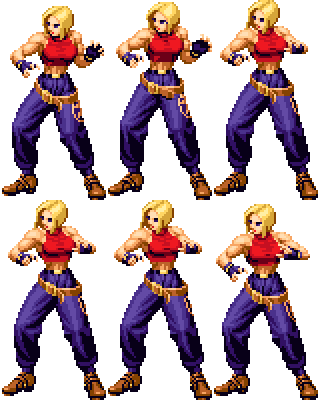
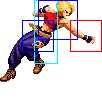
Blue Mary is dollar store brand Android 18. Joined the King of Fighters tournament because she heard that the winner wins a lifetime supply of crack.
The only thing she loves more than crack is her dog, Antonio.
Colors

|

|

|

|
Gameplay Overview
Mary is mainly a poking character, but she has a little bit of everything. Throws, anti-airs, crossups, overheads, counters, etc. That said, she's not Iori or something. She is not as easy to use as most characters, since her good combo damage options are unsafe in different ways, and her safer ones require very good execution. Still, she is a very solid mid-tier character. For beginners, she's not bad; a good character to learn fundamentals with, but there are friendlier choices.
In-depth Analysis
Movelist
Normal Throws
- b or f + C = Breakable, reverse knockdown, back turned, un-rollable.
- b or f + D - Breakable, reverse knockdown, back turned, un-rollable.
C throw preferred, leaves them closer and sets up for a safe jump better.
Special Moves
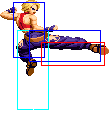
- M. Spider aka Stridum aka Bryan! (qcf + P) - A/C control the distance traveled. Jumping throw kind of like O.Yashiro's except it does static damage. Ends in a back turned, un-rollable knockdown for the opponent. If it misses, you're probably screwed. Against a good player you should never use it.
- Spin Fall aka Peephole aka Pee Hole (qcf + K) - B/D control the distance. Goes over all ground attacks, including ground fireballs. Won't combo from anything, but good to cancel into because it's safe on block. Note that you can get thrown on block if you land close enough (in the corner).
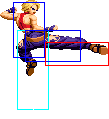
- Vertical Arrow~M. Snatcher aka Branch Can Allow~Snatch (dp + K > dp + K) - B version has no invincibility, D version has invincibility up to the hit (aka will trade with meaties as a reversal). Great anti-air, great damage. Ends in a back turned, un-rollable knockdown for the opponent, although it puts them far (great in the corner). If the D version hits twice, you can do the followup before the second hit connects, so pay attention for this if you want max damage.
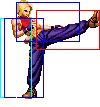
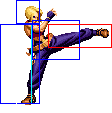
- Straight Slicer~Crab Clutch aka Hey!~Crotch! ((b) f + K > qcf + K) - Goes under a lot of high/mid attacks, including mid-height (Athena/Kensou) fireballs, though it takes a moment to go low. Ridiculously meaty, and a good option for long-range anti-air. Ends in a face forward, un-rollable knockdown for the opponent.
- M. Reverse Facelock (qcb + B) - Counter/reversal move against jumping attacks and special moves. Ends in a back turned, un-rollable knockdown for the opponent.
- M. Head Buster (qcb + D) - Counter/reversal move against normal ground attacks. After she flips them up, you can followup with a Vertical Arrow or Dynamite Swing, or just a superjump D for a reset/running cross-under setup.
- Backdrop Real aka Gudbai (hcb f + P) - Instant, nice range command throw. Good to end combos with or in mixups, etc.
Desperation Moves
- M. Splash Rose (qcf hcb + P) - This really doesn't get used much. It doesn't combo off of lights, and it does less damage than her other supers. The only application is that you can crossup someone on wakeup with it, by timing it so that you are just past them as they stand up. You can perform this setup from a hcb f + P command throw. Not the most smart or practical use of meter, though.
- M. Dynamite Swing (qcf qcf + K) - An instant, invincible, anti-air super. Really, really good. Always use the D version, as the throw portion will reach higher and not whiff nearly as much as the B version will. MAX version does more damage.
- M. Typhoon aka Bloody Tampon (hcb hcb + K) - Instant throw super. Best combo damage. The whiff is a little weird, since she takes a moment to jump (this won't hit anything). It looks similar to her Dynamite Swing, so you might get away with whiffing it. MAX version does more damage.
Fastest Attacks
- 0F: C throw; D throw
- 1F: -
- 2F: cl.A
- 3F: cl.B; cl.C; st.A; st.B; cr.A; cr.B
- 4F: -
- 5F: cr.C; df + B
- 6F: -
- 7F: -
- 8F: -
- 9F: -
- 10F: -
Combos
- Best jump-ins:
- j.D (Can crossup.)
- cl.C (2 hits) > [5.1% | MAX: 6.38%]
- f + A > [9.6% | MAX: 10.75%]
- (S)DM M. Typhoon (hcb hcb + K) [42.4% | MAX: 65.1%]
- (S)DM M. Dynamite Swing (qcf qcf + D) [41% | MAX: 64.2%]
- (S)DM qcf hcb + P (MAX: Use f + A only on point blank.) [40% | MAX: 63.3%]
- Vertical Arrow > M. Snatcher (dp + B/D > dp + K) (If close. Max meterless damage. Whiffs on some crouchers. Whiffs on MAX out of the corner.) [25.2/26.3% | MAX:31.5%/32.88%]
- Backdrop Real (hcb f + P) [24.4% | MAX: 30.5%]
- f + A > [9.6% | MAX: 10.75%]
- cl.B, cl.C...
- cr.B, cr.A > [1.9% | MAX: 2.38%]
- (S)DM M. Typhoon (hcb hcb + K)
- (S)DM M. Dynamite Swing (qcf qcf + D)
- B Vertical Arrow > M. Snatcher (dp + B > dp + K)
- Backdrop Real (hcb f + P)
- cr.A / cr.B x 3, st.B
- cr.C >
- DM qcf hcb + P
- (b) f + D > qcf + K
Out of close range.
- M. Head Buster (qcb + D),
- (S)DM M. Dynamite Swing (qcf qcf + D)
- (S)DM qcf hcb + P (Easier to hit than above.)
- D Vertical Arrow (dp + D > dp + K)
- Corner & anti-air: DM M. Dynamite Swing (qcf qcf + B) (Knee hits, grab whiffs - must hit high/far),
- M. Typhoon (hcb hcb + K)
- Backdrop Real (hcb f + P)
OTG combo. Depending on the height and distance on the initial hit, you may have time to enter in MAX mode before the throw.
- Simple buffers:
- cr.B, cl.A / st.A / cl.B > (S)DM qcf qcf + K
- cr.B, qcf + A/B > qcf + K (As cr.B is not cancelable, qcf + A/B will chain into a normal attack.)
- cl.A / st.A > (S)DM hcb hcb + K
- hcb + A > hcb + K
- cr.B, cl.B > (S)DM hcf hcf + K
- cr.B, hcb + B > hcb + K (As cr.B is not cancelable, hcb + B will chain into a normal attack.)
- cr.B, cr.A > (S)DM hcb hcb + K
- f df d db + B b f df d db + A b + K
- cr.B, cl.A / st.A / cl.B > (S)DM qcf qcf + K
For the first combo, note that close C is not safe on block, and f + A is REALLY not safe on block. Ending with dp + D like noted is for maximum meterless damage. It is also the best option in the corner, because it ends with a back turned knockdown, so you can go for a corner crossup afterwards. Mid-screen you should use the hcb f + P throw.
For supers, Typhoon (hcb hcb + K) does a tiny bit more damage than Dynamite Swing (qcf qcf + D), but Dynamite Swing has an easier command for some people, especially when comboed from cr.B, cr.A.
I highly recommend always using the D version of Dynamite Swing. The knee part flies higher, and therefore the grab part reaches higher as well and hits more consistently, especially against someone in the air. This is really obvious when doing it off of a qcb + D counter. You CAN use the B version, but you have to time it extremely late.
The whiffed Dynamite Swing into Backdrop Real is an OTG combo, perform the grab just before/right as they touch the ground.
Strategy Corner
- MAX: cl.C >
 + A >
+ A > 
 + P
+ P
deals considerable less damage (~ cl.C + 1/2 cl.A) than
- cl.C >
 + A > DM
 + K
+ K
Keep this in mind, when you need to decide whether to trigger MAX or keep meter for a DM.
