|
|
Frames
|
Advantage
|
Cancel
|
Block
|
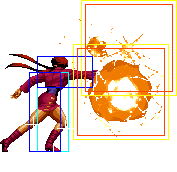
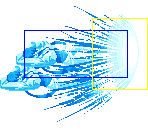
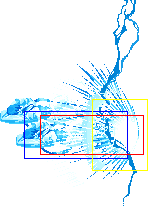
Hitbox
|
Notes
|
| Standing Close
|

|
5/2/6
|
+4/+2
|
|
HL
|
|
Identical to far A
|

|
5/3(5)9/5
|
-2/-4
|
|
HL
|
|
|
Identical to far B
|

|
4/6/16
|
-2/-4
|
|
HL
|
|
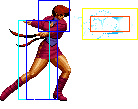
Fast and cancelable. Good as meaty.
|

|
8/5/30
|
-15/-17
|
|
HL
|
|
Identical to far D
|
| Standing Far
|

|
5/2/6
|
+4/+2
|
|
HL
|
|
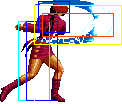
A standard anti-air normal. Shorter horizontal range than other characters. In most situations that Standing A could be used, Crouching C would be preferable but this move still has its uses.
|

|
5/3(5)9/5
|
-2/-4
|
|
HL
|
|
|
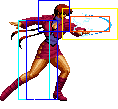
The first hit is cancelable. This move could link from cr.A and cr.B. It's more difficult to link from cr.B but being able to threaten with a low hitting, hit-confirm combo is well worth learning to help break alternate guarding opponents. It's a decent anti air to use from mid-range to stop a hop but it stays out for quite a bit of time so it's relatively easy to sweep.
|

|
14/2+3/27
|
-12/-14
|
|
HL
|
|
|
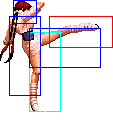
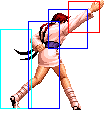
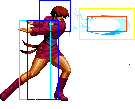
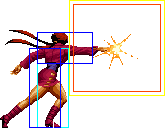
An outstretched palm attack that covers the area above Shermie's head and stop about right in front of her face. It's a move that is in the same spirit of E. Honda's far Fierce punch. This move isn't too reliable in hitting opponents let alone for pressuring and there are better anti-air options than it. It's used occasionally to frame trap an opponent by making the opponent to block a normal and if the opponent was mashing a reversal hop or tried to approach on the ground, the opponent will just be struck by the Standing C.
|

|
8/5/30
|
-15/-17
|
|
HL
|
|
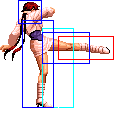
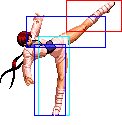
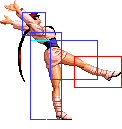
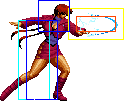
A high kick that is similar to Goro's Standing D. What this move lacks is the horizontal range that Goro's Standing D has and it's very situational in anti-airing with.
|
 + +
|
11/6/17
|
KD/-1
|
S,Su
|
HL
|
|
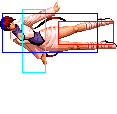
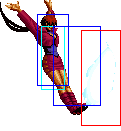
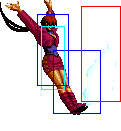
Shermie defies gravity and positions her pelvic area in a stationary space and performs a drop kick without dropping. Acts like a sobat kick and it goes over most crouching attacks. Also functions as an anti air from a jump that was spaced far upon landing.
|
| Crouching
|

|
5/2/6
|
+4/+2
|
|
HL
|
|
A fast slap without much horizontal range. Could be used to do a meaty frame trap such as Crouching A > Close C. Generally it doesn't have much uses. Hits mid.
|

|
5/5/9
|
-2/-4
|
|
L
|
|
A low poke that isn't terribly fast. Good to use occasionally to break alternate guarding. Links into Standing B.
|

|
4/3+7/17
|
-7/-9
|
|
HL
|
|
|
This is Shermie's best anti-air normal. Beats out most jump-ins. Easily whiff cancelable into Forward B for whatever kind of zoning/gimmick.
|

|
10/8/19
|
KD/-9
|
|
L
|
|
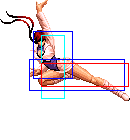
A relatively good sweep. It's good in that it shrinks Shermie's hitbox extremely low and it's hard to properly hop or jump onto her with a jump in. One would have to do a deep jump in to punish it; otherwise, this move easily acts like an anti-air since many jumps get caught by it. This sweep is also slower than most other sweeps and it's not as good to play footsies with.
|
| Jump
|

|
6/8/-
|
-/-
|
|
H
|
|
An air to air. Mainly used during a hop to air to air a full/super jump.
|

|
6/6/-
|
-/-
|
|
H
|
|
Has a similar application to Jumping A.
|

|
6/8/-
|
-/-
|
|
H
|
|
One of Shermie's best jump-in attacks. It's an extremely good ambiguous cross up with a good hitbox. This is a key component of her okizeme game. It can air to air to an extent but it's not as good as her others.
|

|
9/8/-
|
-/-
|
|
H
|
|
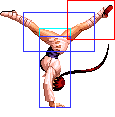
An air-to-ground jump-in attack that's hard for a number of the cast to anti-air. It's similar to Goro's Jumping D. It's cross up hitbox is not as big as Jumping C but it's still pretty big for a KOF cross up. It also functions as an air-to-air attack against an airborne opponent that is about at the same height in the jump.
|
 + +
|
13/4/-
|
KD/-
|
|
HL
|
|
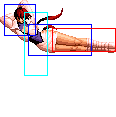
This move is similar to Shermie's Neutral Jumping D but her legs are further apart, signifying that her hitbox on this move is also wider. As a Jumping CD move, it doesn't have overhead properties but can control space like Neutral Jumping D from multiple angles and jumping/hopping trajectories.
|
| Neutral Jump
|

|
6/10/-
|
-/-
|
|
H
|
|
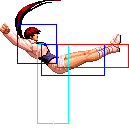
One of Shermie's best tools when going on the defense or trying to keep someone out during her neutral game. Shermie does a drop kick that directly hits horizontally and it beats out most aerial approaches as well as some grounded ones. Shermie could also keep herself safe from preemptive air-to-air attacks that are trying to stuff this attack by just Air Guarding during a Full Neutral Jump. Best not to use it too generously or the opponent could adapt and run under the full jump and meaty/anti-air Shermie on the other side.
|
| Command Normals
|
f + 
|
15/4(4)4+4+4/11
|
-3/-5
|
|
HL,H
|
|
|
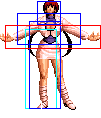
Shermie Stand - f + B
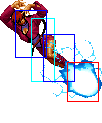
A two hit move. The first hit has a mid property while the second hit has an overhead property (unless Shermie cancels into Shermie Stand from a normal move). Although not to be used too much, the first hit of Shermie Stand could be used as a means of anti-air. When canceled into, the second hit of this move becomes cancelable into a special or super although there isn't anything that combos afterwards.
|
f + 
(cancel)
|
15/4(4)4+4+4/11
|
-3/-5
|
S,Su
|
HL
|
|
|
| Special Moves
|
hcf + 
|
26/23/33
|
|
|
HL
|
|
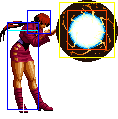
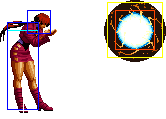
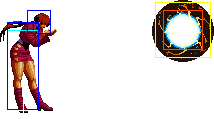
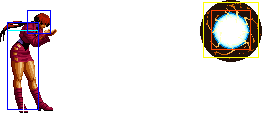
Mugetsu no Raiun - hcf + any button
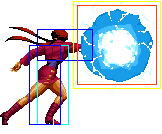
A lightning-based projectile pops up in a location dependent on the button you use; it ranges from close (A) to very far (D). It takes a while for the lightning ball to appear, so you really do have to predict where your opponent is going to be.
|
hcf + 
|
30/23/33
|
|
|
HL
|
|
hcf + 
|
34/23/33
|
|
|
HL
|
|
hcf + 
|
38/23/33
|
|
|
HL
|
|
qcb + 
|
14/8/4/16/18
|
|
|
HL
|
|
|
|
Yatanagi no Muchi - qcb + P
Two-step projectile with a limited distance. The strong version reaches farther.
|
qcb + 
|
16/8/4/16/22
|
|
|
HL
|
|
|
|
qcb + 
|
5 + 7+2, 3, 3, 3, 3, 3, 3, 3, 3, 3, 3+2+13
|
|
|
HL
|
|
Shajitsu no Odori - qcb + K
A multi-hit rushing move (looks an awful lot like Axle Spin Kick... with lightning). It doesn’t do knockdown, even on a successful hit, but as long as the opponent isn’t cornered, it is hard for them to serve you a severe counterattack if it is blocked.
|
qcb + 
|
9 + 9+2, 3, 3, 3, 3, 3, 3, 3, 3, 3, 2+2+15
|
|
|
HL
|
air qcf + 
|
26/7/11
|
|
|
H
|
|
Raijin no Tsue - air qcf + K
A move that attempts to trample the opponent underfoot while advancing forward a little in midair. It is an overhead, and if it hits, it does unrollable knockdown, but it leaves you pretty open.
|
air qcf + 
|
32/7/13
|
|
|
H
|
|
| DMs
|
qcf qcf + 
|
( {1 + 28 + 3} + 1, 1+4, 5, 4, 5, 4, 5, 4, 5, 4, 7+27)
|
|
|
HL
|
|
Ankoku Raikou Ken - qcf qcf + P
Takes the form of Benimaru’s Raikōken. The startup is extremely fast. The normal version does five hits, the MAX version does eight. It does not do knockdown if the last one doesn’t hit.
|
qcf qcf + 
|
( {1 + 28 + 7} + 1, 1+4, 5, 4, 5, 4, 5, 4, 5, 4, 11+27)
|
|
|
HL
|
qcf qcf + 
|
( {1 + 28 + 12}, 28, 11+25) ( {1 + 28 + 12} + 3, 1, 3, 1, 3, 1, 3, 1, 3, 1, 3, 1, 3, 1, 11+25)
|
|
|
HL
|
|
|
Shukumei, Gen'ei, Shinshi - qcf qcf + K
A multi-hit rushing move. It has startup invincibility. The normal weak version (and only that version) will combo from strong attacks when very close. It goes through the opponent regardless of whether it hits or is blocked.
|
qcf qcf + 
|
( {1 + 28 + 15}, 36, 11+28) ( {1 + 28 + 15} + 3, 1, 3, 1, 3, 1, 3, 1, 7, 1, 3, 1, 3, 1, 3, 1, 11+28)
|
|
|
HL
|
| SDMs
|
MAX: qcf qcf + 
|
( {1 + 28} + 4, {[1](0, 1+6), [2](4, 1+6), [3](8, 1+6), [4](12, 1+6), [5](16, 1+6), [6](20, 1+6), [7](24, 1+6), [8](28, 1+6)}, 25+27)
|
|
|
HL
|
|
|
Ankoku Raikou Ken - MAX: qcf qcf P
See DM description above.
|
MAX: qcf qcf + 
|
( {1 + 28 + 11} + 3, 1, 3, 1, 3, 1, 3, 1, 3, 1, 3, 1, 3, 1, 3, 1, 3, 1, 11+32)
|
|
|
HL
|
|
|
Shukumei, Gen'ei, Shinshi - MAX: qcf qcf + K
See DM description above.
|
 + B (2 hits) >
  + P
+ P
 + P
+ P