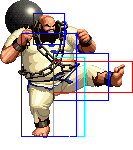
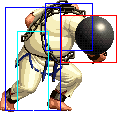
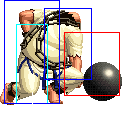
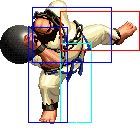
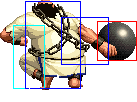
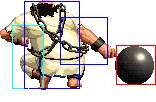
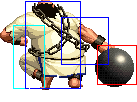
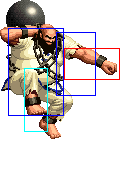
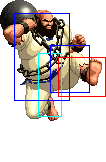
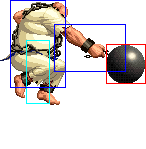
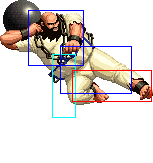
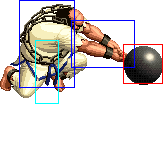
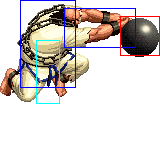
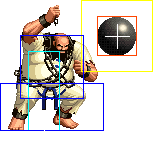
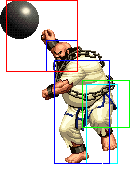
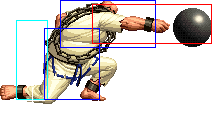
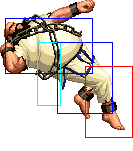
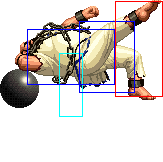
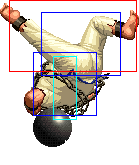
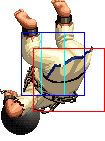
The King of Fighters '98/Chang

From SuperCombo Wiki

Introduction

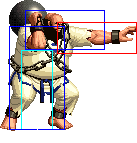
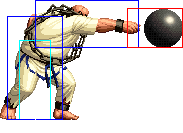
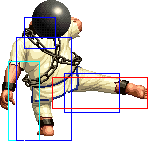
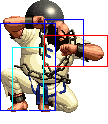
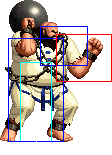
Chang aka Chang, Lord of the Balls, ruler of the ancient kingdom of Ballgaria, was crowned Emperor after defeating the marble from Marble Madness and the entire cast of Ballz 3D - 3D Fighting At Its Ballziest.

In his quest to destroy all other balls, one time Chang mistook Sonic for a ball and crushed him with his bare hands and that's why all new Sonic games suck.

Colors

Snka.gif Snkb.gif Snkc.gif Snkd.gif
Chang98 colorA.png Chang98 colorB.png Chang98 colorC.png Chang98 colorD.png

Gameplay Overview

Chang is a mid-range zoning/powerhouse/tank character. He has very high priority and high damage air normals, making him a prime character to use MAX mode with. He has some very strong anti-airs and basically focuses on keeping the opponent from moving. While he is ridiculously strong against most characters when he has the life advantage, he is oppositely weak when he is at a life disadvantage. He's still really good though, a solid high-mid tier character. He requires little execution skill, and he is a great character for a beginner.

In-depth Analysis

Movelist

Frames Advantage Cancel Block Hitbox Notes
Standing Close
Snka.gif 5/5/7 0/-2 C HL
Chang98 clA.png
Chain: -
Snkb.gif 4/6/7 -1/-3 C HL
Chang98 stB.png
Identical to far B
Snkc.gif 14/4*8/12 0/-2 -/- HL/HL
Chang98 clC1.png
Chang98 clC2.png
Snkd.gif 9/8/13 -1/-3 C HL
Chang98 clD.png
Standing Far
Snka.gif 5/5/7 0/-2 - HL
Chang98 stA.png
Super crazy diesel anti-air vs short hop or even a normal height jump, and has high priority in general.

Chain: -

Snkb.gif 4/6/7 -1/-3 C HL
Chang98 stB.png
The move of choice to cancel into things, since it's Chang's fastest cancelable move. It even links into his A Belly Flop (qcf qcf + A).

It has more hit stun than other weak attacks, the hit stun is the same of a normal heavy attack (df + A can combo from it for example). Chain: -

Snkc.gif 16/4/19 -3/-5 - HL
Chang98 stC.png
Long range and a pretty big hitbox, but slow and has a lot of recovery. Still, you can use it to beat certain pokes and things, so experiment.
Snkd.gif 13/9/22 -11/-13 - HL
Chang98 stD.png
Snkc.gif+Snkd.gif 19/4+3/19 KD/-4 S HL
Chang98 stCD1.png
Chang98 stCD2.png
Nice big hitbox, cancelable. Good as a meaty.
Crouching
Snka.gif 6/5/7 0/-2 C HL
Chang98 crA.png
Easy to cancel into Ball Swing (P rapidly).

Chain: -

Snkb.gif 7/5/12 -5/-7 C L
Chang98 crB.png
Low and cancelable, but slow. Good as a meaty.

Chain: -

Snkc.gif 8/3+3+3+4+5/18 -16/-18 C (1st part) HL
Chang98 crC1.png
Chang98 crC2.png
Chang98 crC3.png
Cancelable before he extends his arm all the way. Can be used an an early anti-air.
Chang98 crC4.png
Chang98 crC5.png
Snkd.gif 11/4+4+4/23 KD/-17 C L
Chang98 crD1.png
Chang98 crD2.png
Chang98 crD3.png
#1 long range ground move. Cancelable on hit/block or on whiff, good to cancel into Ball Swing~cancel or A Ball Thrust ((b) f + A). Has a blind spot between Chang and the ball.
Jump
Snka.gif 4/17/- -/- - H
Chang98 jA.png
Nice air-to-air, since it stays out a long time.
Snkb.gif 4/13/- -/- - H
Chang98 jB.png
Not bad, but jumping D is probably a better choice.
Snkc.gif 6/5/- -/- - H
Chang98 jC.png
Infamous jump move #1. Fast, huge hitbox, crazy high priority, big damage. MAX mode + counter-hit + jumping C = pain. Has a blind spot between Chang and the ball.
Snkd.gif 7/9/- -/- - H
Chang98 jD.png
Jumping attack if choice when you're too close for jumping C. Good as a jump-in to combo st.B > Ragdoll Slam from.
Snkc.gif+Snkd.gif 12/3+3/- KD/- - HL
Chang98 jCD1.png
Chang98 jCD2.png
Infamous jumping attack #2. Longer reach and more horizontally angled than jumping C. Actually better for hitting lower at long range than jumping C because it stays out longer.
Command Normals
df + Snka.gif 12/12/31 KD/-25 - L
Chang98 dfA.png
Low slide. Can go under any non-ground fireballs or high attacks. Has really bad recovery compared to other slides so be very careful using it.
Special Moves
Snka.gif rapidly HL
Chang98 mashP.png
Ball Swing (P rapidly, b or f to move, ABCD to cancel)

Practice and get proficient at performing this and immediately canceling it with ABCD, especially from whiff canceling cr.D. You can easily be hit by a low attack and various other moves while swinging. Snuffs fireballs. Can be a very good anti-air, especially if it hits on counter (2 hits). In the corner you can use it for chip damage, and use different canceling points to make them guess when it's going to end.

Snkc.gif rapidly HL
(b) f + Snka.gif HL
Chang98 bfA1.png
Chang98 bfA2.png
Ball Thrust ((b) f + P)

The startup has auto-guard, the A version is faster and has shorter auto-guard, C version is slower/longer auto-guard. This is a pretty nice long range move as an alternative to st.C. Don't use it close, you're asking to get comboed right after the auto-guard ends and before the attack comes out.

The C version has an additional ball swing during the auto-guard before he attacks, and it can actually hit the opponent. This hardly ever hits, but it does do a shit ton fuck of damage. If it's a counter-hit, it'll hit twice, too. Once I tested on Yuri (low hp), MAX mode activated, counter-hit and it did about 90% damage. Not practical but good to know.

(b) f + Snkc.gif HL
Chang98 bfC1.png
Chang98 bfC-2.png
(d) u + Snkb.gif HL
Chang98 duK1.png
Chang98 duK2.png
Chang98 duK3.png
Flash Kick ((d) u + K)

Not invincible. It hits on the way up and the way down. The B version doesn't knock down on the way up, the C version does. Looks funny!

(d) u + Snkd.gif HL
Chang98 duK4.png
Chang98 duK5.png
hcb f + Punch.gif Grab
Chang98 hcbfP.png
Ragdoll Slam (hcb f + P)

Instant command throw. You use it to throw people. Good after empty short hop, etc. you know the drill. This is KOF so get crackin'.

Normal Throws

  • b or f + C - Breakable, front knockdown, face forward, rollable.


  • b or f + D - Unbreakable (mashable), front knockdown, face forward, rollable.


D throw obviously preferred since it's unbreakable. It can even potentially do more damage than his command throw. Mash!

Special Moves

  • Tekkyuu DaiKaiten - P rapidly (ABCD cancels, b / f to move)

See description on Movelist section.


  • Tekkyuu FunsaiGeki - (b) f + P

See description on Movelist section.


  • Tekkyuu HienZan - (d) u + K

See description on Movelist section.


  • Dai Hakai Nage - hcb f + P

See description on Movelist section.

Desperation Moves

  • Chang Rush (qcf hcb + P) - Invincible startup, A version is faster. Safe on block, but can be rolled though and Chang will fall on his face and it's a free punish. It's not super fast, but good as a 'random' super. I would recommend it as an anti-air super (and it isn't bad as one either), but Belly Flop is faster. MAX version does more damage.

At the end of the super, Chang will randomly do a different ender. One of the enders looks like his st.B. If this connects in the corner, you can combo a A version Belly Flop (qcf qcf + A) after.


  • Belly Flop (qcf qcf + P) - A version is a super-fast invincible move that works as an infallible anti-air. Be careful because the opponent can recovery roll after it and heavily punish you while you recover. If it hits on counter, both hits will connect. The C version will cause him to run forward before he performs the belly flop. This can cross up, so watch it. The MAX version will cause him to belly flop in place no matter what. When he lands, he causes a damaging 'earthquake' effect similar to Daimon's DP + A. The "fall" in the normal version is an overhead, in the MAX version the "fall" may be blocked high or low, but is better to block low, so you be already crouching during the following 'earthquake' effect.

Fastest Attacks

  • 0F: C throw; D throw; hcb f + P
  • 1F: -
  • 2F: -
  • 3F: -
  • 4F: cl.B; st.B
  • 5F: cl.A; st.A
  • 6F: cr.A
  • 7F: cr.B
  • 8F: cr.C
  • 9F: cl.D
  • 10F: -


Combos

Chang doesn't have many combos, but you're going to hit them with something if you need to get in and do some damage.


  • Best jump-ins:
    • j.D


  • cl.B, cr.A >
    • DM A Belly Flop (qcf qcf + A)
    • Ball Swing (P rapidly > ABCD to cancel.)


  • cr.B / cr.A >
    • DM A Belly Flop (qcf qcf + A)
    • Ragdoll Slam (hcb f + P)
    • Ball Swing (P rapidly > ABCD to cancel.)


  • cl.B / st.B / cr.C / cl.D >
    • (S)DM qcf hcb + A, [junggler] (Point blank and only against large characters like Brian or Chang because of the push back - in the case o Chang only out of MAX and from cl.B.)
    • DM A Belly Flop (qcf qcf + A)
    • Ragdoll Slam (hcb f + P)
    • Ball Swing (P rapidly, ABCD to cancel.)
    • df + A


  • Counter: j.CD, DM A Belly Flop (qcf qcf + A)


  • Counter: P rapidly > ABCD (Cancel), CD > DM A Belly Flop (qcf qcf + A) (OTG)


  • Corner: ... (S)DM qcf hcb + P (Kick ender.),
    • DM A Belly Flop (qcf qcf + A)
    • st.CD


  • Simple buffers:
    • cl.B / st.B / cl.A / cl.D > DM qcf qcf + A
      • qcf + B/A/D > qcf + A
    • cl.B / cl.D > (S)DM qcf hcb + A
      • qcf + B/D > hcb + A


Strategy Corner

  • MAX: cl.B > Hcb.png F.png + P

deals just a tiny less damage (~ 1/4 cl.A) than

  • cl.B > Qcf.png Qcf.png + A

Keep this in mind, when you need to decide whether to trigger MAX or keep meter for a DM.

Links

Game Navigation

General
Controls
Notation
HUD
Gameplay Overview
System
FAQ
Normal Characters
Andy
Athena
Benimaru
Billy
Blue Mary
Brian
Chang
Chin
Chizuru
Choi
Chris
Clark
Daimon
Heidern
Heavy D!
Iori
Joe
Kensou
Kim
King
Kyo
Leona
Lucky
Mai
Mature
Ralf
Robert
Rugal
Ryo
Saisyu
Shermie
Shingo
Takuma
Terry
Vice
Yamazaki
Yashiro
Yuri
EX Characters
EX Andy
EX Billy
EX Joe
EX Kyo
EX Mai
Orochi Chris
Orochi Shermie
Orochi Yashiro
EX Robert
EX Ryo
EX Terry
EX Yuri
Omega Rugal