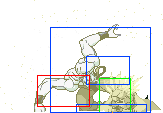
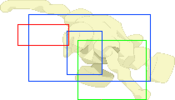
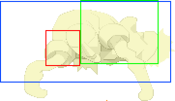
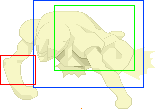
No edit summary |
No edit summary |
||
| Line 1: | Line 1: | ||
{{Character Subnav HFTF|name=Iggy}} | {{Character Subnav HFTF|name=Iggy}} | ||
=Movelist= | |||
==Normals== | |||
===Stand Off=== | |||
{{MoveData | |||
|image=Iggy 5a.png | |||
|caption= | |||
|name=5A | |||
|data= | |||
{{AttackData-HFTF | |||
|startup=5 | |||
|active=2 | |||
|recovery=17 | |||
|hit=-6 | |||
|block=-8 | |||
|pushblock=-11 | |||
|guard=Mid | |||
|damage=3 | |||
|cancel=5A<br>Special/Super | |||
|properties=Air UB | |||
|description= | |||
*Can chain into itself | |||
*Worse than 2A in almost every way, no real reason to use this move | |||
}} | |||
}} | |||
<br> | |||
{{MoveData | |||
|image=Iggy 5b.png | |||
|caption= | |||
|name=5B | |||
|data= | |||
{{AttackData-HFTF | |||
|startup=10 | |||
|active=3 | |||
|recovery=23 | |||
|hit=-7 | |||
|block=-9 | |||
|pushblock=-17 | |||
|guard=Mid | |||
|damage=6 | |||
|cancel=Special/Super | |||
|properties=Air UB | |||
|description= | |||
*Shrinks Iggy's hurtbox dramatically. | |||
*Don't let the 10f start-up fool you, because the move moves Iggy forward slightly it's effectively pretty quick. | |||
*Usable as a cross-under normal that can then confirm into 236aa among other things. | |||
}} | |||
}} | |||
<br> | |||
{{MoveData | |||
|image=Iggy 6b.png | |||
|caption= | |||
|name=6B | |||
|data= | |||
{{AttackData-HFTF | |||
|startup=21 | |||
|active=2 | |||
|recovery=25 | |||
|hit=0 | |||
|block=-10 | |||
|pushblock=-23 | |||
|guard=High | |||
|damage=10 | |||
|cancel=Special/Super | |||
|properties= | |||
|description= | |||
*Hits overhead | |||
*Too small to be used in neutral, mainly used for oki | |||
*Can combo into supers or negative edge 63214B | |||
*Certain characters can jump out of it on wakeup, while others can't | |||
}} | |||
}} | |||
<br> | |||
{{MoveData | |||
|image=Iggy Close 5c.png | |||
|caption= | |||
|name=5C (Close) | |||
|data= | |||
{{AttackData-HFTF | |||
|startup=10 | |||
|active=22 | |||
|recovery=2 | |||
|hit=-4 | |||
|block=-6 | |||
|pushblock=-24 | |||
|guard=Mid | |||
|damage=9 | |||
|cancel=236S/214S | |||
|properties=Air UB | |||
|description= | |||
*Hits 3 times | |||
*Can only cancel into 236S and tandem | |||
*Hitbox still comes out even if you get hit out of it | |||
*Can be good as an anti air | |||
*Also good for catching people neutral jumping out of oki | |||
}} | |||
}} | |||
<br> | |||
{{MoveData | |||
|image=Iggy Far 5c.png | |||
|caption= | |||
|name=5C (Far) | |||
|data= | |||
{{AttackData-HFTF | |||
|startup=12 | |||
|active=6 | |||
|recovery=10 | |||
|hit=0 | |||
|block=-2 | |||
|pushblock=-12 | |||
|guard=Mid | |||
|damage=10 | |||
|cancel=236S/214S | |||
|properties= | |||
|description= | |||
*Can only cancel into 236S or tandem | |||
*Extremely disjointed poke, can even beat moves like Avdol 2C | |||
*Basically iggys only ranged option in stand off besides his charge moves | |||
*Fairly slow startup and can't hit jumping opponents, but it’s still hard to punish even if you jump over | |||
*Very strong button, use it a lot | |||
}} | |||
}} | |||
<br> | |||
{{MoveData | |||
|image=Iggy 2a.png | |||
|caption= | |||
|name=2A | |||
|data= | |||
{{AttackData-HFTF | |||
|startup=4 | |||
|active=4 | |||
|recovery=8 | |||
|hit=+8 | |||
|block=+6 | |||
|pushblock=+3 | |||
|guard=Low | |||
|damage=3 | |||
|cancel=2A<br>Special/Super | |||
|properties= | |||
|description= | |||
*Can chain into itself | |||
*Good frame data and disjoint make this a good small range poke | |||
*Also good tick grab tool and combo starter | |||
}} | |||
}} | |||
<br> | |||
{{MoveData | |||
|image=Iggy 2b.png | |||
|caption=The meaty of your dreams (until they hold 8) | |||
|name=2B | |||
|data= | |||
{{AttackData-HFTF | |||
|startup=6 | |||
|active=20 | |||
|recovery=4 | |||
|hit=-8 | |||
|block=-10 | |||
|pushblock=-18 | |||
|guard=Low | |||
|damage=7 | |||
|cancel=Special/Super | |||
|properties= | |||
|description= | |||
*Mainly used as a meaty or to catch people's landings | |||
*Extreme low profile, will go under a lot of higher aerials and certain grounded moves | |||
*Most characters can jump out of it when used as a meaty after grab | |||
*Can be +9 on block if you hit someone at its last active frame | |||
}} | |||
}} | |||
<br> | |||
{{MoveData | |||
|image=Iggy 2c.png | |||
|caption= | |||
|name=2C | |||
|data= | |||
{{AttackData-HFTF | |||
|startup=4 | |||
|active=9 | |||
|recovery=12 | |||
|hit=Launch | |||
|block=-4 | |||
|pushblock=-17 | |||
|guard=Mid | |||
|damage=11 | |||
|cancel=236S/214S | |||
|properties=Air UB | |||
|description= | |||
*Can only cancel into 236S or tandem | |||
*Mostly used as a combo ender after tandems to get a hard knockdown | |||
*Can sometimes be used as an anti air but has a bad hurtbox | |||
}} | |||
}} | |||
<br> | |||
{{MoveData | |||
|image=Iggy j.c (1).png | |||
|caption= | |||
|name=j.A | |||
|data= | |||
{{AttackData-HFTF | |||
|startup=2 | |||
|active=Until landing | |||
|recovery= | |||
|hit=+12 | |||
|block=+10 | |||
|pushblock=+6 | |||
|guard=High | |||
|damage=3 | |||
|cancel= | |||
|properties= | |||
|description= | |||
*Can be used instead of other jumping attacks for cmd oki in order avoid activating IPS | |||
}} | |||
}} | |||
<br> | |||
{{MoveData | |||
|image=Iggy j.c (1).png | |||
|image2 = Iggy j.c (2).png | |||
|caption= | |||
|name=j.B | |||
|data= | |||
{{AttackData-HFTF | |||
|startup=2 | |||
|active=Until Landing | |||
|recovery= | |||
|hit=+12 | |||
|block=+10 | |||
|pushblock=+6 | |||
|guard=High | |||
|damage=8 | |||
|cancel= | |||
|properties= | |||
|description= | |||
*Hits 2 times | |||
*Also no reason to use this | |||
}} | |||
}} | |||
<br> | |||
{{MoveData | |||
|image=Iggy j.c (1).png | |||
|image2=Iggy j.c (2).png | |||
|caption= | |||
|name=j.C | |||
|data= | |||
{{AttackData-HFTF | |||
|startup=2 | |||
|active=Until landing | |||
|recovery= | |||
|hit=+12 | |||
|block=+10 | |||
|pushblock=+6 | |||
|guard=High | |||
|damage=10 | |||
|cancel= | |||
|properties= | |||
|description= | |||
*Hits 2 times | |||
*The good one, has higher damage than both of the others with no drawbacks | |||
*Has only 2 frames of startup | |||
*Can be a good anti air | |||
}} | |||
}} | |||
<br> | |||
{{MoveData | |||
|image=Iggy 5b.png | |||
|caption=Are you sensing a theme here | |||
|name=d.5A/B | |||
|data= | |||
{{AttackData-HFTF | |||
|startup=10 | |||
|active=3 | |||
|recovery=23 | |||
|hit=-8 | |||
|block=-9 | |||
|pushblock=-15 | |||
|guard=Mid | |||
|damage=5 | |||
|cancel=Special/Super | |||
|properties=Air UB | |||
|description= | |||
*Worse version of d.5C | |||
}} | |||
}} | |||
<br> | |||
{{MoveData | |||
|image=Iggy 5b.png | |||
|image2=Iggy d.5c (2).png | |||
|caption= | |||
|name=d.5C | |||
|data= | |||
{{AttackData-HFTF | |||
|startup=10 | |||
|active=9 | |||
|recovery=17 | |||
|hit=-10 | |||
|block=-11 | |||
|pushblock=-15 | |||
|guard=Mid | |||
|damage=8 | |||
|cancel=Special/Super | |||
|properties=Air UB | |||
|description= | |||
*Hits 2 times | |||
*Can confirm into 236AA | |||
*Ok approaching option | |||
}} | |||
}} | |||
<br> | |||
{{MoveData | |||
|image=Iggy 2b.png | |||
|caption= | |||
|name=d.2A/B/C | |||
|data= | |||
{{AttackData-HFTF | |||
|startup=6 | |||
|active=20 | |||
|recovery=4 | |||
|hit=-8 | |||
|block=-10 | |||
|pushblock=-18 | |||
|guard=Low | |||
|damage=7 | |||
|cancel=Special/Super | |||
|properties= | |||
|description= | |||
*Just 2B but it goes slightly farther | |||
}} | |||
}} | |||
<br> | |||
{{MoveData | |||
|image=Iggy Grab.png | |||
|caption= | |||
|name=6C/4C (Close) | |||
|data= | |||
{{AttackData-HFTF | |||
|startup= | |||
|active= | |||
|recovery= | |||
|hit= | |||
|block= | |||
|pushblock= | |||
|guard=Grab | |||
|damage=17 | |||
|cancel= | |||
|properties=Air UB | |||
|description= | |||
*Knocks opponents down near Iggy, gives time for oki | |||
*Has a long range, which combined with Iggy's fast walking speed makes this exceptionally easy to hit | |||
*Very strong option to have, considering how many oki options Iggy has to work with | |||
*Iggy's grab is unique compared to other knockdowns. On the first frame of waking up on most knockdowns, the only thing you are allowed to do is block. This doesn't apply to Iggy, meaning people can use frame 1 reversals to get out of his oki, and can jump out of his 2B and sometimes his 6B. | |||
*Keep in mind this only applies to his grab, meaning any other source of oki will have normal knockdown properties. | |||
*The oki he gets can range from very good to almost nonexistant depending on the character's wakeup speed. Wakeup speeds are different from Iggy's grab than other knockdowns. There's a chart showing the advantage in the Strategy section. | |||
}} | |||
}} | |||
<br> | |||
===Stand On=== | |||
{{MoveData | |||
|image=Iggy s.5a.png | |||
|caption= | |||
|name=S.5A | |||
|data= | |||
{{AttackData-HFTF | |||
|startup=5 | |||
|active=3 | |||
|recovery=11 | |||
|hit=-1 | |||
|block=-2 | |||
|pushblock=-5 | |||
|guard=Mid | |||
|damage=4 | |||
|cancel= Special/Super | |||
|properties= IPS=No Scales=yes<br> Air-UB | |||
|description= | |||
*Decent combo starter | |||
*Usually outclassed by s.2A, but this one can do slightly more damage | |||
}} | |||
}} | |||
<br> | |||
{{MoveData | |||
|image=Iggy s.5b (1).png | |||
|image2=Iggy s.5b (2).png | |||
|image3=Iggy s.5b (3).png | |||
|caption= | |||
|name=S.5B | |||
|data= | |||
{{AttackData-HFTF | |||
|startup=8 | |||
|active=4 | |||
|recovery=13 | |||
|hit=-1 | |||
|block=-2 | |||
|pushblock=-10 | |||
|guard=Mid | |||
|damage=11 | |||
|cancel= Special/Super | |||
|properties= IPS=No Scaling=Yes<br> Air-UB | |||
|description= | |||
*Mainly combo filler | |||
*Ok anti air | |||
}} | |||
}} | |||
<br> | |||
{{MoveData | |||
|image=Iggy s.5c (1).png | |||
|image2=Iggy s.5c (2).png | |||
|caption2=Programming is hard | |||
|name=S.5C | |||
|data= | |||
{{AttackData-HFTF | |||
|startup=9 | |||
|active=7 | |||
|recovery=19 | |||
|hit=-6 | |||
|block=-9 | |||
|pushblock=-21 | |||
|guard=Mid | |||
|damage=13 | |||
|cancel= Special/Super | |||
|properties= IPS=No Scaling=Yes<br> Air-UB | |||
|description= | |||
*Would be a good poke if the hitbox actually matched the animation. | |||
}} | |||
}} | |||
<br> | |||
{{MoveData | |||
|image=Iggy 236s (1).png | |||
|image2=Iggy 236s (2).png | |||
|image3=Iggy 236s (3).png | |||
|caption= | |||
|name=S.5C (Chain) | |||
|data= | |||
{{AttackData-HFTF | |||
|startup=5 | |||
|active=? | |||
|recovery=15 | |||
|hit=0 | |||
|block=-1 | |||
|pushblock=-10 | |||
|guard=Mid | |||
|damage=9 | |||
|cancel= Special/Super | |||
|properties= IPS=No Scaling=Yes<br> Air-UB | |||
|description= | |||
*Can only get this move when chained into | |||
*Combo filler | |||
}} | |||
}} | |||
<br> | |||
{{MoveData | |||
|image=Iggy s.6c.png | |||
|image2=Iggy s.6c (2).png | |||
|caption2=Totally didn't release my charge early just then | |||
|name=S.6C | |||
|data= | |||
{{AttackData-HFTF | |||
|startup=12 | |||
|active=15 | |||
|recovery=4 | |||
|hit=-6 | |||
|block=-7 | |||
|pushblock=-10 | |||
|guard=Mid | |||
|damage=5 | |||
|cancel= Special/Super | |||
|properties= IPS=No Scaling=no<br> Air-UB | |||
|description= | |||
*Decent poke but harder to use without accidentally doing charge moves. | |||
*Going stand on and then using the move helps with that | |||
*Can be plus on hit, block and push block if spaced well | |||
}} | |||
}} | |||
<br> | |||
{{MoveData | |||
|image=Iggy s.2a.png | |||
|caption= | |||
|name=S.2A | |||
|data= | |||
{{AttackData-HFTF | |||
|startup=4 | |||
|active=4 | |||
|recovery=9 | |||
|hit=0 | |||
|block=-1 | |||
|pushblock=-4 | |||
|guard=Low | |||
|damage=5 | |||
|cancel= Special/Super | |||
|properties= IPS=No Scaling=Yes<br> Air-UB | |||
|description= | |||
*Main combo starter and the low in his stand on high/low game | |||
*Somewhat punishable due to the sub-par recovery. | |||
}} | |||
}} | |||
<br> | |||
{{MoveData | |||
|image=Iggy s.2b (1).png | |||
|image2=Iggy s.2b (2).png | |||
|caption= | |||
|name=S.2B | |||
|data= | |||
{{AttackData-HFTF | |||
|startup=4 | |||
|active=4 | |||
|recovery=9 | |||
|hit=3 | |||
|block=2 | |||
|pushblock=-6 | |||
|guard=Mid | |||
|damage=10 | |||
|cancel= Special/Super | |||
|properties= IPS=No Scaling=Yes<br> Air-UB | |||
|description= | |||
*Strong counterpoke, important in matchups like Alessi and Kak | |||
*Also Iggy's main meterbuild option | |||
}} | |||
}} | |||
<br> | |||
{{MoveData | |||
|image=Iggy s.2c.png | |||
|caption= | |||
|name=s.2C | |||
|data= | |||
{{AttackData-HFTF | |||
|startup=10 | |||
|active=4 | |||
|recovery=38 | |||
|hit=Launch | |||
|block=-24 | |||
|pushblock=-37 | |||
|guard=Low | |||
|damage=13 | |||
|cancel= Special/Super | |||
|properties= IPS=No Scaling=Yes<br> Air-UB | |||
|description= | |||
*Is special cancellable unlike the chained version | |||
*Launches instead of knocking down | |||
*Generally not used over the chained version | |||
}} | |||
}} | |||
<br> | |||
{{MoveData | |||
|image=Iggy s.2c.png | |||
|caption= | |||
|name=s.2C (Chain) | |||
|data= | |||
{{AttackData-HFTF | |||
|startup=9 | |||
|active=17 | |||
|recovery=19 | |||
|hit=KD | |||
|block=-24 | |||
|pushblock=-37 | |||
|guard=Low | |||
|damage=13 | |||
|cancel= | |||
|properties= IPS=No Scaling=Yes<br> Air-UB | |||
|description= | |||
*Safest combo ender, but lower damage and punishable against Stand On characters | |||
*Has more limited oki options than grab, but isn't able to be reversaled | |||
*Insanely active for no reason | |||
}} | |||
}} | |||
<br> | |||
{{MoveData | |||
|image=Iggy s.j.a.png | |||
|caption=The fastest Iads in the west | |||
|name=S.J.A | |||
|data= | |||
{{AttackData-HFTF | |||
|startup=4 | |||
|active=4 | |||
|recovery= until landing | |||
|hit=5 | |||
|block= | |||
|pushblock= | |||
|guard=High | |||
|damage=4 | |||
|cancel= | |||
|properties= IPS=No Scales=Yes | |||
|description= | |||
*Very fast but less-damaging option out of air dashing for those sick unreactable Iads. | |||
*Can be used as a quick air to air sometimes | |||
}} | |||
}} | |||
<br> | |||
{{MoveData | |||
|image=Iggy S.J.B (1).png | |||
|image2=Iggy j.s.b (2).png | |||
|image3=Iggy s.j.b (3).png | |||
|caption= | |||
|name=S.J.B | |||
|data= | |||
{{AttackData-HFTF | |||
|startup=8 | |||
|active=4 | |||
|recovery= until landing | |||
|hit= | |||
|block= | |||
|pushblock= | |||
|guard=High | |||
|damage=11 | |||
|cancel= | |||
|properties= IPS=No Scales=Yes | |||
|description= | |||
*Mainly used as a tech chase tool or air to air against people above you | |||
}} | |||
}} | |||
<br> | |||
{{MoveData | |||
|image=Iggy s.j.c (1).png | |||
|image2=Iggy s.j.c (2).png | |||
|caption= | |||
|name=S.J.C | |||
|data= | |||
{{AttackData-HFTF | |||
|startup=8 | |||
|active=2 | |||
|recovery= until landing | |||
|hit= | |||
|block= | |||
|pushblock= | |||
|guard=High | |||
|damage=13 | |||
|cancel= nothing | |||
|properties= IPS=No Scales=Yes | |||
|description= | |||
*Very strong air to air | |||
*Most common jump in | |||
*Does a lot of stand gauge damage | |||
}} | |||
}} | |||
<br> | |||
{{MoveData | |||
|image=Iggy d.s.5a.png | |||
|caption= | |||
|name=d.s.5A | |||
|data= | |||
{{AttackData-HFTF | |||
|startup=4 | |||
| | |active=3 | ||
| | |recovery=16 | ||
|hit=-6 | |||
| | |block=-7 | ||
| | |pushblock=-10 | ||
| | |guard=Mid | ||
|- | |damage=4 | ||
| | |cancel=Special/Super | ||
|- | |properties=Air UB | ||
| | |description= | ||
| | *Not very good | ||
| | }} | ||
| | }} | ||
| | <br> | ||
{| | {{MoveData | ||
|image=Iggy d.s.5b.png | |||
|caption= | |||
|name=d.s.5B | |||
|data= | |||
{{AttackData-HFTF | |||
| | |startup=9 | ||
| | |active=4 | ||
|recovery=15 | |||
| | |hit=0 | ||
| | |block=-1 | ||
| | |pushblock=-12 | ||
|- | |guard=Mid | ||
| | |damage=7 | ||
| | |cancel=Special/Super | ||
| | |properties=Air UB | ||
| | |description= | ||
*Dashing version of chain s.5C | |||
*Mainly used to combo into tandem after standcrash | |||
}} | |||
}} | |||
<br> | |||
{| | {{MoveData | ||
| | |image=Iggy d.s.5c.png | ||
| | |caption= | ||
|name=d.s.5C | |||
|- | |data= | ||
| | {{AttackData-HFTF | ||
| | |startup=3 | ||
| | |active=4 | ||
|recovery=20 | |||
|hit=-8 | |||
|block=-9 | |||
|pushblock=-17 | |||
|guard=Mid | |||
|damage=11 | |||
|cancel=Special/Super | |||
|properties=Air UB | |||
|description= | |||
*Dashing version of s.5B | |||
*Iggy’s most useful dashing normal | |||
*Very fast with a decent hitbox | |||
*Useful after making someone block an aerial | |||
*Fairly unsafe on block and hit, should usually be cancelled into teleport | |||
}} | |||
}} | |||
<br> | |||
== | {{MoveData | ||
|image=Iggy d.s.2a.png | |||
|caption= | |||
|name=d.s.2A | |||
|data= | |||
{{AttackData-HFTF | |||
|startup=4 | |||
|active=4 | |||
|recovery=15 | |||
|hit=-6 | |||
|block=-7 | |||
|pushblock=-1 | |||
|guard=Low | |||
|damage=3 | |||
|cancel=Special/Super | |||
|properties= | |||
|description= | |||
*Can be used for tick throws but it has a lot of recovery | |||
}} | |||
}} | |||
<br> | |||
{{MoveData | |||
|image=Iggy d.s.2b.png | |||
|caption= | |||
|name=d.s.2B | |||
|data= | |||
{{AttackData-HFTF | |||
|startup=4 | |||
|active=4 | |||
|recovery=15 | |||
|hit=-3 | |||
|block=-4 | |||
|pushblock=-12 | |||
|guard=Mid | |||
|damage=10 | |||
|cancel=Special/Super | |||
|properties=Air UB | |||
|description= | |||
*s.2B with more recovery | |||
}} | |||
}} | |||
<br> | |||
s. | {{MoveData | ||
|image=Iggy d.s.2c.png | |||
|caption= | |||
|name=d.s.2C | |||
|data= | |||
{{AttackData-HFTF | |||
|startup=9 | |||
Iggy | |active=4 | ||
|recovery=33 | |||
|hit=Launch | |||
|block=-19 | |||
|pushblock=-32 | |||
|guard=Low | |||
|damage=11 | |||
|cancel=Special/Super | |||
|properties= | |||
|description= | |||
== | *About the same as regular s.2C, use it for similar things | ||
}} | |||
}} | |||
<br> | |||
{{MoveData | |||
|image=Iggy s.j.2c.png | |||
|caption=As if it wasn’t hard enough to anti air Iggy | |||
|name=S.J.2C | |||
|data= | |||
{{AttackData-HFTF | |||
|startup=10 | |||
|active=until landing | |||
|recovery=28 | |||
|hit= | |||
|block= | |||
|pushblock= | |||
|guard=High | |||
|damage=10 | |||
|cancel= nothing | |||
|properties= IPS=No Scales=No | |||
|description= | |||
*Divekick style move that halts Iggy's momentum | |||
*Causes a knockdown on standing opponents. If the opponent is crouching they recover instantly and kill you | |||
*Not a great move on it's own thanks to the bad hurtbox and how unsafe it is | |||
*At the same time, it can be used out of glide if you get yourself in a bad situation. Even if it doesn't work, just having the move will make people have to think about whether or not to anti air you. | |||
}} | |||
}} | |||
<br> | |||
{{MoveData | |||
|image=Iggy Grab.png | |||
|caption= | |||
|name=S.4C/S.6C (Close) | |||
|data= | |||
{{AttackData-HFTF | |||
|startup= | |||
|active= | |||
|recovery= | |||
|hit= | |||
|block= | |||
|pushblock= | |||
|guard=Grab | |||
|damage=17 | |||
|cancel= | |||
|properties= | |||
|description= | |||
*The same as stand off grab. | |||
*Not used as much given how slow Stand on Iggy is | |||
}} | |||
}} | |||
==Specials== | |||
<br> | |||
{{MoveData | |||
|image=Iggy glide.png | |||
|caption=Making people hate you 101 | |||
|name=Glider<br>s.j.[8] | |||
|data= | |||
{{AttackData-HFTF | |||
|startup= | |||
|active= | |||
|recovery= | |||
|hit= | |||
|block= | |||
|pushblock= | |||
|guard=Mid | |||
|damage=1(A)<br>2(B)<br>3(C) | |||
|cancel= | |||
|properties= | |||
|description= | |||
*Hold 8 to keep floating and release to drop, lasts for about 3 seconds | |||
*Iggy loses his double jump to have this | |||
*You cannot airdash and float in the same jump. | |||
*Iggy can block during this, but blocking an attack causes you to drop out of the glide. | |||
*Pressing an attack will cause Iggy to drop a sandball. A drops it the furthest out and does the least damage, while C drops right below Iggy and does the most damage. | |||
*After doing a certain amount of sandballs, there is a cooldown before you can use more. (3 for A, 2 for B, 1 for C) You can bypass this limit by alternating between the A and B sandballs. | |||
Easily one of Iggy's strongest tools, if not his strongest. First, there's the glide itself. Combining this with his airdash and divekick, this can make Iggy very unpredictable in the air, since he can easily change or halt his momentum. It can also be used as a fast instant overhead that you can combo off of. And then there's the sandballs. This is an insanely low risk projectile that you can just throw out with little fear of being punished. Just a simple superjump means that no anti air can hit you, and even if you get air to aired somehow, you just block it. The only real threat you have is if someone rolls behind you, but you still have C sandball and divekick to catch people doing that. Also, since you can block while throwing out sandballs, this move will just flat out beat every air to air in the game. And you can also use it on oki to give yourself time for a high/low/grab mixup. You might notice that the sandballs only do 1 or 2 damage, but that isn't as big of a problem as it seems. If you can get the sandball to launch, you can usually follow up with an S.J.B. And even on ground hits you can get an aerial or some pressure. And the sanballs also still do chip, so blocking isn't very effective against them. They can bring you down to 1 health, and if Iggy gets to that point, he's almost unbeatable. This is one of the best projectiles in the game, do not overlook this move. | |||
}} | |||
}} | |||
<br> | |||
{{MoveData | |||
|image=Iggy 4 charge (1).png | |||
|image2=Iggy 4 charge (2).png | |||
|caption2=Your punishable on hit combo ender | |||
|name=Sand Crush <br>[4]6A/B/C | |||
|data= | |||
{{AttackData-HFTF | |||
|startup=15 | |||
|active= | |||
|recovery=14 | |||
|hit=-9(S.On) | |||
|block=-15 | |||
|pushblock=-17(S.On) | |||
|guard=Mid | |||
|damage=8(S.Off)<br>19(S.On) | |||
|cancel= | |||
|properties=Air UB | |||
|description= | |||
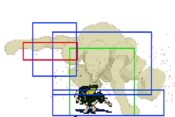
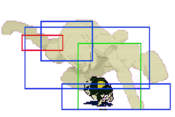
*The Fool charges forward, distance depends on the button | |||
*In stand on Iggy will also charge forward with his stand | |||
*Is air unblockable for some reason | |||
The stand off version of this move is generally used as a quick, long range poke. It's a strong roundstart option and can catch a lot of people off guard. However, it does very low damage, the Fool has a hurtbox, and the Fool takes a while to come back, locking Iggy out of a big portion of his moveset. The stand on version is mainly used as a combo ender or a long range punish tool. Be aware that this move is punishable on hit, but it also has a good amount of pushback. That means some characters will have a harder time punishing it. It goes fullscreen, so you can use it to punish slow projectiles. Be aware that this move is very punishable on block, though. | |||
}} | |||
}} | |||
<br> | |||
{{MoveData | |||
|image=Iggy 2 charge (2).png | |||
|caption= | |||
|name=Sand Uprising <br>[2]8A/B/C | |||
|data= | |||
{{AttackData-HFTF | |||
|startup=5 | |||
|active= | |||
|recovery= | |||
|hit=Launches | |||
|block= | |||
|pushblock= | |||
|guard=Mid | |||
|damage=14 | |||
|cancel= | |||
|properties= | |||
|description= | |||
*The Fool charges up, distance depends on the button | |||
*In stand on Iggy will also charge up with his stand | |||
*Is NOT air unblockable | |||
*Stand on version is invulnerable during startup | |||
Mainly used as an anti air. It's a fairly decent one, but it does require a charge. The stand on version can also be decent to use when you're getting pressured, since it knocks the opponent away and has i-frames. Just remember this is also fairly unsafe. | |||
}} | |||
}} | |||
<br> | |||
{{MoveData | |||
|image= | |||
|caption= | |||
|name=Sand Magic <br>623 or 421A/B/C | |||
|data= | |||
{{AttackData-HFTF | |||
|startup=2 | |||
|active= | |||
|recovery= | |||
|hit= | |||
|block= | |||
|pushblock= | |||
|guard= | |||
|damage= | |||
|cancel= | |||
|properties= | |||
|description= | |||
*A teleport. 623 teleports him forward, while 421 teleports him back | |||
*No difference between buttons | |||
*Decent approach option versus some zoners | |||
*Can also be used to make certain buttons safe like s.d.5c | |||
*Punishable, so use sparingly. | |||
}} | |||
}} | |||
<br> | |||
{{MoveData | |||
|image=Iggy 63214.png | |||
|caption=More dogs | |||
|name=Sand Clutch <br>63214A/B/C | |||
|data= | |||
{{AttackData-HFTF | |||
|startup=15 | |||
|active= | |||
|recovery= | |||
|hit=Launches | |||
|block= | |||
|pushblock= | |||
|guard=Grab | |||
|damage=24 | |||
|cancel= | |||
|properties= | |||
|description= | |||
*A slow moving command grab. The buttons determine how far it goes | |||
*When the hitbox touches the opponent, they are trapped and dealt damage until they are knocked away. | |||
*In stand off Iggy can hit the opponent while they're trapped, in stand on he just sleeps. | |||
*Can be combo'd into from 6B and a very meaty 2B. | |||
Not very good in neutral, so mainly used for oki. These are the main part of his unblockable setups, and you can read more about them in the Strategy section. These are also really good to catch people hold up back on wakeup. Don't use the stand on version. | |||
}} | |||
}} | |||
<br> | |||
{{MoveData | |||
|image=Iggy 236s (1).png | |||
|image2=Iggy 236s (2).png | |||
|caption= | |||
|name=Stand Activation Attack <br>236S | |||
|data= | |||
{{AttackData-HFTF | |||
|startup=9 | |||
|active=4 | |||
|recovery=15 | |||
|hit=-1 | |||
|block=-1 | |||
|pushblock=-13 | |||
|guard=Mid | |||
|damage=7 | |||
|cancel= | |||
|properties=Air UB | |||
|description= | |||
*Mainly just a tool used to make yourself safe after moves like 5C or 2B. | |||
*Can be used as a low damage combo ender. | |||
}} | |||
}} | |||
<br> | |||
{{MoveData | |||
|image=Iggy 2 charge (2).png | |||
|caption= | |||
|name=Guard Cancel (623A/B/C While Blocking) | |||
|data= | |||
{{AttackData-HFTF | |||
|startup=5 | |||
|active=2 | |||
|recovery=17 | |||
|hit=38 | |||
|block=32 | |||
|pushblock=26 | |||
|guard=Mid | |||
|damage=8 | |||
|cancel= | |||
|properties= | |||
|description= | |||
Iggy performs his Sand Uprising for his Guard Cancel. A decent Guard Cancel with good invincibility. | |||
*Because of it's hitbox, it can hit aerial opponents well. | |||
*Has a decent range. | |||
*Launch is techable. | |||
*Iggy travels up with The Fool when in Stand On. | |||
}} | |||
}} | |||
<br> | |||
==Supers== | |||
{{MoveData | |||
|image=Iggy 236aa (1).png | |||
|image2=Iggy 236aa (4).png | |||
|image3=Iggy 236aa (5).png | |||
|caption= | |||
|name=Big Sand Wave <br>236AA | |||
|data= | |||
{{AttackData-HFTF | |||
|startup=6 | |||
|active=5 | |||
|recovery= | |||
|hit= | |||
|block= | |||
|pushblock= | |||
|guard=Mid | |||
|damage=38 | |||
|cancel= | |||
|properties= IPS = No SC = No | |||
|description= | |||
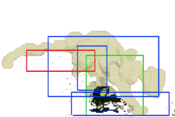
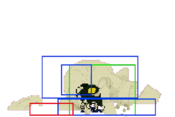
*A big sand wave, as the name suggests. Goes fullscreen. | |||
*In stand on Iggy will ride the wave. | |||
*Knocks down mid screen, but in the corner the opponent can tech, destroying your oki. | |||
*Very inconsistent on air hit. | |||
*Will beat guard cancels a lot of the time | |||
*In stand off you can get a decent 50/50 when they block the first hit by running up and doing 2a or j.c. | |||
*Stand on version isn’t great, use tandem instead | |||
}} | |||
}} | |||
<br> | |||
{{MoveData | |||
|image=Iggy aa6bc.png | |||
|caption=[https://youtu.be/uBlYvTARU9M The perfect oki tool against the sdio with 1 hour] | |||
|name=Raging Demon <br>AA6BC | |||
|data= | |||
{{AttackData-HFTF | |||
|startup=5 | |||
|active=31 | |||
|recovery=1 | |||
|hit= | |||
|block= | |||
|pushblock= | |||
|guard=Grab | |||
|damage=39 | |||
|cancel= | |||
|properties= | |||
|description= | |||
*A raging demon, basically a slow moving command grab that does a lot of damage | |||
*Very easy to jump out of, so it isn’t a great oki tool | |||
*Can be used as a high damage combo ender, though it is harder to combo into | |||
}} | |||
}} | |||
<br> | |||
{{MoveData | |||
|image= | |||
|caption= | |||
|name=Tandem <br>214S | |||
|data= | |||
{{AttackData-HFTF | |||
|startup= | |||
|active= | |||
|recovery= | |||
|hit= | |||
|block= | |||
|pushblock= | |||
|guard= | |||
|damage= | |||
|cancel= | |||
|properties= | |||
|description= | |||
*Standard tandem, mainly used as combo filler and a reversal. | |||
*For Iggy, you usually just want to do A B C reps, then roll behind the opponent and mash 2a. | |||
}} | |||
}} | |||
{{NavboxHFTF}} | {{NavboxHFTF}} | ||
Revision as of 17:27, 17 January 2024
Movelist
Normals
Stand Off
| Startup | Active | Recovery | Base Damage | Stand Damage | Guard | Hit Adv. | Block Adv. | Pushblock Adv. | ||||||||||||
|---|---|---|---|---|---|---|---|---|---|---|---|---|---|---|---|---|---|---|---|---|
| 5 | 2 | 17 | 3 | - | Mid | -6 | -8 | -11 | ||||||||||||
| ||||||||||||||||||||
| Startup | Active | Recovery | Base Damage | Stand Damage | Guard | Hit Adv. | Block Adv. | Pushblock Adv. | ||||||||||||
|---|---|---|---|---|---|---|---|---|---|---|---|---|---|---|---|---|---|---|---|---|
| 10 | 3 | 23 | 6 | - | Mid | -7 | -9 | -17 | ||||||||||||
| ||||||||||||||||||||
| Startup | Active | Recovery | Base Damage | Stand Damage | Guard | Hit Adv. | Block Adv. | Pushblock Adv. | ||||||||||||
|---|---|---|---|---|---|---|---|---|---|---|---|---|---|---|---|---|---|---|---|---|
| 21 | 2 | 25 | 10 | - | High | 0 | -10 | -23 | ||||||||||||
| ||||||||||||||||||||
| Startup | Active | Recovery | Base Damage | Stand Damage | Guard | Hit Adv. | Block Adv. | Pushblock Adv. | ||||||||||||
|---|---|---|---|---|---|---|---|---|---|---|---|---|---|---|---|---|---|---|---|---|
| 10 | 22 | 2 | 9 | - | Mid | -4 | -6 | -24 | ||||||||||||
| ||||||||||||||||||||
| Startup | Active | Recovery | Base Damage | Stand Damage | Guard | Hit Adv. | Block Adv. | Pushblock Adv. | ||||||||||||
|---|---|---|---|---|---|---|---|---|---|---|---|---|---|---|---|---|---|---|---|---|
| 12 | 6 | 10 | 10 | - | Mid | 0 | -2 | -12 | ||||||||||||
| ||||||||||||||||||||
| Startup | Active | Recovery | Base Damage | Stand Damage | Guard | Hit Adv. | Block Adv. | Pushblock Adv. | ||||||||||||
|---|---|---|---|---|---|---|---|---|---|---|---|---|---|---|---|---|---|---|---|---|
| 4 | 4 | 8 | 3 | - | Low | +8 | +6 | +3 | ||||||||||||
| ||||||||||||||||||||
| Startup | Active | Recovery | Base Damage | Stand Damage | Guard | Hit Adv. | Block Adv. | Pushblock Adv. | ||||||||||||
|---|---|---|---|---|---|---|---|---|---|---|---|---|---|---|---|---|---|---|---|---|
| 6 | 20 | 4 | 7 | - | Low | -8 | -10 | -18 | ||||||||||||
| ||||||||||||||||||||
| Startup | Active | Recovery | Base Damage | Stand Damage | Guard | Hit Adv. | Block Adv. | Pushblock Adv. | ||||||||||||
|---|---|---|---|---|---|---|---|---|---|---|---|---|---|---|---|---|---|---|---|---|
| 4 | 9 | 12 | 11 | - | Mid | Launch | -4 | -17 | ||||||||||||
| ||||||||||||||||||||
| Startup | Active | Recovery | Base Damage | Stand Damage | Guard | Hit Adv. | Block Adv. | Pushblock Adv. | ||||||||||||
|---|---|---|---|---|---|---|---|---|---|---|---|---|---|---|---|---|---|---|---|---|
| 2 | Until landing | - | 3 | - | High | +12 | +10 | +6 | ||||||||||||
| ||||||||||||||||||||
| Startup | Active | Recovery | Base Damage | Stand Damage | Guard | Hit Adv. | Block Adv. | Pushblock Adv. | ||||||||||||
|---|---|---|---|---|---|---|---|---|---|---|---|---|---|---|---|---|---|---|---|---|
| 2 | Until Landing | - | 8 | - | High | +12 | +10 | +6 | ||||||||||||
| ||||||||||||||||||||
| Startup | Active | Recovery | Base Damage | Stand Damage | Guard | Hit Adv. | Block Adv. | Pushblock Adv. | ||||||||||||
|---|---|---|---|---|---|---|---|---|---|---|---|---|---|---|---|---|---|---|---|---|
| 2 | Until landing | - | 10 | - | High | +12 | +10 | +6 | ||||||||||||
| ||||||||||||||||||||
| Startup | Active | Recovery | Base Damage | Stand Damage | Guard | Hit Adv. | Block Adv. | Pushblock Adv. | ||||||||||||
|---|---|---|---|---|---|---|---|---|---|---|---|---|---|---|---|---|---|---|---|---|
| 10 | 3 | 23 | 5 | - | Mid | -8 | -9 | -15 | ||||||||||||
| ||||||||||||||||||||
| Startup | Active | Recovery | Base Damage | Stand Damage | Guard | Hit Adv. | Block Adv. | Pushblock Adv. | ||||||||||||
|---|---|---|---|---|---|---|---|---|---|---|---|---|---|---|---|---|---|---|---|---|
| 10 | 9 | 17 | 8 | - | Mid | -10 | -11 | -15 | ||||||||||||
| ||||||||||||||||||||
| Startup | Active | Recovery | Base Damage | Stand Damage | Guard | Hit Adv. | Block Adv. | Pushblock Adv. | ||||||||||||
|---|---|---|---|---|---|---|---|---|---|---|---|---|---|---|---|---|---|---|---|---|
| 6 | 20 | 4 | 7 | - | Low | -8 | -10 | -18 | ||||||||||||
| ||||||||||||||||||||
| Startup | Active | Recovery | Base Damage | Stand Damage | Guard | Hit Adv. | Block Adv. | Pushblock Adv. | ||||||||||||
|---|---|---|---|---|---|---|---|---|---|---|---|---|---|---|---|---|---|---|---|---|
| - | - | - | 17 | - | Grab | - | - | - | ||||||||||||
| ||||||||||||||||||||
Stand On
| Startup | Active | Recovery | Base Damage | Stand Damage | Guard | Hit Adv. | Block Adv. | Pushblock Adv. | ||||||||||||
|---|---|---|---|---|---|---|---|---|---|---|---|---|---|---|---|---|---|---|---|---|
| 5 | 3 | 11 | 4 | - | Mid | -1 | -2 | -5 | ||||||||||||
| ||||||||||||||||||||
| Startup | Active | Recovery | Base Damage | Stand Damage | Guard | Hit Adv. | Block Adv. | Pushblock Adv. | ||||||||||||
|---|---|---|---|---|---|---|---|---|---|---|---|---|---|---|---|---|---|---|---|---|
| 8 | 4 | 13 | 11 | - | Mid | -1 | -2 | -10 | ||||||||||||
| ||||||||||||||||||||
| Startup | Active | Recovery | Base Damage | Stand Damage | Guard | Hit Adv. | Block Adv. | Pushblock Adv. | ||||||||||||
|---|---|---|---|---|---|---|---|---|---|---|---|---|---|---|---|---|---|---|---|---|
| 9 | 7 | 19 | 13 | - | Mid | -6 | -9 | -21 | ||||||||||||
| ||||||||||||||||||||
| Startup | Active | Recovery | Base Damage | Stand Damage | Guard | Hit Adv. | Block Adv. | Pushblock Adv. | ||||||||||||
|---|---|---|---|---|---|---|---|---|---|---|---|---|---|---|---|---|---|---|---|---|
| 5 | ? | 15 | 9 | - | Mid | 0 | -1 | -10 | ||||||||||||
| ||||||||||||||||||||
| Startup | Active | Recovery | Base Damage | Stand Damage | Guard | Hit Adv. | Block Adv. | Pushblock Adv. | ||||||||||||
|---|---|---|---|---|---|---|---|---|---|---|---|---|---|---|---|---|---|---|---|---|
| 12 | 15 | 4 | 5 | - | Mid | -6 | -7 | -10 | ||||||||||||
| ||||||||||||||||||||
| Startup | Active | Recovery | Base Damage | Stand Damage | Guard | Hit Adv. | Block Adv. | Pushblock Adv. | ||||||||||||
|---|---|---|---|---|---|---|---|---|---|---|---|---|---|---|---|---|---|---|---|---|
| 4 | 4 | 9 | 5 | - | Low | 0 | -1 | -4 | ||||||||||||
| ||||||||||||||||||||
| Startup | Active | Recovery | Base Damage | Stand Damage | Guard | Hit Adv. | Block Adv. | Pushblock Adv. | ||||||||||||
|---|---|---|---|---|---|---|---|---|---|---|---|---|---|---|---|---|---|---|---|---|
| 4 | 4 | 9 | 10 | - | Mid | 3 | 2 | -6 | ||||||||||||
| ||||||||||||||||||||
| Startup | Active | Recovery | Base Damage | Stand Damage | Guard | Hit Adv. | Block Adv. | Pushblock Adv. | ||||||||||||
|---|---|---|---|---|---|---|---|---|---|---|---|---|---|---|---|---|---|---|---|---|
| 10 | 4 | 38 | 13 | - | Low | Launch | -24 | -37 | ||||||||||||
| ||||||||||||||||||||
| Startup | Active | Recovery | Base Damage | Stand Damage | Guard | Hit Adv. | Block Adv. | Pushblock Adv. | ||||||||||||
|---|---|---|---|---|---|---|---|---|---|---|---|---|---|---|---|---|---|---|---|---|
| 9 | 17 | 19 | 13 | - | Low | KD | -24 | -37 | ||||||||||||
| ||||||||||||||||||||
| Startup | Active | Recovery | Base Damage | Stand Damage | Guard | Hit Adv. | Block Adv. | Pushblock Adv. | ||||||||||||
|---|---|---|---|---|---|---|---|---|---|---|---|---|---|---|---|---|---|---|---|---|
| 4 | 4 | until landing | 4 | - | High | 5 | - | - | ||||||||||||
| ||||||||||||||||||||
| Startup | Active | Recovery | Base Damage | Stand Damage | Guard | Hit Adv. | Block Adv. | Pushblock Adv. | ||||||||||||
|---|---|---|---|---|---|---|---|---|---|---|---|---|---|---|---|---|---|---|---|---|
| 8 | 4 | until landing | 11 | - | High | - | - | - | ||||||||||||
| ||||||||||||||||||||
| Startup | Active | Recovery | Base Damage | Stand Damage | Guard | Hit Adv. | Block Adv. | Pushblock Adv. | ||||||||||||
|---|---|---|---|---|---|---|---|---|---|---|---|---|---|---|---|---|---|---|---|---|
| 8 | 2 | until landing | 13 | - | High | - | - | - | ||||||||||||
| ||||||||||||||||||||
| Startup | Active | Recovery | Base Damage | Stand Damage | Guard | Hit Adv. | Block Adv. | Pushblock Adv. | ||||||||||||
|---|---|---|---|---|---|---|---|---|---|---|---|---|---|---|---|---|---|---|---|---|
| 4 | 3 | 16 | 4 | - | Mid | -6 | -7 | -10 | ||||||||||||
| ||||||||||||||||||||
| Startup | Active | Recovery | Base Damage | Stand Damage | Guard | Hit Adv. | Block Adv. | Pushblock Adv. | ||||||||||||
|---|---|---|---|---|---|---|---|---|---|---|---|---|---|---|---|---|---|---|---|---|
| 9 | 4 | 15 | 7 | - | Mid | 0 | -1 | -12 | ||||||||||||
| ||||||||||||||||||||
| Startup | Active | Recovery | Base Damage | Stand Damage | Guard | Hit Adv. | Block Adv. | Pushblock Adv. | ||||||||||||
|---|---|---|---|---|---|---|---|---|---|---|---|---|---|---|---|---|---|---|---|---|
| 3 | 4 | 20 | 11 | - | Mid | -8 | -9 | -17 | ||||||||||||
| ||||||||||||||||||||
| Startup | Active | Recovery | Base Damage | Stand Damage | Guard | Hit Adv. | Block Adv. | Pushblock Adv. | ||||||||||||
|---|---|---|---|---|---|---|---|---|---|---|---|---|---|---|---|---|---|---|---|---|
| 4 | 4 | 15 | 3 | - | Low | -6 | -7 | -1 | ||||||||||||
| ||||||||||||||||||||
| Startup | Active | Recovery | Base Damage | Stand Damage | Guard | Hit Adv. | Block Adv. | Pushblock Adv. | ||||||||||||
|---|---|---|---|---|---|---|---|---|---|---|---|---|---|---|---|---|---|---|---|---|
| 4 | 4 | 15 | 10 | - | Mid | -3 | -4 | -12 | ||||||||||||
| ||||||||||||||||||||
| Startup | Active | Recovery | Base Damage | Stand Damage | Guard | Hit Adv. | Block Adv. | Pushblock Adv. | ||||||||||||
|---|---|---|---|---|---|---|---|---|---|---|---|---|---|---|---|---|---|---|---|---|
| 9 | 4 | 33 | 11 | - | Low | Launch | -19 | -32 | ||||||||||||
| ||||||||||||||||||||
| Startup | Active | Recovery | Base Damage | Stand Damage | Guard | Hit Adv. | Block Adv. | Pushblock Adv. | ||||||||||||
|---|---|---|---|---|---|---|---|---|---|---|---|---|---|---|---|---|---|---|---|---|
| 10 | until landing | 28 | 10 | - | High | - | - | - | ||||||||||||
| ||||||||||||||||||||
| Startup | Active | Recovery | Base Damage | Stand Damage | Guard | Hit Adv. | Block Adv. | Pushblock Adv. | ||||||||||||
|---|---|---|---|---|---|---|---|---|---|---|---|---|---|---|---|---|---|---|---|---|
| - | - | - | 17 | - | Grab | - | - | - | ||||||||||||
| ||||||||||||||||||||
Specials
| Startup | Active | Recovery | Base Damage | Stand Damage | Guard | Hit Adv. | Block Adv. | Pushblock Adv. | ||||||||||||
|---|---|---|---|---|---|---|---|---|---|---|---|---|---|---|---|---|---|---|---|---|
| - | - | - | 1(A) 2(B) 3(C) |
- | Mid | - | - | - | ||||||||||||
Easily one of Iggy's strongest tools, if not his strongest. First, there's the glide itself. Combining this with his airdash and divekick, this can make Iggy very unpredictable in the air, since he can easily change or halt his momentum. It can also be used as a fast instant overhead that you can combo off of. And then there's the sandballs. This is an insanely low risk projectile that you can just throw out with little fear of being punished. Just a simple superjump means that no anti air can hit you, and even if you get air to aired somehow, you just block it. The only real threat you have is if someone rolls behind you, but you still have C sandball and divekick to catch people doing that. Also, since you can block while throwing out sandballs, this move will just flat out beat every air to air in the game. And you can also use it on oki to give yourself time for a high/low/grab mixup. You might notice that the sandballs only do 1 or 2 damage, but that isn't as big of a problem as it seems. If you can get the sandball to launch, you can usually follow up with an S.J.B. And even on ground hits you can get an aerial or some pressure. And the sanballs also still do chip, so blocking isn't very effective against them. They can bring you down to 1 health, and if Iggy gets to that point, he's almost unbeatable. This is one of the best projectiles in the game, do not overlook this move.
| ||||||||||||||||||||
| Startup | Active | Recovery | Base Damage | Stand Damage | Guard | Hit Adv. | Block Adv. | Pushblock Adv. | ||||||||||||
|---|---|---|---|---|---|---|---|---|---|---|---|---|---|---|---|---|---|---|---|---|
| 15 | - | 14 | 8(S.Off) 19(S.On) |
- | Mid | -9(S.On) | -15 | -17(S.On) | ||||||||||||
The stand off version of this move is generally used as a quick, long range poke. It's a strong roundstart option and can catch a lot of people off guard. However, it does very low damage, the Fool has a hurtbox, and the Fool takes a while to come back, locking Iggy out of a big portion of his moveset. The stand on version is mainly used as a combo ender or a long range punish tool. Be aware that this move is punishable on hit, but it also has a good amount of pushback. That means some characters will have a harder time punishing it. It goes fullscreen, so you can use it to punish slow projectiles. Be aware that this move is very punishable on block, though.
| ||||||||||||||||||||
| Startup | Active | Recovery | Base Damage | Stand Damage | Guard | Hit Adv. | Block Adv. | Pushblock Adv. | ||||||||||||
|---|---|---|---|---|---|---|---|---|---|---|---|---|---|---|---|---|---|---|---|---|
| 5 | - | - | 14 | - | Mid | Launches | - | - | ||||||||||||
Mainly used as an anti air. It's a fairly decent one, but it does require a charge. The stand on version can also be decent to use when you're getting pressured, since it knocks the opponent away and has i-frames. Just remember this is also fairly unsafe.
| ||||||||||||||||||||
| Startup | Active | Recovery | Base Damage | Stand Damage | Guard | Hit Adv. | Block Adv. | Pushblock Adv. | ||||||||||||
|---|---|---|---|---|---|---|---|---|---|---|---|---|---|---|---|---|---|---|---|---|
| 2 | - | - | - | - | - | - | - | - | ||||||||||||
| ||||||||||||||||||||
| Startup | Active | Recovery | Base Damage | Stand Damage | Guard | Hit Adv. | Block Adv. | Pushblock Adv. | ||||||||||||
|---|---|---|---|---|---|---|---|---|---|---|---|---|---|---|---|---|---|---|---|---|
| 15 | - | - | 24 | - | Grab | Launches | - | - | ||||||||||||
Not very good in neutral, so mainly used for oki. These are the main part of his unblockable setups, and you can read more about them in the Strategy section. These are also really good to catch people hold up back on wakeup. Don't use the stand on version.
| ||||||||||||||||||||
| Startup | Active | Recovery | Base Damage | Stand Damage | Guard | Hit Adv. | Block Adv. | Pushblock Adv. | ||||||||||||
|---|---|---|---|---|---|---|---|---|---|---|---|---|---|---|---|---|---|---|---|---|
| 9 | 4 | 15 | 7 | - | Mid | -1 | -1 | -13 | ||||||||||||
| ||||||||||||||||||||
| Startup | Active | Recovery | Base Damage | Stand Damage | Guard | Hit Adv. | Block Adv. | Pushblock Adv. | ||||||||||||
|---|---|---|---|---|---|---|---|---|---|---|---|---|---|---|---|---|---|---|---|---|
| 5 | 2 | 17 | 8 | - | Mid | 38 | 32 | 26 | ||||||||||||
|
Iggy performs his Sand Uprising for his Guard Cancel. A decent Guard Cancel with good invincibility.
| ||||||||||||||||||||
Supers
| Startup | Active | Recovery | Base Damage | Stand Damage | Guard | Hit Adv. | Block Adv. | Pushblock Adv. | ||||||||||||
|---|---|---|---|---|---|---|---|---|---|---|---|---|---|---|---|---|---|---|---|---|
| 6 | 5 | - | 38 | - | Mid | - | - | - | ||||||||||||
| ||||||||||||||||||||
| Startup | Active | Recovery | Base Damage | Stand Damage | Guard | Hit Adv. | Block Adv. | Pushblock Adv. | ||||||||||||
|---|---|---|---|---|---|---|---|---|---|---|---|---|---|---|---|---|---|---|---|---|
| 5 | 31 | 1 | 39 | - | Grab | - | - | - | ||||||||||||
| ||||||||||||||||||||
| Startup | Active | Recovery | Base Damage | Stand Damage | Guard | Hit Adv. | Block Adv. | Pushblock Adv. | ||||||||||||
|---|---|---|---|---|---|---|---|---|---|---|---|---|---|---|---|---|---|---|---|---|
| - | - | - | - | - | - | - | - | - | ||||||||||||
| ||||||||||||||||||||


