No edit summary |
No edit summary |
||
| Line 55: | Line 55: | ||
</center> | </center> | ||
* To begin, most of Twelves approaching tools revolve around his Air Dash, Kokuu. [[Image: (twelvejffbb).gif|100px]] | |||
** You want to punch him. Twelve is a giant square '''''MADE''''' for punching here, but a good Twelve will know when to properly cancel into their two most effective air normals, as well as Air Dash in '''''Reverse''''' against the wall to mix up their approach timings. If you read anything here, read: '''As Ken, it's more vital to be aware not of what moves Twelve is using, but more so their movement. Properly judging twelves movement in the air and reacting as opposed to predicting will reward you double-DP's with super-worthy damage in droves, and ample opportunities to chase with jumping Ex Tatsu ({{qcb}}{{k}}{{k}}) as well.''' Onto the moves: | |||
* J.{{hp}}: While not necessarily a "good move" by 3S standards, it's certainly one of Twelves most used tools. Reach is pretty great, though only active for 2 frames, and its hurtbox still extends beyond its hitboxes. In fact, immediately following its two active frames, Twelves' arms are still vulnerable and fully extended for another 4 frames ([http://ensabahnur.free.fr/BastonNew/hitboxesDisplay.php?sMode=f&iChar=19&sMoveType=fd_normals&sAction=w&iMove=11 Viewable in full on ensabehnur]). Twelves Air Dash will swoop down slightly before it arcs back upwards, creating a rather strange angle to look for to time a well-placed DP or equivalent anti-air (i.e st.{{hp}} or c.{{hp}}). In the case of Ken, Twelve would benefit more from opting not to airdash and instead stay at a safe distance and j.{{hp}}, hoping for the Ken player to whiff a DP in preparation for an Air Dash and then poking with Twelves j.{{hp}} at the expense of beginning a quick high-low mixup. Paying attention to both the height at which Twelve uses j.{{hp}}, as well as understanding just how few active frames it has will allow the Ken to better judge when to anti-air, or when to instead prepare to engage post-landing. Should Ken choose to stay on the defensive during an Air Dash, the other move to be aware of is: | |||
* J.{{hk}}: Once again, viewable in full on [http://ensabahnur.free.fr/BastonNew/hitboxesDisplay.php?sMode=f&iChar=19&sMoveType=fd_normals&sAction=w&iMove=20 ensabehnur], only the first frame of j.{{hk}} extends ever-so-slightly past his hurtbox, while the following 5 remaining active frames leave Twelve exposed from both at the tip of the spike, and slightly behind. While this may point to Twelve being incentivized to use it high and early, Twelve players are more likely to want to use this deep after an air dash, since this is typically one of the only ways for Twelve to begin his (rather weak) ground game. Without meter, Twelve is limited to deep j.{{hk}} > c.{{lk}} etc, or deep j.{{hk}} > {{lp}} A.X.E. '''''With''''' meter, Twelve can opt to confirm deep j.{{hk}} xx SA1 (X.N.D.L), or "mixup" into close st.{{mk}} xx SA1, or close st.{{mk}} > sjc.SA2. This is to say, Twelve is incentivized to play a tad more squirely when there's meter to play with, so when judging whether to anti-air or stay on the defensive and gambling on whether j.{{hp}} or {{hk}} is coming, understanding that Twelve is more likely to play at an anti-DP range when they don't have meter available is key to knowing when you're allowed to stay on the aggressive, even when they approach. | |||
* Lastly, if it wasn't obvious, both of these tools have two distinct ranges in which they're typically used. While j.{{hp}} '''''can''''' be used as close as j.{{hk}}, you're unlikely to see it as the opportunity to take a pair of Mr.Masters knuckles to the chin rises dangerously for Twelve. In short, if Twelve looks to begin an Air Dash, and j.{{hp}} hasn't appeared on the screen a few frames later, it's fair to assume a j.{{hk}} is coming. If Ken has continuously parried Twelves ariel approaches, particularly his deep j.{{hk}} attempts, Twelve may opt for deep j.A.X.E ({{qcb}}{{p}}). It's a multi-hit, so it's just the equivalent of "now parry THIS." Should they use its {{hp}} version, and assuming it hits, it hardly does much more than getting bopped with a j.{{hk}}, and it doesn't really lead into anything, so Twelve isn't much better off. EX will do a little less than double that of a single j.{{hk}}, and again, doesn't lead to much else. As you can see on [http://ensabahnur.free.fr/BastonNew/hitboxesDisplay.php?sMode=f&iChar=19&sMoveType=fd_specials&sAction=w&iMove=34 Ensabehnur], Twelve is also wide open from below should they start this from the top of an Air-Dash, so use this knowledge responsibly. | |||
<center> <span style="font-size: 1.2em; text-decoration: underline;">'''''Grounded threats'''''</span><br>[[Image: (twelvehp).gif|60px]] <span style="font-size: 1.2em;">'''''st.{{hp}}'''''</span>, [[Image: (twelvehk).gif|100px]] <span style="font-size: 1.2em;">'''''st.{{hk}}'''''</span> | |||
</center> | |||
</div> | </div> | ||
Revision as of 11:29, 28 August 2021


Unless otherwise noted, the most commonly picked super for Ken is SA3- Shipuujinrai Kyaku (![]()
![]() +
+![]() ), and will most often assume this super is selected. This matters not only due to the versatility of the super but also due to the number of EX special moves it allows ken access to, the speed at which ken has opportunities to DED, etc. You can read more about the super on Kens page!
), and will most often assume this super is selected. This matters not only due to the versatility of the super but also due to the number of EX special moves it allows ken access to, the speed at which ken has opportunities to DED, etc. You can read more about the super on Kens page!
Select a character icon to jump to their matchup info! (redirections to be fixed as sections are added)
| Serious Advantage |
 
|
|---|---|
| Advantage |          
|
| Even |    
|
| Disadvantage | 
|
| Serious Disadvantage |
Ken is a good character :) |
Twelve
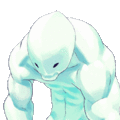
I know what you're thinking: "Why do you think I need help with Twelve??" Frankly, we're not here to judge, and we won't tell anyone if you came to the matchup list looking for Twelve advice, but players like Yamazaki/Yama exist, so nothing wrong with being overprepared.
{{#evt:
service=youtube
|id=https://youtu.be/eOf9SgBrp54
|alignment=center
|dimensions=480x320
|urlargs=start=1152&end=1266&loop=1
}}
- Twelve typically LOVES to take heavy advantage of both approaching and retreating with their air dash. A good Twelve will know when to stay grounded against ken, however. Recklessly air dashing is begging to be double-DP'd (2x

 ). Normally, in order for Ken to double-DP Twelve, the typical route is st.
 xx
xx
 xx Kara.
 . However, if Ken can DP characters while they're airborne, it's often fairly simple to successfully hit a 2nd DP, even without an added Kara due to the extra launching height. Twelves Air Dash makes for these perfect opportunities, though there are two specific moves you should be on the lookout for:
 J.
J. J.
J.- To begin, most of Twelves approaching tools revolve around his Air Dash, Kokuu.

- You want to punch him. Twelve is a giant square MADE for punching here, but a good Twelve will know when to properly cancel into their two most effective air normals, as well as Air Dash in Reverse against the wall to mix up their approach timings. If you read anything here, read: As Ken, it's more vital to be aware not of what moves Twelve is using, but more so their movement. Properly judging twelves movement in the air and reacting as opposed to predicting will reward you double-DP's with super-worthy damage in droves, and ample opportunities to chase with jumping Ex Tatsu (


 ) as well. Onto the moves:
- You want to punch him. Twelve is a giant square MADE for punching here, but a good Twelve will know when to properly cancel into their two most effective air normals, as well as Air Dash in Reverse against the wall to mix up their approach timings. If you read anything here, read: As Ken, it's more vital to be aware not of what moves Twelve is using, but more so their movement. Properly judging twelves movement in the air and reacting as opposed to predicting will reward you double-DP's with super-worthy damage in droves, and ample opportunities to chase with jumping Ex Tatsu (
- J.
 : While not necessarily a "good move" by 3S standards, it's certainly one of Twelves most used tools. Reach is pretty great, though only active for 2 frames, and its hurtbox still extends beyond its hitboxes. In fact, immediately following its two active frames, Twelves' arms are still vulnerable and fully extended for another 4 frames (Viewable in full on ensabehnur). Twelves Air Dash will swoop down slightly before it arcs back upwards, creating a rather strange angle to look for to time a well-placed DP or equivalent anti-air (i.e st.
 or c.
or c. ). In the case of Ken, Twelve would benefit more from opting not to airdash and instead stay at a safe distance and j.
 , hoping for the Ken player to whiff a DP in preparation for an Air Dash and then poking with Twelves j.
 at the expense of beginning a quick high-low mixup. Paying attention to both the height at which Twelve uses j.
 , as well as understanding just how few active frames it has will allow the Ken to better judge when to anti-air, or when to instead prepare to engage post-landing. Should Ken choose to stay on the defensive during an Air Dash, the other move to be aware of is:
- J.
 : Once again, viewable in full on ensabehnur, only the first frame of j.
 extends ever-so-slightly past his hurtbox, while the following 5 remaining active frames leave Twelve exposed from both at the tip of the spike, and slightly behind. While this may point to Twelve being incentivized to use it high and early, Twelve players are more likely to want to use this deep after an air dash, since this is typically one of the only ways for Twelve to begin his (rather weak) ground game. Without meter, Twelve is limited to deep j.
 > c.
> c. etc, or deep j.
 >
>  A.X.E. With meter, Twelve can opt to confirm deep j.
 xx SA1 (X.N.D.L), or "mixup" into close st.
 xx SA1, or close st.
 > sjc.SA2. This is to say, Twelve is incentivized to play a tad more squirely when there's meter to play with, so when judging whether to anti-air or stay on the defensive and gambling on whether j.
 or
or  is coming, understanding that Twelve is more likely to play at an anti-DP range when they don't have meter available is key to knowing when you're allowed to stay on the aggressive, even when they approach.
- Lastly, if it wasn't obvious, both of these tools have two distinct ranges in which they're typically used. While j.
 can be used as close as j.
 , you're unlikely to see it as the opportunity to take a pair of Mr.Masters knuckles to the chin rises dangerously for Twelve. In short, if Twelve looks to begin an Air Dash, and j.
 hasn't appeared on the screen a few frames later, it's fair to assume a j.
 is coming. If Ken has continuously parried Twelves ariel approaches, particularly his deep j.
 attempts, Twelve may opt for deep j.A.X.E (
 ). It's a multi-hit, so it's just the equivalent of "now parry THIS." Should they use its
  version, and assuming it hits, it hardly does much more than getting bopped with a j.
 , and it doesn't really lead into anything, so Twelve isn't much better off. EX will do a little less than double that of a single j.
 , and again, doesn't lead to much else. As you can see on Ensabehnur, Twelve is also wide open from below should they start this from the top of an Air-Dash, so use this knowledge responsibly.
Q
Test Test Test Test Test Test Test Test Test Test Test Test Test Test Test Test Test Test Test Test Test Test Test Test Test Test Test Test Test Test Test Test Test Test Test Test Test Test Test Test Test Test Test Test Test Test Test Test Test Test Test Test Test Test Test Test Test Test Test Test Test Test Test Test Test Test Test Test Test Test Test Test Test Test Test Test Test Test Test Test Test Test Test Test Test Test Test
Yang
Test Test Test Test Test Test Test Test Test Test Test Test Test Test Test Test Test Test Test Test Test Test Test Test Test Test Test Test Test Test Test Test Test Test Test Test Test Test Test Test Test Test Test Test Test Test Test Test Test Test Test Test Test Test Test Test Test Test Test Test Test Test Test Test Test Test Test Test Test Test Test Test Test Test Test Test Test Test Test Test Test Test Test Test Test Test Test
Akuma

Test Test Test Test Test Test Test Test Test Test Test Test Test Test Test Test Test Test Test Test Test Test Test Test Test Test Test Test Test Test Test Test Test Test Test Test Test Test Test Test Test Test Test Test Test Test Test Test Test Test Test Test Test Test Test Test Test Test Test Test Test Test Test Test Test Test Test Test Test Test Test Test Test Test Test Test Test Test Test Test Test Test Test Test Test Test Test
Urien
Test Test Test Test Test Test Test Test Test Test Test Test Test Test Test Test Test Test Test Test Test Test Test Test Test Test Test Test Test Test Test Test Test Test Test Test Test Test Test Test Test Test Test Test Test Test Test Test Test Test Test Test Test Test Test Test Test Test Test Test Test Test Test Test Test Test Test Test Test Test Test Test Test Test Test Test Test Test Test Test Test Test Test Test Test Test Test
Oro
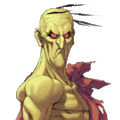
Test Test Test Test Test Test Test Test Test Test Test Test Test Test Test Test Test Test Test Test Test Test Test Test Test Test Test Test Test Test Test Test Test Test Test Test Test Test Test Test Test Test Test Test Test Test Test Test Test Test Test Test Test Test Test Test Test Test Test Test Test Test Test Test Test Test Test Test Test Test Test Test Test Test Test Test Test Test Test Test Test Test Test Test Test Test Test
Ibuki
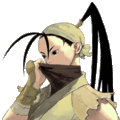
Test Test Test Test Test Test Test Test Test Test Test Test Test Test Test Test Test Test Test Test Test Test Test Test Test Test Test Test Test Test Test Test Test Test Test Test Test Test Test Test Test Test Test Test Test Test Test Test Test Test Test Test Test Test Test Test Test Test Test Test Test Test Test Test Test Test Test Test Test Test Test Test Test Test Test Test Test Test Test Test Test Test Test Test Test Test Test
Elena
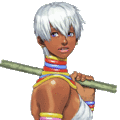
Test Test Test Test Test Test Test Test Test Test Test Test Test Test Test Test Test Test Test Test Test Test Test Test Test Test Test Test Test Test Test Test Test Test Test Test Test Test Test Test Test Test Test Test Test Test Test Test Test Test Test Test Test Test Test Test Test Test Test Test Test Test Test Test Test Test Test Test Test Test Test Test Test Test Test Test Test Test Test Test Test Test Test Test Test Test Test
Necro
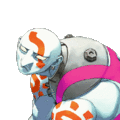
Test Test Test Test Test Test Test Test Test Test Test Test Test Test Test Test Test Test Test Test Test Test Test Test Test Test Test Test Test Test Test Test Test Test Test Test Test Test Test Test Test Test Test Test Test Test Test Test Test Test Test Test Test Test Test Test Test Test Test Test Test Test Test Test Test Test Test Test Test Test Test Test Test Test Test Test Test Test Test Test Test Test Test Test Test Test Test
Alex

Test Test Test Test Test Test Test Test Test Test Test Test Test Test Test Test Test Test Test Test Test Test Test Test Test Test Test Test Test Test Test Test Test Test Test Test Test Test Test Test Test Test Test Test Test Test Test Test Test Test Test Test Test Test Test Test Test Test Test Test Test Test Test Test Test Test Test Test Test Test Test Test Test Test Test Test Test Test Test Test Test Test Test Test Test Test Test
Remy
Test Test Test Test Test Test Test Test Test Test Test Test Test Test Test Test Test Test Test Test Test Test Test Test Test Test Test Test Test Test Test Test Test Test Test Test Test Test Test Test Test Test Test Test Test Test Test Test Test Test Test Test Test Test Test Test Test Test Test Test Test Test Test Test Test Test Test Test Test Test Test Test Test Test Test Test Test Test Test Test Test Test Test Test Test Test Test
Hugo

Test Test Test Test Test Test Test Test Test Test Test Test Test Test Test Test Test Test Test Test Test Test Test Test Test Test Test Test Test Test Test Test Test Test Test Test Test Test Test Test Test Test Test Test Test Test Test Test Test Test Test Test Test Test Test Test Test Test Test Test Test Test Test Test Test Test Test Test Test Test Test Test Test Test Test Test Test Test Test Test Test Test Test Test Test Test Test
Sean
Test Test Test Test Test Test Test Test Test Test Test Test Test Test Test Test Test Test Test Test Test Test Test Test Test Test Test Test Test Test Test Test Test Test Test Test Test Test Test Test Test Test Test Test Test Test Test Test Test Test Test Test Test Test Test Test Test Test Test Test Test Test Test Test Test Test Test Test Test Test Test Test Test Test Test Test Test Test Test Test Test Test Test Test Test Test Test
Yun

Test Test Test Test Test Test Test Test Test Test Test Test Test Test Test Test Test Test Test Test Test Test Test Test Test Test Test Test Test Test Test Test Test Test Test Test Test Test Test Test Test Test Test Test Test Test Test Test Test Test Test Test Test Test Test Test Test Test Test Test Test Test Test Test Test Test Test Test Test Test Test Test Test Test Test Test Test Test Test Test Test Test Test Test Test Test Test
Makoto
Test Test Test Test Test Test Test Test Test Test Test Test Test Test Test Test Test Test Test Test Test Test Test Test Test Test Test Test Test Test Test Test Test Test Test Test Test Test Test Test Test Test Test Test Test Test Test Test Test Test Test Test Test Test Test Test Test Test Test Test Test Test Test Test Test Test Test Test Test Test Test Test Test Test Test Test Test Test Test Test Test Test Test Test Test Test Test
Dudley
Test Test Test Test Test Test Test Test Test Test Test Test Test Test Test Test Test Test Test Test Test Test Test Test Test Test Test Test Test Test Test Test Test Test Test Test Test Test Test Test Test Test Test Test Test Test Test Test Test Test Test Test Test Test Test Test Test Test Test Test Test Test Test Test Test Test Test Test Test Test Test Test Test Test Test Test Test Test Test Test Test Test Test Test Test Test Test
Ryu
Test Test Test Test Test Test Test Test Test Test Test Test Test Test Test Test Test Test Test Test Test Test Test Test Test Test Test Test Test Test Test Test Test Test Test Test Test Test Test Test Test Test Test Test Test Test Test Test Test Test Test Test Test Test Test Test Test Test Test Test Test Test Test Test Test Test Test Test Test Test Test Test Test Test Test Test Test Test Test Test Test Test Test Test Test Test Test
Chun-li
Test Test Test Test Test Test Test Test Test Test Test Test Test Test Test Test Test Test Test Test Test Test Test Test Test Test Test Test Test Test Test Test Test Test Test Test Test Test Test Test Test Test Test Test Test Test Test Test Test Test Test Test Test Test Test Test Test Test Test Test Test Test Test Test Test Test Test Test Test Test Test Test Test Test Test Test Test Test Test Test Test Test Test Test Test Test Test
Gill

- If you're fighting Gill, I'm assuming you're playing the arcade mode. Here's what to do, step by step:
- Get a knockdown.
- st.
 on Gills wakeup. They'll block it.
 - Wait just a moment; don't cancel into it, but then

 . It'll hit. So long as you timed the st.
 correctly, it'll hit.
 - 2x

 when you eventually drag Gill to the corner.
 - st.
 , delay, SA3, if you want to finish with a super.
- If Gill dies with enough meter to super, jump just before the resurrection freeze, then EX-Tatsu (


 ) him out of it. Rinse-and-repeat steps 1-5. Apply liberally to every other character in arcade mode, if you so choose.
Godspeed, friend.


