Street Fighter 3: 3rd Strike/Alex

From SuperCombo Wiki
Alex's Character Select Portrait
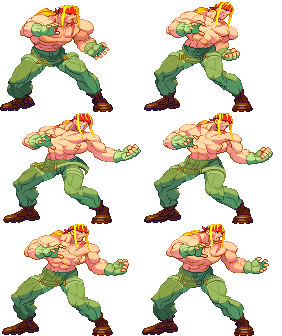
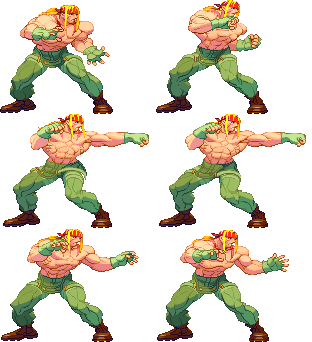
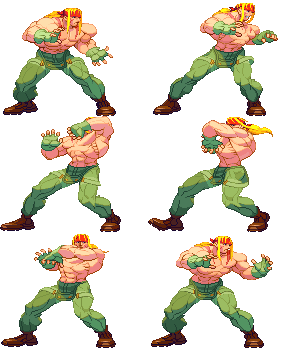
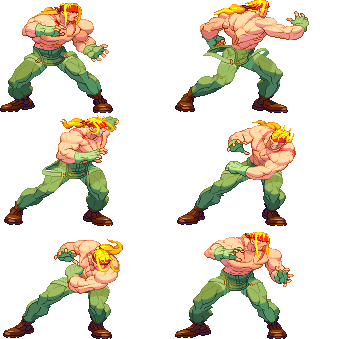
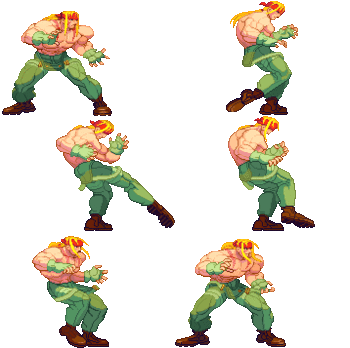
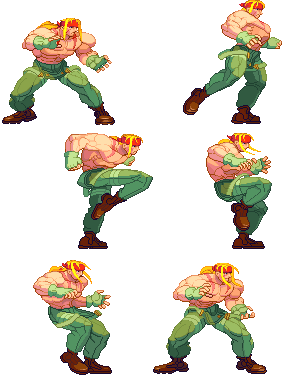
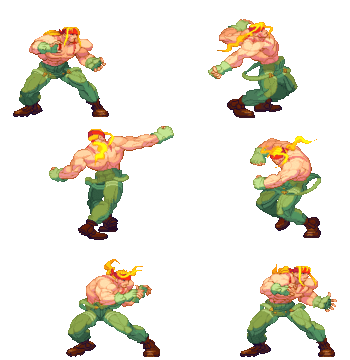
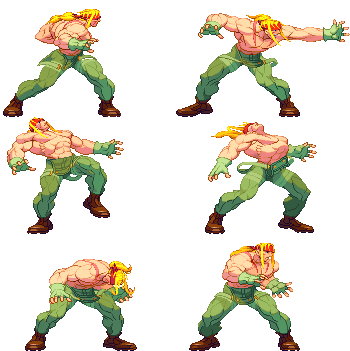
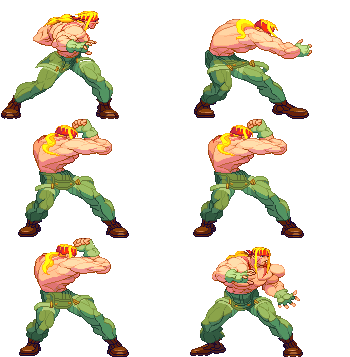
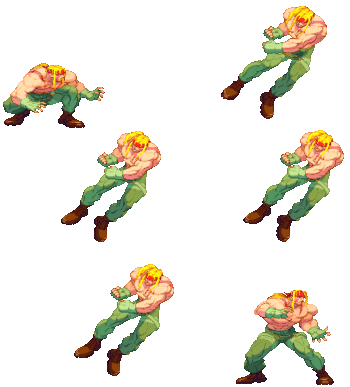
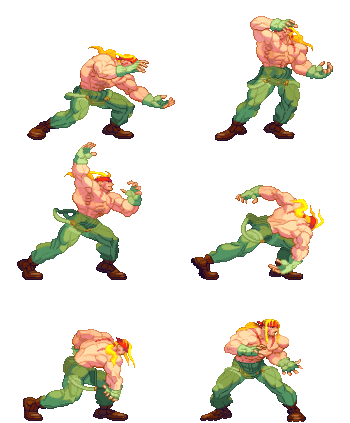
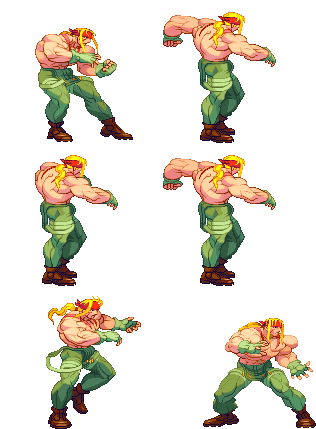
Alex's Neutral Stance

Introduction

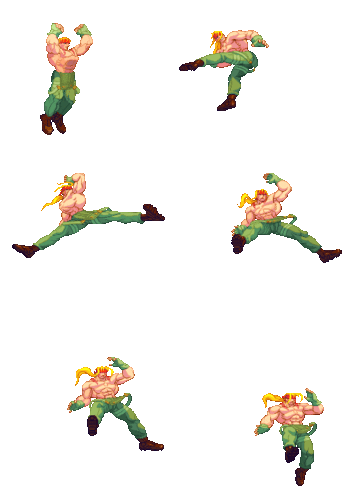
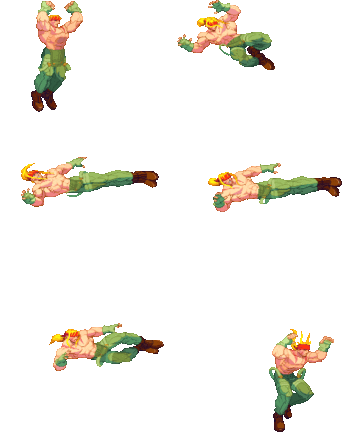
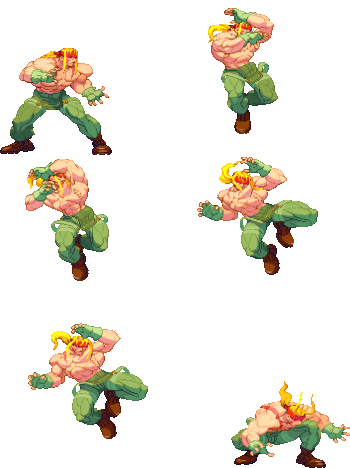
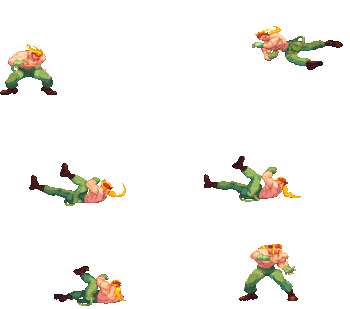
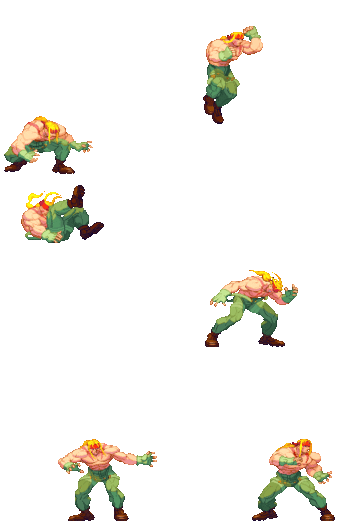
Alex, who hails from New York, is the main character in the Street Fighter III series. His appearance slightly mimics that of professional wrestler Hulk Hogan. He wears green overalls, brown combat boots and an identifying red headband.

As the new main character of Street Fighter at the time, Alex was created to be another well-rounded character like Ryu and Ken, but also original from the Shoto archetype. As such, he is a semi-grappler who is both strong and decently swift, has good health and can rack up a lot of stun very quickly, with a breadth of various and unique tools to work with. While he may not have many combos or offensive mixups, in the right hands, he can bring down his opponents quicker than anyone else in the game.

Strengths Weaknesses
  • Medium-Heavyweight grappler varied specials
  • Can combo a Fierce Chop with a back+Fierce or Power Bomb for stun damage
  • Incredible EX Moves properties against jumping and projectile spamming opponents
  • good poking and damaging normals
  • Had the slowest recovery commands, Flying Chop is the worst command air in game
  • Too Specific Super Arts Uses, and a bit stock dependant for EX Moves
  • easy crossup and extended advanced combo target

Specific Character Information

  • Stamina: 1200
  • Stun Bar Length (dots): 72 (Long)
  • Stun Bar Recovery (frames it takes to recover 1 dot): 23
  • Taunt:

Unheld taunt - Increases damage for the next hit/combo by 9.4% for the first taunt and 6.3% for each additional taunt. Maximum: 6 taunts, 37.5% bonus.

Held taunt - Increases damage for the next hit/combo or throw by 6.3% per extra arm turn. Maximum: 8 turns, 50% bonus.

  • Best Kara-Throw: C.LP/ F.HP / S.LK

  • Standard Throw Range (pixels): 30
  • Kara Throw Range (pixels): 46 / 46 / 38
  • Dash Forward: 17 frames, 123px
  • Dash Backward: 21 frames, 107px
  • Normal Wake up (frames): 67
  • Quick Stand (frames): 49

Moves List

Throws

Body Slam Lp.png+Lk.png

Command Moves

Chop F.png+Mp.png
Lariat F.png+Hp.png
Headbutt B.png+Hp.png
Sleeper Hold from behindB.png+Hp.png
Flying Cross Chop Air D.png+Hp.png

Special Moves

Flash Chop Qcf.png+P.png EX SC SC with Mp.png /Hp.png] on normal version and EX version
Powerbomb Close Hcb.png+P.png
Power Backdrop from behindHcb.png+P.png
Spiral D.D.T. Hcb.png+K.png
Air Knee Smash Dp.png+K.png EX
Air Stampede D.png charge U.png+K.png EX
Slash Elbow B.png charge F.png+K.png SC SC on 1st hit

Super Arts

I Hyper Bomb Close 360.png+P.png 128 Gauge Dots 1 Stock 3.2 EX Uses
I Backdrop Bomb from behind360.png+P.png 128 Gauge Dots 1 Stock 3.2 EX Uses
II Boomerang Raid Qcf.pngQcf.png+P.png 96 Gauge Dots 2 Stocks 4.8 EX Uses
III Stun Gun Headbutt Qcf.pngQcf.png+P.png 80 Gauge Dots 1 Stock 2.0 EX Uses

Target Combo

D.png+Lk.pngcD.png+Mk.png/D.png+Hk.png

Move Analysis

Please note that the images show in this section are for the 1st frame it hits, so this means the opponent is taking the hit in the image shown on the move. I use the 1st frame of every move (except taunt, dash, jump, wakeup and 2nd throw image sprites) because you will see the maximum range of every attack (mostly of the attacks). Note also that those images are ACCURATE, they are exactly the first frame it hits, so enemy takes damage but they still dont make the "pain" frame.

General

  • Move: Move name
  • Motion: What you must do to execute the move
  • Damage: Damage it does (in pixels)
  • Stun Damage: Stun Damage it does (in pixels)
  • Chains into itself: If you can combo into the same movement
  • Special Cancel: If you can cancel the move into a Special Move
  • Super Cancel: If you can cancel the move into a Super Art
  • Juggle Value: Amount of JP the move adds in aerial juggles
  • 0: JP is reset
  • Juggle or Reset: If the move knocks down on air connect or air resets
  • Throw Range: Range of the throw (in pixels)
  • Num.: Super Art number
  • Super Art: Super Art name
  • Super Art Stock: Number of Gauge Bars the Super Art have, also the lenght of each bar (in pixels)

Frame Data

  • Startup: Number of frames it takes to start the move
  • Hit: Number of frames that can hit the opponent
  • Recovery: Number of frames it takes to recover from the move
  • Blocked Advantage: Number of frames you are in advantage/disadvantage after opponent have been blocked the hit
  • Hit Advantage: Number of frames you are in advantage/disadvantage after opponent have been take the hit
  • Crouching Hit Advantage: Number of frames you are in advantage/disadvantage after opponent have been take the hit while he's crouching
  • + # : You have # frames of advantage
  • - # : You have # frames of disadvantage
  • # ~ # : Advantage/disadvantage can vary from # to #
  • Down: Enemy gets knocked down
  • Guard: How opponent must guard the move, High (H), Low (L) or both (HL)
  • Parry: How opponent must parry the move, High (H), Low (L) or both (HL)

Gauge Increase

  • Miss: Gauge you gain if you miss the move (in pixels)
  • Blocked: Gauge you gain if the move gets blocked (in pixels)
  • Hit: Gauge you gain if you hit the opponent with the move (in pixels)
  • Parry: Gauge opponent gains when he parry the move (in pixels)

Basic Moves

(alexdf).gif
Move Total frames
Dash Forward 17

Comments here


(alexdb).gif
Move Total frames
Dash Backwards 21

Comments here

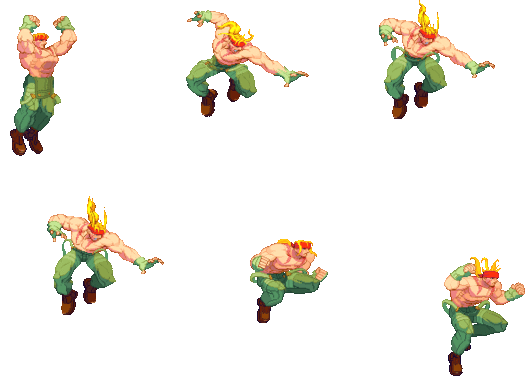
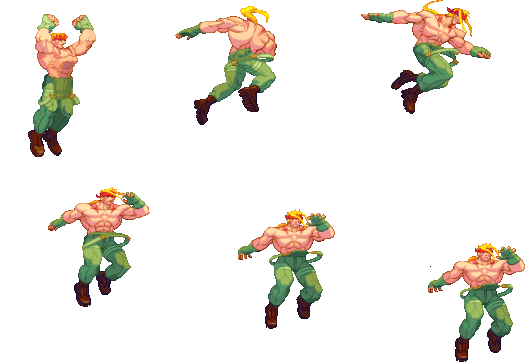
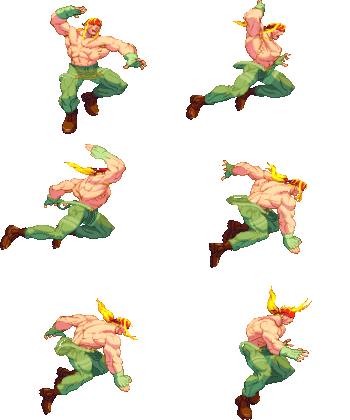
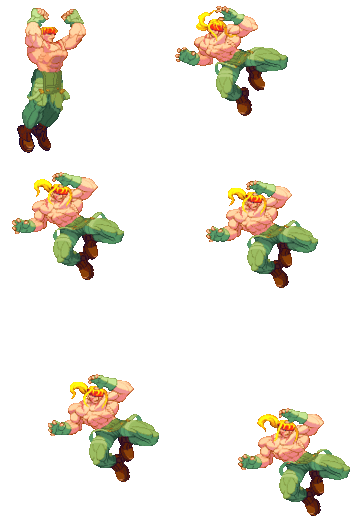
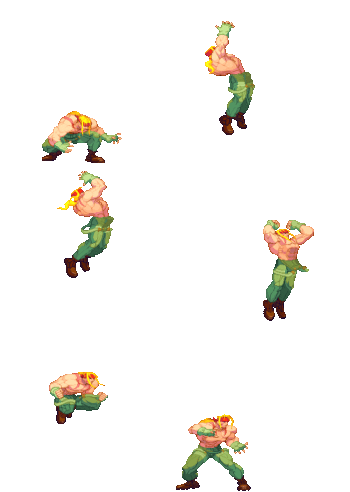
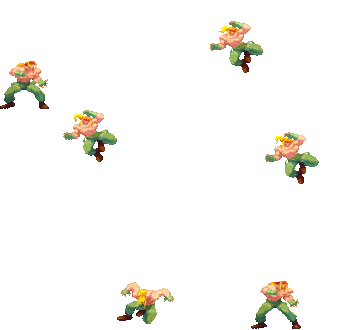
(alexbjump).gif
(alexjump).gif
(alexfjump).gif
Move Motion Startup Frames
Jump BU or U or FU 4

Comments here


Move Motion Startup Frames
Super Jump DBU or DU or DFU 6

Comments here


(alexw).gif
Move Motion Frames
Normal Wakeup - 67

Comments here


(alextw).gif
Move Motion Frames
Quick Stand Tap D when hitting the ground 49

Comments here


(alext).gif
Move Motion Damage Stun Damage Chains into itself Special Cancel Super Cancel Juggle Value Reset or Juggle
Taunt HP+HK - - - - - - - -

Frame Data

Startup Hit Recovery Blocked Advantage Hit Advantage Crouching Hit Advantage Guard Parry
- 64 - - - - - -

Gauge Increase

Miss Blocked Hit Parry (Gauge for opponent)
4(6) ? ? 8(4+4)

Comments here


(alexhparry).gif
(alexlparry).gif
Move Motion
Parry (High) Tap F when about taking a hit
Parry (Low) Tap D when about taking a hit
Parry (Air) Tap F in air when about taking a hit

Frame Data

Move Frames you're frozen Frames opponent is frozen Frame Advantage when parry is successful Frames before you can try another parry
Parry (High) 16 16 +4(LP/LK) +3(MP/MK) +2(HP/HK) 0(Special/Super) -16(Fireball) 24(19 when attack comes from the air)*,**
Parry (Low) 16 16 +4(LP/LK) +3(MP/MK) +2(HP/HK) 0(Special/Super) -16(Fireball) 24(19 when attack comes from the air)*,**
Parry (Air) 16 16 +4(LP/LK) +3(MP/MK) +2(HP/HK) 0(Special/Super) -16(Fireball) 21(19 when attack comes from the air)*,**
* (If a parry attempt is successful, the 19/21/24 frame restriction is taken away and you can attempt another parry immediately)
** (If another attack connects within 2 frames of your parry, it will automatically be parried)

Gauge Increase

Move Gauge Increase
Parry (High) 4***
Parry (Low) 4***
Parry (Air) 4***
*** (You gain 4 of gauge for whatever attack parried, and for whatever hit you parry during multihit attack)

You can buffer any motion during High or Low parry, but NOT during Air parry, also parry resets the juggle count (and thus resets all scaling).

  • Parry information is taken from Flash Chop Forums, more exactly, from user JinraiPVC. Thanks for this information dude

Normal Moves

Standing Normals

(alexlp).gif
Move Motion Damage Stun Damage Chains into itself Special Cancel Super Cancel Juggle Value Reset or Juggle
Far Jab LP 30(5 life points) 5 Yes Yes Yes 1 Reset

Frame Data

Startup Hit Recovery Blocked Advantage Hit Advantage Crouching Hit Advantage Guard Parry
4 2 9 +1 +1 +1 HL HL

Gauge Increase

Miss Blocked Hit Parry (Gauge for opponent)
0 1 2 4

Comments here


(alexmp).gif
Move Motion Damage Stun Damage Chains into itself Special Cancel Super Cancel Juggle Value Reset or Juggle
Far Strong MP 100(17 life points) 11 No Yes Yes 1 Reset

Frame Data

Startup Hit Recovery Blocked Advantage Hit Advantage Crouching Hit Advantage Guard Parry
4 3 12 -1 0 +1 HL H

Gauge Increase

Miss Blocked Hit Parry (Gauge for opponent)
2 5 10 4

Comments here


(alexhp).gif
Move Motion Damage Stun Damage Chains into itself Special Cancel Super Cancel Juggle Value Reset or Juggle
Far Fierce HP 145(25 life points) 19 No No No 1 Juggle

Frame Data

Startup Hit Recovery Blocked Advantage Hit Advantage Crouching Hit Advantage Guard Parry
14 4 16 -1 +1 +3 H H

Gauge Increase

Miss Blocked Hit Parry (Gauge for opponent)
3 9 17 4

Comments here


(alexcloselp).gif
Move Motion Damage Stun Damage Chains into itself Special Cancel Super Cancel Juggle Value Reset or Juggle
Close Jab (Close to opponent) LP 30(5 life points) 5 Yes Yes Yes 1 Reset

Frame Data

Startup Hit Recovery Blocked Advantage Hit Advantage Crouching Hit Advantage Guard Parry
4 2 9 +1 +1 +1 HL HL

Gauge Increase

Miss Blocked Hit Parry (Gauge for opponent)
0 1 2 4

Comments here


(alexlk).gif
Move Motion Damage Stun Damage Chains into itself Special Cancel Super Cancel Juggle Value Reset or Juggle
Short LK 40(7 life points) 3 No Yes Yes 1 Reset

Frame Data

Startup Hit Recovery Blocked Advantage Hit Advantage Crouching Hit Advantage Guard Parry
5 3 10 0 0 0 HL HL

Gauge Increase

Miss Blocked Hit Parry (Gauge for opponent)
0 1 2 4

Comments here


(alexmk).gif
Move Motion Damage Stun Damage Chains into itself Special Cancel Super Cancel Juggle Value Reset or Juggle
Forward MK 100(17 life points) 9 No No No 1 Reset

Frame Data

Startup Hit Recovery Blocked Advantage Hit Advantage Crouching Hit Advantage Guard Parry
11 3 14 -1 0 +1 HL H

Gauge Increase

Miss Blocked Hit Parry (Gauge for opponent)
3 9 17 4

Comments here


(alexhk).gif
Move Motion Damage Stun Damage Chains into itself Special Cancel Super Cancel Juggle Value Reset or Juggle
Roundhouse HK 150(26 life points) 21 No No No 1 Juggle

Frame Data

Startup Hit Recovery Blocked Advantage Hit Advantage Crouching Hit Advantage Guard Parry
16 5 29 -13 0 +2 H H

Gauge Increase

Miss Blocked Hit Parry (Gauge for opponent)
3 9 17 4

Comments here

(alexclosemk).gif
Move Motion Damage Stun Damage Chains into itself Special Cancel Super Cancel Juggle Value Reset or Juggle
Close Forward Close MK 105(18 life points) 9 No Yes Yes 1 Reset

Frame Data

Startup Hit Recovery Blocked Advantage Hit Advantage Crouching Hit Advantage Guard Parry
5 3 12 0 +1 +2 HL H

Gauge Increase

Miss Blocked Hit Parry (Gauge for opponent)
2 5 10 4

Comments here

Jumping Normals

(alexjlp).gif
Move Motion Damage Stun Damage Chains into itself Special Cancel Super Cancel Juggle Value Reset or Juggle
Jump Jab (Air) LP 40(7 life points) 9 No No No 3 Reset

Frame Data

Startup Hit Recovery Blocked Advantage Hit Advantage Crouching Hit Advantage Guard Parry
4 12 - -8~+7 -8~+7 +4~+7 H H

Gauge Increase

Miss Blocked Hit Parry (Gauge for opponent)
0 1 2 4

Comments here


(alexjmp).gif
Move Motion Damage Stun Damage Chains into itself Special Cancel Super Cancel Juggle Value Reset or Juggle
Jump Strong (Air) MP 80(14 life points) 13 No No No 3 Reset

Frame Data

Startup Hit Recovery Blocked Advantage Hit Advantage Crouching Hit Advantage Guard Parry
5 3 - +2~+10 +2~+10 +8~+10 H H

Gauge Increase

Miss Blocked Hit Parry (Gauge for opponent)
2 5 10 4

Comments here


(alexjhp).gif
Move Motion Damage Stun Damage Chains into itself Special Cancel Super Cancel Juggle Value Reset or Juggle
Jump Fierce (Air) HP 140(80)(24 life points) 15 No No No 3 Reset

Frame Data

Startup Hit Recovery Blocked Advantage Hit Advantage Crouching Hit Advantage Guard Parry
8 3 - +2~+13 +2~+13 +10~+13 H H

Gauge Increase

Miss Blocked Hit Parry (Gauge for opponent)
3 9 17 4

Comments here


(alexjlk).gif
Move Motion Damage Stun Damage Chains into itself Special Cancel Super Cancel Juggle Value Reset or Juggle
Jump Short (Air) LK 60(10 life points) 7 No No No 3 Reset

Frame Data

Startup Hit Recovery Blocked Advantage Hit Advantage Crouching Hit Advantage Guard Parry
4 Until Landing - -8~+7 -8~+7 +4~+7 H H

Gauge Increase

Miss Blocked Hit Parry (Gauge for opponent)
0 1 2 4

Comments here


(alexjmk).gif
Move Motion Damage Stun Damage Chains into itself Special Cancel Super Cancel Juggle Value Reset or Juggle
Jump Forward (Air) MK 90(16 life points) 11 No No No 3 Reset

Frame Data

Startup Hit Recovery Blocked Advantage Hit Advantage Crouching Hit Advantage Guard Parry
9 3 - -3~+10 0~+10 +7~+10 H H

Gauge Increase

Miss Blocked Hit Parry (Gauge for opponent)
2 5 10 4

Comments here


(alexjhk).gif
Move Motion Damage Stun Damage Chains into itself Special Cancel Super Cancel Juggle Value Reset or Juggle
Jump Roundhouse (Air) HK 120(21 life points) 15 No No No 3 Reset

Frame Data

Startup Hit Recovery Blocked Advantage Hit Advantage Crouching Hit Advantage Guard Parry
8 4 - +2~+13 +2~+13 +9~+13 H H

Gauge Increase

Miss Blocked Hit Parry (Gauge for opponent)
3 9 17 4

Comments here


(alexoh).gif
Move Motion Damage Stun Damage Chains into itself Special Cancel Super Cancel Juggle Value Reset or Juggle
Universal Overhead MP+MK 40(7 life points) 3 No No No 1 Reset

Frame Data

Startup Hit Recovery Blocked Advantage Hit Advantage Crouching Hit Advantage Guard Parry
15 10 5 -5~+7 0~+8 +1~+9 HL H

Gauge Increase

Miss Blocked Hit Parry (Gauge for opponent)
0 1 2 4

Comments here

Throws

(alexbsl).gif
Move Motion Damage Stun Damage Throw Range Kara-Throw Kara-Throw Range
Body Slam (B+F)+LP+LK 120(24 life points) 17 30 C.LP/ F.HP / S.LK 46 / 46 / 38

Frame Data

Startup Hit Recovery Blocked Advantage Hit Advantage Crouching Hit Advantage Guard Parry
2 1 21 - - - (B+F)+LP+LK -

Gauge Increase

Miss Blocked Hit
0 7 (for the player who blocked) 8

Comments here

Crouching Normals

(alexclp).gif
Move Motion Damage Stun Damage Chains into itself Special Cancel Super Cancel Juggle Value Reset or Juggle
Crouch Jab D+LP 30(5 life points) 5 Yes Yes Yes 1 Reset

Frame Data

Startup Hit Recovery Blocked Advantage Hit Advantage Crouching Hit Advantage Guard Parry
4 2 9 +1 +1 +1 HL HL

Gauge Increase

Miss Blocked Hit Parry (Gauge for opponent)
0 1 2 4

Comments here


(alexcmp).gif
Move Motion Damage Stun Damage Chains into itself Special Cancel Super Cancel Juggle Value Reset or Juggle
Crouch Strong D+MP 90(16 life points) 7 No No No 1 Reset

Frame Data

Startup Hit Recovery Blocked Advantage Hit Advantage Crouching Hit Advantage Guard Parry
7 2 13 0 +1 +2 HL HL

Gauge Increase

Miss Blocked Hit Parry (Gauge for opponent)
2 5 10 4

Comments here


(alexchp).gif
Move Motion Damage Stun Damage Chains into itself Special Cancel Super Cancel Juggle Value Reset or Juggle
Crouch Fierce D+HP 140(80+60)(23 life points) 8(3+5) No No No 1/5 Juggle/Juggle

Frame Data

Startup Hit Recovery Blocked Advantage Hit Advantage Crouching Hit Advantage Guard Parry
13 2,3 7 -9 Down Down HL HL

Gauge Increase

Miss Blocked Hit Parry (Gauge for opponent)
3 10 18 4

Comments here


(alexclk).gif
Move Motion Damage Stun Damage Chains into itself Special Cancel Super Cancel Juggle Value Reset or Juggle
Crouch Short D+LK 30(5 life points) 3 No Yes Yes 1 Reset

Frame Data

Startup Hit Recovery Blocked Advantage Hit Advantage Crouching Hit Advantage Guard Parry
5 2 8 +2 +2 +2 L L

Gauge Increase

Miss Blocked Hit Parry (Gauge for opponent)
0 1 2 4

Comments here


(alexcmk).gif
Move Motion Damage Stun Damage Chains into itself Special Cancel Super Cancel Juggle Value Reset or Juggle
Crouch Forward D+MK 70(12 life points) 3 No No No 1 Reset

Frame Data

Startup Hit Recovery Blocked Advantage Hit Advantage Crouching Hit Advantage Guard Parry
8 3 12 -1 0 +1 L L

Gauge Increase

Miss Blocked Hit Parry (Gauge for opponent)
2 5 10 4

Comments here


(alexchk).gif
Move Motion Damage Stun Damage Chains into itself Special Cancel Super Cancel Juggle Value Reset or Juggle
Crouch Roundhouse D+HK 130(23 life points) 3 No No No 15 Juggle

Frame Data

Startup Hit Recovery Blocked Advantage Hit Advantage Crouching Hit Advantage Guard Parry
11 2 29 -15 Down Down L L

Gauge Increase

Miss Blocked Hit Parry (Gauge for opponent)
3 9 17 4

Comments here

Command Normals

(alexfmp).gif
Move Motion Damage Stun Damage Chains into itself Special Cancel Super Cancel Juggle Value Reset or Juggle
Chop F+MP 110(19 life points) 9 No No No 1 Reset

Frame Data

Startup Hit Recovery Blocked Advantage Hit Advantage Crouching Hit Advantage Guard Parry
7 5 10 -2 -1 0 HL H

Gauge Increase

Miss Blocked Hit Parry (Gauge for opponent)
2 5 10 4

Comments here


(alexfhp).gif
Move Motion Damage Stun Damage Chains into itself Special Cancel Super Cancel Juggle Value Reset or Juggle
Lariat F + HP 135(24 life points) 15 No No No 7 Reset

Frame Data

Startup Hit Recovery Blocked Advantage Hit Advantage Crouching Hit Advantage Guard Parry
9 4 17 -1 +1 +3 HL/H/H H/H/H

Gauge Increase

Miss Blocked Hit Parry (Gauge for opponent)
3 9 17 4

Comments here

(alexbhp).gif
Move Motion Damage Stun Damage Chains into itself Special Cancel Super Cancel Juggle Value Reset or Juggle
Head Butt B + HP 180(32 life points) 24 No No No - -

Frame Data

Startup Hit Recovery Blocked Advantage Hit Advantage Crouching Hit Advantage Guard Parry
8 4 23 -11 +1 - HL -

Gauge Increase

Miss Blocked Hit Parry (Gauge for opponent)
3 9 11 4

Comments here


(alexjbhpr).gif
Move Motion Damage Stun Damage Chains into itself Special Cancel Super Cancel Juggle Value Reset or Juggle
Sleeper Hold B + HP in reversed opponent 240(40 life points) 24 No No No - -

Frame Data

Startup Hit Recovery Blocked Advantage Hit Advantage Crouching Hit Advantage Guard Parry
8 4 23 -11 +4 - HL -

Gauge Increase

Miss Blocked Hit Parry (Gauge for opponent)
3 9 11 4

Comments here

(alexjdhp).gif
Move Motion Damage Stun Damage Chains into itself Special Cancel Super Cancel Juggle Value Reset or Juggle
Flying Cross Chop Jump D + HP 120(21 life points) 11 No No No 3 Juggle

Frame Data

Startup Hit Recovery Blocked Advantage Hit Advantage Crouching Hit Advantage Guard Parry
10 11 24 -10 -1 +1 HL -

Gauge Increase

Miss Blocked Hit Parry (Gauge for opponent)
3 6 15 4

Comments here

Target Combo

Move Motion Damage Stun Damage Chains into itself Special Cancel Super Cancel Juggle Value Reset or Juggle
Target Combo Crouch LK -> Crouch MK 30+50 3+3 No/No Yes/No Yes/No 1/1 Reset/Reset

Frame Data

Startup Hit Recovery Blocked Advantage Hit Advantage Crouching Hit Advantage Guard Parry
4 - - -1 0 +1 L/L L/L

Gauge Increase

Miss Blocked Hit Parry (Gauge for opponent)
0+? 1+1 2+1 8(4+4)

Comments here

Move Motion Damage Stun Damage Chains into itself Special Cancel Super Cancel Juggle Value Reset or Juggle
Target Combo Crouch LK -> Crouch HK 30+130 3+3 No/No Yes/No Yes/No 1/15 Reset/Juggle

Frame Data

Startup Hit Recovery Blocked Advantage Hit Advantage Crouching Hit Advantage Guard Parry
4 - - -15 Down Down L/L L/L

Gauge Increase

Miss Blocked Hit Parry (Gauge for opponent)
0+? 1+1 2+1 8(4+4)

Comments here

Special Moves

Please note that in this section you will see mainly 3 images for the special moves, this means the image on the left its done with LP (or LK), the image on the center its done with MP (or MK), and the image on the right its done with HP (or HK). Also its the same "rule" as the sections above, its the 1rst frame it hits for every of the moves.

(alexchop).gif
Move Motion Damage Blocked Damage Stun Damage Super Cancel Juggle Value Reset or Juggle
Flash Chop (Jab) QCF+LP 120(21 life points) 15 7 No 15 Juggle
Flash Chop (Strong) QCF+MP 130(23 life points) 16 9 Yes 15 Juggle
Flash Chop (Fierce) QCF+HP 140(24 life points) 18 15 Yes 15 Juggle

Frame Data

Startup Hit Recovery Blocked Advantage Hit Advantage Crouching Hit Advantage Guard Parry
11 2 17 -2 0 0 HL H
15 3 19 -1 +14 +14 HL H
19 4 17 -1 +15 +15 HL H

Gauge Increase

Miss Blocked Hit Parry (Gauge for opponent)
3 10 16 4

Comments here

(alexaksm).gif
Move Motion Damage Blocked Damage Stun Damage Super Cancel Juggle Value Reset or Juggle
Air Knee Smash (Short) F, D, DF+LK 120(21 life points) - 15 No - -
Air Knee Smash (Forward) F, D, DF+MK 135(24 life points) - 15 No - -
Air Knee Smash (Roundhouse) F, D, DF+HK 150(26 life points) - 15 No - -

Frame Data

Move Startup Hit Recovery Blocked Advantage Hit Advantage Crouching Hit Advantage Guard Parry
Air Knee Smash (Short) 6 6 35 - - - HL HL
Air Knee Smash (Forward) 7 10 34 - - - HL HL
Air Knee Smash (Roundhouse) 8 12 33 - - - HL HL

Gauge Increase

Move Miss Blocked Hit Parry (Gauge for opponent)
Air Knee Smash (Short) 2 0 18 4

Comments here

(alexpbomb).gif
Move Motion Damage Blocked Damage Stun Damage Super Cancel Juggle Value Reset or Juggle
Powerbomb (Jab) HCB+LP 160(28 life points) - 19 No - -
Powerbomb (Strong) HCB+MP 180(32 life points) - 19 No - -
Powerbomb (Fierce) HCB+HP 200(35 life points) - 19 No - -

Frame Data

Move Startup Hit Recovery Blocked Advantage Hit Advantage Crouching Hit Advantage Guard Parry
Powerbomb (Jab) 6 1 35 - - - HL -
Powerbomb (Strong) 7 1 41 - - - HL -
Powerbomb (Fierce) 8 1 44 - - - HL -

Gauge Increase

Move Miss Blocked Hit Parry (Gauge for opponent)
Powerbomb (Jab) 2 - 20 -
Powerbomb (Strong) 2 - 20 -
Powerbomb (Fierce) 2 - 20 -

Comments here


(alexse).gif
Move Motion Damage Blocked Damage Stun Damage Super Cancel Juggle Value Reset or Juggle
Slash Elbow (Short) Hold B, F+LK 100(17 life points) 13 13 Yes 3 Juggle
Slash Elbow (Forward) Hold B, F+MK 120(21 life points) 15 15 Yes 3 Juggle
Slash Elbow (Roundhouse) Hold B, F+HK 140(24 life points) 18 17 Yes 3 Juggle

Frame Data

Move Startup Hit Recovery Blocked Advantage Hit Advantage Crouching Hit Advantage Guard Parry
Slash Elbow (Short) 15 1 17 -2 0 +2 HL H
Slash Elbow (Forward) 18 1 23 -8 0 +2 HL H
Slash Elbow (Roundhouse) 20 1 23 -8 -1 +1 HL H

Gauge Increase

Move Miss Blocked Hit Parry (Gauge for opponent)
Slash Elbow (Short) 3 4 12 4
Slash Elbow (Forward) 3 4 12 4
Slash Elbow (Roundhouse) 3 4 12 4

Comments here


(alexstomp).gif
Move Motion Damage Blocked Damage Stun Damage Super Cancel Juggle Value Reset or Juggle
Stomp (Short) Hold D, U+LK 120(21 life points) 15 11 No 1 Juggle
Stomp (Forward) Hold D, U+MK 140(24 life points) 18 11 No 1 Juggle
Stomp (Roundhouse) Hold D, U+HK 160(28 life points) 20 11 No 1 Juggle

Frame Data

Move Startup Hit Recovery Blocked Advantage Hit Advantage Crouching Hit Advantage Guard Parry
Stomp (Short) 23 2 19 -3 Down Down HL H
Stomp (Forward) 25 2 19 -3 Down Down HL H
Stomp (Roundhouse) 26 2 19 -3 Down Down HL H

Gauge Increase

Move Miss Blocked Hit Parry (Gauge for opponent)
Stomp (Short) 3 4 12 4
Stomp (Forward) 3 4 12 4
Stomp (Roundhouse) 3 4 12 4

Comments here

(alexsddt).gif
Move Motion Damage Blocked Damage Stun Damage Super Cancel Juggle Value Reset or Juggle
Spiral DDT (Short) HCB+LK 160(28 life points) - 15 No - -
Spiral DDT (Forward) HCB+MK 160(28 life points) - 15 No - -
Spiral DDT (Roundhouse) HCB+HK 160(28 life points) - 15 No - -

Frame Data

Move Startup Hit Recovery Blocked Advantage Hit Advantage Crouching Hit Advantage Guard Parry
Spiral DDT (Short) 20 3 8 - - - HL H
Spiral DDT (Forward) 22 3 8 - - - HL H
Spiral DDT (Roundhouse) 24 3 8 - - - HL H

Gauge Increase

Move Miss Blocked Hit Parry (Gauge for opponent)
Spiral DDT (Short) 2 -) 20 -
Spiral DDT (Forward) 2 -) 20 -
Spiral DDT (Roundhouse) 2 -) 20 -

Comments here

EX Moves

(alexfcex).gif
Move Motion Gauge Needed Damage Blocked Damage Stun Damage Super Cancel Juggle Value Reset or Juggle
Flash Chop (EX) QCF+PP 40 200(100+100)(34 life points) 12(6+6) 14(11+3) No 3/7 Juggle/Juggle

Frame Data

Move Startup Hit Recovery Blocked Advantage Hit Advantage Crouching Hit Advantage Guard Parry
Flash Chop (EX) 9・11 2・2 15 -1 Down Down HL H

Gauge Increase

Move Miss Blocked Hit Parry (Gauge for opponent)
Flash Chop (EX) - - - 8(4+4)

Comments here


(alexakmex).gif
Move Motion Gauge Needed Damage Blocked Damage Stun Damage Super Cancel Juggle Value Reset or Juggle
Air Knee Smash (EX) F, D, DF+KK 40 190(26 life points) 0 19 No - -

Frame Data

Move Startup Hit Recovery Blocked Advantage Hit Advantage Crouching Hit Advantage Guard Parry
Air Knee Smash (EX) 3 17 34 -31 Down Down HL HL

Gauge Increase

Move Miss Blocked Hit Parry (Gauge for opponent)
Air Knee Smash (EX) - - -/16 4

Comments here


(alexseex).gif
Move Motion Gauge Needed Damage Blocked Damage Stun Damage Super Cancel Juggle Value Reset or Juggle
Slash Elbow (EX) Hold B, F+KK 40 160(80+80)(27 life points) 10(5+5) 18(7+11) Yes/No 3/15 Juggle/Juggle

Frame Data

Move Startup Hit Recovery Blocked Advantage Hit Advantage Crouching Hit Advantage Guard Parry
Slash Elbow (EX) 9・20 6・1 23 -6 KD KD HL H

Gauge Increase

Move Miss Blocked Hit Parry (Gauge for opponent)
Slash Elbow (EX) - - - 8(4+4)

Comments here

(alexastompex).gif
Move Motion Gauge Needed Damage Blocked Damage Stun Damage Super Cancel Juggle Value Reset or Juggle
Stomp (EX) Hold D, U+KK 40 180(32 life points) 23 13 No 1 Juggle

Frame Data

Move Startup Hit Recovery Blocked Advantage Hit Advantage Crouching Hit Advantage Guard Parry
Stomp (EX) 26 2 19 -3 Down Down HL H

Gauge Increase

Move Miss Blocked Hit Parry (Gauge for opponent)
Stomp (EX) - - - 4

Comments here

Super Arts

(alexsa1).gif
Super Art Super Art Name Super Art Stock Motion Damage Blocked Damage Stun Damage Damage/Gauge Juggle Value Reset or Juggle
I Hyper Bomb 1 bar (128) 360+P 530*(88 life points) - 13 2,25 - -

Frame Data

Startup Hit Recovery Blocked Advantage Hit Advantage Crouching Hit Advantage Guard Parry
2 2 33 -38 Down Down HLx7~9 HLx7~9

Comments here

(alexsa1r).gif
Super Art Super Art Name Super Art Stock Motion Damage Blocked Damage Stun Damage Damage/Gauge Juggle Value Reset or Juggle
I Reverse Hyper Bomb 1 bar (128) 360+P 590*(99 life points) - 18 4,61 - -

Frame Data

Startup Hit Recovery Blocked Advantage Hit Advantage Crouching Hit Advantage Guard Parry
2 2 33 -38 Down Down HLx7~9 HLx7~9

Comments here

(alexsa2).gif
Super Art Super Art Name Super Art Stock Motion Damage Blocked Damage Stun Damage Damage/Gauge Juggle Value Reset or Juggle
II Boomerang Raid 2 bar (96 each) QCF QCF+P 350*(59 life points) 22** 15*** 3,64 (x2) 0 for all hits Juggle for all hits
* 50+40+50+40+250/180 Damage is when all hits connect.
** 6+5+6+5 Damage is when all hits connect.
** 5x4+5/19 is when all hits connect.

Frame Data

Startup Hit Recovery Blocked Advantage Hit Advantage Crouching Hit Advantage Guard Parry
1・12・25・36・57 3・3・3・3・2 41 Down Down HLx4 HLx4

Comments here


(alexsa3).gif
Super Art Super Art Name Super Art Stock Motion Damage Blocked Damage Stun Damage Damage/Gauge Juggle Value Reset or Juggle
III Stun Gun Head-butt 1 bar (80) QCF QCF+P 180*(31 life points) - Max 0,44 - -

Frame Data

Startup Hit Recovery Blocked Advantage Hit Advantage Crouching Hit Advantage Guard Parry
25 3 17 Down Down - -

Comments here

Combos

  • Alex's BnB - j.Hp.png, Close Mk.png xLp.png/EX Flash Chop
    • [j.Hp.png, Close Mk.png x SA2]meter
  • Alex's Punisher -Hp.png Flash Chop,Hp.png Power Bomb
    • [[[File:Hp.png]] Flash Chop, Close Mk.png x SA2]meter
  • Hp.png Flash Chop, Close Mk.png x SA2
  • c.Lp.png x c.Lp.png x SA2
  • Hp.png Flash Chop x SA3 (Useful for attempting the stun gun trap)
  • Mp.png x EX Air Knee (Good Anti-Air after a parry)

Midscreen

Everyone

1st Move 2nd Move 3rd Move 4th Move Damage Stun Damage
Jumping HP Close MK LP Flash Chop - 345 (30%) 27
Jumping HP Close MK Flash Chop (EX) - 414 (36%) 33
Jumping HP Close MK Air Knee (EX) - 380 (33%) 28

Super Art I

Super Art II

Super Art III

1st Move 2nd Move 3rd Move 4th Move Damage Stun Damage
Flash Chop HP L Super Art III -

Strategies

Overview

Alex is a low tier character, who is afflicted with being the other half of Hugo, in that he's fast, but his grabs aren't particularly good. His EX Techniques are very useful, as they make his regularly unsafe moves safe(ish).

Basics

Super Art Selection

Use Super Art: SA2 (Boomerang Raid). Why? Alex's EX moves make him a much better character, and SA2 has the most meter to store EX moves. SA2 is also the easiest super art to combo into. Why not SA1? Because it has a 3 frame start up, that's why. The opponent can just jump out of it if it's not properly set up. The only time that it is ever guaranteed is after amp orHp.png Flash Chop. Why not SA3? Because the Stun Gun trap is escapable. It's not easy, but its possible.

The other two supers tend to rely on gimmicks to land. As we all know, gimmicks only work once on a competent opponent, if at all.

  • SA1
    • Big Damage
    • Harder to setup than other supers
      • Use on: Low stamina characters - Low stamina means that this super can really frighten an offensive player.
  • SA2
    • Large capacity for EX Moves
    • It can be hit confirmed
    • Opponent may not be grabbed if SA2 wasn't done at far range
      • Use on: All
  • SA3
    • Small meter, big damage, Massive Stun
    • Trap can be escaped
    • Small capacity for EX Techniques
      • Use on:
        • Characters with no anti air - SA3 can be good anti air move against characters with no fast start up anti airs (such as Ryu's Shoryuken).
        • Chun-Li - After you blocked her air D+Mk.png you can punish it with SA3.

Kara-Techniques

Throw
Alex's prime kara-throw normal is FHp.png. (FHp.png x Throw)

Alex can also kara-power bomb, with [st.LP] [→ ↘ ↓ ↙ ←] [→ HP ~ LP].

A kara-throw is cancelling a normal move into a throw before the normal technique executes, extending your grab range. They are incredibly tight to execute.

To grasp what it is you're supposed to be seeing after a successful Kara-Throw, watch the feet of your character. If you see dust appear around them, and visually see the sprite move forward, you have successfully performed a Kara-Throw.

Neutral

Pokes

  • cr.MP is a very strong poke, as it is very fast, safe, and covers up a good amount of space. HOWEVER, it is weak to both forward and down parry, so overuse of this will quickly get yourself in trouble.
  • forward.MP is slower and has slightly less range than cr.MP, but requires are forward parry, and has a great vertical hitbox, letting you tag jumpers.
  • cr.MK is a great low poke to stop walkers in their tracks.

Anti Airs

  • cl.MP is a lightning fast reliable anti air.
  • cr.HP is a slow, but beefy anti air with multiple hits.
  • j.MP is your go to air to air. j.HK can be useful in ranged situations.

Tricks

  • EX Stomp can be a great tool to catch fireball/preemptive pokers off guard, as it often avoids their move.

Mixups

HIGH

Alex's standing Hp.png and UOH are useful. Strong high section techniques include;

  • Hp.png - Does a ton of stun, somewhat ambiguous animation, and is relatively safe on block.
  • Meaty UOH x SA2.
  • Meaty Close Mk.png x Hk.png/Mk.png Stomp are also useful tools at lower levels, as you can cross up for a left/right. However, be warned that tapping in any direction performs a block/parry OS against crossups, so use sparingly against a familiar opponent. Useful for DDT setups.

LOW

  • Regarding Alex's low mix-ups, c.Lk.png, c.Mk.png, and c.Hk.png are all lows.
  • Alex's target combo of c.Lk.png > c.Mk.png lets him get more reward off of his c.Lk.png, and the sweep can be used as a high risk callout. (It is quite unsafe on block though, so use carefully.)


THROW

  • As is the way with all the characters in the game, an additional layer of Strike/Throw can be layered into your mixups.
  • Power Bomb, being a command grab, is a high-risk middling-reward tool. Alex's is not especially rewarding, both in damage and in positioning, but it is an important tool nonetheless.
  • Tick throwing is an important tool for any grappler - by throwing right as your opponent leaves blockstun, you can beat out any option asides from invuln/jumping.
  • Tick throwing from st.Lp.png/st.Mk.png/ > Power Bomb can be an especially powerful tool, and you can mix it up with normal attacks to catch jumpers.
  • Given Alex's little reward off of Power Bomb, however, comes the importance of using regular throws - although they are techable, they are significantly safer, as if your opponent jumps out of your throw, you can block punishes that would catch Power Bomb otherwise.
  • DDT is a unique command grab, in that it has good range and oki, but whiffs on crouchers. This makes it a very risky tool on its own, but is quite useful to bait parries/people afraid of overheads. Meaty cl.Mk.png x Mk.png DDT can be used where one would expect a stomp, which can catch parry/high block attempts.

Additional Notes

  • Personal Action: Alex's damage done on the next attack increases. Holding Fierce and Roundhouse keeps this action going. If Alex rotates his arm 7 times, the damage increase is maxed out. This can be done in multiple taunts.

Match-ups

Serious Advantage Match-ups

Alex has no match-ups where he is at a serious advantage

Advantage Match-ups

  • Q - Headbutt works well against Q, so use it often.

Mixup your "Big Guy" pokes: twd.FP,Mp.png.Flash Chop, st.Mp.png, twd.Mp.png.

After your pokes, throw in empty parries to catch Q's rush punches.

  • Hugo - Poke with towards.FP (the lariat)/towards.Mp.png/Mp.png/Headbutt. st.Mp.png beats Hugo's st.Mp.png. Also try poking every so often with amp.Flash Chop from just outside Hugo's 360 range.

You can't headbutt a dizzied Hugo.

  • Twelve - Anti-air with EX-Knee Grab.

Try to catch him with air-to-air j.Mp.png, j.FP, j.Mk.png to reset him, then dash up and mixup with either kara throw, jab powerbomb, st.Mk.png or st.Mp.png xx EX-Flash Chop. Try a plain EX-Flash Chop after dashing, too, since it's low risk. You can also try charge partitioned trickery, like dash stomp or dash Lk.png/EX-Slash Elbow.

  • Sean - Punish blocked cr.FK with EX-Slash Elbow.

Punish blocked shoto cr.Mk.png with SAII or SAI (reversal timing required, and must be very close to opponent)

Fair Match-ups

  • Remy - Remy has one of the shortest stun bars in the game, so your goal should be to exploit that. Headbutt! Keep the pressure on and make sure you can parry his LOV's and Flash Kicks to get inside.

Blocked Flash Kicks (any variety) can be punished with a headbutt.

  • Alex - Don't get too predictable with your stomp setups. If you're playing a guy and you smell stomp, unless you know which way it's going (crossup or not), you can use EX Stomp and it will beat out the regular stomp.
  • Necro - Do not blindly use EX-Slash Elbow once he gets meter, since he has one of the fastest supers (SAIII) in the game and can punish a blocked one. You can, however, still use normal Slash Elbows if you space them properly (Lk.png version only). You want to hit with it so you can block any retaliation if the Slash Elbows is blocked.

Necro's long limbs parried at a distance are perfect for twd.FP.

Immediately twd.FP Necro if you see him jump from close up. Also, learn how to red parry the second hit of his drills, then punish with st.Mp.png xx EX-Knee Grab.


Disadvantage Match-ups

  • Yun - Random stomp sometimes helps against activated Yun trying for the command throw.

Stay just out of Yun's dash range. In my experience, forcing Yun to come after you works the best, since you can react accordingly. In short, I guess, keep-away is good.

When a Yun/Yang dives on u throw out a st.Mp.png when they're going to jump out again, if the dive kick is too deep you can throw them. Also, for people who like to run away and charge with crouching strong usually you can throw out an EX-Slash Elbow, its so fast a lot of times I notice it surprises the opponent. And even if its blocked its safe vs yun/yang. Abuse the jab powerbomb on Yun's wakeup since he has very few good wakeup options.

When Yun/Yang tries to either throw, command grab, or hit with st.Mk.png launcher, counter with the backward-karamp.Flash Chop (kara with Roundhouse Kick to move backwards instead of forwards). This will move you out of throw/launcher range and nail Yun/Yang with a Flash Chop --> German Suplex or combo of your choice.

Learn how to red parry the second hit of Yun's j.Lp.png --> j.FP target combo. If you successfully red parry the j.FP, hit a quick st.Mk.png xx SAII

  • Chun-Li - Do not blindly use EX-Slash Elbow once she gets meter, since she has one of the fastest supers (SAII) in the game and can punish a blocked one. You can, however, still use normal Slash Elbows if you space them properly. You want to hit with it so you can block any retaliation if the Elbow Slash is blocked.

Whenever Chun doesn't have a super charged, rush her down...this is your shot at dealing some damage before she becomes extremely dangerous. So, at the start of the first round, be aggressive. Try some cr.FK outside of her cr.Mk.png range to trip her up. Throw in some headbutts while playing the footsie game with her. Tick powerbomb with j.Lp.png, or early j.FP --> land then jab.powerbomb.

Once she gets meter, you'll need to be less aggressive and more tricky since one little mistake can cost you the round easily. Try to get a knockdown with charge partitioned dashing stomps. Carefully poke with far.Mk.png or towards.Mp.png(the chop). Empty jump-in and mix-up charge partitioned stomps/kara throws/Mp.png xx EX Flash Chop/low parry SGGK technique. Parry her pokes from a distance if you can, and retaliate with the headbutt for nice stun.

ONLY safe shoulder dash against kensa3/chunsa2/necrosa1/3/dudleysa3/elenasa2 is a Lk.png.Slash Elbow... all others are reversible by super.


  • Ken -

When palying footies, stay out of his c.Mk.png range at all times. Thankfully alex's c.mp & s.Mk.png go over ken's c.Mk.png, so use that;However, a good ken will wait for you to whiff the move first so they can walk foward c.Mk.pngxxSAIII.

So, when you poke out a move, ALWAYS make it hit, even if it's blocked because alex has slow recover time if missed. It's ken's c.mp, s.mp that you have to worry about, that shit will just out prioritize most of the time.

It's not the safest thing, but f.fp is good move when at about jab length away because it will hit ken crouching too. But as i said it ain't the safest thing so I only use it when ken has no super. Same goes for alex's c.fk, it's good to use it at sweep distance, but if whiffed it's a long recovery time.

When ken has no meter, you can throw out c.mp & s.Mk.png without fear of missing & taking bing damage so keep the pressure on ken as long as you can. You can't out prioritize ken, but since alex has longer limbs than ken just stay right outside his c.fk/s.fk range.

The best thing to do is wait for ken to whiff a move, then go for an attack. You have 3 or 4 options or so.

1. Punish a whiffed move with alex's c.mp s.Mk.png c.fk. The problem with this, is that ken has like, little to no reaction time off his whiffed moves so you gotta be quick, like you just gotta know it will miss & hit ASAP off reaction.

2.Dash foward kara-throw/Lp.png powerbomb. I like the kara-throw better, i believe it comes out faster the powerbomb. Plus, this gives alex that momentum to start mixing up his high/low/grab game. This is also a good tatic to do out of the blue too, but if they have a super it's kinda of a gamble.

3.Jump towards them. The jump game brings a whole new set of options, so i'm only going to hit a couple of them. A lot of kens moves will react before you get there so ithe safest thing to do is empty jump just to keep the pressure on.

Empty jump:throw, powerbomb, c.Lk.png->kara-throw, ect. If you jump in Mk.png you can tick throw afterwards. Or jump in late with amp so that it misses & you can land throw. But since ken has his SRK it's safest to just empty jump just un case so you can parry.

4.EX Elbow. Even from half the screen this move will punish people who just throw out random attacks. If ken has no meter you are completely safe, but it can be punished with his SAIII, unlike his Lk.png.elbow which is safe even from super. Also, sharge down as soon as you ex elbow so if ken moves at all you can stomp him.

Random Tips -S.FP will tie out with SRK -EX Stomp will hit every time if ken throws a fireball -F.FP will beat ken's air-hurricane kick

  • Makoto - Since she likes to dash around a lot, throw out random (unpredictable) cr.Mp.png or st.Mk.png every so often to catch her. Also, if you space yourself correctly, you could fish for SAII by hitting st.Lk.png and buffering the super...similar to Dudley's st.FK xx EX-MGB empty buffering. This is risky though, because if you're too far away from her when you connect with the st.Lk.png, the grab at the end of the super will wiff.

They love to jab tick into karakusa. Doesn't matter what the tick is, if you see it, st.FK (Das Boot!) pulls you out of grab range and deals in pain.

  • Dudley - Poke with towards.FP (the lariat)/towards.Mp.png/Mp.png/Headbutt. Try to anti-air Dudley the split second you see him leave the ground with a well placed towards.FP. You can also try to poke Dud withMp.png.Flash Chops (you'd be surprised!)

ONLY safe shoulder dash against kensa3/chunsa2/necrosa1/3/dudleysa3/elenasa2 is a Lk.png.Slash Elbow... all others are reversible by super.

A blocked SA3 from Dudley keeps you at st. strong xx EX slash elbow range. It is a lifesaver if he's got you in the corner.

st.Mp.png xx EX Slash Elbow punishes any MGB (EX or not).


  • Yang - If yang stops his EX slashes at about three or four, meaning you were blocking til then, free headbutt.

When Yun/Yang tries to either throw, command grab, or hit with st.Mk.png launcher, counter with the backward-karamp.Flash Chop (kara with Roundhouse Kick to move backwards instead of forwards). This will move you out of throw/launcher range and nail Yun/Yang with a Flash Chop --> German Suplex or combo of your choice.

  • Akuma - Punish blocked cr.FK with EX-Slash Elbow.

If you block any variation of Akuma's spinning kick you can succesfully reversal into a guaranteed super as long as you're not slow as fuck. You catch him recovering.

Punish blocked shoto cr.Mk.png with SAII or SAI (reversal timing required, and must be very close to opponent)

  • Urien - Urien's wakeup options are limited, so you should meaty jab powerbomb him a few times to keep him on his toes, then mixup st.Mk.png xx SAII.

Urien can't use his normal juggles on Alex since Alex's floating/weight properties are different than the rest of the cast. This can be a good advantage.

Against Urien, cr.Mp.png is a godsend. It's free damage against a blocked tackle.

Meaty st.FP should stuff anything he does on wake-up.

If an Aegis Reflector is in front of you and Urien is walking up, headbutt. The hand goes through the reflector and will grab Urien through it.

  • Ryu - Punish blocked cr.FK with EX-Slash Elbow.

Block Hurricane Kicks standing so you can punish with withMp.png or Powerbomb. You can also duck the kick and get up between the hits and choke or Backdrop him.

Punish blocked shoto cr.Mk.png with SAII or SAI (reversal timing required, and must be very close to opponent)

  • Oro - Keep to the ground against Oro. A single parry can send you into an easily achievable unblockable set up.

Headbutting parried normals is a good idea against Oro.

Oro's jump-ins do not angle very well. They're good air to air but air to ground cr.Hp.png will beat them everytime. st.Mp.png as an anti-air against Oro is also good for similar reasons. Cancel st.Mp.png into EX-Knee Grab.

  • Ibuki - cr.FP (the rising shoulder tackle) immediately when you see Ibuki leave the ground, which she likes to do often. If you hit with the cr.FP early so it only connects once instead of twice, you can follow up with a quick FK.Knee Grab.

cr. FP, out-prioritizes ALL of Ibuki's air normals and kunai except for an early j.FK. Hence the reason it's your best friend.

When she jumps in, she usually goes for a 2-hit air target combo, so be prepared to do a bunch of double parrying. Punish with st.Mp.png xx EX-Knee Grab when you get an opportunity.

Alex's twd.FP can sometime knock Ibuki's kunai out of the air if Ibuki jumps and throws the kunai...this takes good timing.

Meet her in the air with an early j.Mp.png or j.Mk.png...these are great air-to-air normals. Try to stay off the ground for the entire match since Ibuki wants you grounded to land her cross-up Mk.png into crazy stun combos.

If she gets a launch combo on you (like jab-strong-c.roundhouse-roundhouse or something like that), if you're quick enough, EX-Knee Grab.

Her jab-strong block chains leave you without a lot to do so block low and if you see her getting in close for a throw attempt, immediately Stomp. It's easy to see too, because it's the moment she's not jabbing.

When she performs an SAI to chip you away, you SHOULD try to UOH or just jump to take minimum damage. The jump will cause you to get hit by like three kunai and then you'll drop to the ground.

You can Knee Grab Ibuki out of SAI. Even if you get hit, you take minimal damage because you're airborne.

If you block Ibuki's close FK, and she doesn't super jump cancel, it's a free headbutt.

  • Elena - ONLY safe shoulder dash against kensa3/chunsa2/necrosa1/3/dudleysa3/elenasa2 is a Lk.png.Slash Elbow... all others are reversible by super.

cr.FP (the rising shoulder tackle) immediately when you see Elena leave the ground. If you hit with the cr.FP early so it only connects once instead of twice, you can follow up with a quick FK.Knee Grab.

When she jumps in, she usually goes for a 2-hit air target combo, so be prepared to do a bunch of double parrying. Punish with st.Mp.png xx EX-Knee Grab when you get an opportunity.

parrying her Mallet Smash (arch kick), the two hit one, allows for a choke/sleeper hold, or german suplex as a follow-up.

Serious Disadvantage Match-ups

  • Chun-Li -Do not blindly use EX-Slash Elbow once she gets meter, since she has one of the fastest supers (SAII) in the game and can punish a blocked one. You can, however, still use normal Slash Elbows if you space them properly. You want to hit with it so you can block any retaliation if the Elbow Slash is blocked.

Whenever Chun doesn't have a super charged, rush her down...this is your shot at dealing some damage before she becomes extremely dangerous. So, at the start of the first round, be aggressive. Try some cr.FK outside of her cr.Mk.png range to trip her up. Throw in some headbutts while playing the footsie game with her. Tick powerbomb with j.Lp.png, or early j.FP --> land then jab.powerbomb.

Once she gets meter, you'll need to be less aggressive and more tricky since one little mistake can cost you the round easily. Try to get a knockdown with charge partitioned dashing stomps. Carefully poke with far.Mk.png or towards.Mp.png(the chop). Empty jump-in and mix-up charge partitioned stomps/kara throws/Mp.png xx EX Flash Chop/low parry SGGK technique. Parry her pokes from a distance if you can, and retaliate with the headbutt for nice stun.

ONLY safe shoulder dash against kensa3/chunsa2/necrosa1/3/dudleysa3/elenasa2 is a Lk.png.Slash Elbow... all others are reversible by super.

3S Navigation

General
Controls
Notation
HUD
Glossary
System
FAQ
Characters
Akuma
Alex
Chun-Li
Dudley
Elena
Hugo
Ibuki
Ken
Makoto
Q
Necro
Oro
Remy
Ryu
Sean
Twelve
Urien
Yang
Yun
Gill