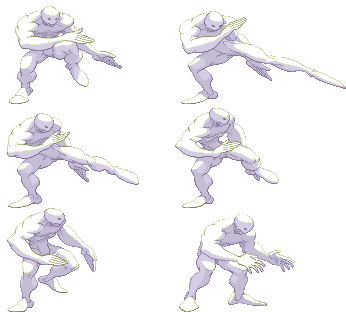
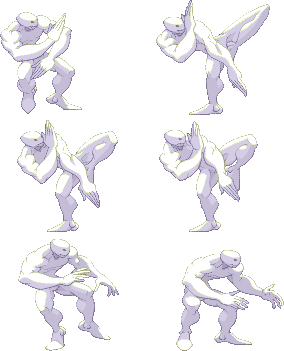
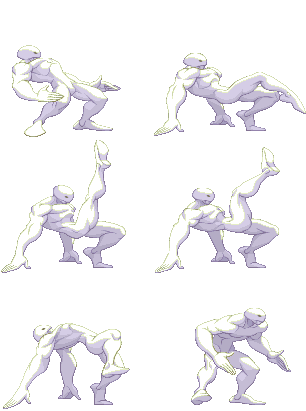
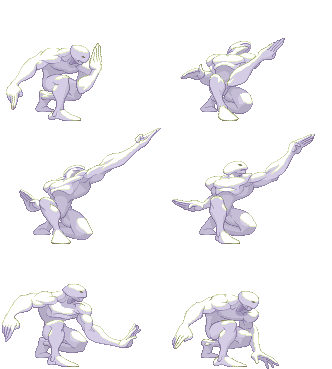
Street Fighter 3: 3rd Strike/Twelve

From SuperCombo Wiki
Twelve's Character Select Portrait
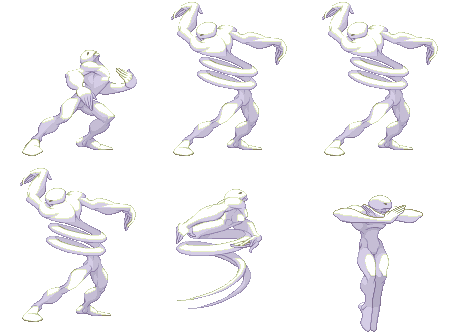
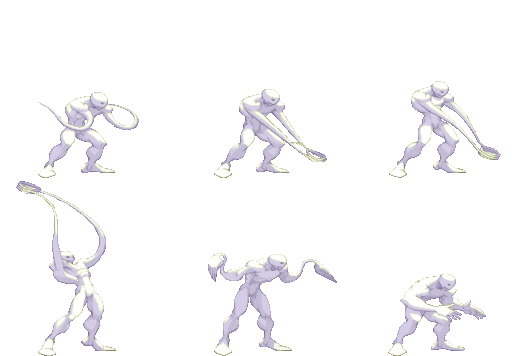
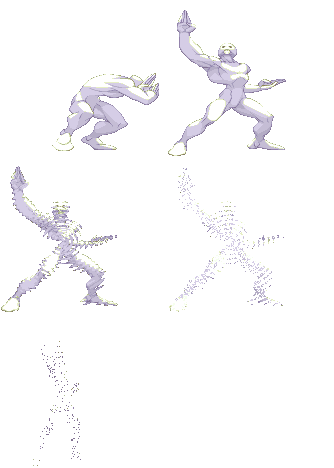
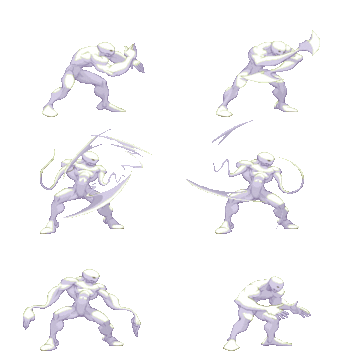
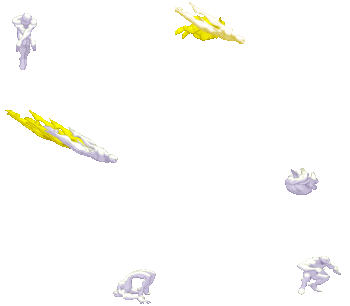
Twelve's Neutral Stance

Introduction

With Necro being his prototype, Twelve is genetically engineered to regenerate, form other shapes (usually weapons) out of his body, copy a person's appearance and skill, and is meant to be incapable of being damaged. The "G-Project", the secret project that resulted in Twelve's birth, was executed by Dr. Kure, and overseen by Gill's brother, Urien. Twelve is ordered to retrieve Necro and Effie after the latter freed and helped Necro escape from Gill's organization. Twelve is also being mass produced by the organization to create an army of Twelve-like creatures. Twelve considers Urien to be his father because of his involvement with his creation.

It's not worth it to deny the fact that twelve is awful - he's easily on the bottom 2 characters in the game. He lacks in a lot of important fields, and shifts his gameplan from what was probably meant to be mixup-heavy rushdown to hit and run, heavy on getting a lifelead safely and stalling away. However, contrary to belief, twelve isn't actually useless or unviable - his airdash is a great tool for approaching, mixups and stalling. his walk low profiles projectiles and allows him to go for anti airs more safely. his ex needles can tthreaten with a knockdown and oki opportunity from far away, and he actually has a few decent normals for poking, anti airing and blockstrings. If you pick twelve, prepare to play one of the most difficult characters to play, but if you like hit and run chars, twelve's design, or playing a difficult character, he can be a lot of fun.

Strengths Weaknesses
  • Great mobility with his airdash, used for approaching or stalling
  • Walk can low profile projectiles, only boosting his stalling ability
  • Great high/low or left/right mixups thanks to his airdash and funky j.hk
  • fireballs can be annoying for certain characters, ex needles can threaten with a knockdown from anywhere on the screen.
  • some all-around decent normals, especially in close range
  • the worst damage output in the game
  • No conversions unless standing close to opponent
  • some of the lower health and stun in the game
  • struggles to get knockdown once he does get a conversion, especially without a super
  • very poor frame data meaning he has a hard time being safe or getting + frames
  • While his supers are not awful, he doesnt gain much utility from them, except actually decent damage in some situations

Specific Character Information

  • Stamina: 1080
  • Stun Bar Length (dots): 64 (Normal)
  • Stun Bar Recovery (frames it takes to recover 1 dot): 23
  • Taunt: It turns you invisible for a while.
  • Best Kara-Throw: None. Technically s.MP is best but it becomes cl.MP at ranges where the kara throw would be relevant, which gives very little bonus range.
  • Standard Throw Range (pixels): 22
  • Kara-Throw Range (pixels): 40
  • Dash Forward (frames) / Moving Distance: 20 / 1,5
  • Dash Backward (frames) / Moving Distance: 16 / 1,5
  • Normal Wake up (frames): 59
  • Quick Stand (frames): 49

Moves List

Standing Normals

s.LP - Quick, cancellable jab. Frequently used as an anti-air and cancelled into LP A.X.E. Can be crouched under by most characters.

s.MP - Really good button. Longish startup for a medium normal but amazing range and fast recovery. Used pretty much just as a long range poke since it's not cancellable, can be crouched like LP.

cl.MP - Good speed, good recovery, cancellable, scaling isn't bad. The only thing holding this move back is that it's situational since raw SA1 does more damage than cl.MP xx SA1. Whiffs on short crouching opponents like Chun and Elena.

s.HP - Slow, single hit """anti-air""". It's more like an anti-jump move because it's so slow, you almost have to predict the jump instead of reacting to it. Covers a good angle though and isn't a bad move. A good "shut the hell up" button.

s.LK - Fast, cancellable poke. Good button, almost never used because cr.LK is just better.

s.MK - Funky button. Kinda slow but it's super cancellable and superjump cancellable. This is Twelve's only SJC-able button and you can occasionally throw it into your pressure game for some fun loops. Just don't get carried away. This move is also his only true confirm into SA2.

s.HK - The Dhalsim button. One of the biggest normals in the game. Very good at low level but is parryable on reaction at high level and is also -2 on hit, meaning you're eating a super if you use this against the wrong characters.

Crouching Normals

Jumping Normals

Command Normals

b.MK B.png+Mk.png
Kokkou Air F.png/B.png
Kabe Haritsuki Air F.png/B.png into wall

b.MK - Funkier button. Used for pretty much the same things as cl.MP except it's also sort of an anti-air and hits short chrouching characters. Highest damage confirm to SA1, harder execution. Weird, unexplored move.

Kokkou (aka Airdash) - One of the main reasons to play Twelve. Performed with two forward inputs while airborne, airdash opens up so many of the options Twelve has and enables his mixups and pressure game.

Twelve cannot parry while airdashing. An instant airdash can be performed by pressing up-forward to jump and forward to begin the airdash.

Twelve's airdash is a key part of their kit and it is essential to understand not only the benefits of airdash but the drawbacks as well.

More advanced airdash options will be discussed in the "Advanced Strategy" section (when I eventually get around to adding to it)

Kabe Haritsuki (aka Walljump) - Almost completely irrelevant. Can be used to mix up stalling in very situational occasions but is overall fairly useless.

Specials

Supers

Throws

H.U.G. Lp.png+Lk.png
F.L.G. F.png+Lp.png+Lk.png
T.R.W. B.png+Lp.png+Lk.png


Neutral Throw - not good. Does slightly more stun that his other throws and is harder to mash oit of than other mash throws, but overall is rarely worth giving up the positioning and setup potential of his other throws. Also, you can OTG Hugo with Super if he doesn't quickrise this.

Forward Throw - Sends fullscreen and gives you enough time to airdash over and start oki. You can also forego oki to set up funny taunt but be aware that many characters can punish you since forward throw does not give you as many + frames as back throw.

Back Throw - Unless you have your opponent cornered or something this is usually Twelve's best throw. You basically get everything you would normally get off forward throw except back throw is safer on hit, allowing for more time to set up oki or the t a u n t.

Special Moves

N.D.L. Qcf.png+P.png EX
A.X.E. (Air)Qcb.png+Mash P.png EX
D.R.A. Air Qcb.png+K.png EX

Super Arts

SA Number SA Name SA Motion Bar Length # of Stocks # of EX uses Notes
I X.N.D.L. Qcf.pngQcf.png+P.png 96 Gauge Dots 2 Stocks 4.7 EX Uses recovers crouching
II X.F.L.A.T. Air Qcf.pngQcf.png+K.png 112 Gauge Dots 1 Stock 2.7 EX Uses
III X.C.O.P.Y. Qcf.pngQcf.png+P.png 128 Gauge Dots 1 Stock 3.2 EX Uses transform into a foe

Move Analysis

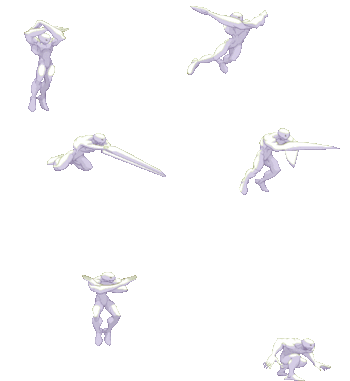
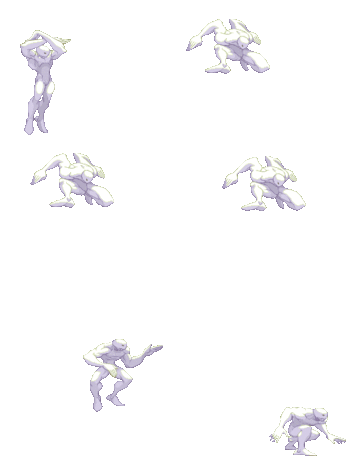
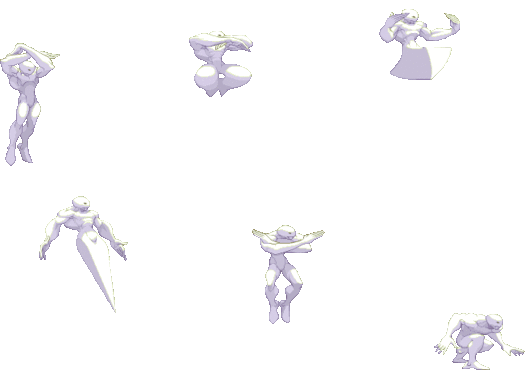
Please note that the images show in this section are for the 1st frame it hits, so this means the opponent is taking the hit in the image shown on the move. I use the 1st frame of every move (except taunt, dash, jump, wakeup and 2nd throw image sprites) because you will see the maximum range of every attack (mostly of the attacks). Note also that those images are ACCURATE, they are exactly the first frame it hits, so enemy takes damage but they still dont make the "pain" frame.

General

  • Move: Move name
  • Motion: What you must do to execute the move
  • Damage: Damage it does (in pixels)
  • Stun Damage: Stun Damage it does (in pixels)
  • Chains into itself: If you can combo into the same movement
  • Special Cancel: If you can cancel the move into a Special Move
  • Super Cancel: If you can cancel the move into a Super Art
  • Throw Range: Range of the throw (in pixels)
  • Num.: Super Art number
  • Super Art: Super Art name
  • Super Art Stock: Number of Gauge Bars the Super Art have, also the lenght of each bar (in pixels)

Frame Data

  • Startup: Number of frames it takes to start the move
  • Hit: Number of frames that can hit the opponent
  • Recovery: Number of frames it takes to recover from the move
  • Blocked Advantage: Number of frames you are in advantage/disadvantage after opponent have been blocked the hit
  • Hit Advantage: Number of frames you are in advantage/disadvantage after opponent have been take the hit
  • Crouching Hit Advantage: Number of frames you are in advantage/disadvantage after opponent have been take the hit while he's crouching
  • + # : You have # frames of advantage
  • - # : You have # frames of disadvantage
  • # ~ # : Advantage/disadvantage can vary from # to #
  • Down: Enemy gets knocked down
  • Guard: How opponent must guard the move, High (H), Low (L) or both (HL)
  • Parry: How opponent must parry the move, High (H), Low (L) or both (HL)

Gauge Increase

  • Miss: Gauge you gain if you miss the move (in pixels)
  • Blocked: Gauge you gain if the move gets blocked (in pixels)
  • Hit: Gauge you gain if you hit the opponent with the move (in pixels)
  • Parry: Gauge opponent gains when he parry the move (in pixels)

Basic Moves

(twelvedf).gif
Move Start-up frames In ground frames In air frames Recovery frames Total frames
Dash Forward 1,5 8? - 6? 20

Comments here


(twelvedb).gif
Move Start-up frames In ground frames In air frames Recovery frames Total frames
Dash Backwards 1,5 4? - 6? 16

Comments here


(twelvebjump).gif
(twelvejump).gif
(twelvefjump).gif
Move Motion Startup Frames
Jump BU or U or FU 3

Comments here


Move Motion Startup Frames
Super Jump DBU or DU or DFU 5

Comments here


(twelvew).gif
Move Motion Frames
Normal Wakeup - 59

Comments here


(twelvetw).gif
Move Motion Frames
Quick Stand Tap D when hitting the ground 49

Comments here


(twelvet).gif
Move Motion Damage Stun Damage Chains into itself Special Cancel Super Cancel Juggle Value
Taunt HP+HK - - No No No

Frame Data

Startup Hit Recovery Blocked Advantage Hit Advantage Crouching Hit Advantage Guard Parry
79 150 71 ? ? ? HL HL

Gauge Increase

Miss Blocked Hit Parry (Gauge for opponent)
2(3) ? ? 4

Comments here


(twelvehparry).gif
(twelvelparry).gif
Move Motion
Parry (High) Tap F when about taking a hit
Parry (Low) Tap D when about taking a hit
Parry (Air) Tap F in air when about taking a hit
Frame Data

Move Frames you're frozen Frames opponent is frozen Frame Advantage when parry is successful Frames before you can try another parry
Parry (High) 16 16 +4(LP/LK) +3(MP/MK) +2(HP/HK) 0(Special/Super) -16(Fireball) 24(19 when attack comes from the air)*,**
Parry (Low) 16 16 +4(LP/LK) +3(MP/MK) +2(HP/HK) 0(Special/Super) -16(Fireball) 24(19 when attack comes from the air)*,**
Parry (Air) 16 16 +4(LP/LK) +3(MP/MK) +2(HP/HK) 0(Special/Super) -16(Fireball) 21(19 when attack comes from the air)*,**
* (If a parry attempt is successful, the 19/21/24 frame restriction is taken away and you can attempt another parry immediately)
** (If another attack connects within 2 frames of your parry, it will automatically be parried)

Gauge Increase

Move Gauge Increase
Parry (High) 4***
Parry (Low) 4***
Parry (Air) 4***
*** (You gain 4 of gauge for whatever attack parried, and for whatever hit you parry during multihit attack)

You can buffer any motion during High or Low parry, but NOT during Air parry, also parry resets the juggle count (and thus resets all scaling).

  • Parry information is taken from A.X.E. Forums, more exactly, from user JinraiPVC. Thanks for this information dude

Normal Moves

Standing Normals

(twelvelp).gif
Move Motion Damage Stun Damage Chains into itself Special Cancel Super Cancel Juggle Value
Far Jab LP 30(5 life points) 3 Yes Yes Yes

Frame Data

Startup Hit Recovery Blocked Advantage Hit Advantage Crouching Hit Advantage Guard Parry
3 3 7 +1 +1 +1 HL HL

Gauge Increase

Miss Blocked Hit Parry (Gauge for opponent)
0 1 2 4

Comments here


(twelvemp).gif
Move Motion Damage Stun Damage Chains into itself Special Cancel Super Cancel Juggle Value
Far Strong MP 70(11 life points) 11 No Yes Yes

Frame Data

Startup Hit Recovery Blocked Advantage Hit Advantage Crouching Hit Advantage Guard Parry
9 4 12 -2 -1 0 HL H

Gauge Increase

Miss Blocked Hit Parry (Gauge for opponent)
2 6 11 4

Comments here


(twelvehp).gif
Move Motion Damage Stun Damage Chains into itself Special Cancel Super Cancel Juggle Value
Far Fierce HP 110(19 life points) 15 No No No

Frame Data

Startup Hit Recovery Blocked Advantage Hit Advantage Crouching Hit Advantage Guard Parry
12 4 17 -3 -1 +1 HL H

Gauge Increase

Miss Blocked Hit Parry (Gauge for opponent)
3 10 19 4

Comments here

(twelveclosemp).gif
Move Motion Damage Stun Damage Chains into itself Special Cancel Super Cancel Juggle Value
Close Strong (Close to opponent) MP 65(12 life points) 9 No Yes Yes

Frame Data

Startup Hit Recovery Blocked Advantage Hit Advantage Crouching Hit Advantage Guard Parry
6 4 12 -2 +4 +5 HL H

Gauge Increase

Miss Blocked Hit Parry (Gauge for opponent)
2 6 11 4

Comments here


(twelvelk).gif
Move Motion Damage Stun Damage Chains into itself Special Cancel Super Cancel Juggle Value
Short LK 35(7 life points) 3 No No No

Frame Data

Startup Hit Recovery Blocked Advantage Hit Advantage Crouching Hit Advantage Guard Parry
3 2 10 -1 -1 -1 HL HL

Gauge Increase

Miss Blocked Hit Parry (Gauge for opponent)
0 1 2 4

Comments here


(twelvemk).gif
Move Motion Damage Stun Damage Chains into itself Special Cancel Super Cancel Juggle Value
Forward MK 70(12 life points) 11 No No No

Frame Data

Startup Hit Recovery Blocked Advantage Hit Advantage Crouching Hit Advantage Guard Parry
6 6 13 -6 -2 0 HL H

Gauge Increase

Miss Blocked Hit Parry (Gauge for opponent)
2 4 8 4

Comments here


(twelvehk).gif
Move Motion Damage Stun Damage Chains into itself Special Cancel Super Cancel Juggle Value
Roundhouse HK 100(17 life points) 13 No No No

Frame Data

Startup Hit Recovery Blocked Advantage Hit Advantage Crouching Hit Advantage Guard Parry
17 3 25 -11 -1 +1 HL H

Gauge Increase

Miss Blocked Hit Parry (Gauge for opponent)
3 10 19 4

Comments here

Jumping Normals

(twelvejlp).gif
Move Motion Damage Stun Damage Chains into itself Special Cancel Super Cancel Juggle Value
Jump Jab (Air) LP 50(60 if neutral jump)(5/7 life points) 7 No No No

Frame Data

Startup Hit Recovery Blocked Advantage Hit Advantage Crouching Hit Advantage Guard Parry
4(5 if neutral jump) Until landing - - - - H H

Gauge Increase

Miss Blocked Hit Parry (Gauge for opponent)
0 1 2 4

Comments here


(twelvejmp).gif
Move Motion Damage Stun Damage Chains into itself Special Cancel Super Cancel Juggle Value
Jump Strong (Air) MP 100(14 life points) 11 No No No

Frame Data

Startup Hit Recovery Blocked Advantage Hit Advantage Crouching Hit Advantage Guard Parry
5(6 if neutral jump) 5 - - - - H H

Gauge Increase

Miss Blocked Hit Parry (Gauge for opponent)
2 4 8 4

Comments here


(twelvejhp).gif
Move Motion Damage Stun Damage Chains into itself Special Cancel Super Cancel Juggle Value
Jump Fierce (Air) HP 130(17 life points) 15 No No No

Frame Data

Startup Hit Recovery Blocked Advantage Hit Advantage Crouching Hit Advantage Guard Parry
6 4 - - - - H H

Gauge Increase

Miss Blocked Hit Parry (Gauge for opponent)
3 6 14 4

Comments here


(twelvenjhp).gif
Move Motion Damage Stun Damage Chains into itself Special Cancel Super Cancel Juggle Value
Neutral Jump Fierce (Air) HP 130(17 life points) 15 No No No

Frame Data

Startup Hit Recovery Blocked Advantage Hit Advantage Crouching Hit Advantage Guard Parry
7 3 - - - - H H

Gauge Increase

Miss Blocked Hit Parry (Gauge for opponent)
3 6 14 4

Comments here


(twelvejlk).gif
Move Motion Damage Stun Damage Chains into itself Special Cancel Super Cancel Juggle Value
Jump Short (Air) LK 50(7 life points) 5(7 if neutral jump) No No No

Frame Data

Startup Hit Recovery Blocked Advantage Hit Advantage Crouching Hit Advantage Guard Parry
4(5 if neutral jump) 10(19 if neutral jump) - - - - H H

Gauge Increase

Miss Blocked Hit Parry (Gauge for opponent)
0 1 2 4

Comments here


(twelvejmk).gif
Move Motion Damage Stun Damage Chains into itself Special Cancel Super Cancel Juggle Value
Jump Forward (Air) MK 90(12 life points) 9 No No No

Frame Data

Startup Hit Recovery Blocked Advantage Hit Advantage Crouching Hit Advantage Guard Parry
5 6 - - - - H H

Gauge Increase

Miss Blocked Hit Parry (Gauge for opponent)
2 4 8 4

Comments here


(twelvenjmk).gif
Move Motion Damage Stun Damage Chains into itself Special Cancel Super Cancel Juggle Value
Neutral Jump Forward (Air) MK 90(12 life points) 9 No No No

Frame Data

Startup Hit Recovery Blocked Advantage Hit Advantage Crouching Hit Advantage Guard Parry
5 6 - - - - H H

Gauge Increase

Miss Blocked Hit Parry (Gauge for opponent)
2 4 8 4

Comments here


(twelvejhk).gif
Move Motion Damage Stun Damage Chains into itself Special Cancel Super Cancel Juggle Value
Jump Roundhouse (Air) HK 125(21 life points) 13 No No No

Frame Data

Startup Hit Recovery Blocked Advantage Hit Advantage Crouching Hit Advantage Guard Parry
6 4 - - - - H H

Gauge Increase

Miss Blocked Hit Parry (Gauge for opponent)
3 6 14 4

Comments here


(twelvenjhk).gif
Move Motion Damage Stun Damage Chains into itself Special Cancel Super Cancel Juggle Value
Neutral Jump Roundhouse (Air) HK 130(21 life points) 13 No No No

Frame Data

Startup Hit Recovery Blocked Advantage Hit Advantage Crouching Hit Advantage Guard Parry
7 5 - - - - H H

Gauge Increase

Miss Blocked Hit Parry (Gauge for opponent)
3 6 14 4

Comments here


(twelveoh).gif
Move Motion Damage Stun Damage Chains into itself Special Cancel Super Cancel Juggle Value
Universal Overhead MP+MK 40(7 life points) 3 No No No

Frame Data

Startup Hit Recovery Blocked Advantage Hit Advantage Crouching Hit Advantage Guard Parry
15 8 7 -5~+7 0~+8 +1~+9 H H

Gauge Increase

Miss Blocked Hit Parry (Gauge for opponent)
0 1 2 4

Comments here

Throws

(twelventr).gif
Move Motion Damage Stun Damage Throw Range Kara-Throw Kara-Throw Range
H.U.G. LP+LK 100(20x6)(21 life points) 18(3x6) 22 Far S.MP / Close S.MP / S.HP 40 / 29 / 28

Frame Data

Startup Hit Recovery Blocked Advantage Hit Advantage Crouching Hit Advantage Guard Parry
2 1 21 - - - LP+LK -

Gauge Increase

Miss Blocked Hit
0 7 (for the player who blocked) 6

Comments here


(twelveftr).gif
Move Motion Damage Stun Damage Throw Range Kara-Throw Kara-Throw Range
F.L.G. F+LP+LK 120(15 life points) 11 22 Far S.MP / Close S.MP / S.HP 40 / 29 / 28

Frame Data

Startup Hit Recovery Blocked Advantage Hit Advantage Crouching Hit Advantage Guard Parry
2 1 21 - - - F+LP+LK -

Gauge Increase

Miss Blocked Hit
0 7 (for the player who blocked) 7

Comments here


(twelvebtr).gif
Move Motion Damage Stun Damage Throw Range Kara-Throw Kara-Throw Range
T.R.W. B+LP+LK 120(14 life points) 11 22 Far S.MP / Close S.MP / S.HP 40 / 29 / 28

Frame Data

Startup Hit Recovery Blocked Advantage Hit Advantage Crouching Hit Advantage Guard Parry
2 1 21 - - - B+LP+LK -

Gauge Increase

Miss Blocked Hit
0 7 (for the player who blocked) 7

Comments here

Crouching Normals

(twelveclp).gif
Move Motion Damage Stun Damage Chains into itself Special Cancel Super Cancel Juggle Value
Crouch Jab D+LP 30(5 life points) 3 No Yes Yes

Frame Data

Startup Hit Recovery Blocked Advantage Hit Advantage Crouching Hit Advantage Guard Parry
3 2 5 +4 +4 +4 HL HL

Gauge Increase

Miss Blocked Hit Parry (Gauge for opponent)
0 1 2 4

Comments here


(twelvecmp).gif
Move Motion Damage Stun Damage Chains into itself Special Cancel Super Cancel Juggle Value
Crouch Strong D+MP 55(9 life points) 7 No No No

Frame Data

Startup Hit Recovery Blocked Advantage Hit Advantage Crouching Hit Advantage Guard Parry
5 2 10 -2 +4 +5 HL HL

Gauge Increase

Miss Blocked Hit Parry (Gauge for opponent)
2 6 11 4

Comments here


(twelvechp).gif
Move Motion Damage Stun Damage Chains into itself Special Cancel Super Cancel Juggle Value
Crouch Fierce D+HP 100(40x3)(18 life points) 9(5+3+3) No No No

Frame Data

Startup Hit Recovery Blocked Advantage Hit Advantage Crouching Hit Advantage Guard Parry
10 7 13 -8 -1 +1 HL HL

Gauge Increase

Miss Blocked Hit Parry (Gauge for opponent)
2 4 10 4

Comments here


(twelveclk).gif
Move Motion Damage Stun Damage Chains into itself Special Cancel Super Cancel Juggle Value
Crouch Short D+LK 35(7 life points) 3 No Yes Yes

Frame Data

Startup Hit Recovery Blocked Advantage Hit Advantage Crouching Hit Advantage Guard Parry
3 4 8 +1 +1 +1 L L

Gauge Increase

Miss Blocked Hit Parry (Gauge for opponent)
0 1 2 4

Comments here


(twelvecmk).gif
Move Motion Damage Stun Damage Chains into itself Special Cancel Super Cancel Juggle Value
Crouch Forward D+MK 60(10 life points) 3 No No No

Frame Data

Startup Hit Recovery Blocked Advantage Hit Advantage Crouching Hit Advantage Guard Parry
8 2 14 -2 -1 0 L L

Gauge Increase

Miss Blocked Hit Parry (Gauge for opponent)
2 6 11 4

Comments here


(twelvechk).gif
Move Motion Damage Stun Damage Chains into itself Special Cancel Super Cancel Juggle Value
Crouch Roundhouse D+HK 90(16 life points) 3 No No No

Frame Data

Startup Hit Recovery Blocked Advantage Hit Advantage Crouching Hit Advantage Guard Parry
13 2 25 -11 Down Down L L

Gauge Increase

Miss Blocked Hit Parry (Gauge for opponent)
2 8 11 4

Comments here

Command Normals

(twelvebmk).gif
Move Motion Damage Stun Damage Chains into itself Special Cancel Super Cancel Juggle Value
B.M.K. B+MK 80(14 life points) 11 No Yes Yes

Frame Data

Startup Hit Recovery Blocked Advantage Hit Advantage Crouching Hit Advantage Guard Parry
5 5 14 -2 -1 0 HL HL

Gauge Increase

Miss Blocked Hit Parry (Gauge for opponent)
2¿ 6 11 4

Comments here


(twelvejffbb).gif
Move Motion Damage Stun Damage Chains into itself Special Cancel Super Cancel Juggle Value
Kokuu (Air) F,F or B,B - - No Yes No

Frame Data

Startup Hit Recovery Blocked Advantage Hit Advantage Crouching Hit Advantage Guard Parry
- - - - - - - -

Gauge Increase

Miss Blocked Hit Parry (Gauge for opponent)
- - - -

Comments here

Special Moves

Please note that in this section you will see mainly 3 images for the special moves, this means the image on the left its done with LP (or LK), the image on the center its done with MP (or MK), and the image on the right its done with HP (or HK). Also its the same "rule" as the sections above, its the 1rst frame it hits for every of the moves.


(twelvendl).gif
Move Motion Damage Blocked Damage Stun Damage Super Cancel Juggle Value
N.D.L. (Jab) QCF+LP 60(10 life points) 4 3 No
N.D.L. (Strong) QCF+MP 60(10 life points) 4 3 No
N.D.L. (Fierce) QCF+HP 80(10 life points) 5 6 No

Frame Data

Move Startup Hit Recovery Blocked Advantage Hit Advantage Crouching Hit Advantage Guard Parry
N.D.L. (Jab) 13 11 14 -5 -4 -3 HL HL
N.D.L. (Strong) 13 13 16 -9 -8 -7 HL/HL HL
N.D.L. (Fierce) 14 13 20 -13 -12 -11 HL HHL

Gauge Increase

Move Miss Blocked Hit Parry (Gauge for opponent)
N.D.L. (Jab) 1 3 5 4
N.D.L. (Strong) 1 3 5 4
N.D.L. (Fierce) 1 3 5 4

Recovers crouching

(twelveaxe).gif
Move Motion Damage Blocked Damage Stun Damage Super Cancel Juggle Value
A.X.E. (Jab) QCB+LP 60 (2 hits)(10 life points) 11 8 Yes
A.X.E. (Strong) QCB+MP 140 (4 hits)(17 life points) 22 12 Yes
A.X.E. (Fierce) QCB+HP 200 (5 hits)(20 life points) 33 15 Yes

Frame Data

Move Startup Hit Recovery Blocked Advantage Hit Advantage Crouching Hit Advantage Guard Parry
A.X.E. (Jab) 6 3 16 -5 -1 0 HL HL
A.X.E. (Strong) 10 3 17 -6 -1 0 HL/HL HL
A.X.E. (Fierce) 14 3 18 -7 -1 0 HL/HL/HL HL

Gauge Increase

Move Miss Blocked Hit Parry (Gauge for opponent)
A.X.E. (Jab) 2 5 11 8(4+4)
A.X.E. (Strong) 2 7 13 16(4+4+4+4)
A.X.E. (Fierce) 3 11 21 20(4+4+4+4+4)

Comments here

(twelveaaxe).gif
Move Motion Damage Blocked Damage Stun Damage Super Cancel Juggle Value
Air A.X.E. (Jab) (Air) QCB+LP 90(13 life points) 14 9 No
Air A.X.E. (Strong) (Air) QCB+MP 120(16 life points) 22 11 No
Air A.X.E. (Fierce) (Air) QCB+HP 180(18 life points) 29 13 No

Frame Data

Move Startup Hit Recovery Blocked Advantage Hit Advantage Crouching Hit Advantage Guard Parry
Air A.X.E. (Jab) 9 3 15 - - - HL H
Air A.X.E. (Strong) 11 3 15 - - - HL H
Air A.X.E. (Fierce) 13 3 15 - - - HL H

Gauge Increase

Move Miss Blocked Hit Parry (Gauge for opponent)
Air A.X.E. (Jab) 2 6 12 12(4+4+4)
Air A.X.E. (Strong) 2 7 13 16(4+4+4+4)
Air A.X.E. (Fierce) 3 11 21 20(4+4+4+4+4)

Comments here


(twelvedra).gif
Move Motion Damage Blocked Damage Stun Damage Super Cancel Juggle Value
D.R.A. (Short) (Air) QCB+LK 110(19 life points) 14 5 No
D.R.A. (Forward) (Air) QCB+MK 110(19 life points) 14 5 No
D.R.A. (Roundhouse) (Air) QCB+HK 110(19 life points) 14 5 No

Frame Data

Move Startup Hit Recovery Blocked Advantage Hit Advantage Crouching Hit Advantage Guard Parry
D.R.A. (Short) 14 Until Landing 10~11/20 Whiff/12~13 Guard/Parry -11 0 +2 HL H
D.R.A. (Forward) 14 Until Landing 10~11/20 Whiff/12~13 Guard/Parry -11 0 +2 HL H
D.R.A. (Roundhouse) 14 Until Landing 10~11/20 Whiff/12~13 Guard/Parry -11 0 +2 HL H

Gauge Increase

Move Miss Blocked Hit Parry (Gauge for opponent)
D.R.A. (Short) 3 12 18 4
D.R.A. (Forward) 3 12 18 4
D.R.A. (Roundhouse) 3 12 18 4

Comments here

EX Moves

(twelvendlex).gif
Move Motion Gauge Needed Damage Blocked Damage Stun Damage Super Cancel Juggle Value
N.D.L. (EX) QCF+PP 40 80(50+30)(13 life points) 5(3+2) 6(3+3) No

Frame Data

Move Startup Hit Recovery Blocked Advantage Hit Advantage Crouching Hit Advantage Guard Parry
N.D.L. (EX) 12・18 6・7 15 0 Down Down HL H

Gauge Increase

Move Miss Blocked Hit Parry (Gauge for opponent)
N.D.L. (EX) - - - 8(4+4)

Comments here


(twelveaxeex).gif
Move Motion Gauge Needed Damage Blocked Damage Stun Damage Super Cancel Juggle Value
A.X.E. (EX) QCB+PP 40 240(60+[40x5])(22 life points) 40(15+[5x5]) 18(5+[3x5]) Yes/No~

Frame Data

Move Startup Hit Recovery Blocked Advantage Hit Advantage Crouching Hit Advantage Guard Parry
A.X.E. (EX) 8 3・3・5・3・3・4 15(13) -4 -1 0 HL H

Gauge Increase

Move Miss Blocked Hit Parry (Gauge for opponent)
A.X.E. (EX) - - - 24(4x6)

Comments here


(twelveaaxeex).gif
Move Motion Gauge Needed Damage Blocked Damage Stun Damage Super Cancel Juggle Value
Air A.X.E. (EX) (Air) QCB+PP 40 210(60+[35X5])(20 life points) 35(15+[4X5]) 15(5+[3X5]) Yes

Frame Data

Move Startup Hit Recovery Blocked Advantage Hit Advantage Crouching Hit Advantage Guard Parry
Air A.X.E. (EX) 6 3・3・4・3・3・4 15 - - - HL H

Gauge Increase

Move Miss Blocked Hit Parry (Gauge for opponent)
Air A.X.E. (EX) - - - 24(4X6)

Comments here


(twelvedraex).gif
Move Motion Gauge Needed Damage Blocked Damage Stun Damage Super Cancel Juggle Value
D.R.A. (EX) (Air) QCB+KK 40 240(80(x10))(20 life points) 5(5(x10)) 15(5(x10)) No

Frame Data

Move Startup Hit Recovery Blocked Advantage Hit Advantage Crouching Hit Advantage Guard Parry
D.R.A. (EX) 6・8 Until Landing 20 -8~0 -1~0・Down -2~0・Down HL H

Gauge Increase

Move Miss Blocked Hit Parry (Gauge for opponent)
D.R.A. (EX) - - - 8(4+4)

Comments here

Super Arts

(twelvesa1).gif
Super Art Super Art Name Super Art Stock Motion Damage Blocked Damage Stun Damage Damage/Gauge
I X.N.D.L. 2 bars (112 each bar) QCF QCF+P 370*(57 life points) 48** 15*** 3,30 (x2)
* (60×3~8) Damage is when all hits connect.
** (4×3~8) Damage is when all hits connect.
*** (3×3~8) Damage is when all hits connect.

Frame Data

Startup Hit Recovery Blocked Advantage Hit Advantage Crouching Hit Advantage Guard Parry
3 34 33 -31 Down Down HLx8 HLx8

Comments here


(twelvesa2).gif
Super Art Super Art Name Super Art Stock Motion Damage Blocked Damage Stun Damage Damage/Gauge
II X.F.L.A.T. 1 bar (104) Jump In, QCF QCF+K 430(74 life points)/230(40 life points)* 4/off** 25/18* 4,13
* Ground/Air Damage is when all hits connect.

Frame Data

Startup Hit Recovery Blocked Advantage Hit Advantage Crouching Hit Advantage Guard Parry
2 Until Landing 49 -26 Down Down HL HL

Comments here


(twelvesa3).gif
Super Art Super Art Name Super Art Stock Motion Damage Blocked Damage Stun Damage Damage/Gauge
III X.C.O.P.Y. 1 bar (120) QCF QCF+P - - - -

Frame Data

Startup Hit Recovery Blocked Advantage Hit Advantage Crouching Hit Advantage Guard Parry
12 * 73 - - - - -

*1440 frames lenght (like 24 seconds)

More

Standing

LP -Twelve stretches his arm forward with a open hand.

A quick and well-ranged poke. However, it will whiff on most crouching characters

LK -Twelve barely lifts his leg and he goes to give a low kick.

Very short range kick. No pratical use.

MP -Twelve leans forward and swipes his arm across with an open hand.

Similiar poke to standing LP, but better range and damage. Unfortunately, this normal will whiff on all crouching characters. Very good for zoning and occasional footsies.

MK -Twelve steps forward and thrusts his knee upward.

This attack gives Twelve a good option to verify a super off of a mid-level hit. Short range, decent damage. In addition, Twelve can super jump cancel this move giving him a great mix-up (see below under Mix-Ups)

HP -Twelve morphs his hand into an axe and flings it at an upward angle.

Twelve's most powerful normal. The priority is great and works as an excellent anti-air.

HK -Twelve stands on both hands as he morphs his legs together into a huge sickle and swipes the opponent.

Good range, good damage, ok priority but horrible recovery making it vulnerable to recovery supers. This serves as a decent poke once in a blue moon from max range. Plus unlike MP it can hit all crouching opponents. Best used to juggle an opponent after a EX N.D.L.


Standing close

MP


Crouching

LP

LK

MP

MK

HP

HK


Jumping

LP

LK

MP

MK

HP

HK

Combos

Meterless EX Moves S.A. I S.A. II
Crouching LK, A.X.E. (LP) Mid-screen, EX N.D.L., standing HK Kokkuu deep HK, X.N.D.L. Standing close MK, super jump cancel, X.F.L.A.T.
Kokkuu deep HK, A.X.E. (LP) EX N.D.L. x 4 (Air Elena Only) Standing close MP, X.N.D.L. Neutral Throw ,X.F.L.A.T (Hugo Only)
Crouching LP, A.X.E. (LP) Crouching LK, A.X.E. (LP), xx, X.N.D.L.
Standing close MK, X.N.D.L.
B.M.K., X.N.D.L.
UOH, link X.N.D.L.

Strategies

Overview

Twelve is one of the weakest characters in the game. His defense and stamina are low, adding to this is his lack of options to land damage without meter. Twelve does make up for this with his high mobility and his arsenal of decent pokes.

Basics

Super Art Selection

X.N.D.L. offers Twelve the most options. Resets, EX moves, simple combos and an anti-air. The gauge is composed of two average sized gauges. So upon executing a super, Twelve still has one gauge for EX moves. You may find yourself using EX D.R.A.'s and EX N.D.L.s over X.N.D.L. however. But unlike X.F.L.A.T., Twelve can verify a super from a low hit (crouching LK, A.X.E. (LP) and a high hit (standing close MP).

X.F.L.A.T. is a second possibility but landing a successful hit is hard in high-level play. There is some speculation with X.C.O.P.Y. since every other character can offer more damage than Twelve, plus the damage and defense bonus Twelve gets during X.C.O.P.Y. At the same time many characters rely on their super or EX moves to land big damage ala Chun-Li, Urien, etc. X.C.O.P.Y. does not offer Twelve the ability to execute his opponent's EX and super moves. Yet, both super arts only offer one gauge meaning no room for EX moves.

Kara-Techniques

Kara-Throw - standing MP

Twelve's kara-throw has nothing to offer to his game, including that the range on his throw is already good.

Kara-UOH - Standing MP

Resets

Anti-air LP, X.N.D.L.

Anti-Air IAD MP, X.N.D.L.

Anti-air A.X.E. (LP) (1-hit) walk-up standing MK, X.N.D.L.

Anti-Air IAD MP, Instant X.F.L.A.T.

Anti-air A.X.E. (LP) (1-hit), walk-up standing MK, super jump cancel, X.F.L.A.T.

Zoning

Standing MP

crouching MK

standing HK

Jump-back HP

N.D.L.

Mixups

Kokkuu HK

  • hit from front
  • hit behind
  • whiff in front
  • whiff behind
  • fake cross-up

>Kokkuu HK (hit), X.N.D.L.

>Kokkuu HK (whiff), walk-up, throw or walk-up crouching LK, A.X.E. (LP), xx, X.N.D.L.

>Kokkuu HK (block), walk-up, throw or walk-up crouching LK, A.X.E. (LP), xx, X.N.D.L.


Standing close MK (blocked), Super Jump Cancel

  • IAD, D.R.A. (LK)
  • IAD, EX D.R.A.
  • IAD MK (whiff), throw
  • IAD MK (whiff) crouching LK, A.X.E. (LP), xx, X.N.D.L.
  • IAD MK, X.N.D.L.

When the opponent is in the corner, sweep range, EX N.D.L., standing LP (reset)

  • UOH, X.N.D.L.
  • Walk-up, crouching LK, X.N.D.L.

Additional Notes

Personal Action: Invisibility.

After landing a H.U.G. on Hugo at mid-screen, Twelve can OTG Hugo with SA1 or an instant SA2. However, this does not combo and Hugo can avoid both supers by quick recovering from the H.U.G.

Cross-Ups:

  • Twelve can cross-up a cornered Hugo
  • Twelve can ground cross-up a cornered Hugo

IAD (Instant Air-Dash) - Twelve can execute a IAD by simply inputting http://www.shoryuken.com/wiki/images/5/57/Upleft.gif, http://www.shoryuken.com/wiki/images/8/8e/Left.gif or http://www.shoryuken.com/wiki/images/9/9a/Upright.gif, http://www.shoryuken.com/wiki/images/2/29/Right.gif quickly. The game will register this as if you jumped and immediately pressed http://www.shoryuken.com/wiki/images/8/8e/Left.gif, http://www.shoryuken.com/wiki/images/8/8e/Left.gif or http://www.shoryuken.com/wiki/images/2/29/Right.gif, http://www.shoryuken.com/wiki/images/2/29/Right.gif. The IAD keeps Twelve close to ground. Due to the low altitude his normals will hit deeper, while his HP and HK will whiff every time. For there is not enough time for both attacks to fully animate. IAD allows you to create high/low/faint/throw mix-ups while keeping the pressure on. Upon executing a normal or not, Twelve cant act immediately upon landing from a IAD. Aside from quick reversals and supers, a blocked IAD normal is usually safe since Twelve will be grounded upon recovery. This allows Twelve to easily land tick-throws.

Match-ups

Serious Advantage Match-ups

Advantage Match-ups

Sean

Fair Match-ups

Q

Hugo

Disadvantage Match-ups

Chun-Li - Now your Street Fighter Anniversary Edition Strategy Guide may title this as a favorable match-up for Twelve. The guide will include that Chun-Li has no anti-airs nor a decent air game. If anything this is an overstatement. Chun-Li's B HP serves as a great anti-air and will stuff any air dash attack. Her crouching HK has a wide enough hit box to counter Twelve before he lands from an air-dash. While her standing HP can stuff Twelve from afar if he tries to IAD. Another viable option is standing MK. In addition, Chun-Li can meet him in the air with an air-to-air vertical jumping LP, MP or HK. She can also jump forward and hit Twelve out of anything with LK.

What do I do you ask? Luckily, most Chun-Li players will not be looking for attacks to anti-air. They will be too busy blocking to throw to gain some ground, whiffing B HP or crouching MK to get some bar. Try to rush Chun-Li the first round before she gets any bar. But play accordingly and counter-act any possible normal that will thwart your air game. If she is spamming B HP, land short with a HK and walk-up to throw or crouching MK as she recovers. If you anticipate a crouching HK, interrupt your air dash with a quick D.R.A. this should catch her off guard and hit her while recovering. Mix-up your game between normal air dashing and IAD. Mix-up your normals to, attack from a far with HP, whiff MK or HK to put you in mix-up range. Do not try hard to play a ground game with her by using MP, N.D.L. or HK. With that said, never ever attack a full stocked Chun-Li with standing HK. Hit or not she can easily reversal super you for big damage into the corner. Once Chun has bar be prepared to start flying around like crazy. Fly back and forth, high and low. Mix-up your normals more than before. Do anything to keep Chun-Li fishing for an opening on the ground to land a super. A Chun-Li player will not risk their bar to reset to super off of an air-to-air or anti-air.


Urien

Don’t carlessly AD vs Uiren or get fireballed>tackled to death into the corner. Use random NDL to get him from far away. Cr.MK and St.Strong are good safe ways to keep Urien off you and get some free damage. With Uiren I only AD maybe twice when they don’t expect you to, after you’ve stayed grounded for a while.

XNDL’s the only super to use on Urien as it can go through Aeigs corner-traps and allow you to possibly SJ> AD your way outta there.


Elena

She has great pokes, over-headS not over-head and just about outprioritizes anything from 12.

Try using the same bait tricks on her, like IAD HK to walk-up throw if she whiffs her DP + K

Don’t Cross her up

Don’t know the name or motion, she turns around and jumps kicks you lol corny I know, I think it’s a HC motion. But if blocked, you can throw or super her for free. If you anticipate it, it’s quite easy to parry. But if u block/parry and stand there like a fuckin moron, then she will DP + K yo ass

She can also do the DP + LK (whiff) game like Ken, slightly.

Don’t always assume your safe when in not point-blank range, cause she will KARA that shit down and throw your goo ass! dont have much else on her, no one really plays her lol

Serious Disadvantage Match-ups

Yun'

Akuma

Ken


3S Navigation

General
Controls
Notation
HUD
Glossary
System
FAQ
Characters
Akuma
Alex
Chun-Li
Dudley
Elena
Hugo
Ibuki
Ken
Makoto
Q
Necro
Oro
Remy
Ryu
Sean
Twelve
Urien
Yang
Yun
Gill