Street Fighter 3: 3rd Strike/Remy

From SuperCombo Wiki
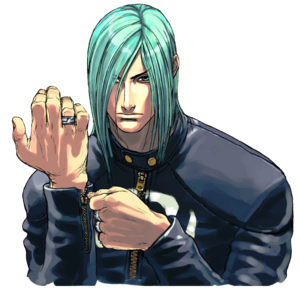
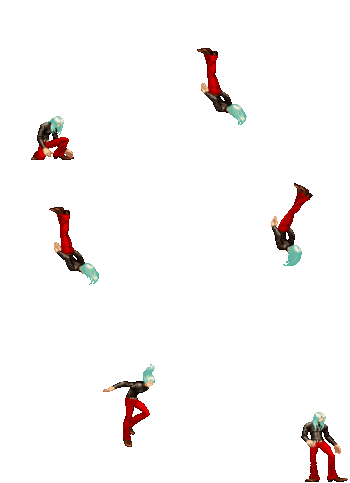
Remy's Character Select Portrait
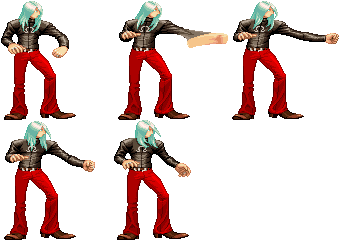
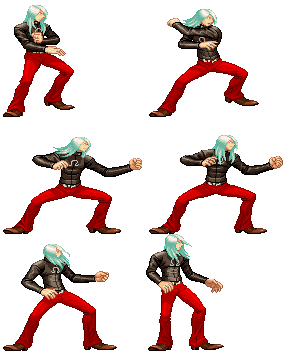
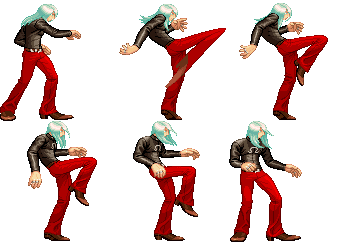
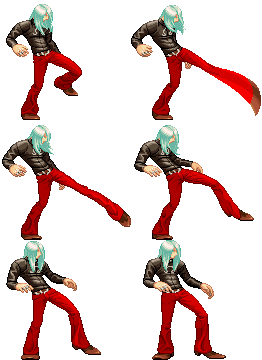
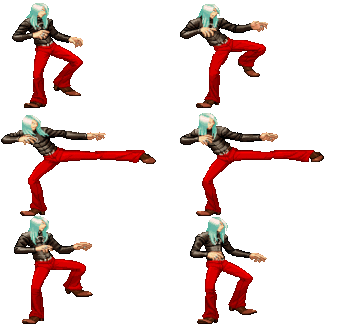
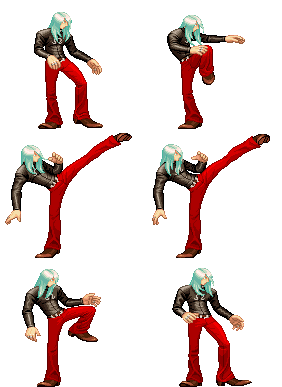
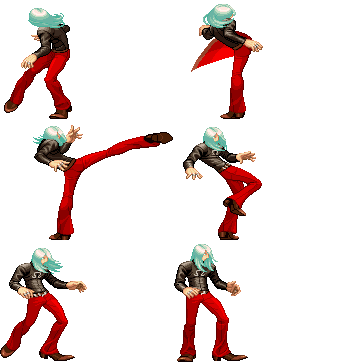
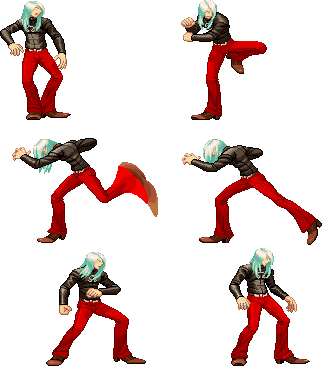
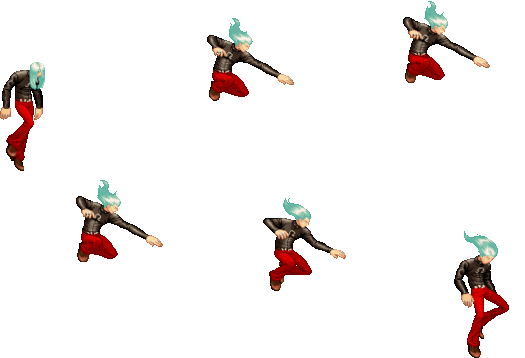
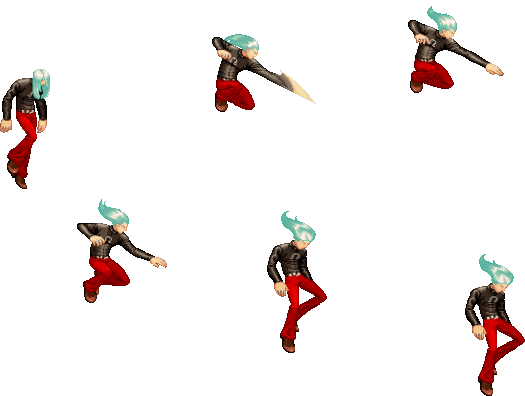
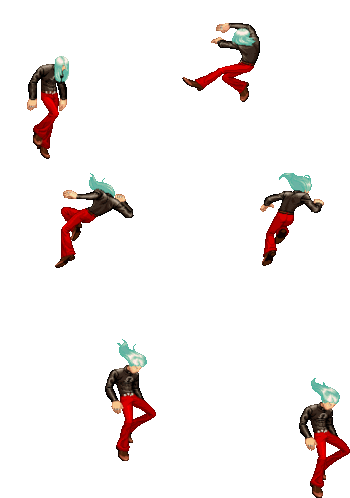
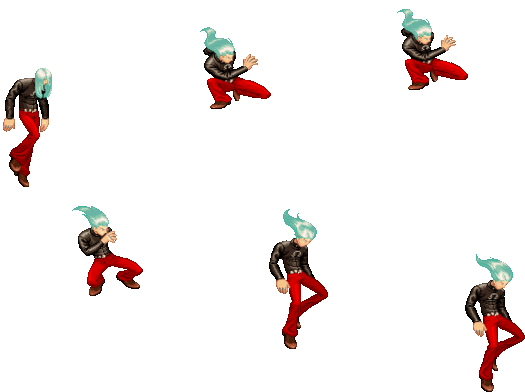
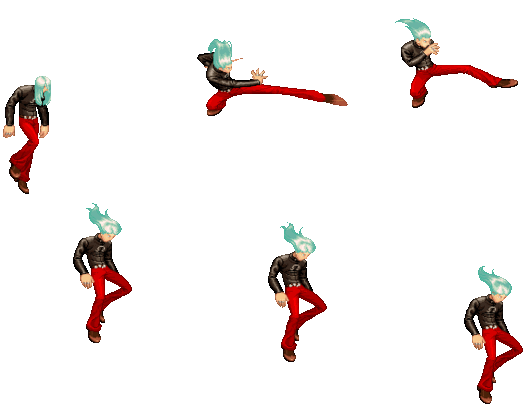
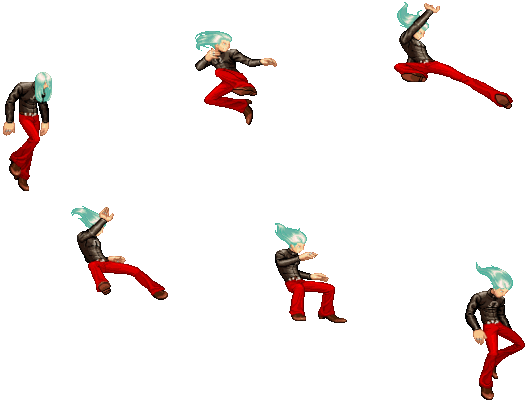
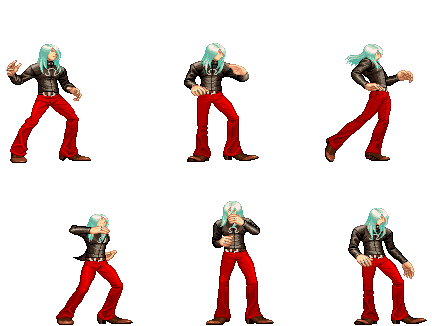
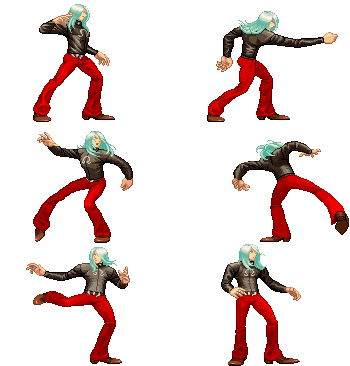
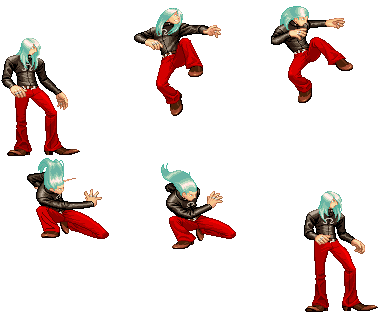
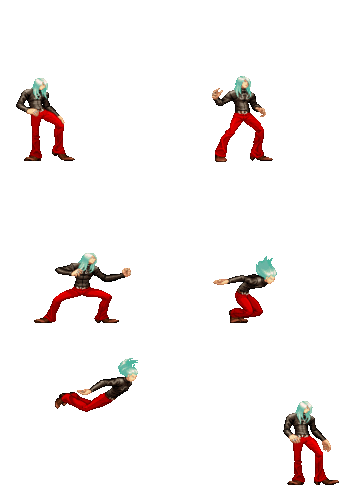
Remy's Neutral Stance

Introduction

Strengths Weaknesses
  • Great anti airs in terms of versitility, range and damage
  • Fireballs can create a frustrating ground control which can be hard (although possible) to avoid by parrying
  • Likes having the opponent in the corner: can combo from his grab in the corner, pressure with fireballs repeatedly, anti air more easily, etc.
  • A good choice between a safe on block SA1 and a high-damage punish in SA2
  • The lowest stun bar in the game
  • Must have charge or super ready to scare with punishing, otherwise his damage is lackluster
  • Lacks a good low attack for poking and punishing, makes it harder in neutral
  • Opponent can still parry through his anti airs and fireballs, makes it harder for him to 100% assert these strengths vs. good players

Specific Character Information

  • Stamina: 1120
  • Stun Bar Length (in pixels): 52 (Short)
  • Stun Bar Recovery (frames it takes to recover 1 pixel): 21
  • Taunt: Increases stun damage for the next hit/combo by 18.8% per taunt. Maximum 4 taunts, 75% bonus.
  • Best Kara-Throw: Far S.HK / Far S.MP / F.MK / Close S.MP / Close S.LK / Close S.MK / Far S.HP / C.MK / C.HK / C.HP / Far S.LP
  • Standard Throw Range (pixels): 24
  • Kara Throw Range (pixels): 51 / 45 / 40 / 38 / 36 / 36 / 33 / 32 / 31 / 30 / 25
  • Dash Forward (frames) / Moving Distance: 17 / 2
  • Dash Backward (frames) / Moving Distance: 17 / 2
  • Normal Wake up (frames): 67
  • Quick Stand (frames): 47

Moves List

Throws

Valse no you ni Kuruoshiku Lp.png+Lk.png
Nemuri wo Midasu Contour F.png/B.png+Lp.png+Lk.png

Command Moves

Amari ni Muku na Aiguille F.png+Mk.png

Special Moves

Vertu no Zankou~Haute B.png charge F.png+P.png EX SC
Vertu no Zankou~Basse B.png charge F.png+K.png EX SC
Ma Cherie no Hiai D.png charge U.png+K.png EX SC SC on EX version on 1st hit
Tsumetaku Aoi Regret Qcb.png+K.png EX

Super Arts

I Light of Justice Qcf.pngQcf.png+P.png 104 Gauge Dots 2 Stocks 5.2 EX Uses
II Supreme Rising Rage Flash Qcf.pngQcf.png+K.png 120 Gauge Dots 2 Stocks 6.0 EX Uses
III Blue Nocturne Qcf.pngQcf.png+K.png 80 Gauge Dots 1 Stock 2.0 EX Uses

Target Combos

close Mk.png -> Hk.png
close Lp.png -> close Lk.png

Move Analysis

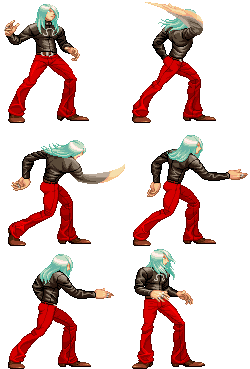
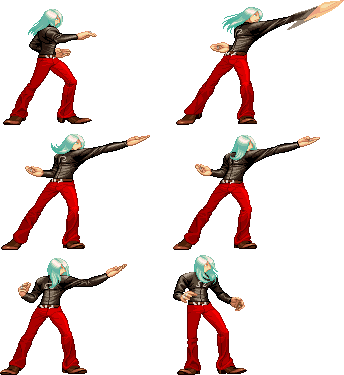
Please note that the images show in this section are for the 1st frame it hits, so this means the opponent is taking the hit in the image shown on the move. I use the 1st frame of every move (except taunt, dash, jump, wakeup and 2nd throw image sprites) because you will see the maximum range of every attack (mostly of the attacks). Note also that those images are ACCURATE, they are exactly the first frame it hits, so enemy takes damage but they still dont make the "pain" frame.

General

  • Move: Move name
  • Motion: What you must do to execute the move
  • Damage: Damage it does (in pixels)
  • Stun Damage: Stun Damage it does (in pixels)
  • Chains into itself: If you can combo into the same movement
  • Special Cancel: If you can cancel the move into a Special Move
  • Super Cancel: If you can cancel the move into a Super Art
  • Juggle Value: Amount of JP the move adds in aerial juggles
  • 0: JP is reset
  • Juggle or Reset: If the move knocks down on air connect or air resets
  • Throw Range: Range of the throw (in pixels)
  • Num.: Super Art number
  • Super Art: Super Art name
  • Super Art Stock: Number of Gauge Bars the Super Art have, also the lenght of each bar (in pixels)

Frame Data

  • Startup: Number of frames it takes to start the move
  • Hit: Number of frames that can hit the opponent
  • Recovery: Number of frames it takes to recover from the move
  • Blocked Advantage: Number of frames you are in advantage/disadvantage after opponent have been blocked the hit
  • Hit Advantage: Number of frames you are in advantage/disadvantage after opponent have been take the hit
  • Crouching Hit Advantage: Number of frames you are in advantage/disadvantage after opponent have been take the hit while he's crouching
  • + # : You have # frames of advantage
  • - # : You have # frames of disadvantage
  • # ~ # : Advantage/disadvantage can vary from # to #
  • Down: Enemy gets knocked down
  • Guard: How opponent must guard the move, High (H), Low (L) or both (HL)
  • Parry: How opponent must parry the move, High (H), Low (L) or both (HL)

Gauge Increase

  • Miss: Gauge you gain if you miss the move (in pixels)
  • Blocked: Gauge you gain if the move gets blocked (in pixels)
  • Hit: Gauge you gain if you hit the opponent with the move (in pixels)
  • Parry: Gauge opponent gains when he parry the move (in pixels)

Basic Moves

(remydf).gif
Move Start-up frames In ground frames In air frames Recovery frames Total frames
Dash Forward 2 8? - 6? 17

Comments here


(remydb).gif
Move Start-up frames In ground frames In air frames Recovery frames Total frames
Dash Backwards 2 4? - 6? 17

Comments here


(remybjump).gif
(remyjump).gif
(remyfjump).gif
Move Motion Startup Frames
Jump BU or U or FU 3

Comments here


Move Motion Startup Frames
Super Jump DBU or DU or DFU 5

Comments here


(remyw).gif
Move Motion Frames
Normal Wakeup - 67

Comments here


(remytw).gif
Move Motion Frames
Quick Stand Tap D when hitting the ground 47

Comments here


(remyt).gif
Move Motion Damage Stun Damage Chains into itself Special Cancel Super Cancel Juggle Value
Taunt HP+HK - - No No No

Frame Data

Startup Hit Recovery Blocked Advantage Hit Advantage Crouching Hit Advantage Guard Parry
- 131 - ? ? ? HL HL

Gauge Increase

Miss Blocked Hit Parry (Gauge for opponent)
4(6) ? ? 8(4+4)

Comments here


(remyhparry).gif
(remylparry).gif
Move Motion
Parry (High) Tap F when about taking a hit
Parry (Low) Tap D when about taking a hit
Parry (Air) Tap F in air when about taking a hit

Frame Data

Move Frames you're frozen Frames opponent is frozen Frame Advantage when parry is successful Frames before you can try another parry
Parry (High) 16 16 +4(LP/LK) +3(MP/MK) +2(HP/HK) 0(Special/Super) -16(Fireball) 24(19 when attack comes from the air)*,**
Parry (Low) 16 16 +4(LP/LK) +3(MP/MK) +2(HP/HK) 0(Special/Super) -16(Fireball) 24(19 when attack comes from the air)*,**
Parry (Air) 16 16 +4(LP/LK) +3(MP/MK) +2(HP/HK) 0(Special/Super) -16(Fireball) 21(19 when attack comes from the air)*,**
* (If a parry attempt is successful, the 19/21/24 frame restriction is taken away and you can attempt another parry immediately)
** (If another attack connects within 2 frames of your parry, it will automatically be parried)

Gauge Increase

Move Gauge Increase
Parry (High) 4***
Parry (Low) 4***
Parry (Air) 4***
*** (You gain 4 of gauge for whatever attack parried, and for whatever hit you parry during multihit attack)

You can buffer any motion during High or Low parry, but NOT during Air parry, also parry resets the juggle count (and thus resets all scaling).

  • Parry information is taken from Shoryuken Forums, more exactly, from user JinraiPVC. Thanks for this information dude

Normal Moves

Standing Normals

(remylp).gif
Move Motion Damage Stun Damage Chains into itself Special Cancel Super Cancel Juggle Value Reset or Juggle
Far Jab LP 30(3 life points) 3 Yes Yes Yes 15 Reset

Frame Data

Startup Hit Recovery Blocked Advantage Hit Advantage Crouching Hit Advantage Guard Parry
4 4 4 +3 +3 +3 HL HL

Gauge Increase

Miss Blocked Hit Parry (Gauge for opponent)
0 1 2 4

A standard quick punch with decent range and no combo applications. Useful as a low-commitment anti-air at ranges where close Jab doesn't activate as it is safe on air parry.


(remymp).gif
Move Motion Damage Stun Damage Chains into itself Special Cancel Super Cancel Juggle Value Reset or Juggle
Far Strong MP 60(10 life points) 9 No No No 15 Reset

Frame Data

Startup Hit Recovery Blocked Advantage Hit Advantage Crouching Hit Advantage Guard Parry
7 3 12 +1 +2 +3 HL H

Gauge Increase

Miss Blocked Hit Parry (Gauge for opponent)
2 6 11 4

Nice, high-angled strike with decent startup and good range, but poor damage. Good for anti-airs and as a poke against taller characters, but prone to being crouched.


(remyhp).gif
Move Motion Damage Stun Damage Chains into itself Special Cancel Super Cancel Juggle Value Reset or Juggle
Far Fierce HP 110(19 life points) 7 No No No 15 Reset

Frame Data

Startup Hit Recovery Blocked Advantage Hit Advantage Crouching Hit Advantage Guard Parry
10 5 18 -2 0 +2 HL H

Gauge Increase

Miss Blocked Hit Parry (Gauge for opponent)
3 10 19 4

Big punch with good damage, range, and priority. Pretty good as a poke and to build space with its large pushback.


(remycloselp).gif
Move Motion Damage Stun Damage Chains into itself Special Cancel Super Cancel Juggle Value Reset or Juggle
Close Jab (Close to opponent) LP 30(5 life points) 3 No Yes Yes 1 Reset

Frame Data

Startup Hit Recovery Blocked Advantage Hit Advantage Crouching Hit Advantage Guard Parry
4 4 3 +3 +3 +3 HL HL

Gauge Increase

Miss Blocked Hit Parry (Gauge for opponent)
0 1 2 4

Fast, low commitment anti-air that chains into itself, meaning you can keep mashing it if the opponent parries in the air. His close LP -> close LK TC will combo even when the opponent is airborne, which is a nice damage bonus to a very effective anti-air.


(remyclosemp).gif
Move Motion Damage Stun Damage Chains into itself Special Cancel Super Cancel Juggle Value Reset or Juggle
Close Strong (Close to opponent) MP 70(12 life points) 7 No Yes Yes 15 Reset

Frame Data

Startup Hit Recovery Blocked Advantage Hit Advantage Crouching Hit Advantage Guard Parry
5 5 8 +5 +6 +7 HL H

Gauge Increase

Miss Blocked Hit Parry (Gauge for opponent)
2 6 11 4

Remy proceeds to roast the opponent with a BOI motion. Allows for links into cr. Short afterwards. Generally outclassed by close MK, but can be used in certain blockstrings due to its good frame advantage and low pushback.


(remyclosehp).gif
Move Motion Damage Stun Damage Chains into itself Special Cancel Super Cancel Juggle Value Reset or Juggle
Close Fierce (Close to opponent) HP 130(21 life points) 15 No Yes Yes 15 Reset (Juggle at fist)

Frame Data

Startup Hit Recovery Blocked Advantage Hit Advantage Crouching Hit Advantage Guard Parry
6 3 15 -2 0 +2 HL H

Gauge Increase

Miss Blocked Hit Parry (Gauge for opponent)
3 6 14 4

Remy's highest damage cancel by a good margin. However, it whiffs on crouching opponents and has disapointing range, making its applications in neutral somewhat limited. Its hitbox is very tall, potentially catching cross-up attempts if you didn't have time to charge a flash kick.


(remylk).gif
Move Motion Damage Stun Damage Chains into itself Special Cancel Super Cancel Juggle Value Reset or Juggle
Short LK 35(5 life points) 5 No No No 15 Reset

Frame Data

Startup Hit Recovery Blocked Advantage Hit Advantage Crouching Hit Advantage Guard Parry
2 5 4 +2 +2 +2 HL HL

Gauge Increase

Miss Blocked Hit Parry (Gauge for opponent)
0 1 2 4

The almighty foot. You can land this as part of Remy's LP xx LK target combo, but the timing for this is difficult. Tied for one of the fastest normals in the game, strangely enough, and has a small disjoint near the tip of his foot. It's nothing to write home about, though it is a one-frame link into SA2.


(remymk).gif
Move Motion Damage Stun Damage Chains into itself Special Cancel Super Cancel Juggle Value Reset or Juggle
Forward MK 80(14 life points) 7 No No No 15 Reset

Frame Data

Startup Hit Recovery Blocked Advantage Hit Advantage Crouching Hit Advantage Guard Parry
8 5 14 -3 -2 -1 HL H

Gauge Increase

Miss Blocked Hit Parry (Gauge for opponent)
2 6 11 4

A decent poke and OK counter-poke with good range, but little else.


(remyhk).gif
Move Motion Damage Stun Damage Chains into itself Special Cancel Super Cancel Juggle Value Reset or Juggle
Roundhouse HK 130(23 life points) 11 No No No 15 Reset

Frame Data

Startup Hit Recovery Blocked Advantage Hit Advantage Crouching Hit Advantage Guard Parry
10 3 23 -9 -7 -5 HL H

Gauge Increase

Miss Blocked Hit Parry (Gauge for opponent)
3 10 19 4

Functions as a slower, beefier version of standing Strong. Good in anti-air scenarios with a high angled hitbox, but prone to air parries. Also OK as a poke against some taller characters like Hugo, but can be crouched.


(remycloselk).gif
Move Motion Damage Stun Damage Chains into itself Special Cancel Super Cancel Juggle Value Reset or Juggle
Close Short (Close to opponent) LK 35(6 life points) 5 No Yes Yes 15 Reset

Frame Data

Startup Hit Recovery Blocked Advantage Hit Advantage Crouching Hit Advantage Guard Parry
2 5 7 0 0 0 HL HL

Gauge Increase

Miss Blocked Hit Parry (Gauge for opponent)
0 1 2 4

Also tied for the fastest move in the game, this quick knee strike has very little utility outside of Remy's TC.


(remyclosemk).gif
Move Motion Damage Stun Damage Chains into itself Special Cancel Super Cancel Juggle Value Reset or Juggle
Close Forward (Close to opponent) MK 80(16 life points) 7 No Yes Yes 15 Reset

Frame Data

Startup Hit Recovery Blocked Advantage Hit Advantage Crouching Hit Advantage Guard Parry
4 6 11 +1 +3 +5 HL H

Gauge Increase

Miss Blocked Hit Parry (Gauge for opponent)
2 6 11 4

Now we finally reach a good normal! This is Remy's main damage hitconfirm a la SA2 (st.Forward -> SA2), which is important because Remy has very few safe confirms. Without it, Remy doesn't really have good damage options outside of his cr. Fierce.


(remyclosehk).gif
Move Motion Damage Stun Damage Chains into itself Special Cancel Super Cancel Juggle Value Reset or Juggle
Close Roundhouse (Close to opponent) HK 140(80+60)(23 life points) 16(7+9) No Yes/No Yes/No 3/3 Reset/Reset

Frame Data

Startup Hit Recovery Blocked Advantage Hit Advantage Crouching Hit Advantage Guard Parry
6 3 15 +3 +5 +7 HL H

Gauge Increase

Miss Blocked Hit Parry (Gauge for opponent)
3 12 25 8(4+4)

A 2-hit tall kick that allows links to SA2 afterwards. Sounds nice, until you remember that the first hit only comes out point blank, which is a shame because it also special cancels. Still, it can act as a decent anti-air for opponents only expecting one parry.

Jumping Normals

(remyjlp).gif
Move Motion Damage Stun Damage Chains into itself Special Cancel Super Cancel Juggle Value Reset or Juggle
Jump Jab (Air) LP 40(7 life points) 7 No No No 3 Reset

Frame Data

Startup Hit Recovery Blocked Advantage Hit Advantage Crouching Hit Advantage Guard Parry
4 20 - -3~+7 -3~+7 +3~+7 H H

Gauge Increase

Miss Blocked Hit Parry (Gauge for opponent)
0 1 2 4

A rather meh move. Completely outclassed by jumping Strong.


(remyjmp).gif
Move Motion Damage Stun Damage Chains into itself Special Cancel Super Cancel Juggle Value Reset or Juggle
Jump Strong (Air) MP 70(12 life points) 11 No No No 3 Reset

Frame Data

Startup Hit Recovery Blocked Advantage Hit Advantage Crouching Hit Advantage Guard Parry
5 14 - -3~+10 -3~+10 +7~+10 H H

Gauge Increase

Miss Blocked Hit Parry (Gauge for opponent)
2 6 11 4

Remy smacks you with his clown fingers with a good amount of active frames. Can be used in air-to-airs or to tick throw, but is generally outclassed by jumping Fierce.


(remyjhp).gif
Move Motion Damage Stun Damage Chains into itself Special Cancel Super Cancel Juggle Value Reset or Juggle
Jump Fierce (Air) HP 125(22 life points) 15 No No No 3 Juggle

Frame Data

Startup Hit Recovery Blocked Advantage Hit Advantage Crouching Hit Advantage Guard Parry
9 5 - -2~+13 -2~+13 +8~+13 H H

Gauge Increase

Miss Blocked Hit Parry (Gauge for opponent)
3 10 19 4

In 3S, meeting the opponent air-to-air is normally a safer option than grounded anti-airs since most air normals don't allow combos on airborne opponents. This blunt elbow strike is an exception to this and makes Remy's opponents want to parry way earlier in their jump arc than most other characters, which can open them up for Remy's myriad of other options. Generally you only have time for a flash kick once you land, but if you smack the opponent particularly high in their jump near the corner you can do a short or forward Cold Blue Kick first.


(remyjlk).gif
Move Motion Damage Stun Damage Chains into itself Special Cancel Super Cancel Juggle Value Reset or Juggle
Jump Short (Air) LK 50(8 life points) 5 No No No 3 Reset

Frame Data

Startup Hit Recovery Blocked Advantage Hit Advantage Crouching Hit Advantage Guard Parry
4 14 - -4~+7 -4~+7 +1~+7 H H

Gauge Increase

Miss Blocked Hit Parry (Gauge for opponent)
0 1 2 4

Almost useless except for the fact that it is Remy's only cross-up. The cross-up box is so small that it doesn't really matter anyways.


(remyjmk).gif
Move Motion Damage Stun Damage Chains into itself Special Cancel Super Cancel Juggle Value Reset or Juggle
Jump Forward (Air) MK 90(16 life points) 9 No No No 3 Reset

Frame Data

Startup Hit Recovery Blocked Advantage Hit Advantage Crouching Hit Advantage Guard Parry
6 4 - -2~+10 -2~+10 +7~+10 H H

Gauge Increase

Miss Blocked Hit Parry (Gauge for opponent)
2 6 11 4

Good as a long range air-to-air.

(remyjhk).gif
Move Motion Damage Stun Damage Chains into itself Special Cancel Super Cancel Juggle Value Reset or Juggle
Jump Roundhouse (Air) HK 120(21 life points) 13 No No No 3 Reset

Frame Data

Startup Hit Recovery Blocked Advantage Hit Advantage Crouching Hit Advantage Guard Parry
10 4 - -1~+13 -1~+13 +7~+13 H H

Gauge Increase

Miss Blocked Hit Parry (Gauge for opponent)
3 10 19 4

The hitbox goes very low to the ground, making it hit characters looking to anti-air parry earlier than usual. It also hits most characters after an immediate neutral jump, making neutral jumps yet another potential anti-air in Remy's kit. This is your main jump-in normal alongside jumping Fierce.

(remyoh).gif
Move Motion Damage Stun Damage Chains into itself Special Cancel Super Cancel Juggle Value Reset or Juggle
Universal Overhead MP+MK 40(7 life points) 3 No No No 1 Reset

Frame Data

Startup Hit Recovery Blocked Advantage Hit Advantage Crouching Hit Advantage Guard Parry
15 10 5 -5~+7 0~+8 +1~+9 H H

Gauge Increase

Miss Blocked Hit Parry (Gauge for opponent)
0 1 2 4

As far as UOHs go, Remy gets a good amount of use out of spaced/meaty UOH -> SA2, especially with a standing HK kara giving it a massive range boost. However, Remy suffers from a severe lack of reasons for the opponent to block or parry low, so it's not entirely in Remy's favor.

Throws

(remyvnk).gif
Move Motion Damage Stun Damage Throw Range Kara-Throw Kara-Throw Range Juggle Value Reset or Juggle
Valse no you ni Kuruoshiku LP+LK 120(17 life points) 15 24 Far S.HK / Far S.MP / F.MK / Close S.MP / Close S.LK / Close S.MK / Far S.HP / C.MK / C.HK / C.HP / Far S.LP 51 / 45 / 40 / 38 / 36 / 36 / 33 / 32 / 31 / 30 / 25 1 Juggle

Frame Data

Startup Hit Recovery Blocked Advantage Hit Advantage Crouching Hit Advantage Guard Parry
2 1 21 - - - LP+LK -

Gauge Increase

Miss Blocked Hit
0 7 (for the player who blocked) 7

Because Remy has few ways of dissuading parries, this throw is a godsend. It smacks the opponent fullscreen, and in the corner it allows you to juggle an HK flash kick (requires a st.MP kara on Twins, Ibuki, Dudley, and Oro) or even partial connects of SA1/SA2. His kara throw range is pretty nice as well.


(remynmm).gif
Move Motion Damage Stun Damage Throw Range Kara-Throw Kara-Throw Range
Nemuri wo Midasu Contour B/F+LP+LK 130(23 life points) 5 24 Far S.HK / Far S.MP / F.MK / Close S.MP / Close S.LK / Close S.MK / Far S.HP / C.MK / C.HK / C.HP / Far S.LP 51 / 45 / 40 / 38 / 36 / 36 / 33 / 32 / 31 / 30 / 25

Frame Data

Startup Hit Recovery Blocked Advantage Hit Advantage Crouching Hit Advantage Guard Parry
2 1 21 - - - B/F+LP+LK -

Gauge Increase

Miss Blocked Hit
0 7 (for the player who blocked) 8

Basic damage throw. Good in the corner against characters that need a kara flash kick, if you haven't mastered it.


Crouching Normals

(remyclp).gif
Move Motion Damage Stun Damage Chains into itself Special Cancel Super Cancel Juggle Value Reset or Juggle
Crouch Jab D+LP 30(3 life points) 3 Yes Yes Yes 15 Reset

Frame Data

Startup Hit Recovery Blocked Advantage Hit Advantage Crouching Hit Advantage Guard Parry
5 2 7 +2 +2 +2 HL HL

Gauge Increase

Miss Blocked Hit Parry (Gauge for opponent)
0 1 2 4

cr.LP -> cr.LP -> flash kick is another one of Remy's confirms, but it's held back somewhat by the fact that cr.LP can be parried in any direction. Still, it IS a confirm. 3 cr.LPs -> flash kick is also a combo that requires no prior charge, but also requires you to be point blank.

(remycmp).gif
Move Motion Damage Stun Damage Chains into itself Special Cancel Super Cancel Juggle Value Reset or Juggle
Crouch Strong D+MP 55(9 life points) 5 No Yes Yes 15 Reset

Frame Data

Startup Hit Recovery Blocked Advantage Hit Advantage Crouching Hit Advantage Guard Parry
5 5 11 -2 -1 0 HL HL

Gauge Increase

Miss Blocked Hit Parry (Gauge for opponent)
2 6 11 4

Good range, but low damage. It's usually cancelled into LoV for pressure, but can also be parried in either direction. Not only does Remy have a hard time making them block low, but making them parry low is also difficult. Given that this is Remy's main cancel for extending combos and blockstrings, it's a rather nifty tool. It also has a very good anti-air hitbox, as if Remy didn't have enough of those.


(remychp).gif
Move Motion Damage Stun Damage Chains into itself Special Cancel Super Cancel Juggle Value Reset or Juggle
Crouch Fierce D+HP 100(17 life points) 9 No No No 3 Juggle

Frame Data

Startup Hit Recovery Blocked Advantage Hit Advantage Crouching Hit Advantage Guard Parry
9 5 18 -5 Down Down HL HL

Gauge Increase

Miss Blocked Hit Parry (Gauge for opponent)
3 10 19 4

This move is the most basic and scary of all of Remy's anti-airs, since it allows juggles on hit. On grounded connects and when midscreen it gives you time to charge up a HK flash kick, which is Remy's max damage for close range parries. In the corner you can combo an short Cold Blue Kick before this for more damage. Be careful to switch up between anti-airs, as if this move is air parried you're eating a fat combo.


(remyclk).gif
Move Motion Damage Stun Damage Chains into itself Special Cancel Super Cancel Juggle Value Reset or Juggle
Crouch Short D+LK 30(5 life points) 3 No Yes Yes 15 Reset

Frame Data

Startup Hit Recovery Blocked Advantage Hit Advantage Crouching Hit Advantage Guard Parry
3 4 7 0 0 0 L L

Gauge Increase

Miss Blocked Hit Parry (Gauge for opponent)
0 1 2 4

Very important, as it's the only way you can safely make the opponent fear a low in neutral, even though it has no confirming options, bad damage, and is 0 on hit/block. More like a nuisance than anything threatening. Still, strings like low Short xx low LoV and low Short xx Light of Justice are safe and make the opponent block their toes to avoid damage, although neither confirm.


(remycmk).gif
Move Motion Damage Stun Damage Chains into itself Special Cancel Super Cancel Juggle Value Reset or Juggle
Crouch Forward D+MK 60(10 life points) 3 No No No 15 Reset

Frame Data

Startup Hit Recovery Blocked Advantage Hit Advantage Crouching Hit Advantage Guard Parry
8 5 18 -9 -8 -7 L L

Gauge Increase

Miss Blocked Hit Parry (Gauge for opponent)
2 6 11 4

This would be a nice low poke if not for the fact that it's laughably minus. Most shotos can sweep this on reaction and most other characters can get free damage depending on spacing. Still, it's not worthless against characters with bad mid-range punish options, like Dudley, but it still ends your momentum.


(remychk).gif
Move Motion Damage Stun Damage Chains into itself Special Cancel Super Cancel Juggle Value Reset or Juggle
Crouch Roundhouse D+HK 100+110(17 life points) 3+3 No No No 15 Juggle

Frame Data

Startup Hit Recovery Blocked Advantage Hit Advantage Crouching Hit Advantage Guard Parry
9 2/5 21 -11 Down Down L L

Gauge Increase

Miss Blocked Hit Parry (Gauge for opponent)
3 20 22 4

Guile much? While a sweep for most characters is a risky but slightly more rewarding low, the risk-reward for Remy is definitely not in his favor. This is due to the fact that, on block, the two hits are not a true blockstring, allowing the opponent to blue parry the second hit on reaction. Not only that, but on hit you get little okizeme since you're stuck whiffing the second hit. It's not useless, but only pull this out if you are confident that the opponent isn't blocking low.

Command Normals

(remyfmk).gif
Move Motion Damage Stun Damage Chains into itself Special Cancel Super Cancel Juggle Value Reset or Juggle
Amari ni Muku na Aiguille F+MK 80 3 No No No 15 Reset

Frame Data

Startup Hit Recovery Blocked Advantage Hit Advantage Crouching Hit Advantage Guard Parry
18 3 20 -7 -6 -5 H H

Gauge Increase

Miss Blocked Hit Parry (Gauge for opponent)
2 6 11 4

While this is an overhead with good range, it has little else going for it - the startup is somewhat reactable (meaning opponents can potentially parry on reaction, depending on skill level) and it's pretty bad on hit/block, ending your turn and potentially opening the door for the opponent to punish you for it. Generally an HK kara universal overhead has a bit less range but accomplishes the same thing without being minus.


Target Combo 1

Move Motion Damage Stun Damage Chains into itself Special Cancel Super Cancel Juggle Value Reset or Juggle
Target Combo 1 Close MK -> HK 90+60 9+5 No Yes/No Yes/No 15/15 Reset/Reset

Frame Data

Startup Hit Recovery Blocked Advantage Hit Advantage Crouching Hit Advantage Guard Parry
4 - - -9 -7 -5 HL/HL H/H

Gauge Increase

Miss Blocked Hit Parry (Gauge for opponent)
2+? 6+1 11+1 8(4+4)

Useless on grounded opponents, but serves as another 2-hit anti-air option select should the opponent parry the first hit.


Target Combo 2

Move Motion Damage Stun Damage Chains into itself Special Cancel Super Cancel Juggle Value Reset or Juggle
Target Combo 2 Close LP -> Close LK 30+35 (11 life points) 3+5 Yes/No Yes/Yes Yes/Yes 1/15 Reset/Reset

Frame Data

Startup Hit Recovery Blocked Advantage Hit Advantage Crouching Hit Advantage Guard Parry
4 - - 0 0 0 HL/HL HL/HL

Gauge Increase

Miss Blocked Hit Parry (Gauge for opponent)
0(0+0) 2(1+1) 4(2+2) 8(4+4)

A very strange target combo that gives Remy better damage and versatility off of a close Jab anti-air as discussed previously. When point blank, close Jab xx close Jab xx close Short is a decent super confirm for both SA1 and SA2 (and is technically damage optimal for SA2), but is executionally difficult due to the fact that the close Short must be done while the stick is in the neutral position.


Special Moves

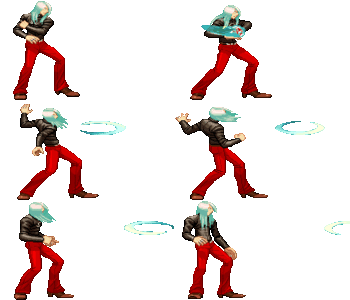
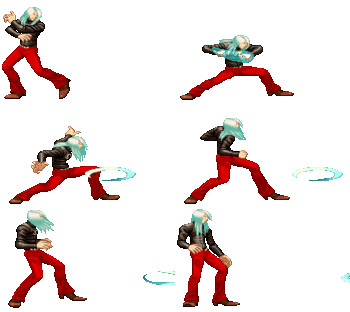
Please note that in this section you will see mainly 3 images for the special moves, this means the image on the left its done with LP (or LK), the image on the center its done with MP (or MK), and the image on the right its done with HP (or HK). Also its the same "rule" as the sections above, its the 1rst frame it hits for every of the moves.

(remyhlov).gif
Move Motion Damage Blocked Damage Stun Damage Super Cancel Juggle Value Reset or Juggle
Light of Virtue (Jab) Charge B,F+LP 60(10 life points) 4 3 Yes 7 Reset
Light of Virtue (Strong) Charge B,F+MP 60(10 life points) 4 3 Yes 7 Reset
Light of Virtue (Fierce) Charge B,F+HP 60(10 life points) 4 3 Yes 7 Reset

Frame Data

Move Startup Hit Recovery Blocked Advantage Hit Advantage Crouching Hit Advantage Guard Parry
Light of Virtue (Jab) 8 1 22 +5 +6 +7 HL H
Light of Virtue (Strong) 9 1 22 +5 +6 +7 HL H
Light of Virtue (Fierce) 10 1 22 +5 +6 +7 HL H

Gauge Increase

Move Miss Blocked Hit Parry (Gauge for opponent)
Light of Virtue (Jab) 0 1 1 4
Light of Virtue (Strong) 0 1 1 4
Light of Virtue (Fierce) 0 1 1 4

The traditional Sonic Boom, in a game where you can parry sonic booms. Just like Guile, Remy's Sonic Boom is the best meterless projectile in the game, with lightning fast recovery and great frame advantage. It's so fast that someone could reaction super through your fireballs and you would still have enough time to smack them with a super 2 afterwards. You can set up a meaty Sonic Boom (*ahem* Light of Virtue) very easily after a knockdown for obnoxious kara throw mixups, kara UOH, low Short, pokes, or whatever else you want to subject your opponent to depending on the character. The high version can unfortunately be crouched by most characters (except Q and Hugo, in which matchups this move is incredibly obnoxious). This move also synergizes very well with Remy's great forward dash or a spaced Cold Blue Kick to quickly approach with a Sonic Boom in front.


(remyllov).gif
Move Motion Damage Blocked Damage Stun Damage Super Cancel Juggle Value Reset or Juggle
Light of Virtue (Short) Charge B,F+LK 60(10 life points) 4 3 Yes 7 Reset
Light of Virtue (Forward) Charge B,F+MK 60(10 life points) 4 3 Yes 7 Reset
Light of Virtue (Roundhouse) Charge B,F+HK 60(10 life points) 4 3 Yes 7 Reset

Frame Data

Move Startup Hit Recovery Blocked Advantage Hit Advantage Crouching Hit Advantage Guard Parry
Light of Virtue (Short) 10 1 22 +1 +2 +3 L L
Light of Virtue (Forward) 11 1 22 +1 +2 +3 L L
Light of Virtue (Roundhouse) 12 1 22 +1 +2 +3 L L

Gauge Increase

Move Miss Blocked Hit Parry (Gauge for opponent)
Light of Virtue (Short) 0 1 1 4
Light of Virtue (Forward) 0 1 1 4
Light of Virtue (Roundhouse) 0 1 1 4

Sagat much? While the high Sonic Boom has better frame advantage and startup, the low Sonic Boom has the incredible plus of both being a low and hitting crouching opponents. The only options an opponent has against it are blocking it, parrying it, jumping out of the way, or supering through it. Additionally, since the low and high Sonic Booms are different projectiles, you can have one of each on the screen at any one time.


(remycbk).gif
Move Motion Damage Blocked Damage Stun Damage Super Cancel Juggle Value Reset or Juggle
Cold Blue Kick (Short) QCB+LK 120(21 life points) 15 7 No 2 Juggle
Cold Blue Kick (Forward) QCB+MK 120(21 life points) 15 7 No 2 Juggle
Cold Blue Kick (Roundhouse) QCB+HK 120(21 life points) 15 7 No 2 Juggle

Frame Data

Move Startup Hit Recovery Blocked Advantage Hit Advantage Crouching Hit Advantage Guard Parry
Cold Blue Kick (Short) 17 12 10 -4/+5 Low -4/+5 Low -4/+5 Low HL H
Cold Blue Kick (Forward) 18 12 10 -4/+5 Low -4/+5 Low -4/+5 Low HL H
Cold Blue Kick (Roundhouse) 19 10 10 -6/+5 Low Down down HL H

Gauge Increase

Move Miss Blocked Hit Parry (Gauge for opponent)
Cold Blue Kick (Short) 3 12 18 4
Cold Blue Kick (Forward) 3 12 18 4
Cold Blue Kick (Roundhouse) 3 12 18 4

Since this is Remy's only special move that can be done without charge, it's important in his kit. When properly spaced, it's safe on block with little recovery. Don't just throw out this move to approach for free, though, since it can be reaction parried if it hits later. The roundhouse version jumps over cornered opponents and knocks down on hit, so it can potentially be used as a corner escape and as a pre-emptive anti air. In the corner, you can juggle into a short Cold Blue Kick to extend juggles, leading to the cool-looking, iconic and useful cr.HP -> LK Cold Blue Kick -> HK Flash Kick.


(remyrsf).gif
Move Motion Damage Blocked Damage Stun Damage Super Cancel Juggle Value Reset or Juggle
Rising Rage Flash (Short) Charge D,U+LK 120(21 life points) 15 9 No 15 Juggle
Rising Rage Flash (Forward) Charge D,U+MK 130(23 life points) 8 7 No 15 Juggle
Rising Rage Flash (Roundhouse) Charge D,U+HK 140(24 life points) 9 7 No 15 Juggle

Frame Data

Move Startup Hit Recovery Blocked Advantage Hit Advantage Crouching Hit Advantage Guard Parry
Rising Rage Flash (Short) 3 3 32 -17 Down Down HL HL
Rising Rage Flash (Forward) 4 3 39 -23 Down Down HL HL
Rising Rage Flash (Roundhouse) 5 4 44 -26 Down Down HL HL

Gauge Increase

Move Miss Blocked Hit Parry (Gauge for opponent)
Rising Rage Flash (Short) 3 12 17 4
Rising Rage Flash (Forward) 3 12 17 4
Rising Rage Flash (Roundhouse) 3 12 17 4

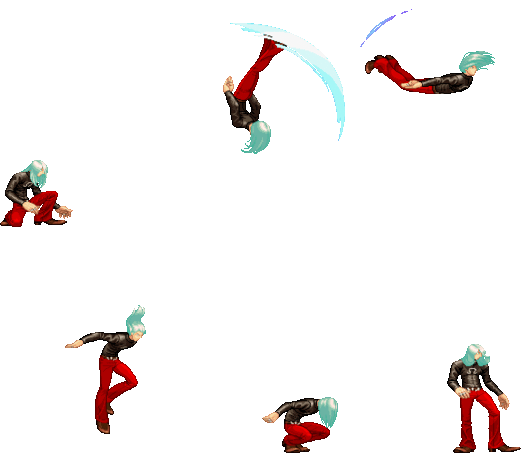
This move functions pretty much the same as a standard flash kick - big anti-air hitbox and awful on block. Since it requires charge, it's not always available as an anti-air, and even when it is the opponent could parry it for a big punish, so it's not a free win. Its primary purpose is using the HK version as a combo ender and very occasionally linking into the LK version off of a spaced UOH.

EX Moves

(remyhlovex).gif
Move Motion Gauge Needed Damage Blocked Damage Stun Damage Super Cancel Juggle Value Reset or Juggle
Light of Virtue (EX) Charge B,F+PP 40 120(60+60)(20 life points) 8(4+4) 6(3+3) Yes 14 (7+7) Juggle

Frame Data

Move Startup Hit Recovery Blocked Advantage Hit Advantage Crouching Hit Advantage Guard Parry
Light of Virtue (EX) 7/8* 1 23 +4 +5 +6 HL H

Gauge Increase

Move Miss Blocked Hit Parry (Gauge for opponent)
Light of Virtue (EX) - - - 8(4+4)
  • Means High/Low

Zips across the screen lightning fast, with a second Sonic Boom under the first that hits crouching opponents. This does wonders for Remy's neutral game and expands his capacity to pressure the opponent from mid range, making it even more likely for the opponent to jump right into Remy's many many anti-airs.


(remyllovex).gif
Move Motion Gauge Needed Damage Blocked Damage Stun Damage Super Cancel Juggle Value Reset or Juggle
Light of Virtue (EX) Charge B,F+KK 40 120(60+60)(20 life points) 8(4+4) 6(3+3) Yes 14(7+7) Juggle

Frame Data

Move Startup Hit Recovery Blocked Advantage Hit Advantage Crouching Hit Advantage Guard Parry
Light of Virtue (EX) 8/7* 1 27 0 +1 +2 HL H

Gauge Increase

Move Miss Blocked Hit Parry (Gauge for opponent)
Light of Virtue (EX) - - - 8(4+4)
  • Means High/Low


(remyrrgex).gif
Move Motion Gauge Needed Damage Blocked Damage Stun Damage Super Cancel Juggle Value Reset or Juggle
Rising Rage Flash (EX) Charge D,U+KK 40 190(120+70)(32 life points) 28(24+4) 14(7+7) Yes/No 7/15 Juggle/Juggle

Frame Data

Move Startup Hit Recovery Blocked Advantage Hit Advantage Crouching Hit Advantage Guard Parry
Rising Rage Flash (EX) 6 5 41 -21 Down Down HLx2 HLx2

Gauge Increase

Move Miss Blocked Hit Parry (Gauge for opponent)
Rising Rage Flash (EX) - - - 8(4+4)

Completely invincible and functions as Remy's true reversal. If you're running SA1, you can cancel the first hit on block to make it safe, but that spends a lot of meter that Remy would much rather keep for EX Booms. Reversals are nice option to have considering some characters don't have any that aren't locked behind Supers, and can invalidate an opponent's wakeup game when properly placed.


(remycbkex).gif
Move Motion Gauge Needed Damage Blocked Damage Stun Damage Super Cancel Juggle Value Reset or Juggle
Cold Blue Kick (EX) QCB+KK 40 160(90+70)(27 life points) 20(11+9) 12(7+5) No 2(1+1) Juggle

Frame Data

Move Startup Hit Recovery Blocked Advantage Hit Advantage Crouching Hit Advantage Guard Parry
Cold Blue Kick (EX) 18 9 10 -2/+5 Low Down Down HLx2 Hx2

Gauge Increase

Move Miss Blocked Hit Parry (Gauge for opponent)
Cold Blue Kick (EX) - - - 8(4+4)

Generally useless. It doesn't do anything that the normal versions don't already do besides being 2 hits (which is a pretty easy reaction to make considering Remy flashes yellow). It can be used as a niche 2-hit anti-air, but Remy already has plenty of options on that front. At least it gets both of its hits as an anti-air.

Super Arts

(remysa1).gif
Super Art Super Art Name Super Art Stock Motion Damage Blocked Damage Stun Damage Damage/Gauge Juggle Value Reset or Juggle
I Light of Justice 2 bars (104 each bar) QCF QCF+P 320*(52 life points) 56** 21 3,07(x2) 7(1 per hit) Juggle
* 55x7 Damage is when all hits connect.
** 8x7 Damage is when all hits connect.

Frame Data

Startup Hit Recovery Blocked Advantage Hit Advantage Crouching Hit Advantage Guard Parry
1 1x7 24 +3 +4 +5 HLx7 HLx7

This super has 2 main advantages over Super 2. One is that it's completely safe on block with massive pushback, making it a valuable cancel from low Short. The second is that it's an incredibly obnoxious parry as an anti-air or on wake-up, making it good at shutting down characters like Dudley or Hugo who have a hard time without parries in those situations. It's pretty matchup dependent because against most characters Remy would rather take the burst damage and extra meter that Super 2 provides.


(remysa2).gif
Super Art Super Art Name Super Art Stock Motion Damage Blocked Damage Stun Damage Damage/Gauge Juggle Value Reset or Juggle
II Supreme Rising Rage Flash 2 bars (120 each bar) QCF QCF+K 390*(61 life points) 77** 0 3,25 0, 15 on last hit Juggle
* 100+40+40+60+30+30+40+40+40+80 Damage is when all hits connect.
** 13+10+10+8+4+4+6+6+6+10 Damage is when all hits connect.

Frame Data

Startup Hit Recovery Blocked Advantage Hit Advantage Crouching Hit Advantage Guard Parry
(1,2,3,20,21,22,43,45,47,49)49 1×6+2×3+5 53(20) -80 Down Down HLx10 HLx10

This super gives Remy some nice confirming options into big damage like close Forward, close Jab xx close Jab xx close Short, and crouch Jab -> crouch Jab. Unfortunately, in juggles it loses half of its hits for some pitiful damage. It IS fast enough to hit someone out of a JP 15 air reset, meaning you can cancel any normal on air hit into it. It hits on air resets, so close Jab or any air-to-air jumping normal into SA2 is possible, though the opponent could theoretically parry out. It's a one frame parry after the freeze, so that is nightmarishly hard. Besides the super itself, it also gives Remy the most meter out of all his supers, stocking a total of 6 EX moves in the back pocket.


(remysa3).gif
Super Art Super Art Name Super Art Stock Motion Damage Blocked Damage Stun Damage Damage/Gauge Juggle Value Reset or Juggle
III Blue Nocturne 1 bar (80) QCF QCF+K 465*(75 life points) - 21 5,81 1 per hit, 3 on last hit Reset, Juggle on last hit
* 80+60×5+190/140 Damage is when all hits connect.

Frame Data

Startup Hit Recovery Blocked Advantage Hit Advantage Crouching Hit Advantage Guard Parry
1 21 39(27) -21 Down Down HLx7 Hx6

Hilariously bad, Blue Nocturne is by and away the worst super in the entire game. It's a counter super, meaning that the opponent has to hit you after the super freeze to activate. So anytime you activate this outside of confirming it (easier said than done), the opponent could just...you know... not hit it and get a full jump in combo on Remy. The ONLY WAY to get this off in a real match is to parry a multihit attack and then activate, which is incredibly specific. Or you could pick SA2 and do close Forward -> SA2 or raw SA2 after a multihit parry instead.

Combos

Basic Ground Combos

1st Move 2nd Move 3rd Move 4th Move Damage Stun Damage
Crouching LP Crouching LP HK Rising Rage Flash - 345 (30%) 27
Crouching LP Crouching LP Rising Rage Flash - 403 (35%) 18
Crouching LP Crouching LP Light of Justice - 380 (33%) 28
Close standing MK Supreme Rising Rage Flash - - 380 (33%) 28
Close standing HP HK Rising Rage Flash - - 380 (33%) 28
Close standing HP Supreme Rising Rage Flash - - 380 (33%) 28
Close standing HP Light of Justice - - 380 (33%) 28

Neutral Throw Specific Combos

1st Move 2nd Move 3rd Move 4th Move Damage Stun Damage
Neutral Throw HK Rising Rage Flash - - 196 (17%) 15
Neutral Throw Light of Justice (3 hits only HK Rising Rage Flash - 253 (22%) 20

Those combos are in the Corner

Anti-Air Combos

#1) Anti-air crouching HP, when you recover, juggle with an early HK Rising Rage Flash.


#2) When near a corner, land an anti-Air crouching HP, when you recover, juggle with an early LK Cold Blue Kick, then juggle with a final HK Rising Rage Flash or a crouching MP canceled into a Supreme Rising Rage Flash.


#3) Land a air to air jumping HP, when you land, juggle with an early HK Rising Rage Flash.


#4) When near a corner, land an air to air jumping HP, when you recover, juggle with an early LK Cold Blue Kick, then juggle with a final HK Rising Rage Flash or a crouching MP canceled into a Supreme Rising Rage Flash.


#5) Anti-air crouching MP canceled into a Supreme Rising Rage Flash.

Advanced Combos

#1) Close standing MP linked into a crouching MP canceled into a LK Light of Virtue. Note that this is 1 frame easier to perform on a crouching character.

#2) Against a cornered opponent who's standing, jump in HP,when you land link close standing MK canceled into a HP Light of Virtue, then link crouching LK canceled into a HK Rising Rage Flash, Supreme Rising Rage Flash, or Light of Justice.

The Basics

Remy's Objective

Remy's goal is to force his opponent to jump towards him. Although difficult to implement because of the parry, his focus completely revolves around controlling space with his large array of projectiles and attacks that make it difficult for his opponent to be mobile. By applying the right kind of pressure, your opponent will be pressured into committing risky actions in order to avoid Remy's mid-range offense, like the jump, or other evasive special moves. When properly anticipated, Remy can score big damage off of a poorly timed jump with his wide variety of damaging anti-air options.

Outside of this objective, it's also important to focus on cornering your opponent as soon as possible. Once cornered, Remy's ability to control his opponent's movements is heightened, making it that much easier to apply pressure and bait a jump. In addition to this, many of his anti air options, his neutral throw, and a variety of Light of Virtue based combos, all lead to extra damage when near a corner.

Weaknesses

Remy's low-hitting attacks are severely lacking. Outside of crouching LK, none of his low attacks are safe, nor do they lead to a substantial amount of damage. His only answer to this problem is crouching LK--> Light of Justice, which is safe, but not confirmable. This severely limits his close ranged options to a handful of attacks that are highly vulnerable to standing parries.

Additionally, Remy is heavily reliant on his low EX Light of Virtue to exert a threatening mid-range presence. Without it, his ability to punish whiffed attacks and control the movements of mid-range oriented characters is limited to a handful of lackluster attacks. The result is rarely having access to Remy's much needed Super Arts because of the meter usage. Without a Light of Justice or Supreme Rising Rage Flash stocked, Remy must rely on weak and highly risky tactics in order to score damage at close range.

If the above wasn't enough, Remy also happens to have the lowest stun damage rating in the game. This is a huge disadvantage to shoulder when dealing with characters that are focused on dizzying you, such as Ryu (Denjin Hadouken), Necro (Electric Snake) or Makoto (Abare Tosanami Kudaki).

Offensive Notes

Remy's neutral throw is extremely important to his overall game. Mid-screen this attack sends your enemy flying across the screen, making it very useful for quickly pushing your enemy towards the nearest corner. Remy recovers well before his enemy even hits the ground, enabling you to throw a LP or LK Light of Virtue afterwards that will meet your enemy as they stand up if they perform a Quick recovery. Dash behind the LoV in order to safely approach your enemy. Near corners, Remy's neutral throw can also be juggled after with a HK Rising Rage Flash for additional damage. In comparison to the damage output of most normal throws, the addition of the juggle makes this throw one of the more threatening grappling attacks in 3rd Strike. This is especially helpful considering Remy's overall attack options against the Parry system are so weak.

Moreover, standing MP can be kara-canceled into Remy's throw for a massive range increase. This is done by pressing MP then LP + LK very quickly in succession. Like any kara-throw, this is an invaluable option to Remy because of his weakness towards Parries. Always stand just outside of your enemy's throw range when performing a kara-throw on wake up in order to avoid being thrown yourself.

Remy's most commonly used attack openings are close standing MK and crouching LP x 2. In the case of close standing MK, it's possible to link a Supreme Rising Rage Flash directly after it hits. The second hit of crouching LP x 2 can simply be canceled into a HK Rising Rage Flash or a Supreme Rising Rage Flash. Both options are verifiable (Hit Confirm-able) . Commonly used follow up attack options to go for when these options don't connect consist of either crouching MP--> LK Light of Virtue, walk up kara throw, an immediate universal overhead, or a late walk up close standing MK.

  • Personal Action: Stun Damage up.

Defensive Notes

The Parry System makes it extremely risky to always place faith in the recovery-heavy crouching HP. In order to consistently land this attack, your enemy must be willing to either perform a jump attack (Which will either trade or lose to crouching HP), or attempt a Parry much earlier during a jump then normal. This requires you to bolster your defense with several different types of anti-air maneuvers; all of which are designed to attack your jumping enemy at different points during their jump in order to throw off their Parry timing.

Your first option is to attack your enemy very early during their jump. This effectively throws off their Parry timing, forcing them to attempt one earlier during their jump (Leaving them vulnerable to crouching HP). A quick forward jumping MP is your best choice in this situation. Standing MP can also be used in the same manner if you're close enough, although it cannot catch your airborne enemy quite as early as jumping MP can.

Your second option is to give your enemy more than they can effectively parry. For example, far standing LP (Wait a quarter of a second)--> close standing LP--> standing LK, is an extremely worthy Parry deterrent against later Parry attempts. Your enemy has no choice but to parry all 3 hits of this chain, which is very difficult to do with any sort of consistency. In cases where only the first hit is Parried, the second standing LP will always beat any jump attack your enemy attempts to perform after the Parry. The final standing LK will actually juggle your enemy just after the close standing LP connects, resulting in a strange looking 2 hit juggle combo.

Crouching MP canceled into a Supreme Rising Rage Flash is also very effective against late Parry attempts. The damage is terrible, but it's worth going for on occasion when you're close to ending a round.

Both of the above Parry deterrents can be beaten if your enemy simply decides to perform a jump attack. Knowing this, anticipate your enemy's attempts to counter these options and beat their jump attack with crouching HP.

Super Art Selection

The Supreme Rising Rage Flash is generally the preferred super of choice. It's possible to link into this attack off of the majority Remy's strongest attack openings, including crouching LP x 2, close standing MK, close standing MP, and close standing HK. It even has a long super meter, allowing Remy to store massive amounts of EX moves for opportune moments. It's also worth noting that the Supreme Rising Rage Flash is a 2 frame Super Art, enabling you to juggle with it if canceled into from ANY normal attack that hits a jumping enemy. This also allows you to punish a hand full of close-range attacks that are normally safe when blocked, like Ken's crouching MK or close standing HP, or the third hit of Yun's standing LP-->standing LK-->standing MP Target Combo.

Despite the SRRF's dominance, Remy's Light of Justice has some use in specific match ups against characters who rely heavily on the Parry in wake up situations. Having a safe, high damage option off of crouching LK (crouching LK--> LoJ) gives you your only real deterrent against random parry attempts outside of throws. It's also very effective as an anti-air option against close-range oriented characters with low jump arcs, like Dudley and Hugo. Specifically, a LP Light of Virtue canceled into the Light of Justice is a solid anti-air option.

Advanced Strategy

Jump Straight Up HK

As mentioned, the risk versus reward on Remy's close range options is lacking when he isn't sitting on super meter. To compensate for this, you may have no choice but to commit to risky actions in order to open up the window to score big damage in wake up situations.

One of these such options is utilizing Remy's jumping HK as a means to punish throw whiffs. In wake up situations, anticipate when your opponent may attempt to tech a throw, then jump straight up just before they initiate the command. If timed correctly, your opponent's throw will whiff directly under you. Since jumping HK has such a steep downward angle, you can initiate the attack very early in the air to punish the throw whiff. After it connects, it's still possible to link a crouching LK canceled into a Raging Rage Flash for sizable damage.

It's possible to use jump straight up HK in a variety of attack patterns to punish tech throw whiffs. For example:

Options after blocked crouching LK

  • Kara throw directly where you're standing.
  • Jump straight up HK

Options after blocked close standing MP

  • Walk up a step, kara throw.
  • Walk up a step, jump straight up HK
  • Early crouching MP canceled into a LK Light of Virtue

Unfortunately, there are several ways for many characters to avoid this tactic altogether. Chun-li for instance can simply use crouching LP to avoid throws instead of teching, which is far too fast to be punished by jumping HK if it whiffs.

In other cases, players may use a throw teching technique that involves pressing LP + LK while crouching. Although throws cannot be initiated while crouching, your opponent can still tech throws using this command. That bieng the case, if you don't go for a throw, your opponent's character will simply do a stand alone crouching LP, avoiding the recovery heavy throw whiff.

In either of these cases, it's advised to option select crouching MP with a low parry if you anticipate these options (Let the joystick return to neutral, tap down, then press MP). Doing so will scare your opponent into teching throws while standing, allowing you to utilize jump straight up HK once again.

More on Jump Straight Up HK

It's possible to tap forward just as you leave the ground for the jump to cover reversal attempts with a parry. Although this may seem impossible if you want to keep a charge for the crouching LK-->RRF follow up, simply tapping down for a second before you jump will allow you to partition and keep a charge for the follow up combo (Press down for a slightly longer period of time then normal to make sure you don't get a super jump). This is, however, only applicable after crouching LK or a standalone jump.

Additionally, against characters that utilize recovery heavy command throws, such as Makoto, Hugo, or Alex, jumping HK can be done slightly later then normal to punish the throw whiff. Because of the extended hit stun from the later jump attack, it's possible to go for extended combos when near a corner.

Example Combo: Jump straight up, charge down-back, press HK when you start to fall, land, let the joystick return to the neutral position, link close standing MK canceled into a HP LoV (use the motion db, f, db + HP, then continue to hold db), then link crouching LK canceled into a HK Rising Rage Flash once you recover from the projectile.

Although risky, this combo leads to massive damage and a large amount of super meter gain.

Meaty LP Light of Virtue

In wake up situations, Remy's LP Light of Virtue can be thrown on top of your opponent to meet them as they initiate a quick recovery. Although the LP LoV whiffs on most crouching characters, the quick recovery's final recovery frame is much taller then normal, allowing the LoV to hit. Strategically, not only does Remy have frame advantage after an LoV that connects this late, but the projectile itself acts as an effective reversal deterrent.

The better situations to set up a meaty LoV are after any Rising Rage Flash that connects near a corner. In regards to commonly used set ups, land a neutral throw near a corner and juggle with a HK Rising Rage Flash afterwards. Once you recover from the Rising Rage Flash, whiff a crouching MP, then throw a LP LoV when you recover. Assuming your opponent does a quick recovery, the LoV will meet your opponent just as they stand up. Remy recovers well before the LoV is blocked, leaving you with a heavy amount of frame advantage to work with for staging an attack.

Basic options after the blocked LoV

  • Walk up kara throw
  • Walk up close standing MK. If it hits, link into a Supreme Rising Rage Flash.
  • If your opponent parries the LoV, immediately do crouching MP canceled into a LK LoV to beat anything the try afterwards that doesn't have invulnerability.

Moreover, it's possible to increase the options available to you after the blocked LoV by initiating the projectile with this command: charge db, f, db, + LP. This throws the LoV while gathering a small portion of the charge needed for a Rising Rage Flash, allowing you to have the attack available for specific tactics and combos. For example:

After your opponent blocks a meaty LoV

  • Walk up, press down, chain crouching LP x 2. If Crouching LP x 2 hits, press up + HK just as the second LP connects to cancel it into a HK Rising Rage Flash.
  • After you recover from the LoV, let your joystick return to the neutral position. Initiate a Universal Overhead, then immediately start to charge down. If the overhead connects, immediately press up + LK when you recover to link a LK Rising Rage Flash afterwards.

LoV Machinegun

Using charge partitioning, it's possible to loop high and low Light of Virtues back to back without any gaps between each projectile. Although 3rd Strike's projectile rules generally only allow you to have 1 of the same projectile on screen at a time, Remy's High and Low Light of Virtue are considered to be two different projectiles. This simply means that you cannot throw only one type of LoV - you must alternate between Low and High projectiles in order for the technique to work.

Command to initiate the LoV Machinegun:

  1. Charge back and obtain a full charge for a LoV. Once you have a charge, tap forward, then immediately press back then Punch. Continue to hold back after the projectile's release.
  2. Once the first projectile travels about a quarter of its maximum distance, tap forward, then immediately press back + kick to throw a second LoV.
  3. Using the same command (back, forward, back + punch), immediately throw another high LoV as soon as you after you recover from the last. Continue to alternate between high and low LoVs.

Using the LoV Machinegun Effectively

The LoV Machinegun must be initiated at specific distances in order to be effective. The ideal distance is against a cornered opponent at mid-range, just outside of your opponent's maximum attack distance. Moreover, it's best to utilize the trap when your opponent is the most eager to be mobile. This causes them to run into projectiles trying to parry or jump when they should simply be blocking.

However, this technique is not nearly as difficult to counter as some tend to believe. Your opponent needs only to crouch under the high LoV then jump forward to score a free combo on you.

In order for this trap to be air-tight and safe to the parry, LK LoVs must be followed with high EX LoVs. If your opponent attempts to parry the low LoV and jump forward, the EX High LoV will hit them as they leave the ground. If they instead parry the EX High LoV and then attempt to jump forward, react to the parry and simply don't throw the following kick LoV. When you recover, counter their jump accordingly.

Even this technique, however, has a glaring weakness. There's nothing to stop the opposing player from simply blocking your volley of projectiles. They can simply wait you out, watching as you relentlessly blow super meter on something that doesn't lead to guaranteed damage.

For this technique to be effective, you must think of it as a series of pokes. Your opponent can jump during any of the gaps, so anticipate their jump attempts then stop the trap accordingly to counter them. In cases where your opponent is simply blocking, toss in the occasional dash up throw after a blocked or parried LoV to keep your opponent from thinking it's safe to sit. Replace the dash up throw with a EX High LoV when you know your opponent is looking to counter it. The idea is to make them willing to jump or attack, which is exactly the kind of mistakes Remy feeds off of.

LoV Machinegun out of a Dash.

Since the LoV Machinegun trap is only effective in certain positions, it's useful to be able to move around a bit before initiating it. That being the case, it's possible to perform the LoV trap after coming out of a dash. Keep in mind that the example below illustrates how to do this after dashing behind a LK or LP LoV, which is the safest way to move around.

Command to initiate dashing LoV Machinegun:

  1. Charge back and obtain a full charge for a LoV. Once you have a charge, tap forward, then immediately press back then LK. Continue to hold back during the projectile's release.
  2. Once you recover from the LoV, dash forward behind it. Immediately start to charge back again once you initiate the dash.
  3. When you recover from the dash, tap forward, then press back + LP to come out of the dash with a high LoV. Using the same motion, throw alternating LoVs as soon as you recover from the projectile.

Light of Virtue --> Rising Rage Flash

Using the right command, it's possible to immediately initiate a Rising Rage Flash directly after recovering from a Light of Virtue.

Command to store a RRF behind a LoV

  1. Charge down-back and obtain 90% of a charge for a LoV.
  2. Tap forward, then immediately press down-back again. Press any punch button a quarter of a second after hitting down-back to throw the LoV.
  3. When you recover from the projectile, immediately press up + HK to initiate the Rising Rage Flash.


3S Navigation

General
Controls
Notation
HUD
Glossary
System
FAQ
Characters
Akuma
Alex
Chun-Li
Dudley
Elena
Hugo
Ibuki
Ken
Makoto
Q
Necro
Oro
Remy
Ryu
Sean
Twelve
Urien
Yang
Yun
Gill