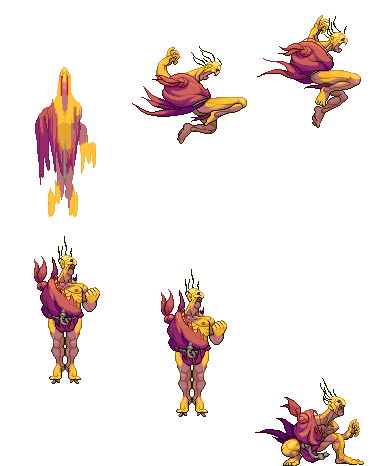
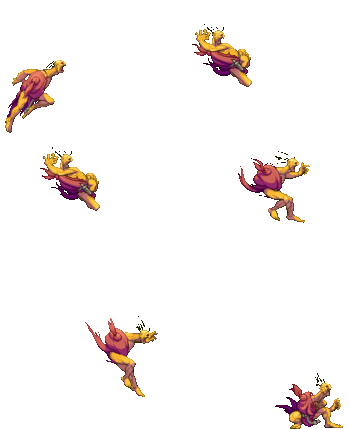
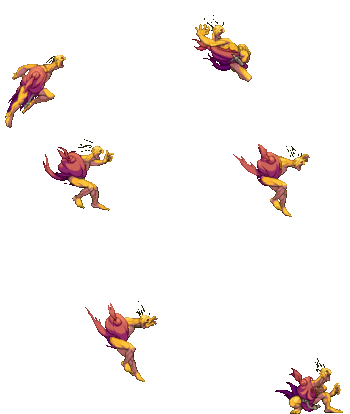
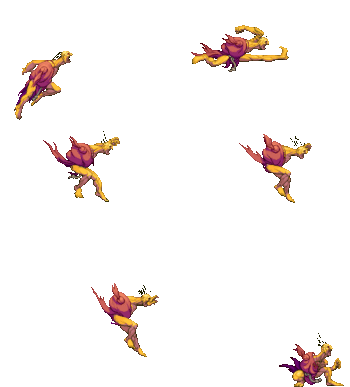
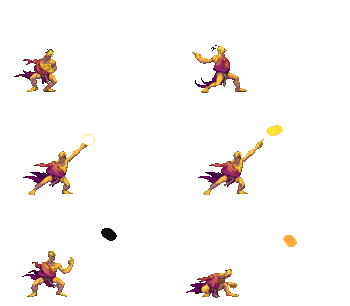
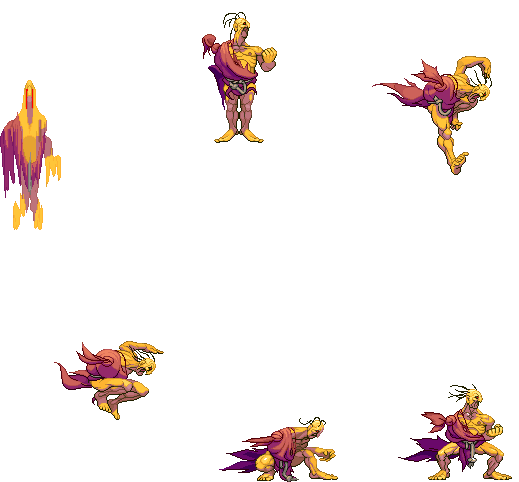
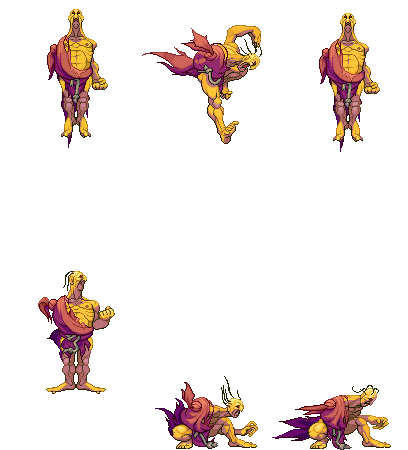
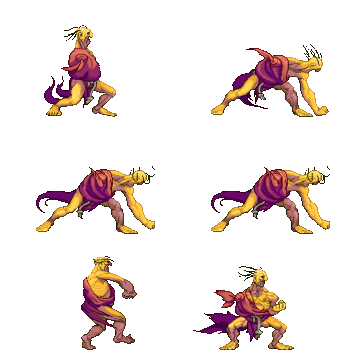
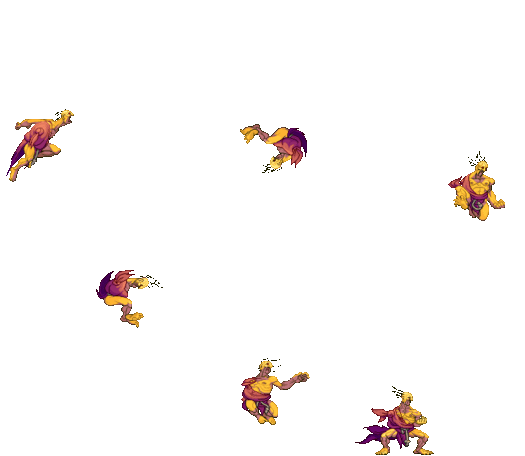
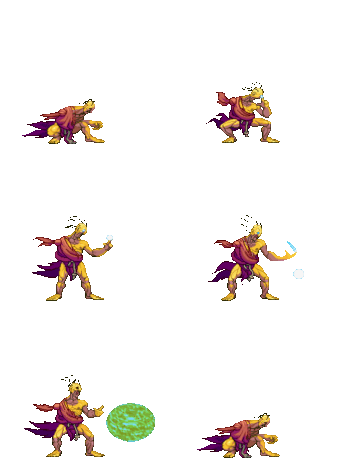
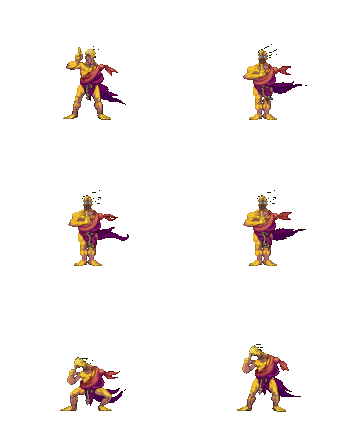
Street Fighter 3: 3rd Strike/Oro

From SuperCombo Wiki

Introduction

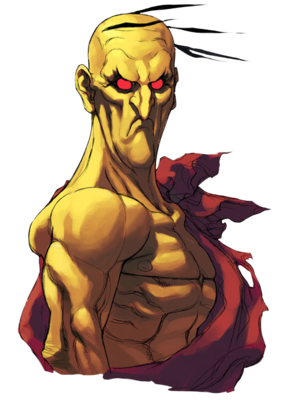
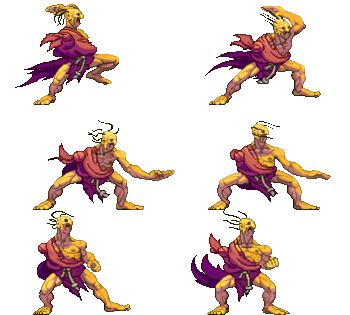
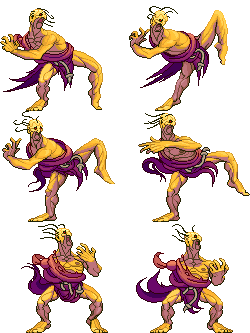
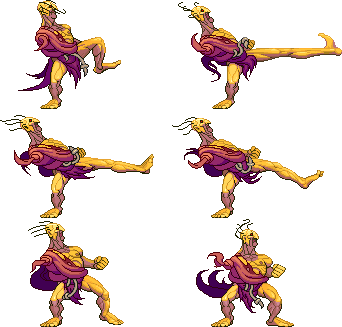
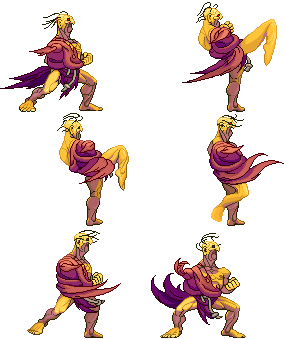
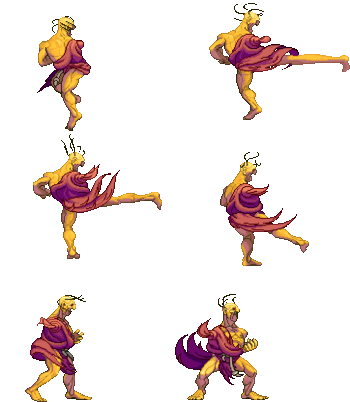
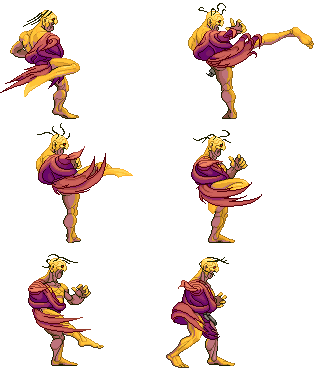
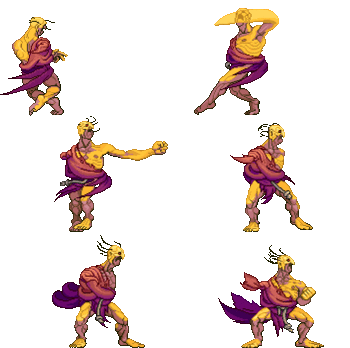
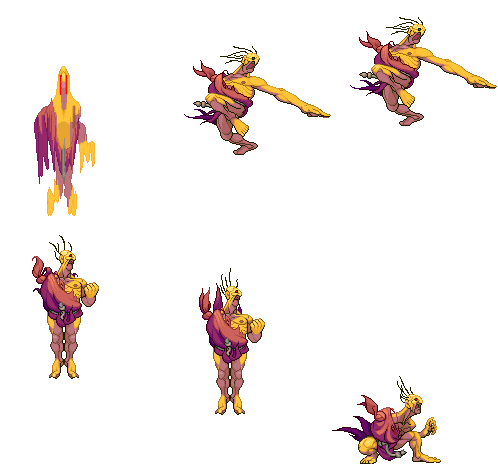
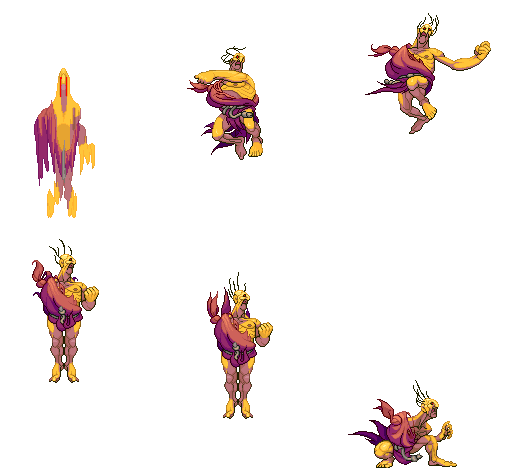
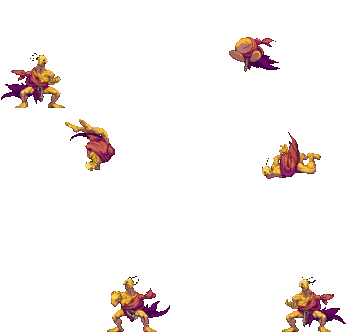
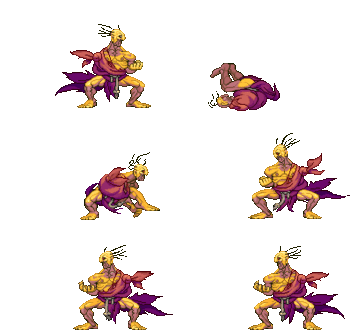
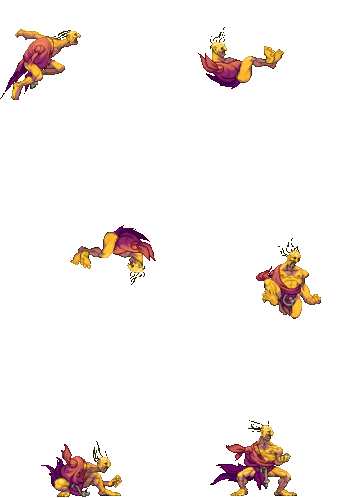
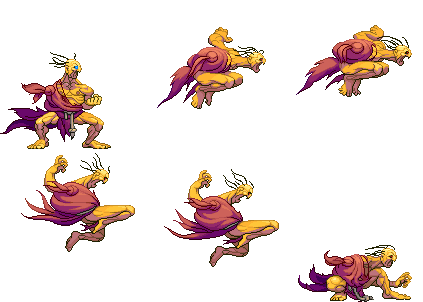
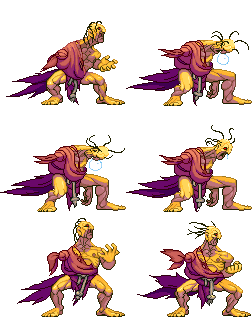
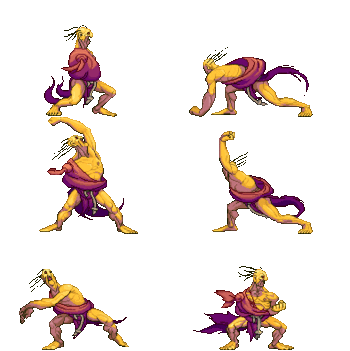
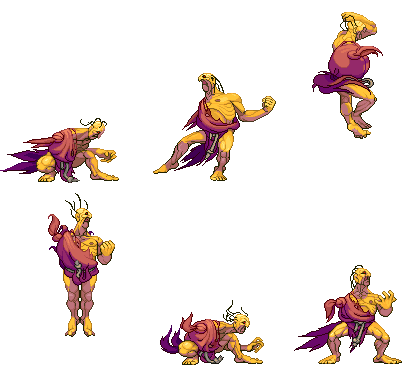
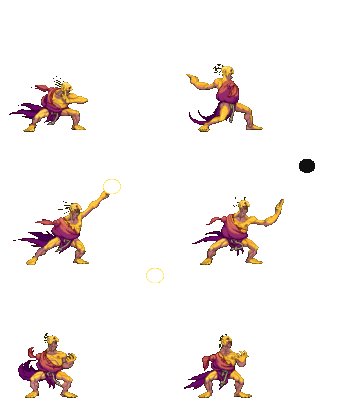
Oro is an ancient old man who has spent so much time mastering martial arts that it has made him immortal, or something. He fights with one arm bound to make his fights more fair for his opponents.

Oro is a highly mobile character with unique movement options and strong grounded pokes. He wants to use his pokes and mobility to maintain distance and frustrate the opponent while building meter. With meter, Oro looks for opportunities to land close MP and activate super to end the round.

While Oro is generally not a very high execution character, his most important combo (the chicken loop) requires different timings against many characters.

Pros and Cons

Strengths Weaknesses
  • Powerful supers: Once Oro has a full meter, any close MP hit becomes a round-ending threat with yagyou unblockables or tengu juggles.
  • Strong pokes: Oro's ground normals range from sufficient to dominating against much of the cast. Standing HK in particular is very fast for a heavy normal and does high stun.
  • Mobility and unique movement: Oro's dashes are fast and cover a lot of distance. His forward dash also shrinks his vertical hurt box, which can cause moves with high hitboxes to miss. Oro is the only character with a double jump. These movement options are key to playing his strong keepaway game and frustrating the opponent.
  • Short and weird: Oro's hurt box can sometimes causes standard combos to drop, forcing opponents to do lower damage or more difficult variations.
  • Slow normal recovery: Many of Oro's important pokes have long recovery, making them whiff punish bait against attentive opponents.
  • Punishable on hit: Two of Oro's best pokes, far MK and 5HK, can be punishable on hit if the opponent has a fast super.
  • Reliance on high pokes: Most of Oro's best pokes are vulnerable to high parry.
  • Whiff punishes and hit confirms: While Oro's grounded normals are generally quite good, he does not convert random hits into damage very well unless he lands close MP.
  • No forward throw: Both of Oro's throws are back throws. If he tries to use throw to open up the opponent, he gives up the corner.

Super Arts

Each of Oro's supers has an EX version, activated by pushing two punch buttons when you activate the super.

SA1: Kishin Riki

Not Recommended

Kishin Riki is Oro's weakest super. It has limited combo potential, provides Oro with limited EX usage, and doesn't do enough to damage to warrant picking it over his other supers.

  • Basic: An install super that replaces Oro's punches, including jumping attacks, with a command grab. Oro can't combo into it without a launch, and because it replaces all punches, combo potential is severely limited once it has been activated. The meter counts down during the attack animation, limiting Oro to at most 3 successful attacks.
  • EX: A grounded command grab that the opponent can jump out of after the super flash. Oro can combo into this super with 2HP xx EX SA3. Does better damage than the basic version, but the long startup limits its effectiveness.

SA2: Yagyou Dama

This is the one with unblockable loops. It is Oro's only super with multiple stocks, so it gives him the most versatility with his rather good EX moves.

  • Basic: Against most of the cast, Oro can confirm a close MP or chicken loop into this super, dash and/or jump to the other side of the opponent for an unblockable, and repeat. Setups vary across the entire cast.
  • EX: Oro flies into the air and uses all three stocks to throw a huge energy ball at the opponent. This actually does a lot of damage if you somehow hit it raw. Generally the damage is not worth it compared to doing an unblockable or going for a corner reset, but you do get a cool win pose if it kills the opponent.

SA3: Tengu Stones

An install super that makes up for the lack of EX meter with the ability do extremely damaging combos, situational unblockables, and pressure the opponent with chip damage. The summoned items sometimes cause strange hit box interactions, but these will usually be in Oro's favor.

  • Basic: Oro summons 3 rocks. The timer counts down slowly and the basic version has limited juggle potential, so this is typically preferred for pressure and chip damage.
  • EX: Oro summons 5 rocks, and the timer counts down quickly. When the rocks hit, they reset the juggle counter. This version enables big, round-ending combos and 100% stun resets.
Oro
3S Oro Art.png
Vitals
Life Points 1120
Stun Points 72
Super Art Stock/Size
SA1 1/104
SA2 3/88
SA3 1/112
Ground Movement
Forward Dash duration/distance 17 (122px)
Back Dash duration/distance 13 (87px)
Jumping
Back Jump duration 43 (5+37+1)
Neutral Jump duration 43 (5+37+1)
Forward Jump duration 43 (5+37+1)
Back Super Jump duration 53 (6+46+1)
Neutral Super Jump duration 53 (6+46+1)
Forward Super Jump duration 53 (6+46+1)
Wake up
Wake up duration 71
Quick rise duration 52
3S Frame Data Glossary
Active

How many frames a move remains active (can hurt opponents) for. Consecutive sets of active frames on a multi-hit move are separated by an asterisk (ex: 3*5). If there is a gap between sets of active frames, the gap is denoted by a number in parentheses (ex: 2(4)2)

Attack

Attack level is L for low attacks (must be blocked crouching), H is for High attacks (which can be blocked high or low) and M for overhead (must be blocked standing). T is for throw attacks (which cannot be blocked).

Cancel options

Available cancel options.

  • "ch": Chain cancel (into itself or another light attack), refer to description for options.
  • "self": Self-only chain cancel. Much more restrictive than a standard chain cancel.
  • "tc": Target combo, refer to description for options. Successive attacks in a target combo may warrant their own move entry.
  • "dash": Grounded dashes.
  • "sj": Super jump.
  • "sp": Special move.
  • "su": Super Art.
Damage

Attack damage on hit in life points. Notation may denote multi-hit or "sweet spot" damage values on certain frames.

Hit/Block

These are frame advantage values when the attack hits or is blocked. If the number is positive, then the move will end before the defender can act again. If the number is negative, the defender will be able to act before the attacker and maybe even punish. D refers to knockdown on hit.

"Cr. Hit" is an additional frame advantage value denoting if the advantage on hit changes when the defender is being hit while crouching.

Kara Range

Almost all normal attacks can be canceled into a special or a multi-button command within three frames of startup. During that time, some attacks will shift position forward or backward and affect the reach of the special or command accordingly. This is denoted in pixels of range. There are a handful of moves in the game that can be kara-canceled after this initial window and will be denoted as a late kara-cancel.

Link

A combo that is performed by inputting the second move after the first move has completely recovered (as opposed to cancelling the first move's animation). In 3S, the final frame of a move's hitstun allows a character to block a normal or special move, as well as some projectile supers. Therefore, an attack's frame advantage must be 2 frames greater than the followup move's startup in order to link. Ex: a +6 normal can link into a 4f normal/special, or a 5f super.

Parry

This field will show a value of A if the attack can be parried standing or crouching, H if it must be parried standing or L if it must be parried crouching.

Recovery

How many frames it takes for a move to finish after it's been active.

Startup

How many frames it takes before the move becomes 'active' or has a hitbox. 3S uses classic startup notation, which does not include the first active frame. A move with 3 startup becomes active on frame 4.

Stun

Amount of stun added to the opponent's stun bar on hit.

Throw range

Range in pixels from the center of the character to the center of the opponent which allows a grab to connect.

Character Colors

(ocolor).gif

Frame Data

Standing Normals

5LP (cl)
Close LP
Lp.png (cl)
(orocloselp).gif
Startup Active Recovery Block Hit Cr. Hit Damage Stun Kara Guard Level Parry Level
2 1 5 +5 +5 +5 6 3 - HL HL
Cancel Options Self Meter Gain Whiff Hit Block / Tech Opponent Meter Gain Hit Block / Tech
sp, su 0 2 1 0 0
  • Good tick throw / frame trap option due to being +5 on block.
  • Still works for "jab jab jab" anti-airs despite not being self-cancelable.
FATonline.png
5LP (far)
Far LP
Lp.png (far)
(orolp).gif
Startup Active Recovery Block Hit Cr. Hit Damage Stun Kara Guard Level Parry Level
4 1 10 0 0 0 5 3 - HL HL
Cancel Options Self Meter Gain Whiff Hit Block / Tech Opponent Meter Gain Hit Block / Tech
sp, su 0 2 1 0 0
FATonline.png
5MP (cl)
Close MP
Mp.png (cl)
(oroclosemp).gif
Startup Active Recovery Block Hit Cr. Hit Damage Stun Kara Guard Level Parry Level
5 4 16 -2 D D 12 9 - HL H
Cancel Options Self Meter Gain Whiff Hit Block / Tech Opponent Meter Gain Hit Block / Tech
sp, su, sj 1 12 8 3 0
  • Can be spaced so it only hits once on block, making it -4.
  • Situational anti-air. Requires specialized followups if only the second hit connects.
  • This is the move Oro really wants to hit you with. It leads into chicken loops, unblockables and Tengu Stone confirms.
FATonline.png
5MP (far)
Far MP
Mp.png (far)
(oromp).gif
Startup Active Recovery Block Hit Cr. Hit Damage Stun Kara Guard Level Parry Level
8 4 12 -2 -1 0 14 11 10 HL H
Cancel Options Self Meter Gain Whiff Hit Block / Tech Opponent Meter Gain Hit Block / Tech
- 1 11 7 3 0
  • Good against characters with low crouching hitboxes like Chun, Elena, and Twins.
FATonline.png
5HP
Stand HP
Hp.png
(orohp).gif
Startup Active Recovery Block Hit Cr. Hit Damage Stun Kara Guard Level Parry Level
17 3 19 -5 -3 -1 22 13 - H*H H*H
Cancel Options Self Meter Gain Whiff Hit Block / Tech Opponent Meter Gain Hit Block / Tech
- 2 18 9 4 0
  • Just fast enough that people still get hit with it sometimes.
  • Good stun damage.
  • Second hit will connect from surprisingly far away.
FATonline.png
5LK (cl)
Close LK
Lk.png (cl)
(orocloselk).gif
Startup Active Recovery Block Hit Cr. Hit Damage Stun Kara Guard Level Parry Level
2 2 4 4 4 4 7 3 - HL HL
Cancel Options Self Meter Gain Whiff Hit Block / Tech Opponent Meter Gain Hit Block / Tech
sp, su, tc 0 2 1 0 0
  • Close anti-air option
  • Tick throw option
  • Cancelable into cl.MK as a target combo
  • Can be used to mash out of pressure due to its 2f startup.
FATonline.png
5LK (far)
Far LK
Lk.png (far)
(orolk).gif
Startup Active Recovery Block Hit Cr. Hit Damage Stun Kara Guard Level Parry Level
3 1 8 2 2 2 6 3 - HL HL
Cancel Options Self Meter Gain Whiff Hit Block / Tech Opponent Meter Gain Hit Block / Tech
sp, su 0 2 1 0 0
  • Good range for a 3f button
  • Moves Oro's lower hurtbox back, so it can dodge lows.
FATonline.png
5MK (cl)
Close MK
Mk.png (cl)
(oroclosemk).gif
Startup Active Recovery Block Hit Cr. Hit Damage Stun Kara Guard Level Parry Level
4 3 15 -5 -4 -3 19 11 10 HL H
Cancel Options Self Meter Gain Whiff Hit Block / Tech Opponent Meter Gain Hit Block / Tech
sp, su 1 11 7 3 0
  • High parry option to combo into hit grab / human pill driver / hcb P.
  • Good proximity range, so this doesn't usually come out when Oro doesn't want it
FATonline.png
5MK (far)
Far MK
Mk.png (far)
(oromk).gif
Startup Active Recovery Block Hit Cr. Hit Damage Stun Kara Guard Level Parry Level
8 6 12 -5 -4 -3 17 13 28 HL H
Cancel Options Self Meter Gain Whiff Hit Block / Tech Opponent Meter Gain Hit Block / Tech
- 1 11 7 3 0
  • Oro's second longest poke. Excellent whiff punish.
  • Great kara range, but finicky to use due to the cl.MK proximity normal.
  • Minus on hit makes it dangerous in some matchups when the opponent has meter.
FATonline.png
5HK
Stand HK
Hk.png
(orohk).gif
Startup Active Recovery Block Hit Cr. Hit Damage Stun Kara Guard Level Parry Level
7 4 17 -5 -3 -1 21 19 14 HL H
Cancel Options Self Meter Gain Whiff Hit Block / Tech Opponent Meter Gain Hit Block / Tech
- 2 20 10 6 0
  • Consistent kara throw option if you're not on it with far MK spacing.
  • Good neutral poke due to hitbox, heavy button priority, and high stun, but it is fairly easy to whiff punish.
  • Minus on hit makes it dangerous in some matchups when the opponent has meter.
FATonline.png


Command Normals

6MP
Mawashihiji
F.png+Mp.png
(orofmp).gif
Startup Active Recovery Block Hit Cr. Hit Damage Stun Kara Guard Level Parry Level
8 2 18 -5 -4 -3 16 13 12 HL H
Cancel Options Self Meter Gain Whiff Hit Block / Tech Opponent Meter Gain Hit Block / Tech
- 1 11 7 3 0
  • Oro's farthest grounded poke. Has some niche whiff punish applications.
FATonline.png


Crouching Normals

2LP
Crouch LP
D.png+Lp.png
(oroclp).gif
Startup Active Recovery Block Hit Cr. Hit Damage Stun Kara Guard Level Parry Level
4 2 9 +1 +1 +1 5 3 - HL HL
Cancel Options Self Meter Gain Whiff Hit Block / Tech Opponent Meter Gain Hit Block / Tech
self, sp, su 0 2 1 0 0
FATonline.png
2MP
Crouch MP
D.png+Mp.png
(orocmp).gif
Startup Active Recovery Block Hit Cr. Hit Damage Stun Kara Guard Level Parry Level
7 6 12 -5 -4 -3 11 3 - HL HL
Cancel Options Self Meter Gain Whiff Hit Block / Tech Opponent Meter Gain Hit Block / Tech
sp, su 1 11 7 3 0
  • Has situational uses, but generally not preferred due to being minus on hit.
FATonline.png
2HP
Crouch HP
D.png+Hp.png
(orochp).gif
Startup Active Recovery Block Hit Cr. Hit Damage Stun Kara Guard Level Parry Level
6 4 18 -2 0 0 21 11 6 HL HL
Cancel Options Self Meter Gain Whiff Hit Block / Tech Opponent Meter Gain Hit Block / Tech
su 2 20 10 6 0
  • Situational anti-air. Covers some jump-ins well, but it's scary because you can't special cancel it into anything if it gets parried.
  • Has some use as a whiff punish generally, but is notably good against Hugo 5MP and Makoto 2MK.
FATonline.png
2LK
Crouch LK
D.png+Lk.png
(oroclk).gif
Startup Active Recovery Block Hit Cr. Hit Damage Stun Kara Guard Level Parry Level
4 2 9 +1 +1 +1 3 3 - L L
Cancel Options Self Meter Gain Whiff Hit Block / Tech Opponent Meter Gain Hit Block / Tech
self, sp, su 0 2 1 0 0
  • Low poke with plus frames on block!
  • Used as a low option to defeat opponents who high parry out of unblockables.
FATonline.png
2MK
Crouch MK
D.png+Mk.png
(orocmk).gif
Startup Active Recovery Block Hit Cr. Hit Damage Stun Kara Guard Level Parry Level
6 4 11 0 +1 +2 14 3 - L L
Cancel Options Self Meter Gain Whiff Hit Block / Tech Opponent Meter Gain Hit Block / Tech
sp, su 1 11 7 3 0
  • A poke that isn't minus on hit!
  • Good counter poke against other lows and many tackle-type moves.
  • Low option that combos into hit-grab / human pillar driver / hcb P.
FATonline.png
2HK
Crouch HK
D.png+Hk.png
(orochk).gif
Startup Active Recovery Block Hit Cr. Hit Damage Stun Kara Guard Level Parry Level
10 2 20 -6 D D 17 3 14 L L
Cancel Options Self Meter Gain Whiff Hit Block / Tech Opponent Meter Gain Hit Block / Tech
- 2 20 10 6 0
  • Fast startup, good recovery, and fairly safe, for a sweep.
  • Useful as a situational poke and as a low option in short block strings.
FATonline.png


Jumping Normals

8LP
Jump LP (Neutral)
U.png+Lp.png
(oronjlp).gif
Startup Active Recovery Block Hit Cr. Hit Damage Stun Kara Guard Level Parry Level
3 12 - - - - 10 5 - H H
Cancel Options Self Meter Gain Whiff Hit Block / Tech Opponent Meter Gain Hit Block / Tech
- - - - - -
FATonline.png
j.LP
Jump LP
Uf.png+Lp.png
(orojlp).gif
Startup Active Recovery Block Hit Cr. Hit Damage Stun Kara Guard Level Parry Level
7 17 - - - - 10 7 - H H
Cancel Options Self Meter Gain Whiff Hit Block / Tech Opponent Meter Gain Hit Block / Tech
- - - - - -
FATonline.png
8MP
Jump MP (Neutral)
U.png+Mp.png
(oronjmp).gif
Startup Active Recovery Block Hit Cr. Hit Damage Stun Kara Guard Level Parry Level
5 6 - - - - 19 9 - H H
Cancel Options Self Meter Gain Whiff Hit Block / Tech Opponent Meter Gain Hit Block / Tech
- 1 11 7 3 0
  • Useful as a neutral poke.
FATonline.png
j.MP
Jump MP
Uf.png+Mp.png
(orojmp).gif
Startup Active Recovery Block Hit Cr. Hit Damage Stun Kara Guard Level Parry Level
10 8 - - - - 17 11 - H H
Cancel Options Self Meter Gain Whiff Hit Block / Tech Opponent Meter Gain Hit Block / Tech
- 1 11 7 3 0
  • Has a lot of startup for a jump-in
FATonline.png
8HP
Jump HP (Neutral)
U.png+Hp.png
(oronjhp).gif
Startup Active Recovery Block Hit Cr. Hit Damage Stun Kara Guard Level Parry Level
7 4 - - - - 24 13 - H H
Cancel Options Self Meter Gain Whiff Hit Block / Tech Opponent Meter Gain Hit Block / Tech
- 2 20 10 6 0
  • Good anti-air, longer range than other options
  • Same damage as neutral jump HK, but less stun
FATonline.png
j.HP
Jump HP
Uf.png+Hp.png
(orojhp).gif
Startup Active Recovery Block Hit Cr. Hit Damage Stun Kara Guard Level Parry Level
9 4 - - - - 23 17 - H H
Cancel Options Self Meter Gain Whiff Hit Block / Tech Opponent Meter Gain Hit Block / Tech
- 2 21 11 6 0
  • Has some use as an air-to-air and jump-in since it has two hits, but can be finicky.
  • Technically his highest stun jump-in, if you can connect with both hits.
FATonline.png
8LK
Jump LK (Neutral)
U.png+Lk.png
(orojlk).gif
Startup Active Recovery Block Hit Cr. Hit Damage Stun Kara Guard Level Parry Level
2 10 - - - - 10 7 - H H
Cancel Options Self Meter Gain Whiff Hit Block / Tech Opponent Meter Gain Hit Block / Tech
- - - - - -
FATonline.png
j.LK
Jump LK
Uf.png+Lk.png
(oronjlk).gif
Startup Active Recovery Block Hit Cr. Hit Damage Stun Kara Guard Level Parry Level
3 13 - - - - 10 5 - H H
Cancel Options Self Meter Gain Whiff Hit Block / Tech Opponent Meter Gain Hit Block / Tech
- - - - - -
FATonline.png
8MK
Jump MK (Neutral)
U.png+Mk.png
(oronjmk).gif
Startup Active Recovery Block Hit Cr. Hit Damage Stun Kara Guard Level Parry Level
4 8 - - - - 19 11 - H H
Cancel Options Self Meter Gain Whiff Hit Block / Tech Opponent Meter Gain Hit Block / Tech
- 1 11 7 3 0
  • Doesn't crossup. :(
FATonline.png
j.MK
Jump MK
Uf.png+Mk.png
(orojmk).gif
Startup Active Recovery Block Hit Cr. Hit Damage Stun Kara Guard Level Parry Level
3 6 - - - - 17 9 - H H
Cancel Options Self Meter Gain Whiff Hit Block / Tech Opponent Meter Gain Hit Block / Tech
- 1 11 7 3 0
  • This is your crossup button. Used in many unblockables.
  • Difficult to combo from due to low hit stun.
  • Can be used as an instant overhead.
FATonline.png
8HK
Jump HK (Neutral)
U.png+Hk.png
(oronjhk).gif
Startup Active Recovery Block Hit Cr. Hit Damage Stun Kara Guard Level Parry Level
5 5 - - - - 24 15 - H H
Cancel Options Self Meter Gain Whiff Hit Block / Tech Opponent Meter Gain Hit Block / Tech
- 2 20 10 6 0
  • Good air-to-air
  • Highest damage jump-in, with good stun damage
  • You want to start jump-in combos with this when possible.
FATonline.png
j.HK
Jump HK
Uf.png+Hk.png
(orojhk).gif
Startup Active Recovery Block Hit Cr. Hit Damage Stun Kara Guard Level Parry Level
5 3 - - - - 21 13 - H H
Cancel Options Self Meter Gain Whiff Hit Block / Tech Opponent Meter Gain Hit Block / Tech
- 2 20 10 6 0
  • Good air-to-air in general, very useful as a jump-back air-to-air in some matchups.
FATonline.png


Target Combos


Throws

LPLK (mash)
Kubishime Kataguruma
Lp.png+Lk.png (mash)
(orokjk).gif
Startup Active Recovery Block Hit Cr. Hit Damage Stun Kara Guard Level Parry Level
2 1 21 - D D 19 22 1 - -
Cancel Options Self Meter Gain Whiff Hit Block / Tech Opponent Meter Gain Hit Block / Tech
- 0 7 0 0 7
  • 24 throw range
  • Very easy for the opponent to mash out of.
  • Has some niche uses in unblockable setups, notably against Chun and Makoto.
FATonline.png
4LPLK
Tomoe Nage
B.png+Lp.png+Lk.png
(orotn).gif
Startup Active Recovery Block Hit Cr. Hit Damage Stun Kara Guard Level Parry Level
2 1 21 - D D 21 14 1 - -
Cancel Options Self Meter Gain Whiff Hit Block / Tech Opponent Meter Gain Hit Block / Tech
- 0 8 0 2 7
  • 24 throw range
  • Good back throw with a ton of corner carry.
FATonline.png
LPLK (air)
Kuuchuu Jigoku Guruma
Lp.png+Lk.png (air)
(orokjg).gif
Startup Active Recovery Block Hit Cr. Hit Damage Stun Kara Guard Level Parry Level
6 1 - -1 D D 32 14 - - -
Cancel Options Self Meter Gain Whiff Hit Block / Tech Opponent Meter Gain Hit Block / Tech
- 0 8 0 2 7
  • 20 throw range
  • When the opponent won't stop air parrying you
  • Does a lot of damage for a throw
  • Can be used if the opponent is parrying out of 2HP xx yagyou corner reset
FATonline.png


Universal Overhead

MPMK
Tobihiza
Mp.png+Mk.png
(orouoh).gif
Startup Active Recovery Block Hit Cr. Hit Damage Stun Kara Guard Level Parry Level
15 10 5 - - - 7 3 - H H
Cancel Options Self Meter Gain Whiff Hit Block / Tech Opponent Meter Gain Hit Block / Tech
- 0 2 1 0 0
  • Oro gets limited use out of this compared to characters that can hit confirm directly into their supers.
  • If it hits meaty enough, Oro can combo into cl.MK or cl.MP for respectable damage.
  • Has some niche uses in funky unblockable mixups.
  • Commonly used for high/low mixups in the corner while EX sun disk locks the opponent down.
  • Can be up to +8 if it hits on the last active frame.
FATonline.png


Taunt

HPHK
Sleep
Hp.png+Hk.png
(orot).gif
Startup Active Recovery Block Hit Cr. Hit Damage Stun Kara Guard Level Parry Level
- - - - - - - - - - -
Cancel Options Self Meter Gain Whiff Hit Block / Tech Opponent Meter Gain Hit Block / Tech
- - - - - -
  • Recovers stun by 600-800% faster as the taunt is held longer.
FATonline.png


Special Moves

63214P
Nioh Riki
Human Pillar Driver
Hcb.png+P.png
(orohpd).gif
Lp.png/Mp.png/Hp.png
LP Startup Active Recovery Block Hit Cr. Hit Damage Stun Kara Guard Level Parry Level
9 2 29 -15 - - 24 19 - HL -
Cancel Options Self Meter Gain Whiff Hit Block / Tech Opponent Meter Gain Hit Block / Tech
- 1 11 0 2 0
  • Has some niche punish applications, notably against Urien's LK chariot tackle.
  • This is like a 12f "confirm" from cl.MK
FATonline.png


MP Startup Active Recovery Block Hit Cr. Hit Damage Stun Kara Guard Level Parry Level
10 2 29 -15 - - 27 19 - HL -
Cancel Options Self Meter Gain Whiff Hit Block / Tech Opponent Meter Gain Hit Block / Tech
- 1 11 0 2 0
FATonline.png


HP Startup Active Recovery Block Hit Cr. Hit Damage Stun Kara Guard Level Parry Level
11 2 29 -15 - - 31 19 - HL -
Cancel Options Self Meter Gain Whiff Hit Block / Tech Opponent Meter Gain Hit Block / Tech
- 1 11 0 2 0
  • This is the one to use in combos, since it does the most damage.

This is Oro's hit-grab. Hit-grabs cannot be parried. All versions have 62 throw range, are -15 on block, and cause an untechable knockdown.

FATonline.png
28P
Oni Yanma (Ogre Dragonfly)
(hold) D.png~U.png+P.png
(orooniyama).gif
Lp.png/Mp.png/Hp.png
(orooyex).gif
Ex.png
LP Startup Active Recovery Block Hit Cr. Hit Damage Stun Kara Guard Level Parry Level
6 10 -29 -34 - - 24 15 - HL HL
Cancel Options Self Meter Gain Whiff Hit Block / Tech Opponent Meter Gain Hit Block / Tech
su 3 21 15 6 0
  • 1-6f upper body and throw invulnerable
  • Sometimes useful as an anti-air, since it travels forward less than other versions.
FATonline.png


MP Startup Active Recovery Block Hit Cr. Hit Damage Stun Kara Guard Level Parry Level
6 17 -30 -42 - - 28 15 - HL HL
Cancel Options Self Meter Gain Whiff Hit Block / Tech Opponent Meter Gain Hit Block / Tech
su 3 21 15 6 0
  • 1-6f upper body and throw invulnerable
  • Usually max damage ender for chicken loop combos
FATonline.png


HP Startup Active Recovery Block Hit Cr. Hit Damage Stun Kara Guard Level Parry Level
7 23 -33 -50 - - 31 21 - HL HL
Cancel Options Self Meter Gain Whiff Hit Block / Tech Opponent Meter Gain Hit Block / Tech
su 3 22 17 6 0
  • 1-7f upper body and throw invulnerable
FATonline.png


EX Startup Active Recovery Block Hit Cr. Hit Damage Stun Kara Guard Level Parry Level
5 25 -43 -60 - - 35 21 - HL HL
Cancel Options Self Meter Gain Whiff Hit Block / Tech Opponent Meter Gain Hit Block / Tech
su -40 -40 -40 0 0
  • Fully invincible 1-7f
  • Used in Inoue 100% stun setups with yagyou

Different versions of oniyanma have a variety of uses in different combo routes. It has slow startup for an uppercut, but good invincibility frames and hitboxes. EX version is fully invincible through the first 2 active frames. If Oro holds down during landing recovery, he will be considered crouching on recovery. He will take crouching damage if the opponent punishes him.

FATonline.png
46P
Nichirin Shou
Sun Disk Palm
(hold) B.png~F.png+P.png
(orosdp).gif
Lp.png
(orosdpm).gif
Mp.png
(orosdph).gif
Hp.png
(orosdp2ex).gif
(hold) B.png~F.png+P.pngP.png (low)
(orosdp1ex).gif
Ex.png
LP Startup Active Recovery Block Hit Cr. Hit Damage Stun Kara Guard Level Parry Level
15 - 27 -6 - - 8 7 - HL H
Cancel Options Self Meter Gain Whiff Hit Block / Tech Opponent Meter Gain Hit Block / Tech
su 0 2 1 0 0

Single-hit fireball that travels horizontally across the entire screen.

FATonline.png


MP Startup Active Recovery Block Hit Cr. Hit Damage Stun Kara Guard Level Parry Level
15 - 25 -4 - - 8 7 - HL H
Cancel Options Self Meter Gain Whiff Hit Block / Tech Opponent Meter Gain Hit Block / Tech
su 0 2 1 0 0

Single-hit fireball that travels upward at a 30 degree angle.

FATonline.png


HP Startup Active Recovery Block Hit Cr. Hit Damage Stun Kara Guard Level Parry Level
13 - 23 -2 - - 10 11 - HL H
Cancel Options Self Meter Gain Whiff Hit Block / Tech Opponent Meter Gain Hit Block / Tech
su 0 2 1 0 0

Single-hit fireball that travels upward at a 45 degree angle.

FATonline.png


EX (low) Startup Active Recovery Block Hit Cr. Hit Damage Stun Kara Guard Level Parry Level
15 - 27 1 - - 16 13 - HL H
Cancel Options Self Meter Gain Whiff Hit Block / Tech Opponent Meter Gain Hit Block / Tech
su -40 -40 -40 0 0

Two-hit fireball that begins travel horizontally, then tracks the opponent's position.

FATonline.png


EX (high) Startup Active Recovery Block Hit Cr. Hit Damage Stun Kara Guard Level Parry Level
21 - 37 - - - 16 13 - HL H
Cancel Options Self Meter Gain Whiff Hit Block / Tech Opponent Meter Gain Hit Block / Tech
su -40 -40 -40 0 0

Two-hit fireball that begins travel upwards at a 45-degree angle, then tracks the opponent's position.

There's no way for Oro to choose the high or low EX version. It depends on the opponent's position, but is typically triggered at close range.

FATonline.png
236K
Jinchuu Watari
Human Pillar Ferry
Qcf.png+K.png
(orojn).gif
Lk.png/Mk.png/Hk.png
(orojnex).gif
(oroajn).gif
(oroajnex).gif
Ex.png
LK Startup Active Recovery Block Hit Cr. Hit Damage Stun Kara Guard Level Parry Level
27 6 19 16 - - 16 9 - H H
Cancel Options Self Meter Gain Whiff Hit Block / Tech Opponent Meter Gain Hit Block / Tech
- 3 22 16 6 0
  • Useful in some character specific combos, such as LK chicken loop on Chun
FATonline.png


MK Startup Active Recovery Block Hit Cr. Hit Damage Stun Kara Guard Level Parry Level
31 6 17 16 - - 20 9 - H H
Cancel Options Self Meter Gain Whiff Hit Block / Tech Opponent Meter Gain Hit Block / Tech
- 3 22 16 6 0
  • MK is the version used for most chicken loops.
FATonline.png


HK Startup Active Recovery Block Hit Cr. Hit Damage Stun Kara Guard Level Parry Level
34 6 16 16 - - 22 9 - H H
Cancel Options Self Meter Gain Whiff Hit Block / Tech Opponent Meter Gain Hit Block / Tech
- 3 22 16 6 0
  • Situational combo use, such as un-cornering Urien during chicken loop.
FATonline.png


EX Startup Active Recovery Block Hit Cr. Hit Damage Stun Kara Guard Level Parry Level
31 12 16 16 - - 34 13 - H H
Cancel Options Self Meter Gain Whiff Hit Block / Tech Opponent Meter Gain Hit Block / Tech
- -40 -40 -40 0 0
  • On-reaction punish to most fireballs.
FATonline.png


Air Startup Active Recovery Block Hit Cr. Hit Damage Stun Kara Guard Level Parry Level
8 6 29 -19 - - 19 9 - H H
Cancel Options Self Meter Gain Whiff Hit Block / Tech Opponent Meter Gain Hit Block / Tech
- 6 27 10 6 0
FATonline.png


EX (Air) Startup Active Recovery Block Hit Cr. Hit Damage Stun Kara Guard Level Parry Level
8 7 30 -20 - - 22 9 - H H
Cancel Options Self Meter Gain Whiff Hit Block / Tech Opponent Meter Gain Hit Block / Tech
- -40 -40 -40 0 0
  • All grounded versions are airborne (air reset state), lower body invulnerable, and ground throw invulnerable from frame 1.
  • If this hits "above the waist," then Oro can mash for extra hits. The exact height seems to be character specific.


Commonly referred to in English as "chicken kicks" or "chicken wing." Ground versions are used in the chicken loop. Air version can be TK'd for an unreactable, but dangerous, mixup with 2MK. A common okizeme tactic is extremely late meaty jump-in chicken kick versus empty jump throw. If the opponent blocks the chicken kick, Oro is still +4 if he hits the chicken kick as late as possible.

FATonline.png

Super Arts

236236P (SA1)
Kishin Riki
Qcf.pngQcf.png+P.png > P.png (ground)
(orosa1).gif
(oroairsa1).gif
Qcf.pngQcf.png+P.png > U.png / Uf.png P.png
(orosa1pp).gif
Qcf.pngQcf.png+3p.png (EX SA1)
Normal Startup Active Recovery Block Hit Cr. Hit Damage Stun Kara Guard Level Parry Level
4 1 18 - - - 58 - - - -
Cancel Options Self Meter Gain Whiff Hit Block / Tech Opponent Meter Gain Hit Block / Tech
- - - - - -
  • 28 throw range
  • Despite sharing an animation with his hit-grab, this functions as a command grab, so you can't block it.
FATonline.png
Air Startup Active Recovery Block Hit Cr. Hit Damage Stun Kara Guard Level Parry Level
5 4 - - - - 52 - - - -
Cancel Options Self Meter Gain Whiff Hit Block / Tech Opponent Meter Gain Hit Block / Tech
- - - - - -
  • 42 throw range
  • Oro can combo into this from a cl.MP launch
FATonline.png


EX Startup Active Recovery Block Hit Cr. Hit Damage Stun Kara Guard Level Parry Level
12 1 25 - - - 71 - - - -
Cancel Options Self Meter Gain Whiff Hit Block / Tech Opponent Meter Gain Hit Block / Tech
- - - - - -
  • This is a command grab, so the only way to avoid it is to jump, do something that makes you throw invulnerable, or be out of range.
  • Has startup after the flash, so the opponent can just hold up during the flash if they aren't in some kind of recovery frames.
  • 37 throw range
FATonline.png
236236P (SA2)
Yagyou Dama
Qcf.pngQcf.png+P.png (SA2)
(orosa2).gif
236236P (SA2)
(orosa2pp).gif
Ex.png
Normal Startup Active Recovery Block Hit Cr. Hit Damage Stun Kara Guard Level Parry Level
28 21 - - - - 33 9 - HL HL
Cancel Options Self Meter Gain Whiff Hit Block / Tech Opponent Meter Gain Hit Block / Tech
- - - - - -
  • Can be activated with LP / MP / HP. Each strength travels at a different angle.
  • LP stays flat, but travels the farthest horizontally.
  • MP travels upwards, but doesn't move as far horizontally.
  • HP travels upwards at a steeper angle, and moves the shortest distance horizontally.
FATonline.png


EX Startup Active Recovery Block Hit Cr. Hit Damage Stun Kara Guard Level Parry Level
27 52 - - - - 96 19 - HL HL
Cancel Options Self Meter Gain Whiff Hit Block / Tech Opponent Meter Gain Hit Block / Tech
- - - - - -
  • It looks really cool, and you get a unique win pose if you win the round with it.
  • Has strange projectile properties that make the parry mashable.
  • Costs too much meter, and is not particularly useful compared to the standard version.
FATonline.png
236236P (SA3)
Tengu Stones
Qcf.pngQcf.png+P.png (SA3)
(orosa3).gif
236236P (SA3)
Normal Startup Active Recovery Block Hit Cr. Hit Damage Stun Kara Guard Level Parry Level
17 - - - - - - - - - -
Cancel Options Self Meter Gain Whiff Hit Block / Tech Opponent Meter Gain Hit Block / Tech
- - - - - -
  • Typically this is the one you'll use to meaty / chip someone after a knockdown.
FATonline.png


EX Startup Active Recovery Block Hit Cr. Hit Damage Stun Kara Guard Level Parry Level
17 - - - - - - - - - -
Cancel Options Self Meter Gain Whiff Hit Block / Tech Opponent Meter Gain Hit Block / Tech
- - - - - -
  • This is the one you'll use for big damage after a hit confirm.
  • Hitting the opponent with the actual rocks / stones / trash resets the juggle counter.
FATonline.png

3S Navigation

General
Controls
Notation
HUD
Glossary
System
FAQ
Characters
Akuma
Alex
Chun-Li
Dudley
Elena
Hugo
Ibuki
Ken
Makoto
Q
Necro
Oro
Remy
Ryu
Sean
Twelve
Urien
Yang
Yun
Gill