mNo edit summary |
|||
| Line 37: | Line 37: | ||
|align="center"| 3/4/5 | |align="center"| 3/4/5 | ||
|align="center"| +3/+1 | |align="center"| +3/+1 | ||
|align="center"| | |align="center"| C | ||
|align="center"| HL | |align="center"| HL | ||
|colspan="3" | [[image:Choi98_clA.png|center]] | |colspan="3" | [[image:Choi98_clA.png|center]] | ||
| Line 45: | Line 45: | ||
|align="center"| 3/4/5 | |align="center"| 3/4/5 | ||
|align="center"| +3/+1 | |align="center"| +3/+1 | ||
|align="center"| | |align="center"| C | ||
|align="center"| HL | |align="center"| HL | ||
|colspan="3" | [[image:Choi98_clB.png|center]] | |colspan="3" | [[image:Choi98_clB.png|center]] | ||
| Line 53: | Line 53: | ||
|align="center"| 7/8/16 | |align="center"| 7/8/16 | ||
|align="center"| -4/-6 | |align="center"| -4/-6 | ||
|align="center"| | |align="center"| - | ||
|align="center"| HL | |align="center"| HL | ||
|colspan="3" | [[image:Choi98_clC.png|center]] | |colspan="3" | [[image:Choi98_clC.png|center]] | ||
| Line 61: | Line 61: | ||
|align="center"| 6/6/18 | |align="center"| 6/6/18 | ||
|align="center"| -4/-6 | |align="center"| -4/-6 | ||
|align="center"| | |align="center"| - | ||
|align="center"| HL | |align="center"| HL | ||
|colspan="3"| [[image:Choi98_stD.png|center]] | |colspan="3"| [[image:Choi98_stD.png|center]] | ||
| Line 71: | Line 71: | ||
|align="center"| 3/4/5 | |align="center"| 3/4/5 | ||
|align="center"| +3/+1 | |align="center"| +3/+1 | ||
| | |align="center"| C | ||
|align="center"| HL | |align="center"| HL | ||
|colspan="3" | [[image:Choi98_stA.png|center]] | |colspan="3" | [[image:Choi98_stA.png|center]] | ||
| Line 79: | Line 79: | ||
|align="center"| 5/4/7 | |align="center"| 5/4/7 | ||
|align="center"| +1/-1 | |align="center"| +1/-1 | ||
| | |align="center"| C | ||
|align="center"| HL | |align="center"| HL | ||
|colspan="3" | [[image:Choi98_stB.png|center]] | |colspan="3" | [[image:Choi98_stB.png|center]] | ||
| Line 87: | Line 87: | ||
|align="center"| 10/3/16 | |align="center"| 10/3/16 | ||
|align="center"| +1/-1 | |align="center"| +1/-1 | ||
| | |align="center"| - | ||
|align="center"| HL | |align="center"| HL | ||
|colspan="3" | [[image:Choi98_stC.png|center]] | |colspan="3" | [[image:Choi98_stC.png|center]] | ||
| Line 95: | Line 95: | ||
|align="center"| 6/9/15 | |align="center"| 6/9/15 | ||
|align="center"| -4/-6 | |align="center"| -4/-6 | ||
| | |align="center"| - | ||
|align="center"| HL | |align="center"| HL | ||
|colspan="3"| [[image:Choi98_stD.png|center]] | |colspan="3"| [[image:Choi98_stD.png|center]] | ||
| Line 103: | Line 103: | ||
|align="center"| 14/7/24 | |align="center"| 14/7/24 | ||
|align="center"| KD/-9 | |align="center"| KD/-9 | ||
|align="center"| | |align="center"| S | ||
|align="center"| HL | |align="center"| HL | ||
|colspan="3"| [[image:Choi98_stCD.png|center]] | |colspan="3"| [[image:Choi98_stCD.png|center]] | ||
| Line 113: | Line 113: | ||
|align="center"| 3/4/5 | |align="center"| 3/4/5 | ||
|align="center"| +3/+1 | |align="center"| +3/+1 | ||
|align="center"| | |align="center"| C | ||
|align="center"| HL | |align="center"| HL | ||
|colspan="3" | [[image:Choi98_crA.png|center]] | |colspan="3" | [[image:Choi98_crA.png|center]] | ||
| Line 121: | Line 121: | ||
|align="center"| 3/4/5 | |align="center"| 3/4/5 | ||
|align="center"| +3/+1 | |align="center"| +3/+1 | ||
|align="center"| | |align="center"| - | ||
|align="center"| L | |align="center"| L | ||
|colspan="3" | [[image:Choi98_crB.png|center]] | |colspan="3" | [[image:Choi98_crB.png|center]] | ||
| Line 129: | Line 129: | ||
|align="center"| 8/7/11 | |align="center"| 8/7/11 | ||
|align="center"| +2/0 | |align="center"| +2/0 | ||
|align="center"| | |align="center"| C | ||
|align="center"| HL | |align="center"| HL | ||
|colspan="3" | [[image:Choi98_crC.png|center]] | |colspan="3" | [[image:Choi98_crC.png|center]] | ||
| Line 137: | Line 137: | ||
|align="center"| 6/9/15 | |align="center"| 6/9/15 | ||
|align="center"| KD/-6 | |align="center"| KD/-6 | ||
|align="center"| | |align="center"| - | ||
|align="center"| L | |align="center"| L | ||
|colspan="3" | [[image:Choi98_crD.png|center]] | |colspan="3" | [[image:Choi98_crD.png|center]] | ||
| Line 147: | Line 147: | ||
|align="center"| 4/5 | |align="center"| 4/5 | ||
|align="center"| -/- | |align="center"| -/- | ||
| | |align="center"| - | ||
|align="center"| H | |align="center"| H | ||
|colspan="3" | [[image:Choi98_jA.png|center]] | |colspan="3" | [[image:Choi98_jA.png|center]] | ||
| Line 155: | Line 155: | ||
|align="center"| 6/7 | |align="center"| 6/7 | ||
|align="center"| -/- | |align="center"| -/- | ||
| | |align="center"| - | ||
|align="center"| H | |align="center"| H | ||
|colspan="3" | [[image:Choi98_jB.png|center]] | |colspan="3" | [[image:Choi98_jB.png|center]] | ||
| Line 163: | Line 163: | ||
|align="center"| 4/4+4+4 | |align="center"| 4/4+4+4 | ||
|align="center"| -/- | |align="center"| -/- | ||
| | |align="center"| C/C/C | ||
|align="center"| H | |align="center"| H/H/H | ||
|valign="bottom" style="border-right:0px;"| [[image:Choi98_jC1.png|center]] | |valign="bottom" style="border-right:0px;"| [[image:Choi98_jC1.png|center]] | ||
|valign="bottom" style="border-right:0px; border-left:0px;"| [[image:Choi98_jC2.png|center]] | |valign="bottom" style="border-right:0px; border-left:0px;"| [[image:Choi98_jC2.png|center]] | ||
| Line 173: | Line 173: | ||
|align="center"| 8/9 | |align="center"| 8/9 | ||
|align="center"| -/- | |align="center"| -/- | ||
| | |align="center"| - | ||
|align="center"| H | |align="center"| H | ||
|colspan="3"| [[image:Choi98_jD.png|center]] | |colspan="3"| [[image:Choi98_jD.png|center]] | ||
| Line 181: | Line 181: | ||
|align="center"| 7/5 | |align="center"| 7/5 | ||
|align="center"| KD/- | |align="center"| KD/- | ||
| | |align="center"| S | ||
|align="center"| HL | |align="center"| HL | ||
|colspan="3"| [[image:Choi98_jCD.png|center]] | |colspan="3"| [[image:Choi98_jCD.png|center]] | ||
| Line 191: | Line 191: | ||
|align="center"| 6/7 | |align="center"| 6/7 | ||
|align="center"| -/- | |align="center"| -/- | ||
| | |align="center"| - | ||
|align="center"| H | |align="center"| H | ||
|colspan="3" | [[image:Choi98_njC.png|center]] | |colspan="3" | [[image:Choi98_njC.png|center]] | ||
| Line 199: | Line 199: | ||
|align="center"| 7/6 | |align="center"| 7/6 | ||
|align="center"| -/- | |align="center"| -/- | ||
| | |align="center"| - | ||
|align="center"| H | |align="center"| H | ||
|colspan="3" | [[image:Choi98_njD.png|center]] | |colspan="3" | [[image:Choi98_njD.png|center]] | ||
| Line 209: | Line 209: | ||
|align="center"| 37/5(8)9/11 | |align="center"| 37/5(8)9/11 | ||
|align="center"| 0/-2 | |align="center"| 0/-2 | ||
|align="center"| | |align="center"| -/S | ||
|align="center"| | |align="center"| HL/HL | ||
|valign="bottom" style="border-right:0px;"| [[image:Choi98_fA1.png|center]] | |valign="bottom" style="border-right:0px;"| [[image:Choi98_fA1.png|center]] | ||
|colspan="2" valign="bottom" style="border-left:0px;"| [[image:Choi98_fA2.png|center]] | |colspan="2" valign="bottom" style="border-left:0px;"| [[image:Choi98_fA2.png|center]] | ||
| Line 218: | Line 218: | ||
|align="center"| 17/2/11 | |align="center"| 17/2/11 | ||
|align="center"| +7/+5 | |align="center"| +7/+5 | ||
|align="center"| | |align="center"| - | ||
|align="center"| | |align="center"| HL | ||
|colspan="3"| [[image:Choi98_fB.png|center]] | |colspan="3"| [[image:Choi98_fB.png|center]] | ||
| | | | ||
Revision as of 19:59, 7 May 2018
Introduction
srsly who wants to play this lamer?
Colors

|

|

|

|
Gameplay Overview
be annoying
In-depth Analysis
Movelist
Normal Throws
b or f + C -
b or f + D -
Normal Moves
Standing A -
Standing B -
Close C -
Crouching A - Cancel into super
Crouching B - Use this to combo into ^ so you can cancel into super
Crouching C -
Jumping C - Use this
Command Normals
f + B - sometimes do this
f + A -
Special Moves
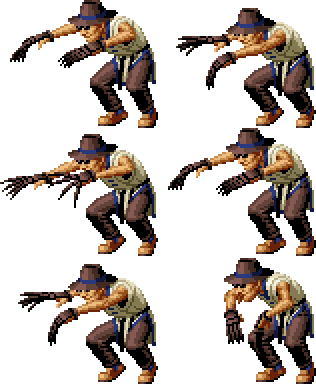
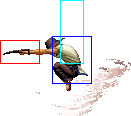
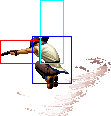
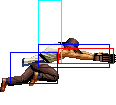
Shissou Hishou Zan (Charge b, f + P) - Choi dashes to right in front of the opponent, and finishes the job with his claws. It leaves you excessively open, making it extremely hard to use.
Senpuu Hien Sashi (Charge b, f + K) - Mechanism is the same as that from Hishō Kūretsuzan; see description there.
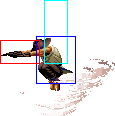
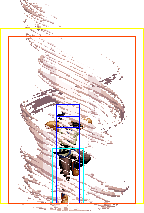
Tatsumaki Shippuu Zan (Charge d, u + P) - Either version is useful for combos and countering.
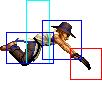
Hishou Kuuretsu Zan (Charge d, ub~uf + K, hold K to attack) - Do a lot of this, If you perform the command to the ub or u directions, he will head for the edge of the screen behind him; otherwise (uf), he will head for the edge of the screen behind the opponent; he then (if you are still holding the button) triangle jumps diagonally downward for the weak version or horizontally for the strong version. It’s generally okay to use this just to get to the edge of the screen quickly.
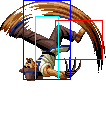
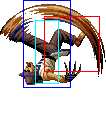
Kaiten Hien Zan (qcb + P) - Choi rolls up and spins, thereby slashing the opponent multiple times. It has nearly full-body invincibility on startup. After it hits or is blocked, the weak version jumps forward, and the strong version jumps backward. During this jump-off, it is now possible to cancel into Hishōkyaku, but just like later KOF’s, it can’t be done immediately (i.e., no combo); it becomes possible at the apex of his jump. Although Hishōkyaku has been weakened, it is generally a good follow-up (because otherwise you’re just floating there...).
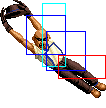
Hishou Kyaku (In air, qcf + K) - Do this sometimes and sometimes from canceling j.C
Desperation Moves
Shin! Chouzetsu T. Shinkuu Zan (hcb x 2 + P) -
Hou'ou Kyaku (qcf, hcb + K) - Do this a lot from hit confirms
Combos
- crossup j.C > cr.B >> cr.A >> strong Tatsumaki Shippūzan or weak Hōōkyaku
- crossup j.C > cl.C >> Toorima Geri > (st.A >>) weak Hōōkyaku
- Hishō Kūretsuzan or Senpū Hien Shitotsu (midair hit) > Hōkō Tenkan > follow-up
- Nidanzan (2 hit) >> juggler
