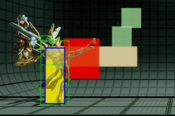
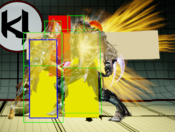
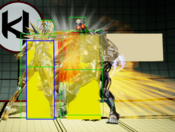
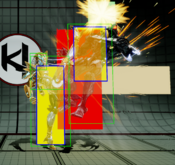
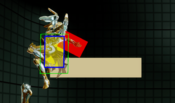
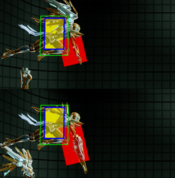
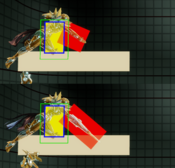
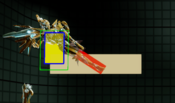
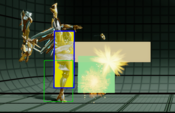
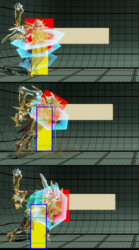
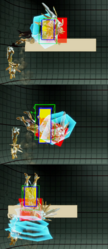
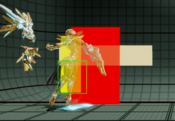
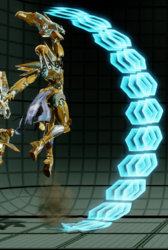
(Aria Jumping Normals) |
|||
| (37 intermediate revisions by 2 users not shown) | |||
| Line 24: | Line 24: | ||
=== Far Normals === | === Far Normals === | ||
{{MoveData | {{MoveData | ||
|image= | |image= Aria SLPhb.png|thumb | ||
|caption= Test Caption | |caption= Test Caption | ||
|name= Standing Light Punch | |name= Standing Light Punch | ||
| Line 31: | Line 31: | ||
|data= | |data= | ||
{{AttackData-KI2013 | {{AttackData-KI2013 | ||
|damage= 8(2%) | |damage= 8 (2%) | ||
|counter-hit damage= 12(3%) | |counter-hit damage= 12 (3%) | ||
|potential damage= -- | |potential damage= -- | ||
|shadow on hit= 1.6% | |shadow on hit= 1.6% | ||
| Line 45: | Line 45: | ||
|on block= +1 | |on block= +1 | ||
|special properties= Chain | |special properties= Chain | ||
|description= | |description= ARIA's stand jab is 5 frame attack that serves as a key light attack on offense and defense | ||
* Has a hitbox with a lot of depth for a stand jab. ARIA 5LP will hit every character crouching but some low profile attacks can sneak under. | |||
* 5LP plays a pivotal role in Defense with ARIA as it is her 5 frame with the longest range. Mashing 5LP will out of blockstun will hit attackers doing loose frame traps at more ranges than her other candidate 5f normals (2LK which has short range and 2LP which has short range on its first active frame) | |||
* As a part of ARIA's offense, it is a relatively big 5 frame that has more range and active frames than 2LK/2LP and recovers slightly quicker than those normals as well. ARIA can use this for SF4 backdash OS meaties. | |||
}} | }} | ||
}} | }} | ||
| Line 51: | Line 54: | ||
{{MoveData | {{MoveData | ||
|image= | |image= Aria SMPhb2.png|thumb | ||
|caption= | |caption= 85% of Orchid's 5MP 2/3 of the time, 120% the other 1/3 | ||
|name= Far Standing Medium Punch | |name= Far Standing Medium Punch | ||
|linkname= 5MP | |linkname= 5MP | ||
| Line 58: | Line 61: | ||
|data= | |data= | ||
{{AttackData-KI2013 | {{AttackData-KI2013 | ||
|damage= 20(5%) | |damage= 20 (5%) | ||
|counter-hit damage= 26(7%) | |counter-hit damage= 26 (7%) | ||
|potential damage= -- | |potential damage= -- | ||
|shadow on hit= 2.4% | |shadow on hit= 2.4% | ||
| Line 72: | Line 75: | ||
|on block= -2 | |on block= -2 | ||
|special properties= None | |special properties= None | ||
|description= | |description= Serviceable mid range poke in BASS body and BOOST body. Absurd footsie normal is BLADE body | ||
* The best quality of the standard far 5MP is that it is the ARIA poke that has the least chance of immediately losing neutral when used at the wrong time due to its 26 frame total duration. Opponents will have a tough time whiff punishing this move compared to the very committal MK normals (both 37 frames total duration)and ARIAs far 5HP (40 frames) | |||
}} | |||
}} | }} | ||
{{MoveData | {{MoveData | ||
|image= | |image= Aria SHPhb2.png|thumb | ||
|caption= Test Caption | |caption= Test Caption | ||
|name= Far Standing Heavy Punch | |name= Far Standing Heavy Punch | ||
| Line 85: | Line 89: | ||
|data= | |data= | ||
{{AttackData-KI2013 | {{AttackData-KI2013 | ||
|damage= 30(8%) | |damage= 30 (8%) | ||
|counter-hit damage= 38(10%) | |counter-hit damage= 38 (10%) | ||
|potential damage= -- | |potential damage= -- | ||
|shadow on hit= 4% | |shadow on hit= 4% | ||
| Line 105: | Line 109: | ||
{{MoveData | {{MoveData | ||
|image= | |image= Aria SLKhb.png|thumb | ||
|caption= Test Caption | |caption= Test Caption | ||
|name= Standing Light Kick | |name= Standing Light Kick | ||
| Line 112: | Line 116: | ||
|data= | |data= | ||
{{AttackData-KI2013 | {{AttackData-KI2013 | ||
|damage= 8(2%) | |damage= 8 (2%) | ||
|counter-hit damage= 12(3%) | |counter-hit damage= 12 (3%) | ||
|potential damage= -- | |potential damage= -- | ||
|shadow on hit= 1.6% | |shadow on hit= 1.6% | ||
| Line 125: | Line 129: | ||
|on counter-hit= +7 | |on counter-hit= +7 | ||
|on block= +2 | |on block= +2 | ||
|special properties= Chain, | |special properties= Chain, Flipout, cancels into st.HK | ||
|description= Not good in neutral. Short ranged, will whiff most crouchers, not enough block or hitstun to be worth using the st.HK cancel except as a potential sneaky reset behind assists. Press any other button. Runs the risk of screwing you over as a manual too. Usage as a flipout is extremely strong, however - experiment! | |description= Not good in neutral. Short ranged, will whiff most crouchers, not enough block or hitstun to be worth using the st.HK cancel except as a potential sneaky reset behind assists. Press any other button. Runs the risk of screwing you over as a manual too. Usage as a flipout is extremely strong, however - experiment! | ||
}} | }} | ||
| Line 132: | Line 136: | ||
{{MoveData | {{MoveData | ||
|image= | |image= Aria SMKhb.png|thumb | ||
|caption= | |caption= | ||
|name= Standing Medium Kick | |name= Standing Medium Kick | ||
|linkname= 5MK | |linkname= 5MK | ||
| Line 139: | Line 143: | ||
|data= | |data= | ||
{{AttackData-KI2013 | {{AttackData-KI2013 | ||
|damage= 18(5%) | |damage= 18 (5%) | ||
|counter-hit damage= 18(5%) | |counter-hit damage= 18 (5%) | ||
|potential damage= -- | |potential damage= -- | ||
|shadow on hit= 2.4% | |shadow on hit= 2.4% | ||
| Line 159: | Line 163: | ||
{{MoveData | {{MoveData | ||
|image= | |image= Aria SHKhb.png|thumb | ||
|caption= Test Caption | |caption= Test Caption | ||
|name= Far Standing Heavy Kick | |name= Far Standing Heavy Kick | ||
| Line 166: | Line 170: | ||
|data= | |data= | ||
{{AttackData-KI2013 | {{AttackData-KI2013 | ||
|damage= 40.3(11%) | |damage= 40.3 (11%) | ||
|counter-hit damage= 48.3(13%) | |counter-hit damage= 48.3 (13%) | ||
|potential damage= -- | |potential damage= -- | ||
|shadow on hit= 4% | |shadow on hit= 4% | ||
| Line 184: | Line 188: | ||
}} | }} | ||
===Close Normals=== | |||
{{MoveData | {{MoveData | ||
|image= | |image= Aria NMPhb.png|thumb | ||
|caption= Test Caption | |caption= Test Caption | ||
|name= Close Standing Medium Punch | |name= Close Standing Medium Punch | ||
| Line 193: | Line 197: | ||
|data= | |data= | ||
{{AttackData-KI2013 | {{AttackData-KI2013 | ||
|damage= 20(5%) | |damage= 20 (5%) | ||
|counter-hit damage= 26(7%) | |counter-hit damage= 26 (7%) | ||
|potential damage= -- | |potential damage= -- | ||
|shadow on hit= 2.4% | |shadow on hit= 2.4% | ||
| Line 213: | Line 217: | ||
{{MoveData | {{MoveData | ||
|image= | |image= Aria NHPhb.png|thumb | ||
|caption= Somehow as much recovery as a light. | |caption= Somehow as much recovery as a light. | ||
|name= Close Standing Heavy Punch | |name= Close Standing Heavy Punch | ||
| Line 220: | Line 224: | ||
|data= | |data= | ||
{{AttackData-KI2013 | {{AttackData-KI2013 | ||
|damage= 30(8%) | |damage= 30 (8%) | ||
|counter-hit damage= 38(10%) | |counter-hit damage= 38 (10%) | ||
|potential damage= -- | |potential damage= -- | ||
|shadow on hit= 4% | |shadow on hit= 4% | ||
| Line 240: | Line 244: | ||
{{MoveData | {{MoveData | ||
|image= | |image= Aria NHKhb.png|thumb | ||
|caption= Test Caption | |caption= Test Caption | ||
|name= Close Standing Heavy Kick | |name= Close Standing Heavy Kick | ||
| Line 247: | Line 251: | ||
|data= | |data= | ||
{{AttackData-KI2013 | {{AttackData-KI2013 | ||
|damage= 35.4(9%) | |damage= 35.4 (9%) | ||
|counter-hit damage= 43.4(12%) | |counter-hit damage= 43.4 (12%) | ||
|potential damage= -- | |potential damage= -- | ||
|shadow on hit= 4% | |shadow on hit= 4% | ||
| Line 264: | Line 268: | ||
}} | }} | ||
}} | }} | ||
=== Crouching Normals === | === Crouching Normals === | ||
{{MoveData | {{MoveData | ||
|image= | |image= Aria CLPhb.png|thumb | ||
|caption= The basic pressure tool | |caption= The basic pressure tool | ||
|name= Crouching Light Punch | |name= Crouching Light Punch | ||
| Line 275: | Line 278: | ||
|data= | |data= | ||
{{AttackData-KI2013 | {{AttackData-KI2013 | ||
|damage= 8(2%) | |damage= 8 (2%) | ||
|counter-hit damage= 12(3%) | |counter-hit damage= 12 (3%) | ||
|potential damage= -- | |potential damage= -- | ||
|shadow on hit= 1.6% | |shadow on hit= 1.6% | ||
| Line 295: | Line 298: | ||
{{MoveData | {{MoveData | ||
|image= | |image= Aria CMPhb2.png|thumb | ||
|caption= Test Caption | |caption= Test Caption | ||
|name= Crouching Medium Punch | |name= Crouching Medium Punch | ||
| Line 302: | Line 305: | ||
|data= | |data= | ||
{{AttackData-KI2013 | {{AttackData-KI2013 | ||
|damage= 20(5%) | |damage= 20 (5%) | ||
|counter-hit damage= 24(6%) | |counter-hit damage= 24 (6%) | ||
|potential damage= -- | |potential damage= -- | ||
|shadow on hit= 2.4% | |shadow on hit= 2.4% | ||
| Line 319: | Line 322: | ||
}} | }} | ||
}} | }} | ||
{{MoveData | {{MoveData | ||
|image= | |image= Aria CHPhb2.png|thumb | ||
|caption= Test Caption | |caption= Test Caption | ||
|name= Crouching Heavy Punch | |name= Crouching Heavy Punch | ||
| Line 330: | Line 332: | ||
|data= | |data= | ||
{{AttackData-KI2013 | {{AttackData-KI2013 | ||
|damage= 30(8%) | |damage= 30 (8%) | ||
|counter-hit damage= 38(10%) | |counter-hit damage= 38 (10%) | ||
|potential damage= -- | |potential damage= -- | ||
|shadow on hit= 4% | |shadow on hit= 4% | ||
| Line 350: | Line 352: | ||
{{MoveData | {{MoveData | ||
|image= | |image= Aria CLKhb.png|thumb | ||
|caption= Test Caption | |caption= Test Caption | ||
|name= Crouching Light Kick | |name= Crouching Light Kick | ||
| Line 357: | Line 359: | ||
|data= | |data= | ||
{{AttackData-KI2013 | {{AttackData-KI2013 | ||
|damage= 8(2%) | |damage= 8 (2%) | ||
|counter-hit damage= 12(3%) | |counter-hit damage= 12 (3%) | ||
|potential damage= -- | |potential damage= -- | ||
|shadow on hit= 1.6% | |shadow on hit= 1.6% | ||
| Line 377: | Line 379: | ||
{{MoveData | {{MoveData | ||
|image= | |image= Aria CMKhb.png|thumb | ||
|caption= Test Caption | |caption= Test Caption | ||
|name= Crouching Medium Kick | |name= Crouching Medium Kick | ||
| Line 384: | Line 386: | ||
|data= | |data= | ||
{{AttackData-KI2013 | {{AttackData-KI2013 | ||
|damage= 18(5%) | |damage= 18 (5%) | ||
|counter-hit damage= 18(5%) | |counter-hit damage= 18 (5%) | ||
|potential damage= -- | |potential damage= -- | ||
|shadow on hit= 2.4% | |shadow on hit= 2.4% | ||
|shadow on block= 4% | |shadow on block= 4% | ||
|guard= | |guard= Mid | ||
|startup= 8 | |startup= 8 | ||
|active= 2 | |active= 2 | ||
| Line 404: | Line 406: | ||
{{MoveData | {{MoveData | ||
|image= | |image= Aria CHKhb.png|thumb | ||
|caption= Test Caption | |caption= Test Caption | ||
|name= Crouching Heavy Kick | |name= Crouching Heavy Kick | ||
| Line 411: | Line 413: | ||
|data= | |data= | ||
{{AttackData-KI2013 | {{AttackData-KI2013 | ||
|damage= 28.3(7%) | |damage= 28.3 (7%) | ||
|counter-hit damage= 36.3(10%) | |counter-hit damage= 36.3 (10%) | ||
|potential damage= -- | |potential damage= -- | ||
|shadow on hit= 4% | |shadow on hit= 4% | ||
| Line 432: | Line 434: | ||
=== Command Normals === | === Command Normals === | ||
{{MoveData | {{MoveData | ||
|image= | |image= Aria 6HPhb.png|thumb | ||
|caption= Birth of comeback clips everywhere. | |caption= Birth of comeback clips everywhere. | ||
|name= Forward Heavy Punch "Interlude" (BLADE ONLY) | |name= Forward Heavy Punch "Interlude" (BLADE ONLY) | ||
| Line 439: | Line 441: | ||
|data= | |data= | ||
{{AttackData-KI2013 | {{AttackData-KI2013 | ||
|damage= 20(5%) | |damage= 20 (5%) | ||
|counter-hit damage= 32(8%) | |counter-hit damage= 32 (8%) | ||
|potential damage= -- | |potential damage= -- | ||
|shadow on hit= 3.2% | |shadow on hit= 3.2% | ||
| Line 459: | Line 461: | ||
{{MoveData | {{MoveData | ||
|image= | |image= Aria 6XPhb.png|thumb | ||
|caption= Tag out! | |caption= Tag out! | ||
|name= Three Punches/Kicks "Upload" | |name= Three Punches/Kicks "Upload" | ||
| Line 486: | Line 488: | ||
{{MoveData | {{MoveData | ||
|image= | |image= | ||
[[File:Aria XPoHB.png|thumb]] | |||
[[File:ARIA XPaHB.png|thumb]] | |||
[[File:Aria XPlHB.png|thumb]] | |||
[[File:Aria XPdHB.png|thumb]] | |||
|caption= The core gameplan | |caption= The core gameplan | ||
|name= Orchestrate | |name= Orchestrate | ||
| Line 494: | Line 500: | ||
{{AttackData-KI2013 | {{AttackData-KI2013 | ||
|version= Booster | |version= Booster | ||
|damage= 30(8%) | |damage= 30 (8%) | ||
|counter-hit damage= 30(8%) | |counter-hit damage= 30 (8%) | ||
|potential damage= -- | |potential damage= -- | ||
|shadow on hit= 2.4% | |shadow on hit= 2.4% | ||
| Line 512: | Line 518: | ||
{{AttackData-KI2013 | {{AttackData-KI2013 | ||
|version= Bass | |version= Bass | ||
|damage= 16.4(4%) | |damage= 16.4 (4%) | ||
|counter-hit damage= 16.4(4%) | |counter-hit damage= 16.4 (4%) | ||
|potential damage= 2.1 (0.5%) | |potential damage= 2.1 (0.5%) | ||
|shadow on hit= 1.6% | |shadow on hit= 1.6% | ||
| Line 530: | Line 536: | ||
{{AttackData-KI2013 | {{AttackData-KI2013 | ||
|version= Blade | |version= Blade | ||
|damage= 23(6%) | |damage= 23 (6%) | ||
|counter-hit damage= 23(6%) | |counter-hit damage= 23 (6%) | ||
|potential damage= 3.7 (1%) | |potential damage= 3.7 (1%) | ||
|shadow on hit= 1.6% | |shadow on hit= 1.6% | ||
| Line 548: | Line 554: | ||
{{AttackData-KI2013 | {{AttackData-KI2013 | ||
|version= Instinct | |version= Instinct | ||
|damage= 13.4(3%) | |damage= 13.4 (3%) | ||
|counter-hit damage= 13.4(3%) | |counter-hit damage= 13.4 (3%) | ||
|potential damage= 1.1 (0.3%) | |potential damage= 1.1 (0.3%) | ||
|shadow on hit= 1.6%? | |shadow on hit= 1.6%? | ||
| Line 565: | Line 571: | ||
}} | }} | ||
}} | }} | ||
=== Jumping Normals === | === Jumping Normals === | ||
{{MoveData | {{MoveData | ||
|image= | |image= Aria JLPhb.png|thumb | ||
|caption= ? | |caption= ? | ||
|name= Jumping Light Punch | |name= Jumping Light Punch | ||
| Line 576: | Line 581: | ||
|data= | |data= | ||
{{AttackData-KI2013 | {{AttackData-KI2013 | ||
|damage= 20(5%) | |damage= 20 (5%) | ||
|counter-hit damage= 24(6%) | |counter-hit damage= 24 (6%) | ||
|potential damage= -- | |potential damage= -- | ||
|shadow on hit= 1.6 | |shadow on hit= 1.6 | ||
| Line 596: | Line 601: | ||
{{MoveData | {{MoveData | ||
|image= | |image= Aria JMPhb2.png|thumb | ||
|caption= Almost a cross-up | |caption= Almost a cross-up | ||
|name= Jumping Medium Punch | |name= Jumping Medium Punch | ||
| Line 603: | Line 608: | ||
|data= | |data= | ||
{{AttackData-KI2013 | {{AttackData-KI2013 | ||
|damage= 24(6%) | |damage= 24 (6%) | ||
|counter-hit damage= 30(8%) | |counter-hit damage= 30 (8%) | ||
|potential damage= -- | |potential damage= -- | ||
|shadow on hit= 2.4 | |shadow on hit= 2.4 | ||
| Line 623: | Line 628: | ||
{{MoveData | {{MoveData | ||
|image= | |image= Aria JHPhb2.png|thumb | ||
|caption= bap | |caption= bap | ||
|name= Jumping Heavy Punch | |name= Jumping Heavy Punch | ||
| Line 631: | Line 636: | ||
{{AttackData-KI2013 | {{AttackData-KI2013 | ||
|damage= 30 (8%) | |damage= 30 (8%) | ||
|counter-hit damage= 38(10%) | |counter-hit damage= 38 (10%) | ||
|potential damage= | |potential damage= | ||
|shadow on hit= 4 | |shadow on hit= 4 | ||
| Line 650: | Line 655: | ||
{{MoveData | {{MoveData | ||
|image= | |image= Aria JLKhb.png|thumb | ||
|caption= Test Caption | |caption= Test Caption | ||
|name= Jumping Light Kick | |name= Jumping Light Kick | ||
| Line 657: | Line 662: | ||
|data= | |data= | ||
{{AttackData-KI2013 | {{AttackData-KI2013 | ||
|damage= 20(5%) | |damage= 20 (5%) | ||
|counter-hit damage= 24(6%) | |counter-hit damage= 24 (6%) | ||
|potential damage= -- | |potential damage= -- | ||
|shadow on hit= 1.6 | |shadow on hit= 1.6 | ||
| Line 677: | Line 682: | ||
{{MoveData | {{MoveData | ||
|image= | |image= Aria JMKhb.png|thumb | ||
|caption= Like a mosquito. | |caption= Like a mosquito. | ||
|name= Jumping Medium Kick | |name= Jumping Medium Kick | ||
| Line 684: | Line 689: | ||
|data= | |data= | ||
{{AttackData-KI2013 | {{AttackData-KI2013 | ||
|damage= 18(5%) | |damage= 18 (5%) | ||
|counter-hit damage= 18(5%) | |counter-hit damage= 18 (5%) | ||
|potential damage= -- | |potential damage= -- | ||
|shadow on hit= 2.4 | |shadow on hit= 2.4 | ||
| Line 704: | Line 709: | ||
{{MoveData | {{MoveData | ||
|image= | |image= Aria JHKhb.png|thumb | ||
|caption= Queen of roundstarts | |caption= Queen of roundstarts | ||
|name= Jumping Heavy Kick | |name= Jumping Heavy Kick | ||
| Line 711: | Line 716: | ||
|data= | |data= | ||
{{AttackData-KI2013 | {{AttackData-KI2013 | ||
|damage= 40.3(11%) | |damage= 40.3 (11%) | ||
|counter-hit damage= 48.3(13%) | |counter-hit damage= 48.3 (13%) | ||
|potential damage= 3.4 (0.9%) | |potential damage= 3.4 (0.9%) | ||
|shadow on hit= 4 | |shadow on hit= 4 | ||
| Line 727: | Line 732: | ||
|description= That's right! ARIA has a heavy air move that has 5f of startup and a decent hitbox. I don't know why, either. It has a lot of usages, including hitting people round-start by jumping close to the ground and pressing this button to beat any option they might be trying besides invincible reversals or faster moves that won't do much anyway because they'd hit her out of the air. She can follow up hitting this with a j.LP juggle, too, to flip out the opponent while they're in the air, or simply set up assists as they're coming down. Good usage of this move can win entire games. Be wary of using it as an instant-air-overhead, however - that option is strong, but difficult to land and risky, as it is death on block unless used very close to the ground on the way down. | |description= That's right! ARIA has a heavy air move that has 5f of startup and a decent hitbox. I don't know why, either. It has a lot of usages, including hitting people round-start by jumping close to the ground and pressing this button to beat any option they might be trying besides invincible reversals or faster moves that won't do much anyway because they'd hit her out of the air. She can follow up hitting this with a j.LP juggle, too, to flip out the opponent while they're in the air, or simply set up assists as they're coming down. Good usage of this move can win entire games. Be wary of using it as an instant-air-overhead, however - that option is strong, but difficult to land and risky, as it is death on block unless used very close to the ground on the way down. | ||
}} | }} | ||
}} | |||
== Throws == | |||
{{MoveData | |||
|image= Aria LPLKhb.png|thumb | |||
|caption= Test Caption | |||
|name= Throw | |||
|linkname= LPLK | |||
|input= 5LPLK/4LPLK | |||
|data= | |||
{{AttackData-KI2013 | |||
|damage= 24.3 (6%) | |||
|potential damage= 8.1 (2%) | |||
|startup= 5 | |||
|active= 2 | |||
|recovery= 29 | |||
|total duration= 35f | |||
|special properties= Hard Knockdown | |||
|description= There's no difference whether you're in the Blade body or not. | |||
}} | |||
}} | |||
==Special Moves== | |||
{{MoveData | |||
|image= Aria 236Khb.png|thumb | |||
|caption= Somehow as much recovery as a light. | |||
|name= Shotgun Blitz | |||
|linkname= 236K | |||
|input= QCF+K/236K | |||
|data= | |||
{{AttackData-KI2013 | |||
|version= LK | |||
|damage= 26.8 (7%) | |||
|counter-hit damage= 38.8 (10%) | |||
|potential damage= 2.3 (0.6%) | |||
|shadow on hit= ?? | |||
|shadow on block= ?? | |||
|guard= Mid | |||
|startup= 8 | |||
|active= 6 | |||
|recovery= 16 | |||
|total duration= 29f | |||
|on hit= +6 | |||
|on counter-hit= +6 | |||
|on block= -3 | |||
|special properties= -- | |||
|description= To Do | |||
}} | |||
{{AttackData-KI2013 | |||
|version= MK | |||
|damage= 26.8 (7%) | |||
|counter-hit damage= 38.8 (10%) | |||
|potential damage= 2.3 (0.6%) | |||
|shadow on hit= ?? | |||
|shadow on block= ?? | |||
|guard= Mid | |||
|startup= 10 | |||
|active= 10 | |||
|recovery= 14 | |||
|total duration= 33f | |||
|on hit= +9 | |||
|on counter-hit= +9 | |||
|on block= -5 | |||
|special properties= Low Invul 5-10f | |||
|description= To Do | |||
}} | |||
{{AttackData-KI2013 | |||
|version= HK | |||
|damage= 26.8 (7%) | |||
|counter-hit damage= 38.8 (10%) | |||
|potential damage= 2.3 (0.6%) | |||
|shadow on hit= ?? | |||
|shadow on block= ?? | |||
|guard= Mid | |||
|startup= 13 | |||
|active= 14 | |||
|recovery= 10 | |||
|total duration= 36f | |||
|on hit= +13 | |||
|on counter-hit= +13 | |||
|on block= -10 | |||
|special properties= Low Invul 4-10f | |||
|description= To Do | |||
}} | |||
}} | |||
{{MoveData | |||
|image= Aria 214Khb.png|thumb | |||
|caption= Test Caption | |||
|name= Explosive Arc | |||
|linkname= 214K | |||
|input= QCB+K/214K | |||
|data= | |||
{{AttackData-KI2013 | |||
|version= LK | |||
|damage= 26.3 (7%) | |||
|counter-hit damage= 26.3 (7%) | |||
|potential damage= 3.4 (0.9%) | |||
|shadow on hit= ?? | |||
|shadow on block= ?? | |||
|guard= Mid | |||
|startup= 11 | |||
|active= 9 | |||
|recovery= 19 | |||
|total duration= 38f | |||
|on hit= +5 | |||
|on counter-hit= +5 | |||
|on block= -5 | |||
|special properties= High Invul 1-15f | |||
|description= To Do | |||
}} | |||
{{AttackData-KI2013 | |||
|version= MK | |||
|damage= 26.3 (7%) | |||
|counter-hit damage= 26.3 (7%) | |||
|potential damage= 3.4 (0.9%) | |||
|shadow on hit= ?? | |||
|shadow on block= ?? | |||
|guard= Mid | |||
|startup= 14 | |||
|active= 9 | |||
|recovery= 24 | |||
|total duration= 46f | |||
|on hit= +9 | |||
|on counter-hit= +9 | |||
|on block= -1 | |||
|special properties= High Invul 1-15f | |||
|description= To Do | |||
}} | |||
{{AttackData-KI2013 | |||
|version= HK | |||
|damage= 26.3 (7%) | |||
|counter-hit damage= 26.3 (7%) | |||
|potential damage= 3.4 (0.9%) | |||
|shadow on hit= ?? | |||
|shadow on block= ?? | |||
|guard= Mid | |||
|startup= 17 | |||
|active= 9 | |||
|recovery= 31 | |||
|total duration= 56f | |||
|on hit= +13 | |||
|on counter-hit= +13 | |||
|on block= +1 | |||
|special properties= High Invul 1-15f | |||
|description= To Do | |||
}} | |||
}} | |||
{{MoveData | |||
|image= Aria 214Phb.png|thumb | |||
|caption= From top to bottom: H, M, L | |||
|name= Crescendo</br> | |||
(BOOSTER ONLY) | |||
|linkname= 214P | |||
|input= QCB+P/214P | |||
|data= | |||
{{AttackData-KI2013 | |||
|version= LP | |||
|damage= 30 (8%) | |||
|counter-hit damage= 36 (10%) | |||
|potential damage= -- | |||
|shadow on hit= ?? | |||
|shadow on block= ?? | |||
|guard= Mid | |||
|startup= 11 | |||
|active= 8 | |||
|recovery= 50 | |||
|total duration= 68f | |||
|on hit= 0 | |||
|on counter-hit= +10 | |||
|on block= -7 | |||
|special properties= Stagger | |||
|description= To Do | |||
}} | |||
{{AttackData-KI2013 | |||
|version= MP | |||
|damage= 30 (8%) | |||
|counter-hit damage= 36 (10%) | |||
|potential damage= -- | |||
|shadow on hit= ?? | |||
|shadow on block= ?? | |||
|guard= Mid | |||
|startup= 11 | |||
|active= 8 | |||
|recovery= 55 | |||
|total duration= 73f | |||
|on hit= +32 | |||
|on counter-hit= +32 | |||
|on block= -21 | |||
|special properties= Soft Knockdown | |||
|description= To Do | |||
}} | |||
{{AttackData-KI2013 | |||
|version= HP | |||
|damage= 40 (11%) | |||
|counter-hit damage= 48 (13%) | |||
|potential damage= -- | |||
|shadow on hit= ?? | |||
|shadow on block= ?? | |||
|guard= Mid | |||
|startup= 11 | |||
|active= 9 | |||
|recovery= 44 | |||
|total duration= 63f | |||
|on hit= +38 | |||
|on counter-hit= +38 | |||
|on block= -42 | |||
|special properties= Full Invul 1-11f, Hard Knockdown | |||
|description= To Do | |||
}} | |||
}} | |||
{{MoveData | |||
|image= Aria J214Phb.png|thumb | |||
|caption= From top to bottom: L, M, H | |||
|name= Air Crescendo</br> | |||
(BOOSTER ONLY) | |||
|linkname= J214P | |||
|input= J-QCB+P/J-214P | |||
|data= | |||
{{AttackData-KI2013 | |||
|version= LP | |||
|damage= 24 (6%) | |||
|counter-hit damage= 24 (6%) | |||
|potential damage= -- | |||
|shadow on hit= ?? | |||
|shadow on block= ?? | |||
|guard= Mid | |||
|startup= 11 | |||
|active= 10 | |||
|recovery= 12 | |||
|total duration= 32+f | |||
|on hit= +44 | |||
|on counter-hit= +44 | |||
|on block= -36 | |||
|special properties= Stagger | |||
|description= To Do | |||
}} | |||
{{AttackData-KI2013 | |||
|version= MP | |||
|damage= 24 (6%) | |||
|counter-hit damage= 24 (6%) | |||
|potential damage= -- | |||
|shadow on hit= ?? | |||
|shadow on block= ?? | |||
|guard= Mid | |||
|startup= 13 | |||
|active= 7 | |||
|recovery= 12 | |||
|total duration= 31+f | |||
|on hit= +28 | |||
|on counter-hit= +28 | |||
|on block= -25 | |||
|special properties= Stagger | |||
|description= To Do | |||
}} | |||
{{AttackData-KI2013 | |||
|version= HP | |||
|damage= 24 (6%) | |||
|counter-hit damage= 24 (6%) | |||
|potential damage= -- | |||
|shadow on hit= ?? | |||
|shadow on block= ?? | |||
|guard= Mid | |||
|startup= 11 | |||
|active= 8 | |||
|recovery= 12 | |||
|total duration= 31f | |||
|on hit= +27 | |||
|on counter-hit= +27 | |||
|on block= -22 | |||
|special properties= Stagger | |||
|description= To Do | |||
}} | |||
}} | |||
{{MoveData | |||
|image= Aria 623LPhb.png|thumb | |||
|caption= Test Caption | |||
|name= Allegro | |||
|linkname= 236K | |||
|input= QCF+K/236K | |||
|data= | |||
{{AttackData-KI2013 | |||
|version= LP | |||
|damage= 32 (8%) | |||
|counter-hit damage= 44 (12%) | |||
|potential damage= -- | |||
|shadow on hit= ?? | |||
|shadow on block= ?? | |||
|guard= Mid | |||
|startup= 3 | |||
|active= 8 | |||
|recovery= 36 | |||
|total duration= 46f | |||
|on hit= +11 | |||
|on counter-hit= +11 | |||
|on block= -36 | |||
|special properties= Full Invul 1-2f, High Invul 3-7f, Throw Invul 3-15f | |||
|description= To Do | |||
}} | |||
{{AttackData-KI2013 | |||
|version= MP | |||
|damage= 23 (6%) | |||
|counter-hit damage= 59 (16%) | |||
|potential damage= 3 (0.8%) | |||
|shadow on hit= ?? | |||
|shadow on block= ?? | |||
|guard= Mid | |||
|startup= 11 | |||
|active= 3[13]2[16]2 | |||
|recovery= 25 | |||
|total duration= 71f | |||
|on hit= +11 | |||
|on counter-hit= +11 | |||
|on block= +2 | |||
|special properties= -- | |||
|description= *Doesn't go directly into auto-doubles or linkers, but you can convert with a manual. Just don't press HK. | |||
*First strike does 14 (3%) on normal hit and 50 (13%) on counter hit because this character is completely nonsensical! | |||
}} | |||
{{AttackData-KI2013 | |||
|version= HP | |||
|damage= 37.2 (10%) | |||
|counter-hit damage= 49.2 (13%) | |||
|potential damage= 4.4 (1%) | |||
|shadow on hit= ?? | |||
|shadow on block= ?? | |||
|guard= Mid | |||
|startup= 11 | |||
|active= 2[14]2[8]10 | |||
|recovery= 36 | |||
|total duration= 92f | |||
|on hit= +59 | |||
|on counter-hit= +59 | |||
|on block= -13 | |||
|special properties= High Invul 37-43f, Throw Invul 37-51f | |||
|description= *Jugglable for 29 frames | |||
}} | |||
}} | |||
{{MoveData | |||
|image= Aria 236Phb.png|thumb | |||
|caption= Top to bottom: H, M, L | |||
|name= Dissonance</br> | |||
(BASS ONLY) | |||
|linkname= 236P | |||
|input= QCF+P/236P | |||
|data= | |||
{{AttackData-KI2013 | |||
|version= LP | |||
|damage= 16.4 (4%) | |||
|counter-hit damage= 16.4 (4%) | |||
|potential damage= 2.1 (0.5%) | |||
|shadow on hit= ?? | |||
|shadow on block= ?? | |||
|guard= Low | |||
|startup= 15 | |||
|active= -- | |||
|recovery= 38 | |||
|total duration= 53f | |||
|on hit= +1 | |||
|on counter-hit= +1 | |||
|on block= -15 | |||
|special properties= -- | |||
|description= To Do | |||
}} | |||
{{AttackData-KI2013 | |||
|version= MP | |||
|damage= 16.4 (4%) | |||
|counter-hit damage= 16.4 (4%) | |||
|potential damage= 2.1 (0.5%) | |||
|shadow on hit= ?? | |||
|shadow on block= ?? | |||
|guard= Mid | |||
|startup= 15 | |||
|active= -- | |||
|recovery= 39 | |||
|total duration= 54f | |||
|on hit= 0 | |||
|on counter-hit= 0 | |||
|on block= -16 | |||
|special properties= -- | |||
|description= To Do | |||
}} | |||
{{AttackData-KI2013 | |||
|version= HP | |||
|damage= 16.4 (4%) | |||
|counter-hit damage= 16.4 (4%) | |||
|potential damage= 2.1 (0.5%) | |||
|shadow on hit= ?? | |||
|shadow on block= ?? | |||
|guard= Mid | |||
|startup= 15 | |||
|active= -- | |||
|recovery= 41 | |||
|total duration= 56f | |||
|on hit= -2 | |||
|on counter-hit= -2 | |||
|on block= -18 | |||
|special properties= -- | |||
|description= To Do | |||
}} | |||
}} | |||
==Shadow Moves== | |||
{{MoveData | |||
|image= Aria 236KKhb.png|thumb | |||
|caption= Test Caption | |||
|name= Shadow Shotgun Blitz | |||
|linkname= 236KK | |||
|input= QCF+KK/236KK | |||
|data= | |||
{{AttackData-KI2013 | |||
|version= S | |||
|damage= 44 (12%) | |||
|counter-hit damage= 44 (12%) | |||
|potential damage= 8 (2%) | |||
|shadow on hit= 0 | |||
|shadow on block= 0 | |||
|guard= Mid | |||
|startup= 1+10 (11) | |||
|active= 4[8]2[20] | |||
2[17]2[7]2 | |||
|recovery= 46 | |||
|total duration= 120f | |||
|on hit= -1 | |||
|on counter-hit= -1 | |||
|on block= -9 | |||
|special properties= Proj Invul 1-20f, Strike Invul 21-22f | |||
|description= To Do | |||
}} | |||
}} | |||
{{MoveData | |||
|image= Aria 214KKhb.png|thumb | |||
|caption= Test Caption | |||
|name= Shadow Explosive Arc | |||
|linkname= 214KK | |||
|input= QCB+KK/214KK | |||
|data= | |||
{{AttackData-KI2013 | |||
|version= S | |||
|damage= 35.2 (9%) | |||
|counter-hit damage= 35.2 (9%) | |||
|potential damage= 6.4 (1%) | |||
|shadow on hit= 0 | |||
|shadow on block= 0 | |||
|guard= Mid | |||
|startup= 11+2 (13) | |||
|active= 5[1]5[2] | |||
5[2]5[2]5 | |||
|recovery= 22 | |||
|total duration= 66f | |||
|on hit= +2 | |||
|on counter-hit= +2 | |||
|on block= -2 | |||
|special properties= High Invul 1-11f | |||
|description= To Do | |||
}} | |||
}} | |||
{{MoveData | |||
|image= Aria 214PPhb.png|thumb | |||
|caption= Test Caption | |||
|name= Shadow Crescendo</br> | |||
(BOOSTER ONLY) | |||
|linkname= 214PP | |||
|input= QCB+PP/214PP | |||
|data= | |||
{{AttackData-KI2013 | |||
|version= S | |||
|damage= 44 (12%) | |||
|counter-hit damage= 44 (12%) | |||
|potential damage= 8 (2%) | |||
|shadow on hit= 0 | |||
|shadow on block= 0 | |||
|guard= Mid | |||
|startup= 1+11 (12) | |||
|active= 5[1]5[1]5 | |||
[1]5[1]5 | |||
|recovery= 24 | |||
|total duration= 64f | |||
|on hit= +15 | |||
|on counter-hit= +15 | |||
|on block= -12 | |||
|special properties= Armored, Soft Knockdown, Cashout | |||
|description= To Do | |||
}} | |||
}} | |||
{{MoveData | |||
|image= Aria J214PPhb.png|thumb | |||
|caption= Test Caption | |||
|name= Air Shadow Crescendo</br> | |||
(BOOSTER ONLY) | |||
|linkname= J214PP | |||
|input= J-QCB+PP/8-214PP | |||
|data= | |||
{{AttackData-KI2013 | |||
|version= S | |||
|damage= 44 (12%) | |||
|counter-hit damage= 44 (12%) | |||
|potential damage= 8 (2%) | |||
|shadow on hit= 0 | |||
|shadow on block= 0 | |||
|guard= Mid | |||
|startup= 1+11 (12) | |||
|active= 5[1]5[1]5 | |||
[1]5[1]5 | |||
|recovery= 12 (Landing) | |||
|total duration= 52+f | |||
|on hit= +31 | |||
|on counter-hit= +31 | |||
|on block= +4 | |||
|special properties= Soft Knockdown | |||
|description= To Do | |||
}} | |||
}} | |||
{{MoveData | |||
|image= Aria 623PPhb.png|thumb | |||
|caption= Test Caption | |||
|name= Shadow Allegro</br> | |||
(BLADE ONLY) | |||
|linkname= 623PP | |||
|input= DP+PP/623PP | |||
|data= | |||
{{AttackData-KI2013 | |||
|version= S | |||
|damage= 52.8 (14%) | |||
|counter-hit damage= 52.8 (14%) | |||
|potential damage= 9.6 (2%) | |||
|shadow on hit= -- | |||
|shadow on block= -- | |||
|guard= Mid | |||
|startup= 3+0(0) | |||
|active= 7[1]2[1]2 | |||
|recovery= 39 | |||
|total duration= 54f | |||
|on hit= +25 | |||
|on counter-hit= +25 | |||
|on block= -30 | |||
|special properties= Invul 1-6f, High Invul 7-10f, Throw Invul 7-15f, Juggle Cashout | |||
|description= To Do | |||
}} | |||
}} | |||
{{MoveData | |||
|image= Aria 236PPhb.png|thumb | |||
|caption= Test Caption | |||
|name= Shadow Dissonance</br> | |||
(BASS ONLY) | |||
|linkname= 236PP | |||
|input= QCF+PP/236PP | |||
|data= | |||
{{AttackData-KI2013 | |||
|version= S | |||
|damage= 39.2 (10%) | |||
|counter-hit damage= 39.2 (10%) | |||
|potential damage= 8.4 (2%) | |||
|shadow on hit= -- | |||
|shadow on block= -- | |||
|guard= Mid | |||
|startup= 1+5 (6) | |||
|active= -- | |||
|recovery= 50 | |||
|total duration= 56f | |||
|on hit= +84 | |||
|on counter-hit= +84 | |||
|on block= -8 | |||
|special properties= Hard Knockdown | |||
|description= *ARIA fires a volley of 7 projectiles in a fan pattern. | |||
*Jugglable for 14 frames. | |||
}} | |||
}} | |||
==Enders== | |||
{{MoveData | |||
|image= Aria 236nv.png|thumb | |||
|caption= Test Caption | |||
|name= Shotgun Blitz Ender | |||
|linkname= 236HK | |||
|input= QCF+HK/236HK | |||
|data= | |||
{{KI2013_EnderData | |||
|version= Level 1 | |||
|ender type= Hard Knockdown | |||
|on hit= +57 | |||
|special properties= -- | |||
|description= | |||
}} | |||
{{KI2013_EnderData | |||
|version= Level 2 | |||
|ender type= Hard Knockdown | |||
|on hit= +57 | |||
|special properties= -- | |||
|description= | |||
}} | |||
{{KI2013_EnderData | |||
|version= Level 3 | |||
|ender type= Hard Knockdown | |||
|on hit= +57 | |||
|special properties= -- | |||
|description= | |||
}} | |||
{{KI2013_EnderData | |||
|version= Level 4 | |||
|ender type= Hard Knockdown | |||
|on hit= +57 | |||
|special properties= -- | |||
|description= | |||
}} | |||
}} | |||
{{MoveData | |||
|image= Aria 214Knv.png|thumb | |||
|caption= Test Caption | |||
|name= Explosive Arc Ender | |||
|linkname= 214HK | |||
|input= QCB+HK/214HK | |||
|data= | |||
{{KI2013_EnderData | |||
|version= Level 1 | |||
|ender type= Launcher | |||
|on hit= +58 | |||
|special properties= -- | |||
|description= Jugglable for 28 frames | |||
}} | |||
{{KI2013_EnderData | |||
|version= Level 2 | |||
|ender type= Launcher | |||
|on hit= +58 | |||
|special properties= -- | |||
|description= Jugglable for 28 frames | |||
}} | |||
{{KI2013_EnderData | |||
|version= Level 3 | |||
|ender type= Launcher | |||
|on hit= +58 | |||
|special properties= -- | |||
|description= Jugglable for 28 frames | |||
}} | |||
{{KI2013_EnderData | |||
|version= Level 4 | |||
|ender type= Launcher | |||
|on hit= +58 | |||
|special properties= -- | |||
|description= Jugglable for 28 frames | |||
}} | |||
}} | |||
{{MoveData | |||
|image= Aria 214Pnv.png|thumb | |||
|caption= Test Caption | |||
|name= Crescendo Ender</br> | |||
(BOOSTER ENDER) | |||
|linkname= 214P | |||
|input= QCB+P/214P | |||
|data= | |||
{{KI2013_EnderData | |||
|version= Level 1 | |||
|ender type= Wall Splat | |||
|on hit= -16/+10 (Splat) | |||
|special properties= -- | |||
|description= | |||
}} | |||
{{KI2013_EnderData | |||
|version= Level 2 | |||
|ender type= Wall Splat | |||
|on hit= -15/+11 (Splat) | |||
|special properties= -- | |||
|description= | |||
}} | |||
{{KI2013_EnderData | |||
|version= Level 3 | |||
|ender type= Wall Splat | |||
|on hit= -15/+11 (Splat) | |||
|special properties= -- | |||
|description= | |||
}} | |||
{{KI2013_EnderData | |||
|version= Level 4 | |||
|ender type= Wall Splat | |||
|on hit= -15/+11 (Splat) | |||
|special properties= -- | |||
|description= | |||
}} | |||
{{KI2013_EnderData | |||
|version= Shadow | |||
|ender type= Damage | |||
|on hit= +15 | |||
|special properties= -- | |||
|description= | |||
}} | |||
}} | |||
{{MoveData | |||
|image= Aria 623Pnv.png|thumb | |||
|caption= Test Caption | |||
|name= Allegro Ender</br> | |||
(BLADE ONLY) | |||
|linkname= 623P | |||
|input= DP+P/623P | |||
|data= | |||
{{KI2013_EnderData | |||
|version= Level 1 | |||
|ender type= Damage | |||
|on hit= +30 | |||
|special properties= -- | |||
|description= | |||
}} | |||
{{KI2013_EnderData | |||
|version= Level 2 | |||
|ender type= Damage | |||
|on hit= +30 | |||
|special properties= -- | |||
|description= | |||
}} | |||
{{KI2013_EnderData | |||
|version= Level 3 | |||
|ender type= Damage | |||
|on hit= +30 | |||
|special properties= -- | |||
|description= | |||
}} | |||
{{KI2013_EnderData | |||
|version= Level 4 | |||
|ender type= Damage | |||
|on hit= +31 | |||
|special properties= -- | |||
|description= | |||
}} | |||
{{KI2013_EnderData | |||
|version= Shadow | |||
|ender type= Damage | |||
|on hit= +25 | |||
|special properties= Juggle Cashout | |||
|description= | |||
}} | |||
}} | |||
{{MoveData | |||
|image= Aria 236Pnv.png|thumb | |||
|caption= Test Caption | |||
|name= Dissonance Ender</br> | |||
(BASS ONLY) | |||
|linkname= 236P | |||
|input= QCF+P/236P | |||
|data= | |||
{{KI2013_EnderData | |||
|version= Level 1 | |||
|ender type= Battery | |||
|on hit= +55 | |||
|special properties= Launcher | |||
|description= Jugglable for 25 frames. | |||
}} | |||
{{KI2013_EnderData | |||
|version= Level 2 | |||
|ender type= Battery | |||
|on hit= +59 | |||
|special properties= Launcher | |||
|description= Jugglable for 29 frames. | |||
}} | |||
{{KI2013_EnderData | |||
|version= Level 3 | |||
|ender type= Battery | |||
|on hit= +50 | |||
|special properties= Launcher | |||
|description= Jugglable for 20 frames. | |||
}} | |||
{{KI2013_EnderData | |||
|version= Level 4 | |||
|ender type= Battery | |||
|on hit= +49 | |||
|special properties= Launcher | |||
|description= Jugglable for 19 frames. | |||
}} | |||
}} | |||
== Instinct == | |||
{{MoveData | |||
|image= Aria Instinct Pop.png|thumb | |||
|caption= Test Caption | |||
|name= Combat Symphony No. 9 | |||
|linkname= HP+HK | |||
|input= HP+HK | |||
|data= To Do | |||
}} | }} | ||
{{KI2013_Navbox}} | {{KI2013_Navbox}} | ||
Latest revision as of 15:23, 10 February 2025
Introduction
Lore
ARIA, an abbreviation for 'Advanced Robotics Intelligence Architecture', was designed by UltraTech's founder, Ryat Adams, to direct humanity's evolution and ensure its long-term survival. She has since then become the shadowy company's CEO, working behind the scenes to foil our human heroes' plans and as well as putting a stop to Gargos's oncoming invasion. Her view on the world is cold and calculating, and she rarely takes any ethics or moral code into account when devising plans and making decisions in our world's name. Evolve or die - the choice is yours.
Gameplay
ARIA is an enigma within the game's design, being simultaneously incredibly complex and deceptively simple. Instead of having two healthbars that her opponent burns through, she has three, each with less health than usual that adds up to the total of a regular character's two healthbars. However, each healthbar has a specific body effect attached to it, and ARIA can switch between those at will with the remaining bodies staying behind her as assists - reminiscent of team-tag games such as Marvel vs Capcom. Just like in those games, though ARIA can manage the health of each body, a witty opponent can manage their offense and strike down any careless assist calls to quickly whittle ARIA down of her best tools. Despite this, she makes for an incredibly strong character who, with access to all her assists or her instinct, is without a doubt one of the most oppressive characters of the game at any space on the battlefield. Fly around, abuse your sword's range, then keep the opponent away with an onslaught of projectiles - reminding them that they must evolve their gameplan while you orchestrate your way to a supreme victory.
| Strengths | Weaknesses |
|---|---|
|
|
| Character Data | |
|---|---|
| Forward Walk Speed | 52f to cross two large training mode squares
|
| Backwards Walk Speed | 72f to cross two large training mode squares
|
| Forward Dash Duration | 18f
|
| Backdash Duration | 23f
|
| Pre-Jump Frames | 5f |
| Jump Duration | 38f
|
| Landing Recovery | 4f |
| Advantage Post Grounded Combo Breaker | +1 |
Normal Moves
Far Normals
| Damage | Counter-Hit Damage | Potential Damage | Shadow On Hit | Shadow On Block | Guard | Startup | Active | Recovery | Total Duration | On Hit | On Counter-Hit | On Block | Special Properties |
|---|---|---|---|---|---|---|---|---|---|---|---|---|---|
| 8 (2%) | 12 (3%) | -- | 1.6% | 2.4% | Mid | 5 | 3 | 8 | 15f | +4 | +6 | +1 | Chain |
ARIA's stand jab is 5 frame attack that serves as a key light attack on offense and defense
| |||||||||||||
| Damage | Counter-Hit Damage | Potential Damage | Shadow On Hit | Shadow On Block | Guard | Startup | Active | Recovery | Total Duration | On Hit | On Counter-Hit | On Block | Special Properties |
|---|---|---|---|---|---|---|---|---|---|---|---|---|---|
| 20 (5%) | 26 (7%) | -- | 2.4% | 4% | Mid | 8 | 2 | 17 | 26f | 0 | +4 | -2 | None |
Serviceable mid range poke in BASS body and BOOST body. Absurd footsie normal is BLADE body
| |||||||||||||
| Damage | Counter-Hit Damage | Potential Damage | Shadow On Hit | Shadow On Block | Guard | Startup | Active | Recovery | Total Duration | On Hit | On Counter-Hit | On Block | Special Properties |
|---|---|---|---|---|---|---|---|---|---|---|---|---|---|
| 30 (8%) | 38 (10%) | -- | 4% | 4.5% | Mid | 13 | 2 | 26 | 40f | -5 | -1 | -9 | None |
Meh button in neutral, gains chip damage and great range in Blade body. Still, better used as a punish more than anything else - whiffing this button will get you killed. Can be cancelled into st.HK, allowing for a dash cancel from long range or pre-emptive anti-air with the bomb. Cancel window is deceptively small - learn to buffer your whiff punishes. | |||||||||||||
| Damage | Counter-Hit Damage | Potential Damage | Shadow On Hit | Shadow On Block | Guard | Startup | Active | Recovery | Total Duration | On Hit | On Counter-Hit | On Block | Special Properties |
|---|---|---|---|---|---|---|---|---|---|---|---|---|---|
| 8 (2%) | 12 (3%) | -- | 1.6% | 2.4% | Mid | 5 | 2 | 11 | 17f | +5 | +7 | +2 | Chain, Flipout, cancels into st.HK |
Not good in neutral. Short ranged, will whiff most crouchers, not enough block or hitstun to be worth using the st.HK cancel except as a potential sneaky reset behind assists. Press any other button. Runs the risk of screwing you over as a manual too. Usage as a flipout is extremely strong, however - experiment! | |||||||||||||
| Damage | Counter-Hit Damage | Potential Damage | Shadow On Hit | Shadow On Block | Guard | Startup | Active | Recovery | Total Duration | On Hit | On Counter-Hit | On Block | Special Properties |
|---|---|---|---|---|---|---|---|---|---|---|---|---|---|
| 18 (5%) | 18 (5%) | -- | 2.4% | 4% | Mid | 8 | 2 | 27 | 36f | +2 | +2 | -5 | Projectile |
Decently long-ranged projectile normal, range is off-set by the fact that ARIA's hitbox moves backwards. Harder to confirm or delay than cr.MK but still doable - incredibly useful in tricky mid-range situations to preemptively whiff punish your opponent by avoiding their attack. Can make a decent anti-air too, similar in application to Guilty Gear's 6P moves, though not quite as reliable in a game like KI. | |||||||||||||
| Damage | Counter-Hit Damage | Potential Damage | Shadow On Hit | Shadow On Block | Guard | Startup | Active | Recovery | Total Duration | On Hit | On Counter-Hit | On Block | Special Properties |
|---|---|---|---|---|---|---|---|---|---|---|---|---|---|
| 40.3 (11%) | 48.3 (13%) | -- | 4% | 4.5% | Mid | 14 | 4 [12] 9 | 24 | 62f | +60 (30) | +60 (30) | -3 | Launcher, Soft Knockdown, can be juggled for N frames before the knockdown, can be dash-cancelled. |
Can be held to release more bombs, making this move up to +6 on block. A very weird HK, not often used, though can be made decent in pressure to allow for a surprising amount of plus frames. The bombs come out fairly staggered, too, potentially catching them off-guard, though any resulting juggle or mixup from landing this move is mediocre at best compared to anything else ARIA can do. Can be dash-cancelled for some neat mix-ups off st.LK, st.MP and st.HP, though these dash cancels are never plus unless backed by an assist. | |||||||||||||
Close Normals
| Damage | Counter-Hit Damage | Potential Damage | Shadow On Hit | Shadow On Block | Guard | Startup | Active | Recovery | Total Duration | On Hit | On Counter-Hit | On Block | Special Properties |
|---|---|---|---|---|---|---|---|---|---|---|---|---|---|
| 20 (5%) | 26 (7%) | -- | 2.4% | 4% | Mid | 8 | 3 | 21 | 31f | -2 | +1 | -4 | None |
Cancels into st.HK, like st.MP, though you're unlikely to use this button much up-close - it's not spectacular. It does, however, blockstring into Heavy Explosive Arc, preventing your opponent from shadowing through that move, if they start representing that option. | |||||||||||||
| Damage | Counter-Hit Damage | Potential Damage | Shadow On Hit | Shadow On Block | Guard | Startup | Active | Recovery | Total Duration | On Hit | On Counter-Hit | On Block | Special Properties |
|---|---|---|---|---|---|---|---|---|---|---|---|---|---|
| 30 (8%) | 38 (10%) | -- | 4% | 4.5% | Mid | 9 | 5 | 13 | 26f | +4 | +8 | 0 | None |
The meaty bread-winner. Frame-traps on block into heavy Explosive Arc, beats everything except backdash if meatied properly (and you have assists for that), easy to meaty, recovers in time to block slow reversals, cancels into dash, easy enough to safely confirm into every opener (including Heavy Explosive Arc!) and makes you dinner after a long day of work. Press this button as much as possible over your opponent's wake-up. | |||||||||||||
| Damage | Counter-Hit Damage | Potential Damage | Shadow On Hit | Shadow On Block | Guard | Startup | Active | Recovery | Total Duration | On Hit | On Counter-Hit | On Block | Special Properties |
|---|---|---|---|---|---|---|---|---|---|---|---|---|---|
| 35.4 (9%) | 43.4 (12%) | -- | 4% | 4.5% | Mid | 10 | 5 [5] 3 [1] 3 | 17 | 44f | +45 (+15) | +45 (+15) | -3 | Launcher, Soft Knockdown, can be juggled for N frames before the knockdown. |
A close version of far.HK. You probably pressed this by accident - very rarely worth using except in edge cases. Skip. | |||||||||||||
Crouching Normals
| Damage | Counter-Hit Damage | Potential Damage | Shadow On Hit | Shadow On Block | Guard | Startup | Active | Recovery | Total Duration | On Hit | On Counter-Hit | On Block | Special Properties |
|---|---|---|---|---|---|---|---|---|---|---|---|---|---|
| 8 (2%) | 12 (3%) | -- | 1.6% | 2.4% | Mid | 5 | 2 | 9 | 15f | +4 | +6 | +2 | Chain |
Regular crouch-jab, but very stubby. +2 is a decent number, and will most likely be where most of your pressure starts and ends without assists, either staggering the jabs, frame-trapping into a special or using the push-back to move away to a more comfortable position. | |||||||||||||
| Damage | Counter-Hit Damage | Potential Damage | Shadow On Hit | Shadow On Block | Guard | Startup | Active | Recovery | Total Duration | On Hit | On Counter-Hit | On Block | Special Properties |
|---|---|---|---|---|---|---|---|---|---|---|---|---|---|
| 20 (5%) | 24 (6%) | -- | 2.4% | 4% | Low | 9 | 3 | 15 | 26f | +4 | +7 | +1 | None |
Shoto-esque crouching low with decent range. Confirming takes practice but is worth learning. Also ARIA's best way to catch low approaches in neutral e.g. Tusk Immortal Spirit or Hisako forward dashes. Range increase with Blade body is a godsend. Being +1 on block and +7 on counter-hit means that frame-trapping into a 5f light is highly advisable, as it can be easily counter-hit confirmed if your opponent gets caught pressing a button. | |||||||||||||
| Damage | Counter-Hit Damage | Potential Damage | Shadow On Hit | Shadow On Block | Guard | Startup | Active | Recovery | Total Duration | On Hit | On Counter-Hit | On Block | Special Properties |
|---|---|---|---|---|---|---|---|---|---|---|---|---|---|
| 30 (8%) | 38 (10%) | -- | 4% | 4.5% | Mid | 9 | 3 | 21 | 32f | -3 | -9 | -6 | None |
A decently ranged diagonal anti-air, working well with Booster Body's vertical reversal in Heavy Crescendo. Moves ARIA's hurtbox down, making it easier to avoid punching into enemy air approaches by accident, and making it easier to anti-air longer-ranged moves like General RAAM's j.HK. Can easily convert into any strength Shotgun Blitz for high damage and amazing screen positioning. Blade body increases its range even more, making any air approach inadvisable - especially combined with the light DP. Also works well as a manual, removing the risk of accidentally getting the far slower far.HP as a manual. | |||||||||||||
| Damage | Counter-Hit Damage | Potential Damage | Shadow On Hit | Shadow On Block | Guard | Startup | Active | Recovery | Total Duration | On Hit | On Counter-Hit | On Block | Special Properties |
|---|---|---|---|---|---|---|---|---|---|---|---|---|---|
| 8 (2%) | 12 (3%) | -- | 1.6% | 2.4% | Low | 5 | 2 | 9 | 15f | +5 | +7 | +2 | Chain |
bog-standard cr.LK, secondary pressure option to cr.LP. Fast low, but extremely stubby and a lot more pushback - it is entirely possible to whiff the second cr.LK in an attempt to get a double light confirm on someone. But hey, 5f chainable +2 low. | |||||||||||||
| Damage | Counter-Hit Damage | Potential Damage | Shadow On Hit | Shadow On Block | Guard | Startup | Active | Recovery | Total Duration | On Hit | On Counter-Hit | On Block | Special Properties |
|---|---|---|---|---|---|---|---|---|---|---|---|---|---|
| 18 (5%) | 18 (5%) | -- | 2.4% | 4% | Mid | 8 | 2 | 27 | 36f | +2 | +2 | -5 | Projectile |
It's st.MK, in crouching form. Pushes ARIA's hitbox down instead of back, which also aids in providing some extreme range. Has a larger cancel window than st.MK, making it extremely easy to confirm, and also allows for some tricky stagger pressure to catch people who might be trying to take advantage of this move being -5 on block. Very easily jumped, however, which opens ARIA up for an easy punish. | |||||||||||||
| Damage | Counter-Hit Damage | Potential Damage | Shadow On Hit | Shadow On Block | Guard | Startup | Active | Recovery | Total Duration | On Hit | On Counter-Hit | On Block | Special Properties |
|---|---|---|---|---|---|---|---|---|---|---|---|---|---|
| 28.3 (7%) | 36.3 (10%) | -- | 4% | 4.5% | Mid | 11 | 3 [13] 3 [1] 3 | 28 | 62f | +66 (36) | +66 (36) | -6 | Launcher, Hard Knockdown, can be juggled for (n) frames before the knockdown. |
It's a sweep, but bad. Will be very rarely used in neutral, and even if it is, far.HK is probably a better button for the same purpose. Can be used as a juggle off launcher ender to allow for some nasty cross-up mixups, however. | |||||||||||||
Command Normals
| Damage | Counter-Hit Damage | Potential Damage | Shadow On Hit | Shadow On Block | Guard | Startup | Active | Recovery | Total Duration | On Hit | On Counter-Hit | On Block | Special Properties |
|---|---|---|---|---|---|---|---|---|---|---|---|---|---|
| 20 (5%) | 32 (8%) | -- | 3.2% | 4.8% | High | 20 | 4 | 17 | 40f | +4 | +4 | +2 | Overhead |
ARIA's only grounded overhead, accessible only in blade form. Has a surprising amount of range for its animation, and a lot of its animation is hidden behind ARIA's back (and assists). If your opponent does somehow block this, she's +2, up close. Confirming on hit is a little tricky, like cr.MP, but definitely worth practicing, though you can also risklessly cancel into Heavy Explosive Arc to keep plus frames on block or get an easy confirm on hit. Also surprisingly delayable, allowing for similar stagger pressure you'd get from a blocked cr.MK. | |||||||||||||
| Damage | Counter-Hit Damage | Potential Damage | Shadow On Hit | Shadow On Block | Guard | Startup | Active | Recovery | Total Duration | On Hit | On Counter-Hit | On Block | Special Properties |
|---|---|---|---|---|---|---|---|---|---|---|---|---|---|
| None | None | -- | -- | -- | N/A | 49 | N/A | 22 | 71 | N/A | N/A | N/A | Invincible frames 1-49 |
ARIA's tag, uniquely allowing her to switch healthbars during and in-between rounds. A decent way to preserve her minuscule healthbars to make sure the body and assist you might need is on deck. Although invulnerable for the first half, leaves her incredibly vulnerable to a big punish if used poorly. She can also perform this move as an ender for low damage but a safe body-swap. | |||||||||||||
| Version | Damage | Counter-Hit Damage | Potential Damage | Shadow On Hit | Shadow On Block | Guard | Startup | Active | Recovery | Total Duration | On Hit | On Counter-Hit | On Block | Special Properties |
|---|---|---|---|---|---|---|---|---|---|---|---|---|---|---|
| Booster | 30 (8%) | 30 (8%) | -- | 2.4% | 4% | Mid | 35 | 15 | 55 | 104f | +58 (28) | +58 (28) | +26 | Projectile, can be hit starting frame 10, soft knockdown, can be juggled for (n) frames before knockdown. |
Functions as a 'tackle' assist that goes forward at an upwards angle, with huge pushback on block and a soft-knockdown on hit to control neutral. | ||||||||||||||
| Version | Damage | Counter-Hit Damage | Potential Damage | Shadow On Hit | Shadow On Block | Guard | Startup | Active | Recovery | Total Duration | On Hit | On Counter-Hit | On Block | Special Properties |
| Bass | 16.4 (4%) | 16.4 (4%) | 2.1 (0.5%) | 1.6% | 2.4% | Mid | 50 | -- | 50 | 100f | +38 | +38 | +22f | Projectile, can be hit starting frame 10 |
Shoots out a fast projectile with short blockstun that notably leaves your opponent grounded on hit, unlike the other two, forming the core of how ARIA will get most of her openings, functioning as the 'beam' assist. | ||||||||||||||
| Version | Damage | Counter-Hit Damage | Potential Damage | Shadow On Hit | Shadow On Block | Guard | Startup | Active | Recovery | Total Duration | On Hit | On Counter-Hit | On Block | Special Properties |
| Blade | 23 (6%) | 23 (6%) | 3.7 (1%) | 1.6% | 2.4% | Mid | 45 | 30 | 50 | 124f | +87(57) | +87(57) | +47 | Projectile, can be hit starting frame 76, soft knockdown, can be juggled for (n) frames before knockdown. |
Notably strike invincible until its active frames are completed. It functions as a 'DP assist', performing an upwards whirling attack which juggles your opponent high on hit and leaves them in blockstun for an extremely long time on block, combining neutral control with oppressive lockdown. | ||||||||||||||
| Version | Damage | Counter-Hit Damage | Potential Damage | Shadow On Hit | Shadow On Block | Guard | Startup | Active | Recovery | Total Duration | On Hit | On Counter-Hit | On Block | Special Properties |
| Instinct | 13.4 (3%) | 13.4 (3%) | 1.1 (0.3%) | 1.6%? | 2.4%? | Mid | 43 | - | 22 | 65f | +35 | +35 | +19 | Projectile, can be hit starting frame 10, can be canceled into from normals. |
In Instinct, ARIA combines her bodies, losing her aforementioned assists and instead gaining a special instinct drone, plus one more for each body she has lost, up to 3 total. Each functions as a mini-homing Bass Assist, firing a smaller, 2-hit tracking projectile. These are notable for allowing you to cancel your buttons into these special assists, meaning ARIA in instinct can perform extremely tricky pressure and mixups during instinct while locking down neutral through a combination of powerful assists and a combination of her bodies - it is not uncommon for an ARIA who is on the backfoot to pop instinct and win off a single hit. | ||||||||||||||
Jumping Normals
| Damage | Counter-Hit Damage | Potential Damage | Shadow On Hit | Shadow On Block | Guard | Startup | Active | Recovery | Total Duration | On Hit | On Counter-Hit | On Block | Special Properties |
|---|---|---|---|---|---|---|---|---|---|---|---|---|---|
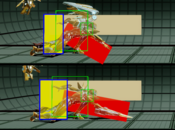
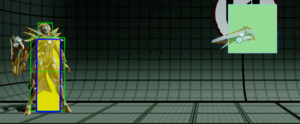
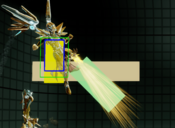
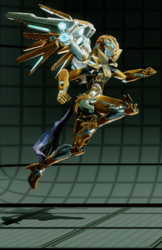
| 20 (5%) | 24 (6%) | -- | 1.6 | 2.4 | High | 8 | 6 | 4 | 17f | +15 | +17 | +8 | Flipout |
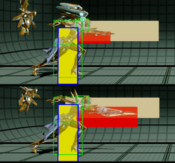
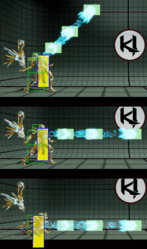
An air flipout. Given the amount of ways ARIA can launch an enemy, this can be extremely strong for a fast, surprise mixup, though it requires some practice to set up something tricky, especially due to the opponent's air-time (due to being flipped out of the air) being longer than if ARIA were to flip somebody out with st.LK, giving both ARIA and her opponent time to set something up and react in turn. | |||||||||||||
| Damage | Counter-Hit Damage | Potential Damage | Shadow On Hit | Shadow On Block | Guard | Startup | Active | Recovery | Total Duration | On Hit | On Counter-Hit | On Block | Special Properties |
|---|---|---|---|---|---|---|---|---|---|---|---|---|---|
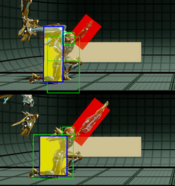
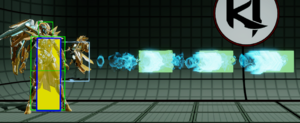
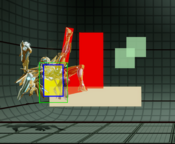
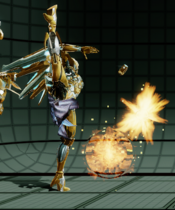
| 24 (6%) | 30 (8%) | -- | 2.4 | 4 | High | 11 | 6 | 4 | 20f | +16 | +19 | +12 | -- |
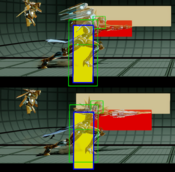
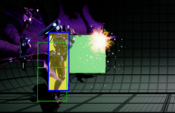
Similar to most j.MPs, a swipe out of the air. The blade version's increased range makes this move an incredibly strong air-to-air, and it can potentially cross-up an opponent, though setting this up is tricky. | |||||||||||||
| Damage | Counter-Hit Damage | Potential Damage | Shadow On Hit | Shadow On Block | Guard | Startup | Active | Recovery | Total Duration | On Hit | On Counter-Hit | On Block | Special Properties |
|---|---|---|---|---|---|---|---|---|---|---|---|---|---|
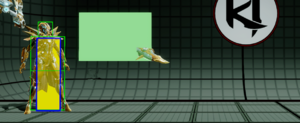
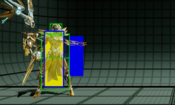
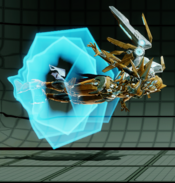
| 30 (8%) | 38 (10%) | - | 4 | 4.5 | High | 11 | 5 | 4 | 19f | +20 | +24 | +17 | - |
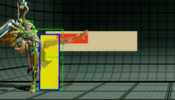
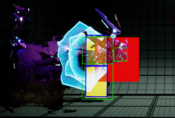
Incredibly strong jump-in, and probably the one you'll be using most. Beefy plus frames on hit and block, allowing for easy confirms or mixups, and it can even cross up the larger characters with ease, like Aganos and Riptor. Blade's increased range makes this jump-in difficult to anti-air, too, on top of the difficult nature of anti-airing ARIA in general due to j.MK | |||||||||||||
| Damage | Counter-Hit Damage | Potential Damage | Shadow On Hit | Shadow On Block | Guard | Startup | Active | Recovery | Total Duration | On Hit | On Counter-Hit | On Block | Special Properties |
|---|---|---|---|---|---|---|---|---|---|---|---|---|---|
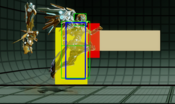
| 20 (5%) | 24 (6%) | -- | 1.6 | 2.4 | High | 8 | 10 | 4 | 21f | +15 | +17 | +8 | - |
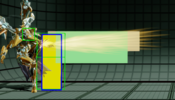
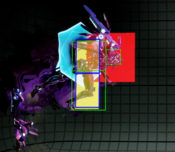
Hitbox is not ideal for hitting people out of the air, though it can provide with some weird jump-ins and float-mixes due to the funky hitbox, especially because ARIA's model doesn't move much on the way down. | |||||||||||||
| Damage | Counter-Hit Damage | Potential Damage | Shadow On Hit | Shadow On Block | Guard | Startup | Active | Recovery | Total Duration | On Hit | On Counter-Hit | On Block | Special Properties |
|---|---|---|---|---|---|---|---|---|---|---|---|---|---|
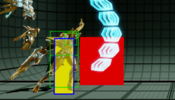
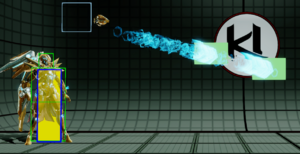
| 18 (5%) | 18 (5%) | -- | 2.4 | 4 | High | 8 | 2 | 27 | 36f | +13 | +13 | -7 | Projectile |
This move used to be a scourge. Now it's just annoying. Good harassment tool, allowing ARIA to opt out of jumping in on an opponent by blasting them in the face, especially if they try to catch her out of the air. Beware abusing this, however, as the above -7 value is at best, and using this "at best" opens ARIA up to getting anti-aired - if an opponent catches you overusing this, ARIA will be opened up for a huge punish. It does, however, also make a decent instant-air-overhead if ARIA has meter, as an instant j.MK will leave the opponent in enough hitstun to convert into Shadow Shotgun Blitz. | |||||||||||||
| Damage | Counter-Hit Damage | Potential Damage | Shadow On Hit | Shadow On Block | Guard | Startup | Active | Recovery | Total Duration | On Hit | On Counter-Hit | On Block | Special Properties |
|---|---|---|---|---|---|---|---|---|---|---|---|---|---|
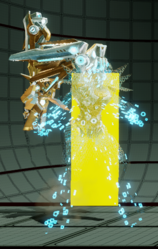
| 40.3 (11%) | 48.3 (13%) | 3.4 (0.9%) | 4 | 4.5 | High | 5 | 6 [12] 2 [3] 2 | 4 | 33f | +89 (59) | +89 (59) | -4 | 2nd and 3rd active act as projectiles |
That's right! ARIA has a heavy air move that has 5f of startup and a decent hitbox. I don't know why, either. It has a lot of usages, including hitting people round-start by jumping close to the ground and pressing this button to beat any option they might be trying besides invincible reversals or faster moves that won't do much anyway because they'd hit her out of the air. She can follow up hitting this with a j.LP juggle, too, to flip out the opponent while they're in the air, or simply set up assists as they're coming down. Good usage of this move can win entire games. Be wary of using it as an instant-air-overhead, however - that option is strong, but difficult to land and risky, as it is death on block unless used very close to the ground on the way down. | |||||||||||||
Throws
| Damage | Counter-Hit Damage | Potential Damage | Shadow On Hit | Shadow On Block | Guard | Startup | Active | Recovery | Total Duration | On Hit | On Counter-Hit | On Block | Special Properties |
|---|---|---|---|---|---|---|---|---|---|---|---|---|---|
| 24.3 (6%) | - | 8.1 (2%) | - | - | - | 5 | 2 | 29 | 35f | - | - | - | Hard Knockdown |
There's no difference whether you're in the Blade body or not. | |||||||||||||
Special Moves
| Version | Damage | Counter-Hit Damage | Potential Damage | Shadow On Hit | Shadow On Block | Guard | Startup | Active | Recovery | Total Duration | On Hit | On Counter-Hit | On Block | Special Properties |
|---|---|---|---|---|---|---|---|---|---|---|---|---|---|---|
| LK | 26.8 (7%) | 38.8 (10%) | 2.3 (0.6%) | ?? | ?? | Mid | 8 | 6 | 16 | 29f | +6 | +6 | -3 | -- |
To Do | ||||||||||||||
| Version | Damage | Counter-Hit Damage | Potential Damage | Shadow On Hit | Shadow On Block | Guard | Startup | Active | Recovery | Total Duration | On Hit | On Counter-Hit | On Block | Special Properties |
| MK | 26.8 (7%) | 38.8 (10%) | 2.3 (0.6%) | ?? | ?? | Mid | 10 | 10 | 14 | 33f | +9 | +9 | -5 | Low Invul 5-10f |
To Do | ||||||||||||||
| Version | Damage | Counter-Hit Damage | Potential Damage | Shadow On Hit | Shadow On Block | Guard | Startup | Active | Recovery | Total Duration | On Hit | On Counter-Hit | On Block | Special Properties |
| HK | 26.8 (7%) | 38.8 (10%) | 2.3 (0.6%) | ?? | ?? | Mid | 13 | 14 | 10 | 36f | +13 | +13 | -10 | Low Invul 4-10f |
To Do | ||||||||||||||
| Version | Damage | Counter-Hit Damage | Potential Damage | Shadow On Hit | Shadow On Block | Guard | Startup | Active | Recovery | Total Duration | On Hit | On Counter-Hit | On Block | Special Properties |
|---|---|---|---|---|---|---|---|---|---|---|---|---|---|---|
| LK | 26.3 (7%) | 26.3 (7%) | 3.4 (0.9%) | ?? | ?? | Mid | 11 | 9 | 19 | 38f | +5 | +5 | -5 | High Invul 1-15f |
To Do | ||||||||||||||
| Version | Damage | Counter-Hit Damage | Potential Damage | Shadow On Hit | Shadow On Block | Guard | Startup | Active | Recovery | Total Duration | On Hit | On Counter-Hit | On Block | Special Properties |
| MK | 26.3 (7%) | 26.3 (7%) | 3.4 (0.9%) | ?? | ?? | Mid | 14 | 9 | 24 | 46f | +9 | +9 | -1 | High Invul 1-15f |
To Do | ||||||||||||||
| Version | Damage | Counter-Hit Damage | Potential Damage | Shadow On Hit | Shadow On Block | Guard | Startup | Active | Recovery | Total Duration | On Hit | On Counter-Hit | On Block | Special Properties |
| HK | 26.3 (7%) | 26.3 (7%) | 3.4 (0.9%) | ?? | ?? | Mid | 17 | 9 | 31 | 56f | +13 | +13 | +1 | High Invul 1-15f |
To Do | ||||||||||||||
| Version | Damage | Counter-Hit Damage | Potential Damage | Shadow On Hit | Shadow On Block | Guard | Startup | Active | Recovery | Total Duration | On Hit | On Counter-Hit | On Block | Special Properties |
|---|---|---|---|---|---|---|---|---|---|---|---|---|---|---|
| LP | 30 (8%) | 36 (10%) | -- | ?? | ?? | Mid | 11 | 8 | 50 | 68f | 0 | +10 | -7 | Stagger |
To Do | ||||||||||||||
| Version | Damage | Counter-Hit Damage | Potential Damage | Shadow On Hit | Shadow On Block | Guard | Startup | Active | Recovery | Total Duration | On Hit | On Counter-Hit | On Block | Special Properties |
| MP | 30 (8%) | 36 (10%) | -- | ?? | ?? | Mid | 11 | 8 | 55 | 73f | +32 | +32 | -21 | Soft Knockdown |
To Do | ||||||||||||||
| Version | Damage | Counter-Hit Damage | Potential Damage | Shadow On Hit | Shadow On Block | Guard | Startup | Active | Recovery | Total Duration | On Hit | On Counter-Hit | On Block | Special Properties |
| HP | 40 (11%) | 48 (13%) | -- | ?? | ?? | Mid | 11 | 9 | 44 | 63f | +38 | +38 | -42 | Full Invul 1-11f, Hard Knockdown |
To Do | ||||||||||||||
| Version | Damage | Counter-Hit Damage | Potential Damage | Shadow On Hit | Shadow On Block | Guard | Startup | Active | Recovery | Total Duration | On Hit | On Counter-Hit | On Block | Special Properties |
|---|---|---|---|---|---|---|---|---|---|---|---|---|---|---|
| LP | 24 (6%) | 24 (6%) | -- | ?? | ?? | Mid | 11 | 10 | 12 | 32+f | +44 | +44 | -36 | Stagger |
To Do | ||||||||||||||
| Version | Damage | Counter-Hit Damage | Potential Damage | Shadow On Hit | Shadow On Block | Guard | Startup | Active | Recovery | Total Duration | On Hit | On Counter-Hit | On Block | Special Properties |
| MP | 24 (6%) | 24 (6%) | -- | ?? | ?? | Mid | 13 | 7 | 12 | 31+f | +28 | +28 | -25 | Stagger |
To Do | ||||||||||||||
| Version | Damage | Counter-Hit Damage | Potential Damage | Shadow On Hit | Shadow On Block | Guard | Startup | Active | Recovery | Total Duration | On Hit | On Counter-Hit | On Block | Special Properties |
| HP | 24 (6%) | 24 (6%) | -- | ?? | ?? | Mid | 11 | 8 | 12 | 31f | +27 | +27 | -22 | Stagger |
To Do | ||||||||||||||
| Version | Damage | Counter-Hit Damage | Potential Damage | Shadow On Hit | Shadow On Block | Guard | Startup | Active | Recovery | Total Duration | On Hit | On Counter-Hit | On Block | Special Properties |
|---|---|---|---|---|---|---|---|---|---|---|---|---|---|---|
| LP | 32 (8%) | 44 (12%) | -- | ?? | ?? | Mid | 3 | 8 | 36 | 46f | +11 | +11 | -36 | Full Invul 1-2f, High Invul 3-7f, Throw Invul 3-15f |
To Do | ||||||||||||||
| Version | Damage | Counter-Hit Damage | Potential Damage | Shadow On Hit | Shadow On Block | Guard | Startup | Active | Recovery | Total Duration | On Hit | On Counter-Hit | On Block | Special Properties |
| MP | 23 (6%) | 59 (16%) | 3 (0.8%) | ?? | ?? | Mid | 11 | 3[13]2[16]2 | 25 | 71f | +11 | +11 | +2 | -- |
| ||||||||||||||
| Version | Damage | Counter-Hit Damage | Potential Damage | Shadow On Hit | Shadow On Block | Guard | Startup | Active | Recovery | Total Duration | On Hit | On Counter-Hit | On Block | Special Properties |
| HP | 37.2 (10%) | 49.2 (13%) | 4.4 (1%) | ?? | ?? | Mid | 11 | 2[14]2[8]10 | 36 | 92f | +59 | +59 | -13 | High Invul 37-43f, Throw Invul 37-51f |
| ||||||||||||||
| Version | Damage | Counter-Hit Damage | Potential Damage | Shadow On Hit | Shadow On Block | Guard | Startup | Active | Recovery | Total Duration | On Hit | On Counter-Hit | On Block | Special Properties |
|---|---|---|---|---|---|---|---|---|---|---|---|---|---|---|
| LP | 16.4 (4%) | 16.4 (4%) | 2.1 (0.5%) | ?? | ?? | Low | 15 | -- | 38 | 53f | +1 | +1 | -15 | -- |
To Do | ||||||||||||||
| Version | Damage | Counter-Hit Damage | Potential Damage | Shadow On Hit | Shadow On Block | Guard | Startup | Active | Recovery | Total Duration | On Hit | On Counter-Hit | On Block | Special Properties |
| MP | 16.4 (4%) | 16.4 (4%) | 2.1 (0.5%) | ?? | ?? | Mid | 15 | -- | 39 | 54f | 0 | 0 | -16 | -- |
To Do | ||||||||||||||
| Version | Damage | Counter-Hit Damage | Potential Damage | Shadow On Hit | Shadow On Block | Guard | Startup | Active | Recovery | Total Duration | On Hit | On Counter-Hit | On Block | Special Properties |
| HP | 16.4 (4%) | 16.4 (4%) | 2.1 (0.5%) | ?? | ?? | Mid | 15 | -- | 41 | 56f | -2 | -2 | -18 | -- |
To Do | ||||||||||||||
Shadow Moves
| Version | Damage | Counter-Hit Damage | Potential Damage | Shadow On Hit | Shadow On Block | Guard | Startup | Active | Recovery | Total Duration | On Hit | On Counter-Hit | On Block | Special Properties |
|---|---|---|---|---|---|---|---|---|---|---|---|---|---|---|
| S | 44 (12%) | 44 (12%) | 8 (2%) | 0 | 0 | Mid | 1+10 (11) | 4[8]2[20]
2[17]2[7]2 |
46 | 120f | -1 | -1 | -9 | Proj Invul 1-20f, Strike Invul 21-22f |
To Do | ||||||||||||||
| Version | Damage | Counter-Hit Damage | Potential Damage | Shadow On Hit | Shadow On Block | Guard | Startup | Active | Recovery | Total Duration | On Hit | On Counter-Hit | On Block | Special Properties |
|---|---|---|---|---|---|---|---|---|---|---|---|---|---|---|
| S | 35.2 (9%) | 35.2 (9%) | 6.4 (1%) | 0 | 0 | Mid | 11+2 (13) | 5[1]5[2]
5[2]5[2]5 |
22 | 66f | +2 | +2 | -2 | High Invul 1-11f |
To Do | ||||||||||||||
| Version | Damage | Counter-Hit Damage | Potential Damage | Shadow On Hit | Shadow On Block | Guard | Startup | Active | Recovery | Total Duration | On Hit | On Counter-Hit | On Block | Special Properties |
|---|---|---|---|---|---|---|---|---|---|---|---|---|---|---|
| S | 44 (12%) | 44 (12%) | 8 (2%) | 0 | 0 | Mid | 1+11 (12) | 5[1]5[1]5
[1]5[1]5 |
24 | 64f | +15 | +15 | -12 | Armored, Soft Knockdown, Cashout |
To Do | ||||||||||||||
| Version | Damage | Counter-Hit Damage | Potential Damage | Shadow On Hit | Shadow On Block | Guard | Startup | Active | Recovery | Total Duration | On Hit | On Counter-Hit | On Block | Special Properties |
|---|---|---|---|---|---|---|---|---|---|---|---|---|---|---|
| S | 44 (12%) | 44 (12%) | 8 (2%) | 0 | 0 | Mid | 1+11 (12) | 5[1]5[1]5
[1]5[1]5 |
12 (Landing) | 52+f | +31 | +31 | +4 | Soft Knockdown |
To Do | ||||||||||||||
| Version | Damage | Counter-Hit Damage | Potential Damage | Shadow On Hit | Shadow On Block | Guard | Startup | Active | Recovery | Total Duration | On Hit | On Counter-Hit | On Block | Special Properties |
|---|---|---|---|---|---|---|---|---|---|---|---|---|---|---|
| S | 52.8 (14%) | 52.8 (14%) | 9.6 (2%) | -- | -- | Mid | 3+0(0) | 7[1]2[1]2 | 39 | 54f | +25 | +25 | -30 | Invul 1-6f, High Invul 7-10f, Throw Invul 7-15f, Juggle Cashout |
To Do | ||||||||||||||
| Version | Damage | Counter-Hit Damage | Potential Damage | Shadow On Hit | Shadow On Block | Guard | Startup | Active | Recovery | Total Duration | On Hit | On Counter-Hit | On Block | Special Properties |
|---|---|---|---|---|---|---|---|---|---|---|---|---|---|---|
| S | 39.2 (10%) | 39.2 (10%) | 8.4 (2%) | -- | -- | Mid | 1+5 (6) | -- | 50 | 56f | +84 | +84 | -8 | Hard Knockdown |
| ||||||||||||||
Enders
| Version | Ender Type | On Hit | Special Properties |
|---|---|---|---|
| Level 1 | Hard Knockdown | +57 | -- |
| Version | Ender Type | On Hit | Special Properties |
| Level 2 | Hard Knockdown | +57 | -- |
| Version | Ender Type | On Hit | Special Properties |
| Level 3 | Hard Knockdown | +57 | -- |
| Version | Ender Type | On Hit | Special Properties |
| Level 4 | Hard Knockdown | +57 | -- |
| Version | Ender Type | On Hit | Special Properties | |||||||||
|---|---|---|---|---|---|---|---|---|---|---|---|---|
| Level 1 | Launcher | +58 | -- | |||||||||
Jugglable for 28 frames | ||||||||||||
| Version | Ender Type | On Hit | Special Properties | |||||||||
| Level 2 | Launcher | +58 | -- | |||||||||
Jugglable for 28 frames | ||||||||||||
| Version | Ender Type | On Hit | Special Properties | |||||||||
| Level 3 | Launcher | +58 | -- | |||||||||
Jugglable for 28 frames | ||||||||||||
| Version | Ender Type | On Hit | Special Properties | |||||||||
| Level 4 | Launcher | +58 | -- | |||||||||
Jugglable for 28 frames | ||||||||||||
| Version | Ender Type | On Hit | Special Properties |
|---|---|---|---|
| Level 1 | Wall Splat | -16/+10 (Splat) | -- |
| Version | Ender Type | On Hit | Special Properties |
| Level 2 | Wall Splat | -15/+11 (Splat) | -- |
| Version | Ender Type | On Hit | Special Properties |
| Level 3 | Wall Splat | -15/+11 (Splat) | -- |
| Version | Ender Type | On Hit | Special Properties |
| Level 4 | Wall Splat | -15/+11 (Splat) | -- |
| Version | Ender Type | On Hit | Special Properties |
| Shadow | Damage | +15 | -- |
| Version | Ender Type | On Hit | Special Properties |
|---|---|---|---|
| Level 1 | Damage | +30 | -- |
| Version | Ender Type | On Hit | Special Properties |
| Level 2 | Damage | +30 | -- |
| Version | Ender Type | On Hit | Special Properties |
| Level 3 | Damage | +30 | -- |
| Version | Ender Type | On Hit | Special Properties |
| Level 4 | Damage | +31 | -- |
| Version | Ender Type | On Hit | Special Properties |
| Shadow | Damage | +25 | Juggle Cashout |
| Version | Ender Type | On Hit | Special Properties | |||||||||
|---|---|---|---|---|---|---|---|---|---|---|---|---|
| Level 1 | Battery | +55 | Launcher | |||||||||
Jugglable for 25 frames. | ||||||||||||
| Version | Ender Type | On Hit | Special Properties | |||||||||
| Level 2 | Battery | +59 | Launcher | |||||||||
Jugglable for 29 frames. | ||||||||||||
| Version | Ender Type | On Hit | Special Properties | |||||||||
| Level 3 | Battery | +50 | Launcher | |||||||||
Jugglable for 20 frames. | ||||||||||||
| Version | Ender Type | On Hit | Special Properties | |||||||||
| Level 4 | Battery | +49 | Launcher | |||||||||
Jugglable for 19 frames. | ||||||||||||
Instinct


