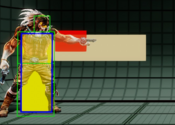
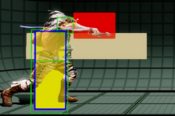
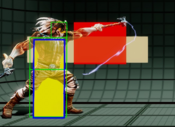
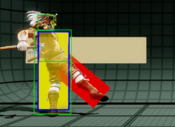
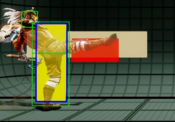
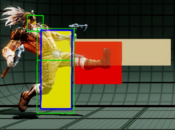
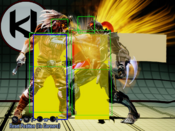
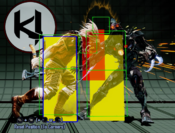
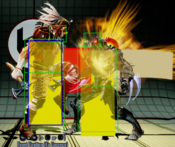
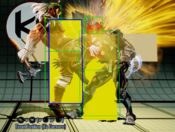
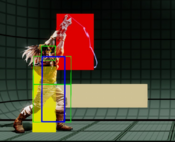
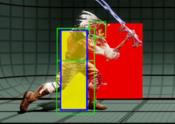
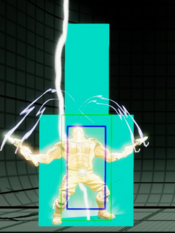
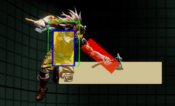
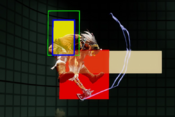
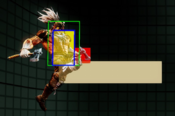
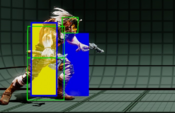
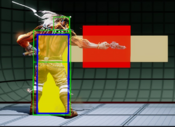
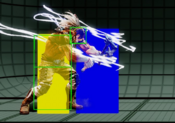
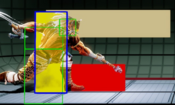
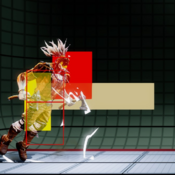
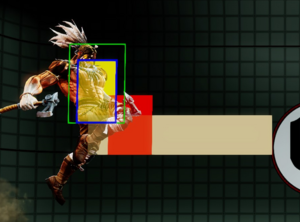
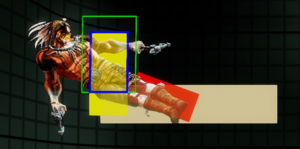
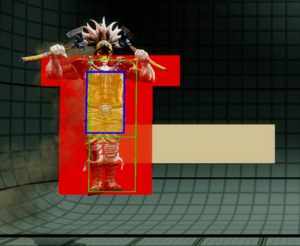
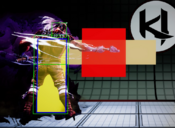
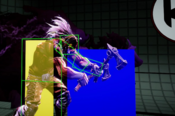
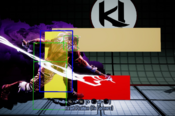
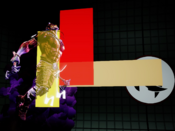
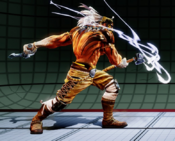
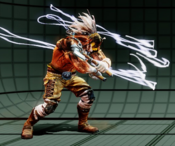
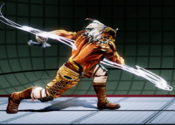
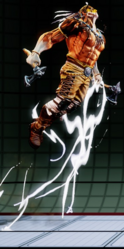
(Thunder Standing Far Normal Hitboxes) |
m (→Throws) |
||
| (21 intermediate revisions by the same user not shown) | |||
| Line 22: | Line 22: | ||
=== Far Normals === | === Far Normals === | ||
{{MoveData | {{MoveData | ||
|image= | |image= Thunder SLPhb.png|thumb | ||
|caption= Test Caption | |caption= Test Caption | ||
|name= Standing Light Punch | |name= Standing Light Punch | ||
| Line 49: | Line 49: | ||
{{MoveData | {{MoveData | ||
|image= | |image= Thunder SMPhb.png|thumb | ||
|caption= Test Caption | |caption= Test Caption | ||
|name= Far Standing Medium Punch | |name= Far Standing Medium Punch | ||
| Line 76: | Line 76: | ||
{{MoveData | {{MoveData | ||
|image= | |image= Thunder SHPhb.png|thumb | ||
|caption= Test Caption | |caption= Test Caption | ||
|name= Far Standing Heavy Punch | |name= Far Standing Heavy Punch | ||
| Line 103: | Line 103: | ||
{{MoveData | {{MoveData | ||
|image= | |image= Thunder SLKhb.png|thumb | ||
|caption= Stanky Leg | |caption= Stanky Leg | ||
|name= Standing Light Kick | |name= Standing Light Kick | ||
| Line 130: | Line 130: | ||
{{MoveData | {{MoveData | ||
|image= | |image= Thunder SMKhb.png|thumb | ||
|caption= Test Caption | |caption= Test Caption | ||
|name= Far Standing Medium Kick | |name= Far Standing Medium Kick | ||
| Line 157: | Line 157: | ||
{{MoveData | {{MoveData | ||
|image= | |image= Thunder SHKhb.png|thumb | ||
|caption= | |caption= | ||
|name= Far Standing Heavy Kick | |name= Far Standing Heavy Kick | ||
| Line 181: | Line 181: | ||
}} | }} | ||
}} | }} | ||
=== Close Normals === | === Close Normals === | ||
{{MoveData | {{MoveData | ||
|image= | |image= Thunder NMPhb.png|thumb | ||
|caption= | |caption= | ||
|name= Close Standing Medium Punch | |name= Close Standing Medium Punch | ||
| Line 212: | Line 211: | ||
{{MoveData | {{MoveData | ||
|image= | |image= Thunder NHPhb.png|thumb | ||
|caption= | |caption= | ||
|name= Close Standing Heavy Punch | |name= Close Standing Heavy Punch | ||
| Line 239: | Line 238: | ||
{{MoveData | {{MoveData | ||
|image= | |image= Thunder NMKhb.png|thumb | ||
|caption= | |caption= | ||
|name= Close Standing Medium Kick | |name= Close Standing Medium Kick | ||
| Line 266: | Line 265: | ||
{{MoveData | {{MoveData | ||
|image= | |image= Thunder NHKhb.png|thumb | ||
|caption= | |caption= | ||
|name= Close Standing Heavy Kick | |name= Close Standing Heavy Kick | ||
| Line 290: | Line 289: | ||
}} | }} | ||
}} | }} | ||
=== Crouching Normals === | === Crouching Normals === | ||
{{MoveData | {{MoveData | ||
|image= | |image= Thunder CLPhb.png|thumb | ||
|caption= | |caption= | ||
|name= Crouching Light Punch | |name= Crouching Light Punch | ||
| Line 321: | Line 319: | ||
{{MoveData | {{MoveData | ||
|image= | |image= Thunder CMPhb.png|thumb | ||
|caption= | |caption= | ||
|name= Crouching Medium Punch | |name= Crouching Medium Punch | ||
| Line 348: | Line 346: | ||
{{MoveData | {{MoveData | ||
|image= | |image= Thunder CHPhb.png|thumb | ||
|caption= | |caption= | ||
|name= Crouching Heavy Punch | |name= Crouching Heavy Punch | ||
| Line 375: | Line 373: | ||
{{MoveData | {{MoveData | ||
|image= | |image= Thunder CLKhb.png|thumb | ||
|caption= Toe Tap | |caption= Toe Tap | ||
|name= Crouching Light Kick | |name= Crouching Light Kick | ||
| Line 402: | Line 400: | ||
{{MoveData | {{MoveData | ||
|image= | |image= Thunder CMKhb.png|thumb | ||
|caption= | |caption= | ||
|name= Crouching Medium Kick | |name= Crouching Medium Kick | ||
| Line 429: | Line 427: | ||
{{MoveData | {{MoveData | ||
|image= | |image= Thunder CHKhb.png|thumb | ||
|caption= | |caption= | ||
|name= Crouching Heavy Kick | |name= Crouching Heavy Kick | ||
| Line 453: | Line 451: | ||
}} | }} | ||
}} | }} | ||
=== Command Normals === | === Command Normals === | ||
{{MoveData | {{MoveData | ||
|image= | |image= Thunder 6HPhb.png|thumb | ||
|caption= "Bonk" | |caption= "Bonk" | ||
|name= Forward Heavy Punch "Horn Breaker" | |name= Forward Heavy Punch "Horn Breaker" | ||
| Line 484: | Line 481: | ||
{{MoveData | {{MoveData | ||
|image= | |image= Thunder SkycallHB.png|thumb | ||
|caption= Dash up S CotE incoming <br> "The reason you should never macro" | |caption= Dash up S CotE incoming <br> "The reason you should never macro" | ||
|name= PPP/Call of the Sky | |name= PPP/Call of the Sky | ||
| Line 499: | Line 496: | ||
|startup= 15 | |startup= 15 | ||
|active= 7 | |active= 7 | ||
|recovery= | |recovery= 25 | ||
|total duration= | |total duration= 46f | ||
|on hit= -- | |on hit= -- | ||
|on counter-hit= -- | |on counter-hit= -- | ||
| Line 508: | Line 505: | ||
}} | }} | ||
}} | }} | ||
=== Jumping Normals === | === Jumping Normals === | ||
{{MoveData | {{MoveData | ||
|image= | |image= Thunder JLPhb.png|thumb | ||
|caption= | |caption= | ||
|name= Jumping Light Punch | |name= Jumping Light Punch | ||
| Line 539: | Line 535: | ||
{{MoveData | {{MoveData | ||
|image= | |image= Thunder JMPhb.png|thumb | ||
|caption= | |caption= | ||
|name= Jumping Medium Punch | |name= Jumping Medium Punch | ||
| Line 567: | Line 563: | ||
{{MoveData | {{MoveData | ||
|image= | |image= Thunder JHPhb.png|thumb | ||
|caption= Emperor of all Crossups | |caption= Emperor of all Crossups | ||
|name= Jumping Heavy Punch | |name= Jumping Heavy Punch | ||
| Line 594: | Line 590: | ||
{{MoveData | {{MoveData | ||
|image= | |image= Thunder JLKhb.png|thumb | ||
|caption= | |caption= | ||
|name= Jumping Light Kick | |name= Jumping Light Kick | ||
| Line 621: | Line 617: | ||
{{MoveData | {{MoveData | ||
|image= | |image= Thunder JMKhb.png|thumb | ||
|caption= | |caption= | ||
|name= Jumping Medium Kick | |name= Jumping Medium Kick | ||
| Line 648: | Line 644: | ||
{{MoveData | {{MoveData | ||
|image= | |image= Thunder JHKhb.png|thumb | ||
|caption= | |caption= | ||
|name= Jumping Heavy Kick | |name= Jumping Heavy Kick | ||
| Line 672: | Line 668: | ||
}} | }} | ||
}} | }} | ||
== Throws == | == Throws == | ||
{{MoveData | {{MoveData | ||
|image= | |image= Thunder LPLKhb.png|thumb | ||
|caption= | |caption= | ||
|name= Forward Throw | |name= Forward Throw | ||
| Line 683: | Line 678: | ||
|data= | |data= | ||
{{AttackData-KI2013 | {{AttackData-KI2013 | ||
|damage= 40(11%) | |damage= 40 (11%) | ||
|counter-hit damage= 40(11%) | |counter-hit damage= 40 (11%) | ||
|potential damage= -- | |potential damage= -- | ||
|shadow on hit= 4% | |shadow on hit= 4% | ||
| Line 710: | Line 705: | ||
|data= | |data= | ||
{{AttackData-KI2013 | {{AttackData-KI2013 | ||
|damage= 0(0%) | |damage= 0 (0%) | ||
|counter-hit damage= 0(0%) | |counter-hit damage= 0 (0%) | ||
|potential damage= -- | |potential damage= -- | ||
|shadow on hit= 4% | |shadow on hit= 4% | ||
| Line 727: | Line 722: | ||
}} | }} | ||
}} | }} | ||
== Special Moves == | == Special Moves == | ||
{{MoveData | {{MoveData | ||
|image= | |image= Thunder 236Phb.png|thumb | ||
|caption= | |caption= | ||
|name= Triplax | |name= Triplax | ||
| Line 793: | Line 789: | ||
{{MoveData | {{MoveData | ||
|image= | |image= Thunder 214Phb.png|thumb | ||
|caption= | |caption= | ||
|name= Call of the Earth | |name= Call of the Earth | ||
| Line 857: | Line 853: | ||
{{MoveData | {{MoveData | ||
|image= | |image= Thunder 214Khb.png|thumb | ||
|caption= | |caption= | ||
|name= Ankle Slicer | |name= Ankle Slicer | ||
| Line 921: | Line 917: | ||
{{MoveData | {{MoveData | ||
|image= | |image= Thunder DPhb.png|thumb | ||
|caption= | |caption= | ||
|name= Sammamish | |name= Sammamish | ||
| Line 985: | Line 981: | ||
{{MoveData | {{MoveData | ||
|image= | |image= | ||
[[File:Thunder KneeHB.png|thumb]] | |||
[[File:Thunder JHKhb.png|thumb]] | |||
[[File:Thunder SkyfalHB.png|thumb]] | |||
|caption= | |caption= | ||
|name= DP Followups | |name= DP Followups | ||
| Line 1,001: | Line 1,000: | ||
|startup= 12 | |startup= 12 | ||
|active= 7 | |active= 7 | ||
|recovery= | |recovery= 21 | ||
|total duration= 49f | |total duration= 49f | ||
|on hit= +8 | |on hit= +8 | ||
| Line 1,007: | Line 1,006: | ||
|on block= -16 | |on block= -16 | ||
|special properties= Flipout | |special properties= Flipout | ||
|description= | |description= Rainmaker shares its animation with Jump Light Kick. | ||
}} | }} | ||
{{AttackData-KI2013 | {{AttackData-KI2013 | ||
| Line 1,019: | Line 1,018: | ||
|startup= 11 | |startup= 11 | ||
|active= 22 | |active= 22 | ||
|recovery= | |recovery= 21 | ||
|total duration= 49f | |total duration= 49f | ||
|on hit= +70 | |on hit= +70 | ||
| Line 1,025: | Line 1,024: | ||
|on block= -16 | |on block= -16 | ||
|special properties= Hard Knockdown | |special properties= Hard Knockdown | ||
|description= | |description= Downpour shares its animation and hitbox with Jump Heavy Kick. | ||
}} | }} | ||
{{AttackData-KI2013 | {{AttackData-KI2013 | ||
| Line 1,037: | Line 1,036: | ||
|startup= 20 | |startup= 20 | ||
|active= 7 | |active= 7 | ||
|recovery= | |recovery= 29 | ||
|total duration= 58f | |total duration= 58f | ||
|on hit= +62 (25f to juggle) | |on hit= +62 (25f to juggle) | ||
|on counter-hit= +62 (25f to juggle) | |on counter-hit= +62 (25f to juggle) | ||
|on block= -13 | |on block= -13 | ||
|special properties= Soft Knockdown, Dash Cancellable | |special properties= Ground Bounce, Soft Knockdown, Crow Dash Cancellable | ||
|description= On hit, Thunder has 0f of landing recovery | |||
}} | }} | ||
}} | }} | ||
== Shadow Moves == | == Shadow Moves == | ||
{{MoveData | {{MoveData | ||
|image= | |image= Thunder 236PPhb.png|thumb | ||
|caption= Test Caption | |caption= Test Caption | ||
|name= Shadow Triplax | |name= Shadow Triplax | ||
| Line 1,075: | Line 1,075: | ||
{{MoveData | {{MoveData | ||
|image= | |image= Thunder 214PPhb.png|thumb | ||
|caption= [[File:Pewish.png|75px]] | |caption= [[File:Pewish.png|75px]] | ||
|name= Shadow Call of the Earth | |name= Shadow Call of the Earth | ||
| Line 1,102: | Line 1,102: | ||
{{MoveData | {{MoveData | ||
|image= | |image= Thunder 214KKhb.png|thumb | ||
|caption= Test Caption | |caption= Test Caption | ||
|name= Shadow Ankle Slicer | |name= Shadow Ankle Slicer | ||
| Line 1,129: | Line 1,129: | ||
{{MoveData | {{MoveData | ||
|image= | |image= Thunder DPPhb.png|thumb | ||
|caption= Test Caption | |caption= Test Caption | ||
|name= Shadow Sammamish | |name= Shadow Sammamish | ||
| Line 1,156: | Line 1,156: | ||
== Enders == | == Enders == | ||
{{MoveData | {{MoveData | ||
|image= | |image= Thunder 236Pnv.png|thumb | ||
|caption= Test Caption | |caption= Test Caption | ||
|name= Triplax Ender | |name= Triplax Ender | ||
| Line 1,194: | Line 1,194: | ||
{{MoveData | {{MoveData | ||
|image= | |image= Thunder 214Pnv.png|thumb | ||
|caption= Test Caption | |caption= Test Caption | ||
|name= Call of the Earth Ender | |name= Call of the Earth Ender | ||
| Line 1,202: | Line 1,202: | ||
{{KI2013_EnderData | {{KI2013_EnderData | ||
|version= Level 1 | |version= Level 1 | ||
|ender type= Damage | |ender type= Damage/Exchange | ||
|on hit= +4 | |on hit= +4 | ||
|special properties= -- | |special properties= -- | ||
| Line 1,208: | Line 1,208: | ||
}} | }} | ||
{{KI2013_EnderData | {{KI2013_EnderData | ||
|ender type= Damage | |ender type= Damage/Exchange | ||
|version= Level 2 | |version= Level 2 | ||
|on hit= +3 | |on hit= +3 | ||
| Line 1,215: | Line 1,215: | ||
}} | }} | ||
{{KI2013_EnderData | {{KI2013_EnderData | ||
|ender type= Damage | |ender type= Damage/Exchange | ||
|version= Level 3 | |version= Level 3 | ||
|on hit= +3 | |on hit= +3 | ||
| Line 1,222: | Line 1,222: | ||
}} | }} | ||
{{KI2013_EnderData | {{KI2013_EnderData | ||
|ender type= Damage | |ender type= Damage/Exchange | ||
|version= Level 4 | |version= Level 4 | ||
|on hit= +3 | |on hit= +3 | ||
| Line 1,239: | Line 1,239: | ||
{{MoveData | {{MoveData | ||
|image= | |image= Thunder 214Knv.png|thumb | ||
|caption= Test Caption | |caption= Test Caption | ||
|name= Ankle Slicer Ender | |name= Ankle Slicer Ender | ||
| Line 1,277: | Line 1,277: | ||
{{MoveData | {{MoveData | ||
|image= | |image= Thunder DPnv.png|thumb | ||
|caption= Test Caption | |caption= Test Caption | ||
|name= Sammamish Ender | |name= Sammamish Ender | ||
Latest revision as of 18:33, 26 January 2025
Introduction
Lore
To Do
Gameplay
Thunder is a hybrid grappler character with a large emphasis on brawling tools. Said tools allow him to bulldog his way in and begin his destructive offense. Once Thunder scores a hard knockdown the party really gets started, forcing his opponent to endure a series of brutal ambiguous 50/50s. Get in the opponent's face and tear through their defense with this walking blender of death.
| Strengths | Weaknesses |
|---|---|
|
|
Universal Mechanics
Instinct
Murder of Crows: Thunder can cancel attacks into and out of dashes. All dashes become invulnerable and pass through your opponent.
Combat Trait
Throw Linkers: Thunder can use his Back Throw as an Opener or Exchange Linker during combos.
Normal Moves
Far Normals
| Damage | Counter-Hit Damage | Potential Damage | Shadow On Hit | Shadow On Block | Guard | Startup | Active | Recovery | Total Duration | On Hit | On Counter-Hit | On Block | Special Properties |
|---|---|---|---|---|---|---|---|---|---|---|---|---|---|
| 10(2%) | 14(3%) | -- | 1.6% | 2.4% | Mid | 5 | 2 | 13 | 19f | +5 | +7 | +2 | Chain |
To Do | |||||||||||||
| Damage | Counter-Hit Damage | Potential Damage | Shadow On Hit | Shadow On Block | Guard | Startup | Active | Recovery | Total Duration | On Hit | On Counter-Hit | On Block | Special Properties |
|---|---|---|---|---|---|---|---|---|---|---|---|---|---|
| 20(5%) | 26(7%) | -- | 2.4% | 4% | Mid | 8 | 3 | 15 | 25f | -1 | +3 | -4 | -- |
To Do | |||||||||||||
| Damage | Counter-Hit Damage | Potential Damage | Shadow On Hit | Shadow On Block | Guard | Startup | Active | Recovery | Total Duration | On Hit | On Counter-Hit | On Block | Special Properties |
|---|---|---|---|---|---|---|---|---|---|---|---|---|---|
| 30(8%) | 38(10%) | -- | 4% | 4.5% | Mid | 11 | 5 | 19 | 34f | -1 | +3 | -4 | -- |
To Do | |||||||||||||
| Damage | Counter-Hit Damage | Potential Damage | Shadow On Hit | Shadow On Block | Guard | Startup | Active | Recovery | Total Duration | On Hit | On Counter-Hit | On Block | Special Properties |
|---|---|---|---|---|---|---|---|---|---|---|---|---|---|
| 10(2%) | 14(3%) | -- | 1.6% | 2.4% | Mid | 6 | 3 | 10 | 18f | +5 | +9 | +2 | Flipout |
LMAO this button. Easily Thunder's overall most useful button. Fast startup, +2 on block so it frametraps into itself, almost no pushback and range that rivals medium buttons, can link into 5f buttons on hit/ch, and ticks into M CotE on hit/ch/block. Pressing this up close is never a bad idea. | |||||||||||||
| Damage | Counter-Hit Damage | Potential Damage | Shadow On Hit | Shadow On Block | Guard | Startup | Active | Recovery | Total Duration | On Hit | On Counter-Hit | On Block | Special Properties |
|---|---|---|---|---|---|---|---|---|---|---|---|---|---|
| 20(5%) | 26(7%) | -- | 2.4% | 4% | Mid | 9 | 4 | 14 | 26f | +3 | +6 | 0 | -- |
To Do | |||||||||||||
| Damage | Counter-Hit Damage | Potential Damage | Shadow On Hit | Shadow On Block | Guard | Startup | Active | Recovery | Total Duration | On Hit | On Counter-Hit | On Block | Special Properties |
|---|---|---|---|---|---|---|---|---|---|---|---|---|---|
| 36(10%) | 44(12%) | -- | 4% | 4.5% | Mid | 15 | 5 | 21 | 40f | +3 | +6 | +1 | -- |
Close Normals
| Damage | Counter-Hit Damage | Potential Damage | Shadow On Hit | Shadow On Block | Guard | Startup | Active | Recovery | Total Duration | On Hit | On Counter-Hit | On Block | Special Properties |
|---|---|---|---|---|---|---|---|---|---|---|---|---|---|
| 20(5%) | 26(7%) | -- | 2.4% | 4% | Mid | 8 | 2 | 13 | 22f | +1 | +4 | -2 | -- |
| Damage | Counter-Hit Damage | Potential Damage | Shadow On Hit | Shadow On Block | Guard | Startup | Active | Recovery | Total Duration | On Hit | On Counter-Hit | On Block | Special Properties |
|---|---|---|---|---|---|---|---|---|---|---|---|---|---|
| 30(8%) | 38(10%) | -- | 4% | 4.5% | Mid | 10 | 4 | 16 | 29f | 0 | +4 | -5 | -- |
| Damage | Counter-Hit Damage | Potential Damage | Shadow On Hit | Shadow On Block | Guard | Startup | Active | Recovery | Total Duration | On Hit | On Counter-Hit | On Block | Special Properties |
|---|---|---|---|---|---|---|---|---|---|---|---|---|---|
| 20(5%) | 26(7%) | -- | 2.4% | 4% | Mid | 7 | 3 | 13 | 22f | +4 | +7 | +1 | -- |
| Damage | Counter-Hit Damage | Potential Damage | Shadow On Hit | Shadow On Block | Guard | Startup | Active | Recovery | Total Duration | On Hit | On Counter-Hit | On Block | Special Properties |
|---|---|---|---|---|---|---|---|---|---|---|---|---|---|
| 30(8%) | 38(10%) | -- | 4% | 4.5% | Mid | 9 | 4 | 15 | 27f | -1 | +3 | -5 | -- |
Crouching Normals
| Damage | Counter-Hit Damage | Potential Damage | Shadow On Hit | Shadow On Block | Guard | Startup | Active | Recovery | Total Duration | On Hit | On Counter-Hit | On Block | Special Properties |
|---|---|---|---|---|---|---|---|---|---|---|---|---|---|
| 10(2%) | 14(3%) | -- | 1.6% | 2.4% | Mid | 5 | 2 | 10 | 16f | +4 | +6 | +2 | Chain |
| Damage | Counter-Hit Damage | Potential Damage | Shadow On Hit | Shadow On Block | Guard | Startup | Active | Recovery | Total Duration | On Hit | On Counter-Hit | On Block | Special Properties |
|---|---|---|---|---|---|---|---|---|---|---|---|---|---|
| 20(5%) | 26(7%) | -- | 2.4% | 4% | Mid | 9 | 2 | 15 | 25f | +3 | +6 | -3 | -- |
| Damage | Counter-Hit Damage | Potential Damage | Shadow On Hit | Shadow On Block | Guard | Startup | Active | Recovery | Total Duration | On Hit | On Counter-Hit | On Block | Special Properties |
|---|---|---|---|---|---|---|---|---|---|---|---|---|---|
| 30(8%) | 38(10%) | -- | 4% | 4.5% | Mid | 10 | 4 | 21 | 34f | -3 | +1 | -6 | -- |
| Damage | Counter-Hit Damage | Potential Damage | Shadow On Hit | Shadow On Block | Guard | Startup | Active | Recovery | Total Duration | On Hit | On Counter-Hit | On Block | Special Properties |
|---|---|---|---|---|---|---|---|---|---|---|---|---|---|
| 10(2%) | 14(3%) | -- | 1.6% | 2.4% | Low | 5 | 2 | 8 | 15f | +4 | +6 | +1 | Chain |
Thunder's first and best low normal. Useful in frametraps and especially tick throws. Ticks into M CotE on hit/ch/block and its blistering fast total duration of 15f means a barely delayed cancel into M CotE will come out on whiff, OSing backdashes. | |||||||||||||
| Damage | Counter-Hit Damage | Potential Damage | Shadow On Hit | Shadow On Block | Guard | Startup | Active | Recovery | Total Duration | On Hit | On Counter-Hit | On Block | Special Properties |
|---|---|---|---|---|---|---|---|---|---|---|---|---|---|
| 20(5%) | 26(7%) | -- | 2.4% | 4% | Low | 9 | 3 | 14 | 27f | -2 | +1 | -4 | -- |
Thunder's second and still decent low normal. Better range means you can check standers from farther than 2LK can reach. When used as a tick normal you have to be mindful about their mashing habits as it will tick properly with M CotE on hit and block but will whiff on ch. If worried about a counterhit, tick into H CotE instead. | |||||||||||||
| Damage | Counter-Hit Damage | Potential Damage | Shadow On Hit | Shadow On Block | Guard | Startup | Active | Recovery | Total Duration | On Hit | On Counter-Hit | On Block | Special Properties |
|---|---|---|---|---|---|---|---|---|---|---|---|---|---|
| 36(10%) | 44(12%) | -- | 4% | 4.5% | Low | 12 | 3 | 25 | 39f | +48 | +48 | -6 | Hard Knockdown |
Thunder's final and by far his worst low normal. Slow and unsafe, pressing any other button is better in nearly every scenario. | |||||||||||||
Command Normals
| Damage | Counter-Hit Damage | Potential Damage | Shadow On Hit | Shadow On Block | Guard | Startup | Active | Recovery | Total Duration | On Hit | On Counter-Hit | On Block | Special Properties |
|---|---|---|---|---|---|---|---|---|---|---|---|---|---|
| 32.1(8%) | 40.1(11%) | 2.7(0.7%) | 3.2% | 4.8% | High | 19 | 2[17]2 | 26 | 65f | -2 | -2 | -6 | Overhead |
Key component of Thunder's offense due to being a grounded overhead. Long animation means it can easily be confirmed into an optimal opener on hit as well as some additional mix on block. Ticks into any meterless version of CotE on block with an increasingly tight window depending on which version you choose. Despite being a fairly easy shadow counter, making the opponent remember that you can always clock them on the head will immediately make your mixup game even more terrifying. | |||||||||||||
| Damage | Counter-Hit Damage | Potential Damage | Shadow On Hit | Shadow On Block | Guard | Startup | Active | Recovery | Total Duration | On Hit | On Counter-Hit | On Block | Special Properties |
|---|---|---|---|---|---|---|---|---|---|---|---|---|---|
| -- | -- | -- | -- | -- | -- | 15 | 7 | 25 | 46f | -- | -- | -- | Destroys projectiles during active frames. Next dash becomes an instinct crow dash. |
While not an attack nor a very consistent anti-fireball tool, Call of the Sky remains a very important move in Thunder's arsenal. Access to an instinct mechanic outside of instinct is a feature unique to Thunder. Once CotS is up Thunder's neutral suddenly becomes much scarier as dash up special move and dash cancelling DP>HK both become possible. If already in his ideal range because CotS was used after DP Ender or S CotE his offense gains an additional layer with the threat of dash throughs/cancels. If your opponent allows it, there is essentially no reason to go without CotS. | |||||||||||||
Jumping Normals
| Damage | Counter-Hit Damage | Potential Damage | Shadow On Hit | Shadow On Block | Guard | Startup | Active | Recovery | Total Duration | On Hit | On Counter-Hit | On Block | Special Properties |
|---|---|---|---|---|---|---|---|---|---|---|---|---|---|
| 20(5%) | 24(6%) | -- | 1.6% | 2.4% | High | 7 | 7 | 4 | 17f | +15 | +17 | +8 | -- |
| Damage | Counter-Hit Damage | Potential Damage | Shadow On Hit | Shadow On Block | Guard | Startup | Active | Recovery | Total Duration | On Hit | On Counter-Hit | On Block | Special Properties |
|---|---|---|---|---|---|---|---|---|---|---|---|---|---|
| 24(6%) | 30(8%) | -- | 2.4% | 4% | High | 9 | 4 | 4 | 16f | +16 | +19 | +12 | -- |
| Damage | Counter-Hit Damage | Potential Damage | Shadow On Hit | Shadow On Block | Guard | Startup | Active | Recovery | Total Duration | On Hit | On Counter-Hit | On Block | Special Properties |
|---|---|---|---|---|---|---|---|---|---|---|---|---|---|
| 26(7%) | 32(8%) | -- | 4% | 4.5% | High | 11 | 4 | 4 | 18f | +20 | +24 | +16 | Crossup |
Likely KI's most infamous crossup. The foundation of his post CotE vortex as, if it is properly timed, jHP is the single most ambiguous crossup in the game. It is absolutely mandatory for all aspiring Thunder players to learn how to use this normal. | |||||||||||||
| Damage | Counter-Hit Damage | Potential Damage | Shadow On Hit | Shadow On Block | Guard | Startup | Active | Recovery | Total Duration | On Hit | On Counter-Hit | On Block | Special Properties |
|---|---|---|---|---|---|---|---|---|---|---|---|---|---|
| 20(5%) | 24(6%) | -- | 1.6% | 2.4% | High | 8 | 7 | 4 | 17f | +15 | +17 | +8 | -- |
| Damage | Counter-Hit Damage | Potential Damage | Shadow On Hit | Shadow On Block | Guard | Startup | Active | Recovery | Total Duration | On Hit | On Counter-Hit | On Block | Special Properties |
|---|---|---|---|---|---|---|---|---|---|---|---|---|---|
| 24(6%) | 30(8%) | -- | 2.4% | 4% | High | 10 | 10 | 4 | 23f | +16 | +19 | +11 | Crossup |
Essentially no reason to ever use this normal. Not because it is bad, but because in every possible use case for jMK it is outclassed by jHP | |||||||||||||
| Damage | Counter-Hit Damage | Potential Damage | Shadow On Hit | Shadow On Block | Guard | Startup | Active | Recovery | Total Duration | On Hit | On Counter-Hit | On Block | Special Properties |
|---|---|---|---|---|---|---|---|---|---|---|---|---|---|
| 30(8%) | 38(10%) | -- | 4% | 4.5% | High | 10 | 12 | 4 | 25f | +20 | +24 | +17 | -- |
Throws
| Damage | Counter-Hit Damage | Potential Damage | Shadow On Hit | Shadow On Block | Guard | Startup | Active | Recovery | Total Duration | On Hit | On Counter-Hit | On Block | Special Properties |
|---|---|---|---|---|---|---|---|---|---|---|---|---|---|
| 40 (11%) | 40 (11%) | -- | 4% | N/A | Throw | 5 | 2 | 29 | 35f | +63 | +63 | N/A | Hard Knockdown |
| Damage | Counter-Hit Damage | Potential Damage | Shadow On Hit | Shadow On Block | Guard | Startup | Active | Recovery | Total Duration | On Hit | On Counter-Hit | On Block | Special Properties |
|---|---|---|---|---|---|---|---|---|---|---|---|---|---|
| 0 (0%) | 0 (0%) | -- | 4% | N/A | Throw | 5 | 2 | 29 | 35f | +14 (+14 for manuals) | +14 (+14 for manuals) | N/A | Opener/Linker |
Thunder's back throw can be used as both a combo opener and a linker. Useful for positioning to keep the corner due to Thunder's damage enders switching sides. | |||||||||||||
Special Moves
| Version | Damage | Counter-Hit Damage | Potential Damage | Shadow On Hit | Shadow On Block | Guard | Startup | Active | Recovery | Total Duration | On Hit | On Counter-Hit | On Block | Special Properties |
|---|---|---|---|---|---|---|---|---|---|---|---|---|---|---|
| LP | 19.4(5%) | 31.4(8%) | 1.8 (0.5%) | 1.6% | 2.4% | Mid | 9 | 2[11]2 | 27 | 50f | +4 (+9 for manuals) | +4 (+9 for manuals) | -1 | -- |
| Version | Damage | Counter-Hit Damage | Potential Damage | Shadow On Hit | Shadow On Block | Guard | Startup | Active | Recovery | Total Duration | On Hit | On Counter-Hit | On Block | Special Properties |
| MP | 22.1(6%) | 34.1(9%) | 2.0 (0.5%) | 2.4% | 4% | Mid | 11 | 2[11]2 | 26 | 52f | +2 (+7 for manuals) | +2 (+7 for manuals) | -2 | -- |
| Version | Damage | Counter-Hit Damage | Potential Damage | Shadow On Hit | Shadow On Block | Guard | Startup | Active | Recovery | Total Duration | On Hit | On Counter-Hit | On Block | Special Properties |
| HP | 32.8(9%) | 44.8(12%) | 4.3 (1%) | 4% | 6.4% | Mid | 13 | 3[12]2[7]2 | 26 | 62f | +1 (+6 for manuals) | +1 (+6 for manuals) | -3 | -- |
| Version | Damage | Counter-Hit Damage | Potential Damage | Shadow On Hit | Shadow On Block | Guard | Startup | Active | Recovery | Total Duration | On Hit | On Counter-Hit | On Block | Special Properties |
|---|---|---|---|---|---|---|---|---|---|---|---|---|---|---|
| LP | 54.2(15%) | 54.2(15%) | -- | 2.4% | N/A | Throw | 11 | 3 | 46 | 59f | +69 | +69 | N/A | Hard Knockdown and Throw Invul 1-13f |
| Version | Damage | Counter-Hit Damage | Potential Damage | Shadow On Hit | Shadow On Block | Guard | Startup | Active | Recovery | Total Duration | On Hit | On Counter-Hit | On Block | Special Properties |
| MP | 54.2 (15%) | 54.2 (15%) | -- | 4% | N/a | Throw | 14 | 3 | 48 | 64f | +69 | +69 | N/A | Hard Knockdown and Throw Invul 1-16f |
| Version | Damage | Counter-Hit Damage | Potential Damage | Shadow On Hit | Shadow On Block | Guard | Startup | Active | Recovery | Total Duration | On Hit | On Counter-Hit | On Block | Special Properties |
| HP | 54.2 (15%) | 54.2 (15%) | -- | 4% | N/a | Throw | 18 | 3 | 48 | 68f | +69 | +69 | N/A | Hard Knockdown and Throw Invul 1-20f |
| Version | Damage | Counter-Hit Damage | Potential Damage | Shadow On Hit | Shadow On Block | Guard | Startup | Active | Recovery | Total Duration | On Hit | On Counter-Hit | On Block | Special Properties |
|---|---|---|---|---|---|---|---|---|---|---|---|---|---|---|
| LK | 20.4(6%) | 36(10%) | -- | 2.4% | 4% | Low | 16 | 2 | 20 | 37f | +5 (+10 for manuals) | +11 (+16 for manuals) | -2 | Lower Body Invul 3-15f |
| Version | Damage | Counter-Hit Damage | Potential Damage | Shadow On Hit | Shadow On Block | Guard | Startup | Active | Recovery | Total Duration | On Hit | On Counter-Hit | On Block | Special Properties |
| MK | 32(6%) | 44(12%) | -- | 4% | 6.4% | Low | 19 | 2 | 20 | 40f | +4 (+9 for manuals) | +10 (+15 for manuals) | -3 | Lower Body Invul 3-18f |
| Version | Damage | Counter-Hit Damage | Potential Damage | Shadow On Hit | Shadow On Block | Guard | Startup | Active | Recovery | Total Duration | On Hit | On Counter-Hit | On Block | Special Properties |
| HK | 40(11%) | 52(14%) | -- | 4% | 6.4% | Low | 21 | 2 | 19 | 41f | +2 (+7 for manuals) | +8 (+13 for manuals) | -5 | Lower Body Invul 3-20f |
| Version | Damage | Counter-Hit Damage | Potential Damage | Shadow On Hit | Shadow On Block | Guard | Startup | Active | Recovery | Total Duration | On Hit | On Counter-Hit | On Block | Special Properties |
|---|---|---|---|---|---|---|---|---|---|---|---|---|---|---|
| LP | 28(7%) | 34(9%) | -- | 2.4% | 4% | Mid | 8 | 7 | 39 | 53f | +13 | +13 | -31 | Soft Knockdown, Upper Body Invul 1-8f, Proj Invul 1-19f, Throw Invul 9-18f |
| Version | Damage | Counter-Hit Damage | Potential Damage | Shadow On Hit | Shadow On Block | Guard | Startup | Active | Recovery | Total Duration | On Hit | On Counter-Hit | On Block | Special Properties |
| MP | 32(8%) | 38(10%) | -- | 4% | 6.4% | Mid | 8 | 9 | 37 | 53f | +55 | +55 | -34 | Hard Knockdown, Upper Body Invul 1-10f, Proj Invul 1-20f, Throw Invul 9-18f |
| Version | Damage | Counter-Hit Damage | Potential Damage | Shadow On Hit | Shadow On Block | Guard | Startup | Active | Recovery | Total Duration | On Hit | On Counter-Hit | On Block | Special Properties |
| HP | 38(10%) | 44(12%) | -- | 4% | 6.4% | Mid | 12 | 7 | 47 | 65f | +48 | +48 | -38 | Hard Knockdown, Upper Body Invul 1-12f, Proj Invul 1-21f, Throw Invul 9-22f |
| Version | Damage | Counter-Hit Damage | Potential Damage | Shadow On Hit | Shadow On Block | Guard | Startup | Active | Recovery | Total Duration | On Hit | On Counter-Hit | On Block | Special Properties |
|---|---|---|---|---|---|---|---|---|---|---|---|---|---|---|
| Rainmaker/LK | 16(4%) | 20(5%) | -- | 2.4% | 4% | High | 12 | 7 | 21 | 49f | +8 | +8 | -16 | Flipout |
Rainmaker shares its animation with Jump Light Kick. | ||||||||||||||
| Version | Damage | Counter-Hit Damage | Potential Damage | Shadow On Hit | Shadow On Block | Guard | Startup | Active | Recovery | Total Duration | On Hit | On Counter-Hit | On Block | Special Properties |
| Downpour/MK | 32(8%) | 36(10%) | -- | 4% | 6.4% | High | 11 | 22 | 21 | 49f | +70 | +70 | -16 | Hard Knockdown |
Downpour shares its animation and hitbox with Jump Heavy Kick. | ||||||||||||||
| Version | Damage | Counter-Hit Damage | Potential Damage | Shadow On Hit | Shadow On Block | Guard | Startup | Active | Recovery | Total Duration | On Hit | On Counter-Hit | On Block | Special Properties |
| Skyfall/HK | 34(9%) | 38(10%) | -- | 4% | 6.4% | High | 20 | 7 | 29 | 58f | +62 (25f to juggle) | +62 (25f to juggle) | -13 | Ground Bounce, Soft Knockdown, Crow Dash Cancellable |
On hit, Thunder has 0f of landing recovery | ||||||||||||||
Shadow Moves
| Damage | Counter-Hit Damage | Potential Damage | Shadow On Hit | Shadow On Block | Guard | Startup | Active | Recovery | Total Duration | On Hit | On Counter-Hit | On Block | Special Properties |
|---|---|---|---|---|---|---|---|---|---|---|---|---|---|
| 33.6 (9%) | 45.6 (12%) | 7.2 (2%) | -- | -- | Mid | 3+3 | 2 [11] 1 [9] 2 [8] 2 [9] 2 | 27 | 78f | +4 (+6 for manuals) | +4 (+6 for manuals) | +1 | 1 Hit of Armor starting frame 4 |
Likely Thunder's overall least useful shadow move. This does not mean that S Triplax is bad, far from it, this means that his other shadows are just that good. 3f after the screen freeze, 5 hits of chip damage, 1 hit of armor, and +1 on block means this move can be used as a high-chip cancel from H triplax that leaves you advantaged and in their face. Also serves as a great meaty lockdown tool if the opponent has no meter, as the armor blows through any meterless reversals. Overall very potent shadow, only mildly overshadowed by Thunder's other uses for bar. | |||||||||||||
| Damage | Counter-Hit Damage | Potential Damage | Shadow On Hit | Shadow On Block | Guard | Startup | Active | Recovery | Total Duration | On Hit | On Counter-Hit | On Block | Special Properties |
|---|---|---|---|---|---|---|---|---|---|---|---|---|---|
| 74.0 (20%) | 74.0 (20%) | -- | -- | -- | Throw | 5+0 | 3 | 37 | 44f | +103 (37f to juggle) | +103 (37f to juggle) | -- | Throw Invincible 1-9f, Hard Knockdown, Launcher, Combo Cashout, Has "First Launcher Bug" (see the System page) |
Character defining move. 5f command grab with no startup after the screen freeze, nearly half screen reach, 20% damage, ground bounces for a juggle combo, cashes out combos for extreme damage at level 4, a ludicrous +103 hard knockdown that allows for a free CotS buff and still have time for jHP crossup mixup, will bring your dad back from getting milk. The alpha and omega, in the opinion of this wiki contributor it is the single best shadow move in the game and it is inarguably in the top 5. Even with 3 other very good shadow moves, S CotE stands head and shoulders above them. Go out and grab some fuckers. | |||||||||||||
| Damage | Counter-Hit Damage | Potential Damage | Shadow On Hit | Shadow On Block | Guard | Startup | Active | Recovery | Total Duration | On Hit | On Counter-Hit | On Block | Special Properties |
|---|---|---|---|---|---|---|---|---|---|---|---|---|---|
| 44.8 (12%) | 52.8 (14%) | 9.6 (2%) | -- | -- | Low | 1+9 | 5 | 18 | 32f | +6 (+11 for manuals) | +6 (+11 for manuals) | -4 | Throw Invincible and Lower Body Invincible 1-10f |
Thunder's most damaging opener and best whiff punisher. Good as an Instinct freeze informed (or just yolo) response to throws and lows. Very easy to break as a linker which is both a blessing and a curse. Least interesting shadow but a workhorse, as it really does do that much extra damage compared to other openers. | |||||||||||||
| Damage | Counter-Hit Damage | Potential Damage | Shadow On Hit | Shadow On Block | Guard | Startup | Active | Recovery | Total Duration | On Hit | On Counter-Hit | On Block | Special Properties |
|---|---|---|---|---|---|---|---|---|---|---|---|---|---|
| 43.0 (11%) | 59.0 (16%) | 9.0 (2%) | -- | -- | Mid | 6+0 | 5 | 45 | 55f | +33 | +33 | -30 | Invincible 1-11f, Soft Knockdown, Combo & Juggle Cashout |
The shadow you ideally use the least of, but it undeniably fills a hole in Thunder's kit by giving him a full invul reversal. Despite being safejumpable at 6f, definitely a good get-off-me tool. Can also be used as an ender in both grounded and juggle combos, but it should never be used in grounded combos as S CotE is a much better cashout. Being 0f after the screen freeze, there are some dash through shenanigans you can do with CotS up or in Instinct. | |||||||||||||
Enders
| Version | Ender Type | On Hit | Special Properties | |||||||||
|---|---|---|---|---|---|---|---|---|---|---|---|---|
| Level 1 | Wallsplat | 0/+16 | x= when used midscreen/y= when used in the corner | |||||||||
| Version | Ender Type | On Hit | Special Properties | |||||||||
| Level 2 | Wallsplat | 0/+21 | x= when used midscreen/y= when used in the corner | |||||||||
| Version | Ender Type | On Hit | Special Properties | |||||||||
| Level 3 | Wallsplat | 0/+26 | x= when used midscreen/y= when used in the corner | |||||||||
| Version | Ender Type | On Hit | Special Properties | |||||||||
| Level 4 | Wallsplat | 0/+31 | x= when used midscreen/y= when used in the corner | |||||||||
To Do | ||||||||||||
| Version | Ender Type | On Hit | Special Properties | |||||||||
|---|---|---|---|---|---|---|---|---|---|---|---|---|
| Level 1 | Damage/Exchange | +4 | -- | |||||||||
| Version | Ender Type | On Hit | Special Properties | |||||||||
| Level 2 | Damage/Exchange | +3 | -- | |||||||||
| Version | Ender Type | On Hit | Special Properties | |||||||||
| Level 3 | Damage/Exchange | +3 | -- | |||||||||
| Version | Ender Type | On Hit | Special Properties | |||||||||
| Level 4 | Damage/Exchange | +3 | -- | |||||||||
To Do | ||||||||||||
| Version | Ender Type | On Hit | Special Properties | |||||||||
| Shadow | Damage | +103 (37f to juggle) | Launcher and Hard Knockdown | |||||||||
To Do | ||||||||||||
| Version | Ender Type | On Hit | Special Properties | |||||||||
|---|---|---|---|---|---|---|---|---|---|---|---|---|
| Level 1 | Battery | +7 | -- | |||||||||
| Version | Ender Type | On Hit | Special Properties | |||||||||
| Level 2 | Battery | +7 | -- | |||||||||
| Version | Ender Type | On Hit | Special Properties | |||||||||
| Level 3 | Battery | +7 | -- | |||||||||
| Version | Ender Type | On Hit | Special Properties | |||||||||
| Level 4 | Battery | +7 | -- | |||||||||
To Do | ||||||||||||
| Version | Ender Type | On Hit | Special Properties | |||||||||
|---|---|---|---|---|---|---|---|---|---|---|---|---|
| Level 1 | Launcher and Hard Knockdown | +85 (15f to juggle) | -- | |||||||||
| Version | Ender Type | On Hit | Special Properties | |||||||||
| Level 2 | Launcher and Hard Knockdown | +90 (20f to juggle) | -- | |||||||||
| Version | Ender Type | On Hit | Special Properties | |||||||||
| Level 3 | Launcher and Hard Knockdown | +94 (24f to juggle) | -- | |||||||||
| Version | Ender Type | On Hit | Special Properties | |||||||||
| Level 4 | Launcher and Hard Knockdown | +93 (23 to juggle) | -- | |||||||||
To Do | ||||||||||||
| Version | Ender Type | On Hit | Special Properties | |||||||||
| Shadow | Launcher and Hard Knockdown | +26 | Launcher and Hard Knockdown | |||||||||
To Do | ||||||||||||

