mNo edit summary |
|||
| (66 intermediate revisions by 2 users not shown) | |||
| Line 12: | Line 12: | ||
|advantage post grounded combo breaker= 0 | |advantage post grounded combo breaker= 0 | ||
}} | }} | ||
== Normal Moves == | |||
=== Standing Normals === | |||
{{MoveData | |||
|image= RAAM SLPhb2.png|thumb | |||
|caption= Test Caption | |||
|name= Standing Light Punch | |||
|linkname= 5LP | |||
|input= Stand LP/5LP | |||
|data= | |||
{{AttackData-KI2013 | |||
|damage= 10 (2%) | |||
|counter-hit damage= 14 (3%) | |||
|potential damage= -- | |||
|shadow on hit= 1.6 | |||
|shadow on block= 2.4 | |||
|guard= Mid | |||
|startup= 5 | |||
|active= 2 | |||
|recovery= 8 | |||
|total duration= 14f | |||
|on hit= +3 | |||
|on counter-hit= +5 | |||
|on block= +2 | |||
|special properties= Chain | |||
|description= To Do | |||
}} | |||
}} | |||
{{MoveData | |||
|image= RAAM SMPhb2.png|thumb | |||
|caption= Test Caption | |||
|name= Standing Medium Punch | |||
|linkname= 5MP | |||
|input= Stand MP/5MP | |||
|data= | |||
{{AttackData-KI2013 | |||
|damage= 20 (5%) | |||
|counter-hit damage= 26 (7%) | |||
|potential damage= -- | |||
|shadow on hit= 2.4 | |||
|shadow on block= 4 | |||
|guard= Mid | |||
|startup= 6 | |||
|active= 2 | |||
|recovery= 14 | |||
|total duration= 21f | |||
|on hit= +1 | |||
|on counter-hit= +4 | |||
|on block= -1 | |||
|special properties= -- | |||
|description= To Do | |||
}} | |||
}} | |||
{{MoveData | |||
|image= Raam SHPhb3.png|thumb | |||
|caption= Test Caption | |||
|name= Standing Heavy Punch | |||
|linkname= 5HP | |||
|input= Stand HP/5HP | |||
|data= | |||
{{AttackData-KI2013 | |||
|damage= 30 (8%) | |||
|counter-hit damage= 38 (10%) | |||
|potential damage= -- | |||
|shadow on hit= 4 | |||
|shadow on block= 4.5 | |||
|guard= Mid | |||
|startup= 9 | |||
|active= 3 | |||
|recovery= 17 | |||
|total duration= 28f | |||
|on hit= +4 | |||
|on counter-hit= +6 | |||
|on block= +1 | |||
|special properties= -- | |||
|description= To Do | |||
}} | |||
}} | |||
{{MoveData | |||
|image= RAAM SLKhb2.png|thumb | |||
|caption= Test Caption | |||
|name= Standing Light Kick | |||
|linkname= 5LK | |||
|input= Stand LK/5LK | |||
|data= | |||
{{AttackData-KI2013 | |||
|damage= 10 (2%) | |||
|counter-hit damage= 14 (3%) | |||
|potential damage= -- | |||
|shadow on hit= 1.6 | |||
|shadow on block= 2.4 | |||
|guard= Mid | |||
|startup= 6 | |||
|active= 3 | |||
|recovery= 7 | |||
|total duration= 15f | |||
|on hit= +4/+6 | |||
|on counter-hit= +15 | |||
|on block= +3 | |||
|special properties= Flipout OTG | |||
|description= To Do | |||
}} | |||
}} | |||
{{MoveData | |||
|image= RAAM SMKhb2.png|thumb | |||
|caption= Test Caption | |||
|name= Standing Medium Kick | |||
|linkname= 5MK | |||
|input= Stand MK/5MK | |||
|data= | |||
{{AttackData-KI2013 | |||
|damage= 20 (5%) | |||
|counter-hit damage= 26 (7%) | |||
|potential damage= -- | |||
|shadow on hit= 2.4 | |||
|shadow on block= 4 | |||
|guard= Mid | |||
|startup= 14 | |||
|active= 7 | |||
|recovery= 15 | |||
|total duration= 35f | |||
|on hit= +9/+67 | |||
|on counter-hit= +13 | |||
|on block= +2 | |||
|special properties= Hard Knockdown OTG | |||
|description= RAAM steps forward and stomps. | |||
*A highly active and highly plus meaty. | |||
*Hits downed opponents who do not or cannot quick rise. | |||
**Each OTG stomp adds about 1% in damage. | |||
*Unusually among normals, this can't be special-canceled. | |||
}} | |||
}} | |||
{{MoveData | |||
|image= RAAM SHKhb2.png|thumb | |||
|caption= (Locust Kick) | |||
|name= Standing Heavy Kick | |||
|linkname= 5HK | |||
|input= Stand HK/5HK | |||
|data= | |||
{{AttackData-KI2013 | |||
|damage= 32 (8%) | |||
|counter-hit damage= 38 (10%) | |||
|potential damage= -- | |||
|shadow on hit= 4 | |||
|shadow on block= 4.5 | |||
|guard= Mid | |||
|startup= 16 | |||
|active= 5 | |||
|recovery= 21 | |||
|total duration= 41f | |||
|on hit= +15 | |||
|on counter-hit= +20 | |||
|on block= +1 | |||
|special properties= Stagger | |||
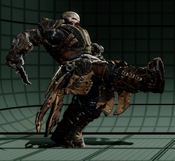
|description= A slow boot to the face. Causes stagger on hit, which means it combos directly into Dominance. | |||
}} | |||
}} | |||
=== Crouching Normals === | |||
{{MoveData | |||
|image= RAAM CLPhb2.png|thumb | |||
|caption= Test Caption | |||
|name= Crouching Light Punch | |||
|linkname= 2LP | |||
|input= Crouch LP/2LP | |||
|data= | |||
{{AttackData-KI2013 | |||
|damage= 10 (2%) | |||
|counter-hit damage= 14 (3%) | |||
|potential damage= -- | |||
|shadow on hit= 1.6 | |||
|shadow on block= 2.4 | |||
|guard= Mid | |||
|startup= 5 | |||
|active= 2 | |||
|recovery= 9 | |||
|total duration= 15f | |||
|on hit= +2 | |||
|on counter-hit= +4 | |||
|on block= 0 | |||
|special properties= Chain | |||
|description= To Do | |||
}} | |||
}} | |||
{{MoveData | |||
|image= RAAM CMPhb2.png|thumb | |||
|caption= Test Caption | |||
|name= Crouching Medium Punch | |||
|linkname= 2MP | |||
|input= Crouch MP/2MP | |||
|data= | |||
{{AttackData-KI2013 | |||
|damage= 20 (5%) | |||
|counter-hit damage= 26 (7%) | |||
|potential damage= -- | |||
|shadow on hit= 2.4 | |||
|shadow on block= 4 | |||
|guard= Mid | |||
|startup= 8 | |||
|active= 2 | |||
|recovery= 14 | |||
|total duration= 23f | |||
|on hit= 0 | |||
|on counter-hit= +3 | |||
|on block= -1 | |||
|special properties= -- | |||
|description= To Do | |||
}} | |||
}} | |||
{{MoveData | |||
|image= RAAM2HP-ezgif.com-speed.gif|thumb | |||
|caption= Test Caption | |||
|name= Crouching Heavy Punch | |||
|linkname= 2HP | |||
|input= Crouch HP/2HP | |||
|data= | |||
{{AttackData-KI2013 | |||
|damage= 30 (8%) | |||
|counter-hit damage= 38 (10%) | |||
|potential damage= -- | |||
|shadow on hit= 4 | |||
|shadow on block= 4.5 | |||
|guard= Mid | |||
|startup= 9 | |||
|active= 4 | |||
|recovery= 19 | |||
|total duration= 31f | |||
|on hit= 0 | |||
|on counter-hit= +2 | |||
|on block= -3 | |||
|special properties= -- | |||
|description= To Do | |||
}} | |||
}} | |||
{{MoveData | |||
|image= RAAM CLKhb2.png|thumb | |||
|caption= Test Caption | |||
|name= Crouching Light Kick | |||
|linkname= 2LK | |||
|input= Crouch LK/2LK | |||
|data= | |||
{{AttackData-KI2013 | |||
|damage= 10 (2%) | |||
|counter-hit damage= 14 (3%) | |||
|potential damage= -- | |||
|shadow on hit= 1.6 | |||
|shadow on block= 2.4 | |||
|guard= Low | |||
|startup= 5 | |||
|active= 2 | |||
|recovery= 10 | |||
|total duration= 16f | |||
|on hit= +2 | |||
|on counter-hit= +4 | |||
|on block= 0 | |||
|special properties= -- | |||
|description= To Do | |||
}} | |||
}} | |||
{{MoveData | |||
|image= RAAM CMKhb2.png|thumb | |||
|caption= Test Caption | |||
|name= Crouching Medium Kick | |||
|linkname= 2MK | |||
|input= Crouch MK/2MK | |||
|data= | |||
{{AttackData-KI2013 | |||
|damage= 20 (5%) | |||
|counter-hit damage= 26 (7%) | |||
|potential damage= -- | |||
|shadow on hit= 2.4 | |||
|shadow on block= 4 | |||
|guard= Low | |||
|startup= 8 | |||
|active= 6 | |||
|recovery= 13 | |||
|total duration= 26f | |||
|on hit= -3 | |||
|on counter-hit= -1 | |||
|on block= -5 | |||
|special properties= -- | |||
|description= To Do | |||
}} | |||
}} | |||
{{MoveData | |||
|image= RAAM CHKhb2.png|thumb | |||
|caption= Test Caption | |||
|name= Crouching Heavy Kick | |||
|linkname= 2HK | |||
|input= Crouch HK/5HK | |||
|data= | |||
{{AttackData-KI2013 | |||
|damage= 36 (10%) | |||
|counter-hit damage= 44 (12%) | |||
|potential damage= -- | |||
|shadow on hit= 4 | |||
|shadow on block= 4.5 | |||
|guard= Low | |||
|startup= 12 | |||
|active= 3 | |||
|recovery= 33 | |||
|total duration= 47f | |||
|on hit= +54 | |||
|on counter-hit= +54 | |||
|on block= -5 | |||
|special properties= Hard knockdown | |||
|description= High-pushback sweep. | |||
}} | |||
}} | |||
=== Command Normals === | |||
{{MoveData | |||
|image= RAAM 6MKhb.png|thumb | |||
|caption= Test Caption | |||
|name= Deception | |||
|linkname= 6MK | |||
|input= Forward MK/6MK | |||
|data= | |||
{{AttackData-KI2013 | |||
|damage= -- | |||
|counter-hit damage= -- | |||
|potential damage= -- | |||
|shadow on hit= -- | |||
|shadow on block= -- | |||
|guard= -- | |||
|startup= 29 | |||
|active= -- | |||
|recovery= -- | |||
|total duration= 29f | |||
|on hit= -- | |||
|on counter-hit= -- | |||
|on block= -- | |||
|special properties= Fake Out | |||
|description= RAAM slides forward, appearing to do St. MK. Designed to cause lockouts on opponents who are too giddy to escape RAAM's OTG combos. | |||
}} | |||
}} | |||
{{MoveData | |||
|image= RAAM 3Phb2.png|thumb | |||
|caption= Test Caption | |||
|name= Kryll Shield | |||
|linkname= PPP | |||
|input= 3P/PPP | |||
|data= | |||
{{AttackData-KI2013 | |||
|damage= 0(0%) | |||
|counter-hit damage= 0(0%) | |||
|potential damage= -- | |||
|shadow on hit= ?? | |||
|shadow on block= ?? | |||
|guard= Mid | |||
|startup= 31 | |||
|active= 2 | |||
|recovery= 22 | |||
|total duration= 54f | |||
|on hit= +18 | |||
|on counter-hit= +26 | |||
|on block= +8 | |||
|special properties= Applies Kryll, Kryll Armored, Stagger on CH | |||
|description= While charging, RAAM is covered in Kryll Armor and can dash cancel forward or backward. At max charge, Kryll Shield is unblockable. For the cost of 1/2 a bar of Shadow, RAAM can cancel into Shield from normals and Decimation on contact, or from Kryll Rush at any time. | |||
}} | |||
}} | |||
=== Air Normals === | |||
{{MoveData | |||
|image= RAAM JLPhb2.png|thumb | |||
|caption= Test Caption | |||
|name= Jumping Light Punch | |||
|linkname= 8LP | |||
|input= Jump LP/8LP | |||
|data= | |||
{{AttackData-KI2013 | |||
|damage= 20(5%) | |||
|counter-hit damage= 24(6%) | |||
|potential damage= -- | |||
|shadow on hit= 1.6 | |||
|shadow on block= 2.4 | |||
|guard= High | |||
|startup= 8 | |||
|active= 7 | |||
|recovery= 4 | |||
|total duration= 18+f | |||
|on hit= +15 | |||
|on counter-hit= +17 | |||
|on block= +8 | |||
|special properties= -- | |||
|description= To Do | |||
}} | |||
}} | |||
{{MoveData | |||
|image= RAAM JMPhb2.png|thumb | |||
|caption= Test Caption | |||
|name= Jumping Medium Punch | |||
|linkname= 8MP | |||
|input= Jump MP/8MP | |||
|data= | |||
{{AttackData-KI2013 | |||
|damage= 24(6%) | |||
|counter-hit damage= 30(8%) | |||
|potential damage= -- | |||
|shadow on hit= 2.4 | |||
|shadow on block= 4 | |||
|guard= High | |||
|startup= 9 | |||
|active= 4 | |||
|recovery= 4 | |||
|total duration= 16+f | |||
|on hit= +16 | |||
|on counter-hit= +19 | |||
|on block= +12 | |||
|special properties= -- | |||
|description= To Do | |||
}} | |||
}} | |||
{{MoveData | |||
|image= RAAM JHPhb2.png|thumb | |||
|caption= Test Caption | |||
|name= Jumping Heavy Punch | |||
|linkname= 8HP | |||
|input= Jump HP/8HP | |||
|data= | |||
{{AttackData-KI2013 | |||
|damage= 30(8%) | |||
|counter-hit damage= 38(10%) | |||
|potential damage= -- | |||
|shadow on hit= 4 | |||
|shadow on block= 4.5 | |||
|guard= High | |||
|startup= 11 | |||
|active= 10 | |||
|recovery= 4 | |||
|total duration= 24+f | |||
|on hit= +20 | |||
|on counter-hit= +24 | |||
|on block= +17 | |||
|special properties= Cross-up | |||
|description= To Do | |||
}} | |||
}} | |||
{{MoveData | |||
|image= RAAM JLKhb2.png|thumb | |||
|caption= Test Caption | |||
|name= Jumping Light Kick | |||
|linkname= 8LK | |||
|input= Jump LK/8LK | |||
|data= | |||
{{AttackData-KI2013 | |||
|damage= 20(5%) | |||
|counter-hit damage= 24(6%) | |||
|potential damage= -- | |||
|shadow on hit= 1.6 | |||
|shadow on block= 2.4 | |||
|guard= High | |||
|startup= 8 | |||
|active= 13 | |||
|recovery= 4 | |||
|total duration= 24+f | |||
|on hit= +15 | |||
|on counter-hit= +17 | |||
|on block= +8 | |||
|special properties= -- | |||
|description= To Do | |||
}} | |||
}} | |||
{{MoveData | |||
|image= RAAM JMKhb2.png|thumb | |||
|caption= Test Caption | |||
|name= Jumping Medium Kick | |||
|linkname= 8MK | |||
|input= Jump MK/8MK | |||
|data= | |||
{{AttackData-KI2013 | |||
|damage= 24(6%) | |||
|counter-hit damage= 30(8%) | |||
|potential damage= -- | |||
|shadow on hit= 2.4 | |||
|shadow on block= 4 | |||
|guard= High | |||
|startup= 10 | |||
|active= 9 | |||
|recovery= 4 | |||
|total duration= 22+f | |||
|on hit= +16 | |||
|on counter-hit= +19 | |||
|on block= +12 | |||
|special properties= -- | |||
|description= To Do | |||
}} | |||
}} | |||
{{MoveData | |||
|image= RAAM JHKhb2.png|thumb | |||
|caption= Test Caption | |||
|name= Jumping Heavy Kick | |||
|linkname= 8HK | |||
|input= Jump HK/8HK | |||
|data= | |||
{{AttackData-KI2013 | |||
|damage= 30(8%) | |||
|counter-hit damage= 38(10%) | |||
|potential damage= -- | |||
|shadow on hit= 4 | |||
|shadow on block= 4.5 | |||
|guard= High | |||
|startup= 16 | |||
|active= 5 | |||
|recovery= 4 | |||
|total duration= 24+f | |||
|on hit= +20 | |||
|on counter-hit= +24 | |||
|on block= +17 | |||
|special properties= -- | |||
|description= A slow dropkick that's huge like Xbox. | |||
}} | |||
}} | |||
== Throws == | |||
{{MoveData | |||
|image= RAAM LPLKhb2.png|thumb | |||
|caption= Test Caption | |||
|name= Throw | |||
|linkname= LPLK | |||
|input= 5LPLK/4LPLK | |||
|data= | |||
{{AttackData-KI2013 | |||
|damage= 50 (13%) | |||
|startup= 5 | |||
|active= 2 | |||
|recovery= 29 | |||
|total duration= 35f | |||
|special properties= Hard Knockdown | |||
|description= It may come as no surprise that the grappler has a good throw. Most damaging normal throw in the game, with decent corner carry to boot. | |||
}} | |||
}} | |||
== Special Moves == | |||
{{MoveData | |||
|image= Raam Decimate.png|thumb | |||
|caption= Test Caption | |||
|name= Decimation | |||
|linkname= 236P | |||
|input= QCF+P/236P | |||
|data= | |||
{{AttackData-KI2013 | |||
|version= LP | |||
|damage= 24 (6%) | |||
|counter-hit damage= 36 (10%) | |||
|potential damage= -- | |||
|shadow on hit= 1.6 | |||
|shadow on block= 2.4 | |||
|guard= Mid | |||
|startup= 11 | |||
|active= 3 | |||
|recovery= 33 | |||
|total duration= 46f | |||
|on hit= -2 | |||
|on counter-hit= 0 | |||
|on block= -9 | |||
|special properties= -- | |||
|description= Death-on-block mid that exists to be hit-confirmed into, as only it combos out of every normal. You can try to make it safe via Kryll Shield cancel. | |||
}} | |||
{{AttackData-KI2013 | |||
|version= MP | |||
|damage= 26 (7%) | |||
|counter-hit damage= 38 (10%) | |||
|potential damage= -- | |||
|shadow on hit= 2.4 | |||
|shadow on block= 4 | |||
|guard= Mid | |||
|startup= 15 | |||
|active= 5 | |||
|recovery= 20 | |||
|total duration= 39f | |||
|on hit= +7 | |||
|on counter-hit= +9 | |||
|on block= -3 | |||
|special properties= -- | |||
|description= Combos from heavies, but that's about it. | |||
}} | |||
{{AttackData-KI2013 | |||
|version= HP | |||
|damage= 28 (7%) | |||
|counter-hit damage= 40 (11%) | |||
|potential damage= -- | |||
|shadow on hit= 4 | |||
|shadow on block= 4.5 | |||
|guard= Mid | |||
|startup= 19 | |||
|active= 6 | |||
|recovery= 22 | |||
|total duration= 46f | |||
|on hit= +10 | |||
|on counter-hit= +10 | |||
|on block= -1 | |||
|special properties= -- | |||
|description= Combos from St. HK, and not much else. On block, frame traps into Dominance. | |||
}} | |||
}} | |||
{{MoveData | |||
|image= Raam Dominance.png|thumb | |||
|caption= Test Caption | |||
|name= Dominance | |||
|linkname= 214P | |||
|input= QCB+P/214P | |||
|data= | |||
{{AttackData-KI2013 | |||
|version= LP | |||
|damage= 44.5 (12%) | |||
|counter-hit damage= 44.5 (12%) | |||
|potential damage= -- | |||
|shadow on hit= ?? | |||
|shadow on block= ?? | |||
|guard= Throw | |||
|startup= 4 | |||
|active= 2 | |||
|recovery= 39 | |||
|total duration= 44f | |||
|on hit= +92 | |||
|on counter-hit= +92 | |||
|on block= -- | |||
|special properties= Throw Invul 4-5f, Hard Knockdown | |||
|description= Great range for a grab of its speed. A strong abare move. | |||
}} | |||
{{AttackData-KI2013 | |||
|version= MP | |||
|damage= 58.5 (16%) | |||
|counter-hit damage= 58.5 (16%) | |||
|potential damage= -- | |||
|shadow on hit= ?? | |||
|shadow on block= ?? | |||
|guard= Throw | |||
|startup= 4 | |||
|active= 2 | |||
|recovery= 39 | |||
|total duration= 44f | |||
|on hit= +48 | |||
|on counter-hit= +48 | |||
|on block= -- | |||
|special properties= Throw Invul 4-5f, Hard Knockdown | |||
|description= To Do | |||
}} | |||
{{AttackData-KI2013 | |||
|version= HP | |||
|damage= 69.6 (19%) | |||
|counter-hit damage= 69.6 (19%) | |||
|potential damage= -- | |||
|shadow on hit= ?? | |||
|shadow on block= ?? | |||
|guard= Throw | |||
|startup= 4 | |||
|active= 2 | |||
|recovery= 39 | |||
|total duration= 44f | |||
|on hit= +51 | |||
|on counter-hit= +51 | |||
|on block= -- | |||
|special properties= Throw Invul 4-5f, Hard Knockdown | |||
|description= Ideally, you want to land this with Kryll attached for 25% unbreakable damage. | |||
}} | |||
}} | |||
{{MoveData | |||
|image= Raam Emergence.png|thumb | |||
|caption= Test Caption | |||
|name= Emergence | |||
|linkname= 236K | |||
|input= QCF+K/236K | |||
|data= | |||
{{AttackData-KI2013 | |||
|version= LK | |||
|damage= 0 (0%) | |||
|counter-hit damage= 0 (0%) | |||
|potential damage= -- | |||
|shadow on hit= ?? | |||
|shadow on block= ?? | |||
|guard= Mid | |||
|startup= 8 | |||
|active= 20 | |||
|recovery= 21 | |||
|total duration= 48f | |||
|on hit= +2 | |||
|on counter-hit= +2 | |||
|on block= -21 | |||
|special properties= Applies Kryll, Low Invul 4-28f | |||
|description= | |||
}} | |||
{{AttackData-KI2013 | |||
|version= MK | |||
|damage= 0 (0%) | |||
|counter-hit damage= 0 (0%) | |||
|potential damage= -- | |||
|shadow on hit= ?? | |||
|shadow on block= ?? | |||
|guard= Mid | |||
|startup= 8 | |||
|active= 20 | |||
|recovery= 21 | |||
|total duration= 48f | |||
|on hit= +18 | |||
|on counter-hit= +18 | |||
|on block= -21 | |||
|special properties= Applies Kryll, High Invul 1-27f | |||
|description= A ridiculously long-lasting anti-air. | |||
}} | |||
{{AttackData-KI2013 | |||
|version= HK | |||
|damage= 0 (0%) | |||
|counter-hit damage= 0 (0%) | |||
|potential damage= -- | |||
|shadow on hit= ?? | |||
|shadow on block= ?? | |||
|guard= Mid | |||
|startup= 19 | |||
|active= 18 | |||
|recovery= 20 | |||
|total duration= 56f | |||
|on hit= +63 | |||
|on counter-hit= +63 | |||
|on block= -20 | |||
|special properties= Applies Kryll, Strike Invul 1-18f | |||
|description= Another ridiculously long-lasting anti-air. Can be used as a makeshift reversal, but it loses to throws. | |||
}} | |||
}} | |||
{{MoveData | |||
|image= RAAM 214Khb.png|thumb | |||
|caption= Test Caption | |||
|name= Kryll Rush | |||
|linkname= 214K | |||
|input= QCB+K/214K | |||
|data= | |||
{{AttackData-KI2013 | |||
|version= K | |||
|damage= 17.3 (7%) | |||
|counter-hit damage= 17.3 (7%) | |||
|potential damage= -- | |||
|shadow on hit= ?? | |||
|shadow on block= ?? | |||
|guard= -- | |||
|startup= 22 | |||
|active= 2 | |||
|recovery= 34 | |||
|total duration= 57f | |||
|on hit= +4 | |||
|on counter-hit= +4 | |||
|on block= -- | |||
|special properties= Applies Kryll, Kryll Armored | |||
|description= RAAM runs forward, grabbing when he gets close. On hit, leaves them standing close enough to scoop up with L Dominance. If this gets jumped, you will eat shit so be ready to cancel with Kryll Shield at a moment's notice. | |||
}} | |||
}} | |||
== Shadow Moves == | |||
{{MoveData | |||
|image= RAAM 236PP1hb.png|thumb | |||
|caption= Test Caption | |||
|name= Shadow Decimation | |||
|linkname= 236PP | |||
|input= QCF+PP/236PP | |||
|data= | |||
{{AttackData-KI2013 | |||
|version= S | |||
|damage= 33.6(9%) | |||
|counter-hit damage= 45.6(12%) | |||
|potential damage= 7.2(2%) | |||
|shadow on hit= 0 | |||
|shadow on block= 0 | |||
|guard= Mid | |||
|startup= 3+4(7) | |||
|active= 2[10]2[10] | |||
2[12]2[7]1 | |||
|recovery= 20 | |||
|total duration= 75f | |||
|on hit= +12 | |||
|on counter-hit= +12 | |||
|on block= +1 | |||
|special properties= -- | |||
|description= RAAM thrusts his knife five times. | |||
}} | |||
}} | |||
{{MoveData | |||
|image= RAAM 214PPhb.png|thumb | |||
|caption= Test Caption | |||
|name= Shadow Dominance | |||
|linkname= 214PP | |||
|input= QCB+PP/214PP | |||
|data= | |||
{{AttackData-KI2013 | |||
|version= S | |||
|damage= 68.1(18%) | |||
|counter-hit damage= 68.1(18%) | |||
|potential damage= -- | |||
|shadow on hit= 0 | |||
|shadow on block= 0 | |||
|guard= -- | |||
|startup= 1+0(1) | |||
|active= 3 | |||
|recovery= 35 | |||
|total duration= 39f | |||
|on hit= +84 | |||
|on counter-hit= +84 | |||
|on block= -- | |||
|special properties= Throw invul 1f | |||
|description= The fastest attack in the game and the ultimate abare move. If RAAM grabs you while you're in danger, you're dead. | |||
}} | |||
}} | |||
{{MoveData | |||
|image= RAAM 236KKhb.png|thumb | |||
|caption= Test Caption | |||
|name= Shadow Emergence | |||
|linkname= 236KK | |||
|input= QCF+KK/236KK | |||
|data= | |||
{{AttackData-KI2013 | |||
|version= S | |||
|damage= 23.8(7%) | |||
|counter-hit damage= 23.8(7%) | |||
|potential damage= 7.2(2%) | |||
|shadow on hit= 0 | |||
|shadow on block= 0 | |||
|guard= Mid | |||
|startup= 6+9(15) | |||
|active= 2[1]2[1] | |||
2[1]2[1]2 | |||
|recovery= 23 | |||
|total duration= 52f | |||
|on hit= +52 | |||
|on counter-hit= +52 | |||
|on block= -8 | |||
|special properties= Applies Kryll, Strike invul 1-17f | |||
|description= | |||
}} | |||
}} | |||
{{MoveData | |||
|image= RAAM 214KKhb.png|thumb | |||
|caption= Test Caption | |||
|name= Shadow Kryll Rush | |||
|linkname= 214KK | |||
|input= QCB+KK/214KK | |||
|data= | |||
{{AttackData-KI2013 | |||
|version= S | |||
|damage= 15.4(6%) | |||
|counter-hit damage= 15.4(6%) | |||
|potential damage= 1.8(0.5%) | |||
|shadow on hit= 0 | |||
|shadow on block= 0 | |||
|guard= -- | |||
|startup= 1+21(22) | |||
|active= 2 | |||
|recovery= 34 | |||
|total duration= 58f | |||
|on hit= +4 | |||
|on counter-hit= +4 | |||
|on block= -- | |||
|special properties= Applies Kryll, Projectile invul 1-49f | |||
|description= | |||
}} | |||
}} | |||
== Enders == | |||
{{MoveData | |||
|image= RAAM SHKnv.png|thumb | |||
|caption= Test Caption | |||
|name= Decimation Ender | |||
|linkname= 236HP | |||
|input= QCF+HP/236HP | |||
|data= | |||
{{KI2013_EnderData | |||
|version= Level 1 | |||
|ender type= Wall Splat | |||
|on hit= +7/+25 (Splat) | |||
|special properties= -- | |||
|description= | |||
}} | |||
{{KI2013_EnderData | |||
|version= Level 2 | |||
|ender type= Wall Splat | |||
|on hit= 0/+21 | |||
|special properties= -- | |||
|description= | |||
}} | |||
{{KI2013_EnderData | |||
|version= Level 3 | |||
|ender type= Wall Splat | |||
|on hit= +1/+25 | |||
|special properties= -- | |||
|description= | |||
}} | |||
{{KI2013_EnderData | |||
|version= Level 4 | |||
|ender type= Wall Splat | |||
|on hit= +2/+26 | |||
|special properties= -- | |||
|description= | |||
}} | |||
}} | |||
{{MoveData | |||
|image= RAAM Dominance.png|thumb | |||
|caption= Test Caption | |||
|name= Dominance Ender | |||
|linkname= 214P | |||
|input= QCB+P/214P | |||
|data= | |||
{{KI2013_EnderData | |||
|version= Level 1 | |||
|ender type= Damage | |||
|on hit= +25 | |||
|special properties= -- | |||
|description= | |||
}} | |||
{{KI2013_EnderData | |||
|version= Level 2 | |||
|ender type= Damage | |||
|on hit= +25 | |||
|special properties= -- | |||
|description= | |||
}} | |||
{{KI2013_EnderData | |||
|version= Level 3 | |||
|ender type= Damage | |||
|on hit= +25 | |||
|special properties= -- | |||
|description= | |||
}} | |||
{{KI2013_EnderData | |||
|version= Level 4 | |||
|ender type= Damage | |||
|on hit= +25 | |||
|special properties= -- | |||
|description= | |||
}} | |||
{{KI2013_EnderData | |||
|version= Shadow | |||
|ender type= Damage | |||
|on hit= +25 | |||
|special properties= Hard Knockdown | |||
|description= | |||
}} | |||
}} | |||
{{MoveData | |||
|image= RAAM 236HKnv.png|thumb | |||
|caption= Test Caption | |||
|name= Emergence Ender | |||
|linkname= 236K | |||
|input= QCF+K/236K | |||
|data= | |||
{{KI2013_EnderData | |||
|version= Level 1 | |||
|ender type= Hard Knockdown | |||
|on hit= +52 | |||
|special properties= Applies Kryll | |||
|description= | |||
}} | |||
{{KI2013_EnderData | |||
|version= Level 2 | |||
|ender type= Hard Knockdown | |||
|on hit= +50 | |||
|special properties= Applies Kryll | |||
|description= | |||
}} | |||
{{KI2013_EnderData | |||
|version= Level 3 | |||
|ender type= Hard Knockdown | |||
|on hit= +51 | |||
|special properties= Applies Kryll | |||
|description= | |||
}} | |||
{{KI2013_EnderData | |||
|version= Level 4 | |||
|ender type= Hard Knockdown | |||
|on hit= +49 | |||
|special properties= Applies Kryll | |||
|description= | |||
}} | |||
}} | |||
{{MoveData | |||
|image= RAAM 214Knv.png|thumb | |||
|caption= Test Caption | |||
|name= Kryll Rush Ender | |||
|linkname= 214K | |||
|input= QCB+K/214K | |||
|data= | |||
{{KI2013_EnderData | |||
|version= Level 1 | |||
|ender type= Advantage | |||
|on hit= +4 | |||
|special properties= Applies Kryll | |||
|description= | |||
}} | |||
{{KI2013_EnderData | |||
|version= Level 2 | |||
|ender type= Advantage | |||
|on hit= +4 | |||
|special properties= Applies Kryll | |||
|description= | |||
}} | |||
{{KI2013_EnderData | |||
|version= Level 3 | |||
|ender type= Advantage | |||
|on hit= +4 | |||
|special properties= Applies Kryll | |||
|description= | |||
}} | |||
{{KI2013_EnderData | |||
|version= Level 4 | |||
|ender type= Advantage | |||
|on hit= +4 | |||
|special properties= Applies Kryll | |||
|description= | |||
}} | |||
}} | |||
== Instinct == | |||
{{MoveData | |||
|image= RAAM HPHK.png|thumb | |||
|caption= Test Caption | |||
|name= Kryllstorm | |||
|linkname= HP+HK | |||
|input= HP+HK | |||
|data= To Do | |||
}} | |||
{{KI2013_Navbox}} | {{KI2013_Navbox}} | ||
Latest revision as of 21:05, 28 June 2025
Introduction
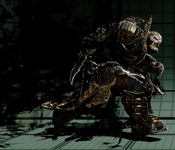
General Raam PLACEHOLDER CHARACTER STORY
General Raam PLACEHOLDER GAMEPLAY OVERVIEW
| Strengths | Weaknesses |
|---|---|
|
|
Universal Mechanics
Instinct
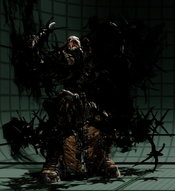
Kryllstorm: A huge swarm of Kryll covers the screen, building Potential Damage on the opponent all the while. RAAM can shimmy back and forward while holding Kryll Shield.
Combat Traits
Deadly Stomps: RAAM can tack extra damage on a downed opponent with MK and LK. These stomps can be broken, and counter-broken.
Kryll Swarm: Kryll Shield, Emergence, and Kryll Rush all inflict the opponent with a poison debuff that drains 14% over 10 seconds. The effect goes away if RAAM is hit.
Normal Moves
Standing Normals
| Damage | Counter-Hit Damage | Potential Damage | Shadow On Hit | Shadow On Block | Guard | Startup | Active | Recovery | Total Duration | On Hit | On Counter-Hit | On Block | Special Properties |
|---|---|---|---|---|---|---|---|---|---|---|---|---|---|
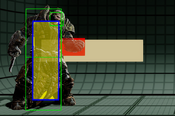
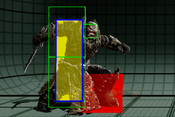
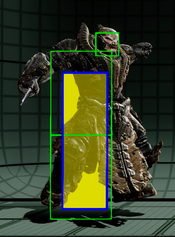
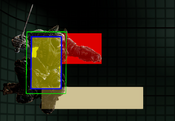
| 10 (2%) | 14 (3%) | -- | 1.6 | 2.4 | Mid | 5 | 2 | 8 | 14f | +3 | +5 | +2 | Chain |
To Do | |||||||||||||
| Damage | Counter-Hit Damage | Potential Damage | Shadow On Hit | Shadow On Block | Guard | Startup | Active | Recovery | Total Duration | On Hit | On Counter-Hit | On Block | Special Properties |
|---|---|---|---|---|---|---|---|---|---|---|---|---|---|
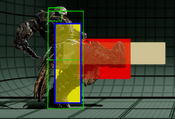
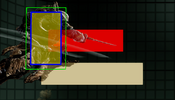
| 20 (5%) | 26 (7%) | -- | 2.4 | 4 | Mid | 6 | 2 | 14 | 21f | +1 | +4 | -1 | -- |
To Do | |||||||||||||
| Damage | Counter-Hit Damage | Potential Damage | Shadow On Hit | Shadow On Block | Guard | Startup | Active | Recovery | Total Duration | On Hit | On Counter-Hit | On Block | Special Properties |
|---|---|---|---|---|---|---|---|---|---|---|---|---|---|
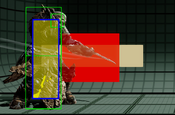
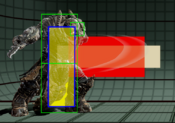
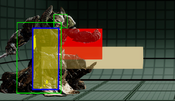
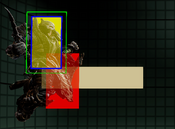
| 30 (8%) | 38 (10%) | -- | 4 | 4.5 | Mid | 9 | 3 | 17 | 28f | +4 | +6 | +1 | -- |
To Do | |||||||||||||
| Damage | Counter-Hit Damage | Potential Damage | Shadow On Hit | Shadow On Block | Guard | Startup | Active | Recovery | Total Duration | On Hit | On Counter-Hit | On Block | Special Properties |
|---|---|---|---|---|---|---|---|---|---|---|---|---|---|
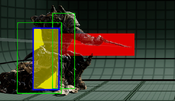
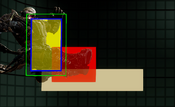
| 10 (2%) | 14 (3%) | -- | 1.6 | 2.4 | Mid | 6 | 3 | 7 | 15f | +4/+6 | +15 | +3 | Flipout OTG |
To Do | |||||||||||||
| Damage | Counter-Hit Damage | Potential Damage | Shadow On Hit | Shadow On Block | Guard | Startup | Active | Recovery | Total Duration | On Hit | On Counter-Hit | On Block | Special Properties |
|---|---|---|---|---|---|---|---|---|---|---|---|---|---|
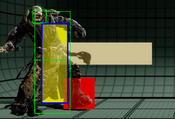
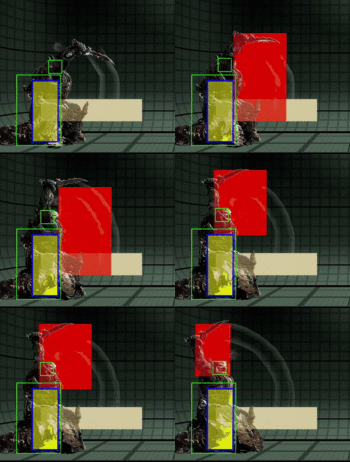
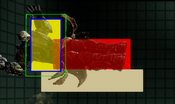
| 20 (5%) | 26 (7%) | -- | 2.4 | 4 | Mid | 14 | 7 | 15 | 35f | +9/+67 | +13 | +2 | Hard Knockdown OTG |
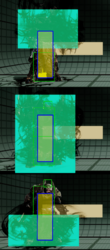
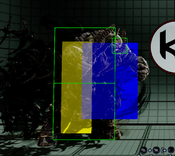
RAAM steps forward and stomps.
| |||||||||||||
| Damage | Counter-Hit Damage | Potential Damage | Shadow On Hit | Shadow On Block | Guard | Startup | Active | Recovery | Total Duration | On Hit | On Counter-Hit | On Block | Special Properties |
|---|---|---|---|---|---|---|---|---|---|---|---|---|---|
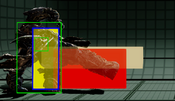
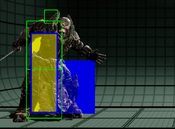
| 32 (8%) | 38 (10%) | -- | 4 | 4.5 | Mid | 16 | 5 | 21 | 41f | +15 | +20 | +1 | Stagger |
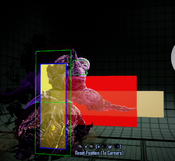
A slow boot to the face. Causes stagger on hit, which means it combos directly into Dominance. | |||||||||||||
Crouching Normals
| Damage | Counter-Hit Damage | Potential Damage | Shadow On Hit | Shadow On Block | Guard | Startup | Active | Recovery | Total Duration | On Hit | On Counter-Hit | On Block | Special Properties |
|---|---|---|---|---|---|---|---|---|---|---|---|---|---|
| 10 (2%) | 14 (3%) | -- | 1.6 | 2.4 | Mid | 5 | 2 | 9 | 15f | +2 | +4 | 0 | Chain |
To Do | |||||||||||||
| Damage | Counter-Hit Damage | Potential Damage | Shadow On Hit | Shadow On Block | Guard | Startup | Active | Recovery | Total Duration | On Hit | On Counter-Hit | On Block | Special Properties |
|---|---|---|---|---|---|---|---|---|---|---|---|---|---|
| 20 (5%) | 26 (7%) | -- | 2.4 | 4 | Mid | 8 | 2 | 14 | 23f | 0 | +3 | -1 | -- |
To Do | |||||||||||||
| Damage | Counter-Hit Damage | Potential Damage | Shadow On Hit | Shadow On Block | Guard | Startup | Active | Recovery | Total Duration | On Hit | On Counter-Hit | On Block | Special Properties |
|---|---|---|---|---|---|---|---|---|---|---|---|---|---|
| 30 (8%) | 38 (10%) | -- | 4 | 4.5 | Mid | 9 | 4 | 19 | 31f | 0 | +2 | -3 | -- |
To Do | |||||||||||||
| Damage | Counter-Hit Damage | Potential Damage | Shadow On Hit | Shadow On Block | Guard | Startup | Active | Recovery | Total Duration | On Hit | On Counter-Hit | On Block | Special Properties |
|---|---|---|---|---|---|---|---|---|---|---|---|---|---|
| 10 (2%) | 14 (3%) | -- | 1.6 | 2.4 | Low | 5 | 2 | 10 | 16f | +2 | +4 | 0 | -- |
To Do | |||||||||||||
| Damage | Counter-Hit Damage | Potential Damage | Shadow On Hit | Shadow On Block | Guard | Startup | Active | Recovery | Total Duration | On Hit | On Counter-Hit | On Block | Special Properties |
|---|---|---|---|---|---|---|---|---|---|---|---|---|---|
| 20 (5%) | 26 (7%) | -- | 2.4 | 4 | Low | 8 | 6 | 13 | 26f | -3 | -1 | -5 | -- |
To Do | |||||||||||||
| Damage | Counter-Hit Damage | Potential Damage | Shadow On Hit | Shadow On Block | Guard | Startup | Active | Recovery | Total Duration | On Hit | On Counter-Hit | On Block | Special Properties |
|---|---|---|---|---|---|---|---|---|---|---|---|---|---|
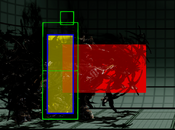
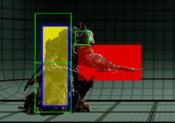
| 36 (10%) | 44 (12%) | -- | 4 | 4.5 | Low | 12 | 3 | 33 | 47f | +54 | +54 | -5 | Hard knockdown |
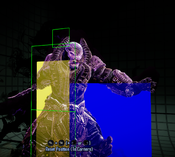
High-pushback sweep. | |||||||||||||
Command Normals
| Damage | Counter-Hit Damage | Potential Damage | Shadow On Hit | Shadow On Block | Guard | Startup | Active | Recovery | Total Duration | On Hit | On Counter-Hit | On Block | Special Properties |
|---|---|---|---|---|---|---|---|---|---|---|---|---|---|
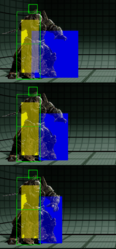
| -- | -- | -- | -- | -- | -- | 29 | -- | -- | 29f | -- | -- | -- | Fake Out |
RAAM slides forward, appearing to do St. MK. Designed to cause lockouts on opponents who are too giddy to escape RAAM's OTG combos. | |||||||||||||
| Damage | Counter-Hit Damage | Potential Damage | Shadow On Hit | Shadow On Block | Guard | Startup | Active | Recovery | Total Duration | On Hit | On Counter-Hit | On Block | Special Properties |
|---|---|---|---|---|---|---|---|---|---|---|---|---|---|
| 0(0%) | 0(0%) | -- | ?? | ?? | Mid | 31 | 2 | 22 | 54f | +18 | +26 | +8 | Applies Kryll, Kryll Armored, Stagger on CH |
While charging, RAAM is covered in Kryll Armor and can dash cancel forward or backward. At max charge, Kryll Shield is unblockable. For the cost of 1/2 a bar of Shadow, RAAM can cancel into Shield from normals and Decimation on contact, or from Kryll Rush at any time. | |||||||||||||
Air Normals
| Damage | Counter-Hit Damage | Potential Damage | Shadow On Hit | Shadow On Block | Guard | Startup | Active | Recovery | Total Duration | On Hit | On Counter-Hit | On Block | Special Properties |
|---|---|---|---|---|---|---|---|---|---|---|---|---|---|
| 20(5%) | 24(6%) | -- | 1.6 | 2.4 | High | 8 | 7 | 4 | 18+f | +15 | +17 | +8 | -- |
To Do | |||||||||||||
| Damage | Counter-Hit Damage | Potential Damage | Shadow On Hit | Shadow On Block | Guard | Startup | Active | Recovery | Total Duration | On Hit | On Counter-Hit | On Block | Special Properties |
|---|---|---|---|---|---|---|---|---|---|---|---|---|---|
| 24(6%) | 30(8%) | -- | 2.4 | 4 | High | 9 | 4 | 4 | 16+f | +16 | +19 | +12 | -- |
To Do | |||||||||||||
| Damage | Counter-Hit Damage | Potential Damage | Shadow On Hit | Shadow On Block | Guard | Startup | Active | Recovery | Total Duration | On Hit | On Counter-Hit | On Block | Special Properties |
|---|---|---|---|---|---|---|---|---|---|---|---|---|---|
| 30(8%) | 38(10%) | -- | 4 | 4.5 | High | 11 | 10 | 4 | 24+f | +20 | +24 | +17 | Cross-up |
To Do | |||||||||||||
| Damage | Counter-Hit Damage | Potential Damage | Shadow On Hit | Shadow On Block | Guard | Startup | Active | Recovery | Total Duration | On Hit | On Counter-Hit | On Block | Special Properties |
|---|---|---|---|---|---|---|---|---|---|---|---|---|---|
| 20(5%) | 24(6%) | -- | 1.6 | 2.4 | High | 8 | 13 | 4 | 24+f | +15 | +17 | +8 | -- |
To Do | |||||||||||||
| Damage | Counter-Hit Damage | Potential Damage | Shadow On Hit | Shadow On Block | Guard | Startup | Active | Recovery | Total Duration | On Hit | On Counter-Hit | On Block | Special Properties |
|---|---|---|---|---|---|---|---|---|---|---|---|---|---|
| 24(6%) | 30(8%) | -- | 2.4 | 4 | High | 10 | 9 | 4 | 22+f | +16 | +19 | +12 | -- |
To Do | |||||||||||||
| Damage | Counter-Hit Damage | Potential Damage | Shadow On Hit | Shadow On Block | Guard | Startup | Active | Recovery | Total Duration | On Hit | On Counter-Hit | On Block | Special Properties |
|---|---|---|---|---|---|---|---|---|---|---|---|---|---|
| 30(8%) | 38(10%) | -- | 4 | 4.5 | High | 16 | 5 | 4 | 24+f | +20 | +24 | +17 | -- |
A slow dropkick that's huge like Xbox. | |||||||||||||
Throws
| Damage | Counter-Hit Damage | Potential Damage | Shadow On Hit | Shadow On Block | Guard | Startup | Active | Recovery | Total Duration | On Hit | On Counter-Hit | On Block | Special Properties |
|---|---|---|---|---|---|---|---|---|---|---|---|---|---|
| 50 (13%) | - | - | - | - | - | 5 | 2 | 29 | 35f | - | - | - | Hard Knockdown |
It may come as no surprise that the grappler has a good throw. Most damaging normal throw in the game, with decent corner carry to boot. | |||||||||||||
Special Moves
| Version | Damage | Counter-Hit Damage | Potential Damage | Shadow On Hit | Shadow On Block | Guard | Startup | Active | Recovery | Total Duration | On Hit | On Counter-Hit | On Block | Special Properties |
|---|---|---|---|---|---|---|---|---|---|---|---|---|---|---|
| LP | 24 (6%) | 36 (10%) | -- | 1.6 | 2.4 | Mid | 11 | 3 | 33 | 46f | -2 | 0 | -9 | -- |
Death-on-block mid that exists to be hit-confirmed into, as only it combos out of every normal. You can try to make it safe via Kryll Shield cancel. | ||||||||||||||
| Version | Damage | Counter-Hit Damage | Potential Damage | Shadow On Hit | Shadow On Block | Guard | Startup | Active | Recovery | Total Duration | On Hit | On Counter-Hit | On Block | Special Properties |
| MP | 26 (7%) | 38 (10%) | -- | 2.4 | 4 | Mid | 15 | 5 | 20 | 39f | +7 | +9 | -3 | -- |
Combos from heavies, but that's about it. | ||||||||||||||
| Version | Damage | Counter-Hit Damage | Potential Damage | Shadow On Hit | Shadow On Block | Guard | Startup | Active | Recovery | Total Duration | On Hit | On Counter-Hit | On Block | Special Properties |
| HP | 28 (7%) | 40 (11%) | -- | 4 | 4.5 | Mid | 19 | 6 | 22 | 46f | +10 | +10 | -1 | -- |
Combos from St. HK, and not much else. On block, frame traps into Dominance. | ||||||||||||||
| Version | Damage | Counter-Hit Damage | Potential Damage | Shadow On Hit | Shadow On Block | Guard | Startup | Active | Recovery | Total Duration | On Hit | On Counter-Hit | On Block | Special Properties |
|---|---|---|---|---|---|---|---|---|---|---|---|---|---|---|
| LP | 44.5 (12%) | 44.5 (12%) | -- | ?? | ?? | Throw | 4 | 2 | 39 | 44f | +92 | +92 | -- | Throw Invul 4-5f, Hard Knockdown |
Great range for a grab of its speed. A strong abare move. | ||||||||||||||
| Version | Damage | Counter-Hit Damage | Potential Damage | Shadow On Hit | Shadow On Block | Guard | Startup | Active | Recovery | Total Duration | On Hit | On Counter-Hit | On Block | Special Properties |
| MP | 58.5 (16%) | 58.5 (16%) | -- | ?? | ?? | Throw | 4 | 2 | 39 | 44f | +48 | +48 | -- | Throw Invul 4-5f, Hard Knockdown |
To Do | ||||||||||||||
| Version | Damage | Counter-Hit Damage | Potential Damage | Shadow On Hit | Shadow On Block | Guard | Startup | Active | Recovery | Total Duration | On Hit | On Counter-Hit | On Block | Special Properties |
| HP | 69.6 (19%) | 69.6 (19%) | -- | ?? | ?? | Throw | 4 | 2 | 39 | 44f | +51 | +51 | -- | Throw Invul 4-5f, Hard Knockdown |
Ideally, you want to land this with Kryll attached for 25% unbreakable damage. | ||||||||||||||
| Version | Damage | Counter-Hit Damage | Potential Damage | Shadow On Hit | Shadow On Block | Guard | Startup | Active | Recovery | Total Duration | On Hit | On Counter-Hit | On Block | Special Properties |
|---|---|---|---|---|---|---|---|---|---|---|---|---|---|---|
| LK | 0 (0%) | 0 (0%) | -- | ?? | ?? | Mid | 8 | 20 | 21 | 48f | +2 | +2 | -21 | Applies Kryll, Low Invul 4-28f |
| Version | Damage | Counter-Hit Damage | Potential Damage | Shadow On Hit | Shadow On Block | Guard | Startup | Active | Recovery | Total Duration | On Hit | On Counter-Hit | On Block | Special Properties |
| MK | 0 (0%) | 0 (0%) | -- | ?? | ?? | Mid | 8 | 20 | 21 | 48f | +18 | +18 | -21 | Applies Kryll, High Invul 1-27f |
A ridiculously long-lasting anti-air. | ||||||||||||||
| Version | Damage | Counter-Hit Damage | Potential Damage | Shadow On Hit | Shadow On Block | Guard | Startup | Active | Recovery | Total Duration | On Hit | On Counter-Hit | On Block | Special Properties |
| HK | 0 (0%) | 0 (0%) | -- | ?? | ?? | Mid | 19 | 18 | 20 | 56f | +63 | +63 | -20 | Applies Kryll, Strike Invul 1-18f |
Another ridiculously long-lasting anti-air. Can be used as a makeshift reversal, but it loses to throws. | ||||||||||||||
| Version | Damage | Counter-Hit Damage | Potential Damage | Shadow On Hit | Shadow On Block | Guard | Startup | Active | Recovery | Total Duration | On Hit | On Counter-Hit | On Block | Special Properties |
|---|---|---|---|---|---|---|---|---|---|---|---|---|---|---|
| K | 17.3 (7%) | 17.3 (7%) | -- | ?? | ?? | -- | 22 | 2 | 34 | 57f | +4 | +4 | -- | Applies Kryll, Kryll Armored |
RAAM runs forward, grabbing when he gets close. On hit, leaves them standing close enough to scoop up with L Dominance. If this gets jumped, you will eat shit so be ready to cancel with Kryll Shield at a moment's notice. | ||||||||||||||
Shadow Moves
| Version | Damage | Counter-Hit Damage | Potential Damage | Shadow On Hit | Shadow On Block | Guard | Startup | Active | Recovery | Total Duration | On Hit | On Counter-Hit | On Block | Special Properties |
|---|---|---|---|---|---|---|---|---|---|---|---|---|---|---|
| S | 33.6(9%) | 45.6(12%) | 7.2(2%) | 0 | 0 | Mid | 3+4(7) | 2[10]2[10]
2[12]2[7]1 |
20 | 75f | +12 | +12 | +1 | -- |
RAAM thrusts his knife five times. | ||||||||||||||
| Version | Damage | Counter-Hit Damage | Potential Damage | Shadow On Hit | Shadow On Block | Guard | Startup | Active | Recovery | Total Duration | On Hit | On Counter-Hit | On Block | Special Properties |
|---|---|---|---|---|---|---|---|---|---|---|---|---|---|---|
| S | 68.1(18%) | 68.1(18%) | -- | 0 | 0 | -- | 1+0(1) | 3 | 35 | 39f | +84 | +84 | -- | Throw invul 1f |
The fastest attack in the game and the ultimate abare move. If RAAM grabs you while you're in danger, you're dead. | ||||||||||||||
| Version | Damage | Counter-Hit Damage | Potential Damage | Shadow On Hit | Shadow On Block | Guard | Startup | Active | Recovery | Total Duration | On Hit | On Counter-Hit | On Block | Special Properties |
|---|---|---|---|---|---|---|---|---|---|---|---|---|---|---|
| S | 23.8(7%) | 23.8(7%) | 7.2(2%) | 0 | 0 | Mid | 6+9(15) | 2[1]2[1]
2[1]2[1]2 |
23 | 52f | +52 | +52 | -8 | Applies Kryll, Strike invul 1-17f |
| Version | Damage | Counter-Hit Damage | Potential Damage | Shadow On Hit | Shadow On Block | Guard | Startup | Active | Recovery | Total Duration | On Hit | On Counter-Hit | On Block | Special Properties |
|---|---|---|---|---|---|---|---|---|---|---|---|---|---|---|
| S | 15.4(6%) | 15.4(6%) | 1.8(0.5%) | 0 | 0 | -- | 1+21(22) | 2 | 34 | 58f | +4 | +4 | -- | Applies Kryll, Projectile invul 1-49f |
Enders
| Version | Ender Type | On Hit | Special Properties |
|---|---|---|---|
| Level 1 | Wall Splat | +7/+25 (Splat) | -- |
| Version | Ender Type | On Hit | Special Properties |
| Level 2 | Wall Splat | 0/+21 | -- |
| Version | Ender Type | On Hit | Special Properties |
| Level 3 | Wall Splat | +1/+25 | -- |
| Version | Ender Type | On Hit | Special Properties |
| Level 4 | Wall Splat | +2/+26 | -- |
| Version | Ender Type | On Hit | Special Properties |
|---|---|---|---|
| Level 1 | Damage | +25 | -- |
| Version | Ender Type | On Hit | Special Properties |
| Level 2 | Damage | +25 | -- |
| Version | Ender Type | On Hit | Special Properties |
| Level 3 | Damage | +25 | -- |
| Version | Ender Type | On Hit | Special Properties |
| Level 4 | Damage | +25 | -- |
| Version | Ender Type | On Hit | Special Properties |
| Shadow | Damage | +25 | Hard Knockdown |
| Version | Ender Type | On Hit | Special Properties |
|---|---|---|---|
| Level 1 | Hard Knockdown | +52 | Applies Kryll |
| Version | Ender Type | On Hit | Special Properties |
| Level 2 | Hard Knockdown | +50 | Applies Kryll |
| Version | Ender Type | On Hit | Special Properties |
| Level 3 | Hard Knockdown | +51 | Applies Kryll |
| Version | Ender Type | On Hit | Special Properties |
| Level 4 | Hard Knockdown | +49 | Applies Kryll |
| Version | Ender Type | On Hit | Special Properties |
|---|---|---|---|
| Level 1 | Advantage | +4 | Applies Kryll |
| Version | Ender Type | On Hit | Special Properties |
| Level 2 | Advantage | +4 | Applies Kryll |
| Version | Ender Type | On Hit | Special Properties |
| Level 3 | Advantage | +4 | Applies Kryll |
| Version | Ender Type | On Hit | Special Properties |
| Level 4 | Advantage | +4 | Applies Kryll |
Instinct

