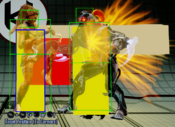
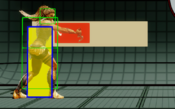
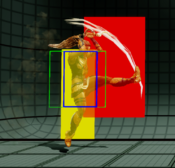
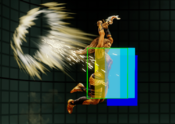
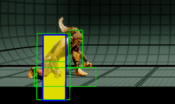
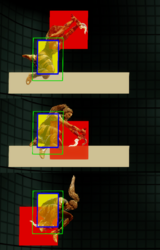
| Line 432: | Line 432: | ||
=== Command Normals === | === Command Normals === | ||
{{MoveData | |||
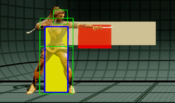
|image= Maya 4HPhb.png|thumb | |||
|caption= Test Caption | |||
|name= Savage Strikes | |||
|linkname= 4HP | |||
|input= Back HP/4HP | |||
|data= | |||
{{AttackData-KI2013 | |||
|damage= 30.6(8%) | |||
|counter-hit damage= 34.6(9%) | |||
|potential damage= 4.9 (1%) | |||
|shadow on hit= ?? | |||
|shadow on block= ?? | |||
|guard= Mid | |||
|startup= 9 | |||
|active= 2[7]3[8] | |||
2[12]3 | |||
|recovery= 17 | |||
|total duration= 62f | |||
|on hit= +8 | |||
|on counter-hit= +8 | |||
|on block= +5 | |||
|special properties= -- | |||
|description= A series of strikes using both daggers. | |||
}} | |||
}} | |||
{{MoveData | {{MoveData | ||
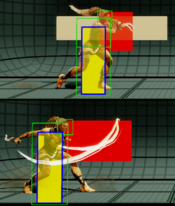
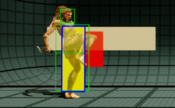
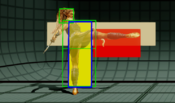
|image= Maya 6HKhb.png|thumb | |image= Maya 6HKhb.png|thumb | ||
| Line 437: | Line 465: | ||
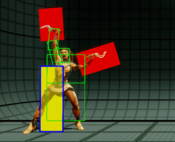
|name= Axe Kick | |name= Axe Kick | ||
|linkname= 6HK | |linkname= 6HK | ||
|input= Forward | |input= Forward HK/6HK | ||
|data= | |data= | ||
{{AttackData-KI2013 | {{AttackData-KI2013 | ||
Revision as of 12:44, 10 August 2024
Introduction
Maya PLACEHOLDER CHARACTER STORY
Maya PLACEHOLDER GAMEPLAY OVERVIEW
| Strengths | Weaknesses |
|---|---|
|
|
Universal Mechanics
Instinct
Possession Rite: Maya's daggers fly back to her on activation, and continue to do so throughout the Instinct.
| Character Data | |
|---|---|
| Forward Walk Speed | 57f to cross two large training mode squares |
| Backwards Walk Speed | 74f to cross two large training mode squares |
| Forward Dash Duration | 21f
|
| Backdash Duration | 23f |
| Pre-Jump Frames | 5f |
| Jump Duration | 38f
|
| Landing Recovery | 4f |
| Advantage Post Grounded Combo Breaker | +1 |
Normal Moves
Maya's light punches use her yellow Temperance dagger
Maya's medium punches use her purple Vengeance dagger
Maya's heavy punches use both daggers
Standing Normals
| Damage | Counter-Hit Damage | Potential Damage | Shadow On Hit | Shadow On Block | Guard | Startup | Active | Recovery | Total Duration | On Hit | On Counter-Hit | On Block | Special Properties |
|---|---|---|---|---|---|---|---|---|---|---|---|---|---|
| 12(3%) | 16(4%) | -- | 1.6 | 2.4 | Mid | 5 | 3 | 8 | 15f | +4 | +6 | +1 | Chain |
To Do | |||||||||||||
| Damage | Counter-Hit Damage | Potential Damage | Shadow On Hit | Shadow On Block | Guard | Startup | Active | Recovery | Total Duration | On Hit | On Counter-Hit | On Block | Special Properties |
|---|---|---|---|---|---|---|---|---|---|---|---|---|---|
| 22(6%) | 28(7%) | -- | 2.4 | 4 | Mid | 6 | 2 | 14 | 21f | +3 | +7 | +1 | -- |
To Do | |||||||||||||
| Damage | Counter-Hit Damage | Potential Damage | Shadow On Hit | Shadow On Block | Guard | Startup | Active | Recovery | Total Duration | On Hit | On Counter-Hit | On Block | Special Properties |
|---|---|---|---|---|---|---|---|---|---|---|---|---|---|
| 32.1(8%) | 42.1(11%) | 2.7 (0.7%) | 8 | 9 | Mid | 10 | 2[15]2 | 12 | 40f | +6 | +6 | +5 | -- |
To Do | |||||||||||||
| Damage | Counter-Hit Damage | Potential Damage | Shadow On Hit | Shadow On Block | Guard | Startup | Active | Recovery | Total Duration | On Hit | On Counter-Hit | On Block | Special Properties |
|---|---|---|---|---|---|---|---|---|---|---|---|---|---|
| 8(2%) | 12(3%) | -- | 1.6 | 2.4 | Mid | 5 | 3 | 10 | 17f | +5 | +7 | +2 | -- |
To Do | |||||||||||||
| Damage | Counter-Hit Damage | Potential Damage | Shadow On Hit | Shadow On Block | Guard | Startup | Active | Recovery | Total Duration | On Hit | On Counter-Hit | On Block | Special Properties |
|---|---|---|---|---|---|---|---|---|---|---|---|---|---|
| 18(5%) | 24(6%) | -- | 2.4 | 4 | Mid | 7 | 3 | 17 | 26f | +2 | +4 | -1 | -- |
To Do | |||||||||||||
| Damage | Counter-Hit Damage | Potential Damage | Shadow On Hit | Shadow On Block | Guard | Startup | Active | Recovery | Total Duration | On Hit | On Counter-Hit | On Block | Special Properties |
|---|---|---|---|---|---|---|---|---|---|---|---|---|---|
| 26.8(7%) | 36.8(10%) | 2.3 (0.6%) | 8 | 9 | Mid | 9 | 2[1]3 | 17 | 31f | +2 | +2 | 0 | -- |
A twice hitting roundhouse. No close variant. | |||||||||||||
Crouching Normals
| Damage | Counter-Hit Damage | Potential Damage | Shadow On Hit | Shadow On Block | Guard | Startup | Active | Recovery | Total Duration | On Hit | On Counter-Hit | On Block | Special Properties |
|---|---|---|---|---|---|---|---|---|---|---|---|---|---|
| 12(3%) | 16(4%) | -- | 1.6 | 2.4 | Mid | 5 | 2 | 9 | 15f | +4 | +6 | +2 | Chain |
To Do | |||||||||||||
| Damage | Counter-Hit Damage | Potential Damage | Shadow On Hit | Shadow On Block | Guard | Startup | Active | Recovery | Total Duration | On Hit | On Counter-Hit | On Block | Special Properties |
|---|---|---|---|---|---|---|---|---|---|---|---|---|---|
| 20(5%) | 26(7%) | -- | 2.4 | 4 | Mid | 7 | 3 | 16 | 25f | +3 | +6 | 0 | -- |
To Do | |||||||||||||
| Damage | Counter-Hit Damage | Potential Damage | Shadow On Hit | Shadow On Block | Guard | Startup | Active | Recovery | Total Duration | On Hit | On Counter-Hit | On Block | Special Properties |
|---|---|---|---|---|---|---|---|---|---|---|---|---|---|
| 32.1(8%) | 42.1(11%) | 2.7 (0.7%) | 8 | 9 | Mid | 9 | 12 | 12 | 32f | -1 | -1 | -4 | -- |
To Do | |||||||||||||
| Damage | Counter-Hit Damage | Potential Damage | Shadow On Hit | Shadow On Block | Guard | Startup | Active | Recovery | Total Duration | On Hit | On Counter-Hit | On Block | Special Properties |
|---|---|---|---|---|---|---|---|---|---|---|---|---|---|
| 8(2%) | 12(3%) | -- | 1.6 | 2.4 | Low | 5 | 2 | 16 | 22f | -2 | 0 | -3 | Chain |
To Do | |||||||||||||
| Damage | Counter-Hit Damage | Potential Damage | Shadow On Hit | Shadow On Block | Guard | Startup | Active | Recovery | Total Duration | On Hit | On Counter-Hit | On Block | Special Properties |
|---|---|---|---|---|---|---|---|---|---|---|---|---|---|
| 18(5%) | 24(6%) | -- | 2.4 | 4 | Low | 8 | 5 | 12 | 24f | +3 | +8 | -2 | -- |
To Do | |||||||||||||
| Damage | Counter-Hit Damage | Potential Damage | Shadow On Hit | Shadow On Block | Guard | Startup | Active | Recovery | Total Duration | On Hit | On Counter-Hit | On Block | Special Properties |
|---|---|---|---|---|---|---|---|---|---|---|---|---|---|
| 28(7%) | 34(9%) | -- | 4 | 4.5 | Low | 9 | 2 | 22 | 32f | +42 | +42 | -3 | Hard Knockdown |
Standard sweep. | |||||||||||||
Close Normals
| Damage | Counter-Hit Damage | Potential Damage | Shadow On Hit | Shadow On Block | Guard | Startup | Active | Recovery | Total Duration | On Hit | On Counter-Hit | On Block | Special Properties |
|---|---|---|---|---|---|---|---|---|---|---|---|---|---|
| 22(6%) | 28(7%) | -- | 2.4 | 4 | Mid | 6 | 3 | 13 | 21f | +7 | +10 | +5 | -- |
To Do | |||||||||||||
| Damage | Counter-Hit Damage | Potential Damage | Shadow On Hit | Shadow On Block | Guard | Startup | Active | Recovery | Total Duration | On Hit | On Counter-Hit | On Block | Special Properties |
|---|---|---|---|---|---|---|---|---|---|---|---|---|---|
| 32(8%) | 38(10%) | -- | 4 | 4.5 | Mid | 9 | 3 | 15 | 26f | +9 | +9 | +1 | -- |
To Do | |||||||||||||
| Damage | Counter-Hit Damage | Potential Damage | Shadow On Hit | Shadow On Block | Guard | Startup | Active | Recovery | Total Duration | On Hit | On Counter-Hit | On Block | Special Properties |
|---|---|---|---|---|---|---|---|---|---|---|---|---|---|
| 16(4%) | 22(6%) | 1.3 (0.3%) | 4.8 | 8 | Mid | 6 | 3[5]2 | 10 | 25f | +4 | +4 | 0 | -- |
A twice hitting front kick with high pushback. | |||||||||||||
Command Normals
| Damage | Counter-Hit Damage | Potential Damage | Shadow On Hit | Shadow On Block | Guard | Startup | Active | Recovery | Total Duration | On Hit | On Counter-Hit | On Block | Special Properties |
|---|---|---|---|---|---|---|---|---|---|---|---|---|---|
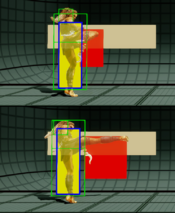
| 30.6(8%) | 34.6(9%) | 4.9 (1%) | ?? | ?? | Mid | 9 | 2[7]3[8]
2[12]3 |
17 | 62f | +8 | +8 | +5 | -- |
A series of strikes using both daggers. | |||||||||||||
| Damage | Counter-Hit Damage | Potential Damage | Shadow On Hit | Shadow On Block | Guard | Startup | Active | Recovery | Total Duration | On Hit | On Counter-Hit | On Block | Special Properties |
|---|---|---|---|---|---|---|---|---|---|---|---|---|---|
| 30(8%) | 38(10%) | -- | 4 | 4.5 | High | 34 | 2 | 14 | 49f | +21 | +21 | -3 | Recapture, Opener |
A very slow overhead given bite by its fake-out version (just hold the button), letting Maya slip lows and throws past tentative opponents. | |||||||||||||
| Damage | Counter-Hit Damage | Potential Damage | Shadow On Hit | Shadow On Block | Guard | Startup | Active | Recovery | Total Duration | On Hit | On Counter-Hit | On Block | Special Properties |
|---|---|---|---|---|---|---|---|---|---|---|---|---|---|
| 40.8(11%) | 40.8(11%) | -- | ?? | ?? | Low | 11 | 11 | 29 | 40+f | +23 | +23 | -- | Throw Invul 1-landing |
| |||||||||||||
| Damage | Counter-Hit Damage | Potential Damage | Shadow On Hit | Shadow On Block | Guard | Startup | Active | Recovery | Total Duration | On Hit | On Counter-Hit | On Block | Special Properties |
|---|---|---|---|---|---|---|---|---|---|---|---|---|---|
| -- | -- | -- | -- | -- | -- | 2 | -- | 16 | 18f | -- | -- | -- | -- |
A fast and risk-free way to retrieve daggers. | |||||||||||||
Air Normals
| Damage | Counter-Hit Damage | Potential Damage | Shadow On Hit | Shadow On Block | Guard | Startup | Active | Recovery | Total Duration | On Hit | On Counter-Hit | On Block | Special Properties |
|---|---|---|---|---|---|---|---|---|---|---|---|---|---|
| 22(6%) | 26(7%) | -- | 1.6 | 2.4 | High | 7 | 5 | 4 | 15+f | +15 | +17 | +8 | -- |
To Do | |||||||||||||
| Damage | Counter-Hit Damage | Potential Damage | Shadow On Hit | Shadow On Block | Guard | Startup | Active | Recovery | Total Duration | On Hit | On Counter-Hit | On Block | Special Properties |
|---|---|---|---|---|---|---|---|---|---|---|---|---|---|
| 26(7%) | 32(8%) | -- | 2.4 | 4 | High | 7 | 3 | 4 | 13+f | +16 | +19 | +12 | -- |
To Do | |||||||||||||
| Damage | Counter-Hit Damage | Potential Damage | Shadow On Hit | Shadow On Block | Guard | Startup | Active | Recovery | Total Duration | On Hit | On Counter-Hit | On Block | Special Properties |
|---|---|---|---|---|---|---|---|---|---|---|---|---|---|
| 28(7%) | 34(9%) | -- | 4 | 4.5 | High | 9 | 9 | 4 | 21+f | +20 | +24 | +17 | Crossup |
To Do | |||||||||||||
| Damage | Counter-Hit Damage | Potential Damage | Shadow On Hit | Shadow On Block | Guard | Startup | Active | Recovery | Total Duration | On Hit | On Counter-Hit | On Block | Special Properties |
|---|---|---|---|---|---|---|---|---|---|---|---|---|---|
| 18(5%) | 22(6%) | -- | 1.6 | 2.4 | High | 8 | 13 | 4 | 24+f | +16 | +18 | +9 | -- |
To Do | |||||||||||||
| Damage | Counter-Hit Damage | Potential Damage | Shadow On Hit | Shadow On Block | Guard | Startup | Active | Recovery | Total Duration | On Hit | On Counter-Hit | On Block | Special Properties |
|---|---|---|---|---|---|---|---|---|---|---|---|---|---|
| 22(6%) | 28(7%) | -- | 2.4 | 4 | High | 9 | 9 | 4 | 21+f | +16 | +19 | +12 | Cross-up |
To Do | |||||||||||||
| Damage | Counter-Hit Damage | Potential Damage | Shadow On Hit | Shadow On Block | Guard | Startup | Active | Recovery | Total Duration | On Hit | On Counter-Hit | On Block | Special Properties |
|---|---|---|---|---|---|---|---|---|---|---|---|---|---|
| 26(7%) | 32(9%) | -- | 4 | 4.5 | High | 10 | 6 | 4 | 19+f | +20 | +24 | +17 | -- |
To Do | |||||||||||||

