Introduction
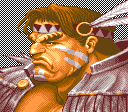
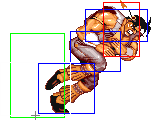
T. Hawk is a grappler character added in Super Street Fighter II: The New Challengers (SSF2), and returns in Super Street Fighter II Turbo. The differences from CPS-2 Zangief are that his special throw, the typhoon, does not have a whiff animation or a grab window; he was given a special anti-air move that is similar to the shoto's Shoryuken and and air dash attack like E. Honda's headbutt or Blanka's rolling attack. Also, his arsenal of normal moves is different from Zangief's, making both very different characters which are often weak where the other is strong. Say, Zangief has no dash-like special and his sweep is fast but does not reach very far; T. Hawk has a dash-like attack and his sweep is very slow, but with long reach. The most important difference in high-level play, however, is the lack of a whiff animation. While it is harder to do a tight tick into special throw with T. Hawk, they can be made safe with the use of negative-edge.
Competitive Overview
Players to watch, if you want to see practical T.Hawk play:
Mayakon - N.Hawk
Toutanki / Toutanboy - N.Hawk and O.Hawk
K - N.Hawk and O.Hawk
Inomata - N.Hawk
VIPER - N.Hawk utilizes st.jab from max range -> negative edge Typhoon. Definitely unique.
Search for these guys on YouTube.
Strengths & Weaknesses
Strengths
- Has access to high damage potential, combos, spd, and a lot of normals do above average damage.
- His spd has the second largest throw range behind giefs spd, this is helpful as you can grab people from outside their range.
- Good walk and jump speed for a command grab character.
- Command grab has no whiff animation, and super can't be wasted.
- Decent OS game and spd setups via sako tick.
Weaknesses
- Pretty bad normals for the most part.
- No safe way to build meter.
- Large hurtbox.
- Dp whiffs against low attacks.
- Loses to basically everyone, besides Gief.
- Has a hard time with a lot of fireballs, and general keepaway tactics, dive is usually unsafe on block, and has low priority.
- Has to go in, not useful options for defensive play.
- Difficult to use effectively, setups are hard to execute, has to take a lot of risks, and has many horrible matchups.
New & Old Versions Comparison
To select O.T.Hawk, choose T.Hawk and then press → → ← ← Jab/Fierce, pressing Short simultaneously with the punch button for the alternate color.
Here is the list of differences:
- Obvious stuff: O.T.Hawk can not tech throws and does not have a Super;
- O.T.Hawk has a slightly smaller and thinner body hitbox than N.T.Hawk, it's unknown if it has any relevance. N.T.Hawk's hitbox goes from his feet to his nose, O.T.Hawk's goes from the feet but only to his jaw. Also note that this affects most standing normals as well so it will not be listed on the normal moves differences list;
- O.T.Hawk has almost every normal with something better. Here is a list with differences worth mentioning:
- Crouching Jab has a much fatter and slightly longer hitbox;
- Far Standing Strong has the active hitbox a bit larger upwards and downwards;
- Crouching Strong does not has the stray hurtbox during the recovery frames;
- Close Standing Fierce does more damage on both hits;
- Far Standing Fierce has better priority and range by some pixels and does more damage;
- Crouching Fierce has the second active hitbox a lot taller than N.T.Hawk's version, but it has less horizontal range and does more damage on both hits but doesn't have to be crouch blocked;
- Close Standing Short has a bigger hitbox;
- Far Standing Short has a bigger hitbox downwards and can be special canceled;
- Far Standing Forward has a bigger active hitbox upwards;
- Crouching Forward has a larger hitbox, it has more priority and reach;
- Close Standing Roundhouse does more damage and has a fatter hitbox, it doesn't misses crouching Blanka and Cammy;
- Far Standing Roundhouse has less range, but it will not miss crouching Blanka, Cammy and M.Bison(Dictator) and does more damage;
- Crouching Roundhouse is faster and does more damage;
- Both Jumping Strongs have much bigger hitbox;
- Neutral Jumping Fierce has a larger hitbox and does more damage;
- Diagonal Jumping Fierce has a much bigger hitbox on both active parts and does more damage;
- Neutral Jumping Short and Forward both have larger hitbox, exactly like Diagonal Jumping Short;
- Diagonal Jumping Short can be special canceled;
- Neutral Jumping Roundhouse has a bigger hitbox and does more damage;
- Diagonal Jumping Roundhouse has a bigger hitbox and does more damage;
- His aerial command normals are also different:
- O.T.Hawk's Elbow Drop has a fatter hitbox and hits lower;
- O.T.Hawk's Body Slam can crossup against all characters and does more damage;
- O.T.Hawk's Strong Tomahawk Buster second active part do more damage, Fierce version do less damage on the first active part and more damage on the second active part and both versions have better invincibility just like the Jab version;
O.T.Hawk is straight better. Why bother learning the complicated N.T.Hawk's tick into super setups if you'll not be able to land then enough because of the poor normals N.T.Hawk has? Most T.Hawk players usually learn both versions though.
--Born2SPD
Color Options
| Jab | Strong | Fierce | Start | Old |
 |
 |
 |
 |

|
 |
 |
 |
 |

|
| Short | Forward | Roundhouse | Hold | Old Alternative |
--Born2SPD
Video Overview
Moves Analysis
Disclaimer: To better understand the diagrams, read this.
Normal Moves
Ground Normals
- Close/Far Standing Jab:
| Damage | 4[1] |  |
 |
|
| Stun | 0~5 | |||
| Stun Timer | 40 | |||
| Chain Cancel | No | |||
| Special Cancel | Yes | |||
| Frame Advantage | +5 | |||
| Frame Count | 3 | 4 | 4 | |
| Simplified | 1 + 3 | 4 | 4 | |
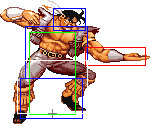
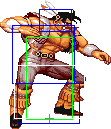
A short stab which is the same for any distance. It does low damage, but has good priority and recovery. It's a very important ticking move since it's indispensable for the sako tick technique, which is key to stand a chance with T.Hawk on high level play. It's also useful on hit-confirm combos: if the opponent is blocking the combo then go for a sako tick, else cancel it into Tomahawk Buster.
Even if you aren't good enough to Sako tick (it's one of the game's hardest techniques) or consistently safe jump, this move acts as an excellent safe meaty against most of the cast since it typically hits mid. Not many characters get one of these so use it to your advantage. Crouching Jab (viewed below) can also act as a safe meaty but you get a few more pixels of length on the Standing Jab.
- Crouching Jab:
| Damage | 4[1] |  |
 |
 |

|
| Stun | 0~5 | ||||
| Stun Timer | 40 | ||||
| Chain Cancel | Yes | ||||
| Special Cancel | Yes | ||||
| Frame Advantage | +5 | ||||
| Frame Count | 2 | 1 | 4 | 4 | |
| Simplified | 1 + 3 | 4 | 4 | ||
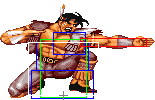
A low stab with chain cancel properties, so it can be used as a rapid fire move. It does the same low damage as the standing version and also has very good priority and recovery. This is one of T.Hawk's most important ticking moves: you can do 1 or 2 jabs and then go for the Typhoon or you can do 1, 2 or 3 jabs and then a standing jab and go for a Typhoon, using the sako tick technique. Because it can be used as a rapid fire move and has very good horizontal priority, it can also be used to beat torpedo like moves like E.Honda's Headbutt or Blanka's Beast Rolls. N.T.Hawk's version of this move received some considerable nerfs: the hitbox was nerfed vertically by 7px (both upwards and downwards) and horizontally by 5px. The horizontal priority difference doesn't mean much, it just means that with N.T.Hawk this move has less range so you'll have to mash a little faster when using it as a rapid fire move. The vertical priority difference is a bigger loss, but that depends on the matchup. For example, N.T.Hawk's version doesn't hit shoto's Tatsumakis while they're spinning since the hitbox was nerfed a few pixels upwards. Also, it's not possible to beat Blanka's slide by mashing this move because the hitbox was also nerfed a few pixels downwards, missing the slide entirelly. Finally, just like all other chain cancelable normals in this game, there's a glitch that allows you to cancel this move directly into a jump - that has the benefit of forcing the opponent to be stuck on his block animation while T.Hawk is jumping (this is specially useful against charge characters).
- Close Standing Strong: (Base max activation range: 48)
| Damage | 24[1] |  |
 |
 |

|
| Stun | 5~11 | ||||
| Stun Timer | 60 | ||||
| Chain Cancel | No | ||||
| Special Cancel | Yes / No | ||||
| Frame Advantage | +4 / +7 | ||||
| Frame Count | 3 | 3 | 6 | 5 | |
| Simplified | 1 + 3 | 9 | 5 | ||
A quick hook punch. The main purpose of this move is to serve as a close anti-air if the opponent is too high on the air, since a Tomahawk Buster may be beat or simply whiff on that kind of situation. For example, that move can prevent shotos from escaping the corner with aerial Tatsumakis, or can hit characters with floaty jumps out of the air, back to the corner, where you want them. This move can be considered good, since it does its job quite well on these very specific situations, but is by no means considered an universal anti-air, for most of your anti-air needs you're better with your Tomahawk Buster. The first active part has special cancel properties, so it can be used to combo into a Tomahawk Buster, but it doesn't has much range and also whiff's against crouching Blanka and Cammy, so this is not a suitable move for combos.
- Far Standing Strong:
| Damage | 24[1] | 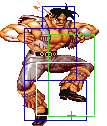 |
 |
 |

|
| Stun | 5~11 | ||||
| Stun Timer | 60 | ||||
| Chain Cancel | No | ||||
| Special Cancel | No | ||||
| Frame Advantage | +4 | ||||
| Frame Count | 3 | 2 | 7 | 7 | |
| Simplified | 1 + 5 | 7 | 7 | ||
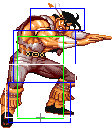
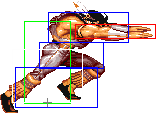
A two-handed stab. This move is a little underused but it has its value as a poke. It actually works well as an antecipation move against shoto's hadoukens, for example. Also note that N.T.Hawk's version has its hitbox nerfed upwards by 8px and downwards by 4px. Only the downward priority nerf is a real loss though, because of it this move whiffs against all crouching characters, while with O.T.Hawk it only whiffs against Blanka, Cammy, Dictator, Chun Li and Guile. With O.T.Hawk this also works well against Boxer's Ground Rushes, somewhat like Zangief's Standing Jab, with no rapid fire ability but with more damage potential and a little longer range.
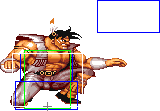
- Crouching Strong:
| Damage | 24[1] |  |
 |
|
| Stun | 5~11 | |||
| Stun Timer | 60 | |||
| Chain Cancel | No | |||
| Special Cancel | No | |||
| Frame Advantage | +3 | |||
| Frame Count | 6 | 8 | 7 | |
| Simplified | 1 + 6 | 8 | 7 | |
T.Hawk brings out both hands. As can be seen, the hitbox only exists on one side. It works decently as an anti-air and can be used to beat random stuff like shoto's Tatsumakis or E.Honda's Headbutt, for example. From point-blank it works really well as a tick into Typhoon, since it will leave T.Hawk inside the Typhoon range, but outside most characters grab range. The only exceptions to this are Zangief and another T.Hawk(of course). The Typhoon attempt may miss against E.Honda though, but after a crossup this basically will not happen, leaving E.Honda with no option other than eating your Typhoon, since he won't have enough charge to escape. With N.T.Hawk this is also a excellent move to use as a tick into Super, since it stays active for a long time, so it's very confortable to buffer the 720 while the move is active. Due to a weird bug, with N.T.Hawk the move has a stray vulnerable hitbox during its recovery, which allows it to be punished from far away, basically nullifying any use this move could have as a poke.
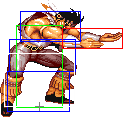
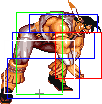
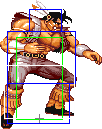
- Close Standing Fierce: (Base max activation range: 40)
| Damage | 20[1] + 20[1] |  |
 |
 |
 |
|
| Stun | 1~7 + 1~7 | |||||
| Stun Timer | 70 + 70 | |||||
| Chain Cancel | No | |||||
| Special Cancel | No | |||||
| Frame Advantage | +1 / +7(+6) | |||||
| Frame Count | 4 | 4 | 6 | 6 | 9 | |
| Simplified | 1 + 8 | 6 | 6 | 9 | ||
A two handed chop. The move comboes into itself, for decent damage if up close, but does mediocre dizzy for a Fierce move. Against certain characters it's simply impossible for the 2 hits to connect, depending if the opponent is standing or crouching, even if on point-blank. By the way this move is straight out classed by Crouching Fierce since that move can always hit twice as long that T.Hawk is close enough, does more damage and dizzy and with N.T.Hawk the second hit actually has to be blocked low. Anyway, for most punishment situations you are better suited by using a cancelable close attack into Tomahawk Buster, or simply using the Typhoon. With O.T.Hawk this move has a little more random damage potential, but the difference is basically unnoticeable. This move is seen most often on messed up walk in Typhoon attempts, from up close, which only shows how bad this move actually is.
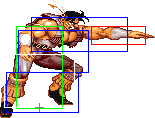
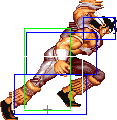
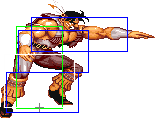
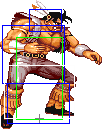
- Far Standing Fierce:
| Damage | 28[1] |  |
 |
 |
 |
 |
|
| Stun | 10~16 | ||||||
| Stun Timer | 80 | ||||||
| Chain Cancel | No | ||||||
| Special Cancel | No | ||||||
| Frame Advantage | +1 | ||||||
| Frame Count | 5 | 5 | 8 | 4 | 4 | 5 | |
| Simplified | 1 + 10 | 8 | 13 | ||||
A far knife-hand strike. It has OK reach, but both start-up and recovery are long. Though not that long for a Fierce attack, the recovery is vulnerable to sweeps from mid and close range. O.T.Hawk's version is a bit better: does more damage and the size of the active hitbox is the same, but it's positioned 10 pixels forward, giving it better priority and range. It can hit certain characters even if they're crouching, so this can be used as a poke of sorts, if you know that the opponent is 1 heavy hit away from falling dizzy then this may actually work. The characters that can be hit from this move even while crouching are Boxer, Dee Jay, Dhalsim, O.Fei Long, Sagat, another T.Hawk and Zangief. If you're using O.T.Hawk then you're better suited by using Far Standing Roundhouse though, it's a little slower but has more range and misses against fewer crouching characters. This move is most seen on out of range or messed up walk in Typhoon attempts though.
- Crouching Fierce:
| Damage | 30[1] + 20[1] |  |
 |
 |
 |
 |

|
| Stun | 10~16 + 2~8 | ||||||
| Stun Timer | 80 + 90 | ||||||
| Chain Cancel | No | ||||||
| Special Cancel | No | ||||||
| Frame Advantage | -3 / +4(+3) | ||||||
| Frame Count | 4 | 4 | 6 | 8 | 3 | 7 | |
| Simplified | 1 + 8 | 6 | 8 | 10 | |||
A strong chop. Hits twice, has good reach and fine close-to-the-ground priority but is an overall slow normal. It can combo after an aerial cross up for a 3 hit combo, but the timing is quite strict. The first active part makes this move T.Hawk's best anti-air normal, it can beat most aerial attacks from the game as long that T.Hawk is right under the opponent. It also works well as a counter to certain cross up attempts like ambiguous Tatsumakis or just low priority normals like N.Cammy's Diagonal Jumping Short. The second active part works differently deppending on which T.Hawk version you're using: O.T.Hawk's has less horizontal range but has more vertical range, leaving O.T.Hawk less vulnerable than N.T.Hawk to medium level normals while using this move. On the other hand, with N.T.Hawk the additional horizontal range makes it more reliable on beating slides (with some luck) and low normals in general, since it has good range and excellent priority. If you're using O.T.Hawk, you should definitelly limit the usage of this move as an anti air; with N.T.Hawk it can be decent on footsies but it is not quite reliable due to the start-up and recovery of the move and the previous active part that does not cover that area, so keep that in mind.
Another minor distinction is that, with N.T.Hawk, the second active part hits low against everyone but Boxer, while with O.T.Hawk it only hit as a low normal against Dee Jay, Dhalsim, Guile, another T.Hawk and Zangief only. If spaced far enough so that only the tip of hitbox touches the opponent's foot hurtbox but not his body hurtbox then it can be made as a low hitting normal as well against Boxer, Cammy, Chun Li, Claw, Dictator, E.Honda, Fei Long and Sagat. This also works with N.T.Hawk to make it hit low against Boxer. Depending on the mathcup, N.T.Hawk's version of this normal is actually better than O.T.Hawk's. O.T.Hawk does more random damage with this move, but this difference is basically unnoticeable.
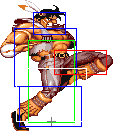
- Close Standing Short: (Base max activation range: 40)
| Damage | 18[1] |  |
 |

|
| Stun | 0~5 | |||
| Stun Timer | 40 | |||
| Chain Cancel | No | |||
| Special Cancel | Yes | |||
| Frame Advantage | +5 | |||
| Frame Count | 3 | 4 | 4 | |
| Simplified | 1 + 3 | 4 | 4 | |
A short knee. Can be used as a tick but T.Hawk's jabs are better suited for that. It can also be used on combos as a substitute to Close Standing Forward when cancelling the normal into Tomahawk Buster. In fact, on some matchups you'll be forced to use Close Standing Short instead, since Close Standing Forward gives too much pushback which results on the Tomahawk Buster to whiff completelly or to only do 1 hit instead of 2, if using the fierce version. O.T.Hawk's version of this move is better because the hitbox is bigger horizontally by 9px, because of that it will never whiff on grounded opponents while the N.T.Hawk version can whiff deppending on the distance it is activated as well as if the opponent is being pushed back from another move. O.T.Hawk's version also has better vertical priority by 14px, but this is meaningless.
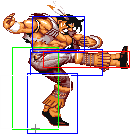
- Far Standing Short:
| Damage | 18[1] |  |
 |
 |

|
| Stun | 0~5 | ||||
| Stun Timer | 40 | ||||
| Chain Cancel | No | ||||
| Special Cancel | No | ||||
| Frame Advantage | +4 | ||||
| Frame Count | 2 | 2 | 5 | 4 | |
| Simplified | 1 + 4 | 5 | 4 | ||
A ranged kick. Does not has any use I can think about. The O.T.Hawk version is better because it can be special cancelled and has better priority upwards by 2px as well as downwards by 6px. But these advantages are meaningles because this move is useless.
- Crouching Short:
| Damage | 4[1] |  |
 |
 |

|
| Stun | 0~5 | ||||
| Stun Timer | 40 | ||||
| Chain Cancel | No | ||||
| Special Cancel | Yes | ||||
| Frame Advantage | +4 | ||||
| Frame Count | 2 | 1 | 4 | 5 | |
| Simplified | 1 + 3 | 4 | 5 | ||
A low kick. This has good priority, but short range. It is an OK move to beat some low moves specially if you can position yourself out of reach, but its damage potential is very low so on its own it won't achieve much. It is also a viable option to tick into Typhoon, it may even grant T.Hawk a little more damage when going for that since the opponent may stand up when trying to escape the tick with a reversal. It can also be used in combos as a cancel into Tomahawk Buster, specially on matchups in which Close Standing Short/Forward won't work, like vs Chun Li when comboing from the front.
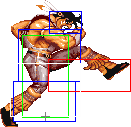
- Close Standing Forward: (Base max activation range: 40)
| Damage | 24[1] |  |
 |

|
| Stun | 5~11 | |||
| Stun Timer | 60 | |||
| Chain Cancel | No | |||
| Special Cancel | Yes | |||
| Frame Advantage | +3 | |||
| Frame Count | 3 | 8 | 7 | |
| Simplified | 1 + 3 | 8 | 7 | |
A foot stab. A valuable move for combos since it can be canceled into Tomahawk Buster. From point-blank it works really well as a tick into Typhoon, since it will leave T.Hawk inside the Typhoon range, but outside most characters grab range. It is also the easiest way to tick into Typhoon/Super.
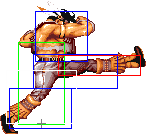
- Far Standing Forward:
| Damage | 24[1] | 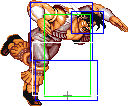 |
 |
 |
 |

|
| Stun | 5~11 | |||||
| Stun Timer | 60 | |||||
| Chain Cancel | No | |||||
| Special Cancel | No | |||||
| Frame Advantage | +7 | |||||
| Frame Count | 4 | 4 | 4 | 3 | 4 | |
| Simplified | 1 + 8 | 4 | 7 | |||
A far kick. OK as a poke. Comes out quicker than a Standing Roundhouse and has longer range than Neutral Standing Jab so it has its uses in keeping someone grounded off a knockdown. The O.T.Hawk version has a bigger hitbox upwards by 9px as well as downwards by 3px. These priority nerfs doesn't really mean much for N.T.Hawk since the horizontal range is still the same, but it's known that there are some rare situations in which N.T.Hawk's version may whiff completelly, but O.T.Hawk's wouldn't.
- Crouching Forward:
| Damage | 24[1] |  |
 |
 |

|
| Stun | 5~11 | ||||
| Stun Timer | 60 | ||||
| Chain Cancel | No | ||||
| Special Cancel | No | ||||
| Frame Advantage | +7 | ||||
| Frame Count | 3 | 3 | 6 | 5 | |
| Simplified | 1 + 6 | 6 | 5 | ||
A floor kick that has very good range. This is T.Hawk's main poke. Similar to Shoto's Crouching Forward; it helps against Guile when playing footsies. This can also be used in tick throwing if timed as a meaty, specially against DeeJay. O.T.Hawk's version of this move is considerably better, since it has a better priority/range of 10 pixels. Definitelly one of the biggest nerfs N.T.Hawk received.
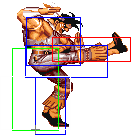
- Close Standing Roundhouse: (Base max activation range: 72)
| Damage | 28[1] |  |
 |
 |
 |
 |
 |

|
| Stun | 10~16 | |||||||
| Stun Timer | 80 | |||||||
| Chain Cancel | No | |||||||
| Special Cancel | No | |||||||
| Frame Advantage | +3 | |||||||
| Frame Count | 2 | 2 | 2 | 2 | 8 | 5 | 6 | |
| Simplified | 1 + 8 | 8 | 11 | |||||
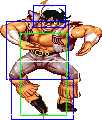
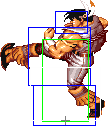
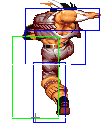
A roundhouse kick. O.T.Hawk's version does more damage and the hitbox is bigger vertically (17px bigger upwards and 11px bigger downwards), which does make it considerably better, even though it's hardly used on purpose. It often comes out when you try to poke the opponent with a Far Standing Roundhouse but the opponent walks forward or jumps on the last moment for some reason, or, more importantly, when you go for an elbow bash grab but it ends up not connecting and the opponent tries to escape by jumping. It can even be somewhat used on purpose as an anti-air if you have the balls for it. Specifically, it can stuff Shoto's Diagonal Jumping Rh, which not many things do. These are the benefits of the better priority upwards; as for the better priority downwards, it allows it to hit all crouching characters except Blanka and Cammy. All that is for O.T.Hawk only, in the case of N.T.Hawk this move can't really be used as an anti-air nor can it hit any crouching character. The only use I see for this move in N.T.Hawk's case is for buffering a Super when upclose, after a crossup or when the opponent is getting up.
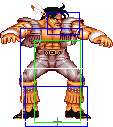
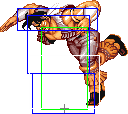
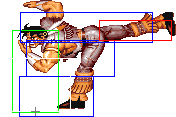
- Far Standing Roundhouse:
| Damage | 28[1] |  |
 |
 |
 |
 |
 |

|
| Stun | 10~16 | |||||||
| Stun Timer | 80 | |||||||
| Chain Cancel | No | |||||||
| Special Cancel | No | |||||||
| Frame Advantage | -3 | |||||||
| Frame Count | 3 | 3 | 5 | 8 | 4 | 6 | 7 | |
| Simplified | 1 + 11 | 8 | 17 | |||||
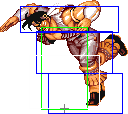
A backwards high kick. Very good reach and damage. It can be used to punish moves from a distance, trade with fireballs and when predicting jumps, if in range. O.T.Hawk's version has a bit less horizontal range than N.T.Hawk's (12px to be exact) so there will be some situations in which N.T.Hawk actualy performs a little better (e.g. trading with Blanka's Neutral Jumps), but on most situations O.T.Hawk's version is clearly the superior one, mainly because of the better priority downwards of 12px (but it's also bigger upwards by 6px - this comes less into play but still good to have) that allows O.T.Hawk to hit all crouching characters except Blanka, Cammy and Dictator from a good distance, unlike N.T.Hawk's that whiffs completelly vs crouching opponents. This makes it one of the best pokes in the game since it hits mid against most of the cast while also having a fairly good damage and reach. You can use it as a battering ram against fireball chuckers. Even if it trades you usually come out ahead. O.T.Hawk's version also does more damage than N.T.Hawk's.
- Crouching Roundhouse:
| Damage | 28[1] / 26[1] |  |
 |
 |
 |
 |

|
| Stun | 5~11 | ||||||
| Stun Timer | 130 | ||||||
| Chain Cancel | No | ||||||
| Special Cancel | No | ||||||
| Frame Advantage | -21 / -7 | ||||||
| Frame Count | 7 | 7 | 7 | 8 | 10 | 11 | |
| Simplified | 1 + 7 | 7 | 7 | 8 | 21 | ||
Two sweep kicks in a row. With N.T.Hawk there's nothing special on the first active part, but with O.T.Hawk it will set a built-in safe jump against Guile, which can be very useful. With that said, regardless of which T.Hawk version you're using, the second active part is usually more useful since it has good priority and awesome reach. It's important to note that the move has the downside of having a long recovery, and this is aggravated in N.T.Hawk's case, since it has a worse recovery by 8f. It is very dangerous to spam this move if the enemy has an horizontal super move ready, and it can also be punished if it misses. N.T.Hawk's version also has a slightly worse startup time - it takes 2f longer for the second hitting part to get active (which is the one that matters the most), but it has the benefit of setting up built-in safe jump against Sagat when the second part hits. It's fair to say that O.T.Hawk's sweep is one of the best in the game, while N.T.Hawk's is just OK. O.T.Hawk's version of this move also does slightly more damage on both hitting parts.
Aerial Normals
- Neutral Jumping Jab:
| Damage | 20[0] |  |
|
| Stun | 1~7(-2) | ||
| Stun Timer | 40 | ||
| Special Cancel | Yes | ||
| Frame Count | 3 | ∞ | |
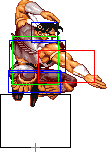
Aerial hand stab attack. Don't be deceived by it's looks, it's nowhere near as good as the Diagonal Jumping version: it has 12px worse horizontal priority and 7px worse downwards priority. Still somewhat decent for protection, it has just average priority and range but it atleast has the long active frames. It misses all crouching characters though. Finally, this can be special canceled into Condor Dive during the ascending part of the jump, but I am not aware of any situation in which this can be useful.
- Diagonal Jumping Jab:
| Damage | 20[0] |  |
|
| Stun | 1~7(-2) | ||
| Stun Timer | 40 | ||
| Special Cancel | Yes | ||
| Frame Count | 3 | ∞ | |
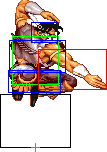
Animates the same as the Neutral Jumping version. This is T.Hawk's main jump in attack. It has a very good horizontal priority: it can beat most moves on air-to-air. It's also hard to get beat by non-invulnerable moves when used as an air-to-ground attack if T.Hawk spaces it so he falls diagonally at the opponent. Depending on the timing and spacing it can even beat N.Ryu's Shoryukens. It has one glaring weakness though: its downwards priority/reach is mediocre. Some characters are able to beat it easily if T.Hawk is landing on top of them. It also cannot hit a crouching Blanka, Cammy and Dictator, forcing T.Hawk to use the Diagonal Jumping Forward (or Diagonal Jumping Strong, if using O.T.Hawk) as a tick/safe jump, which is often unoptimal, since the pushback will vary depending on if it's blocked or not, giving too much pushback if its blocked. With all that said, this is a key move in T.Hawk's arsenal, it's one of the main ways T.Hawk has to get in and is the go to move for setting ticks into Typhoon from the air. Also, just like the Neutral Jumping version, this can be special canceled into Condor Dive, but doing it isn't really useful.
- Neutral/Diagonal Jumping Strong:
| Damage | 24[1] |  |
 |

|
| Stun | 5~11 | |||
| Stun Timer | 50(+10) | |||
| Special Cancel | No | |||
| Frame Count | 5 | 14 | ∞ | |
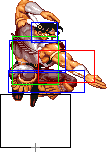
Yet another hand stab attack on the air. Doing it on a neutral or on a diagonal jump will result in the exact same move. In comparison with the jab aerial moves, the lowest hurtbox is more expanded forward by 24px, so it will not be as effective on both air-to-air and air-to-ground uses. Also, as N.T.Hawk the hitbox on it has exactly the same size as his Neutral Jumping Jab, so it has very bad priority and reach and will miss all crouching characters so it's basically useless. On O.T.Hawk's case its hitbox has good dimensions which gives it decent priority (despite it having a worse lower hurtbox): it has 8px better downwards priority/reach as well as 4px upwards. The downwards priority is the most important, as it covers Diagonal Jumping Jab's main weakness: it gives decent downwards priority and also allows O.T.Hawk to hit all crouching characters with it. So, with O.T.Hawk this move is not totally useless: it can be used as a mixup with the jab version if you think the opponent will use a move with low upwards priority to counter it, or you can use it for the longer block stun, but on both cases you have to time it correctly since it has way less active frames than the jab version.
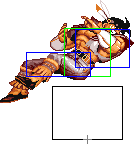
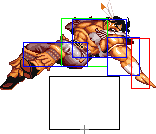
- Neutral Jumping Fierce:
| Damage | 28[1] | 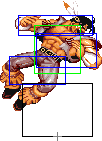 |
 |
 |
 |

|
| Stun | 11~17(-1) | |||||
| Stun Timer | 60(+20) | |||||
| Special Cancel | No | |||||
| Frame Count | 2 | 5 | 12 | 5 | ∞ | |
| Simplified | 7 | 12 | ∞ | |||
T.Hawk does an aerial knife-hand strike downwards diagonally. This doesn't has many uses but it can be used as a bait for advancing moves like Dictator's Psycho Crusher or E.Honda's Headbutt, beating them if T.Hawk lands on top, assuming the button press is not too late. You shouldn't use this move to avoid projectiles though, since T.Hawk's lowest hurtboxes actually get bigger while doing this move. For that purpose favor Neutral Jumping Rh. Finally, O.T.Hawk's version of this move is slightly better: the hitbox is bigger forward by 6px and backwards by 22px. It also does more normal and random damage than N.T.Hawk's.
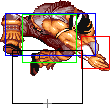
- Diagonal Jumping Fierce:
| Damage | 28[1] |  |
 |
 |

|
| Stun | 11~17(-1) | ||||
| Stun Timer | 60(+20) | ||||
| Special Cancel | No | ||||
| Frame Count | 5 | 2 | 11 | ∞ | |
| Simplified | 5 | 13 | ∞ | ||
A two handed chop on the air. This move has two parts to it. The first one is somewhat an air-to-air tool, but it's only good at it with O.T.Hawk, since his version has way better priority/reach: it's 18px bigger forward as well as 22px downwards. N.T.Hawk's is expanded 6px upwards though, but this is meaningless in comparison and not enough for it to still be useful. With all that said, it's hard for O.T.Hawk to really make use of it on purpose since it stays active for only 2 frames. Anyway, the second part is what really matters: it is an excellent air-to-ground attack. This is a key move on the E.Honda matchup, since it's T.Hawk's only Diagonal Jumping move that can beat his Headbutts from above. It can be used like that to beat Dictator's Psycho Crushers too. It can also work as an anti-anti-air in case the opponent is using certain low priority normals to counter T.Hawk's Diagonal Jumping Jab. O.T.Hawk's version has better priority/reach on the second part too: it's 2px bigger forward, 3px downwards, 18px backwards and 7px upwards. The forward priority/reach change doesn't make much difference but it's good to have. The better downwards priority/reach is the most important difference as it allows O.T.Hawk to beat Dhalsim's slide everytime, unlike with N.T.Hawk in which you have to hit Dhalsim's head to be able to beat it. It also allows O.T.Hawk to beat Blanka's electric attack cleanly instead of trading, which is something that feels like T.Hawk shouldn't be able to do. The backwards priority is useful too since it allows O.T.Hawk to beat E.Honda's Headbutt even when he's almost done passing under O.T.Hawk, while with N.T.Hawk it would miss completelly or even lose. This move can also be used as a crossup because of that. The better upwards priority is usually meaningless though, but can come into play if the opponent jumps when you also decided to jump. Finally, O.T.Hawk's version of this move does more normal and random damage. Because of that, this is his best air move to use as a combo starter on frontal jumps(tied with Diagonal Jumping Rh). With N.T.Hawk the best move for that is the Body Slam move (the down + fierce command normal).
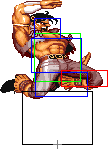
- Neutral Jumping Short:
| Damage | 20[0] | 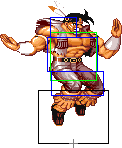 |
 |
|
| Stun | 1~7(-2) | |||
| Stun Timer | 40 | |||
| Special Cancel | No | |||
| Frame Count | 2 | 3 | ∞ | |
| Simplified | 5 | ∞ | ||
Aerial knee attack. Mostly outclassed by Neutral Jumping Jab since it has worse startup and priority and does the same damage and stun. The only advantage it has over it is that it atleast can hit a crouching Boxer, Dhalsim, O.Fei Long, Sagat, Zangief and another T.Hawk, but this is still meaningless for T.Hawk's gameplan. Also, N.T.Hawk's version of this move got its hitbox nerfed upwards by 20px, making it even more terrible. Avoid this move.
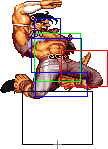
- Diagonal Jumping Short:
| Damage | 20[0] |  |
 |
|
| Stun | 1~7(-2) | |||
| Stun Timer | 40 | |||
| Special Cancel | No | |||
| Frame Count | 2 | 2 | ∞ | |
| Simplified | 4 | ∞ | ||
Animates somewhat like the Neutral Jumping version but with a 1f faster startup, which allows O.T.Hawk (but not N.T.Hawk) to special cancel this move into a Condor Dive, just like he can with a Jab. Doing so usually doesn't achieve much so it's not recommended. This move is totally outclassed by Diagonal Jumping Jab so you should never use it.
- Neutral Jumping Forward:
| Damage | 24[1] |  |
 |
 |
 |

|
| Stun | 5~11 | |||||
| Stun Timer | 50(+10) | |||||
| Special Cancel | No | |||||
| Frame Count | 2 | 3 | 13 | 3 | ∞ | |
| Simplified | 5 | 13 | ∞ | |||
Another aerial knee attack but with a little more damage and stun but less active frames. The priority is exact like the Short version, so as expected it's just as useless.
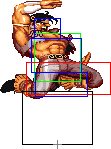
- Diagonal Jumping Forward:
| Damage | 24[1] |  |
 |
 |
 |

|
| Stun | 5~11 | |||||
| Stun Timer | 50(+10) | |||||
| Special Cancel | No | |||||
| Frame Count | 3 | 2 | 16 | 6 | ∞ | |
| Simplified | 5 | 16 | ∞ | |||
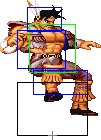
Yet another aerial knee attack. Unlike the other ones, this is actually useful. First of all, this is N.T.Hawk's only reliable crossup move, he can still crossup some characters with his Body Slam move (the down + fierce command normal) but it demands too much precision, and even then it won't work against everyone so it's not reliable. As T.Hawk you should never trade the safety of a guaranted crossup for the possibility of a little higher damage in case the opponent fails to block it. And on O.T.Hawk's case, even though his Body Slam move is easy to use, it still doesn't outclass this move as a crossup for one simple reason: the Body Slam move has bigger hurtboxes at his back which leaves T.Hawk too vulnerable to reversals while T.Hawk is crossing up. This move is also often used as a tick/safe jump on the Blanka, Cammy and Dictator matchups because T.Hawk's light normals can't hit them if they're crouching. This is unoptimal because you can never be sure on the amount of pushback it will do (deppends on if its blocked or not), but thats the best T.Hawk got on these matchups. A Crouching Jab after it puts you out of the throw range of most of the cast but still in range for your Typhoon, so theres at least that.
- Neutral Jumping Roundhouse:
| Damage | 28[1] |  |
 |
 |
 |

|
| Stun | 11~17(-1) | |||||
| Stun Timer | 60(+20) | |||||
| Special Cancel | No | |||||
| Frame Count | 2 | 5 | 12 | 4 | ∞ | |
| Simplified | 7 | 12 | ∞ | |||
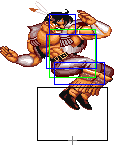
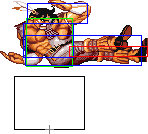
T.Hawk does a heavy two-foot aerial kick. It's T.Hawk's neutral jumping move with the longest horizontal reach. On O.T.Hawk's case the downwards priority is ok-ish so it can be used to beat some ground moves while T.Hawk is falling down, but keep in mind that the horizontal priority is mediocre so it will be beat by pretty much every aerial move in the game. N.T.Hawk's version of this move got its hitbox nerfed by 12px upwards and downwards making it a very mediocre air-to-ground move, so don't expect it to win on that kind of exchange. N.T.Hawk's also does less normal and random damage than O.T.Hawk's. With all that said though, this move only has one real use: it's the best neutral jump move to be used in projectile evasion, since the hurtboxes on his lower back area during the active frames are reduced considerably. Neutral jumping fireballs can be a good idea with T.Hawk too, you shouldn't just default to Condor Dives, specially if you're facing a character that can punish Dives on block everytime (e.g. Dhalsim, Guile, Sagat).
- Diagonal Jumping Roundhouse:
| Damage | 28[1] |  |
 |
 |
 |

|
| Stun | 11~17(-1) | |||||
| Stun Timer | 60(+20) | |||||
| Special Cancel | No | |||||
| Frame Count | 2 | 4 | 8 | 6 | ∞ | |
| Simplified | 6 | 8 | ∞ | |||
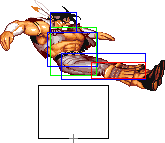
T.Hawk does a heavy two-foot aerial kick diagonally. Don't be deceived by it's looks, its reach is a lot smaller than what the sprite might suggest. It's still T.Hawk's diagonal jumping normal move with the longest horizontal reach though, but a Condor Dive is usually a better option for jumping over stuff so this is rarely used for that purpose. There are a few situations in which this move can be useful. First, it's T.Hawk's best diagonal jump move for projectile evasion, since the hurtboxes on his lower back area during the active frames are reduced considerably... Won't come into play that often, but it's good to be aware of that anyway. Secondly, Sagat's Tiger Uppercut and ChunLi's Tenshou Kyaku (her up kicks) 1st active parts does not have enough upwards reach to hit T.Hawks legs while this move is active, which means you can use this move as a "fake safe jump" against them, as long you space the jump so you don't land too close. You can also do a Tomahawk Buster install in that situation too. O.T.Hawk's version of this move has a hitbox that is 2px bigger forward/downwards, 28px backwards and 12px upwards. The forward and upwards priority/reach difference doesn't make much difference but they're good to have. The better backwards priority allows O.T.Hawk to use it as a cross up, but he has better options for that. The downwards priority difference means only O.T.Hawk can hit a crouching Ryu, Ken, Guile and ChunLi. It whiffs the same against a Crouching Blanka, Dictator and Cammy though. Finally, O.T.Hawk's version of this move does more normal and random damage. Because of that, this is his best air move to use as a combo starter on frontal jumps(tied with Diagonal Jumping Fierce). With N.T.Hawk the best move for that is the Body Slam move (the down + fierce command normal).
Command Normals
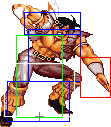
- Downward Jab: (On ground, ←/↖/↗/→ + Jab)
| Damage | 4[1] |  |
 |

|
| Stun | 0~5 | |||
| Stun Timer | 40 | |||
| Chain Cancel | No | |||
| Special Cancel | Yes | |||
| Frame Advantage | +5 | |||
| Frame Count | 3 | 4 | 4 | |
| Simplified | 1 + 3 | 4 | 4 | |
A downward hitting jab. Basically, it's outclassed by the neutral Standing Jab, since that can hit all crouchers too but with way more range. Hits low enough to hit a lot of low kicks, but it has like no range so it's not really useful at that. Usually comes out by accident when going for a neutral Standing Jab. It can chain into itself as a link, but not mashable, like the normal Standing Jab. It's still somewhat passively useful though: it forces you to go to neutral when setting up sako ticks, which is necessary for them to work properly, because you want the forward input (which you got for walking forward to get closer to the opponent) to vanish from the input buffer before going to upwards for the Typhoon, so upwards is the first direction of the 270, instead of forward.
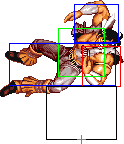
- Elbow Drop: (Jump diagonally, ↙/↓/↘ + Strong)
| Damage | 24[1] |  |
 |
 |

|
| Stun | 5~11 | ||||
| Stun Timer | 50(+10) | ||||
| Special Cancel | No | ||||
| Frame Count | 5 | 30 | 4 | ∞ | |
| Simplified | 5 | 30 | ∞ | ||
T.Hawk does a downwards elbow attack. This move stays out for quite some time, but it's a kinda useless normal for the most part. O.T.Hawk's version has a bigger hitbox: it's 4px bigger forward, 2px backwards and 7px upwards and downwards. The only meaningfull difference is the downwards change, as it allows O.T.Hawk to hit all crouching characters, while with N.T.Hawk it will whiff completelly vs a crouching Blanka and occasionally vs a crouching Cammy, due to some ST weirdness. Diagonal Jumping Forward hits all crouchers and the only drawback it has over this move is that it has less active frames, but thats a non-issue agaisnt a knocked down opponent, so use that instead. It could be said that a plus this move has over Diagonal Jumping Forward, in O.T.Hawk's case, is that it's the medium strenght normal with the best downwards priority, but if you want that you're better using Diagonal Jumping Fierce instead. The Japanese player Inomata uses this move often in safe-jumps.
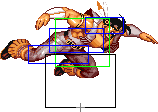
- Body Slam: (Jump diagonally, ↙/↓/↘ + Fierce)
| Damage | 30[1] |  |
 |

|
| Stun | 11~17(-1) | |||
| Stun Timer | 60(+20) | |||
| Special Cancel | No | |||
| Frame Count | 3 | 4 | ∞ | |
| Simplified | 7 | ∞ | ||
T.Hawk does a body press attack, somewhat like Zangief does with his down + fierce move. This attack stays active until T.Hawk lands. This is probably N.T.Hawk's move that received the most nerfs; O.T.Hawk's version of this move is considerably better: the lowest hurtbox is positioned 4px upwards and 7px backwards, and his hitbox is 6px bigger forward, 4px downwards, 32px backwards and 12px upwards. The better forward and upwards priorities are usually not that important, but they're obviously good to have. The better backwards priority makes it a consistent crossup move, unlike with N.T.Hawk which requires very specific spacing and may even not work against the slimmer characters. So, in O.T.Hawk's case, this can be used in some great dizzy/damage crossup combos. Don't get things wrong though, this isn't the go-to crossup move for O.T.Hawk: Diagonal Jumping Forward has better hurtboxes at his back, allowing him to cross up safelly against certain wake up reversals. Which crossup move to use deppends on matchup, opponent behaviour, etc. This move also has an uniquelly low pushbox which makes it a better air-to-ground pressure tool, but may difficult a little a crossup attempt, specially after an Elbow Bash during the built-in safe-jump against Shotos. The better downwards priority make it a good pressure tool. It's very good against less experienced Chun players, because it requires good timing on their part to counter it with a Close Standing Forward, and because it counters one of her counters for your Diagonal Jumping Jab (Chun can walk below T.Hawk's Jumping Jab on reaction, but not below this move). O.T.Hawk's also does a little more random damage with this move than N.T.Hawk. With all that said, N.T.Hawk's version of this move still excels at one thing: it's his best air move to use as a combo starter on frontal jumps since it's the one with the best damage, while with O.T.Hawk you're better off with normal Diagonal Jumping Fierce (or Rh).
--Born2SPD and x64
Normal Throws
T.Hawk can throw with Strong, Fierce and Roundhouse. A important thing to note is that while he has the second biggest throw range in the game with his Command Grab, all his normal throws have a very short range, beating only Fei Long's normal throws, so keep in mind that you will always be vulnerable to be counter thrown when choosing to use the normal throws.
- Normal Grabs Throwboxes:
| Throws | Holds |  |
 |

| |||
| Damage | 32 | Damage | 26 + 4*n | ||||
| Stun | 7~13 | Set amount of hits | 4 / 3 | ||||
| Stun Timer | 100 | Holds do no stun | |||||
| Range | (from axis) | 48 | (from throwable box) | 13 | |||
- Mexican Throw: (←/↖/↗/→ + Strong)
Strong throw is a one handed toss. Not great to use as it puts opponents further away than optimal, but if you're in the corner and you want the opponent cornered then there you go.
A not very known characteristic of this throw is that there are a few frames during the grabbing animation in which T.Hawk change sides with the opponent. This means that if the opponent is using a charge character, he'll lose his charge and will have to start charging for it again once he's released from this throw. The time between being released from the softened throw and the opponent landing is between 60 and 70f, and there are only a few moves that require more than 60f to be fully charged, so for the most part this is meaningless. The main reversal moves that require around 70f of charge are Claw's Scarlet Terror, Boxer's Crazy Buffalo (super) and Dictator's Knee Press Nightmare (super). So, on these match-ups this can be considered a semi-useful tatic: after throwing one of these characters to the corner, you can immediately walk towards them and do a Standing Jab, for a totally safe sako tick attempt.
Another interesting aspect of this throw is that it can set a built-in safe jump on the Ryu, Honda, Guile, Zangief, Dhalsim, DeeJay, Claw and Dictator match-ups: with the opponent near their corner, but not touching it, throw them and hold up-towards to jump as soon as the grab animation ends. If the throw is softened and the opponent only touches the corner when falling to the ground, that jump will be a safe jump (there's a specific spacing for this to work, it's not super precise though). Also, in the case of Claw and Dictator, know that they will not have enough charge for a Scarlet Terror/Knee Press Nightmare (as explained above).
- Neck Hanging Tree: (←/↖/↗/→ + Fierce)
Fierce is a two-handed neck choke. Worse T.Hawk normal throw, it does one more hit than the Rh hold but when released the opponent is at a worst position. The opponent will be close enough for you to attempt a sako tick though, so it's not terrible.
This is also not very known, but if T.Hawk grabs the opponent close (but not too close, except vs E.Honda) to the corner you can cross under after the grab, allowing T.Hawk to do a side switch mix-up, just like Boxer can after his grab. To be exact, this works vs Ryu, Ken, E.Honda, ChunLi, Dhalsim, Cammy, T.Hawk, FeiLong, Claw and Boxer (the spacing is very specific for it to work vs Claw and Boxer though, so its pretty much unusable against them). Realistically speaking this is not very useful, since as T.Hawk you usually want to keep the opponent cornered, but can still be used if your opponent is very good at Reversals and he has meter for a granted loop escape (e.g. Ryu's, Chun's or Boxer's Supers), specially if you're not OSing with Tomahawk Buster.
- Elbow Stomping: (←/↖/↗/→ + Roundhouse)
Roundhouse throw is an elbow bash. This is T.Hawk's best normal throw, hands down. It does one less hit than Fierce hold, but unlike Fierce, the follow up game here is excellent: T.Hawk drops the opponent right next him, allowing you to mix up, cross over, tick throw again, etc. This is one of T.Hawk's most important moves as it can help set up many other traps and keeps people close where you want them. Of course, tick throwing with this grab is very dangerous, due to it's poor range, but it's very safe go for it as a whiff punish.
This throw is extremelly good because it sets a built-in safe jump (holding up-towards for Hawk to jump diagonally on the first possible frame will be a safe jump) against almost all the cast. It will be safe even against characters that it's generally advisable to avoid safe jumping, like Sagat's Tiger Uppercuts (3f startup), Chun's Rh UpKicks (2f startup) and even O.Ken's Fierce/All of Akuma's Shoryukens (1f startup). The only characters that can counter it with a reversal are N.Ken, with his Fierce Shoryuken (0f startup - yeah, it's different from O.Ken's, and that tiny difference happens to be just enough for it to not work on N.Ken) and Blanka with his Vertical Beast Rolls (0f startup - results in a trade). Agaisnt Shotos (Ryu, Ken and Akuma) and DeeJay this will sometimes be a crossup so be prepared to use Jumping Forward kick (or Jumping Down+Fierce, if using O.Hawk). Against everyone else it will never crossup so just go for Jumping Jab, or Jumping Forward if you want the medium block stun. If you're a real monster you can hit-confirm the jump in if you follow up with Crouching Jab(up to 2 times), Standing Jab xx Tomahawk Buster. If the opponent blocks the cross-up just do Crouching Jab(up to 2 times), Standing Jab (Sako tick) into Typhoon or if you can't do that then go for Crouching Jab(up to 2 times) into negative edge Typhoon (or Super, if using N.Hawk). Mayakon does Jumping Forward kick, Crouching Strong into negative edge Typhoon (or Super) which will often leave T.Hawk safe from the opponent's throw range, but still inside Typhoon's range (of course it won't be the case in mirror matches or when facing Zangief). To avoid being too predictable, you can also try to walk-under meaty Crouching Strong into negative edge Typhoon (or Super), but understand that this is not as safe. Also, don't attempt it against Zangief or T.Hawk (and sometimes E.Honda) since they're capable of doing a reversal command throw after or before the Crouching Strong.
Special Moves
- Mexican Typhoon: (360 P)
Detailed Input: (→ [7~14f] ↓ [7~14f] ← [7~14f] ↑ [12/9/7/2f] Jab/Strong/Fierce/any P if you are at a jumpable state and the last direction was ↑. The first direction and the side you spin is not fixed. You just need to input the 4 main directions in order)
| Jab | Strong | Fierce | 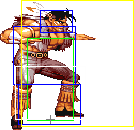 |
| ||
| Damage | 38 | 42 | 46 | |||
| Stun | 7~13 | |||||
| Stun Timer | 100 | |||||
| Super Meter | 20 | |||||
| Range | (from axis) | 83 | ||||
| (from throwable box) | 48 | |||||
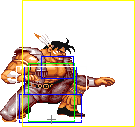
T.Hawk's long range, bread and butter command throw. Hawk grabs the enemy by the face, jumps while spinning him, then smashes his head on the ground for high damage. This is T.Hawk's main attack tool and can be used with a multitude of ticks with Jab being his best. It has better range than any other throw but Zangief's Spinning Pile Driver and can be made safe with the use of negative edge. Like his super, it doesn't have a whiff animation, therefore you will obtain a normal if the enemy is not throwable and you press a punch button, but nothing if you use negative-edge.
- Tomahawk Buster a.k.a. Rising Hawk: (→↓↘ P)
Detailed Input: (→ [7~14f] ↓ [7~14f] ↘ [10/9/7f] Jab/Strong/Fierce)
- Startup + Active:
- Jab Version:
| Damage | 32[2] / 22[2] |  |
 |
 |
 |
|
| Stun | 9~15 | |||||
| Stun Timer | 100 | |||||
| Super Meter | 6 | |||||
| Frame Count | 4 | 5 | 5 | 5 | 15 | |
| Simplified | 4 | 30 | ||||
- Strong/Fierce Version:
- Recovery:
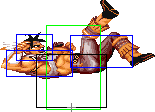
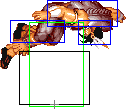
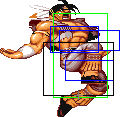 |
 |
 |
 |
 |

| |
| Frame Count (Jab) | 2 | 4 | 3 | 4 | 7 | 4 |
| Simplified (Jab) | 24 | |||||
| Frame Count (Strong) | 2 | 4 | 3 | 4 | 10 | 4 |
| Simplified (Strong) | 27 | |||||
| Frame Count (Fierce) | 2 | 4 | 3 | 4 | 13 | 4 |
| Simplified (Fierce) | 30 | |||||
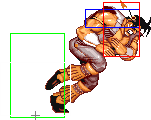
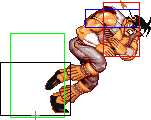
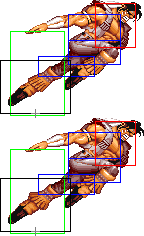
Hawk becomes invulnerable for a split second, crouches, then rises diagonally to the air while hitting the enemy. After that, he falls defenseless to the ground. The Jab and Strong versions hit only once and cause a full knockdown, while the Fierce one hits twice, being that the second active part causes a full knock down. If done with Jab, can go through projectiles if timed late enough. All versions have the first active part, when T.Hawk is still invulnerable, doing more damage. If it hits late, the Jab version will do more damage than the others. As it has less recovery, never use any other version unless you really need a reversal and you want to use pianoing. This is T.Hawk's best anti-air move (Jab version).
- Condor Dive: (In Air, 3P)
Detailed Input: (Can be done from the 6th till the 25th jumping frame, all buttons must be pressed on the same frame)
| Damage | 32[2] |  |
 |
 |
 |
 |
 |

|
| Stun | 9~15 | |||||||
| Stun Timer | 100 | |||||||
| Super Meter | 8 | |||||||
| Frame Count | 10 | 7 | ∞ | 2 | 9 | 10 | 6 | |
| Simplified | 17 | ∞ | 27 | |||||
- Bounce:
 |
 |
 |
 |
 |

| |
| Frame Count | 8 | 4 | 4 | 4 | ∞ | 6 |
| Simplified | ∞ | 6 | ||||
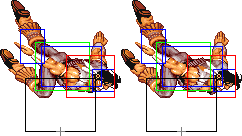
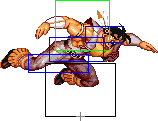
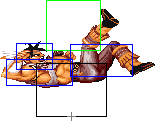
T.Hawk dives diagonally from where the move was started towards the ground. This move can only be performed on a neutral or diagonal jump on the way up. Once T.Hawk reaches his apex and starts coming down from his jump, the move cannot be performed. Extremely good move for punishing fireballs. Can be done close to the ground for shenanigans and dodging and punishing slow recovering lows like Guile's sweep. Good for closing distance after a mid screen Typhoon. This move does not have great priority and can be punished by some characters. Despite being an airborne attack, this move can also be blocked low.
- Characters not to hit with Condor dives unless your sure they will not be able to block: Dhalsim, Ryu, Ken, Sagat, Guile.
Dhalsim the most as he can punish easily with multiple normals. Sagat can punish with fireballs. Also be careful as Ryu and Ken can jump immediately after blocking and j.RH if blocked high on their hitbox. If they do it too late and miss it can leave them in a horrible position(good for T.Hawk). Remember also that Guile is extremely hard to punish for Sonic Booms as he recovers very quick compared to Sagat, Ryu and Ken.
- Characters not to hit with Condor dives unless your sure they will not be able to block or you know they do not have charge: Balrog(Boxer), Blanka, Dhalsim, E. Honda and M.Bison(Dictator).
All four can punish with charge back->forward + Fierce.
- Characters that cannot punish after blocking a Condor dive: Chun Li, Cammy, Dee Jay, Fei Long, T.Hawk, Vega(Claw), Zangief.
It can be extremely useful but can get a lot of inexperienced players in loads of trouble if used too much/incorrectly. It covers a lot of ground very fast. You can use it to punish fireballs by jumping and Dive over them. Remember though that if you don't connect, or it's blocked, you hit the ground and "slide" a bit. Now you can be punished by sweeps and/or certain combos at this point. But, this can also be a useful tool against a scared/slow opponent. In your slide you can Tomahawk Buster(DP) or Typhoon while sliding at the end. You can deceive a player thinking your going to connect and bounce back and if they don not react to you hitting the ground you can punish. Again be careful with this move. Can be a big help or a big hindrance.
Super Move
- Double Typhoon: (720 P)
Detailed Input: (→ [15~22f] ↓ [15~22f] ← [15~22f] ↑ [15~22f] → [15~22f] ↓ [15~22f] ← [15~22f] ↑ [15f] P. The first direction and the side you spin is not fixed. You just need to input the 4 main directions in order and twice)
| Damage | 46 + 38[1] |  |

| |
| Stun | 0 + 7~13 | |||
| Stun Timer | 0 + 100 | |||
| Range | (from axis) | 83 | ||
| (from throwable box) | 48 | |||
T.Hawks super move hits like a freight train. Can be used after ticks, on wake-up and CANNOT be wasted. If you see T.Hawk start the Super Animation that means it going to hit for sure. Also can be negative edged on wake up and after tick for safe attempts. Extremely hard to do after most ticks though as Hawk gets off the ground fairly fast.
The easiest way to do this move consistently, is by starting from d/b with cr.Jab then b, u/b, u, u/f, f, d/f, d, d/b, Jab press and hold Fierce~Strong, b, u/b, u, u/f, f, d/f, d, d/b + release Fierce~Strong. From my experience it's the easiest way to avoid jumping when you attempt it. You can setup his SUPER this way by cross-up j.Forward, cr.Jab x 2 SUPER as mentioned above. Furthermore after a Roundhouse throw, you can either walk under the opponent or cross-up j.Forward and use above mentioned technique for a safe SUPER attempt.
If you hit your opponent with a Typhoon and your SUPER meter is nearly full, jump and do Condor Dive mid-air, upon landing press d/b, b, u/b, u, u/f, f, d/f, d, d/b cr.Short~Fierce~Strong, b, u/b, u, u/f, f, d/f, d, d/b + release Fierce~Strong. You can substitute the cr.Short with cr.Jab, however I find using cr.Short much more consistent, since you won't accidentally attempt a Typhoon.
You can use the above-mentioned method as well when safe-jump. Jumping Short, j.Jab or j.D+Strong upon connection press d/b, b, u/b, u, u/f, f, d/f, d, d/b cr.Short~Fierce~Strong, b, u/b, u, u/f, f, d/f, d, d/b + release Fierce~Strong. Cr.short makes it a lot easier from my experience.
There's yet another option. If you walk up to your knocked down opponent and perform a meaty cr.Strong ~ press Fierce and hold both Strong and Fierce then buffer 720 starting at d/b and ending at d/b + release Strong~Fierce.
Misc Animations
Jump Animations
- Neutral/Back Jump:
 |
 |
 |
 |
 |
 |
 |
 |

| |
| Frame Count (Neutral) | 2 | 1 | 10 | 6 | 16 | 6 | 4 | 1 | 7* |
| Simplified (Neutral) | 2 | 1 | 42 | 1 | 7* | ||||
| Frame Count (Back) | 2 | 1 | 10 | 6 | 16 | 6 | 3 | 1 | 7* |
| Simplified (Back) | 2 | 1 | 41 | 1 | 7* | ||||
- Forward Jump:
 |
 |
 |
 |
 |
 |
 |
 |
 |

| |
| Frame Count | 2 | 1 | 14 | 4 | 4 | 4 | 4 | 11 | 1 | 7* |
| Simplified | 2 | 1 | 41 | 1 | 7* | |||||
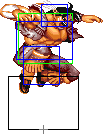
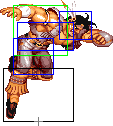
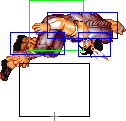
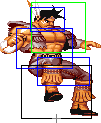
T.Hawk has a considerably fast prejump. On one hand this helps his air game, but on the other hand it makes walk in Typhoons harder to do than Zangief's walk in SPDs. Experienced players do walk in Typhoons either by kara cancelling the Standing Fierce into Typhoon (Fierce is pressed a little before going to ↑ and is released right after it, to activate the move) so the normal move keeps T.Hawk from jumping, or with flick Typhoons (Hajiki Screw).
The landing recovery has a special property which allows it to be canceled into certain actions. At the first landing frame, you can perform throws (including command throws), and on the second landing frame, you can start another jump, attack with a normal or special move, or block. Blocking not being until the second landing frame, as well as hitbox-hurtbox interactions having priority over throwbox-throw hurtbox is why sweeps work as anti airs in this game.
Things are different when jumping over your opponent, however. In that situation it's possible to walk back/forward, to jump again or to even block on the first landing frame! Strangely, if a throw is timed on the first landing frame of a jump that crosses over, a throwbox will never come out, even though that input will result in a normal coming out 2 frames later (like it normally would). Anyway, being able to block on the first landing frame can help a little bit on some safe jump crossup setups, or maybe in other situations as well if your character has a huge jump arc.
The Basics
Get close. This is a lot easier said than done but T.Hawk has some tricks. Once you're in, Hawk has a ton of mix-ups/tricks to stay and punish with Typhoons.
General strategy is to pick your spots and inch forward. This may take some time or a mistake by your opponent but you'll get there. If you don't, your most likely going to lose in a slow agonizing fashion. Don't get greedy though and go for it wildly. Most characters, if not all, have some way to punish T.Hawk for jumping in late, too soon etc.
Your main goal should be to get in and stay in at all costs. Use whatever you can to get there. Sometimes a sweep knock down is all you need to turn a almost perfect loss into a win. Never give up with Hawk, be patient, you'll get in and when you do...punish.
T.Hawk has some good normals:
- st.Rh reaches far and can trade with fireballs favorably;
- st.Frwrd has decent range but in close it's used for a tick and to combo into T.Hawk's DP, Jab is T.Hawk's most important normal;
- cr.Jab which is used for ticks into Typhoon a lot, also stops E.Honda's headbutt, Blanka's roll, Balrog's(Boxer) dash punch(careful with his low hitting one) and M.Bison's(Dictator) Psycho Crusher if timed correctly. These can also trade unfavorably;
- cr.Frc can be used for anti air, but its not great.
- j.Jab is your friend. Probably T.Hawk's best friend as it has insane priority above an opponent and great priority almost all the time. Great for stuffing most characters normals and good for tick setups used with a safe jump on down opponents. Can cause some serious frustration in the mind games department, which, is about all the advantage you have playing T.Hawk most of the time.
T.Hawk's main game is the tick setups for Typhoons. Once your in on an opponent you can get to business. j.Jab->cr.Jab->Typhoon is the main setup(can use cr.jabx2 if close enough to mix up), cr.Jab->Typhoon is a simple yet Hawk's most powerful tick throw. Use it whenever the opportunity presents itself. Coupled with other mixups, cr.Strong->Typhoon, st.Forward->Typhoon, cr.Jabx2->Typhoon, you can be devastating and end matches in seconds. Remember though opponents CAN reversal these ticks on wake up, in between some ticks and right before the Typhoon if they are quick/skilled enough. So be careful and mix up your timing as much as needed/necessary.
This is where T.Hawk's equalizer in close comes into play: T.Hawk has an amazing negative edge tick that is completely safe to reversals if done correctly.
Typhoon execution
An impeccable Typhoon motion execution is among the skills which are needed to have a good T.Hawk. Popular belief (and even some Capcom stickers) says that a 360 (full rotation) is needed, but this is not true. In fact, you can get a Typhoon with just 270-degree motion. But that is still not the "real" required motion. Precisely, you need to input the four main directions (→,↓,←,↑) in order (clockwise or counterclockwise) to get a Typhoon. This means that the diagonals aren't actually needed and that a 270 starting and ending in diagonals also wont work, so saying that Typhoon is a 270 motion isn't true. The same concept is valid for the Super, which in that case is the 4 main directions in order and twice, resulting in a minimal of 8 directions which results in a 630, not a 720-degree motion.
Walk in
Unlike Zangief, T.Hawk gets out of the ground very fast, so doing walk up Typhoons can be relatively more difficult than walk up SPDs. With Zangief, your main concern is to not get an accidental Green Hand as well as to be able to get the SPD to bounce to the optimal side (when possible), but in T.Hawk's case there's only one concern and that is speed (so T.Hawk doesn't jump accidentally).
If you have difficulty in doing it, there are 2 main techniques that can make it a little easier:
1) One of them could be described (using common fighting game jargon) as kara-typhoons. The idea is to press Fierce punch a little sooner, before inputting ↑ (to avoid a misjump). So when you naturally release the button T.Hawk is on the initial startup frames of the normal move and the complete Typhoon input is on the buffer (→,↓,←,↑ if on P1 side; ←,↓,→,↑ if on P2);
2) Another method is known as Hajiki Screw. This technique is optimal for T.Hawk, since all you need is to get the Typhoon input on the least amount of frames (unlike Zangief, in which precision is of more importance than raw speed). You can read more about it here.
Another thing to keep in mind is that walk in Typhoons done with the minimum required inputs (e.g. →,↓,←,↑ if on P1 side; ←,↓,→,↑ if on P2) can be unreliable (a Typhoon may not come out), due to a limitation on the input system: sometimes the 1st towards input will be discarded. To mitigate that problem, it is recommended to always do Walk in Typhoons with a complete 360 (e.g. →,↓,←,↑,→), just so you have an extra cardinal direction in the end as a backup, just in case. To fully understand the reason for why that happens, read this.
Typhoon ticks
There's another key difference between Zangief and T.Hawk that you have to understand and that is, unlike Zangief's SPD, T.Hawk's Typhoon has no whiff animation. This means that a Typhoon that doesn't connect will just result in the normal punch coming out (if you finalize the Typhoon input by PRESSING the punch button) or nothing (if instead of PRESSING you RELEASE a punch button). So, in that sense, T.Hawk's Typhoon is more similar to CPS1 Zangief SPDs (World Warrior, Champion Edition and Hyper Fighting versions of Zangief - it was only on SSF2 that Zangief received the infamous whiff animation on his SPD).
Doing special moves by releasing the button instead of pressing is known as Negative Edge. Having no whiff allows you as a T.Hawk player to do Negative Edge Typhoon ticks that are totally safe from Reversals. All you have to do is end the Typhoon input on a defensive direction (↙ if on P1 side, ↘ if on P2 side) and then RELEASE the punch button when going for a Typhoon. If you set the tick out of the opponent's grabbing range but inside Typhoon's range (this is easy to do on most match-ups - Typhoon has more throw range than every grab in the game except for Zangief's SPDs) then only 2 things can happen:
1) You grab the opponent successfully;
2) The opponent is able to escape with a Reversal, which will either whiff or get blocked. As a number of such attacks are unsafe on block, T.Hawk can throw them afterward and reset the situation. For instance, Flash Kicks and Shoryukens are unsafe on block, and you can simply do a Typhoon or Tomahawk Buster as they recover. Coupling this strategy with safe jumps, it may be very hard or impossible to avoid taking damage for most characters. Even though this is very hard to apply consistently, that's what makes T.Hawk a viable character in high level play;
This can be considered a very basic form of an option select, although this is debatable by some.
As T.Hawk you want to abuse the Negative Edge mechanic on Typhoons as much as possible. The only Typhoons that you don't really have to do as negative edge are walk-up Typhoons. It may feel like a cheap technique, but T.Hawk was designed around it (why did Capcom give the whiff animation only to Zangief?), and even with it he struggles to win on a good number of match-ups, because, overall, T.Hawk lacks the tools to deal with what certain characters can throw at you. T.Hawk is a low tier character so you have to use every tool you have access to. Also, T.Hawk is an all or nothing type of character, you'll often spend the whole round just trying to get in, plus as T.Hawk your main source of damage are the Typhoons, if the actual Typhoon attempts were mix-ups too then T.Hawk would pretty much be unusable (just see what they did to T.Hawk in HD Remix - he's the absolute bottom character on that game for a reason). This, coupled with mix-ups, is how T.Hawk can win matches even though he is usually outmatched on paper. T.Hawk's great Typhoon should be attempted as much as possible as long as you do it the safe way. If you whiff a Tomahawk Buster or land a little too close with Condor Dive, always attempt some negative edge Typhoons. There is literally no harm in trying, so go for it whenever possible.
Crouching Negative Edge Typhoon ticks
This is the most basic T.Hawk ticking setup. Most players do the tick with a Crouching Jab, but other normal moves can be used too (any light and medium normal work, for medium normals (i.e. Strong punch and Forward kick) you have to be at point-blank range to work); heavy normals (i.e. Fierce and Roundhouse) will leave T.Hawk too far to grab the opponent so don't use these). Jab is usually preferred since you can do it twice, if required to space yourself a little more (so T.Hawk is far enough to not be counter-thrown but still is inside the Typhoon range).
The input is like this:
1) Do the tick at down back (e.g. ↙ + Jab if P1);
2) After pressing the Jab button (for the Crouching Jab normal move to come out), keep that button pressed and right after it, press and hold Strong and Fierce too. By this point you'll have T.Hawk doing the Crouching Jab animation, the opponent will be blocking it and you'll be holding the 3 punch buttons;
3) Do the 360 motion, starting from down back (you don't have to go to neutral, you just start the Typhoon from where you were when you did the blocked move) and also ending at down back (so you're safe if the opponent does a reversal). Note that you should always spin it so the up directions come first (↗↑↖), so, in other words, you have to spin it clockwise if on the P1 side (i.e. ↙,←,↑,→,↓,↙), and counter-clockwise if on P2 side (i.e. ↘,→,↑,←,↓,↘). If you don't do that the chances of a mistake (accidental jump) will be high. Also note that the Typhoon motion must be fast enough to be completed during the normal move animation. After you finish the motion, don't leave the down back direction;
4) At this point, if you did everything right, T.Hawk will be on the defensive crouch position (down-back), the 3 punch buttons are being held and the Typhoon input is on the buffer. The opponent is about the get out of block-stun and will soon enter his reversal frame (a.k.a. first throwable frame). All you have to do is, without leaving the down-back position, release the punch buttons, one after the other. This will give you 3 grab attempts, which is more than enough to cover for eventual mistimings. Note that it's extremely important that you release Fierce first and Jab last. I know this may be a little less practical than the other way around, but there's a reason: Jab/Short special moves have longer input buffer windows, while Fierce/Roundhouse specials have it shorter, so you want to leave Jab as a backup in case Fierce and Strong fails. How much time you have to wait before releasing the buttons and on which speed to release each of them is a matter of practice, you'll have to hit the training mode to figure out the timings yourself. You'll also want to adjust your timings so Fierce Typhoons are the one which will connect most often.
This may sound like an exaggeration, but after your get good on it, this will be almost as easy as throwing a Hadouken. It's very lenient.
Jumping Negative Edge Typhoon ticks
This is also important and comes up very frequently. The idea is to go for a Typhoon right after T.Hawk touches the ground after the opponent blocks an Diagonal Jumping Jab.
Input wise, it's almost the same as the Crouching tick setup (see above), there's only 2 main differences:
1) You can only start the 360 after the aerial move touches the opponent, but you hold the other punch buttons as soon as you pressed Jab. This is important because you often have to do the Jab at the middle of the jump to control space and to force the opponent to get stuck on the blocking animation (so he doesn't walk back);
2) You don't have to start at down-back, it's OK to just start at back. It has to end at down-back though.
Also, when you get used to it, you'll learn how to adapt to the character positionings on the fly. Meaning in case the opponent happens to be a little too far for the Jab to touch him, you can just go for a whiffed jump into Typhoon instead. Of course this relies on the opponent not reacting properly (it can be a surprise jump or they can just think that they'll have to block that move due to not having charge for a special move, for example). The input for that is identical to the one I just described, the only difference is that you'll not wait for your aerial move to hit, instead you'll time the motion so the Typhoon is ready once T.Hawk lands, then you just release the punch buttons (remember, Fierce first and Jab last) while holding down-back.
Walking Negative Edge Typhoon ticks
This is more commonly known as Sako tick in the "western" ST scene due to it being firstly presented to us by the Japanese player Sako. But the real author of this technique is the japanese T.Hawk player Inomata (Sako wasn't around till 2008/SF4). So I'll refer to them as Inomata ticks in order to give the proper credits and respect that he deserves.
It's recommended that you first master the Typhoon techniques mentioned above. This is an advanced technique that requires a lot of practice to master. But at the same time it's also pretty much a requirement to be competitive with T.Hawk. So yeah, if you want to play T.Hawk competitively, know that you'll have to grind the training mode before you can be competitive. Hopefully, the following step by step explanation will work as a "shortcut" that most players didn't had.
The Inomata tick is the one in which T.Hawk does a Neutral Standing Jab from far enough (to be safe from most wake-up reversals), walks forward (to get close enough for a Typhoon) during the opponent's block stun and then Typhoons the opponent.
Whats different about this technique is that it:
1) Allows T.Hawk to set up safer Typhoon ticks. If you stick to the (simpler) crouching Typhoon tick technique mentioned above, T.Hawk is only safe if the opponent goes for a reversal between the blocked move and the Typhoon attempt; T.Hawk is still totally open during the normal move (e.g. if T.Hawk goes for a meaty Crouching Jab on the opponent's wake-up, the opponent can do a reversal to hit T.Hawk while he's on the Crouching Jab animation). This is why you can only use the Crouching tick setup safelly on a few scenarios (e.g. from a safe jump). With Inomata ticks, instead of getting point-blank to the opponent, you just do a Neutral Standing Jab (i.e. not the command downwards Jab) from a safe distance - far enough so most reversals will whiff (i.e. will hit the opponent with the tip of T.Hawk's fingers in case the opponent wakes up blocking). This works because T.Hawk's arm during that normal has no hurtbox (i.e. his arm is fully invincible), only a hitbox;
2) Allows T.Hawk to set up Typhoon ticks from distances that he normally couldn't. For example, if you safe jump Ryu, and then go for a Crouching Jab into a Typhoon tick, if Ryu does a Jab Shoryuken as reversal to escape, you can still set up a tick again with this technique;
3) Allows you to set longer block-strings into Typhoons. Without it, you can usually do only a single Jab from a jump in, or 2 from a crossup. Anything more and T.Hawk will be spaced too far for a Typhoon. But with this you can do up to 4 hits (vs Zangief you can even go for 5) on the block string, before going for a Typhoon. This will make it extra-hard for the opponent to do a reversal in the correct moment;
4) Creates a new hit-confirm combo/pattern: Cross-up Forward kick (or Fierce splash, if O.T.Hawk), Crouching Jab x2, Neutral Standing Jab xx Tomahawk Buster (if it's comboing) OR you just use that last Jab to set up a Inomata tick (if blocked).
The input is like this:
1) From the correct distance (as explained above), do a Neutral Standing Jab (not the downwards Jab, you must put the stick on neutral). You press the Jab button (don't release it) and right after you also press Strong and Fierce as well (similar to the crouching tick technique explained above);
2) Do the 270, starting from up and ending at towards (i.e. ↑,←,↓,→ if on the P1 side; ↑,→,↓,← if on the P2 side). You must complete the input before the Jab animation ends, so with hit-freeze you'll have 12+14(=26) frames to do the input. Once you finish it, stay at towards. It's ideal to wait a little before going up, so you don't reach the last direction too soon (which would mean less frames for the grab attempt later), but you also have to do it fast enough so T.Hawk doesn't go to a crouching stance after the Neutral Jab animation (that would not allow T.Hawk to go to the walking stance immediatelly after it, which defeats the purpose);
3) At this point, if you did everything right, just after the Standing Jab finished, T.Hawk went directly to the walking forward animation, the Typhoon is on the buffer and you have all the 3 punch buttons held. Now, after walking a bit, you release the punch buttons, Fierce first and Jab last (as explained before). Understand that you have to time the button releases properly, if you do it too soon the opponent will still be on blockstun (i.e. unthrowable), if too late he will be able to escape it easily, with a non-reversal special or even jump out of it. How to time it properly is something that you have to figure yourself;
I must stress the button release order since this is crucial for the Inomata tick, because a bigger buffer window means T.Hawk can walk forward more. So, you have to release Fierce first since the buffer for it won't last much longer anyway, and you keep Jab last as a backup in case Strong fails. And in truth, the window on the Fierce version is too small anyway, so Inomata ticks with Fierce Typhoons are pretty rare, specially if they're not from a string. At first, you'll pretty much only get Jab Inomata ticks, but once you get good enough, Strong ones will also come out relatively often. To go in detail over this let's take a more in-depth look on the Typhoon input data:
Detailed Input: (↑ [7~14f] ← [7~14f] ↓ [7~14f] → [12/9/7f] Jab/Strong/Fierce)
After pressing towards (or the 4th direction required on an Inomata tick) you'll have 12 frames to input Jab to get the Jab Typhoon, 9 Frames for the Strong Typhoon and 7 frames for the Fierce Typhoon.
4) After releasing the buttons, you can then go to down-back to block an eventual reversal. Although not every player really go for it (I'd say this is match-up dependent).
Here is a video that shows how to do it.
Inomata tick troubleshooting and other informations
Here's a few things you need to have in mind:
1) If you want to walk forward first (to get closer to the opponent) and then do the Neutral Jab for the Inomata tick, understand that you have to wait a little so the Typhoon buffer is "refreshed", or the game will interpret the walking as part of a Typhoon input, that is, towards as the 1st Typhoon input and then up as the 2nd (i.e. as in →,↑,←,↓ if on P1 side). If that happens, the Inomata tick is ruined and you'll just walk-up and nothing will come out. So, before going up (the initial Typhoon input), wait a little. As seen above (on the "Detailed input"), the buffer for the directions are random between 7 and 14 frames. So, to be safe, you have to be trained to wait at least 14f (although it's rare for it to be that high, around 10f is the average);
2) For characters that don't have a good reversal (e.g. ChunLi, Dictator, Dhalsim), you don't have to tick him from max range of the standing jab to be safe, thus you don't have to walk;
3) Some characters out-range your Jab even from max range (e.g. Sagat's Tiger Uppercut, FeiLong's Flame Kick) so the whole setup will not be safe;
As this is a hard technique, it may be hard to figure out mistakes on your own. Thinking of that, I (Born2SPD) wrote a Sako tick training script in lua to be used with MAME-RR or FBA-RR. You can find a link to it on my profile.
--Born2SPD
Advanced Strategy
Walk-in Super
Unlike Zangief, even if you use macros to do a perfect timed super, T.Hawk will jump out of it. This happens because T.Hawk has less pre-jump frames, meaning he jumps earlier. It's still possible to do the super without ticking or jumping by buffering part of the motion in a normal move and i'll explain here how to do it.
First you must know how the 360 motion works in this game, as i've explained in the Zangief article, the SPD (or in this case, Typhoon) motion isn't a 360, nor a 270 but the four main directions (→,↓,←,↑) in a row, meaning that the diagonals aren't actually needed. With this in mind you can understand why you can do a super with 4 main directions in a row twice (which results in a 630-degree motion).
The exact motion I use for this is (left side, for right side just flip it): →↘↓↙← Jab ↖↑ (walk a bit if necessary) →↘↓↙←↖↑ + punch. That's not the only way to do it though.
Now the explanation: First, i do a normal walk-in typhoon command with pressing jab earlier, i do this to prevent T.Hawk from Jumping. Note that the ↗ isn't needed here as i explained above. At this point you can walk a bit to get closer if needed. The window is very small though so you must continue the motion (with a normal walk-in Typhoon) or the first part of the rotation will vanish from the motion buffer.
--Born2SPD
Combos
T.Hawk isn't a combo friendly character, but the few ones he have, are crushingl ones near to a Touch of Death Combo
O.Hawk
Cross Up j.D+FP->st.Forward->Tomahawk Buster
Universal
Close st. Forward -> jab Rising Hawk (only damaging 2-in-1)
Cross Up forward -> st.forward -> Rising Hawk (jab or strong) Note: Versus T.Hawk, Fei Long, Boxer, Sagat, Zangief, Dhalsim and Cammy use the fierce Rising Hawk.
Cross Up forward -> close st. Short -> Fierce Rising Hawk
Cross Up forward -> cr.jab -> cr.jab -> Typhoon attempt if the jab's were blocked / st.jab -> Rising Hawk (jab or strong)
Match-ups
Matchups classified with this diagram in mind. Note that all these factors are for N.Hawk, not O.Hawk. For the old characters i guessed the positions.
--Born2SPD
Serious Advantage Match-ups
None!
Advantage Match-ups
Vs. O. Balrog (boxer):
Vs. O. Zangief:
Fair Match-ups
Vs. Balrog (boxer):
- 4.5 - 5.5
Your going to have a lot of trouble here if you cannot standing SPD or negative edge on wakeup. Once you have him down though Balrog is very easy to pressure with safe jumps as hit Buffalo headbutt takes 13frames (this may be incorrect checking) to hit. This allows you to jump in on wake up fairly easily. Once the tick is out if you can negative edge 360's your almost completely safe from counters in between ticks.
This by large is not a good matchup though for Hawk as it is very hard to get on top of a good Boxer with Hawk.
j.Jab works very well. cr.Jab to stop some rush punches (not very safe) cr.Forward to stop some rush punches (fairly safe) cr.RH is very good at dominating the ground against Boxer. Hits twice, has huge range and is out for a long time (which can be good and bad, if he guesses right or is out of block range your gonna eat a jump in).
--Jedi.10 06:36, 30 August 2007 (UTC)
Vs. Chun-Li:
- 4.5 - 5.5
Vs. O. Dee Jay:
Vs. Ken:
- 4.5 - 5.5
Vs. O. M. Bison (dictator):
Vs. T. Hawk (self):
Vs. O. T. Hawk:
Vs. Zangief:
- 4.5 - 5.5
Vs. O. Vega (claw):
Disadvantage Match-ups
Vs. O. Chun-Li:
Vs. Dhalsim:
- 3.5 - 6.5
Dhalsim has an incredible throw range which can be annoying, however if you're using the correct ticks he can't throw you even when he doesn't block to intentionally throw afterwards. J.forward -> cr.jab is something I've been using instead of j.jab. Make it hit late for the correct spacing.
--Jedi.10 06:36, 30 August 2007 (UTC)
Vs. O. Dhalsim:
Vs. E. Honda:
- 3.5 - 6.5
Main Strategy
I rate this as the single hardest match in the entire game excluding Akuma matches. There is no tick setup I know that would reliably get you out of Oicho range, but inside the Mexican Typhoon one. The best method is the Sako tick. The way the Sako tick command is entered, it gives your opponent less time to react and reverse.
N.Hawk has a slightly harder time in this painful match-up do to his worse cr.Jab hitbox. All you can do is piano cr.Jab and wait for Honda to come at you. If you can take tiny steps forward and cr.Jab, hopefully you can somehow push him into the corner. While your spamming cr.Jab, honda can not hit you with anything other then stand Roundhouse. Spam cr.Jab as fast as you can, as soon as you see Honda get up from down back position you can immediately jump and use Condor Dive at him for some chip damage or try to jump at him with jab and land into negative-edge Typhoon. The later option will probably get you ochioed. If you get tired of jabbing, you can do the suicide attempt. Walk straight at Honda and hopefully you can land a psychic DP to hit Honda trying to head butt you. If you manage to get a knock down, all you have to do next is safe jump with jab with a DP install, cr.Jab, st.Jab, into Sako 360. After you get the Typhoon, Honda bounces then hits an invisible wall and lands closer to you so you can repeat the safe jump again. However, since Honda is hard to tick due the the range problem I mentioned in the beginning of my post, the chances of you landing the Typhoon are pretty slim. These are the only strategy I can think of that is kind of but not really safe against Honda. You just need to get some damage and run away. Force honda to come to you. You can bait a head butt by walking forward and jumping back to stuff the head butt with jump back Fierce. This is probably the safest way to get decent damage against Honda.
In summary, get life lead and turtle till time runs out. I need help myself with this match. I asked Neoray about this match and his response was "In this match, we do not try to win. We must get first hit and then run away until time runs out."
Vs. O. E. Honda:
Vs. Guile:
- 3.5 - 6.5
Vs. O. Guile:
Vs. O. Fei Long:
Vs. O. Ken:
Vs. Ryu:
- 4 - 6
Vs. O. Ryu:
Vs. Sagat:
- 3.5 - 6.5
Serious Disadvantage Match-ups
Vs. Blanka:
- 3 - 7
Vs. O. Blanka:
Vs. Cammy:
- 1.5 - 8.5
Vs. O. Cammy:
Vs. Dee Jay:
- 3 - 7
Vs. Fei Long:
- 3 - 7
Vs. M. Bison (dictator):
- 3 - 7
Vs. O. Sagat:
Vs. Vega (claw):
- 3 - 7
The Claw match is pretty hard but its not unwinnable. The best thing that could happen for the Hawk player is if Claw starts hoping off the walls. If that happens you can jump forward with Jab to knock Claw off the air and land close enough to pressure him with Sako ticks, or if you can not do that yet, just stand Jab and run up to grab him with Hawk's best normal throw, the RH elbow bash. After the bash, immediately jump at Claw as he flips away with jump Jab into cr.Jab into negative-edge Typhoon. Against Claw after the elbow bash when you jump at him you will always land in front of him. Different characters will make you land in different positions, sometimes behind, sometimes in front. You should always know which way you are going to land because the elbow bash can lead to big damage. Anywhere from half life up to 70 percent. The elbow bash should always be a top priority of things to go for because this will help you win matches fast.
A good Claw player that knows this match is going to sit in down back position and turtle, poking with cr.Strong and cr.Forward. In this situation you can stand right outside of the poke range and jump straight up and push Jab or Fierce to try to bait Claw into doing the flip kick. If he whiffs the flip kick you run in to elbow bash into the jump Jab cr.Jab Typhoon. If you can Sako tick, anytime you get a knock down you should be able to end the game by doing safe Sako ticks meaty from max distance into negative-edge Typhoon. If you can not Sako tick the only way to guarantee winning with a knock down is if you get the knock down at the corner with Claw's back up against the wall. If you are not near the corner, after you do the Typhoon walk up next to Claw and crouch. Claw might freak out and flip kick right after getting up and you can repeat the elbow bash routine. If he doesn’t flip, hit him with cr.Jab into Typhoon. This time around you should be close enough to the corner to end it with safe-jump loops. If you get a knock down in the corner, you can safe-jump and repeat the tick into negative-edge Typhoon. There is no need to DP install here because if Claw reverses with the flip kick, you can just run up to elbow bash him. If you get an elbow bash in the corner do not jump at him after Claw shakes out, just walk up and cr.Jab into negative-edge Typhoon instead. This is because after shaking out of the elbow bash, Claw will hit the corner and land later then normal. This is the same with all characters so keep that in mind if you ever get an elbow bash in the corner.
If the Claw player never flip kicks, then your only option is to sit there and wait and watch his poke pattern. Study this for a while and try to guess when he will poke with cr.Strong. When you are sure walk up and DP for the knock down and start doing the safe-jump ticks I mentioned above. If he stops poking with cr.Strong, then the only thing he has to poke you back is cr.Forward or cr.RH. Crouching Roundhouse is bad for you because if you block it, it pushes you back to the corner. This means if you do get a knock down, you probably won’t be able to finish the round with safe-jump loops. But if you have been jumping straight up, you can hit Claw with Fierce or Roundhouse on your way down. This is a way of holding your ground and forcing Claw to jump back away from you, going closer to his corner. If he pokes with Forward, you have to jump and do a really quick dive to knock him down. The dive against Claw is safe on block so you can spam the dive. Spam dives early in the match while you still have lots of life to train Claw to flip kick. As long as you still have 4 slivers of life, once you get that elbow bash, you can safe-jump Typhoon loop 3 or 4 times straight in the corner for the win. When you play hawk, sometimes you have to give away some life to train your opponent to respond a certain way.
PS. During the safe-jump loops Claw is going to try to back flip out, look out for that, when you see it get up and walk towards him. Hawk is fast enough that he can walk up and catch Claw at the end of the flip with a elbow bash throw.
