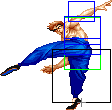
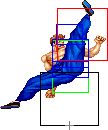
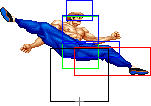
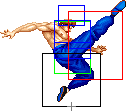
Introduction
Competitive Overview
I would rank Fei Long towards the lower middle tier for the simple fact that Fei has more bad matchups than good ones. There are many people who feel that Fei "dominates" certain matchups but I don’t agree. Fei is a brawler/rushdown fighter and can end a match rather quickly if give the right opportunity. If you are looking to learn Fei be prepared to actually WORK alot harder for your wins than you would playing Sim or OG Sagat. This guide is for New Fei only. Despite what many people say I think SSF2 Fei is a waste of time trying to learn because he loses so much in favor of gaining the ability to 2 in 1 most of his normals. Not worth it IMO.
Jesse Howard was the first person to actually take Fei to a national finals tournament at the Mid-West Championships back in the early-mid 90’s VS Mike Watson. Back then I had only heard of his Fei and not seen it in action until years later. When I watched the footage I noticed that he and I had totally different play styles. With that being said, there is no right or wrong way to play Fei but I do think that Fei is a much better offensively than defensively(my opinion of course). The only time Fei Long should turtle is when you have a HUGE lead and time is running out.
To win with Fei Long you have to create openings. You have to make your opponent guess which way you are going. A blitzkrieg barrage of attacks that is relentless and flawless in execution. Be prepared to face battle tank style defenses. Fei can’t hurt what he can’t touch so you have to make it all happen.
Now taking risks doesn’t mean kamikaze style attack plans. Get a feel for your opponents and see how consistent they are at doing reversals. See how bulletproof their patterns are. It is essential that you catch on to any bad habits and patterns as soon as possible because this can make the difference between winning and losing. If you opponent is uppercut crazy, bait them. If they play safe and turtle, tick throw them. If they go for the throw, make sure you got your reversals down pat! You have to play on the fly, reacting to every single thing your opponent does. It’s easy for players to stick with something that works ie fireball traps, patterns, etc but this doesn’t work very well for Fei Long. These tactics only go so far and once your opponent can predict what you are going to do next you may as well consider yourself beat.
IMO 90% of the fight should take place in the corner. Trap your opponents and give them very few options. Naturally this is a turtles paradise but this is where you want your opponents to be because a stationary target is easier to hit than a target that is moving around all over the place. By putting this kind of "boxed in" pressure it helps to break your opponents down, causing them to make risky decisions. You'll be in their personal space and they will do anything to keep you away.
--Jumpsuit
Strengths & Weaknesses
Strengths
- Speed, Speed and more Speed. Fei Long's strength lies in his ability to deal quick damage with his rekka punches and deadly combos.
- Jumping Jab has very good priority. Almost as good as T.Hawk's Jumping Jab.
- Super is fully invincible until it ends, and he can combo into it well.
- Standing fierce has crazy hit box/dizzy properties.
- Has good dizzy combos.
- Has a pretty quick and useful overhead attack that advances you forward.
- Has an airthrow that can be useful.
- His rekka kick(aka Chicken Wing)has some odd startup invincibility properties and stuff a ton of moves in mid air. You can also combo off of it for insane damage or choose to set up another scenario.
Weaknesses
- He's a mini-me version of E.Honda only he can't "float" over fireballs and doesn’t have a flying headbutt to get your out of those tight spots. Fei has all the weakness of a "fat" character meaning he has a huge hit box and can easily be crossed up. This makes Fei very vulnerable to fireball traps, keep away patterns and zone tricks. Combine this with the fact that there is no trip guard in ST you will quickly realize just how much work you have cut out for you.
- Flame kick whiffs vs low attacks, and has slightly longer startup compared to other reversal specials, making him easy to safejump.
- He's a brawler... meaning you have to make physical contact with your opponents to win. No projectiles means more risk. Playing Fei = taking calculated risks to win.
--Jumpsuit
New & Old Versions Comparison
To select O.FeiLong, choose FeiLong and then press ← ← → → Jab/Fierce, pressing Short simultaneously with the punch button for the alternate color.
Here is the list of differences:
- Obvious stuff: O.FeiLong can not tech throws, does not have the Chicken Wing and Super;
- O.FeiLong has a 2 pixels taller head hurtbox compared to N.Feilong, which affects his grounded, walking, crouching and aerial stances. It is mainly relevant when O.FeiLong is crouched, since some moves that could be avoided by crouching with N.FeiLong can not for O.FeiLong. Also note that this affects most of his normals so it will not be listed on the normal moves differences list;
- O.FeiLong does not have an air throw;
- O.FeiLong has some differences in some of his normals:
- Crouching Jab last recovery frame has extended limbs;
- Far Standing Strong can be special canceled;
- Crouching Strong can be special canceled;
- Far Standing Fierce can be special canceled;
- Far Standing Short can be special canceled;
- Crouching Short can be special canceled;
- Close Standing Forward can be special canceled;
- Far Standing Forward can be special canceled but does less hit/block stun, pushback and stun(dizzy);
- Crouching Forward last recovery frame has extended limbs but can be special canceled;
- Diagonal Jumping Strong animates like the Diagonal Jumping Jab, has nice priority air to ground and more active frames;
- Diagonal Jumping Fierce has better priority plus more attacking frames with very good air to ground priority;
- Diagonal Jumping Short has better priority (beats E.Honda's headbutt cleanly);
- Diagonal Jumping Forward has better horizontal priority but has worse vertical priority and its harder to use as a crossup;
- Diagonal Jumping Roundhouse has the Chicken Wing animation frames and different priorities;
- O.Feilong's hop kick command normal can not be steered forward and is not an overhead attack;
- O.FeiLong's Rekka Ken Punches have some differences: they recover faster (excluding the Jab version's first hit). On the other way, the first Rekka Ken punch has bigger hurtboxes during its recovery. All in all O.FeiLong's Rekka Kens are better;
O.FeiLong has better normals and safer Rekka Kens, but the lack of Chicken Wing, Super and throw teching really hurts him. He is viable but N.FeiLong is better (less bad I'd say).
Color Options
| Jab | Strong | Fierce | Start | Old |
 |
 |
 |
 |

|
 |
 |
 |
 |

|
| Short | Forward | Roundhouse | Hold | Old Alternative |
--Born2SPD
Video Overview
Moves Analysis
Disclaimer: To better understand the diagrams, read this.
Normal Moves
Ground Normals
- Close Standing Jab: (Base max activation range: 42)
| Damage | 4[0] |  |
 |

|
| Stun | 0~5 | |||
| Stun Timer | 40 | |||
| Chain Cancel | Yes | |||
| Special Cancel | Yes | |||
| Super Cancel | Yes | |||
| Frame Advantage | +3 | |||
| Frame Count | 2 | 6 | 4 | |
| Simplified | 1 + 2 | 6 | 4 | |
A spear-hand attack to the head. This is a very good move to hit-confirm aerial attacks. And also useful as a tick throw mix-up: you can make the opponent block 1~2 (1~3 against the bigger characters) of these from point blank and then go for a throw. But know that on some match-ups this whiffs completelly if the opponent crouch blocks, on that case favor Close Standing Short for ticks. It can hit the following crouching characters: Ryu, Ken, E.Honda, Zangief, Dhalsim, T.Hawk, Boxer and Claw. This may also hit a crouching DeeJay, as long Fei is close enough (usually not the case). You can cancel it into itself, another standing Jab, or a crouching Jab, which in turn can be cancelled into specials or super.
- Far Standing Jab:
| Damage | 4[0] |  |
 |
 |

|
| Stun | 0~5 | ||||
| Stun Timer | 40 | ||||
| Chain Cancel | Yes | ||||
| Special Cancel | Yes | ||||
| Super Cancel | Yes | ||||
| Frame Advantage | +3 | ||||
| Frame Count | 2 | 6 | 3 | 1 | |
| Simplified | 1 + 2 | 6 | 4 | ||
Rapid-fire hooks. Unlike a good amount of standing jabs in the game, this is not very reliable as a counter to E.Honda's Headbutt, since the horizontal priority is not very good, for that you have to use Far Standing Short instead. This is mainly useful in combos and block string into Rekkas, as it can be hit-confirmed, has better horizontal reach than Close Standing Fierce and can still hit a good amount of crouching characters (Ryu, Ken, E.Honda, Zangief, Dhalsim, T.Hawk, Boxer and Claw). This is specially useful as a link after a Rekku Kyaku (i.e. Chicken Wing) into Rekkas, since it has slightly more range than Close Standing Fierce and a slightly faster startup, making the link easier to do.
- Crouching Jab:
| Damage | 4[0] |  |
 |

|
| Stun | 0~5 | |||
| Stun Timer | 40 | |||
| Chain Cancel | No | |||
| Special Cancel | Yes | |||
| Super Cancel | Yes | |||
| Frame Advantage | +5 | |||
| Frame Count | 2 | 4 | 4 | |
| Simplified | 1 + 2 | 4 | 4 | |
A crouching elbow strike. This can be chain canceled from Standing Jabs and then cancelled into Rekkas for hit-confirm combos, so this move is useful in combos. This is also N.Fei's only crouching normal that is special cancelable. On neutral this is not realy useful as it has very poor horizontal reach and priority.
- Close Standing Strong: (Base max activation range: 29)
| Damage | 22[0] |  |
 |

|
| Stun | 5~11 | |||
| Stun Timer | 60 | |||
| Chain Cancel | No | |||
| Special Cancel | Yes | |||
| Super Cancel | Yes | |||
| Frame Advantage | +9 | |||
| Frame Count | 3 | 4 | 5 | |
| Simplified | 1 + 3 | 4 | 5 | |
A backfist. Good start-up and recovery. This is useful in combos, since it links into several other attacks (and into itself, from point-blank range) and let's you cancel into specials. It is also good for ticks and baits, such as throw-wait-Flame-Kick mix-ups. Note that this does more stun than close Fierce, which makes it easier to obtain dizzy combos with this move. Also, this whiffs against a crouching Blanka and Cammy, so this is less useful on these match-ups.
- Far Standing Strong:
| Damage | 22[0] |  |
 |
 |

|
| Stun | 5~11 | ||||
| Stun Timer | 60 | ||||
| Chain Cancel | No | ||||
| Special Cancel | No | ||||
| Super Cancel | Yes | ||||
| Frame Advantage | +7 | ||||
| Frame Count | 2 | 2 | 6 | 5 | |
| Simplified | 1 + 4 | 6 | 5 | ||
Knife-hand attack. Nothing special.
- Crouching Strong:
| Damage | 22[0] |  |
 |
 |

|
| Stun | 5~11 | ||||
| Stun Timer | 60 | ||||
| Chain Cancel | No | ||||
| Special Cancel | No | ||||
| Super Cancel | Yes | ||||
| Frame Advantage | +4 | ||||
| Frame Count | 2 | 2 | 6 | 8 | |
| Simplified | 1 + 4 | 6 | 8 | ||
A spear-hand attack with nice range but very bad priority. It has good speed and recovery. This is a good attack, but demands distance awareness, since Fei's whole arm is also vulnerable.
- Close Standing Fierce: (Base max activation range: 48)
| Damage | 28[1] |  |
 |
 |

|
| Stun | 3~9 / 10~16 | ||||
| Stun Timer | 40 / 80 | ||||
| Chain Cancel | No | ||||
| Special Cancel | Yes / No | ||||
| Super Cancel | Yes / No | ||||
| Frame Advantage | +2 / +6 | ||||
| Frame Count | 3 | 4 | 10 | 6 | |
| Simplified | 1 + 3 | 14 | 6 | ||
An upper with very fast recovery. Good anti air and combo starter (canceling into Rekka Kens). Keep this in mind when you are getting crossed-up or when someone jumps and lands on top of you. It can also be used as a meaty.
- Far Standing Fierce:
| Damage | 28[1] |  |
 |
 |

|
| Stun | 10~16 | ||||
| Stun Timer | 80 | ||||
| Chain Cancel | No | ||||
| Special Cancel | No | ||||
| Super Cancel | Yes | ||||
| Frame Advantage | +6 | ||||
| Frame Count | 2 | 2 | 10 | 6 | |
| Simplified | 1 + 4 | 10 | 6 | ||
Fei's famous "handshake" attack. It stays active for some time and also recovers very fast for a Fierce attack. Very useful on the E.Honda matchup to stop his Headbutts and HHS. Somewhat abuseable on the Blanka match-up since it can even beat his slides.
- Crouching Fierce:
| Damage | 28[1] |  |
 |
 |
 |

|
| Stun | 10~16 | |||||
| Stun Timer | 80 | |||||
| Chain Cancel | No | |||||
| Special Cancel | No | |||||
| Super Cancel | No | |||||
| Frame Advantage | +8 | |||||
| Frame Count | 2 | 2 | 2 | 8 | 6 | |
| Simplified | 1 + 6 | 8 | 6 | |||
Nice recovery, priority, range, damage and dizzy potential. Useful when playing footsies, since it is a good poke. As a meaty done at point-blank it can easily be linked into itself for a 2-hit combo that has good chances of dizzying the opponent, and if the opponent doesn't fall dizzy to that, know that any other move that you land right after will. The 2-hit combo is impossible to do on Chun, and very hard to do on Claw. Also, for some weird reason, this doesn't hit low on Boxer and Dictator (unless from far away). Can also be used to hit several characters under their projectiles.
- Close Standing Short: (Base max activation range: 24)
| Damage | 4[0] |  |
 |

|
| Stun | 0~5 | |||
| Stun Timer | 40 | |||
| Chain Cancel | No | |||
| Special Cancel | Yes | |||
| Super Cancel | Yes | |||
| Frame Advantage | +3 | |||
| Frame Count | 3 | 6 | 4 | |
| Simpified | 1 + 3 | 6 | 4 | |
A knee strike to the body. Can be used in tick throw mixups like Close Standing Jab, with the benefit of being able to hit every crouching character. It doesn't has much horizontal range though, so the limit on the blocked moves is usually 1 time less than with Standing Jabs. This can be used as a combo starter from a cross-under by hitting the opponent on its back, just like with Close Standing Forward.
- Far Standing Short:
| Damage | 4[0] |  |
 |
 |
 |

|
| Stun | 0~5 | |||||
| Stun Timer | 40 | |||||
| Chain Cancel | Yes | |||||
| Special Cancel | No | |||||
| Super Cancel | Yes | |||||
| Frame Advantage | -4 | |||||
| Frame Count | 2 | 2 | 8 | 5 | 4 | |
| Simplified | 1 + 4 | 8 | 9 | |||
A high side kick. One of Fei's best anti-airs. It's also useful if mashed to counter moves like E.Honda's Headbutts and Blanka's Horizontal Beast Rolls.
- Crouching Short:
| Damage | 4[0] |  |
 |
 |

|
| Stun | 0~5 | ||||
| Stun Timer | 40 | ||||
| Chain Cancel | No | ||||
| Special Cancel | No | ||||
| Super Cancel | Yes | ||||
| Frame Advantage | +5 | ||||
| Frame Count | 2 | 2 | 4 | 4 | |
| Simplified | 1 + 4 | 4 | 4 | ||
Crouching inside kick. Usually N.Fei has no low-hitting combo starters, but this move can be used as a meaty on the opponent's wake up which Fei can then link into a Close Standing Fierce for a combo. Other than that, this move is not really useful.
- Close Standing Forward: (Base max activation range: 36)
| Damage | 22[0] |  |
 |

|
| Stun | 5~11 | |||
| Stun Timer | 60 | |||
| Chain Cancel | No | |||
| Special Cancel | No | |||
| Super Cancel | Yes | |||
| Frame Advantage | +7 | |||
| Frame Count | 4 | 6 | 5 | |
| Simplified | 1 + 4 | 6 | 5 | |
High vertical kick. Good recovery, can be linked into other normals for devastating combos. This move is very interesting due to it being usable as combo starter from a cross-under by hitting the opponent on its back, which can lead to dizzy combos after softened kick throws or air resets.
- Far Standing Forward:
| Damage | 22[0] |  |
 |
 |
 |

|
| Stun | 5~11 | |||||
| Stun Timer | 60 | |||||
| Chain Cancel | No | |||||
| Special Cancel | No | |||||
| Super Cancel | Yes | |||||
| Frame Advantage | +4 | |||||
| Frame Count | 2 | 2 | 6 | 4 | 4 | |
| Simplified | 1 + 4 | 6 | 8 | |||
High side kick. Exact same priority as Far Standing Short, so it's also a good anti-air, albeit a little slower. Can hit every crouching character except for Blanka. Due to it only being activable when the stick os neutral (i.e. while not holding back/towards), Short is often favored for anti airing.
- Crouching Forward:
| Damage | 22[0] |  |
 |

|
| Stun | 5~11 | |||
| Stun Timer | 60 | |||
| Chain Cancel | No | |||
| Special Cancel | No | |||
| Super Cancel | Yes | |||
| Frame Advantage | +4 | |||
| Frame Count | 4 | 6 | 8 | |
| Simplified | 1 + 4 | 6 | 8 | |
A crouching side kick. Bad priority and not very useful since N.Fei can't special cancel this move like O.Fei can. You only want to use this to hit enemies who are blocking while standing. When blocked this can leave the opponent at optimal range for the Rekka Ken pressure though.
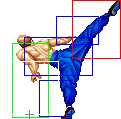
- Close Standing Roundhouse: (Base max activation range: 40)
| Damage | 20[0] + 20[1] |  |
 |
 |
 |
 |
 |
 |

|
| Stun | 2~8 + 10~16 | ||||||||
| Stun Timer | 90 + 80 | ||||||||
| Chain Cancel | No | ||||||||
| Special Cancel | No | ||||||||
| Super Cancel | No | ||||||||
| Frame Advantage | +2 / +6(+5) | ||||||||
| Frame Count | 3 | 3 | 3 | 4 | 6 | 3 | 3 | 4 | |
| Simplified | 1 + 9 | 4 | 6 | 10 | |||||
A double-hitting roundhouse kick. It is an interesting attack, but since it does not lead to anything else, it does not get used much. Fei's several close-range cancelable and frame-advantage attacks are better options, most the time.
- Far Standing Roundhouse:
| Damage | 30[1] |  |
 |
 |
 |
 |

|
| Stun | 10~16 | ||||||
| Stun Timer | 80 | ||||||
| Chain Cancel | No | ||||||
| Special Cancel | No | ||||||
| Super Cancel | No | ||||||
| Frame Advantage | +7 | ||||||
| Frame Count | 2 | 3 | 1 | 8 | 3 | 4 | |
| Simplified | 1 + 6 | 8 | 7 | ||||
A vertical kick with the rear leg. This can be used as an anti-air, but Fei also has better options.
- Crouching Roundhouse:
| Damage | 30[1] |  |
 |
 |
 |

|
| Stun | 5~11 | |||||
| Stun Timer | 130 | |||||
| Chain Cancel | No | |||||
| Special Cancel | No | |||||
| Super Cancel | No | |||||
| Frame Advantage | -1 | |||||
| Frame Count | 3 | 3 | 4 | 10 | 9 | |
| Simplified | 1 + 6 | 4 | 19 | |||
Some weird backwards roundhouse crouching kick. This generates a fast knockdown, but its short range makes it not that great an attack in Fei's arsenal.
Aerial normals
- Neutral Jumping Jab:
| Damage | 14[1] |  |
 |
 |
 |

|
| Stun | 1~7(-2) | |||||
| Stun Timer | 40 | |||||
| Frame Count | 1 | 2 | 30 | 4 | ∞ | |
| Simplified | 3 | 30 | ∞ | |||
Good air to air for countering their air normals. Stays out for a long time.
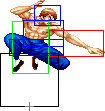
- Diagonal Jumping Jab:
| Damage | 14[1] |  |
 |
 |

|
| Stun | 1~7(-2) | ||||
| Stun Timer | 40 | ||||
| Frame Count | 1 | 2 | 30 | ∞ | |
| Simplified | 3 | 30 | ∞ | ||
A lot like the neutral jump version, this has great forwards priority, and long active frames. Decent jump in from a distance.
- Neutral Jumping Strong:
| Damage | 22[1] |  |
 |
 |
 |

|
| Stun | 5~11 | |||||
| Stun Timer | 50(+10) | |||||
| Frame Count | 1 | 2 | 14 | 5 | ∞ | |
| Simplified | 3 | 14 | ∞ | |||
Pretty much the same as Neutral Jab, but better damage, though much less active frames.
- Diagonal Jumping Strong:
| Damage | 22[1] |  |
 |
 |
 |

|
| Stun | 5~11 | |||||
| Stun Timer | 50(+10) | |||||
| Frame Count | 1 | 2 | 8 | 6 | ∞ | |
| Simplified | 3 | 8 | ∞ | |||
Good forwards priority and reach, but poor vertical properties. This is Fei's diagonal jumping move with the highest stun (i.e. dizzy) potential.
- Neutral Jumping Fierce:
| Damage | 30[1] |  |
 |
 |
 |

|
| Stun | 3~9 | |||||
| Stun Timer | 40 | |||||
| Frame Count | 1 | 2 | 8 | 6 | ∞ | |
| Simplified | 3 | 8 | ∞ | |||
Decent priority, but it's not very useful since you have Neutral Jumping Jab/Strong which are more consistent.
- Diagonal Jumping Fierce:
| Damage | 28[1] |  |
 |
 |
 |

|
| Stun | 3~9 | |||||
| Stun Timer | 40 | |||||
| Frame Count | 1 | 4 | 6 | 4 | ∞ | |
| Simplified | 5 | 6 | ∞ | |||
A strange move that hits high up, decent air to air, and can deal with some trade anti airs (e.g. Guile's Crouching Fierce) well on occasion. His hurtboxes also get very small during it, making it very good to avoid projectiles, specially by back jumping when cornered.
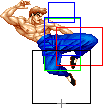
- Neutral Jumping Short:
| Damage | 14[1] |  |
 |
 |

|
| Stun | 1~7(-2) | ||||
| Stun Timer | 40 | ||||
| Frame Count | 3 | 20 | 4 | ∞ | |
| Simplified | 3 | 20 | ∞ | ||
Decent priority both vertically and horizontally, mainly used to help when neutral jumping fireballs.
- Diagonal Jumping Short:
| Damage | 14[1] |  |
 |
 |

|
| Stun | 1~7(-2) | ||||
| Stun Timer | 40 | ||||
| Frame Count | 3 | 20 | 4 | ∞ | |
| Simplified | 3 | 20 | ∞ | ||
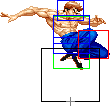
This stays out for a while, but its main downside is the small hitbox. Unfortunatelly the N.Fei verison of this move was nerfed a lot, as a result this move is basically useless.
- Neutral Jumping Forward:
| Damage | 24[1] |  |
 |
 |
 |

|
| Stun | 5~11 | |||||
| Stun Timer | 50(+10) | |||||
| Frame Count | 1 | 2 | 8 | 5 | ∞ | |
| Simplified | 3 | 8 | ∞ | |||
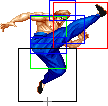
A pretty interesting high kick, appears difficult to utilize, Fei has better options.
- Diagonal Jumping Forward:
| Damage | 24[1] |  |
 |
 |

|
| Stun | 3~9 | ||||
| Stun Timer | 40 | ||||
| Frame Count | 3 | 10 | 5 | ∞ | |
| Simplified | 3 | 10 | ∞ | ||
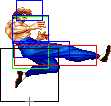
Fei's crossup. This is a very good combo starter, though it may be harder to space as a crossup against certain characters (e.g. Ryu, Ken, Boxer). This can also beat Dhalsim's anti air slides, as long Fei jumps from close enough to hit Dhalsim's head. This also has good downwards priority, allowing it to beat a fair amount of anti air normals. Its hitbox doesn't match the sprite though, so don't be deceived by its looks: it doesn't has a lot of horizontal range.
- Neutral Jumping Roundhouse:
| Damage | 30[1] |  |
 |
 |
 |

|
| Stun | 3~9 | |||||
| Stun Timer | 40 | |||||
| Frame Count | 2 | 3 | 8 | 6 | ∞ | |
| Simplified | 5 | 8 | ∞ | |||
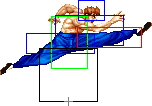
Acceptable reach, but otherwise nothing special. Totally unusable as a way to avoid projectiles since it extends Fei's hurtboxes on his back.
- Diagonal Jumping Roundhouse:
| Damage | 30[1] |  |
 |
 |
 |

|
| Stun | 3~9 | |||||
| Stun Timer | 40 | |||||
| Frame Count | 2 | 3 | 8 | 6 | ∞ | |
| Simplified | 5 | 8 | ∞ | |||
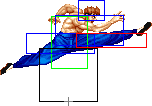
Good reach, slightly better priority horizontally than the neutral jump version. If you jump a fireball from far away, this is usually the best bet to punish. This is also the best move to use as a combo starter from the air, as this does massive damage. The stun/dizzy on it is heavily nerfed though, so if you're looking specially for a combo that may dizzy the opponent, favor jumping with Strong.
Command Normals
- Chokka Raku Shou a.k.a. Hop Kick: (On ground, ←/↖/↗/→ + Forward)
| Damage | 24[1] |  |
 |
 |
 |
 |
 |
 |
 |
 |
 |

|
| Stun | 3~9 | |||||||||||
| Stun Timer | 40 | |||||||||||
| Frame Advantage | Hit standing: -7 Else:-2 | |||||||||||
| Frame Count | 2 | 4 | 2 | 2 | 3 | 8 | 5 | 9 | 1 | 4 | 1 | |
| Simplified | 1 + 21 | 5 | 15 | |||||||||
FeiLong's overhead. Not as fast as Ryu's, but it has the advantage of putting Fei in the air while active (i.e. you're immune to throws during it) while also being invulnerable to a good amount of low moves, including most sweeps. It leaves Fei at minor frame disadvantage, so if Fei lands too close to the opponent, the opponent can counter throw. If done while holding towards, FeiLong will move horizontally a little bit while attacking, giving it a fairly decent reach. If done while holding backwards then there'll be no horizontal movement, which is preferable for when Fei is already close to the oponent, just so Fei doesn't land too close.
- En Geki Shuu a.k.a. Double Kick: (On ground, →/↗ + Roundhouse)
| Damage | 20[0] + 20[1] |  |
 |
 |
 |
 |
 |
 |

|
| Stun | 2~8 + 10~16 | ||||||||
| Stun Timer | 90 + 80 | ||||||||
| Frame Advantage | +6 / +9(+8) | ||||||||
| Frame Count | 1 | 8 | 6 | 1 | 3 | 4 | 4 | 5 | |
| Simplified | 1 + 16 | 3 | 4 | 9 | |||||
Fei takes a quick step forward then performs a double kick, hits twice. Gives good frame advantage, and you can link some normals after the 2nd hit, a lot of the startup is airborne, this seems to not have much benefit since it takes so long to come out. This move is ok to do as a meaty to start mixups vs characters that cannot reverse it.
During the only grounded startup frame, Fei moves 16px forward instantly. So it is totaly possible to kara cancel this move into, say, a Rekka Ken, for extra horizontal range (similar to how DeeJay can cancel his slide into a Sobat for example or how Guile can cancel his Sobats into Flash Kicks for extra horizontal range), although very hard to execute due to the 2nd startup frame having Fei on an airborne state (meaning it can't be kara-canceled anymore). The input for that would be ↓↘→+Rh,Fierce (with the Fierce button being pressed EXACTLY on the 2nd frame after the Roundhouse). You only have a 1f window for it to work though so in the end this is not really usable (unlike in DeeJay's and Guile's case, for them it's totally usable because the window is more forgiving).
Throws
FeiLong can throw using Strong, Fierce, Forward and Roundhouse. If in air, he can throw with Strong and Fierce too. The direction of the joystick determines the direction the enemy gets thrown at. All his ground throws have the same range and do 32 points of damage (plus two more if behind in rounds). Even though he has the worst normal throw range in the game he still has a good tick throwing game, since it's possible to loop them, specially in the corner.
Another thing to keep in mind is that both his punch and kick throws have a few frames during the grabbing animation in which Fei change sides with the opponent. This means that if the opponent is using a charge character, he won't be able to use any special move that requires a back charge right after softening the throw.
- Ground Throws Throwboxes:
| Damage | 32 |  |
 |

| |
| Stun | 7~13 | ||||
| Stun Timer | 100 | ||||
| Range | (from axis) | 40 | |||
| (from throwable box) | 11 | ||||
- Gankai Hou: (←/↖/↗/→ + Strong/Fierce)
Has less mixup potential compared to kick throw if they tech, but getting a whiffed Standing Strong or Fierce is usually better than the command normal kicks. So if they're trying to jump out of the tick throw attempt, this might be useful. If you're facing a charge character, know that the opponent will have lost his back charge, so see this as a "free" meaty/tick throw opportunity (except vs Honda, it's too dangerous to get that close to him).
The real usefulness of this throw comes up when the opponent is cornered: if Fei jumps towards the opponent at the first moment possible, an opponent using a charge character will often be forced to block the air normal, since, as mentioned above, they'll lose their back charge, and if they teched the throw, they most likely were tyring to counter-throw you, so they'll not have down-charge either. And also because Fei recovers a little faster with the punch throw, so there's no time to beat Fei's air normal with a normal move of their own. This is very strong on the Boxer match-up: it sets a built-in safe jump against his Buffalo Headbutt, and he can't use his super (due to him losing his charge). This will also be a safe jump in mirror matches. Against Claw it will also be similar to how it is vs Boxer: it won't look exactly like a safe jump, but on that situation Claw can't beat your jump in move with anything, so you can use it as a tick throw loop, and he'll have to counter throw to escape, but know you'll be outside of his throw range if you don't walk towards him after the blocked air move, so you can very confortably mix-up throws with Flame Kicks. Against Dhalsim and Dictator, if the throw is not teched, you can keep holding up-towards to jump a second time as soon as you land for the first jump, and that will also be a safe jump.
- Shuu Kubi Kari: (←/↖/↗/→ + Forward/Roundhouse)
Usually favoured over punch throw since this leaves the opponent closer to you after teched, and lets you do better mixups in most cases, such as walking underdeath for a cross under Close Standing Forward into Close Standing Fierce xx Rekka Ken.
Also, just like the punch throw, there's a side switch during the grabbing animation, meaning the opponent will lose back charge (and this is even more valid in the case of the kick throw, due to the final side switch happening later, right when the opponent is released), so after throwing the opponent you can go for a meaty/tick throw more safelly against characters that rely on a back charge to escape (e.g. Boxer with super, Claw with Scarlet Terror).
Another interesting aspect about this throw is that it also leads into a built-in safe jump against Claw, Sagat and Dhalsim: if they tech the throw, you can hold up-towards to jump at the first possible moment and that will be a safe jump, as long the opponent doesn't touch the corner or a breakable object. Also, on the Guile match-up, if the opponent is cornered and the throw is not teched, you can keep holding up-towards and the second jump in will be a safe jump. This is not very useful though since if the throw is teched, jumping immediatelly is unsafe. The same happens on the Chun match-up, though it will sometimes whiff completelly, so it's even less useful.
- Shuu Kubi Raku: (Min activation height: 64/80 upwards/downwards, ←/↖/↙/↓/↘/↗/→ + Strong/Fierce)
| Damage | 32 | 
| |
| Stun | 7~13 | ||
| Stun Timer | 100 | ||
| Range | (from axis) | 62 | |
| (from throwable box) | 33 | ||
A N.FeiLong exclusive. Has the third best aerial throw range in the game but unlike other air throws it can only be triggered on the very apex of the jump which makes it quite hard to use.
Special Moves
- Rekka Ken: (↓↘→ P)
Detailed Input: (↓ [7~14f] ↘ [7~14f] → [10/9/7f] Jab/Strong/Fierce)
- First Punch:
- Second Punch:
- Last Punch:
Fei Long attacks the enemy with a cancelable punch while moving forward, attacking up to three times. The first punch is a jab that has good reach, the second one is a hook to the body and the last one is a backfist, followed by a relatively long recovery. Each punch has a unique animation and demands the input. Thus, to get all three punches, you need to input ↓↘→ + P for the jab, then ↓↘→ + P again for the body punch and, finally, ↓↘→ + P for the backfist. Each punch gives Fei super meter, so they are a great way of getting full meter while pressuring the enemy.
Notice the punches are cancelable during their recovery, so you must press the button for the next punch just after the active part ends. This will take a different timing if a punch whiffs.
This move pushes Fei forward pretty fast while causing block animation on the enemy due to proximity blocking, so it is a good way of gaining ground if your opponent is on the ground. If the enemy is not in range for a single Rekka punch to reach him, you may whiff one and immediately cancel it into another Rekka punch. This is harder than a single Rekka, and gives them more time to counter or evade your move, but also gives you twice the amount of super meter.
The last punch has long recovery if you use Fierce or Strong. On the other hand, the Jab version has less range. You want to use the Jab version if the enemy blocks your previous attacks, and the Fierce version in a combo.
- Shien Kyaku a.k.a. Flame Kick: (←↓↙ K)
Detailed Input: (← [7~14f] ↓ [7~14f] ↙ [10/9/7f] Short/Forward/Roundhouse)
- Startup + Invincible active part:
| Short | Forward | Rh |  |
 |
 |

| |
| Damage | 38[2] / 22[2] | 30[2] + 18[2] | |||||
| Stun | 9~15 | 2~8 + 2~8 | |||||
| Stun Timer | 100 | 90 + 90 | |||||
| Frame Advantage | -17 | -26 / -24(-25) | -36 / -34(-35) | ||||
| Super Meter | 8 | ||||||
| Frame Count | 2 | 2 | 2 | 2 | |||
| Simplified | 6 | 2 | |||||
- Non-invincible active part:
- Short Version:
 |
 |
 |
 |
 |
 |
 |

| |
| Frame Count | 2 | 2 | 2 | 2 | 2 | 2 | 2 | 4 |
| Simplified | 18 | |||||||
- Forward Version:
 |
 |
 |
 |
 |
 |
 |

| |
| Frame Count | 2 | 2 | 2 | 2 | 2 | 2 | 2 | 2 |
| Simplified | 16... (22) | |||||||
 |

| ||||
| Frame Count | 2 | 4 | |||
| Simplified | ...6 (22) | ||||
- Roundhouse Version:
 |
 |
 |
 |
 |
 |
 |

| |
| Frame Count | 2 | 2 | 2 | 2 | 2 | 2 | 2 | 2 |
| Simplified | 16... (27) | |||||||
 |
 |
 |
 |

| |
| Frame Count | 2 | 2 | 2 | 1 | 4 |
| Simplified | ...11 (27) | ||||
- Recovery:
 |
 |
 |

| ||
| Frame Count (Short) | 4 | 4 + {5} | 2 | 4 | |
| Simplified (Short) | 19 | ||||
| Frame Count (Forward) | 12 + {5} | 2 | 5 | ||
| Simplified (Forward) | 24 | ||||
| Frame Count (Rh) | 4 | 12 + {5} | 2 | 6 | |
| Simplified (Rh) | 29 | ||||
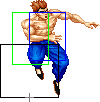
Fei Long becomes invulnerable for a split second, attacks with a low spinning roundhouse flaming kick, which turns into an ascending spinning kick (which is not anymore invincible). After that, Fei falls helpless as he recover from the move.
- Rekku Kyaku a.k.a. Chicken Wing: (←↓↘↗ K)
Detailed Input: (←/↙/↖ [7~14f] ↓ [7~14f] ↘ [7~14f] ↗ [10/9/7/2f] Short/Forward/Roundhouse/any K if you are at a jumpable state)
NOTE: Due to a bug, only the Short version will come out if the K input is on the same frame as ↗.
- Startup + Active:
- Recovery:
 |
 |
 |

| |
| Frame Count (Short) | 3 | 3 + {1} | 3 | 3 |
| Simplified (Short) | 13 | |||
| Frame Count (Forward) | 3 | 1 + {1} | 3 | 3 |
| Simplified (Forward) | 11 | |||
| Frame Count (Rh) | 2 + {1} | {1} | 3 | 3 |
| Simplified (Rh) | 10 | |||
Fei Long becomes invulnerable for a split second, then becomes vulnerable again as he performs a series or three aerial kicks that combo into each other and leave Fei with frame advantage near the enemy. This move is a great combo starter and leads to combos that often do more than 50% health damage. The aerial kicks also have juggle property: if they hit an enemy in the air, it may be hit again by the remaining kicks or even another Rekkuukyaku, for up to three hits.
The command for the special move has a glitch, which is that you must press the kick button after finishing the motion (the only exception is the Short version, which will work normally). Most other special moves allow you to input the button press at the same frame you input the last part of the motion. You must also take into account that if you use the Roundhouse version and accidentally press kick button while you're still at the → direction, the En Geki Shuu (Double Kick) command normal will trigger, which puts Fei on an airborne state immediately, that prevents the special move from working as a kara cancel since you must be on the ground. Because of these 2 oddities, the Roundhouse Chicken Wing is often considered the hardest special move in the game to be performed.
Super Move
- Rekka Shinken: (↓↘→↓↘→ P)
Detailed Input: (↓ [15~22f] ↘ [15~22f] → [15~22f] ↓ [15~22f] ↘ [15~22f] → [7f] P)
| Damage | 18[1] * 5 |  |
 |
 |
 |
 |
 |
 |

|
| Stun | 0~4 * 5 | ||||||||
| Stun Timer | 20 * 5 | ||||||||
| Frame Advantage | -5 | ||||||||
| Frame Count | 1 + [18] | 2 | 6 | 3 | 7 | 7 | 5 | 3 | |
| Simplified | 9 | 3 | 7 | 7 | 5 | 3 | |||
 |
 |
 |
 |
 |
 |

| |
| Frame Count | 7 | 7 | 5 | 6 | 6 | 4 | 19 |
| Simplified | 7 | 7 | 11 | 6 | 23 | ||
Fei has one of the best supers in the game. It has 98%(my own guess)invincibility. It can juggle. It charges up quickly. I have never seen a good Fei player get off no less than 3 supers a round.
Bait Super Many players think that bait super tactics are one of the cheapest thing a Fei player can do. "It's cheap! It's scrubby! It's SO predictable!" but damn it's priceless when it connects
Chances are that if you do connect with a super it's going to be because you baited your opponent into missing a move. We can talk about comboing the super off of normals later though :)
Baiting opponents into sticking out a move, jumping straight up or even baiting them into throwing a projectile are what you want. Use the super and you will breeze through and smack them down for sick damage. Just don't get too predictable because a good opponent will read you and simply time a forward jump as you pass below them and land safely behind you as you are still stuck in super animation. This is risky for them too because the whole point is to bait them into jumping at you and countering them with a flame kick, or have them miss a move that will leave them open for a rekka punch combo or a super. If they jump straight up or jump back you can do super and you can juggle them in the corner for great damage or worse case scenario they will block and you will get some pretty good block damage.
--Jumpsuit
Misc Animations
Jump Animations
- Neutral Jump:
 |
 |
 |
 |
 |
 |
 |
 |
 |
 |

| |
| Frame Count | 2 | 1 | 8 | 7 | 5 | 8 | 5 | 7 | 4 | 1 | 7* |
| Simplified | 2 | 1 | 44 | 1 | 7* | ||||||
- Back Jump:
 |
 |
 |
 |
 |
 |
 |
 |
 |
 |

| |
| Frame Count | 2 | 1 | 8 | 5 | 5 | 5 | 5 | 5 | 12 | 1 | 7* |
| Simplified | 2 | 1 | 45 | 1 | 7* | ||||||
- Forward Jump:
 |
 |
 |
 |
 |
 |
 |
 |
 |
 |

| |
| Frame Count | 2 | 1 | 8 | 5 | 5 | 5 | 5 | 5 | 8 | 1 | 7* |
| Simplified | 2 | 1 | 41 | 1 | 7* | ||||||
FeiLong has a considerably fast prejump. Note that the global buff N.FeiLong received on his head hurtboxes affect his empty jump animations too.
The landing recovery has a special property which allows it to be canceled into certain actions. At the first landing frame, you can perform throws (including command throws), and on the second landing frame, you can start another jump, attack with a normal or special move, or block. Blocking not being until the second landing frame, as well as hitbox-hurtbox interactions having priority over throwbox-throw hurtbox is why sweeps work as anti airs in this game.
Things are different when jumping over your opponent, however. In that situation it's possible to walk back/forward, to jump again or to even block on the first landing frame! Strangely, if a throw is timed on the first landing frame of a jump that crosses over, a throwbox will never come out, even though that input will result in a normal coming out 2 frames later (like it normally would). Anyway, being able to block on the first landing frame can help a little bit on some safe jump crossup setups, or maybe in other situations as well if your character has a huge jump arc.
The Basics
Anti Air Moves
Fei has maybe 4 anti-air moves that I consider to be useful and a few others that are so-so.
-Flame Kick(reverse DP with Kick)
-Jumping jab(Almost as good as T.Hawk’s Jumping Jab)
-Close standing fierce(Use it as early as possible. The earlier you use it the less chance you will trade hits).
-Rekka Kick(chicken wing)
-Walk in-last second low fierce(Making opponents land on it). This is best used on characters who have normal jump in speeds. This doesn't work well against fighters like Vega, Sagat Blanka who have quick or low jumps.
-Far standing roundhouse kick.
-Standing short kick.
His best anti-air is his Flame Kick. It's best if it's used like Sagat's tiger uppercut(late as possible)for max damage and getting a clean counter instead of a trade. This move also can be a blessing and a burden as it doesn't advance you forward like a shoto's dragon punch.
--Jumpsuit
Reversals
Flame Kick - This is most reliable and most damaging reversal he has available. Not quite 100% invincible but can be just as reliable as Sagat's tiger uppercut. Stick to using the short kick version at all time and only use the other 2 versions for show off purposes only.
Rekka Kick(Chicken Wing) - I have used this move on wake up several times and have successfully been able to counter attack many moves. Since it has such odd hit box and priorities it can save your life. I mainly use it against characters who don't have a digging uppercut type move(DP, Tiger Uppercut, etc)because they have a bit tougher time countering it once they see it coming. It can register as a reversal but I wouldn't rely on it. Only use it to get you out of a pinch or if you're feeling daring.
Super - Like other supers in the game Fei can use his super combo as a reversal, even if being attacked with a meaty move.
--Jumpsuit
Fighting Philosophy
“"When the opponent expands, I contract, When he contracts, I expand, And when there is an opportunity, I do not hit--it hits all by itself." - Bruce Lee
Take a good look at that quote above. That pretty much sums up my Fei Long strategy in a nutshell. Don't be afraid to innovate your own ways of winning with Fei Long.
--Jumpsuit
Rekka-Ken Science
If you aren’t within striking distance of the Fierce Rekka Ken punches then you aren’t close enough. This is Fei Long’s “sweet spot” so to speak. It allows you to hit and not be hit because of the insane range that the rekka ken punches have. Being in within this range not only gives you the ability to have a menacing presence in front of your opponent but it also allows you the freedom of using faints to lure your opponent into missing a move.
- Rekka-Wreckage(Important Things To Remember About Rekka Kens)
ALWAYS use the Rekka Kens from MAX DISTANCE. This means using the fierce punch version(has the most range). The closer you are to an opponent, the weaker the punch version should be used...but always try your best to stay right within the fierce rekka ken. It's safer.
Learn the timing of the rekka punches and how they effect each opponent(blocked or hit).
Learn how to manipulate the different button combinations for using the rekka punches(Fierce-Fierce-Jab, Fierce-Strong-Stop, Fierce-Fierce-Pause-Jab, Strong-Jab-Jab, etc etc).
The beauty of this move is that it is instant. It’s like throwing a fireball that instantly hits and can be multiplied X3! It has awesome range and does great tick damage. The best part is having the advantage of option selection once you see whether or not the first hit connects or is blocked. It charges up your meter very quickly. It literally intercepts a plethora of moves before you opponents can even finish them.
The tricky part is that sometimes getting in close can take a very long time. Patience and a good reaction/execution skills are key here. Sometimes this means trading hits or taking a few hits just to get close(Just don't get sloppy). Just make sure you are using the right pokes for the job. Once you are inside it is vital to stay just outside of their normal attack range to take advantage of any whiffed moves. For every whiffed fierce punch or roundhouse kick you should nail them for 20+% of their energy with a rekka ken punch combo. Don't let these valuable opportunities slip away.
I will go into specific advantages and disadvantages of using Rekka-Kens in each match-up scenario. With so many variables in each match you will be switching your attacks like crazy to best suit the situation so be ready.
--Jumpsuit
Avoiding Fireballs
Fei long has the same weakness that E.Honda has had in the past versions of SF2.....Fireball traps. Getting in close and dealing with fireball traps can be a nightmare and since there is no trip guard it becomes very frustrating. You have 3 options.
1. Jump in from max distance - this means your opponent is on the farthest end of the screen and you are on the opposite farthest side. You can jump in and have a good chance of gaining ground because the opponent is usually too far away to trip you when you land. The downside to this is that you can land on slow fireballs. Sometimes it gets even tougher against fighters like OG Sagat....imagine jumping over a tiger shot only to literally land on another one even after perfectly timing a jump in! Grrrr!! Sometimes this almost seems impossible to do against some characters that have longer limbs and long reaching attacks(DeeJay, Sim).
2. Rekka Kick(Chicken Wing) - It's a very risky move and one that I don't condone too much but when you are feeling both desperate and lucky you can use this move to go over projectiles. If you time it early enough you can gain alot of ground and still be safe. Very very risky but it can work. Once your feet touch the ground you have pretty good recovery time and you can choose to go into a flame kick or into super.
3. Inch your way forward and jump straight up over projectiles- Quite possibly the most annoying and slowest way of gaining ground on your opponents. Fei is a pretty fast walker but nothing sucks more than to gain ground only to get pushed back by projectiles. Get into the habit of knowing your projectile speeds and jump straight up over them.
--Jumpsuit
Chicken Wing Execution
The Roundhouse/HK Rekku Kyaku (a.k.a. Chicken Wing) is considered by most players as the hardest move to perform in the game (outside of special setups like Option Selects of course). There are a few reasons for that:
1) If the Roundhouse/HK button is pressed too early (while you're still on →, that is, before you hit ↗) the En Geki Shuu (Double Kick) command normal will come out, and that is a problem because that move puts Fei on an airborne state on its 2nd frame, which means that it's basically impossible to kara cancel that normal move into a Chicken Wing. So, you have to be aware that you can't press the button too soon, but you also can't press it too late or Fei will end up jumping instead. This is something to be aware of, but once you're trained enough, this will not be an issue most of the time;
2) The Chicken Wing has a small bug on its input code: if the kick button is pressed on the first frame in which ↗ is detected, then the Medium and Heavy versions of the move (i.e. Forward/MK and Roundhouse/HK) will not come out (by the way, this also happens with Cammy's Hooligan Combination, which indicates that the code was copy pasted from one move to the other - and no, the Tiger Knee doesn't have this problem). Basically, this means that the kick button must be pressed while Fei is on its pre-jump animation. The existence of this bug also means that even pros will miss this move from time to time, but make no mistake, for most players it's fair to assume that this bug is not the culprit for most missed Chicken Wing attempts, because this only happens on a single frame so it's not that common;
3) Actually, the most common mistake is the miss of the ↘ input (i.e. to go directly from ↓ to → or ↗). Trust me, I know that may sound unlikely but this is indeed the case. A simple diagnostic to see if that's what giving you problems is to check your Tiger Knee execution, if you can do them just fine with Sagat but can't with Fei(or Cammy), then that's why... Tiger Knee input is actually much easier (↓→↗) since it doesn't require a ↘ input. The Chicken Wing motion is longer (↙↓↘↗) and can be complicated to get right (due to the problems mentioned above). After missing it so much, the most common reaction is to speed up the whole motion due to the suspicion of not pressing the kick button on the right time. Now, this may well be the case, but if your issue is the miss of the ↘ input then you'll only be making it worse... My advice is to try to slow down the hand movement a little (not too much though) so you make sure the ↘ input is registered. And that has to be stressed, because this is actually very counter intuitive. In my opinion this is even more critical than the correct timing on the kick input. Use a input display (e.g. the lua script on one of the emulators that support it) if needed to troubleshoot this.
Another information worth pointing out is that, contrary to the popular belief (and even some Capcom stickers), the real motion is not ↙↓↘→↗. First, as was pointed out before, the → input is not needed. Also, the 1st input required doesn't has to be ↙, it can actually be any back direction (←/↙/↖ - similar to charge moves), meaning that you can be walking back and then go directly into ↓ and the Chicken Wing will still work. You can even do ↖↓↘↗ and it will also work (e.g. if you jump back). So, the correct motion is more like ←↓↘↗, with the ← interpreted the same way as on the charge moves (i.e. replaceable by its corresponding diagonals).
Lastly, know that doing a Chicken Wing from a crouch blocking position will give you unreliable results (sometimes the move will not come out). You can read more about it here.
--Born2SPD
Advanced Strategy
Wake Up Mind Games
Meaty fierce(standing) is one of the tactics I use quite often and it’s VERY risky because it can be reversed.
It’s a gamble that has a huge pay-off if your opponent guesses wrong or screws up.
Don’t use this against E.Honda though or any fighter that has a safe command reversal(I think T.Hawk has this advantage also).
The move itself(close standing fierce) has a very long animation and a very large amount of hit frames.
I quote a scene from The Princess Bride because it relates so well to all wake up mind games(if you hated the movie just skip it)
       Westley: Alright, where is the poison? The Battle of Wits has begun.
       Its ends when you decide and we both drink and find out who is right,
       and who is dead.

       Vincini: But it's so simple. All I have to do is divine from what I
       know of you: Are you the sort of man who would put the poison into
       his own goblet or his enemies? Now, a clever man would put the poison
       into his own goblet because he would know that only a great fool would
       reach for what he was given. I am not a great fool so I can clearly
       not choose the wine in front of you. But you must have known I was
       not a great fool--you would have counted on it--so I can clearly not
       choose the wine in front of me!

       Westley: You've made your decision then?

       Vincini: Oh not remotely!
The whole goal is to have more options than your opponent at that moment in time. They usually have 1 of 3 choices on the wake up:
1. Sit there and block 2. Go for the reversal 3. Block, Wait and React
You on the other hand can:
1. Go for the meaty fierce and gamble they miss their reversal and they eat a huge damaging combo of your choice.
2. Go for the meat fierce knowing they will more than likely block and not risk getting comboed and rush if for the throw as your fierce punch retracts.
3. Wait just outside of their range and see what they do. If they miss an uppercut you walk up and combo standing fierce into rekka kens. If they sit in defensive crouch go for the overhead or go for the throw. Or you can walk up and super, stuffing any move they stick out in the process.
4. If they don't have a "scooping" reversal that hits on the first frame you can do a semi meaty low forward kick and choose to wait and go for the throw. Or delay a flame kick. Or go for the overhead.
Depending on the kind of player you are facing your wake up games are all going to vary from doing risky meaty attacks to tick-baiting and faint moves. Your focus is not to solely rely on using the meaty fierce but to use it as one of your weapon options. The more options your opponents know you have the more confusion and frustration they will have.
Now of course you aren’t going to try as many risks if you have a low amount of life but if you have 50% or more then it may very well be worth it. Personally I will risk eating a DP just to see if they will or will not take the bait. If they do, then I know that they go for reversals. If they don’t then I know they don’t take chances and prefer to turtle.
However they react to what I do is valuable knowledge for the rest of the match.
Some will argue that meaty standing fierce is easily reversible(and it may be, I dunno) but if I didn’t have such good success with it then I wouldn’t use it. Use it on a match by match basis.
--Jumpsuit
Chicken Wing Combo Links
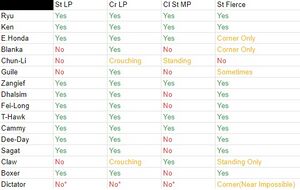
Fei has many links from Chicken wing that he can use to xxx into rekkas however each link works on some characters and some do not not for whatever reason so i created a visualizer for all the links he has I will elaborate on some of the exceptions and other important info bellow
E. Honda: St Fierce Only Works in the Corner
Blanka : St Fierce Only Works in the Corner
Guile : St Fierce whiffs when Chicken Wing 1st and 3rd hit are the only hits that land(2nd hit misses) otherwise it works fine
Claw : Cr Lp only works on crouchers and Fierce works on Standing only but Cl St. MP works on both
Dictator: all Buttons work as a cross up but from the front(where 99% of cw's land) you cant get any meaningful combo from a non croucher. St fierce is possible from a meaty Chicken wing but is practically impossible. Just mix a throw or sweep
Combos
Basic Combos
-Dizzy Combos (combos that will often dizzy the opponent)
Meaty Double Crouching Fierce - Main One Button Linking Combo, these are very hard to counter because it can only be countered by a perfect reversal. Risky but worth it if you think your opponent is not 100% consistent with their reversals.
Almost ALL of your combos will start with close standing fierce because it's the most damaging and the only practical one to use since New Fei can only combo off of his punches.
Multiple Standing Fierce(Handshake) - Not really a combo but if your opponents are really into using pokes to keep you away be sure to show them how friendly you are by sticking out your standing fierce "handshake" punch. It counters many moves cleanly and does very very good dizzy damage. I have seen opponents get hit with just 2 of these and get dizzy. This punch has good recovery time too so use it in close quarters.
Standard Combos (or combos to do when the opponent is dizzy)
Close Jab x1~4, crouch Short x Fierce Rekka Ken x3
Low Starter RFWA combo.
Jumping Roundhouse or Forward, close Fierce, Fierce Rekka Ken x3
5 Hit Rekka - Basic jump in combo that is easy and damaging. Use roundhouse or forward kick instead of fierce. Fierce has a funny habit of whiffing through your opponent if you try to hit too deeply. Use the kicks instead as they provide a little more reach and have a better chance of connecting. Follow up the jump in attack with a connecting close fierce and 2 in 1 into rekka punches for a deadly 5 hit combo. If you are lucky you can score a dizzy too! Try this combo with Fei's cross up forward kick.
Jumping attack (Forward or Roundhouse), close any Punch, Flame Kick
3 Hit Burn - Quick damage and a knockdown. Again, also try this with Fei's cross up forward kick.
Cross up Forward kick, close standing Strong, link crouching Fierce.
3 Hit Cross Up Links
Advanced Combos
Close Strong, close Fierce xx Fierce Rekka Ken x3
2-in-1 most damaging Rekka Ken Combo
Cross up Forward, close standing Strong(or standing Forward), standing Jab 2 in 1 into Short flame kick.
Special Combos VS Guile, Dhalsim, Zangief and Fei - It dizzies almost every time and does nearly 50% damage. It only works on these characters because of their hit animations. This is a link combo, not a chain.
Chicken Wing Link Combos
Roundhouse Chicken Wing, close Fierce xx Fierce Rekka Ken x3
High probability to stun your opponent
Roundhouse Chicken Wing (1-2 hits), Roundhouse Flame Kicks
juggles on airborne opponents
Super Juggle
Roundhouse Chicken Wing , Super Combo
If you connect with a rekka kick(chicken wing)you can juggle your opponents for additional damage if timed correctly. You can also do the opposite by hitting them with a super and then juggling with the rekka kick. The opportunities are quite random but you can usually tell if it will connect by the way your opponent is falling. Some say this is kinda fancy but every bit of energy you can drain helps.
--Jumpsuit
Match-ups
Fei Long is one of those underdog characters like Blanka, T.Hawk and Cammy. On paper they pretty much suck because of their arsenals or because of certain characteristics. But make no mistake, any fighter in this game can be deadly in the hands of the right player. Don't give into that counter character BS. It's amazing how so many "great players" crumbled at the SBO qualifying tourney a few years back because of the One Character Only rule. Anyways, that's a whole other subject....just stick with your character and learn every single match as best you can.
Fei Long does ok against pretty much everyone. I can't say that he "dominates" anyone at all.
He does really well VS Zangief and Chun Li
VS Everyone else Fei has a very hard time or barely breaks even and I will explain why in the in depth strategy section.
Fei has an extremely hard time against: Ryu, Ken, O.Sagat, Guile, E.Honda, ALL the boss characters, Dhalsim, Dee Jay. If there is a character not mentioned here then Fei has a pretty good chance of winning. Odds are usually against you. Above all, if you are facing a really good turtle you are going to have a hard time.
The biggest deciding factors that turn the odds in your favor are experience, execution and clutch. How quickly you take advantage of an opponents mistakes are going to be EXTREMELY IMPORTANT.
--Jumpsuit
Matchups classified with this diagram in mind, for the old characters i guessed the positions.
--Born2SPD
Serious Advantage Match-ups
Vs. Cammy:
- 7 - 3
Cammy is a rushdown character but her specials can be countered easily with your crouching Fierce or Chicken Wing or Flame Kick,also she lacks of a decent Super Meter build move compared to your Short Flame Kick, Rekka Ken its a better special for approach compared to Spiral Arrow, corner her to use your Rekka Ken and Chicken Wing mix ups.
Try to use your Super only after punish a Hooligan Combination with Chicken Wing at the corner, this is your main objective , to build meter at midscreen and then corner Cammy with a Chicken Wing Trap to Super Juggle, Chicken Wing wisely due that can be countered with Cannon Spike.
Vs. T. Hawk:
- 7 - 3
Your normals and specials are better than him crouching Fierce its your main poke and Condor Dive blocked punish, keep him away to prevent Typhoons is the key and also you can hit or miss with Flame Kick or Chicken Wing if he Condor Dive you.
Vs. Zangief:
- 7 - 3
Zangief have worst normals than you, but a better special to approach you with SPD traps, compared to T.Hawk its more ground based combat, punish his Lariat with crouching Fierce its your best option, air strategies are more effective due to Zangief's lack of options, but watch you he can SPD you in trade hits.
Advantage Match-ups
Vs. Blanka:
- 6.5 - 3.5
Fei Long have a nice bunch of Roll punish, try to stay in midscreen to prevent the Electricity traps
Ways to punish Blanka ball (on hit or on block) include:
- f.hk -- easy, low damage
- step forward cr.mp -- only a little bit harder to do and slightly more damage
- whiff rekka into 2 hit rekka combo -- much harder, big damage, and a knockdown
You can bully Blanka pretty well in neutral by using rekkas. If he predicts rekka he can beat it easily with slide, but you can beat slides by spamming far st.hp, which is almost completely safe and also pretty good at hitting him out of ball.
Vs. Chun-Li:
- 6 - 4
Chun Li had a bad projectile, try to Chicken Wing her or get her in the corner or Flame Kick her after she Triangle Jump you, Tensho Kyaku and Spinning Bird Kick are easily punished with crouching normals
Vs. O. T. Hawk:
Similar to New one but try to stay away from his specials
Fair Match-ups
Vs. Ken:
- 5.5 - 4.5
Vs. Fei Long (self):
Disadvantage Match-ups
Vs. Dhalsim:
- 3.5 - 6.5
One of the most bad matchups for Fei Long players, Dhalsim its superior in pokes and specials, so the main objective in your match its to wait if he Teleport or jumping with a Mummy or Drill for a Flame Kick trade hit or miss, you can Chicken Wing a Yoga Fire but Dhalsim can punish you easily depend of the strenght of the special.
Rekka Ken or Chicken Wing are best special starters, an LP Fire its the best Chicken Winged one and if you land before Dhalsim recover you can punish him with Crouching Fierce.
Rekka Kens are your best trade hit and approach option also the Flame Kick for reversals or close combat, your forward and Forward command move are a nice overhead meatty attack or anti crouch normals agasint him at close crouch combat, also if you got full your Super meter first use it as soon as possible, Yoga Inferno will kill your Rekka Ken strategies, short Flame Kicks are better metter builders than Short Yoga Blast but can be punished easily so use it as an Anti Air instead.
Vs. O. Ken:
Old Ken its an Anti Air God in a lot of terms, jump him will be a riskful option, wait if he is spamming Hadokens to Chicken Wing him and then go to a ground close combat and if he whiffs a Fierce Shoryuken will be the moment to punish him with a close Fierce to Rekkas 2-in-1.
Flame Kick its only useful if he jumps randomly, but Old Ken objective its about zoning and punish jumping opponents but ground and close combat due to the lack of Kick Specials will be his weakness
Vs. M. Bison (dictator):
- 3.5 - 6.5
Dictador objective will be poke with standing Forwards and charge for use a random special and stay at midscreen, Chicken Wing its useful against a Stomp or Devil Reverse, but its the most punished special with Dictador's jumping diagonal normals, or you can walk and then punish the whiffed air specials with Rekkakens.
Psycho Crushers are main problem due to the lack of a decent escape or counter, but Rekka Kens als can be punished with a crouching Roundhouse so watch out at far distance, corner him it's difficult so try to punish his Scicross Kicks with Flame Kicks, als if he cross travelled you with a blocked Psycho Crusher Fei can trap him in the corner with Chicken Wing and Rekka Mixups.
Flame Kick its your main special starter at the round ,but try to use the Short one to prevent a crouching Roundhouse punish also at the rest of the match.
Vs. Ryu:
- 3.5 - 6.5
Many seasoned players will say that this match is in Fei Long's favor but don't be fooled. Fighting Shotokans(especially good ones)can be very frustrating for Fei Long.
Ryu's Objective
Ryu's main goal(if they are smart) will be to keep you away using zone tactics, slowly chipping away life with fireballs and countering your jump in attempts with low sweeps. The only time Ryu is going to get very aggressive on you is when you are knocked down or if he has you cornered in a fireball trap. That's when he usually goes for the crossup. Watch out for these attacks along with followup mindgames like overhead strong or low kicks. The best policy is NOT to give Ryu the chance to cross you up. Once you are down and he goes for the crossup you are at his mercy. You pretty much have to guess correctly to get out of that spot.
Fei Long's Objective
As Fei Long, your goal is to stay just within your fierce rekka ken range. At this range you give Ryu a very limited number of options. The options he has at this range are rather dangerous ones too because if he makes a wrong move or you anticipate his attacks you can end the match very quickly.
Watch Out For The Following
1. FIREBALLS - Yep, you guessed it. Good ol' Hadokens in your face, stuffing you like a Thanksgiving Turkey! If you aren't accustomed to blocking on reaction as you walk forward then get used to it. Ryu will do anything and everything to keep your pressure off of him so keep moving forward until you are withing striking distance. Beware of RED fireballs because they can knock you down and at this range it sets you up perfectly for a crossup barrage so be careful! Remember, a smart Ryu will do all he can to keep you away and beat you like E.Honda(fireball, low roundhouse, rinse, repeat).
2. HURRICANE KICKS - I never knew just how deadly these babies were until recently. The problem is that they are so fast and bash you like a damn baseball bat....and they knock you down to boot! The best counter for this(if you see it coming)is a short flame kick. Sometimes Ryu players will use the roundhouse version of this move. You can duck and let them fly over you and then use the fierce rekka punch for a free counter. It knocks Ryu right out of the hurricane kick for a free knockdown.
3. REVERSAL REVERSALS - Nothing is more frustrating than perfectly timing a flame kick reversal only to be stuffed with a shoryuken reversal that reverses your reversal. It's a really tough thing to deal with because you have to guess what Ryu is going to do. Is he going to throw me? Is he going to sweep me? Is he going to do a shoryuken? Is he going to wait for my reversal attempt and then counter? Is he going to do an overhead? Since Fei Long's flame kick isn't 100% invincible you have to sorta be careful on when you use it.
Normal Pokes
Ryu isn't a very "fat" character and most of his limbs aren't punishable(ie Dhalsim, E.Honda, Blanka). Good pokes to use vs Ryu are low fierce, low strong(this move has good range), low roundhouse and standing fierce. Use these when you are playing footsie games with Ryu.
Low Fierce - Probably one of Fei's best normal pokes. It has really good priority, relatively safe to use at close or max distance and it has very good dizzy damage. Sometimes 2 of these is enough for a dizzy. Most people will agree that doing a meaty fierce on wake up is a very good strategy to use(and I agree). If your opponent is a reversal junkie I would risk it if you had the energy to spare. NOTE: For some strang and screwed up reason Balrog(Boxer)can block Fei Long's low fierce standing up! Easily the worst thing that can happen to Fei because this is probably one of his hardest fights.
Low Strong - This move is pretty useful even if it doesn't do all that much damage. It has a stabbing like property and it works great as a close poke. Use it against Blanka if you block his roll. You can walk up and tag him with low strong most of the time.
Low Roundhouse - Probably the weakest of his pokes because of it's limited range. Counters Guile's low forward most of the time and it's a good setup move if it connects for a knockdown. low fierce
Using Rekka-Ken Punches On Ryu
Rekka punches are Fei's best weapon against Ryu. When fighting a Ryu player who is unfamiliar with this match you may even think that Fei Log was custom made as a Shoto counter character but I assure you he is not, lol!
As mentioned before try to stay within fierce rekka striking distance. Ryu's normal moves are short range so his options are limited to fireballs, hurricane kicks, jumping back and psychic dragon punches.
--Jumpsuit
Vs. Sagat:
- 3.5 - 6.5
Vs. Vega (claw):
- 3.5 - 6.5
Serious Disadvantage Match-ups
Vs. Balrog (boxer):
- 3 - 7
Boxer can poke easily Fei Long with normals and Dash Punches and Upper, try to link Chicken Wing or poke with Crouch Fierce, main objective its to stun Boxer and then use a Rekka combo, a jumping Boxer its a vulnerable one for Fei Long, use Flame Kick or crouch traps in case of.
Vs. Dee Jay:
- 2.5 - 7.5
Dee Jay have a projectile option that can't be dangerous as a Sonic Boom or Hadoken but can't be evaded easily with Jump Ins due to the low random speed, Chicken Wing a Max Out if you are far or try to stay close with whiff Rekkas, Fei Long must have DJ at medium distance so he can be crossuped easilty, a crouching Fierce its a main punisher for a Jacknifing Dee Jay.
Vs. E. Honda:
- 3 - 7
E.Honda its a nightmare for rushdown characters because of his low but strong normals and specials along with holds and cross up mixups or his command throw for punish whiffs.
Fei Long have better aereals and can trade hits with a crouch Fierce or punish a Sumo Headbutt with crouch Roundhouse , also he can cross up him with a jumping Forward easily because its a width hitbox for combos.
Vs. Guile:
- 2.5 - 7.5
This is one of my favorite fights. A smart guile can almost ALWAYS keep fei away with booms and trading hits... and again this is where staying just outside his low forward kicks range (aka max Rekka punch range). If you are quick enough you can punish Guile for missed low forward kicks. Take it from me, you will eat a lot of low kicks and a lot of booms so be on your guard. Low fierce works great because it can counter Guile's low attacks cleanly most of the time. Your best bet is to not let Guile breathe and once you are inside use tick throws... bait him into missing his reversal flash kicks and punish him with big damage rekka combos... just dont let him breath because once he pushes you back out its back to square one again and you have to get back in to do damage.
--Jumpsuit
Vs. O.Sagat:
Worst matchup ever, you can punish whiff High Tiger Shots with crouch Fierce but try to punish Low ones with Chicken Wing, medium distance its Old Sagat main weakness


