Introduction
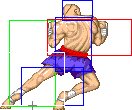
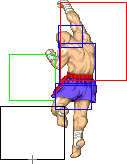
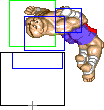
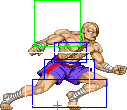
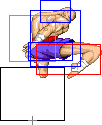
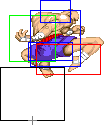
Old Sagat, sometimes called Super Sagat, is the SSF2 version of Sagat. However, due to differences in the game engine, he is actually stronger in this game due to gaining other cancelable moves. Particularly, the second active part of his standing Short and Forward kicks can be canceled into special attacks, for devastating combos or ground control.
Old Sagat's moves are mostly similar to those of N.Sagat. The differences one will notice the most is that his Tiger shots recover faster and he has no super. In addition to it, as all characters from SSF2, he can not soften throws. His Tiger Uppercuts knock down on the first hit and do not have any juggle properties. Finally, he does not have a cross-up jumping attack such as N.Sagat's Forward kick, and some normal moves have different frame data while his tigers have better defensive hitboxes.
Picking Old Sagat
To select O.Sagat, choose Sagat and then press ↑ ↓ ↓ ↑ Jab/Fierce, pressing Short simultaneously with the punch button for the alternate color.
| Normal | Secondary |
 |

|
--Born2SPD
Strengths & Weaknesses
Strengths
- Most normals have good reach and/or good damage.
- J hk is a great defensive/offensive move.
- Has a fireball that hits low, and can't be low profiled.
- Fireballs can travel at fast speeds, and do a lot of dizzy on hit.
- St lk is a great tool in neutral to beat normals and set up frame traps. And can be cancelled into low tiger to push them away when close.
- Uppercut has fast startup, and fast rise speed makes him hard to safejump/cross up.
- Some of the best zoning in the game.
Weaknesses
- Big hurtbox.
- Poor mobility/slow.
- One of the worst throw ranges.
- Can't tech throws.
New & Old Versions Comparison
Here is the list of differences:
- Obvious stuff: O.Sagat can not tech throws and does not have a Super;
- O.Sagat has a slightly smaller hurtbox than N.Sagat but it's unknown if it has any relevance. Note that this affects most standing normals as well so it will not be listed on the normal moves differences list;
- O.Sagat has a faster pre-jump animation by 2 frames;
- O.Sagat has some differences in some of his normals:
- Close Standing Strong has slower startup;
- Far Standing Strong can be special canceled;
- Close Standing Fierce has slower startup and can not be special canceled but does a more damage;
- Far Standing Fierce does more damage;
- Crouching Fierce does more damage;
- Second hit of Standing Short can be special canceled and it has better low-level priority but worse higher-level priority;
- Crouching Short does more damage;
- Standing Forward's first hit does a little less damage but more random damage. Second hit can be special canceled and has better priority as a poke but worse priority as anti-air;
- Standing Roundhouse first active part does a little more random damage;
- Crouching Roundhouse does more damage;
- Both Jumping Fierces do more damage;
- Diagonal Jumping Forward can not be used as a cross-up attack;
- Both Jumping Roundhouses do more damage;
- High Tiger Shots have the same recovery for all versions, and also has better arm and foot hurtboxes;
- Low Tiger Shots have faster startup, the same recovery for all versions, plus a better hurtbox at his fist;
- Fierce Tiger Uppercut is a single hit move so it always does full damage;
Video Overview
Moves Analysis
Disclaimer: To better understand the diagrams, read this.
Normal Moves
Ground Normals
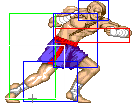
- Close Standing Jab: (Base max activation range: 42)
| Damage | 12[1] |  |
 |

|
| Stun | 0~5 | |||
| Stun Timer | 40 | |||
| Chain Cancel | No | |||
| Special Cancel | Yes | |||
| Frame Advantage | +5 | |||
| Frame Count | 3 | 4 | 4 | |
| Simplified | 1 + 3 | 4 | 4 | |
Not especially useful, decent frame advantage, and you can combo into uppercut or knee by cancelling it, can also be used in tick throwing. Just keep in mind that this will whiff completelly vs Blanka and Cammy if they're crouching.
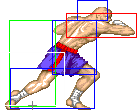
- Far Standing Jab:
| Damage | 12[1] | 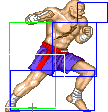 |
 |
 |

|
| Stun | 0~5 | ||||
| Stun Timer | 40 | ||||
| Chain Cancel | No | ||||
| Special Cancel | Yes | ||||
| Frame Advantage | +4 | ||||
| Frame Count | 3 | 4 | 4 | 1 | |
| Simplified | 1 + 3 | 4 | 5 | ||
Similar to Close Standing Jab, this move sees not much use, can function as an ok counter poke, or anti air on occasion, but Sagat usually has better options.
- Crouching Jab:
| Damage | 12[1] |  |
 |
 |

|
| Stun | 0~5 | ||||
| Stun Timer | 40 | ||||
| Chain Cancel | No | ||||
| Special Cancel | Yes* | ||||
| Frame Advantage | +6 | ||||
| Frame Count | 2 | 2 | 3 | 4 | |
| Simplified | 1 + 4 | 3 | 4 | ||
Fast for a Sagat normal, links into some good normals, so it's ok for setting up block strings at close range.
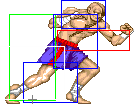
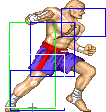
- Close Standing Strong: (Base max activation range: 29)
| Damage | 22[1] |  |
 |
 |

|
| Stun | 5~11 | ||||
| Stun Timer | 60 | ||||
| Chain Cancel | No | ||||
| Special Cancel | Yes* | ||||
| Frame Advantage | +5 | ||||
| Frame Count | 4 | 6 | 6 | 1 | |
| Simplified | 1 + 4 | 6 | 7 | ||
A safe move, but it's pretty much used exclusively for combos, to cancel it into uppercut. In O.Sagat's case it's better to use Standing Forward instead though, since you can cancel the second hit, which does more damage and way more dizzy. O.Sagat's version of this move actually has a slower startup, but this doesn't really mean much.
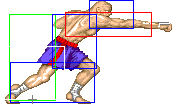
- Far Standing Strong:
| Damage | 22[1] |  |
 |
 |
 |
 |

|
| Stun | 5~11 | ||||||
| Stun Timer | 60 | ||||||
| Chain Cancel | No | ||||||
| Special Cancel | Yes* | ||||||
| Frame Advantage | +5 | ||||||
| Frame Count | 3 | 2 | 4 | 4 | 4 | 1 | |
| Simplified | 1 + 5 | 4 | 9 | ||||
A faster version of Far Standing Fierce, but with less damage and reach. It hits mid versus Boxer, Dhalsim, O.Fei Long, Sagat, T.Hawk and Zangief, i.e. it will not whiff if they're crouching. In O.Sagat's case this can be special cancelled which makes this move very good on some matchups like vs Boxer or Dhalsim.
- Crouching Strong:
| Damage | 22[1] |  |
 |
 |

|
| Stun | 5~11 | ||||
| Stun Timer | 60 | ||||
| Chain Cancel | No | ||||
| Special Cancel | Yes* | ||||
| Frame Advantage | +8 | ||||
| Frame Count | 2 | 2 | 4 | 6 | |
| Simplified | 1 + 4 | 4 | 6 | ||
An ok move to use in neutral, since it's fairly fast, and has acceptable priority. Ok in combos thanks to excellent frame advantage, also cancels, which helps in zoning.
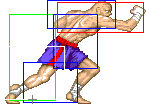
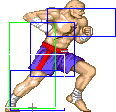
- Close Standing Fierce: (Base max activation range: 53)
| Damage | 28[2] |  |
 |
 |

|
| Stun | 10~16 | ||||
| Stun Timer | 80 | ||||
| Chain Cancel | No | ||||
| Special Cancel | No | ||||
| Frame Advantage | +3 | ||||
| Frame Count | 6 | 8 | 10 | 1 | |
| Simplified | 1 + 6 | 8 | 11 | ||
Can somewhat be used as an anti air, but Sagat has better options for that. O.Sagat's version of this move do a little more damage, but has a slower startup, which results in this move not being special cancellable. This isn't really useful for O.Sagat.
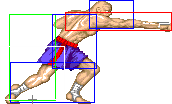
- Far Standing Fierce:
| Damage | 28[2] |  |
 |
 |
 |
 |

|
| Stun | 10~16 | ||||||
| Stun Timer | 80 | ||||||
| Chain Cancel | No | ||||||
| Special Cancel | No | ||||||
| Frame Advantage | -7 | ||||||
| Frame Count | 4 | 3 | 6 | 10 | 12 | 1 | |
| Simplified | 1 + 7 | 6 | 23 | ||||
A great attack if used right, excellent range makes it good to beat fireball startup/trade vs other characters. Can also be good for punishing, and anti air. O.Sagat's version of this move does more normal damage as well as more random damage than N.Sagat's.
- Crouching Fierce:
| Damage | 28[2] |  |
 |
 |

|
| Stun | 10~16 | ||||
| Stun Timer | 80 | ||||
| Chain Cancel | No | ||||
| Special Cancel | No | ||||
| Frame Advantage | +3 | ||||
| Frame Count | 6 | 6 | 12 | 1 | |
| Simplified | 1 + 6 | 6 | 13 | ||
Outside of trading with some attacks, such as Honda's HHS, this move is not too useful. Acceptable priority and reach. O.Sagat's version of this move does more normal damage as well as more random damage than N.Sagat's.
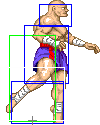
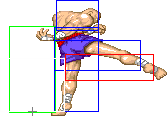
- Close/Far Standing Short:
| Damage | 12[0] + 12[0] | 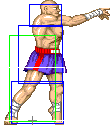 |
 |
 |
 |
 |
 |

|
| Stun | 0~5 + 0~5 | |||||||
| Stun Timer | 40 + 40 | |||||||
| Chain Cancel | No | |||||||
| Special Cancel | Yes / Yes* | |||||||
| Frame Advantage | +2 / +4(+3) | |||||||
| Frame Count | 2 | 1 | 2 | 2 | 2 | 2 | 3 | |
| Simplified | 1 + 3 | 2 | 2 | 7 | ||||
This move has good reach, is a great counterpoke and is good to set up frame traps. Unlike N.Sagat, O.Sagat can cancel the 2nd hit into specials, which does make O.Sagat's zoning potential even more strong on certain matchups. With that said, as a counterpoke O.Sagat's version of this move has worse priority on most matchups, due to the different leg hurtbox placement during the 2nd hit which makes it vulnerable to a multitude of mid level normals on a lot of matchups (e.g. Shoto's Standing Punches, Chun's Standing Fierce, Blanka's Far Standing Rh, Sagat's Standing Fierce, etc). O.Sagat's version is only better (priority wise) than N.Sagat's against Fei's Crouching Fierce and Crouching Short as well as Deejay's Far Standing Short and Crouching Short.
- Crouching Short:
| Damage | 12[1] |  |
 |
 |

|
| Stun | 0~5 | ||||
| Stun Timer | 40 | ||||
| Chain Cancel | No | ||||
| Special Cancel | Yes* | ||||
| Frame Advantage | +4 | ||||
| Frame Count | 4 | 4 | 4 | 1 | |
| Simplified | 1 + 4 | 4 | 5 | ||
Good priority, but Sagat usually has better options in this situation. If done meaty, you can link into Standing Short. This move is also commonly used as a kara cancel into Tiger Uppercut, to avoid getting up when going for a deep anti air.
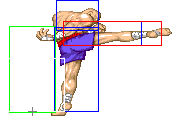
- Close/Far Standing Forward:
| Damage | 12[1] + 18[1] |  |
 |
 |
 |
 |
 |

|
| Stun | 5~11 + 5~11 | |||||||
| Stun Timer | 60 + 60 | |||||||
| Chain Cancel | No | |||||||
| Special Cancel | Yes / Yes* | |||||||
| Frame Advantage | +1 / +3(+2) | |||||||
| Frame Count | 2 | 1 | 2 | 2 | 3 | 4 | 6 | |
| Simplified | 1 + 3 | 2 | 2 | 13 | ||||
Another great normal for Sagat. It functions as a defensive and offensive tool, can be used like Far Standing Fierce to counter fireballs, and punish whiffed moves (it comes out a little faster than Fierce but has a little less horizontal range, also has a completelly different hit/hurtboxes, obviously). Unlike N.Sagat, O.Sagat can cancel the 2nd hit into specials, which does make O.Sagat's combo potential even more dangerous. It's also important to note that they also differ in priority on the 2nd hit: N.Sagat's is better as anti air, while O.Sagat has less vulnerabilities to mid level normals (e.g. Chun's Crouching Rh, Blanka's Crouching Fierce, Zangief's Crouching Punches, Cammy's Standing Rh, Dhalsim's defensive Crouching Punches, Boxer's Crouching Strong, Dictators Standing Forward, etc). Priority wise, O.Sagat's version of this move is better. O.Sagat's version of this move does less normal damage on the 1st hit but does more random damage on that same hit than N.Sagat's.
- Crouching Forward:
| Damage | 22[1] |  |
 |
 |
 |

|
| Stun | 5~11 | |||||
| Stun Timer | 60 | |||||
| Chain Cancel | No | |||||
| Special Cancel | Yes* | |||||
| Frame Advantage | +7 | |||||
| Frame Count | 2 | 2 | 4 | 3 | 4 | |
| Simplified | 1 + 4 | 4 | 7 | |||
Good for zoning, usually when this lands you want to cancel it, or link to itself. Decent meaty to lead into high damage combos. Also fairly fast considering the reach.
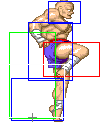
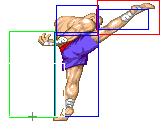
- Close/Far Standing Roundhouse:
| Damage | 16[2] / 22[2] |  |
 |
 |
 |
 |
 |

|
| Stun | 10~16 / 1~7 | |||||||
| Stun Timer | 80 / 70 | |||||||
| Chain Cancel | No | |||||||
| Special Cancel | Yes / No | |||||||
| Frame Advantage | -7 / -4 | |||||||
| Frame Count | 2 | 1 | 3 | 3 | 6 | 7 | 10 | |
| Simplified | 1 + 3 | 3 | 3 | 23 | ||||
Great anti-air and anti-cross-up. The 1st hit can also be cancelled into specials. As O.Sagat this is better left as an anti air only; for combos it's better to cancel Standing Forward's after the 2nd hit instead, since that will give you the most damage and dizzy available. O.Sagat's version of this move does more random damage on the first hit than N.Sagat's, but this doesn't really mean much.
- Crouching Roundhouse:
| Damage | 30[2] |  |
 |
 |
 |

|
| Stun | 5~11 | |||||
| Stun Timer | 130 | |||||
| Chain Cancel | No | |||||
| Special Cancel | No | |||||
| Frame Advantage | -1 | |||||
| Frame Count | 4 | 2 | 6 | 8 | 9 | |
| Simplified | 1 + 6 | 6 | 17 | |||
Sagat's sweep attack. This is one of the best sweeps in this game, if not the best(at least among the non-slide sweeps). It has better range than most sweeps, so Sagat is able to safely trip jump-ins that characters such as shotos and Zangief can not, while also having a fairly good recovery speed. It's also excellent at counter poking. O.Sagat's version of this move does considerably more damage than N.Sagat's.
Aerial Normals
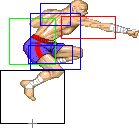
- Neutral Jumping Jab:
| Damage | 12[2] |  |
|
| Stun | 1~7(-2) | ||
| Stun Timer | 40 | ||
| Frame Count | 3 | ∞ | |
Good air to air. O.Sagat's version of this move does more random damage than N.Sagat's, but this doesn't really mean much.
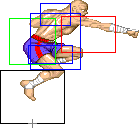
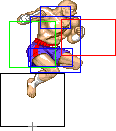
- Diagonal Jumping Jab:
| Damage | 12[2] |  |
 |
 |
 |

| |
| Stun | 1~7(-2) | ||||||
| Stun Timer | 40 | ||||||
| Frame Count | 3 | 20 | 4 | 4 | ∞ | ||
| Simplified | 3 | 24 | ∞ | ||||
Decent air to air, like Neutral Jumping Jab. Also note that, due to a CAPCOM mistake, some of the recovery frames also have a hitbox, but this isn't really abusable in any meaningful way.
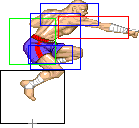
- Neutral Jumping Strong:
| Damage | 22[2] |  |
 |
 |
 |

|
| Stun | 5~11 | |||||
| Stun Timer | 50(+10) | |||||
| Frame Count | 3 | 14 | 4 | 4 | ∞ | |
| Simplified | 3 | 14 | ∞ | |||
Slightly worse priority than Neutral Jumping Jab, but better damage. O.Sagat's version of this move does more random damage than N.Sagat's, but this doesn't really mean much.
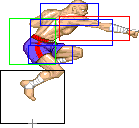
- Diagonal Jumping Strong:
| Damage | 22[3] |  |
 |
 |
 |

|
| Stun | 5~11 | |||||
| Stun Timer | 50(+10) | |||||
| Frame Count | 3 | 14 | 4 | 4 | ∞ | |
| Simplified | 3 | 14 | ∞ | |||
Good forwards reach, but average priority, most characters will have an air to air of their own to beat this usually. O.Sagat's version of this move does more random damage than N.Sagat's, but this doesn't really mean much.
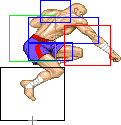
- Neutral Jumping Fierce:
| Damage | 28[2] |  |
 |
 |
 |

|
| Stun | 11~17(-1) | |||||
| Stun Timer | 60(+20) | |||||
| Frame Count | 5 | 10 | 4 | 4 | ∞ | |
| Simplified | 5 | 10 | ∞ | |||
Can be an ok defensive move, will beat a handful of attacks, but Neutral Jumping Rh is favoured most of the time. O.Sagat's version of this move does considerably more damage than N.Sagat's.
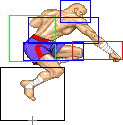
- Diagonal Jumping Fierce:
| Damage | 28[2] |  |
 |
 |
 |

|
| Stun | 11~17(-1) | |||||
| Stun Timer | 60(+20) | |||||
| Frame Count | 5 | 8 | 4 | 4 | ∞ | |
| Simplified | 5 | 8 | ∞ | |||
Doesn't seem to have any particular use, Diagonal Jumping Rh is better usually. O.Sagat's version of this move does considerably more damage than N.Sagat's.
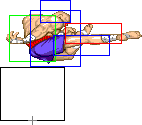
- Neutral Jumping Short:
| Damage | 14[2] |  |
|
| Stun | 1~7(-2) | ||
| Stun Timer | 40 | ||
| Frame Count | 2 | ∞ | |
Ok reach, decent air to air. Good for neutral jumping fireballs while having protection, as Sagat's hitbox does not become more vulnerable. O.Sagat's version of this move does more random damage than N.Sagat's, but this doesn't really mean much.
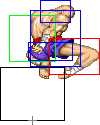
- Diagonal Jumping Short:
| Damage | 16[2] |  |
|
| Stun | 1~7(-2) | ||
| Stun Timer | 40 | ||
| Frame Count | 2 | ∞ | |
Great defensive move, can be ok for safejumps, and vs Dictator, since he struggles to deal with it in some cases. O.Sagat's version of this move does more random damage than N.Sagat's, but this doesn't really mean much.
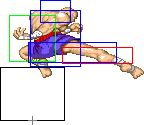
- Neutral/Diagonal Jumping Forward:
| Damage | 22[2] |  |
 |
 |
 |

|
| Stun | 5~11 | |||||
| Stun Timer | 50(+10) | |||||
| Frame Count | 1 | 2 | 20 | 3 | ∞ | |
| Simplified | 3 | 20 | ∞ | |||
Mostly outclassed by Neutral Jumping Rh, but has much more active frames. O.Sagat's version of this move does more random damage than N.Sagat's, but this doesn't really mean much.
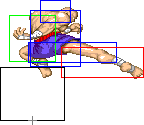
- Neutral Jumping Roundhouse:
| Damage | 30[2] |  |
 |
 |
 |

|
| Stun | 11~17(-1) | |||||
| Stun Timer | 60(+20) | |||||
| Frame Count | 2 | 3 | 8 | 5 | ∞ | |
| Simplified | 5 | 8 | ∞ | |||
A pretty awesome move, good priority and damage, and great area of effect. Many characters can't punish this from a distance, so it's good for baits, and neutral jumping fireballs when close. O.Sagat's version of this move does considerably more damage than N.Sagat's.
- Diagonal Jumping Roundhouse:
| Damage | 30[2] |  |
 |
 |
 |

|
| Stun | 11~17(-1) | |||||
| Stun Timer | 60(+20) | |||||
| Frame Count | 2 | 3 | 8 | 5 | ∞ | |
| Simplified | 5 | 8 | ∞ | |||
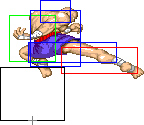
Sagat's main jump in, good range and damage. Some characters may be forced to block or trade unfavourably with a normal in some situations. O.Sagat's version of this move does considerably more damage than N.Sagat's.
Throws
Sagat has only one throw, which is a shoulder toss. It is performed by moving the joystick left or right and pressing either Strong or Fierce. The direction you move the stick is the direction your enemy will get tossed at. This does around 22% damage.
Sagat's throw range is not very good: he is only at an advantage against Fei Long. Boxer's Fierce throw and T. Hawk's normal throws have less range, but those characters have longer reach options.
- Tiger Carry: (←/↖/↗/→ + Strong/Fierce)
| Damage | 32 | 
| |
| Stun | 7~13 | ||
| Stun Timer | 100 | ||
| Range | (from axis) | 48 | |
| (from throwable box) | 16 | ||
Special Moves
- Tiger Shot a.k.a. High Tiger: (↓↘→ P)
Detailed Input: (↓ [7~14f] ↘ [7~14f] → [10/9/7f] Jab/Strong/Fierce)
- Startup:
 |
 |
| ||
| Frame Count | 6 | 3 | 1 | |
| Simplified | 10 | |||
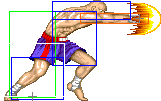
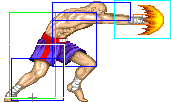
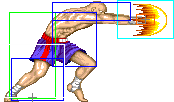
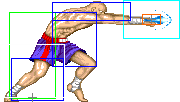
- Active:
- Jab Version:
| Damage | 18[0] | 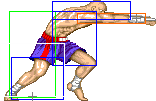 |
 |
 |
 |
|
| Stun | 9~15 | |||||
| Stun Timer | 100 | |||||
| Frame Count | 1 | 1 | 1 | 2 | 1... | |
| Simplified | 38 | |||||
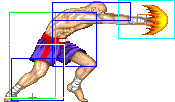
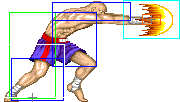
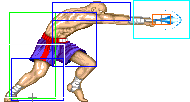
- Strong Version:
| Damage | 20[0] | 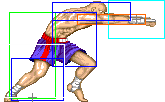 |
 |
 |
 |
|
| Stun | 9~15 | |||||
| Stun Timer | 100 | |||||
| Frame Count | 1 | 1 | 1 | 2 | 1... | |
| Simplified | 38 | |||||
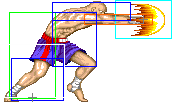
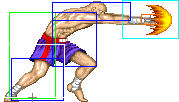
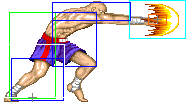
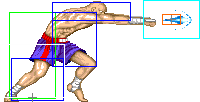
- Fierce Version:
| Damage | 22[0] |  |
 |
 |
 |
|
| Stun | 9~15 | |||||
| Stun Timer | 100 | |||||
| Frame Count | 1 | 1 | 1 | 2 | 1... | |
| Simplified | 38 | |||||
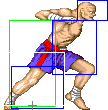
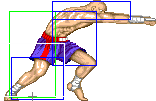
Sagat shouts his trademark move name and throws a projectile while standing still. The strength of the punch determines the speed and damage of the projectile, being Jab the lowest and Fierce the highest. This can be avoided by crouching under the projectile.
- Ground Tiger Shot a.k.a. Low Tiger: (↓↘→ K)
Detailed Input: (↓ [7~14f] ↘ [7~14f] → [10/9/7f] Short/Forward/Roundhouse)
- Startup:
 |
 |

| ||
| Frame Count | 6 | 3 | 1 | |
| Simplified | 10 | |||
- Active:
- Short Version:
| Damage | 17[0] |  |
 |
 |
 |

|
| Stun | 9~15 | |||||
| Stun Timer | 100 | |||||
| Frame Count | 1 | 1 | 1 | 2 | 1... | |
| Simplified | 38 (46 in HSF2) | |||||
- Forward Version:
| Damage | 18[0] |  |
 |
 |
 |

|
| Stun | 9~15 | |||||
| Stun Timer | 100 | |||||
| Frame Count | 1 | 1 | 1 | 2 | 1... | |
| Simplified | 38 (46 in HSF2) | |||||
- Roundhouse Version:
| Damage | 20[0] |  |
 |
 |
 |

|
| Stun | 9~15 | |||||
| Stun Timer | 100 | |||||
| Frame Count | 1 | 1 | 1 | 2 | 1... | |
| Simplified | 38 (46 in HSF2) | |||||
Sagat shouts his trademark move name and throws a projectile while crouching. The kick version determines the speed and damage of the projectile, being Short the lowest and Roundhouse the highest. This move hits low, so the enemy must either evade it with a jump or special move, or crouch block. This move is Sagat's main zoning tool. The Short version is quite slow, while the Roundhouse one is the fastest projectile in the game. Being also the one with fastest recovery (but Sonic Booms, which require charge), it becomes a great way of controlling the ground. No character can defeat Old Sagat in a projectile war: they will eventually be forced to jump, block or try to evade the wave of projectiles somehow. As a few moves quickly go over low Tigers, it is a good idea to mix some High Tigers in and keep the enemy guessing.
- Tiger Uppercut: (→↓↘ P)
Detailed Input: (→ [7~14f] ↓ [7~14f] ↘ [10/9/7f] Jab/Strong/Fierce)
Sagat performs a punch similar to a Shoryuken that hits only once, but with higher damage. This move is invulnerable for a split second, making it an unavoidable anti-air if timed right.
- Tiger Knee Crush: (↓→↗ K)
Detailed Input: (↓ [7~14f] → [7~14f] ↗ [10/9/7/1f] Short/Forward/Roundhouse/any K if you are at a jumpable state)
- Startup + Active:
- Recovery:
 |
 |
 |

| |
| Frame Count (Short) | 6 | 6 | 1 | 7 |
| Simplified (Short) | 20 | |||
| Frame Count (Forward) | 6 | 6 | 2 | 7 |
| Simplified (Forward) | 21 | |||
| Frame Count (Rh) | 6 | 6 | 3 | 7 |
| Simplified (Rh) | 22 | |||
Sagat performs an aerial knee bash attack that hits up to two times. The range, damage and recovery are determined by the kick version, being Short the shortest range and recovery and lowest damage; and Roundhouse the longest reach, longest recovery and highest damage. The first attack does from 14% to 16% damage and forces standing hitstun on the enemy while the second hit does 11% damage and causes a full knock down. This move can be used to avoid projectiles if timed right, finish combos and quickly get close to the enemy, often surprising him with a throw or Tiger Uppercut. Note that with N.Sagat this move is easier to perform because of his 2-frame longer pre-jump animation.
Misc Animations
Jump Animations
- Neutral/Back/Forward Jump:
O.Sagat's prejump animation is the fastest on the game(tied with Dhalsim and Dictator), unlike N.Sagat's that was nerfed by 2 frames. This not only helps with his aerial game, but also makes him very "slippery". This is certainly one of the aspects that make him the top tier that he is. On the other hand, the Tiger Knee input is less lenient with O.Sagat since you have less time to enter the K input before jumping, but that can be easily dealt with if you kara-cancel a normal move into Tiger Knee.
The landing recovery has a special property which allows it to be canceled into certain actions. At the first landing frame, you can perform throws (including command throws), and on the second landing frame, you can start another jump, attack with a normal or special move, or block. Blocking not being until the second landing frame, as well as hitbox-hurtbox interactions having priority over throwbox-throw hurtbox is why sweeps work as anti airs in this game.
Things are different when jumping over your opponent, however. In that situation it's possible to walk back/forward, to jump again or to even block on the first landing frame! Strangely, if a throw is timed on the first landing frame of a jump that crosses over, a throwbox will never come out, even though that input will result in a normal coming out 2 frames later (like it normally would). Anyway, being able to block on the first landing frame can help a little bit on some safe jump crossup setups, or maybe in other situations as well if your character has a huge jump arc.
The Basics
From far away, throw low tigers to pin them down. When they jump, Tiger uppercut of they are close enough, if not do standing FP to knock them out of the air.
When jumping, always use jump RH, it magically beats a million things and does massive damage on connect. If you happen to land a jumping RH, combo into either: 1. low forward kick, roundhouse tiger shot (sometimes dizzies) 2. stand light kick (1-2 hits depending on distance), roundhouse tiger shot 3. if you land DEEP, 1-2 hit standing forward kick with OPTION of either 1-hit Tiger uppercut or roundhouse tiger knee for 1-2 hits.
Basically what you want to choose as your combo depends on your distance from your opponent. If you want to go for a quick dizzy and you've landed deep enough, go for the low forward kick into tiger shot. However, this doesn't always combo if you're not close enough and also doesn't always dizzy. A more reliable combo is option 2, where the stand light kick ALWAYS connects for 1-2 hits and then the tiger shot is guaranteed. If you get lucky enough to connect the jump RH and you land deep, do the standing forward and judging on the results, either cancel into Tiger uppercut after 1 hit or go for the gold with the 2-hit tiger knee if the forward is deep enough to land twice.
What do you do if your jump RH doesn't connect, and they block? In that case either do a blocked standing light kick into tiger shot, or just do the roundhouse tiger shot by itself as soon as you land. This will keep them pinned and taking a bit of block damage.
Now if you end up close, O.Sagat has two awesome options. One is simply his low roundhouse, which is very fast, has decent range, and does a crapload of damage. If you time it right, you can play a wicked game of footsies that will really damage the opponent if they're just slightly out of range and keep whiffing, and you just sweep to punish them afterwards. The other option is just stand light kick, with the option of following with a roundhouse tiger shot. This is good for guaranteed block damage and you don't have to worry about missing and getting counter-swept, since the stand light kick has considerable range and keeps them blocking.
My only warning with O.Sagat is getting over-zealous. DON'T do too many "psychic" tiger uppercuts or you will be getting your ass handed to you. Also, don't try to play TOO many footsies with stand short or crouching roundhouse and just assume you're going to hit every time...sometimes you can get stuffed with DPs or special moves and it can get frustrating to get back to your "zone game" when the opponent has control of the round after a knockdown.
Advanced Strategy
Combos
Bread & Butter
- st.short (hits twice) xx Fierce Tiger Uppercut or RH Tiger Knee (-- Keep in mind that RH Knee will only hit Blanka once regardless of position.)
- st.fwd (hits twice) xx Fierce Tiger Uppercut or RH Tiger Knee (-- RH Knee will only hit once against Shotos unless they're in the corner. It will also only hit Blanka once regardless of position.)
- j.RH, cr.fwd xx RH Tiger Shot
- j.RH, st.strong xx Fierce Tiger Uppercut
- j.Fierce, st. short xx Fierce Tiger Uppercut
-- Recent edits by SpryteMix (12-10-19)
Meaty Combos
- cr.fwd, cr.fwd xx RH Tiger Shot
- cr.fwd, cr.fwd xx RH Tiger Knee (standing opponent, only)
Match-ups
High Advantage Match-ups
Vs. Guile
- 7 - 3
This matchup appears to be incredibly lopsided in o.gat's favor, but looks can be deceiving. Don't get me wrong, this is a highly favorable matchup, yet it isn't as free as you think it is. Guile's character design seems to be somewhat of a counter to Sagat. Or I should say it has balance, synchronicity, good design. Guile's demise? his nerfed low forward, his nerfed sonic boom hitbox, and O.Gat's absurdly unfair low tiger recovery. What does Guile get? the forward sobat kick. A popular move against O.gat, made famous by Kurahashi in his set vs John Choi. He defeated Choi, but not Valle. What did Valle do differently?
Kurahashi vs John Choi
Kurahashi vs Alex Valle
Choi's problem is he was blindly throwing out low tigers (and still the match was close), Valle instead pressured with low tigers. This is what you must keep in mind when fighting against Guile. If Guile is close, you should tend to throw out slow low tigers more often because his sobat kick will cleanly hit you while avoiding the low tiger. The slow one will usually trade, with about equal damage, and a stun advantage, making Guile scared to do it again. You regain your momentum. Also slow low tigers give you a better frame advantage, meaning you'll get more than just one safe follow up low tiger. That being said, don't be afraid to throw out fast low tigers to maintain the projectile's poke pressure potential. That's what the fast low tiger is for after all, hitting people at closer ranges with an insanely fast, cheap projectile. if you hit guile with a low tiger at a closer range, immediately follow up with a slow low tiger, and you'll have a wonderful projectile game surmounted. Generally your most used low tiger will depend on your range, up close, do slow ones often, medium range, do medium ones, far range, fast ones.
Guile can do a trick similar to what he does to ryu, neutralizing your projectile and punishing your recovery. Be wary of this, but don't be afraid to throw them out. Their is a bit of a guessing game, but it's still highly in your favor. just don't be too predictable. The low tiger is still an incredibly fast, and it still has a good hit box, even though o.gat's arm extends a little. You're going to have to make the initial guess, but once you've safely thrown out a low tiger, the odds are very much in your favor. Don't let Guile get the life lead, or you're going to be the one doing all the work here. If guile is good, he'll be able to neutral jump a lot of your low tigers. There is still a bit of a guessing game here, because o.gat's low tigers are so fast. you can bait neutral jumps and punish with a high tiger to catch him in the air or make him land on a low tiger on his way down. You can also just mix up your speeds, cause the RH low tiger is so fast, guile has to jump almost immediately after seeing it, so if you throw a slower one, he'll jump and land right on it. If Guile is really good at neutral jumping you will be forced to guess a bit and even play some footsies. Having your footsies down in this matchup is good to have, it makes you a lot less 1 dimensional, and can pretty much solidify your victory. If you rely too much low tigers and uppercuts, Guile can guess right even though his jumpin sucks and punish you good. So by having strong footsies, you essentially make his jumpin even more useless than it already is. The best option is normally just st.lk xx fast low tiger and continue your zoning game. st.lk is a phenomenal normal in general. if you want to punish low forwards, use cr.mk. it's a fast normal. CR.lk has a good counter hitbox like a shoto cr.lk, and it doubles as a fake low tiger bait. use st.mk to hit guile on sonic boom startup, or use st.hp if you've got a good read or a moment of twitch reactions (or a combination of the two). even if it trades, the damage is favorable, and st.hp does a lot of dizzy. Sweep is useful too, to hit guile on sonic boom startup and get you out of a tight spot. j.rh can be useful too, even though guile can usually punish it. Sometimes it can trade evenly which is worth getting out of a bad spot, but it is a risk.
When it comes to anti airs, Uppercut is pretty much all you need. You can use st.hp or sweep, but you'll find they aren't very necessary. If Guile is doing a far jumpin that you're not sure you can punish in time before he lands safely, just do a jab uppercut. St.hp and sweep are good, but I find they can lose sometimes to certain air normals, which is frustrating for Sagat, losing to such a big floaty jumpin.
And um high tigers arent too necessary. If Guile neutralizes them with his sonic boom, he can just backfist your arm. Ouch. You can use a use a slow high tiger and do a walk up afterward for footsie pressure, but it's not really necessary. it's good to go for though, every now and then. Like I said, just don't be TOO predictable and play on point, you should win this.
-- Ultracombo (2014)
Advantage Match-ups
Vs. Dee Jay
- 6.5 - 3.5
This matchup is pretty straightforward yet slightly different from the rest because Dee Jay's fireball game can somewhat compete yours if he has a life lead and/or the frame advantage and positioning. Dee Jay's going to want to space himself midrange to where he can keep throwing fireballs while you have to risk sticking your limbs out and getting stuffed by fireballs and pokes when you throw a low tiger. This will make you want to throw high tigers which dee jay can slide under for even better positioning. It's really hard to umedp his pokes because of his hitboxes so this position can get you stuck.
But if you deal with this the right away you should be able to avoid this situation. If Dee Jay plays right it's a war of attrition when he has the life lead. He'll make you do all the work. Just keep your cool. You'll have to take some occasional risks to kill Dee Jay because you want to be pro-active about killing him. You can hit Dee Jay's max out recovery on prediction safely with your long j.rh. Use fast high tigers occasionally to catch dee jay trying to jump at the same maintaining your fireball pressure. I would very rarely throw slower high tigers as its very hard to make dee jay land on them from a jump in. Only do it if you're trying to initiate a footsie game, which you shouldn't be trying to do very much. Fast low tigers are good but throw in different speeds when necessary to maintain your frame advantage so dee jay doesn't find holes and lands those frustrating jump ins. Using the appropiate low tiger speed relative to your distance from your opponent is generally a good idea for sagat, in any matchup. It's all about that frame pressure. But keep your fast low tiger with you at all times for that poke factor, it's an incredibly fast attack that can frustrate and demoralize your opponent. Try and play the basic tiger, tiger, tiger, tiger uppercut/sweep game.
When footsies come in to play, remember, st.lk, cr.mk, and cr.hk are always great normals in pretty much any matchup. St.lk has a lot of of range, sagat is standing when he does it so his hitbox is thinner than he is crouching, and it has two hits so it has good counter potential on the first hit. And of course you can cancel it into a fast low tiger. Cr.mk is good as well, the hitbox is not amazing but it looks like sweep which makes it good for footsies, it has a decent startup in comparison to sagat's other normals, giving it decent potential as a move to stuff the startup of your matchup. It can also be canceled, which is always good for o.gat. your sweep is excellent in this matchup, use it to punish baited or bad dee jay slides on reaction, and as a general long reaching poke. You can even use it to punish short sobat kicks on reaction, which dee jay may do to get over low tigers at close range and hit you.
Neutralize every fireball with a high tiger, so your limbs don't get stuffed on high tiger, but don't start using the high tiger out of fear at closer ranges. Do not underestimate your low tiger even if the situation is scary. That being said, dee jay's jump in is very good and can frustrate you, so make sure you throw out a lot of feints by buffering your tiger shot and throwing out low short/jab. You crouching will look like you're inputting tiger shot and low short/jab will make it look like you're on startup animation. You can also use stand jab/strong if dee jay knows he can make you throw out high tigers. Any character will be more inclined to jump in on a high tiger over a low for obvious reasons. These tactics will net you nice antiair damage off sweeps and uppercuts and keep dee jay, allowing you to maintain your pressure and your dominant position in this matchup. I'd say this is perhaps Dee Jay's worst matchup.
If you want a good example of this matchup, watch valle vs afro legends at SCR 2011.
-- ultracombo (2014)
Vs. O.Hawk
- 6.5 - 3.5
Highly Favorable matchup, you should win a large majority of the matches playing on reaction, you must do a few unconventional things though.
Stay crouched, it's a good position, keep calm and tiger, but watch out for a DP through it, mainly a concern for N.Gat, not O.gat, due to the botched low tiger hitbox.
Don't abuse st.lk. Not a vital normal in this matchup. Cr.mk and cr.hk are better, because hawk can't dp these pokes.
Tiger uppercut must be deep, this is vital to your victory. Hawk's j.lp has high priority, and will beat a Rising Tiger Uppercut. He can also stuff you while trying to input Tiger Uppercut, leading to a 360 setup, and possibly death. So try this, buffer your Tiger Uppercut with cr.lp/lk, this will ensure you never stand when inputting your Upper, guaranteeing a Deep TU every time.
Fast reactions will almost guarantee victory. Hawk's main method of getting in on Sagat is the air game. Watch your Tigers, don't get predictable, he can Hawk Dive these if he anticipates it. Punish far/midscreen Hawk Dives with a Roundhouse Tiger knee after blocking it, and if you really want to show Hawk who's boss, you can punish it with a Deep TU, as long as he's far enough. Make sure it's deep, or it will trade, and maybe even flat out lose if done too early. It's usually better to just wait for the tiger knee unless you're really feeling yourself.
Now onto the last two important factors of this matchup: The Hawk Dive/J.LP air mixup, and escaping the loop.
Hawk Dive mixup:
- If hawk jumps in on you from a close enough range, he can do a sort of air mixup, with a hawk dive, which done at close range at the top of his jump arc will stuff your Tiger Uppercut! If he knows you know about it, he can just go for j.lp while you're scared to press buttons and just start his 360 game. Don't let this happen! Reactions! Stay crouched, get ready to do a buffered TU as soon as you see the j.lp or he's coming down and it's too late to hawk dive. And get ready to block and punish the possible hawk dive with a Fierce High Tiger shot. Tiger knee won't work here, so don't do it! you'd only put yourself in danger.
If you get caught in the loop, don't give up. Sagat is pretty much impossible to safe jump, so have your reversal timing ready. You can still be OSd, but there are ways out, it's not like you're Ryu. There still is a slight mixup factor, you can still be baited. But you can also still escape! Fight to the bitter end. Play your tiger shot game, use low pokes in footsies, keep your cool, and react punish everything, and you should have a good time with this matchup.
-- Ultracombo (2014)
Vs. Ryu
- 6 - 4
Objective
Throw low tiger shots to force a jump-in which you can tiger uppercut or sweep (low HK), depending on range. Low tiger shots have excessively short recovery. Ryu must guess in order to punish. Always be mindful of randomizing your timing, especially from within midscreen.
Things to look out for
- Tatsu over low tiger shots - This becomes more difficult for him the closer you are, so don’t fear it too much. You can try to stand HP it if you are far enough away and have recovered in time. If you are close, you can try to throw when he lands, or you can do nothing and wait for an opportunity to push out with low HK or low MK xx low tiger shot and resume your main objective.
- Neutral jump over low tiger shots - Alter tiger shot speed randomly to try and make him land on one.
- Super - From midscreen and beyond, you can still throw low tiger shots and not worry about getting hit by a full super. If he supers through your low tiger shot, you will only get hit once.
- Cross-up tatsu - This can be difficult to deal with, especially when knocked down. Try and crouch or block.
Things to exploit
- Low tiger shot - Excessively short recovery. Ryu must guess, which means there is a high probability that he will jump into your tiger uppercut.
- Neutral jump HK - Low jump arc combined with long downward reaching attack makes this move very difficult to anti-air. Try this move up close to punish fireballs.
- Forward jump HK - Like neutral jump HK, this move is exceptionally difficult to anti-air. Test your opponent a few times before you abandon this move.
- Low HK - One of the best sweeps in the game. Great range and many active frames.
- LK xx low tiger shot - Great speed and range. Use to push out and resume main objective.
--Ernest 17:10, 18 November 2013 (UTC) source: ultracombo
Disadvantage Match-ups
Vs. Claw
This matchup will test your patience, but keep a level head. You will lose some, it is inevitable, but you can still get some consistency with wins if you play it right. Claw might have annoying tactics, but O.Gat has big damage and dizzy potential to equalize matches or surmount a big life lead. The theme of this matchup is to move forward, don’t turtle.
Stand short is your friend, but for it to be useful you must have claw in your range. Outside its range, you’ll find yourself losing to claw pokes and slide more often than not. If Claw has his spacing it’s not best to contest with it. You want to keep patient when claw has the ground advantage and wait for your opening to throw out a fireball. Neutral Jump Roundhouse is a risky option but it’s good to keep in the back of your mind because it can scare claw from abusing slide, it will lose to your NJ.RH and you can combo it into sweep for big damage or into cr.mk xx fast low tiger for the dizzy. Just remember it’s a guess, works strictly for predictions, so don’t rely on it. Just keep it in mind if Claw is being predictable. For the most part, don’t be afraid to block and wait, walk forward until you’re in st.lk range. When you’re outside of st.lk range, cr.lk is a good counter move. It’s not completely safe but moreso than st.lk, and it has better counter potential. When you find the pressure, either from following up a slow low tiger or however you may find the time to move in, st.lk becomes much better. Once you’re in st.lk range, abuse it. Cancel it into tiger, hell do two in a row, it’s good. You can even do something like st.lk, walk up a split second to get into cr.mk range, do a cr.mk and cancel it into tiger, or follow up the st.lk with a sweep. This move has two instances in which it can hit, so it becomes really good at countering slide when it’s spaced right. Keep cr.mk and cr.hk in your back pocket, they are good normals, but not your go to normals. Of course like I said cr.lk is useful too, it has a really good hitbox.
Learn to Deep DP jumpins consistently. This is a must.
When it comes to the projectile game, use slow low tigers more often than you would in other matchups. Claw’s jumpin is really fast, so maximum frame advantage is necessary. But of course, fast low tiger is godlike, use it as poke, but use slow low tiger as a zoning tool. You’ll find more Sweep Antiair opportunities if you use slow low tigers from far-mid range. When you see claw holding charge ready to wall dive, fast high tiger becomes important. It’ll hit claw as he goes to his wall.
When it comes to wall dive, if there’s one thing you should do no matter what, it’s that you should never let Claw wall dive to the wall behind you. If he successfully makes it to your wall, you are fucked, plain and simple. Imminent wall dive loop ensues. As soon as you see claw leave the ground for a wall dive in your direction, immediately do a jump back roundhouse. You need to be able to do this consistently. You need to make it so you only worry about Claw going to his wall, in which case you cannot play the game from far away, it won’t work out for you, I promise. You have to be aggressive. Move forward, get in your poke range, stay in the middle of the screen so when Claw goes to his wall, you can immediately do a fierce TU and be confident it’s going to hit and land that big damage. As soon as you see claw going to his wall, immediately start walking forward, it’ll delay how quickly he gets to the wall, giving you more time to react and punish accordingly.
If you get caught in the wall dive loop, don’t get flustered. It may in fact kill you. But you must contest it. Sagat’s TU seems to have good autocorrect, so just time it right and try to land it deep to slap Claw’s shit. You may get baited, but hey that’s part of the game. You can try to block, but that might not help you at all, since claw can land, immediately do cr.mk, cr.mp cancel it into wall dive off your wall, and continue the loop. I’ve seen MAO do this, very few Claws do it, but it is possible. When wall dive loop comes, be prepared to get frustrated. There is no 100% solution to this, you must guess. The good news is, if you land the TU, you get massive damage.
Safe jumping Claw is important, along with meaties and wakeup baits. Sagat has good wakeup game offense vs Claw. Meaty low forward, into low forward xx tiger knee is a strong hit confirm that continues the mixup. You can also just bait the flip kick with a safe jump or waiting on the ground and punishing with cr.mk/mp xx tiger knee for 3 hits. If you bait him on the ground though, be wary of smart Claws who are aware of your usage of this bait. Going for a meaty is always a risk. Safe jumping is good, guarantees your pressure. If Claw does back flips, you can sweep it or tiger knee if you’re fast and see he’s doing the single back flip, or tiger shot the double backflip. I’d say tiger shot is always the best option, as it’s consistent with whichever backflip claw does, but if you see it, always punish the best way possible.
There’s very few O.Gat vs Claw sets on youtube honestly. I don’t mean to self advertise but me (ultracombo) vs Ganelon is a good set.
https://www.youtube.com/watch?v=b2xaGHDvpAM&feature=player_detailpage#t=83
https://www.youtube.com/watch?v=RuDxjiNfap0
-- ultracombo (2014)


