Introduction
Why play Old Chun when New Chun has a fantastic super and a decent reversal/situational Anti Air in Upkicks? Certainly there are a few things that OG Chun doesn't have, but what she does have can change her play style quite a bit.
She's one of the most easy characters to play in the game : all of her main combos are easy, her instant air stomp is easier to perform than with N.Chun, she don't have to deal with charge partition, no just frame, etc.
The Spinning Bird kick hits during her handspring animation, and can be used similar to an E.Honda headbutt (with good timing). It gives Old Chun a powerful weapon against jump-ins besides her (already fantastic) normals. This allows an OG Chun player a better ability to turtle than N. Chun.
She can use her great air LK and MK to counter DPs if you're far enough.
That being said... a lot of what NKI has in the N. Chun section will be applicable to OG Chun.
Picking Old Chun Li
To select O.Chun Li, choose Chun Li and then press ↓ ↓ ↓ ↑ Jab/Fierce, pressing Short simultaneously with the punch button for the alternate color.
| Normal | Secondary |
 |

|
--Born2SPD
New & Old Versions Comparison
Here is the list of differences:
- Obvious stuff: O.Chun Li can not tech throws, does not have a new Upkicks special move and does not have a Super;
- O.Chun Li has some differences in some of her normals:
- Close Standing Jab has a 1 frame slower startup;
- Crouching Jab has a 1 frame slower startup;
- Far Standing Strong hits high and so whiffs on crouching characters;
- Far Standing Fierce has special cancel properties;
- Close Standing Short has a 3 frames slower startup and can't be special canceled;
- Far Standing Short hits high and so whiffs on crouching characters;
- Crouching Short has a 2 frames slower startup and can't be special canceled;
- Close Standing Forward has a 3 frames slower startup and can't be special canceled;
- Far Standing Forward have better priority;
- Diagonal Jumping Fierce has a much fatter hitbox, though the priority doesn't change much;
- Diagonal Jumping Short have much better priority but do a little less damage;
- Neutral Jumping Forward has much better priority plus 6 more active frames;
- Diagonal Jumping Forward have much better priority but can not be used as a cross up attack;
- Neutral Jumping Roundhouse have much better priority;
- Diagonal Jumping Roundhouse hits lower;
- O.Chun Li's Head Stomp can be performed with any downward direction;
- O.Chun Li's flip kick and neck breaker command normals have proximity requirements;
- O.Chun Li's neckbreaker and flip kick are performed with forward/back/any upwards direction instead of df;
- O.Chun Li's flip kick combo for two hits, the start-up is faster by 2 frames and can be special cancelled;
- O.Chun Li can kara-cancel Kikoukens from Roundhouse easily (for the shorter recovery), where N.Chun Li has trouble with this due to the different command for the Spinning Bird Kick;
- O.Chun's Spinning Bird Kick becomes active and knocks down before the spinning part during her handspring, and demands a "down" charge instead of a "back/away" one.
Basically, O.Chun Li has better aerial tools but worse ground ones, mainly for standing strong whiffing on crouched characters and the lack of super. Choose whichever version you think it's best suited for your style.
Competitive Overview
O.Chun is ranked high mid-tier, together with Ryu, O.Ryu, O.Ken, and Guile. She has solid ground and aerial attacks, but her anti-air moves either require a charge, pressing buttons in a row or early input. As she is a charge character, she has trouble keeping projectiles coming against motion characters.
--NKI
Strengths & Weaknesses
Based on NKI's list for N.Chun.
Strengths
- st.Strong is an extremely good poke. Its hitbox is abnormally high though (at head level), so it's harder to harass crouching opponents with it.
- Cr.mk is an incredible multi purpose move.
- j.Forward and j.Short are the best diagonal jumping attacks in the game.
- Lightning Legs will cleanly beat nearly every ground move in the game.
- Good throw range.
- Throw does a lot more damage than it probably should.
- Good dizzy combos.
- Fast walking speed.
- Very agile (can jump off walls, do attacks after head stomp).
- Is good at both turtling and rushing down.
- Has normal moves that can cause full knockdowns.
Weaknesses
- Cannot soften throws.
- Has no super.
- Can easily be safe-jumped.
- Has a hard time with fireball traps.
Moves Analysis
Disclaimer: To better understand the diagrams, read this.
Normal Moves
Ground Normals
- Close Standing Jab: (Base max activation range: 21)
| Damage | 18[0] |  |
 |
 |
 |

|
| Stun | 0~5 | |||||
| Stun Timer | 40 | |||||
| Chain Cancel | Yes | |||||
| Special Cancel | Yes* | |||||
| Frame Advantage | +5 | |||||
| Frame Count | 2 | 2 | 4 | 1 | 1 | |
| Simplified | 1 + 4 | 4 | 4 | |||
A quick rapid-fire jab, mainly used for combos and as a tick vs characters that can't crouch it. Old Chun Li's version takes an extra frame to come out, but it's still useful. Does massive damage for a jab, you can trade when using this as an anti air, and still have the trade be in Chun's favour.
- Far Standing Jab:
| Damage | 4[0] |  |
 |
 |
 |

|
| Stun | 0~5 | |||||
| Stun Timer | 40 | |||||
| Chain Cancel | Yes | |||||
| Special Cancel | Yes | |||||
| Frame Advantage | +3 | |||||
| Frame Count | 2 | 2 | 4 | 3 | 1 | |
| Simplified | 1 + 2 | 2 | 8 | |||
Similar to close jab in some aspects, the priority is good, so you can rapid fire it (mash) to beat some moves like Blanka ball, and Honda headbutt. Can work as an anti air from far away in some situations.
- Crouching Jab:
| Damage | 4[0] |  |
 |
 |
 |

|
| Stun | 0~5 | |||||
| Stun Timer | 40 | |||||
| Chain Cancel | No | |||||
| Special Cancel | Yes* | |||||
| Frame Advantage | +4 | |||||
| Frame Count | 2 | 2 | 4 | 4 | 1 | |
| Simplified | 1 + 4 | 4 | 5 | |||
Good priority, but not mashable like other jabs. And as a tick, it's outclassed by moves like cr mk and close/far mp. Note that as old Chun Li this attack has one additional frame of startup.
- Close Standing Strong: (Base max activation range: 36)
| Damage | 22[1] |  |
 |
 |
 |

|
| Stun | 5~11 | |||||
| Stun Timer | 60 | |||||
| Chain Cancel | No | |||||
| Special Cancel | Yes* | |||||
| Frame Advantage | +10 | |||||
| Frame Count | 2 | 2 | 4 | 3 | 1 | |
| Simplified | 1 + 4 | 4 | 4 | |||
Ok as a trade anti air, but mainly used for the awesome frame advantage, you can mix them up really well after this, either with throw, or sweep/cr mk to hit them low. Links into just about anything. Only Cammy and Blanka can crouch under this.
- Far Standing Strong:
| Damage | 22[0] |  |
 |
 |
 |

|
| Stun | 5~11 | |||||
| Stun Timer | 60 | |||||
| Chain Cancel | No | |||||
| Special Cancel | Yes* | |||||
| Frame Advantage | +10 | |||||
| Frame Count | 2 | 2 | 4 | 3 | 1 | |
| Simplified | 1 + 4 | 4 | 4 | |||
Note that O.Chun's hits at head level, not at mid/body-level like N.Chun's does. As a result, it's typically harder for O.Chun to keep pressure with this move since several characters can duck it. Otherwise it's the same, good reach, and nice frame advantage.
- Crouching Strong:
| Damage | 18[1] |  |
 |
 |
 |

|
| Stun | 5~11 | |||||
| Stun Timer | 60 | |||||
| Chain Cancel | No | |||||
| Special Cancel | Yes* | |||||
| Frame Advantage | +9 | |||||
| Frame Count | 2 | 2 | 4 | 4 | 1 | |
| Simplified | 1 + 4 | 4 | 5 | |||
Good range and frame advantage, not much reason to use this over standing versions of mp though. The priority is also much worse than cr lp.
- Close Standing Fierce: (Base max activation range: 41)
| Damage | 24[1] |  |
 |

|
| Stun | 10~16 | |||
| Stun Timer | 80 | |||
| Chain Cancel | No | |||
| Special Cancel | Yes | |||
| Frame Advantage | -9 | |||
| Frame Count | 3 | 20 | 11 | |
| Simplified | 1 + 3 | 20 | 11 | |
This move should be used in combos, or as a meaty, otherwise it is quite unsafe. Cancel to fireball or super in combos, or use as a meaty for massive frame advantage, and to set up frame traps. This can usually work as a ground crossup if you are behind them when grounded, but it's not much use in that aspect.
- Far Standing Fierce:
| Damage | 24[0] |  |
 |
 |
 |
 |

|
| Stun | 10~16 | ||||||
| Stun Timer | 80 | ||||||
| Chain Cancel | No | ||||||
| Special Cancel | Yes* | ||||||
| Frame Advantage | -2 | ||||||
| Frame Count | 2 | 3 | 6 | 10 | 7 | 1 | |
| Simplified | 1 + 5 | 6 | 18 | ||||
The fact that O.Chun's is special cancelable is a nice touch. It's possible to string some combos together that aren't possible with N.Chun (though hers is super cancelable). Good as an anti air.
- Crouching Fierce:
| Damage | 22[2] |  |
 |
 |
 |

|
| Stun | 10~16 | |||||
| Stun Timer | 80 | |||||
| Chain Cancel | No | |||||
| Special Cancel | No | |||||
| Frame Advantage | -3 | |||||
| Frame Count | 3 | 3 | 6 | 8 | 11 | |
| Simplified | 1 + 6 | 6 | 19 | |||
Good range with decent priority, but very sluggish, punishable if whiffed. Probably best to use safer attacks.
- Close Standing Short: (Base max activation range: 36)
| Damage | 20[1] |  |
 |
 |
 |

|
| Stun | 0~5 | |||||
| Stun Timer | 40 | |||||
| Chain Cancel | No | |||||
| Special Cancel | No | |||||
| Frame Advantage | +3 | |||||
| Frame Count | 3 | 3 | 5 | 4 | 1 | |
| Simplified | 1 + 6 | 5 | 5 | |||
Compared to N.Chun, this has an extra 3 frames of startup, and also cannot be special cancelled. It can still be a viable tick, but these nerfs make it much less useful. Does unusually high damage for a light attack.
- Far Standing Short:
| Damage | 20[0] |  |
 |
 |
 |

|
| Stun | 0~5 | |||||
| Stun Timer | 40 | |||||
| Chain Cancel | No | |||||
| Special Cancel | No | |||||
| Frame Advantage | +3 | |||||
| Frame Count | 3 | 3 | 5 | 4 | 1 | |
| Simplified | 1 + 6 | 5 | 5 | |||
Like far standing strong, this too whiffs on most crouching opponents. In contrast, this move doesn't project her lowest hurtbox toward the opponent, which means it's less risky in footsies against characters with good sweeps. Useful for setting up frame traps, does unusually high damage for a light attack.
- Crouching Short:
| Damage | 14[0] |  |
 |
 |
 |

|
| Stun | 0~5 | |||||
| Stun Timer | 40 | |||||
| Chain Cancel | No | |||||
| Special Cancel | No | |||||
| Frame Advantage | +4 | |||||
| Frame Count | 3 | 3 | 4 | 4 | 1 | |
| Simplified | 1 + 6 | 4 | 5 | |||
Old Chun Li's version of cr lk has 2 additional startup frames, and cannot be special cancelled, despite this, it is still an ok tick on occasion. Does above average damage for a light attack.
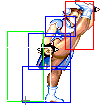
- Close Standing Forward: (Base max activation range: 41)
| Damage | 24[1] |  |
 |
 |
 |
 |
 |

|
| Stun | 5~11 | |||||||
| Stun Timer | 60 | |||||||
| Chain Cancel | No | |||||||
| Special Cancel | No | |||||||
| Frame Advantage | +1 / +4 | |||||||
| Frame Count | 3 | 3 | 3 | 6 | 3 | 4 | 1 | |
| Simplified | 1 + 6 | 9 | 8 | |||||
This has 3 additional startup frames as old Chun Li, and the first part can no longer special cancel, making it much less useful overall. Second part still acts as an ok anti air in some situations.
- Far Standing Forward:
| Damage | 24[0] |  |
 |
 |
 |

|
| Stun | 5~11 | |||||
| Stun Timer | 60 | |||||
| Chain Cancel | No | |||||
| Special Cancel | No | |||||
| Frame Advantage | +5 | |||||
| Frame Count | 3 | 3 | 5 | 4 | 4 | |
| Simplified | 1 + 6 | 5 | 8 | |||
No hurtbox on her head like N.Chun, this move is now a better anti air in some situations.
- Crouching Forward:
| Damage | 18[1] |  |
 |

|
| Stun | 5~11 | |||
| Stun Timer | 60 | |||
| Chain Cancel | No | |||
| Special Cancel | Yes* | |||
| Frame Advantage | +9 | |||
| Frame Count | 4 | 5 | 4 | |
| Simplified | 1 + 4 | 5 | 4 | |
Easily one of the best pokes in the game. Spammable AND special cancelable. One of the main reasons it's very annoying playing against a competent chun.
- Close Standing Roundhouse: (Base max activation range: 56)
| Damage | 28[1] |  |
 |
 |
 |
 |
 |
 |
 |

|
| Stun | 10~16 | |||||||||
| Stun Timer | 80 | |||||||||
| Chain Cancel | No | |||||||||
| Special Cancel | No | |||||||||
| Frame Advantage | -5 | |||||||||
| Frame Count | 1 | 1 | 6 | 1 | 6 | 4 | 6 | 4 | 7 | |
| Simplified | 1 + 9 | 6 | 21 | |||||||
Chun's panty teasing high sidekick. It's a trade anti air(no pre projected hurtboxes before becoming active but poor priority with big hit/hurtboxes afterwards) so if you want to beat a move cleanly you have to use Close Forward instead, which has good priority up close. But against some high priority air normals your only option may be a trade so this move is useful, and it can be used that way against most air normals as long as you time it correctly, minus against some very high priority normals like Cammy's Aerial Strong or against characters with very low jumps, like Boxer. Another difference to keep in mind is that the hitbox of this move is more centered than Close Forward, this is important against ambiguous crossup moves like a crossing up air tatsu for example. This also allows Chun to actually beat/trade with FeiLong's Chicken Wing corner trap, but it's difficult to use because the timing is very strict: you have a 1 frame window (with "reversal timing") for it to beat it cleanly and another 1 frame window to get a trade, anything slower than that and the move will come out too late and Chun will eat the Chicken Wing and probably a combo as well. And since you'll most likelly be playing on a frame-skipping turbo speed, the timing becomes even more strict, leaving Old Chun Li with only one usable counter to the Chicken Wing corner trap: kara-cancelled low normal into Spinning bird kick.
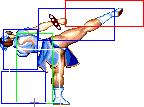
- Far Standing Roundhouse:
| Damage | 28[0] |  |
 |
 |
 |
 |

|
| Stun | 10~16 | ||||||
| Stun Timer | 80 | ||||||
| Chain Cancel | No | ||||||
| Special Cancel | No | ||||||
| Frame Advantage | +0 | ||||||
| Frame Count | 3 | 3 | 4 | 8 | 7 | 7 | |
| Simplified | 1 + 10 | 8 | 14 | ||||
Decent anti air, but takes a while to come out.
- Crouching Roundhouse:
| Damage | 22[2] |  |
 |
 |
 |

|
| Stun | 5~11 | |||||
| Stun Timer | 130 | |||||
| Chain Cancel | No | |||||
| Special Cancel | No | |||||
| Frame Advantage | -3 | |||||
| Frame Count | 3 | 3 | 6 | 8 | 11 | |
| Simplified | 1 + 6 | 6 | 19 | |||
Good range, useful for beating/trading with fireballs, and a good punish in general. Just try not to whiff it, as it leaves Chun quite open. It also sets up a built-in safe jump against Sagat, and it will randomly also be a safe jump against Claw (sometimes Chun will land without hitting him).
Aerial Normals
- Neutral Jumping Jab:
| Damage | 18[2] |  |
 |
 |

|
| Stun | 1~7(-2) | ||||
| Stun Timer | 40 | ||||
| Special Cancel | No | ||||
| Frame Count | 3 | 3 | 2 | ∞ | |
| Simplified | 8 | ∞ | |||
Stays active the whole jump, ok to shield yourself from lower priority attacks.
- Diagonal Jumping Jab:
| Damage | 16[2] |  |
 |
 |
 |
 |

|
| Stun | 1~7(-2) | ||||||
| Stun Timer | 40 | ||||||
| Special Cancel | No | ||||||
| Frame Count | 3 | 3 | 40 | 3 | 4 | ∞ | |
| Simplified | 6 | 40 | ∞ | ||||
Safejumps aside, this isn't much use, outclassed by j mp.
- Neutral Jumping Strong:
| Damage | 22[2] |  |
 |
 |
 |
 |
 |
 |

|
| Stun | 5~11 | ||||||||
| Stun Timer | 50(+10) | ||||||||
| Special Cancel | No | ||||||||
| Frame Count | 3 | 3 | 2 | 16 | 2 | 3 | 4 | ∞ | |
| Simplified | 8 | 16 | ∞ | ||||||
Good priority, but aside from having double the active frames, neutral jump hp outclasses this.
- Diagonal Jumping Strong:
| Damage | 20[2] |  |
 |
 |
 |
 |

|
| Stun | 5~11 | ||||||
| Stun Timer | 50(+10) | ||||||
| Special Cancel | No | ||||||
| Frame Count | 3 | 3 | 8 | 3 | 4 | ∞ | |
| Simplified | 6 | 8 | ∞ | ||||
Good air to air, and good jump in from the right range. Though old Chun Li generally has better options.
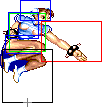
- Neutral Jumping Fierce:
| Damage | 26[2] |  |
 |
 |
 |
 |
 |
 |

|
| Stun | 11~17(-1) | ||||||||
| Stun Timer | 60(+20) | ||||||||
| Special Cancel | No | ||||||||
| Frame Count | 3 | 3 | 2 | 8 | 2 | 3 | 4 | ∞ | |
| Simplified | 8 | 8 | ∞ | ||||||
Great horizontal priority and reach, fantastica air to air, and works as an anti air in some situations if you react in time.
- Diagonal Jumping Fierce:
| Damage | 24[2] |  |
 |
 |
 |
 |

|
| Stun | 11~17(-1) | ||||||
| Stun Timer | 60(+20) | ||||||
| Special Cancel | No | ||||||
| Frame Count | 3 | 3 | 8 | 3 | 4 | ∞ | |
| Simplified | 6 | 8 | ∞ | ||||
Like jump mp but a different hitbox, in some situations it may be better to use this instead. Old Chun Li's version of this move has a slightly better hitbox.
- Neutral Jumping Short:
| Damage | 18[2] |  |
 |

|
| Stun | 1~7(-2) | |||
| Stun Timer | 40 | |||
| Special Cancel | No | |||
| Frame Count | 3 | 3 | ∞ | |
| Simplified | 6 | ∞ | ||
Good priority, beats a handful of moves, and is a great defensive tool.
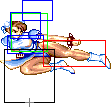
- Diagonal Jumping Short:
| Damage | 16[2] |  |
 |
 |
 |

|
| Stun | 1~7(-2) | |||||
| Stun Timer | 40 | |||||
| Special Cancel | No | |||||
| Frame Count | 3 | 3 | 40 | 3 | ∞ | |
| Simplified | 6 | 40 | ∞ | |||
This does less damage than N.Chun but has awesome priority.
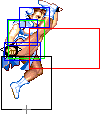
- Neutral Jumping Forward:
| Damage | 22[2] |  |
 |
 |
 |

|
| Stun | 5~11 | |||||
| Stun Timer | 50(+10) | |||||
| Special Cancel | No | |||||
| Frame Count | 3 | 3 | 16 | 3 | ∞ | |
| Simplified | 6 | 16 | ∞ | |||
This stays active a bit longer than N.Chun's version. And the priority is significantly better.
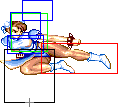
- Diagonal Jumping Forward:
| Damage | 20[2] |  |
 |
 |
 |

|
| Stun | 5~11 | |||||
| Stun Timer | 50(+10) | |||||
| Special Cancel | No | |||||
| Frame Count | 3 | 3 | 16 | 3 | ∞ | |
| Simplified | 6 | 16 | ∞ | |||
The move has amazing hitboxes, and will beat pretty much any other aerial attack it encounters. It will also beat the new shotos' Shoryukens unless they hit deep, and also beats most anti-air normal moves. Though it can no longer be used as a crossup.
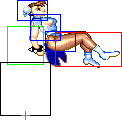
- Neutral Jumping Roundhouse:
| Damage | 26[2] |  |
 |
 |
 |
 |
 |
 |

|
| Stun | 10~16 | ||||||||
| Stun Timer | 80 | ||||||||
| Special Cancel | Yes | ||||||||
| Frame Count | 1 | 2 | 5 | 4 | 4 | 4 | 6 | ∞ | |
| Simplified | 3 | 9 | ∞ | ||||||
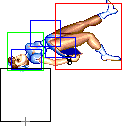
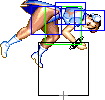
This has a good horizontal range, and trades with most attacks if you time it right. It can also be used against grounded opponents on the way up. This is a rare case of normal moves that cause a full knockdown. This also doesn't require the opponent to be standing to be blocked, which is also unique. Old Chun Li's version of this move has much better priority.
- Diagonal Jumping Roundhouse:
| Damage | 24[2] |  |
 |
 |
 |
 |
 |

|
| Stun | 11~17(-1) | |||||||
| Stun Timer | 60(+20) | |||||||
| Special Cancel | No | |||||||
| Frame Count | 3 | 3 | 6 | 4 | 6 | 6 | ∞ | |
| Simplified | 6 | 6 | 4 | 6 | ∞ | |||
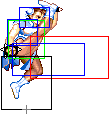
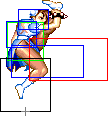
Can be a decent air to air in some situations, just be careful as it leaves you quite vulnerable to air to airs, and anti airs. Old Chun Li's version of this move has both hits with the hitboxes lower down, making it either better or worse depending on the situation.
Strangely enough, the frame in between kicks can hit too: if you look closely, you'll noticed a red dot around her waist, thats a 1x1 px hitbox!
Command Normals
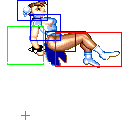
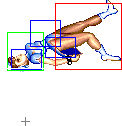
- Flip Kick: (On ground and close, ←/↖/↑/↗/→ + Forward. Base max activation range: 41)
| Damage | 22[0] + 22[0] |  |
 |
 |
 |
 |
 |
 |

|
| Stun | 0~5 + 0~5 | ||||||||
| Stun Timer | 40 + 40 | ||||||||
| Special Cancel | Yes* / No / No | ||||||||
| Frame Count | 2 | 2 | 5 | 4 | 4 | 4 | 6 | 29 | |
| Simplified | 1 + 4 | 9 | 4 | 39 | |||||
Unlike the N.Chun's version of this move, the second active part combos after the first one, so it knocks down almost every time. It also has faster start-up, so it is a much better move. O.Chun can not do this move from far away like N.Chun can. You can also cancel the first hit into specials.
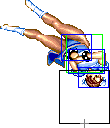
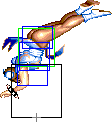
- Neck Breaker: (On ground and close, ←/↖/↑/↗/→ + Roundhouse. Base max activation range: 41)
| Damage | 20[0] |  |
 |
 |
 |
 |
 |
 |

|
| Stun | 10~16 | ||||||||
| Stun Timer | 80 | ||||||||
| Frame Count | 4 | 4 | 5 | 6 | 7 | 8 | 2 | 14 | |
| Simplified | 1 + 36 | 14 | |||||||
This move is good for shenannigans, or to simply force the enemy to block on wake-up, as it can avoid many moves in that situation. It does high stun, but the timer bonus is very short, so odds are it will hit and dizzy, or the enemy will recover from any dizzy damage by the time he gets up again. O.Chun can not do this move from far away like N.Chun can. It hits crossup depending of the timing, so you can use it as a loop as long as your opponent does not guard it. Despite chun being airborne for the active part, it is treated like a ground normal, thus, in addition to standing block, it can also be crouch blocked, if chun lands the active part deep, then it actually has to be blocked low. This can also evade tick throws, since it puts Chun on an airborne state right from the first startup frame.
- Head Stomp: (On air, ↙/↓/↘ + Forward)
| Damage | 20[0] |  |
 |
 |
 |
 |
 |

|
| Stun | 2~8 | |||||||
| Stun Timer | 60 | |||||||
| Special Cancel | Yes | |||||||
| Frame Count | 1 | 2 | 16 | 8 | 4 | 5 | ∞ | |
| Simplified | 3 | 16 | ∞ | |||||
It is possible to use this move as an instant overhead. Simply jump and immediately do a head stomp, and the enemy will have to block high to avoid getting hit. Note that O.Chun can perform this move with any downward direction, as opposed to only neutral down like N.Chun.
Throws
Holding towards or back and pressing Strong or Fierce punch will produce O.Chun Li's throw. She can also air-throw this way. The direction on the joystick determines the direction the enemy gets thrown at.
- Shoulder Throw: (←/↖/↑/↗/→ + Strong/Fierce)
| Damage | 38 / 32 |  |
 |

| |
| Stun | 7~13 | ||||
| Stun Timer | 100 | ||||
| Range | (from axis) | 48 | |||
| (from throwable box) | 23 | ||||
Although both the Strong and Fierce ground throws look identical, they're actually quite different for some weird reason. The Fierce throw deals an ordinary 22% damage, but the Strong throw does 26% damage, which is unusually high. Since the Strong throw has no other drawbacks, use it instead of the Fierce whenever possible. Be careful when throwing a cornered opponent at the corner, if they tech most characters can actually punish you as Chun Li is still recovering.
- Air Shoulder Throw: (Min activation height: 48/48 upwards/downwards, ←/↖/↙/↓/↘/↗/→ + Strong/Fierce)
| Damage | 34 | 
| |
| Stun | 7~13 | ||
| Stun Timer | 100 | ||
| Range | (from axis) | 58 | |
| (from throwable box) | 33 | ||
The air-throw versions are the same and do approximately 23.5% damage. Very good range for an air throw.
--Raisin (March 12, 2007), some info courtesy T.Akiba
Special Moves
- Kikouken a.k.a. Fireball: (Charge ←, → P)
Detailed Input: (Charge ←/↙/↖ for at least 61f, [7~14f] → [10/9/7f] Jab/Strong/Fierce. It is needed to wait at least 1 frame after leaving the charge direction to enter with the P button)
- Startup:
 |
 |
 |
 |

| |
| Frame Count | 1 | 1 | 1 | 1 | 1 |
| Simplified | 5 | ||||
- Active:
- Jab Version:
| Damage | 17[1] |  |
 |
 |
 |
 |

|
| Stun | 7~13 | ||||||
| Stun Timer | 90 | ||||||
| Frame Count | 1 | 1 | 1 | 1 | 1 | 1... | |
| Simplified | 42 | ||||||
- Strong Version:
| Damage | 18[1] |  |
 |
 |
 |
 |

|
| Stun | 7~13 | ||||||
| Stun Timer | 90 | ||||||
| Frame Count | 1 | 1 | 1 | 1 | 1 | 1... | |
| Simplified | 40 | ||||||
- Fierce Version:
| Damage | 20[1] |  |
 |
 |
 |
 |

|
| Stun | 7~13 | ||||||
| Stun Timer | 90 | ||||||
| Frame Count | 1 | 1 | 1 | 1 | 1 | 1... | |
| Simplified | 38 | ||||||
- Total Distance Traveled:
| Jab: 222 pixels after 75 frames | Strong: 176 pixels after 45 frames | Fierce: 150 pixels after 31 frames |
 |
 |

|
Chun Li throws a blue ball of energy that dissipates in the air after some time. This move works very well as an anti-air tool. Even if it trades, you score a full knockdown, which you can use to apply your strong wake-up game. Chun has the best startup for a fireball in the game by far, which helps tremendously stopping advance moves like Honda's headbutt.
Note that O.Chun has a reversal bug with this move; if you use a Kikouken as a reversal, it will come out as the last strength of the most recent one you used, regardless of button strength pressed (similar to T.Hawk's Rising Hawk reversal bug).
Due to a glitch, it's possible to change the recovery of any Kikouken to that of a Fierce by either whiffing or kara-canceling a Fierce or Roundhouse normal. You can read more about it here.
- Hyakuretsu Kyaku a.k.a. Lightning Legs: (Press K five times in quick succession)
Detailed Input: (The maximum time between each input is 15/12/9f (Short/Forward/Rh). Every K input of the same strenght is added to the input counter and everytime the counter is updated the timer is also reseted to its maximum value. The timer is decremented each frame. If the timer reaches 0, the counter is reseted to 0. To get the move out, first you need 5+ inputs within the required frequency, then the move will come out on the 5th or later K input that is within that frequency and is also entered during a moment in which a special move can come out i.e. with no move out or during a normal move startup frames so it can come out as a kara cancel)
- Startup:
 |

| |
| Frame Count (Short) | 1 | 3 |
| Simplified (Short) | 4 | |
| Frame Count (Forward) | 3 | 4 |
| Simplified (Forward) | 7 | |
| Frame Count (Rh) | 4 | 6 |
| Simplified (Rh) | 10 | |
- Active:
| Short | Forward | Rh | 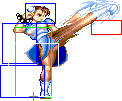 |
 |
 |

| |
| Damage | 28[2] | 30[2] | 32[2] | ||||
| Stun | 5~11 | ||||||
| Stun Timer | 100 | ||||||
| Frame Count (Short) | 4 | 4 | 4 | 4 | |||
| Frame Count (Forward) | 2 | 2 | 2 | 2 | |||
| Frame Count (Rh) | 1 | 1 | 1 | 1 | |||
 |
 |
 |

| |
| Frame Count (Short) | 4 | 4 | 4 | 4 |
| Frame Count (Forward) | 2 | 2 | 2 | 2 |
| Frame Count (Rh) | 1 | 1 | 1 | 1 |
NOTE: What I put there as the active part is a complete cycle but not the minimal duration (if you keep mashing, after the last animation frame it will go back to the first one, and this will be repeated while you keep the mashing). The minimal durations (if you only input the 5 Kick presses needed) are: a full cycle plus the 3 next animation frames for Short Version, 2 full cycles minus the last animation of a cycle for the Forward Version and almost 3 full cycles for the Roundhouse Version, lacking only the last animation like the Forward version.
- Recovery:
 |

| |
| Frame Count (Short) | 2 | 2 |
| Simplified (Short) | 4 | |
| Frame Count (Forward) | 4 | 4 |
| Simplified (Forward) | 8 | |
| Frame Count (Rh) | 6 | 6 |
| Simplified (Rh) | 12 | |
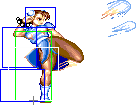
Chun Li unleashes several kicks. This move is a very important tool in her arsenal: since her leg is invulnerable and her vulnerability is moved backwards, it will beat most other attacks in melee range. Thus, in important strategy is to engage melee combat and, while your opponent is worried about throws, Strong punches and Forward kicks, which should pressure him to prevent you from gaining ground with him own attacks, use Lightning Legs, punishing his attempt to attack you. If the Lightning Legs become active, almost every attack will probably be defeated. It can be used in a similar fashion as a safe wake-up attack, if you adjust your distance according to the enemy character so as to avoid his reversal.
This move has a special property in the sense that it will never combo into itself. This is to say that, regardless of one of the kicks hitting the opponent (read "not blocked"), further hits will simply whiff, and as he recovers from hitstun, he will always be able to block the remaining kicks. However, if blocked, further attacks will not whiff. This means this move does relatively more damage than other attacks on block.
This move looks like the Hyakuretsu Harite (Hundred Hands Slap) from E. Honda, but it works differently. The main advantage is that Chun Li's legs are fully invulnerable, thus giving the move priority over any attack that does not have a very long range. However, it has three disadvantages: it cannot be steered horizontally (as O.Honda can), it cannot work as a horizontal dash that keeps charge, and it demands five presses to come out, instead of just four. This makes it much harder to use in combos.
- Spinning Bird Kick: (Charge ↓, ↑ K)
Detailed Input: (Charge ↓/↙/↘ for at least 60f, [7~14f] ↑/↖/↗ [10/9/7/2f] Short/Forward/Roundhouse/any K if you are at a jumpable state. It is needed to wait at least 1 frame after leaving the charge direction to enter with the K button)
- Startup:
| Short | Forward | Rh |  |
 |
 |
 |
 |
 |

| ||
| Damage | 28[2] | 30[2] | 32[2] | ||||||||
| Stun | 7~13 | ||||||||||
| Stun Timer | 90 | ||||||||||
| Frame Count | 1 | 4 | 3 | 2 | 3 | 4 | 4 | 2 | |||
| Simplified | 17 | 4 | 2 | ||||||||
- Active:
- Short Version:
| Damage | 14[1] / 12[1] |  |
 |
 |
 |
 |
 |
 |
|
| Stun | 7~13 | ||||||||
| Stun Timer | 90 | ||||||||
| Frame Count | 4 | 3 | 2 | 2 | 1 | 1 | 1 | 1 | |
| Simplified | 15 | ||||||||
 |
 |
 |
 |
 |
 |
 |

| |
| Frame Count | 2 | 1 | 2 | 2 | 3 | 4 | 4 | 2 |
| Simplified | 20 | |||||||
- Forward Version:
| Damage | 16[1] / 14[1] | 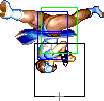 |
 |
 |
 |
 |
 |
 |

|
| Stun | 7~13 | ||||||||
| Stun Timer | 90 | ||||||||
| Frame Count | 4 | 4 | 3 | 3 | 2 | 2 | 1 | 1 | |
| Simplified | 4 | 16 | |||||||
 |
 |
 |
 |
 |
 |
 |

| |
| Frame Count | 1 | 1 | 1 | 1 | 1 | 1 | 1 | 1 |
| Simplified | 1 | 7 | ||||||
 |
 |
 |
 |
 |
 |
 |

| |
| Frame Count | 2 | 1 | 1 | 2 | 2 | 3 | 3 | 4 |
| Simplified | 2 | 16 | ||||||

| |
| Frame Count | 2 |
- Roundhouse Version:
| Damage | 18[1] / 16[1] |  |
 |
 |
 |
 |
 |
 |

|
| Stun | 7~13 | ||||||||
| Stun Timer | 90 | ||||||||
| Frame Count | 5 | 4 | 4 | 3 | 3 | 2 | 2 | 2 | |
| Simplified | 25 | ||||||||
 |
 |
 |
 |
 |
 |
 |

| |
| Frame Count | 1 | 1 | 1 | 1 | 1 | 1 | 1 | 1 |
| Simplified | 8 | |||||||
 |
 |
 |
 |
 |
 |
 |

| |
| Frame Count | 1 | 1 | 1 | 1 | 1 | 1 | 1 | 1 |
| Simplified | 8 | |||||||
 |
 |
 |
 |
 |
 |
 |

| |
| Frame Count | 1 | 1 | 1 | 1 | 1 | 2 | 1 | 1 |
| Simplified | 9 | |||||||
 |
 |
 |
 |
 |

| |
| Frame Count | 2 | 2 | 3 | 3 | 3 | 3 |
| Simplified | 16 | |||||
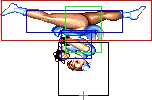
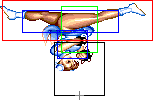
NOTE: This move has some oddities... First of all: in the active part, you see that little red dot near the center of the pushbox? At fist i thought it was just an imperfection in the sprites but that is actually a 1x1 sized active hitbox. So, in that cyclic(Active) part, the move is active all the time. The only exception is the Forward version, which has some gaps, all in the same animation frame(first one in the tables), so in that case i separated the cells in the Simplified Frame count. There is some oddities as well in the recovery part, like for the Short version it has a different pushbox in the second animation frame, and the Rh version having an extra animation frame before the landing frame. My guess is that this move was probably implemented in the game by a capcom Trainee or the programmer was lazy that day, lol.
- Recovery:
- Short Version:
 |
 |
 |
 |
 |
 |

| |
| Frame Count | 2 | 3 | 2 | 2 | 3 | 3 | 6 |
| Simplified | 21 | ||||||
- Forward Version:
 |
 |
 |
 |
 |
 |

| |
| Frame Count | 2 | 3 | 2 | 2 | 3 | 3 | 6 |
| Simplified | 21 | ||||||
- Roundhouse Version:
 |
 |
 |
 |
 |
 |

| ||
| Frame Count | 2 | 3 | 2 | 2 | 3 | 3 | 4 | 6 |
| Simplified | 25 | |||||||
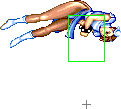
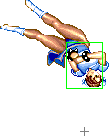
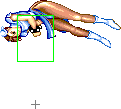
The damage is different depending on which way Chun Li is facing. The higher damage values are related to the attack boxes when she is facing backwards during the spinning part. Old Chun Li's SBK is better as an anti crossup attack, and this early part that can cause a knockdown. Much better as a reversal, but still quite slow, so you can be safejumped easily, due to also lacking upkicks.
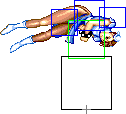
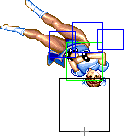
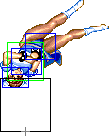
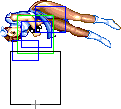
- Aerial Spinning Bird Kick: (Charge ↓, ↑, K in air)
Detailed Input: (Charge ↓/↙/↘ for at least 60f, [7~14f] ↑/↖/↗ [10/9/7f] Short/Forward/Roundhouse. It is needed to wait at least 1 frame after leaving the charge direction to enter with the K button)
 |
 |
 |
 |

| |
| Frame Count | 2 | 4 | 3 | 2 | 4 |
| Simplified | 15 | ||||
 |
 |
 |
 |

| |
| Frame Count | 3 | 2 | 3 | 3 | ∞ |
| Simplified | ∞ | ||||
NOTE: Just like the ground version of the move, it has some active frames with a 1x1 sized hitbox.
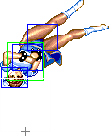
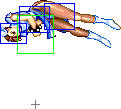
- Landing, partial: (When Chun lands before the last hitting frame)
 |
 |
 |
 |
 |
 |
 |

| |
| Frame Count | 3 | 3 | 2 | 2 | 3 | 3 | 4 | 5 |
| Simplified | 25 | |||||||
- Landing, complete: (When Chun lands after the last hitting frame)
 |
 |

| |
| Frame Count | 2 | 5 | 3 |
| Simplified | 10 | ||
Now that you can't use it for meter building, this move is even less useful. Ok for avoiding some attacks, that's it. Unlike in hyper fighting/turbo, you can't do this after a headstomp.
Misc Animations
Jump Animations
- Neutral Jump:
 |
 |
 |
 |
 |
 |
 |
 |
 |
 |

| |
| Frame Count | 2 | 1 | 12 | 5 | 4 | 8 | 4 | 5 | 7 | 1 | 7* |
| Simplified | 2 | 1 | 45 | 1 | 7* | ||||||
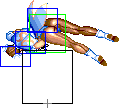
- Back Jump:
 |
 |
 |
 |
 |
 |
 |
 |
 |
 |
 |
 |

| |
| Frame Count | 2 | 1 | 10 | 6 | 5 | 4 | 3 | 4 | 5 | 6 | 3 | 1 | 7* |
| Simplified | 2 | 1 | 46 | 1 | 7* | ||||||||
- Forward Jump:
 |
 |
 |
 |
 |
 |
 |
 |
 |
 |
 |
 |

| |
| Frame Count | 2 | 1 | 10 | 6 | 5 | 4 | 3 | 4 | 5 | 6 | 1+ | 1 | 7* |
| Simplified | 2 | 1 | 44+ | 1 | 7* | ||||||||
Chun has a considerably fast prejump. In contrast to it, she has a huge arc on her jump which does make her a little easier to react. This is specially true against characters with DP moves: Ryu for instance can punish her with his DP most of the time.
Chun, just like Claw, has the abillity to do wall jumps. Thats why the Forward Jump has a '+' on the final frame of the aerial jumping part: that animation will have longer duration in case it's a wall jump.
The landing recovery has a special property which allows it to be canceled into certain actions. At the first landing frame, you can perform throws (including command throws), and on the second landing frame, you can start another jump, attack with a normal or special move, or block. Blocking not being until the second landing frame, as well as hitbox-hurtbox interactions having priority over throwbox-throw hurtbox is why sweeps work as anti airs in this game.
Things are different when jumping over your opponent, however. In that situation it's possible to walk back/forward, to jump again or to even block on the first landing frame! Strangely, if a throw is timed on the first landing frame of a jump that crosses over, a throwbox will never come out, even though that input will result in a normal coming out 2 frames later (like it normally would). Anyway, being able to block on the first landing frame can help a little bit on some safe jump crossup setups, or maybe in other situations as well if your character has a huge jump arc.
- Wall Jump: (In air near corner/wall, any direction away from the corner/wall)

| |
| Frame Count | 6 |
It should be noted, that like Claw, Chun has a command wall jump, you can actually do this during an air normals startup, active, or recovery frames. And you can do another normal after jumping off the wall. Likewise, you can air throw, then jump off the wall, and attack or air throw again. If you're quick enough, the wall jump itself can actually be cancelled into an air sbk, it retains the directional momentum of your original jump arc, say you jump backwards, and cancel the walljump to air sbk, you will still travel backwards.
This is useful for getting out of the corner, or to avoid attacks from the opponent. You can bounce off someone with a headstomp, and then jump off the wall if you're able to reach it.
The Basics
Old Chun has a good air game, but compared to N.Chun her ground game isn't as strong. She can use her air kicks to pressure opponents well, and her sbk is a fairly decent anti crossup tool as you can escape. She still has a good low/throw game, and still the same mad damage on medium punch throw. However her nerfed far mp(whiffs on crouchers), and lack of throw tech make her ground game less safe and abusable. And worst of all she loses the incredible super. If you really like jumping in, and being in the air, this is a good choice of character, otherwise you'd be better of using N.Chun.
Advanced Strategy
Always kara-cancel your LP/LM kikokens. To do it, just press HK before the punch. So, you charge backward, then press forward and immediatly HK, then immediatly HP. If you heard a HK sound, it worked.
Always charge down-backward when you're performing LL to be ready to SBK anti-air or Kiko. Beware though, kiko is not safe from that distance so it should be used only in reaction to a fireball.
Chess-mate situation : when the opponent is almost dead, force him to jump with your kikos and jump with LK.
If Your opponent do a vertical jump over your kikoken, walk forward and anti-air with farMK. farHP can also work but it's slightly harder to use.
O.Chun can meaty neckbreaker loop as long as the opponent don't guard it because if it's well timed, it's an ambiguous cross up. Be careful though, it's not safe if he is standing (he just have to jump backward and hits you), so stop as soon as he guarded.
Against shotos, try to counter hit their hadoken on startup with farMK.
Try to play mid-closely against shotos otherwise you'll get hado/DP trapped. Those match-ups are hard.
Trivia : Jenety (O.Chun Li Japanese player) developped an efficient play style completely without Kikoken.
Combos
Useful combos :
- jHK, clHP xx LL. 3hits + 1 chip. Very easy to perform, and the motion is exaclty the same even if O.Chun lands crossup. High damaging and dizzying combo. Do it when the jump in is guaranteed, like over a fireball. High chance to stun just by it-self, so it worthy to try from time to time at the begining of the round against fireball characters in long FT. Pretty safe in guard but be careful to not begin a second LL loop.
- jHP, clHP xx Kikoken(HP). 3hits. Can be chosen instead of the previous one, the advantage is a better recovery. It's better to use it on corner for two reasons. First it combos better. Secondly it's a pressing dedicated combo because you can quiclier follow with something after the kiko. Easier with the negative edge for the kiko.
- crMK, crMK. 2hits. Can be used in meaty or as a jump punition when the opponent lands on some situations.
- crMK xx LL. 2hits/3hits with a jump move before. Easier with MK version since it's the same button.
- sLP, crLP xx LL. 3hits + 1 chip. Easy to perform and useful to punish a whiffed DP or so, or on stun when you don't have time to do a jump combo. More damaging than a simple throw so it's a good alternative. Not working on Blanka.
- crMP, clHP. 2hits. Alternative for the previous one, but if you're not fast enough the clHP become a farHP that can whiff.
Safe jump : - jMK, crMK, crMK xx Kiko. Useful even in guard for spacing.
Character specific (to hard to get so it's not very useful) : On Zangief, jHP landed crossup (it doesn't hit cross up though), clMP, crMK, farHP. 4 hits and stun (almost?) guaranteed.
Stylish but not very useful combos :
- jMP, clMP, neutral jump HK. Unsafe on hit.
- Old Chun Li specific combo : j(any aerial move, better to use a medium for less pushback), flip kick xx Kiko/LL. The flip kick can be cancel after the first hit so it looks fun (especially with the kiko), but there are better options. Can still be used to finish the round. Since O.Chun can't cancel her clMK (N.Chun can), the flip kick cancel is an alternative.
Other : O.Chun can cancel her farHP, it's most of the time not a combo but can help to safer. Not working on some crouching characters though.
Match-ups
Vs. Chun-Li:
T.Akiba 6/4 O. Chun wins this matchup because N. Chun can't jump on her as easily, RE: SBK. Everything else is basically the same.
Vs. M. Bison (dictator):
O. Chun has the same tools as N. Chun against Bison plus the above mentioned SBK. If he gets cornered, repeatedly tick him with standing MP and throw him. It's difficult for him to escape without meter.
