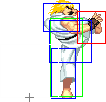
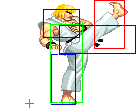
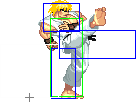
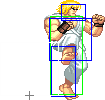
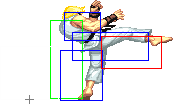
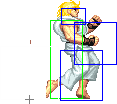
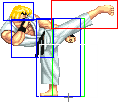
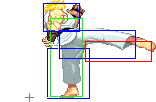
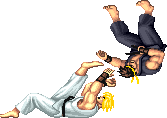
Super Street Fighter 2 Turbo/Ken

From SuperCombo Wiki


Story

Date of Birth: 2/14/1965
Height: 5'10"
Weight: 169lbs
Measurements: B44", W 32", H 33"
Blood Type: B
Likes: Spaghetti
Dislikes: Umeboshi (pickled plum), soap operas, pointless meetings

Born and raised in Japan, Ken faced a troubled upbringing. His Japanese father and Japanese American mother were at odds with one another, constantly arguing and neglecting Ken. In response, Ken became a delinquent in junior high, marking his rebellion with hair dyed blonde. This would cause his parents to settle down, before his father sent him to train under the Anatsuken master Gouken at the age of 12. Here he would discover his love for martial arts, and meet his lifelong rival Ryu. At the age of 23, Ken would take the United States Martial Arts circuit by storm, but upon meeting a girl named Eliza, he began to realize that there was more to life than fighting and began to focus more on his personal life. But when Ryu sends him a letter asking him to join the World Warrior tournament, Ken's fire would reignite...


Overview

Ken uses the same Anatsuken fighting style as Ryu, starting out as an exact copy of him, but throughout SF2's many revisions he began to develop his own spin on Ryu's gameplay. In ST, he can be a very tough character to beat if played with the right tools and the right mindset.

The ST version of Ken has longer start-up on his projectile, making it worse for zoning. While the faster face of the game makes it actually harder to simply react to it, the addition of super moves makes it a very dangerous option against a few characters. On the other hand, New Ken is much more dangerous up close. His low-knee-bash-Shoryuken pressure game can quickly deplete the enemy's vitality with only a few correct guesses. Ken also has a number of dizzy combos, giving him even more comeback potential.

If you want to check Youtube and Nico Nico Douga for high level footage, check players such as Aniken, Mattsun, Choshu, and Kiken, among others.


Strengths Weaknesses
  • Shoto Tool Kit: Ken uses Ryu's moveset as his base, meaning he has a decent projectile and incredible anti air moves.
  • Shoryuken: Ken's Jab Shoryuken is an incredible anti-air move, with huge damage. His Fierce Shoryuken makes it impossible for characters to safejump him.
  • Knee Bash Hold: Ken's Knee Bash leads to dangerous loops, creating powerful mixups.
  • Weaker Hadoken: Ken's Hadokens have long startup, making them much harder to use.
  • Relatively Niche Tatsumaki Usage: Ken's grounded Tatsumakis don't have invincibility, limiting the cases in which you'd be using Tatsumaki compared to Ryu.
  • Average Range: Ken shares Ryu's average range on both his normals and throws, his longest normals having long recovery, making them a death sentence to whiff.


New & Old Versions Comparison

To select Old Ken, choose Ken and then press ← ← ← → Jab/Fierce, pressing Short simultaneously with the punch button for the alternate color.

Here is the list of differences:

  • System Changes: Old Ken cannot tech throws, or use his Super Combo.
  • Old Ken does not have Crazy Kicks or the Knee Bash hold;
  • Old Ken has a faster pre-jump animation by 1 frame;
  • Old Ken does not have an air throw;
  • Old Ken has some differences in some of his normals:
    • Far Standing Jab has better priority;
    • Close Standing Fierce second active hitbox has much better priority;
    • Far Standing Short is an anti air kick like the Far Standing Forward, while for New Ken it's a low hitting kick like the close version;
    • Crouching Short has much better priority;
    • Far Standing Forward has a slower startup;
    • Close Standing Forward is a knee attack, while for New Ken is a high kick similar to his old Close Standing Roundhouse;
    • Crouching Forward has much better priority;
    • Close Standing Roundhouse is a not very useful kick with minor anti air priority that hits twice, while for New Ken it's a kick that moves him forward while attacking low;
    • Far Standing Roundhouse is the classic mediocre anti air shoto kick, while for New Ken its a kick that moves him forward while attacking low;
    • Crouching Roundhouse has much better priority and does more damage;
    • Both Jumping Fierces do more damage;
    • Diagonal Jumping Short has worse priority during the first 10 active frames;
    • Diagonal Jumping Forward is an aerial kick with very good priority, while for New Ken it's a new kick made for crossups, but it's ironically easier to time with Old Ken's Forward;
    • Neutral Jumping Roundhouse has better air-to-air priority but worse air-to-ground priority and does more damage;
    • Diagonal Jumping Roundhouse can be used as a cross-up attack and has better air-to-air priority, but has somewhat worse air-to-ground priority. It also does more damage;
  • Old Ken's Hadoukens have a 1 frame faster startup. His Strong Hadoukens have 1 frame faster recovery and his Fierce ones have a 2 frame faster recovery;
  • Old Ken's Shoryukens are invulnerable until their apex. Jab and Strong versions do not have 2 grounded frames where Ken is throwable;
  • Old Ken's Fierce Shoryuken have a 1f startup, while New Ken's has 0f startup. Also, the hitbox on the 1st active part is moved 2px towards in case of New Ken, which allows him to get it to combo for 3 hits against a Standing Chun-Li;


New Ken may have a better mixup game due to his Crazy Kicks and hold, as well as his Super Combo and throw techs, but Old Ken has better normals, fireballs, and Shoryukens. For many, this is all they really need to play Old Ken, but New Ken still has unique properties to him.


Color Options

Jab Strong Fierce Start Old
Ken-lp.gif Ken-mp.gif Ken-hp.gif Ken-start.gif Ken-old1.gif
Ken-lk.gif Ken-mk.gif Ken-hk.gif Ken-hold.gif Ken-old2.gif
Short Forward Roundhouse Hold Old Alternative

--Born2SPD

Video Overview

Ken
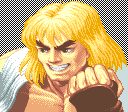
Ken's portrait in Super Turbo.
Character Data
Damage Scaling Factor 27/32
Forward Walk Speed 51
Backwards Walk Speed 34
Pre-Jump Frames 4
Forwards Jump Duration 44
Backwards Jump Duration 43
Landing Frames 7*
Jump Height Apex 78
Forwards Jump Distance 135
Backwards Jump Distance 163
Soft Knockdown Recovery 39
Hard Knockdown Recovery 73


Normal Moves

Disclaimer: To better understand the diagrams, read this.

Standing Normals

cllp
Close Jab
Close Light Punch
5LP / cl.Lp.png
Ken stcljab2.png
Damage Dizzy Dizzy Time Cancel Guard Act. Range
4[6] 0~5 40 Special, Super Mid 0~25
Startup Active Recovery Total Frame Adv. Meter
3 4 5 12 +4 2/1

A quick elbow smash in front and above Ken's head.

  • Fast start-up.
  • Works as an anti-air if you're close enough.
  • OK priority.

Click to toggle detailed hitbox data.

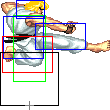
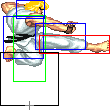
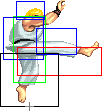
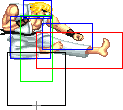
Ken stcljab1&3 stclstrng1&7 stfarstrng1 stfarfrc1 stclshrt1&6 stfarshrt1&8 stclfrwrd1&5 stfarfrwrd1.png Ken stcljab2.png Ken stcljab1&3 stclstrng1&7 stfarstrng1 stfarfrc1 stclshrt1&6 stfarshrt1&8 stclfrwrd1&5 stfarfrwrd1.png
Frame Count 1 + 2 4 5
Simplified 3 4 5

frlp

Far Jab
Far Light Punch
5LP / cl.Lp.png
Ken stfarjab2.png
Damage Dizzy Dizzy Time Cancel Guard Act. Range
4[1] 0~5 40 Chain, Special, Super Mid 26+
Startup Active Recovery Total Frame Adv. Meter
3 4 5 12 +4 2/1

A simple jab.

  • Chainable, ok reach, good priority.

Click to toggle detailed hitbox data.

Ken stfarjab1&3.png Ken stfarjab2.png Ken stfarjab1&3.png Ken stfarjab4 stfarstrng6 stfarfrc6.png
Frame Count 1 + 2 4 4 1
Simplified 3 4 5


clmp

Close Strong
Close Medium Punch
5MP / cl.Mp.png
Ken stclstrng3.png
Damage Dizzy Dizzy Time Cancel Guard Act. Range
22[0] 5~11 60 Special, Super Mid 0~31
Startup Active Recovery Total Frame Adv. Meter
4 2 17 23 -1 4/3

Ken performs a hook, then another one that doesn't hit for some reason.

  • Terrible recovery, so try canceling this into a special like a Hadoken.

Click to toggle detailed hitbox data.

Ken stcljab1&3 stclstrng1&7 stfarstrng1 stfarfrc1 stclshrt1&6 stfarshrt1&8 stclfrwrd1&5 stfarfrwrd1.png Ken stclstrng2&6.png Ken stclstrng3.png Ken stclstrng4.png Ken stclstrng5.png Ken stclstrng2&6.png Ken stcljab1&3 stclstrng1&7 stfarstrng1 stfarfrc1 stclshrt1&6 stfarshrt1&8 stclfrwrd1&5 stfarfrwrd1.png
Frame Count 1 + 1 2 2 6 4 3 4
Simplified 4 2 17

frmp

Far Strong
Far Medium Punch
5MP / fr.Mp.png
Ken stfarstrng3.png
Damage Dizzy Dizzy Time Cancel Guard Act. Range
22[6] 5~11 60 Special, Super Mid 32+
Startup Active Recovery Total Frame Adv. Meter
4 4 7 15 +7 4/3

Ken performs a straight punch.

  • Very good recovery, reach and priority.
  • Works as anti-air against moves whose extended limbs are vulnerable, but Ken's body moves forward a bit, so you'll need some room to use it correctly.

Click to toggle detailed hitbox data.

Ken stcljab1&3 stclstrng1&7 stfarstrng1 stfarfrc1 stclshrt1&6 stfarshrt1&8 stclfrwrd1&5 stfarfrwrd1.png Ken stfarstrng2&4 stfarfrc2&4 stfarshrt2&7.png Ken stfarstrng3.png Ken stfarstrng2&4 stfarfrc2&4 stfarshrt2&7.png Ken stfarstrng5 stfarfrc5.png Ken stfarjab4 stfarstrng6 stfarfrc6.png
Frame Count 1 + 1 2 4 3 3 1
Simplified 4 4 7


clhp

Close Fierce
Close Heavy Punch
5HP / cl.Hp.png
Ken stclfrc2.png
Ken stclfrc3.png
Ken got the short end of the stick here.
Damage Dizzy Dizzy Time Cancel Guard Act. Range
28[7] 3~9 / 10~16 40 / 80 Special, Super / None Mid 0~41
Startup Active Recovery Total Frame Adv. Meter
4 8 (2 / 6) 23 35 -9 / -7 5/4

A close uppercut.

  • If you're close to your enemy, it can be canceled into any special attack for a basic but damaging combo. Bad recovery.
  • Decent priority anti air if your opponent is up close.
  • Has a noticeably smaller hitbox compared to the other shotos, so it's more vulnerable to crossups.

Click to toggle detailed hitbox data.

Ken stclfrc1.png Ken stclfrc2.png Ken stclfrc3.png Ken stclfrc4.png Ken stclfrc5.png
Frame Count 1 + 3 2 6 10 13
Simplified 4 8 23

frhp

Far Fierce
Far Heavy Punch
5HP / fr.Hp.png
Ken stfarfrc3.png
Damage Dizzy Dizzy Time Cancel Guard Act. Range
28[2] 10~16 80 Super Mid 42+
Startup Active Recovery Total Frame Adv. Meter
6 6 23 35 -7 5/4

Similar to Far Strong.

  • Higher damage and longer reach, but hideous recovery and the same extended hurtbox. Better make sure it hits.

Click to toggle detailed hitbox data.

Ken stcljab1&3 stclstrng1&7 stfarstrng1 stfarfrc1 stclshrt1&6 stfarshrt1&8 stclfrwrd1&5 stfarfrwrd1.png Ken stfarstrng2&4 stfarfrc2&4 stfarshrt2&7.png Ken stfarfrc3.png Ken stfarstrng2&4 stfarfrc2&4 stfarshrt2&7.png Ken stfarstrng5 stfarfrc5.png Ken stfarjab4 stfarstrng6 stfarfrc6.png
Frame Count 1 + 3 2 6 10 12 1
Simplified 6 6 23


cllk

Close Short
Close Light Kick
5LK / cl.Lk.png
Ken stclshrt3.png
Hits low because Ken says so.
Damage Dizzy Dizzy Time Cancel Guard Act. Range
12[0] 0~5 40 Chain, Super Low 0
Startup Active Recovery Total Frame Adv. Meter
6 2 8 16 +3 2/1

A low kick.

  • Can be canceled into another standing Short or crouching Short.
  • This move must be blocked low, which can be used as a simple knowledge check.

Click to toggle detailed hitbox data.

Ken stcljab1&3 stclstrng1&7 stfarstrng1 stfarfrc1 stclshrt1&6 stfarshrt1&8 stclfrwrd1&5 stfarfrwrd1.png Ken stclshrt2&5 stclfrwrd4.png Ken stclshrt3.png Ken stclshrt4.png Ken stclshrt2&5 stclfrwrd4.png Ken stcljab1&3 stclstrng1&7 stfarstrng1 stfarfrc1 stclshrt1&6 stfarshrt1&8 stclfrwrd1&5 stfarfrwrd1.png
Frame Count 1 + 2 3 2 4 3 1
Simplified 6 2 8

frlk

Far Short
Far Light Kick
5LK / fr.Lk.png
Ken stfarshrt4.png
Same as above but worse.
Damage Dizzy Dizzy Time Cancel Guard Act. Range
14[0] 0~5 40 None Low 1+
Startup Active Recovery Total Frame Adv. Meter
8 2 9 18 +2 2/1

A low-hitting shin kick.

  • The close version has better priority and can be Chain/Super canceled.
  • This version could still be used as a low level knowledge check.
  • Often used as Chain Cancel fodder.

Click to toggle detailed hitbox data.

Ken stcljab1&3 stclstrng1&7 stfarstrng1 stfarfrc1 stclshrt1&6 stfarshrt1&8 stclfrwrd1&5 stfarfrwrd1.png Ken stfarstrng2&4 stfarfrc2&4 stfarshrt2&7.png Ken stfarshrt3&6.png Ken stfarshrt4.png Ken stfarshrt5.png Ken stfarshrt3&6.png Ken stfarstrng2&4 stfarfrc2&4 stfarshrt2&7.png Ken stcljab1&3 stclstrng1&7 stfarstrng1 stfarfrc1 stclshrt1&6 stfarshrt1&8 stclfrwrd1&5 stfarfrwrd1.png
Frame Count 1 + 3 2 2 2 2 3 3 1
Simplified 8 2 9

clmk

Close Forward
Close Medium Kick
5MK / cl.Mk.png
Ken stclfrwrd3.png
Move a little farther away, and this move becomes way better.
Damage Dizzy Dizzy Time Cancel Guard Act. Range
22[6] 5~11 60 Special, Super Mid 0~32
Startup Active Recovery Total Frame Adv. Meter
8 8 11 27 -1 4/3

A very flexible split kick.

  • Pretty similar to the far version with worse vertical priority and worse recovery.
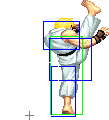
  • Also triggers from farther away than most other close normals of its ilk, so it's harder to activate the Far version.
  • Reaches higher than the far version, but the extended hurtbox gives the move significantly worse priority.
  • At least it hits straight up.

Click to toggle detailed hitbox data.

Ken stcljab1&3 stclstrng1&7 stfarstrng1 stfarfrc1 stclshrt1&6 stfarshrt1&8 stclfrwrd1&5 stfarfrwrd1.png Ken stclfrwrd2.png Ken stclfrwrd3.png Ken stclshrt2&5 stclfrwrd4.png Ken stcljab1&3 stclstrng1&7 stfarstrng1 stfarfrc1 stclshrt1&6 stfarshrt1&8 stclfrwrd1&5 stfarfrwrd1.png
Frame Count 1 + 3 4 8 10 1
Simplified 8 8 11

frmk

Far Forward
Far Medium Kick
5MK / fr.Mk.png
Ken stfarfrwrd3.png
Damage Dizzy Dizzy Time Cancel Guard Act. Range
22[1] 5~11 60 None Mid 33+
Startup Active Recovery Total Frame Adv. Meter
8 8 7 23 +3 4/3

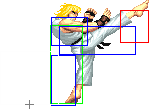
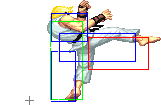
A high side kick.

  • Good priority, but very slow start-up.
  • Also a good anti-air if you can press the button fast enough.

Click to toggle detailed hitbox data.

Ken stcljab1&3 stclstrng1&7 stfarstrng1 stfarfrc1 stclshrt1&6 stfarshrt1&8 stclfrwrd1&5 stfarfrwrd1.png Ken stfarfrwrd2&4.png Ken stfarfrwrd3.png Ken stfarfrwrd2&4.png Ken stfarfrwrd5.png
Frame Count 1 + 3 4 8 6 1
Simplified 8 8 7


frhk

Roundhouse
Standing Heavy Kick
5HK / Hk.png
Ken stclrh5 stfarrh5.png
Damage Dizzy Dizzy Time Cancel Guard Act. Range
26[2] 10~16 80 None Mid N/A
Startup Active Recovery Total Frame Adv. Meter
9 5 21 35 -4 5/4

Ken's spinning kick.

  • Moves ken forward a little.
  • Can work well as a poke/punish in some matchups.
  • Be careful, since it has a long recovery on whiff and is more than reactable.

Click to toggle detailed hitbox data.

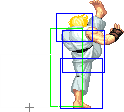
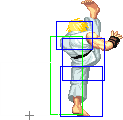
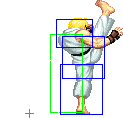
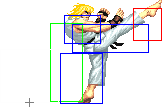
Ken stclrh1 stfarrh1.png Ken stclrh2 stfarrh2.png Ken stclrh3 stfarrh3.png Ken stclrh4 stfarrh4.png Ken stclrh5 stfarrh5.png Ken stclrh6 stfarrh6.png Ken stclrh7 stfarrh7.png Ken stclrh8 stfarrh8.png Ken stclrh9 stfarrh9.png
Frame Count 1 + 2 2 2 2 5 5 5 5 6
Simplified 9 5 21

Crouching Normals

crlp

Crouching Jab
Crouching Light Punch
2LP / D.png+Lp.png
Ken crjab2.png
Damage Dizzy Dizzy Time Cancel Guard Act. Range
4[1] 0~5 40 Chain, Special, Super Mid N/A
Startup Active Recovery Total Frame Adv. Meter
3 4 5 12 +4 2/1

Another jab.

  • Average reach and very good priority.

Click to toggle detailed hitbox data.

Ken crjab1&3.png Ken crjab2.png Ken crjab1&3.png Ken crjab4 crstrng6 crshrt4 crfrwrd6.png
Frame Count 1 + 2 4 4 1
Simplified 3 4 5


crmp

Crouching Strong
Crouching Medium Punch
2MP / D.png+Mp.png
Ken crstrng3.png
And you thought Alpha 2 Rose's Cr.MP had good priority.
Damage Dizzy Dizzy Time Cancel Guard Act. Range
22[1] 5~11 60 Special, Super Mid N/A
Startup Active Recovery Total Frame Adv. Meter
4 4 7 15 +7 4/3

Ken does a crouching straight.

  • Good damage, stun, recovery and priority.
  • This move can be used as a safe meaty against several invulnerable special attacks from the correct distance. However, this can be countered by standing still (which shrinks the hurtbox horizontally) and then either attacking or walking up and throwing. It's also unsafe against most supers.

Click to toggle detailed hitbox data.

Ken crstrng1&5.png Ken crstrng2&4.png Ken crstrng3.png Ken crstrng2&4.png Ken crstrng1&5.png Ken crjab4 crstrng6 crshrt4 crfrwrd6.png
Frame Count 1 + 1 2 4 3 3 1
Simplified 4 4 7


crhp

Crouching Fierce
Crouching Heavy Punch
2HP / D.png+Hp.png
Ken crfrc2.png
First Hitbox
Ken crfrc3.png
Second Hitbox.
Close Fierce isn't as good on New Ken, so this is an actual alternative now.
Damage Dizzy Dizzy Time Cancel Guard Act. Range
28[2] / 22[2] 3~9 / 10~16 40 / 80 Special, Super / None Mid N/A
Startup Active Recovery Total Frame Adv. Meter
4 11 (3 / 8) 23 37 -12 / -9 5/4

Ken begins an uppercut from crouching position.

  • Good damage and has a deceptively long horizontal reach.
  • Average to low priority and quite long recovery.
  • Mainly used in combos.
  • Works as an anti-air as an alternative to Shoryuken.

Click to toggle detailed hitbox data.

Ken crfrc1&5.png Ken crfrc2.png Ken crfrc3.png Ken crfrc4.png Ken crfrc1&5.png Ken crfrc6.png
Frame Count 1 + 3 3 8 10 12 1
Simplified 4 11 23


crlk
Crouching Short
Crouching Light Kick
2LK / D.png+Lk.png
Ken crshrt2.png
Damage Dizzy Dizzy Time Cancel Guard Act. Range
4[1] 0~5 40 Chain, Special, Super Low N/A
Startup Active Recovery Total Frame Adv. Meter
4 4 5 13 +4 2/1

Crouching low kick.

  • Mediocre priority but good reach.
  • Great for simple combos.

Click to toggle detailed hitbox data.

Ken crshrt1&3 crfrwrd1&5.png Ken crshrt2.png Ken crshrt1&3 crfrwrd1&5.png Ken crjab4 crstrng6 crshrt4 crfrwrd6.png
Frame Count 1 + 3 4 4 1
Simplified 4 4 5
frmk
Crouching Forward
Crouching Medium Kick
2MK / D.png+Mk.png
Ken crfrwrd3.png
Damage Dizzy Dizzy Time Cancel Guard Act. Range
22[1] 5~11 60 Special, Super Low N/A
Startup Active Recovery Total Frame Adv. Meter
4 6 9 19 +3 4/3
  • Crouching side kick.
  • Good reach and recovery, but has projected vulnerable hitboxes before and after it becomes active.
  • An important tool when closing the gap on the enemy as it can be canceled into Hadokens.
  • Also used in bread and butter combos.

Click to toggle detailed hitbox data.

Ken crshrt1&3 crfrwrd1&5.png Ken crfrwrd2&4.png Ken crfrwrd3.png Ken crfrwrd2&4.png Ken crshrt1&3 crfrwrd1&5.png Ken crjab4 crstrng6 crshrt4 crfrwrd6.png
Frame Count 1 + 1 2 6 4 4 1
Simplified 4 6 9
crhk
Crouching Roundhouse
Crouching Heavy Kick
2HK / D.png+Hk.png
Ken crrh2.png
Damage Dizzy Dizzy Time Cancel Guard Act. Range
26[2] 5~11 130 Special, Super Low N/A
Startup Active Recovery Total Frame Adv. Meter
4 6 25 34 Hit: Soft KD
Block: -9
5/4

Ken's sweep kick.

  • Soft knockdown on hit.
  • Good range and the priority is such that it beats or trades with a number of moves.
  • Very long recovery however, so good players will often bait and punish this move.
  • Top shoto players will often cancel this move into either a LP Shoryuken (harder to punish and generates meter) or a Hadoken (the pushback makes the move practically unpunishable).
  • Walking up cr.Roundhouse xx Hadouken is an important skill for shoto players to master, due to the spacing it generates.
  • Tied with Ryu for the fastest sweep startup in the game (3 frames), which makes it really good in pressure situations.

Click to toggle detailed hitbox data.

Ken crrh1.png Ken crrh2.png Ken crrh3.png Ken crrh4.png Ken crrh5.png
Frame Count 1 + 3 6 6 8 11
Simplified 4 6 25

Jumping Normals

jlp
Jumping Jab
Jumping Light Punch
8LP / U.png+Lp.png
Ken njjab2.png
Neutral Jump version
Ken djjab2.png
Diagonal Jump version
U.png + Lp.png Damage Dizzy Dizzy Time Cancel Guard Act. Range
12[2] 1~7(-2) 40 Special High N/A
Startup Active Recovery Total Frame Adv. Meter
2 N/A 2+∞ Dependent 2/1

The only differences between this version and the Diagonal Jump version are that this version has a taller vertical hitbox and a different random damage modifier.

Ub.png or Uf.png + Lp.png Damage Dizzy Dizzy Time Cancel Guard Act. Range
12[2] 1~7(-2) 40 Special High N/A
Startup Active Recovery Total Frame Adv. Meter
2 N/A 2+∞ Dependent 2/1

Ken performs a jumping jab that is active throughout the whole jump.

  • Ken's hand has a relatively large active hitbox around it, making this a good air-to-air move.
  • It can be used for jumping on your opponent after a knockdown. The small amount of pushback allows for mixups such as throw, cr.forward xx Hadoken/Super, or delayed Jab Shoryuken (to beat reversal throws).
  • Beats Zangief's Lariats from the right distance and still hits him if he crouches.

Click to toggle detailed hitbox data.

Neutral Jump Version:

Ken njjab1 njstrng1&4 djstrng1&4 njfrc1&4 djfrc4.png Ken njjab2.png
Frame Count 2

Diagonal Jump Version:

Ken njjab1 njstrng1&4 djstrng1&4 njfrc1&4 djfrc4.png Ken djjab2.png
Frame Count 2
jmp
Jumping Strong
Jumping Medium Punch
8MP / U.png+Mp.png
Ken njstrng3 djstrng3.png
Hitbox is the same across both versions.
U.png+Mp.png Damage Dizzy Dizzy Time Cancel Guard Act. Range
22[2] 5~11 50 Special High N/A
Startup Active Recovery Total Frame Adv. Meter
4 20 24+∞ Dependent 4/3

The same as the Diagonal Jump version, but with more active frames.

Ub.png or Uf.png+Mp.png Damage Dizzy Dizzy Time Cancel Guard Act. Range
22[2] 5~11 50 Special High N/A
Startup Active Recovery Total Frame Adv. Meter
4 8 12+∞ Dependent 4/3

An aerial punch that stays active for a while.

  • Very good horizontal reach and priority.
  • A move to be considered when afraid of wall dives crossing you or aerial attacks in general.
  • This attack does not hit crouching opponents.

Click to toggle detailed hitbox data.

Neutral Jump Version:

Ken njjab1 njstrng1&4 djstrng1&4 njfrc1&4 djfrc4.png Ken njstrng2 djstrng2 njfrc2.png Ken njstrng3 djstrng3.png Ken njjab1 njstrng1&4 djstrng1&4 njfrc1&4 djfrc4.png Ken njstrng5 djstrng5 njfrc5 djfrc5 njshrt3 njfrwrd3 djfrwrd7 djrh5.png Ken njstrng6 djstrng6 njfrc6 djfrc6 njfrwrd4 djfrwrd8 njrh6 djrh6.png Ken njstrng7 djstrng7 njfrc7 djfrc7 njfrwrd5 djfrwrd9 njrh7 djrh7.png
Frame Count 2 2 20 4 4 4
Simplified 4 20

Diagonal Jump Version:

Ken njjab1 njstrng1&4 djstrng1&4 njfrc1&4 djfrc4.png Ken njstrng2 djstrng2 njfrc2.png Ken njstrng3 djstrng3.png Ken njjab1 njstrng1&4 djstrng1&4 njfrc1&4 djfrc4.png Ken njstrng5 djstrng5 njfrc5 djfrc5 njshrt3 njfrwrd3 djfrwrd7 djrh5.png Ken njstrng6 djstrng6 njfrc6 djfrc6 njfrwrd4 djfrwrd8 njrh6 djrh6.png Ken njstrng7 djstrng7 njfrc7 djfrc7 njfrwrd5 djfrwrd9 njrh7 djrh7.png
Frame Count 2 2 8 4 4 4
Simplified 4 8
jhp
Jumping Fierce
U.png+Hp.png
8HP / U.png+Hp.png
Ken njfrc3.png
Neutral Jump version
Ken djfrc3.png
Diagonal Jump Version
U.png+Hp.png Damage Dizzy Dizzy Time Cancel Guard Act. Range
24[2] 11~17(-1) 60(+20) Special High N/A
Startup Active Recovery Total Frame Adv. Meter
4 20 24+∞ Dependent 5/4

Ken's strongest jumping punch.

  • The Neutral Jump version trades air to ground priority for more stun and active frames.
Ub.png or Uf.png+Hp.png Damage Dizzy Dizzy Time Cancel Guard Act. Range
24[1] 3~9 40 Special High N/A
Startup Active Recovery Total Frame Adv. Meter
4 8 12+∞ Dependent 5/4
  • Can be used as anti-air from certain distances, and also beats or trades most other aerial attacks.

Click to toggle detailed hitbox data.

Neutral Jump Version:

Ken njjab1 njstrng1&4 djstrng1&4 njfrc1&4 djfrc4.png Ken njstrng2 djstrng2 njfrc2.png Ken njfrc3.png Ken njjab1 njstrng1&4 djstrng1&4 njfrc1&4 djfrc4.png Ken njstrng5 djstrng5 njfrc5 djfrc5 njshrt3 njfrwrd3 djfrwrd7 djrh5.png Ken njstrng6 djstrng6 njfrc6 djfrc6 njfrwrd4 djfrwrd8 njrh6 djrh6.png Ken njstrng7 djstrng7 njfrc7 djfrc7 njfrwrd5 djfrwrd9 njrh7 djrh7.png
Frame Count 2 2 20 4 4 4
Simplified 4 20

Diagonal Jump Version:

Ken djfrc1.png Ken djfrc2.png Ken djfrc3.png Ken njjab1 njstrng1&4 djstrng1&4 njfrc1&4 djfrc4.png Ken njstrng5 djstrng5 njfrc5 djfrc5 njshrt3 njfrwrd3 djfrwrd7 djrh5.png Ken njstrng6 djstrng6 njfrc6 djfrc6 njfrwrd4 djfrwrd8 njrh6 djrh6.png Ken njstrng7 djstrng7 njfrc7 djfrc7 njfrwrd5 djfrwrd9 njrh7 djrh7.png
Frame Count 2 2 8 4 4 4
Simplified 4 8
njlk
Neutral Jumping Short
Neutral Jumping Light Kick
8LK / U.png+Lk.png
Ken njshrt2.png
Damage Dizzy Dizzy Time Cancel Guard Act. Range
14[2] 1~7(-2) 40 Special High N/A
Startup Active Recovery Total Frame Adv. Meter
3 40 43+∞ Dependent 2/1

A jumping split kick.

  • Stays active for a while, but has a pitiful reach.
  • Mostly useless.

Click to toggle detailed hitbox data.

Ken njshrt1 njfrwrd1.png Ken njshrt2.png Ken njstrng5 djstrng5 njfrc5 djfrc5 njshrt3 njfrwrd3 djfrwrd7 djrh5.png
Frame Count 3 40
djlk
Diagonal Jumping Short
dj.Lk.png
7LK/9LK
Ken djshrt3.png
His hurtbox gets a bit bigger after 10 frames.
Damage Dizzy Dizzy Time Cancel Guard Act. Range
12[2] 1~7(-2) 40 None High N/A
Startup Active Recovery Total Frame Adv. Meter
5 ∞ (10 / ∞) N/A 5+∞ Dependent 2/1

Ken's jumping knee.

  • Stays out for quite some time, but safe jumps aside, this does not have many uses.
  • Its main downside is the short reach.

Click to toggle detailed hitbox data.

Ken djshrt1.png Ken djshrt2.png Ken djshrt3.png Ken djshrt4.png
Frame Count 2 3 10
Simplified 5
njmk
Neutral Jumping Forward
Neutral Jumping Medium Kick
8MK / U.png+Mk.png
Ken njfrwrd2.png
Damage Dizzy Dizzy Time Cancel Guard Act. Range
22[2] 5~11 50 None High N/A
Startup Active Recovery Total Frame Adv. Meter
5 13 18+∞ Dependent 4/3

A slightly better jumping split kick.

  • Stays active for some time.
  • Can be used in certain crossup situations, but neutral Strong/Fierce has a lower hitbox and neutral Roundhouse has better reach and damage.

Click to toggle detailed hitbox data.

Ken njshrt1 njfrwrd1.png Ken njfrwrd2.png Ken njstrng5 djstrng5 njfrc5 djfrc5 njshrt3 njfrwrd3 djfrwrd7 djrh5.png Ken njstrng6 djstrng6 njfrc6 djfrc6 njfrwrd4 djfrwrd8 njrh6 djrh6.png Ken njstrng7 djstrng7 njfrc7 djfrc7 njfrwrd5 djfrwrd9 njrh7 djrh7.png
Frame Count 5 13 6 6
Simplified 5 13
djmk
Diagonal Jumping Forward
Diagonal Jumping Medium Kick
7MK or 9MK
Ub.png or Uf.png+Mk.png
Ken djfrwrd4.png
First hitbox. The crossup part.
Ken djfrwrd5.png
Second hitbox. How the hitbox shifts is one of life's greatest mysteries.
Damage Dizzy Dizzy Time Cancel Guard Act. Range
26[2] / 22[2] 3~9 / 5~11 40 / 50(+10) None High N/A
Startup Active Recovery Total Frame Adv. Meter
5 13 (5 / 8) 18+∞ Dependent 4/3

Ken brings his knee down, then his leg realizes it needs to put its hurtbox out.

  • His main crossup, alongside Air Tatsu.
  • Unsuitable as an air to air due to the huge startup.

Click to toggle detailed hitbox data.

Ken djfrwrd1.png Ken djfrwrd2.png Ken djfrwrd3.png Ken djfrwrd4.png Ken djfrwrd5.png Ken djfrwrd6 djrh2&4.png Ken njstrng5 djstrng5 njfrc5 djfrc5 njshrt3 njfrwrd3 djfrwrd7 djrh5.png Ken njstrng6 djstrng6 njfrc6 djfrc6 njfrwrd4 djfrwrd8 njrh6 djrh6.png Ken njstrng7 djstrng7 njfrc7 djfrc7 njfrwrd5 djfrwrd9 njrh7 djrh7.png
Frame Count 1 2 2 5 8 3 3 3
Simplified 5 13
njhk
Neutral Jumping Roundhouse
Neutral Jumping Heavy Kick
8HK / U.png+Hk.png
Ken njrh2.png
First Hitbox
Ken njrh3.png
Second Hitbox
Damage Dizzy Dizzy Time Cancel Guard Act. Range
26[2] 11~17(-1) 60(+20) Special / None High N/A
Startup Active Recovery Total Frame Adv. Meter
2 8 (4 / 4) 10+∞ Dependent 5/4

Neutral spin kick.

  • The first active part becomes active very fast, saving you from some troublesome situations.
  • It can also be special canceled for some reason.
  • The second part has good reach, making it an effective normal to keep your opponent away. In fact, it can even beat Dhalsim's slides.

Click to toggle detailed hitbox data.

Ken njrh1.png Ken njrh2.png Ken njrh3.png Ken njrh4.png Ken njrh5.png Ken njstrng6 djstrng6 njfrc6 djfrc6 njfrwrd4 djfrwrd8 njrh6 djrh6.png Ken njstrng7 djstrng7 njfrc7 djfrc7 njfrwrd5 djfrwrd9 njrh7 djrh7.png
Frame Count 2 4 4 4 3 3
Simplified 2 8
djhk
Diagonal Jumping Roundhouse
Diagonal Jumping Heavy Kick
7 or 9 HK
Ub.png or Uf.png+Hk.png
Ken djrh3.png
Damage Dizzy Dizzy Time Cancel Guard Act. Range
26[2] 3~9 40 None High N/A
Startup Active Recovery Total Frame Adv. Meter
5 7 12+∞ Dependent 5/4

A full power kick.

  • Unlike Ryu's version of this move, N.Ken can't use it as a crossup due to the nerfed hitbox. N.Ken has to use Forward kick instead.
  • The leg hurtbox at the front is slightly better than N.Ryu's though. This can have minimal effects of various instances, but the main impact of this difference is that Ken can, with proper spacing, "safe jump" Chun's Tenshokyaku easily, since Ken's leg can't be hit by Tensho's 1st hitting part.
  • Still has good reach, but can be countered if you whiff due to projected hurtboxes.
  • Can be used as an anti air from certain distances, in the same fashion as diagonal jumping Fierce, hitting your enemy from above his attack or around the head.

Click to toggle detailed hitbox data.

Ken djrh1.png Ken djfrwrd6 djrh2&4.png Ken djrh3.png Ken djfrwrd6 djrh2&4.png Ken njstrng5 djstrng5 njfrc5 djfrc5 njshrt3 njfrwrd3 djfrwrd7 djrh5.png Ken njstrng6 djstrng6 njfrc6 djfrc6 njfrwrd4 djfrwrd8 njrh6 djrh6.png Ken njstrng7 djstrng7 njfrc7 djfrc7 njfrwrd5 djfrwrd9 njrh7 djrh7.png
Frame Count 2 3 7 3 3 3
Simplified 5 7

Throws

Ken can throw with Mp.png, Hp.png, Mk.png, and Hk.png. He also has an Air Throw.

Shoulder Throw
Seoi Nage
cl. 4/6 + MP/HP
cl.B.png/F.png+Mp.png/Hp.png
Ssf2t ken kthrow.png
Damage Dizzy Dizzy Time Cancel Guard Act. Range
32* 7~13 100 - Grab 48 (from axis)
19 (from throwable box)
Startup Active Recovery Total Frame Adv. Meter
0 1 Dependent 1 N/A -

Ken's Punch throw, where he throws his enemy above his head.

  • Can be activated with either Strong or Fierce.
  • The direction you're holding determines the direction you'll throw in.
  • Useful over Knee Bash if you're about to dizzy/K.O. your opponent or if you need the OS with Fierce normals in case the throw attempt fails.


Hiza Jigoku
Knee Bash
cl. 4/6 + MK
cl. B.png/F.png+Mk.png
Ssf2t ken hold.png
Welcome to mixup city, bad boy!
Damage Dizzy Dizzy Time Cancel Guard Act. Range
26* + 4 x n
Set amount of hits = 5
0 0 - Grab 48 (from axis)
19 (from throwable box)
Startup Active Recovery Total Frame Adv. Meter
0 1 Dependent 1 N/A -

Ken's Hold.

  • Activated with Forward kick.
  • Leads to a bunch of mixups since you can walk under your opponent as they're being thrown.
  • A few examples are walk up combo, walk under combo, jump in combo, tick throws, or jab Shoryuken.
  • More detailed strategies are in the Strategy section.


Hell Wheel
Jigoku Gurama
cl. 4/6 + HK
cl. B.png/F.png+Hk.png
Ssf2t ken pthrow.png
Damage Dizzy Dizzy Time Cancel Guard Act. Range
32* 7~13 100 - Grab 48 (from axis)
19 (from throwable box)
Startup Active Recovery Total Frame Adv. Meter
0 1 Dependent 1 N/A -

Ken's Heavy Kick throw, where he pulls his enemy towards himself, rolls, and then throws his enemy with his leg.

  • Activated with Roundhouse.
  • The direction you're holding determines the direction you'll throw in.
  • Moves the enemy farther than his Punch throw, so it's useful for cornering opponents.
  • Also useful for Throw for the Win tactics, like his Punch throw.
  • May be useful when you use Standing Roundhouse as an OS in case the throw attempt fails.


Airborne Hell Wheel
Air Jigoku Gurama
Anything but 8 midair + MK/HK
Anything but U.png midair + Mk.png/Hk.png
Ssf2t ken pthrow.png
Damage Dizzy Dizzy Time Cancel Guard Act. Range
32* 7~13 100 - Grab 48 (from axis)
19 (from throwable box)
Minimum height: 56/48
Startup Active Recovery Total Frame Adv. Meter
0 1 Dependent 1 N/A -

Same as above, but airborne.

  • You'll always throw in the direction you jumped. If you neutral jumped, you throw towards yourself.
  • This usually comes out accidentally, but still has decent range and activation height.

Click to toggle throwbox data.

  • Ground Throw:
Ken throwb.png Ken throw.png Ken throwf.png
  • Air Throw:
Ken airthrow.png

Special Moves

Hadoken

Hadoken
Fireball
236P / Qcf.png+P.png
Ken fb8jab.png
Mainly for applying pressure.
Lp.png Damage Dizzy Dizzy Time Cancel Guard Act. Range
18[0] 5~11 110 None Mid N/A
Startup Active Recovery Total Frame Adv. Meter
13 Traveling 40* 53 -4 (Point Blank) 2


Mp.png Damage Dizzy Dizzy Time Cancel Guard Act. Range
20[0] 7~13 110 None Mid N/A
Startup Active Recovery Total Frame Adv. Meter
13 Traveling 41* 54 -5 (Point Blank) 2


Hp.png Damage Dizzy Dizzy Time Cancel Guard Act. Range
22[0] 7~13 110 None Mid N/A
Startup Active Recovery Total Frame Adv. Meter
13 Traveling 42* 55 -6 (Point Blank) 2

Ken's iconic fireball, now with extra hands.

  • Damage, speed, and recovery increases with strength.
  • Generally harder to hit enemies out of moves due to the increased startup.
  • All 3 versions have the same startup, but differ in recovery frames. (This is almost imperceptible, however.)
  • Some characters such as Claw can punish Hadokens on block or hit from close distance, so watch out for that.
  • This move can miss completely when used from point-blank range, as some characters' attacks move their hitboxes towards a bit.
  • Due to a glitch, it's possible to change the recovery of any Hadoken to that of a Jab by either whiffing or kara-canceling a Jab or Short normal. You can read more about it here.
  • With Hadokens, you can force your enemy to jump and anti air them with a Shoryuken, trap them in the corner, force them to throw fireballs and punish when they least expect it, or put them on the defensive, making it easier to approach.

Click to toggle detailed hitbox data.

Startup:

Ken fb1.png Ken fb2.png Ken fb3.png Ken fb4.png
Frame Count 2 7 3 1
Simplified 13

Active:

  • Jab Version:
Ken fb5.png Ken fb6jab.png Ken fb7jab.png Ken fb8jab.png
Frame Count 1 1 2 2...
Simplified 40
  • Strong Version:
Ken fb5.png Ken fb6strng.png Ken fb7strng.png Ken fb8strng.png
Frame Count 1 1 2 2...
Simplified 41
  • Fierce Version:
Ken fb5.png Ken fb6frc.png Ken fb7frc.png Ken fb8frc.png
Frame Count 1 1 2 2...
Simplified 42

NOTE: A lot of frames were omitted here, because in each frame the fb's hitbox move 1-3 pixels forward, the images are all uploaded though with the same name pattern, so you can still see them.

Shoryuken

Shoryuken
Dragon Punch
623P / Dp.png+P.png
Ken srk1frc.png
First hitbox (Fierce Only)
Ken srk2.png
Second hitbox. (Jab/Strong ver.)
Ken srk3frc.png
Third hitbox (Fierce ver.)
Lp.png Damage Dizzy Dizzy Time Cancel Guard Act. Range
38[2] / 22[2] 9~15 / 2~8 100 / 90 None Mid N/A
Startup Active Recovery Total Frame Adv. Meter
2 18 (4 / 14) 19 39 Hit: Hard KD
Block: -15 / -11(-12)
8
  • Invincible on frames 1-6.
Mp.png Damage Dizzy Dizzy Time Cancel Guard Act. Range
34[0] + 14[0] 9~15 + 2~8 100 + 90 None Mid N/A
Startup Active Recovery Total Frame Adv. Meter
2 26 (4 + 22) 27 55 Hit: -31 / Hard KD
Block: -31 / -27(-28)
8
  • Invincible on frames 1-6.
Hp.png Damage Dizzy Dizzy Time Cancel Guard Act. Range
4[0] + 32[0] + 12[0] 1~7 + 9~15 + 1~7 30 + 100 + 30 None Mid N/A
Startup Active Recovery Total Frame Adv. Meter
0 30 (2 + 2 + 26) 34 64 Hit: -43 / -40(-41) / Hard KD
Block: -43 / -40(-41) / -38(-39)
8
  • Invincible on frames 1-5.


Ken's unmistakable uppercut.

  • Jab and Strong are invincible on frames 1-6, while Fierce is invincible frames 1-5.
  • Airborne after 8 frames.
  • Overall damage, stun, and vertical height increase with strength. Strong deals more stun time than Fierce, though.
  • Easier to perform in neutral than Ryu's due to the added horizontal priority and lesser recovery.
  • Also can be used to avoid projectiles due to the invincibility frames.
  • Strong and Fierce tend to be stronger when used raw, since they tend to whiff when used in combos.
  • Strong DP is not invulnerable while ascending, so some air attacks will trade/beat it. For example, Old Chun-Li's diagonal kicks and New Chun-Li's neutral Fierce beat the rising part.
  • Fierce forces a crouching flaming hitstun on first hit, then a standing flaming hitstun, then a knockdown. It has the most range as well, so it's most useful when you don't know if a Jab DP will connect.

General Strategies

  • Lp.png version:
    • Your general-purpose anti-air, as it's easy to land and recovers quickly.
    • Properly time this and you'll beat any normal your opponent might throw out. Miss and you'll likely get punished. Some high level players like to do two in a row, reasoning that the second might connect with an opponent's counterattack if they time it a bit too late.
    • Ken's best reversal, since it can be safe on block due to the knockback/great rising priority, although that may not be the case on certain match-ups.
    • Allows for continued pressure after a knockdown.
    • Jab does the most damage in a vacuum, other Shoryukens are likely to whiff their consecutive hits and Jab's initial hitbox deals the most damage out of all 3. You'll also be guaranteed a knockdown if you hit with a Jab DP, so this is your go-to combo ender.
  • Mp.png version:
    • By far the less useful version.
    • Can be used as a movement tool to close the gap on fireball match-ups, but its hard to use, since it can't pass through fireballs like the Jab version can.
  • Hp.png version:
    • Usually a granted anti air against most aerial moves, as long Ken reacts fast enough, but the damage output is very low so a properly timed Jab Shoryuken is often preferred. But against Claw's Wall Dives Fierce is optimum since Claw can't avoid him, making his Wall Dives basically unusable outside of looping on your wake up.
    • Has 0f of startup which makes it be totally impossible to be safe jumped at. The Jab and Strong versions start in 2f, which are already almost impossible to safe jump, though.
    • Can be used for combos on the match-ups in which all 3-hits connect after a canceled move.
    • Has no grounded frames before recovery. This is useful because if Ken gets hit out of it (for example, when the opponent goes for a cross-up), Ken will go into his air-reset animation, allowing him to escape dangerous cross-up situations while taking minimal damage. On that situation, the Jab and Strong versions can get hit on the ground, which would leave Ken vulnerable to combos. Not having grounded frames also means Ken can't be grabbed by Typhoons and SPDs before recovery, but the long duration and recovery basically means Ken is left totally open afterwards.
    • The very first frame of the 3rd hitting part (i.e. the rising one) is actually fully invincible, which allows Ken to beat certain delayed air moves cleanly instead of trading.

Click to toggle detailed hitbox data.

  • Jab Version:
Ken srk1.png Ken srk2.png Ken srk3jab.png Ken srk4jab.png Ken srk5.png Ken srk6.png Ken srk7.png
Frame Count 2 4 2 12 6 10 3
Simplified 2 18 19
  • Strong Version:
Ken srk1.png Ken srk2.png Ken srk3strng.png Ken srk4strng.png Ken srk5.png Ken srk6.png Ken srk7.png
Frame Count 2 4 2 20 6 18 3
Simplified 2 4 22 27
  • Fierce Version:
Ken srk1frc.png Ken srk2frcanm.gif Ken srk3frc.png Ken srk4frcanm.gif Ken srk5frcanm.gif Ken srk6frcanm.gif Ken srk7frcanm.gif
Frame Count 2 2 1 25 6 25 3
Simplified 2 2 26 34

Tatsumaki Senpukyaku

Tatsumaki Senpukyaku
Hurricane Kick
214K / Qcb.png+K.png
Ken tatsu2.png
First hitbox.
Ken tatsu6&10&14shrt 6&10&14&18frwrd 6&10&14&18&22rh.png
Second hitbox.
Ken tatsu8&12&16shrt 8&12&16&20frwrd 8&12&16&20&24rh.png
Third hitbox. Short spins 3 times, Forward spins 4 times, and Roundhouse spins 5 times.
Damage Dizzy Dizzy Time Cancel Guard Act. Range
12[1] (First Hitbox)
12[2] (All others)
Lk.png: 3~9 x 3
Mk.png: 3~9 x 4
Hk.png: 3~9 x 5
Lk.png: 90 x 3
Mk.png: 90 x 4
Hk.png: 90 x 5
None Mid N/A
Startup Active Recovery Total Frame Adv. Meter
1 Lk.png: 3(7) > 2(1)2(2) x 3
Mk.png: 3(7) > 2(1)2(2) x 4
Hk.png: 3(7) > 2(1)2(2) x 5
2 + 12 Lk.png: 44
Mk.png: 51
Hk.png: 58
+3 (Last Front Hit) 6

Ken's iconic spinning kick. Propels you forward with hitboxes ahead and behind you.

  • All strengths are the same in terms of damage, but differ in distance and amount of spins.
  • Since your hurtbox shrinks while using this move, you can use Tatsus to travel straight over Guile's Sonic Booms and Dhalsim's Yoga Fires.
  • This attack will likely be VERY unsafe on block, as pushback almost guarantees not all of the hits will connect.
  • Ken can't use this move as a reversal or a safe jump avoider due to a lack of invincibility, but he can avoid throws since he's instantly airborne.

Click to toggle detailed hitbox data.

Startup:

Ken tatsu1.png Ken tatsu2.png Ken tatsu3.png Ken tatsu4.png Ken tatsu5.png
Frame Count 1 3 3 3 1
Simplified 1 3 7

Active:

  • Short Version: This happens 3 times.
  • Forward Version: This happens 4 times.
  • Roundhouse Version: This happens 5 times.
Ken tatsu6&10&14shrt 6&10&14&18frwrd 6&10&14&18&22rh.png Ken tatsu7&11&15shrt 7&11&15&19frwrd 7&11&15&19&23rh.png Ken tatsu8&12&16shrt 8&12&16&20frwrd 8&12&16&20&24rh.png Ken tatsu9&13&17shrt 9&13&17&21frwrd 9&13&17&21&25rh.png
Frame Count 2 1 2 2

Recovery:

Ken tatsu18shrt 22frwrd 26rh.png Ken tatsu19shrt 23frwrd 27rh.png Ken tatsu20shrt 24frwrd 28rh.png Ken tatsu21shrt 25frwrd 29rh.png
Frame Count 4 4 4 0
Simplified 12 0

Kuuchuu Tatsumaki Senpukyaku

Kuuchuu Tatsumaki Senpukyaku
Air Hurricane Kick
AIR 214K
AIR Qcb.png+K.png
Ken atatsu1&5&9shrt 1&5&9&13frwrd 1&5&9&13&17rh.png
First hitbox.
Ken atatsu3&7&11shrt 3&7&11&15frwrd 3&7&11&15&19rh.png
Second hitbox. Short spins 3 times, Forward spins 4 times, and Roundhouse spins 5 times.
Damage Dizzy Dizzy Time Cancel Guard Act. Range
12[2] (All Hits) Lk.png: 3~9 x 3
Mk.png: 3~9 x 4
Hk.png: 3~9 x 5
Lk.png: 90 x 3
Mk.png: 90 x 4
Hk.png: 90 x 5
None High N/A
Startup Active Recovery Total Frame Adv. Meter
0 Lk.png: 2(1)2(2) x 3
Mk.png: 2(1)2(2) x 4
Hk.png: 2(1)2(2) x 5
∞+7 Lk.png: 21 + ∞+7
Mk.png: 28 + ∞+7
Hk.png: 35 + ∞+7
Dependent 6

The Tatsumaki Senpukyaku except airborne.

  • Instead of propelling you forward like a normal Tatsu, each kick temporarily decreases your gravity value (How fast you fall from a jump) as well as slightly boosting your horizontal velocity. This means you'll fall slower if performed on the way down, and gain more height on the way up. Your gravity returns to normal once the kick ends.
  • This move has a variety of uses. You can use it as an alternative aerial since the hitbox is pretty far out (but so is the hurtbox).
  • You can also surprise the enemy with a sudden movement change, or you can simply use it to build meter on the way down from a jump.
  • Can be cancelled into from Ken's jumping punches, creating a strong strike/throw mixup.
  • Skillful use allows you to cross-up enemy air counters like the Flash Kick to hit the opponent from behind, too!
  • Can combo on the way down and hits crouching characters more often, so it's well suited for shenanigans.
  • Since there's no minimum activation requirement unlike Ryu's tatsu, Ken can create a rather parabolic jump arc or activate right before landing for the best possible frame advantage.
  • Keep in mind that the priority on air Tatsus isn't as good as the grounded version.
  • Also keep in mind that once you land, you have 7 frames of landing animation you can't cancel out of whatsoever.

Click to toggle detailed hitbox data.

Active:

  • Short Version: This happens 3 times.
  • Forward Version: This happens 4 times.
  • Roundhouse Version: This happens 5 times.
Ken atatsu1&5&9shrt 1&5&9&13frwrd 1&5&9&13&17rh.png Ken atatsu2&6&10shrt 2&6&10&14frwrd 2&6&10&14&18rh.png Ken atatsu3&7&11shrt 3&7&11&15frwrd 3&7&11&15&19rh.png Ken atatsu4&8&12shrt 4&8&12&16frwrd 4&8&12&16&20rh.png
Frame Count 2 1 2 2

Recovery:

Ken atatsu10shrt 14frwrd 18rh.png Ken atatsu11shrt 15frwrd 19rh.png Ken atatsu12shrt 16frwrd 20rh.png Ken atatsu13shrt 17frwrd 21rh.png Ken atatsu14shrt 18frwrd 22rh.png Ken atatsu15shrt 19frwrd 23rh.png
Frame Count 4 4 4 4 7
Simplified 7

Crazy Kicks

Officially known as Roundhouse Kicks, called Crazy Kicks by the community as to not confuse people with the roundhouse button. All of them have the same power regardless of what kick button pressed to use them, but all will turn into an Inazuma Kick overhead if you hold them. They're not very useful, but they're there.

Kama Barai Geri (Inside Crescent)

Kama Barai Geri
Inside Crescent
236K / Qcf.png+K.png
Ken ckshrt4.png
First Hitbox
Ken ckshrt5.png
Second Hitbox
Damage Dizzy Dizzy Time Cancel Guard Act. Range
4[2] + 30[2] 0~4 + 7~13 20 + 90 None Mid N/A
Startup Active Recovery Total Frame Adv. Meter
7 8 (3 + 5) 17 32 -8 / -4(-5) 6

A fast high hitting kick.

  • Combos very easily off of Crouching Short/Forward
  • Extended part does a lot of stun damage, which is very good when you want to land one of Ken's high damaging combos.
  • Best Crazy Kick to cancel into Inazuma Kick due to the quick startup. Still way slower than other character's overheads.
  • The first active part of this move can hit crouching Dhalsim, Sagat, T.Hawk, Zangief, and Old Fei Long. Dee Jay and Boxer can also be hit, but you have to be very close.
  • Can be used as a built in safejump in some matchups by canceling sweep into this move, then holding up-forwards. This works on Cammy and Fei Long, and may also work on Zangief if you attack with Jumping Jab (as to avoid his Lariats) and Zangief doesn't crouch.

Click to toggle detailed hitbox data.

Startup:

Ken ckshrt1.png Ken ckshrt2.png Ken ckshrt3.png
Frame Count 2 2 3
Simplified 7

Active:

Ken ckshrt4.png Ken ckshrt5.png
Frame Count 3 5

Recovery:

Ken ckshrt6.png Ken ckshrt7.png Ken ckshrt8.png Ken ckshrt9.png Ken ckshrt10.png Ken ckshrt11.png Ken ckshrt12.png
Frame Count 4 4 4 2 2 2 3
Simplified 17

Nata Otoshi Geri (Outside Crescent)

Nata Otoshi Geri
Outside Crescent
632K / Qcfd.png+K.png
Ken ckfrwrd6.png
First Hit
Ken ckfrwrd7.png
Second Hit
Damage Dizzy Dizzy Time Cancel Guard Act. Range
4[2] + 28[2] 2~8 + 7~13 90 x 2 None Mid N/A
Startup Active Recovery Total Frame Adv. Meter
16 6 (3 + 3) 13 35 +2 / +6(+5) 6

A slower two-hit kick.

  • Grants a lot of frame advantage, but has a VERY slow startup.
  • Hits most crouching characters (whiffs completelly against Blanka, and only the first hit can reach a crouching Cammy).
  • Usually an annoyance since you can accidentally pull this off when attempting a walk in sweep. It's vital for New Ken players to avoid using this move.
  • Has the slowest startup out of Ken's Crazy Kicks, so it's unsuitable as a Inazuma cancel.
  • It does at the very least add Outside Crescent's first hitbox to the Inazuma Kick, comboing into the overhead.
  • It's called a Crazy Kick because you'd be crazy to pull this off in an actual match.

Click to toggle detailed hitbox data.

Startup:

Ken ckfrwrd1.png Ken ckfrwrd2.png Ken ckfrwrd3.png Ken ckfrwrd4.png Ken ckfrwrd5.png
Frame Count 2 2 2 2 8
Simplified 16

Active/Recovery:

Ken ckfrwrd6.png Ken ckfrwrd7.png Ken ckfrwrd8.png Ken ckfrwrd9.png Ken ckfrwrd10.png Ken ckfrwrd11.png
Frame Count 3 3 3 3 2 5
Simplified 3 3 13

Oosoto Mawashi Geri (Big Roundhouse)

Oosoto Mawashi Geri
Big Roundhouse
41236K / Hcf.png+K.png
Ken ckrh5.png
First Hitbox
Ken ckrh6.png
Second Hitbox
Damage Dizzy Dizzy Time Cancel Guard Act. Range
32[2] 0~4 / 7~13 20 / 90 None Mid N/A
Startup Active Recovery Total Frame Adv. Meter
12 7 (3 / 4) 15 34 Hit: Hard KD / Far KD
Block: 0 / +3(+2)
6

Ken's old Far Standing Roundhouse, but worse, and jankier.

  • Less active frames and worse priority than his old RH.
  • First hit does a hard knockdown, second hit is one of the few moves in the game that does a Far Knockdown. For some reason.
  • The first active part can hit a crouching Dhalsim, Zangief, T.Hawk, or Sagat. You can also hit Boxer and Dee Jay while really close.
  • Against other Shotos, if you're on the starting side (Left if you're Player 1, Right if you're Player 2) you can hit this move point blank to switch sides with your opponent. Follow this up with a Jab Shoryuken using the crosscut input for a surprise knockdown.
  • Canceling this into an Inazuma Kick allows you to temporarily change sides with Ryu, Ken, Chun-Li, Guile, Cammy, Fei Long, Boxer, and Claw, making their reversals whiff.
  • The craziest of Crazy Kicks.

General Strategies

  • If you manage to hit with the hard knockdown somehow, you can follow up with a Roundhouse Tatsu or a juice kick to get your opponment close to the corner, and close to you.
  • Some players like to use this move to fake a Hadoken, since the first sprite on startup is the same across both moves.
  • While QCF+K has a better startup for Inazumas, this move can be useful for them since you can safely space them against Zangief's SPD, due to his hitboxes being projected way ahead of his throw hurtbox.
  • Can be used as a built in safe jump by canceling a sweep into this move, then holding up towards (Unless your opponent touches the corner during their knockdown animation). This works on Ryu, E. Honda, Cammy, Fei Long, and Dictator.
  • Hitting with the second part also allows for safe jumps, if you hit with it and then jump twice in a row. This works on Ryu, T. Hawk, Fei Long, Dee Jay, and Dictator, and also works on Zangief if you jump with Jab or Strong.

Click to toggle detailed hitbox data.

Startup:

Ken ckrh1.png Ken ckrh2.png Ken ckrh3.png Ken ckrh4.png
Frame Count 3 3 3 3
Simplified 12

Active/Recovery:

Ken ckrh5.png Ken ckrh6.png Ken ckrh7.png Ken ckrh8.png Ken ckrh9.png Ken ckrh10.png
Frame Count 3 4 6 2 4 3
Simplified 7 15

Inazuma Kick

Inazuma Kick
Hold K.png during any Crazy Kick input
Ken ckohrh5.png
First Hitbox (HCF version)
Ken ckohrh6.png
Second Hitbox (HCF version)
Damage Dizzy Dizzy Time Cancel Guard Act. Range
24[2] 7~13 90 None High N/A
Startup Active Recovery Total Frame Adv. Meter
Qcf.png+K.png: 27
Qcfd.png+K.png: 36
Hcf.png+K.png: 34
6 {3/3) 7 Qcf.png+K.png: 40
Qcfd.png+K.png: 49
Hcf.png+K.png: 47
+9(+8) / +12(+11) 6

Ken's Overhead conversion. Can be performed from any of his Crazy Kicks, but the overall strength doesn't change depending on button or Crazy Kick performed.

  • One of the game's slower overheads. Rarely used in mixups as a result of the move's poor startup.
    • Recommended to perform this from Ken's QCF Kick, since that has the least startup. The QCDF version is a straight downgrade (same everything except for worse startup), so it should never be used. As for the HCF version, it has better horizontal reach so it can be useful against grapplers (specially Zangief), since it allows Ken to go for the overhead while being safe from command grabs.
    • The 1st overhead hitting part will not reach most crouching characters, which makes the move effectively have a 3f worse startup, but also 3f better frame advantage. The exceptions to that are Zangief, Dhalsim, T.Hawk, O.Fei, DeeJay(only if very close), Boxer and Sagat, these characters have taller crouching hurtboxes, allowing the 1st active part to hit.

Click to toggle detailed hitbox data.

  • QCF Version:

Startup:

Ken ckshrt1.png Ken ckshrt2.png Ken ckshrt3.png
Frame Count 2 2 3
Simplified 7

Active/Recovery:

Ken ckshrt4.png Ken ckohshrt1.png Ken ckohshrt2.png Ken ckohshrt3.png Ken ckohshrt4.png
Frame Count 2 2 2 10 4
Simplified 2 18
Ken ckohshrt5.png Ken ckohshrt6.png Ken ckohshrt7.png Ken ckohshrt8.png Ken ckohshrt9.png
Frame Count 3 3 3 3 1
Simplified 6 7
  • QCDF Version:

Startup:

Ken ckfrwrd1.png Ken ckfrwrd2.png Ken ckfrwrd3.png Ken ckfrwrd4.png Ken ckfrwrd5.png
Frame Count 2 2 2 2 8
Simplified 16

Active/Recovery:

Ken ckfrwrd6.png Ken ckohfrwrd1.png Ken ckohfrwrd2.png Ken ckohfrwrd3.png Ken ckohfrwrd4.png
Frame Count 2 2 2 10 4
Simplified 2 18
Ken ckohfrwrd5.png Ken ckohfrwrd6.png Ken ckohfrwrd7.png Ken ckohfrwrd8.png Ken ckohfrwrd9.png
Frame Count 3 3 3 3 1
Simplified 6 7
  • HCF Version:

Startup:

Ken ckrh1.png Ken ckrh2.png Ken ckrh3.png Ken ckrh4.png
Frame Count 3 3 3 3
Simplified 12

Active/Recovery:

Ken ckrh5.png Ken ckohrh1.png Ken ckohrh2.png Ken ckohrh3.png Ken ckohrh4.png
Frame Count 2 3 3 10 4
Simplified 2 20
Ken ckohrh5.png Ken ckohrh6.png Ken ckohrh7.png Ken ckohrh8.png Ken ckohrh9.png
Frame Count 3 3 3 3 1
Simplified 6 7

Super Combo

Shoryureppa
236236P
Qcf.pngD.pngDf.png+P.png
Ken super2&8.png
First and Fourth hit
Ken super3&9.png
Second and Fifth hit
Ken super7.png
Third hit.
Damage Dizzy Dizzy Time Cancel Guard Act. Range
18[1] x 5 0~4 x 5 20 x 5 None Mid N/A
Startup Active Recovery Total Frame Adv. Meter
2 8(17)30 33 90 Hit: Hard KD
Block:-36 (Point Blank)
-

Ken does a Shoryuken, then another Shoryuken.

  • Invincible until Ken falls down from his second DP (Frames 1-57)
  • Creates a juggle state.
  • Ken has very little landing recovery frames, so a throw or a DP on landing can catch an unsuspecting opponent (If they allow you to land).
  • Can't be used as an invincible reversal for some reason. You'll just get a special move instead.

Click to toggle detailed hitbox data.

Ken super1.png Ken super2&8.png Ken super3&9.png Ken super4.png Ken super5.png Ken super6.png Ken super7.png Ken super2&8.png Ken super3&9.png Ken super10.png Ken super11.png Ken super12.png
Frame Count 1+[18]+1 2 6 6 5 2 2 2 26 6 25 2
Simplified 2 2 6 13 2 2 26 33

Misc Animations

Jump Animations

  • Neutral Jump:
Ken bj10 nj1&10 fj1&11.png Ken nj2 fj2.png Ken nj3.png Ken nj4.png Ken nj5.png Ken nj6.png Ken nj7.png Ken nj8 fj9.png Ken nj9 fj10.png Ken bj10 nj1&10 fj1&11.png
Frame Count 3 1 8 8 8 8 8 4 1 7*
Simplified 3 1 44 1 7*
  • Back Jump:
Ken bj1.png Ken bj2.png Ken bj3 fj8.png Ken bj4 fj7.png Ken bj5 fj6.png Ken bj6.png Ken bj7 fj4.png Ken bj8 fj3.png Ken bj9.png Ken bj10 nj1&10 fj1&11.png
Frame Count 3 1 15 3 3 3 3 18 1 7*
Simplified 3 1 43 1 7*
  • Forward Jump:
Ken bj10 nj1&10 fj1&11.png Ken nj2 fj2.png Ken bj8 fj3.png Ken bj7 fj4.png Ken fj5.png Ken bj5 fj6.png Ken bj4 fj7.png Ken bj3 fj8.png Ken nj8 fj9.png Ken nj9 fj10.png Ken bj10 nj1&10 fj1&11.png
Frame Count 3 1 13 5 3 3 3 5 11 1 7*
Simplified 3 1 43 1 7*

New Ken's prejump animation was nerfed on ST by 1 frame, so unlike Old Ken, who has a considerably fast prejump animation, New Ken's prejump is of average speed. This for the most part is a disadvantage.

There's a small gap between the leg hurtbox and chest hurtbox on Ken's backward prejump frames. You can actually abuse it to evade Low Tiger Shots entirely, and even can even evade meaty Low Tiger Shots on wake up since the first wake up frame will be the first prejump frame if you wake up holding up-back. Mattsun does this frequently. Be aware though that if it's a meaty Short Low Tiger Shot you'll most likely end up landing on it, unless you react with an Air Tatsu to alter your jump trajectory, of course.

The landing recovery has a special property which allows it to be canceled into certain actions. At the first landing frame, you can perform throws (including command throws), and on the second landing frame, you can start another jump, attack with a normal or special move, or block. Blocking not being until the second landing frame, as well as hitbox-hurtbox interactions having priority over throwbox-throw hurtbox is why sweeps work as anti airs in this game.
Things are different when jumping over your opponent, however. In that situation it's possible to walk back/forward, to jump again or to even block on the first landing frame! Strangely, if a throw is timed on the first landing frame of a jump that crosses over, a throwbox will never come out, even though that input will result in a normal coming out 2 frames later (like it normally would). Anyway, being able to block on the first landing frame can help a little bit on some safe jump crossup setups, or maybe in other situations as well if your character has a huge jump arc.


Game Navigation

General
Controls and Notation
System
HUD
FAQ
New Characters
Balrog
Blanka
Cammy
Chun-Li
Dee Jay
Dhalsim
E. Honda
Fei Long
Guile
Ken
M. Bison
Ryu
Sagat
T. Hawk
Vega
Zangief
Akuma
Old Characters
O. Balrog
O. Blanka
O. Cammy
O. Chun-Li
O. Dee Jay
O. Dhalsim
O. E. Honda
O. Fei Long
O. Guile
O. Ken
O. M. Bison
O. Ryu
O. Sagat
O. T. Hawk
O. Vega
O. Zangief