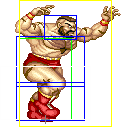
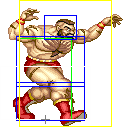
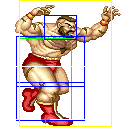
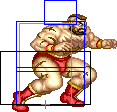
Introduction
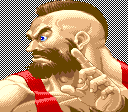
Picking Old Zangief
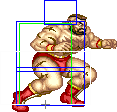
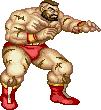
To select O.Zangief, choose Zangief and then press ← → → → Jab/Fierce, pressing Short simultaneously with the punch button for the alternate color.
| Normal | Secondary |
 |

|
--Born2SPD
Strengths & Weaknesses
Strengths
- Very strong in close range. Excluding T.Hawk, who can not do anything else, all the cast must rely on keep away tactics because of how strong Zangief's close range game is.
- Lariats allow Zangief to barely ever take damage from projectiles from a distance.
- The range on SPD is amazing; it allows you to tick anyone outside of their throw range, and allows some cool walk-up grabs.
- It is the only character in the game with a crouching normal throw, which can save your life against a lot of different mix-ups.
- Hard to cross-up and has the best cross-up move in the game, priority wise (Fierce splash).
- Zangief takes less damage and usually is harder to dizzy, giving him more survivability.
- Has a decent combo potential.
Weaknesses
- Does not have a projectile, you have to be on offense all the time or you not gonna win.
- Most normals have poor priority.
- Zangief has no invulnerable or high priority anti-air moves.
- Has a hard time against keep away tactics.
- Has the second worst match-up in the whole game, against E.Honda, and many hard ones (O.Sagat, N/O.Guile, N/O.Chun Li, Dhalsim, Fei Long).
New & Old Versions Comparison
To select O.Zangief, choose Zangief and then press ← → → → Jab/Fierce, pressing Short simultaneously with the punch button for the alternate color.
Here is the list of differences:
- Obvious stuff: O.Zangief can not tech throws, does not have the Fierce/Strong hops, Green Hand and Super;
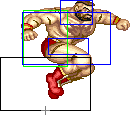
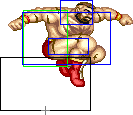
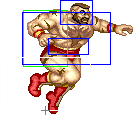
- O.Zangief's empty jumps have fatter hurtboxes;
- O.Zangief has some differences in some of his normals:
- Close Standing Jab is a bit worse (does not has that improved hitbox on the first active frame, the other active frames are a bit worse and has a smaller activation range);
- Close/Far Standing Strong can be special canceled and do a little more damage;
- Close/Far Standing Fierce do a little more damage;
- Crouching Fierce do a little more damage;
- Close Standing Short have worse priority, but this is meaningless;
- Far Standing Short can be special canceled;
- Far Standing Forward has better anti-air priority, but worse ground priority and horizontal range;
- Close Standing Roundhouse do a little more damage;
- Far Standing Roundhouse has very poor priority but can be special canceled and do a little more damage;
- Crouching Roundhouse can be special canceled and do a little more damage, this is nice;
- Most of his aerial attacks have fatter body hurtboxes, including his splash and headbutts. They hardly alter the air to air priority though;
- Neutral Jumping Fierce do a little more damage;
- Diagonal Jumping Fierce do a little more damage;
- Neutral Jumping Roundhouse do a little more damage;
- Diagonal Jumping Roundhouse do a little more damage;
- O.Zangief Knee Drops do more damage;
- O.Zangief has some differences in his Lariats:
- Both Punch and Kick versions have a different head hurtbox during the start-up frames: better horizontal priority and different vertical priority; that last one allows O.Zangief to beat Shoto's Tatsus from a crouched position with 100% success while with N.Zangief you actually need to time it right or lariat will be beaten. On the other way, it will be worse against Vega(Claw)'s Wall Dives. The better horizontal priority helps against T.Hawk to counter his dives during the 7 first frames easier. All in all it's a little buff/nerf for O.Zangief in these matchups, but it's basically the same really;
- Kick version does not have the improved foot hurtbox which lets N.Zangief beat some supers and pass through low Tiger shots. This is vital and totally compromises O.Zangief in that match-up;
In the WORLD version of the arcade ST there is a bug in O.Zangief’s Roundhouse Suplex, if done as reversal: will grab the opponent from any range if he is throwable, even from full screen away. Perhaps, if someone mastered this, it could make Zangief vs E.Honda a fair match or something. Just think, blocked HHS -> Reversal Suplex, madness. (This is a bug, though, so you should not take this seriously)
O.Zangief can special cancel some normals that N.Zangief can not, but that's it. The only reason most people consider using O.Zangief is so you don't have to worry about an accidental hop or green hand. The tools you lose by picking O.Gief (worse normals/kick lariat, loss of throw tech, green hand mobility and super) is absolutely not worth it. Stick to N.Zangief; only use O.Zangief for casual play, or if you want to troll someone with his Roundhouse Suplex bug.
Moves Analysis
Disclaimer: To better understand the diagrams, read this.
Normal Moves
Ground Normals
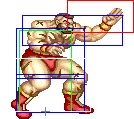
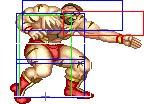
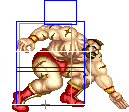
- Close Standing Jab: (Base max activation range: 40)
| Damage | 14[1] / 14[1] |  |
 |
 |
 |
 |
 |

|
| Stun | 0~5 | |||||||
| Stun Timer | 40 | |||||||
| Chain Cancel | Yes | |||||||
| Special Cancel | Yes / No | |||||||
| Frame Advantage | -6 / -4 | |||||||
| Frame Count | 2 | 2 | 2 | 2 | 4 | 4 | 5 | |
| Simplified | 1 + 2 | 4 | 15 | |||||
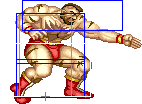
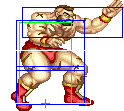
Zangief does a knife hand strike from above his head until towards. O.Zangief's version is not as good as N.Zangief's, since it has worse hitboxes as well as activation range, but it can still be considered a good anti air. The first active part is important because it is O.Zangief's only ground response to Ken's Jumping Fierce. The second part has no specific use because it leaves O.Zangief at frame disadvantage so limit the usage of this move as an anti air only.
- Far Standing Jab:
| Damage | 16[1] | 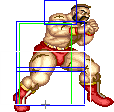 |
 |

|
| Stun | 0~5 | |||
| Stun Timer | 40 | |||
| Chain Cancel | Yes | |||
| Special Cancel | Yes | |||
| Frame Advantage | +4 | |||
| Frame Count | 2 | 4 | 5 | |
| Simplified | 1 + 2 | 4 | 5 | |
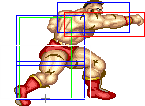
Zangief performs a fast straight punch that can be canceled into itself. This happens to be a very damaging Jab, it even does the strong sound when it hits. Unlike most character's rapid fire Jabs, Zangief's Standing Jab should not be used to beat advance moves like Blanka's rolls or E.Honda's Headbutt. It is, however, very important when facing Boxer, because it is Zangief's only reliable way to deal with his Low Rushes. It also beats Cammy's Roundhouse Cannon Drills and trades with Dictator's Scissor Kicks. Other than that, this move is better suited as a counter poke (e.g. beats Claw's Crouching Jab/Strong and Dictator's Standing Forward from the right range) or as a tick (e.g. allows you to tick Dhalsim from a more comfortable range). But keep in mind that this move hits high and will whiff on most characters if they are crouching. Boxer, Dhalsim, O.Fei Long, Sagat, T.Hawk and another Zangief are the characters which are vulnerable to this move even when they are crouching. It will also sometimes be able to hit a crouching DeeJay. This move can also be used in footsies as a whiff to force the opponent to get stuck in the block animation, allowing you to attempt a walk in SPD, or, with the use of a glitch, to jump at the opponent without allowing them to walk back, leaving them stuck on their blocking stance (this is specially usefull against charge characters).
- Crouching Jab:
| Damage | 4[1] |  |

|
| Stun | 0~5 | ||
| Stun Timer | 40 | ||
| Chain Cancel | Yes | ||
| Special Cancel | Yes | ||
| Frame Advantage | +8 | ||
| Frame Count | 3 | 5 | |
| Simplified | 1 + 3 | 5 | |
Crouching spear hand strike. This move does very low damage, but it is your most important ticking move and can also be used into hit confirm combos such as Crouching Jab (n times) linked into Standing Short or Crouching Roundhouse. It can beat a lot of different moves like E.Honda's Headbutt and HHS, Blanka's Beast Rolls and Fierce Slide, Dictator's Scissor Kicks and some varied normals. This move has no recovery frames which allows it to be used as a safe tick/meaty.
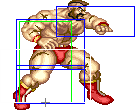
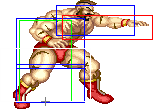
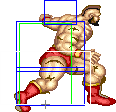
- Close/Far Standing Strong:
| Damage | 24[2] | 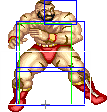 |
 |
 |
|
| Stun | 5~11 | ||||
| Stun Timer | 60 | ||||
| Chain Cancel | No | ||||
| Special Cancel | Yes* | ||||
| Frame Advantage | +10 | ||||
| Frame Count | 2 | 2 | 3 | 5 | |
| Simplified | 1 + 4 | 3 | 5 | ||
Relatively fast horizontal knife hand strike. Doing it close or far will result in the exact same move. This attack is used in most of his combos because of the solid damage and the fairly good frame advantage which allows Zangief to link it to most of his normals. It can also be used as a poke just like Standing Jab because it has very similar hitboxes with the plus of the added damage and stun. Be aware though that this move is not as spammable as the Standing Jab because it has a slower start up and it can be more easily stuffed before becoming active due to premature projected hurtboxes. It also whiffs on most crouching characters, although against Boxer, Dhalsim, O.Fei Long, Sagat, T.Hawk, Zangief and DeeJay it won't (on DeeJay's case, know that he leans back when crouch blocking (which makes this move whiff when used as a poke), so the usage has to be limited for when you're on point-blank distance, for example as part of a crossup combo/string). Note that with O.Zangief this move can be considered a little better since you can move freely and poke at the same time (i.e. a hop won't come out) and also because O.Zangief happens to be able to Special Cancel this move (being able to cancel it is not very significant though). Also, O.Zangief does a little more random damage with this move.
- Crouching Strong:
| Damage | 24[1] |  |
 |
 |
 |

|
| Stun | 5~11 | |||||
| Stun Timer | 60 | |||||
| Chain Cancel | No | |||||
| Special Cancel | No | |||||
| Frame Advantage | +1 | |||||
| Frame Count | 3 | 3 | 8 | 4 | 5 | |
| Simplified | 1 + 6 | 8 | 9 | |||
A crouching straight punch that hits around the stomach, with moderate recovery. It can be used as a poke or to trade damage with some moves. It also excels as a tick into Atomic Suplex for two reasons: leaves Zangief at perfect range (outside most characters normal throw range but inside Roundhouse Atomic Suplex range) and it leaves Zangief at one frame of advantage so a Running Bear Grab will rarely come out (or at no frame advantage if used as the last hit of a block string/combo, so a Running Bear Grab will never come out).
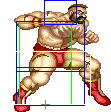
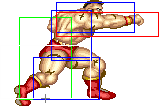
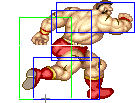
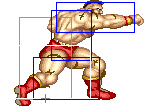
- Close/Far Standing Fierce:
| Damage | 30[2] |  |
 |
 |
 |
 |
 |

|
| Stun | 10~16 | |||||||
| Stun Timer | 80 | |||||||
| Chain Cancel | No | |||||||
| Special Cancel | No | |||||||
| Frame Advantage | -13 | |||||||
| Frame Count | 3 | 3 | 6 | 10 | 8 | 6 | 5 | |
| Simplified | 1 + 6 | 6 | 29 | |||||
A powerful straight punch with very long recovery. Doing it close or far will result in the exactly same move. Has a nice damage and dizzy potential. It can be linked from a Standing Strong for dizzy combos. It also can be used as a trade anti air. In most cases you should avoid this move though, the exaggerated recovery kills any viable use. O.Zangief does a little more random damage with this move.
- Crouching Fierce:
| Damage | 30[2] |  |
 |
 |
 |

|
| Stun | 10~16 | |||||
| Stun Timer | 80 | |||||
| Chain Cancel | No | |||||
| Special Cancel | No | |||||
| Frame Advantage | -9 | |||||
| Frame Count | 3 | 3 | 8 | 10 | 13 | |
| Simplified | 1 + 6 | 8 | 23 | |||
Another crouching straight punch that hits around the stomach, but with much longer recovery than the Strong version. It works decently as an anti air against certain moves (e.g. T.Hawk's Jumping Jab, Fei Long's Jumping Jab, Blanka's Jumping Jab and Strong, Vega(claw)'s Dive). It works decently as a trade move against E.Honda's HHS or as a punish for Shoto's Tatsus, but not as a poke since it has very long recovery. O.Zangief does a little more random damage with this move.
- Close Standing Short: (Base max activation range: 32)
| Damage | 18[1] |  |
 |
 |
 |
 |

|
| Stun | 0~5 | ||||||
| Stun Timer | 40 | ||||||
| Chain Cancel | No | ||||||
| Special Cancel | No | ||||||
| Frame Advantage | +0 | ||||||
| Frame Count | 3 | 2 | 2 | 8 | 4 | 1 | |
| Simplified | 1 + 7 | 8 | 5 | ||||
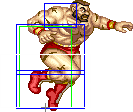
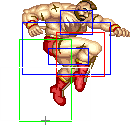
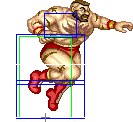
Zangief's does a weak knee attack. Ticking move for dummies. It is Zangief's easiest move to use as tick because of the fairly long duration. Leaves Zangief at optimal range to tick into Super and at no frame advantage or disadvantage which makes it a good move to tick into Atomic Suplex (i.e. if the normal move wasn't meaty timed then a Running Bear Grab will never come out). Zangief has better moves though and once you get better at the art of ticking you should never use this move again.
- Far Standing Short:
| Damage | 18[1] | 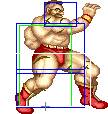 |
 |
|
| Stun | 0~5 | |||
| Stun Timer | 40 | |||
| Chain Cancel | No | |||
| Special Cancel | Yes* | |||
| Frame Advantage | +8 | |||
| Frame Count | 2 | 2 | 5 | |
| Simplified | 1 + 4 | 5 | ||
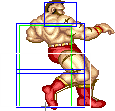
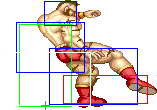
Zangief performs a low hitting kick. One of Zangief's most important normals as it is Zangief's best standing tick. During the opponents wake up it is a killer: you can mix between tick into SPD or linked sweep to give your opponent extra trouble when trying to reverse. Also, this move has no recovery frames which allows it to be used as a safe tick/meaty. Master the safe tick pattern and most match ups will be a lot easier. Watch out for reversal tatsus or upkicks when using this against a knocked down opponent. Strangely, O.Zangief has the ability to Special Cancel this move.
- Crouching Short:
| Damage | 18[1] |  |
 |

|
| Stun | 0~5 | |||
| Stun Timer | 40 | |||
| Chain Cancel | No | |||
| Special Cancel | Yes | |||
| Frame Advantage | +2 | |||
| Frame Count | 3 | 4 | 7 | |
| Simplified | 1 + 3 | 4 | 7 | |
Fast crouching side kick with poor priority. It's Zangief's best ground move to tick into Super. It's also OK as a tick into his other grabs. Has Special Cancel properties which allows O.Zangief to combo it into a Lariat, but Crouching Forward is better suited for that. You can also cancel a Running Bear Grab out of it, which will usually connect but doesn't do much damage. It can also be used in footsies once in a while to lure the opponent into punishing a Crouching Roundhouse, since it animates the same but recovers a lot faster.
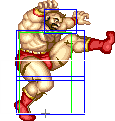
- Close Standing Forward: (Base max activation range: 56)
| Damage | 24[1] |  |
 |
 |
 |

|
| Stun | 5~11 | |||||
| Stun Timer | 60 | |||||
| Chain Cancel | No | |||||
| Special Cancel | No | |||||
| Frame Advantage | +5 | |||||
| Frame Count | 3 | 3 | 4 | 4 | 5 | |
| Simplified | 1 + 6 | 4 | 9 | |||
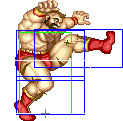
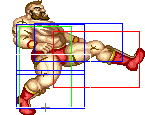
Zangief does a front kick with moderate start up and recovery. It can be considered semi-useful against Ken's Jumping Fierce: you can make his move whiff (or at the very least make it hit late enough so he can't cancel it into air tatsu, which you can then counter with a SAC SPD) by timing your move so his punch is active during the 7f window in which this move has Zangief without a head hurtbox. With that said, most of the time you're better off just using Close Standing Jab instead, since that one is much more safer and consistent, the only exception would be when you're too far away to get a Close Standing Jab, since it has a slightly bigger activation range than that jab. Other than that, this move does not have many uses. It is too slow to be used in combos, the only practical normal to link into is the Far Standing Jab, but it's not too good because it whiffs against the majority of the cast if they're crouching. It is also too fast to be used as a tick into Suplex, it can be used as a tick into SPD but if you want a medium hitstun and pushback then you should just use Crouching Forward instead, since that may give you some extra damage against a standing opponent.
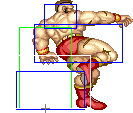
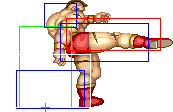
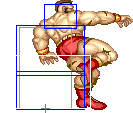
- Far Standing Forward:
| Damage | 24[1] |  |
 |
 |
 |

|
| Stun | 5~11 | |||||
| Stun Timer | 60 | |||||
| Chain Cancel | No | |||||
| Special Cancel | No | |||||
| Frame Advantage | +5 | |||||
| Frame Count | 3 | 3 | 4 | 4 | 5 | |
| Simplified | 1 + 6 | 4 | 9 | |||
Semi-circular middle kick. O.Zangief's version has less range and doesn't hit as low, so it's not very useful. Probably the move I miss the most in O.Zangief.
- Crouching Forward:
| Damage | 24[1] |  |
 |

|
| Stun | 5~11 | |||
| Stun Timer | 60 | |||
| Chain Cancel | No | |||
| Special Cancel | Yes | |||
| Frame Advantage | +3 | |||
| Frame Count | 3 | 6 | 9 | |
| Simplified | 1 + 3 | 6 | 9 | |
Crouching side kick. Better damage and priority than Crouching Short, but longer recovery. It has Special Cancel properties just like the former so you can cancel into Lariat or Running Bear Grab. Cross-up Fierce splash, Crouching Forward into Kick Lariat is a particularly hot combo. It can also be used as a tick into SPD or Suplex, but you usually have better options for that, unless you're specifically looking for the medium block stun.
- Close Standing Roundhouse: (Base max activation range: 56)
| Damage | 30[2] + 4[2] | 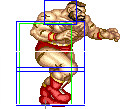 |
 |
 |
 |
 |
 |
 |
 |
 |
|
| Stun | 10~16 + 1~7 | ||||||||||
| Stun Timer | 80 + 70 | ||||||||||
| Chain Cancel | No | ||||||||||
| Special Cancel | No | ||||||||||
| Frame Advantage | -23 / -17(-18) | ||||||||||
| Frame Count | 2 | 2 | 2 | 3 | 6 | 8 | 8 | 10 | 8 | 5 | |
| Simplified | 1 + 9 | 6 | 8 | 31 | |||||||
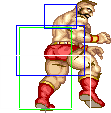
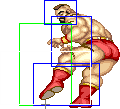
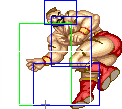
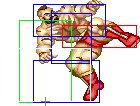
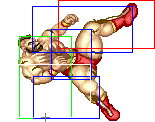
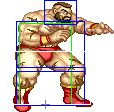
Weird butterfly kick that hits twice. It is a quite useless move. It can hit twice from close range and it is the most damaging normal Zangief have, but it has long start-up and recovery. The second hit has a decent anti-air priority but the situations where you can use it like that are limited and the use is often shadowed by Close Standing Jab (i.e. worse start up, does less damage and has worse priority). O.Zangief does a little more random damage with this move.
- Far Standing Roundhouse:
| Damage | 30[2] |  |
 |

|
| Stun | 10~16 | |||
| Stun Timer | 80 | |||
| Chain Cancel | No | |||
| Special Cancel | Yes* | |||
| Frame Advantage | +3 | |||
| Frame Count | 4 | 8 | 11 | |
| Simplified | 1 + 4 | 8 | 11 | |
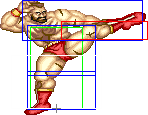
Zangief performs a high side kick. O.Zangief's version has mediocre priority so it can't really be used as a anti air like N.Zangief does. With O.Zangief this move is only good for shenanigans: whiff it into SPD after the opponent wakes up from a knockdown. Also, O.Zangief can special cancel this move but this is of no help. O.Zangief does a little more random damage with this move.
- Crouching Roundhouse:
| Damage | 30[2] |  |
 |
 |

|
| Stun | 5~11 | ||||
| Stun Timer | 130 | ||||
| Chain Cancel | No | ||||
| Special Cancel | Yes* | ||||
| Frame Advantage | +1 | ||||
| Frame Count | 4 | 8 | 12 | 1 | |
| Simplified | 1 + 4 | 8 | 13 | ||
Zangief's sweep kick. Animates the same as Zangief's other crouching kicks, but with longer recovery. This is a pretty awesome move, with good recovery for a Roundhouse sweep and deceptive reach. It can be linked into well, comes out relatively fast, does good damage, has decent recovery, not to say the precious knockdown which can lead into ticking mix-ups or safe jumps. This move is very important in tick mix-ups, together with Far Standing Short: both can be used to punish the enemy for standing up, which is often necessary for inputting invulnerable reversal moves. Always going for the SPD from max range can get predictable, so this is one of the possible mix-ups one can do. O.Zangief has the interesting ability to Special Cancel this move, which will be a gimick at best. Also, O.Zangief does a little more random damage with this move.
Aerial Normals
- Neutral Jumping Jab:
| Damage | 18[1] | 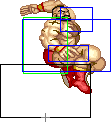 |
 |
 |
|
| Stun | 1~7(-2) | ||||
| Stun Timer | 40 | ||||
| Frame Count | 2 | 3 | 8 | ∞ | |
| Simplified | 2 | 11 | ∞ | ||
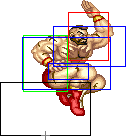
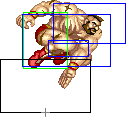
Aerial knife hand strike. Totally outclassed by the Strong and Fierce versions since it has the same frame data but worse priority and damage. Avoid this move.
- Diagonal Jumping Jab:
| Damage | 18[1] |  |
 |
 |

|
| Stun | 1~7(-2) | ||||
| Stun Timer | 40 | ||||
| Frame Count | 2 | 3 | 8 | ∞ | |
| Simplified | 2 | 11 | ∞ | ||
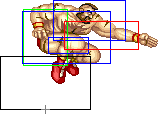
Animates the same as the Neutral Jumping version. Somewhat outclassed by the Strong version. It has better vertical priority by 2 pixels but the damage and horizontal priority/range is a lot worse, so you should favor Strong for your air to air uses. This move has only one use as far as I know: since it has a little more horizontal range than Diagonal Jumping Short, it will be able to set up ticks into SPD from a little farther. It doesn't hit as low though, which makes it whiff vs crouching characters (with DeeJay being the only exception, though he leans back during his crouch blocking animation, so this end up having less horizontal range than Short), this is important to keep in mind.
- Neutral Jumping Strong:
| Damage | 22[1] |  |
 |
 |

|
| Stun | 1~7(-2) | ||||
| Stun Timer | 40 | ||||
| Frame Count | 2 | 3 | 8 | ∞ | |
| Simplified | 2 | 11 | ∞ | ||
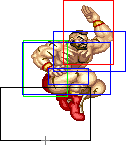
Yet another knife hand strike in the air. Totally outclassed by the Fierce version since it has same everything but worse priority and damage. Also, it does an unusually low stun for a Strong attack. Another totally useless move.
- Diagonal Jumping Strong:
| Damage | 22[1] |  |
 |
 |

|
| Stun | 5~11 | ||||
| Stun Timer | 50(+10) | ||||
| Frame Count | 2 | 3 | 8 | ∞ | |
| Simplified | 2 | 11 | ∞ | ||
Animates like the Neutral Jumping version as well. It's Zangief's main air to air option, mainly due to it being the diagonal jumping normal with the longest horizontal reach. It's not that great at it but it can beat some low priority moves like Blanka's Jumping Strong, or can also be used against Claw's Wall Dives by anticipation, though that's very risky.
- Neutral Jumping Fierce:
| Damage | 30[2] |  |
 |
 |

|
| Stun | 11~17(-1) | ||||
| Stun Timer | 60(+20) | ||||
| Frame Count | 2 | 3 | 8 | ∞ | |
| Simplified | 2 | 11 | ∞ | ||
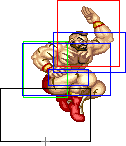
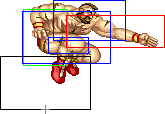
Animates like his Jumping Jabs and Strongs. This is Zangief's Neutral Jumping move with the best priority air to air. At least it's good enough to beat Claw's Wall Dive (it may trade if Claw does it late though) and Cammy's Thrust Kick (if done from far enough). O.Zangief does a little more random damage with this move.
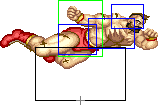
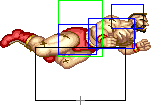
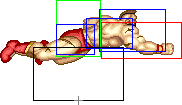
- Diagonal Jumping Fierce:
| Damage | 30[2] | 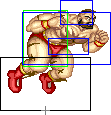 |
 |
 |
 |
 |
 |

|
| Stun | 11~17(-1) | |||||||
| Stun Timer | 60(+20) | |||||||
| Frame Count | 1 | 3 | 3 | 7 | 3 | 3 | ∞ | |
| Simplified | 7 | 7 | ∞ | |||||
Zangief does an aerial long punch. It is Zangief's main air to ground attack: great at jumping over fireballs (except against Low Tiger Shots, in that case you must use Diagonal Jumping Roundhouse instead), at surprise jumps and as a combo starter. You can follow it up with a SPD: if you know the opponent will take the hit (i.e. you just jumped over a fireball) you can go directly to a SPD when landing, for massive damage, or if you believe the opponent will most likelly block it, you can then walk up and then go for a SPD, which, if not expected, can be very hard to escape, due to the long blockstun that this move inflicts. O.Zangief does a little more random damage with this move.
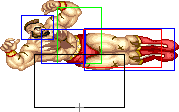
- Neutral Jumping Short:
| Damage | 18[1] | 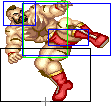 |
|
| Stun | 1~7(-2) | ||
| Stun Timer | 40 | ||
| Frame Count | 3 | ∞ | |
Zangief does a weak two foot kick which stays active for the entire jump. OK for tick throwing if you ever find yourself in the range and with enough momentum. This will rarely be the case though.
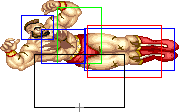
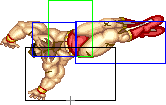
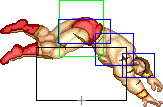
- Diagonal Jumping Short:
| Damage | 18[1] |  |
 |
 |
 |
 |
|
| Stun | 1~7(-2) | ||||||
| Stun Timer | 40 | ||||||
| Frame Count | 3 | 16 | 8 | 6 | 4 | ∞ | |
| Simplified | 3 | 16 | ∞ | ||||
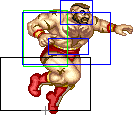
Zangief does a weak two foot kick which stays active a lot less time than the Neutral Jumping version. It's Zangief's main air ticking move. It excels at it because it has good range and you don't need to care if it hits or if it's blocked: the timing for the SPD when landing will be the same because aerial light attacks do equal stun on hit or block. If your opponent happens to be able to constantly reverse these tick attempts then a possible mix-up exists: use Forward or Roundhouse instead, since they animate the same the opponent will not be able to tell the difference until it hits, but keep in mind that this will only be really effective if the opponent actually blocks it (remember: aerial block stun is gradual but aerial hit stun is constant). It's also the best move to be used on safe jumps and can also be used as an instant overhead.
- Neutral Jumping Forward:
| Damage | 22[1] |  |
 |
 |
 |
 |

|
| Stun | 5~11 | ||||||
| Stun Timer | 50(+10) | ||||||
| Frame Count | 3 | 16 | 8 | 6 | 4 | ∞ | |
| Simplified | 3 | 16 | ∞ | ||||
Another two foot aerial kick but with a little more damage, stun, priority and range. With that aside, it's as useless as the Short version.
- Diagonal Jumping Forward:
| Damage | 22[1] |  |
 |
 |
 |
 |

|
| Stun | 5~11 | ||||||
| Stun Timer | 50(+10) | ||||||
| Frame Count | 3 | 16 | 8 | 6 | 4 | ∞ | |
| Simplified | 3 | 16 | ∞ | ||||
Animates like the Short version, it even has the same priority and frame data, but with more damage and stun potential of course. It can be used as a mix-up when air ticking with the Short version but it's not as efficient because of the difference on the hit and block stuns (i.e. you have to know before hand if it will hit or if it will be blocked). It's also Zangief's best move to use as an instant overhead.
- Neutral Jumping Roundhouse:
| Damage | 30[2] |  |
 |
 |
 |
 |

|
| Stun | 11~17(-1) | ||||||
| Stun Timer | 60(+20) | ||||||
| Frame Count | 3 | 8 | 8 | 6 | 4 | ∞ | |
| Simplified | 3 | 8 | ∞ | ||||
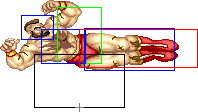
Zangief does a fast two foot aerial kick which has awesome range. It is the best Neutral Jumping kick, it has pretty much the same range as Neutral Jumping Fierce and less priority, but it hits lower which allows Zangief to beat some low moves (e.g. Blanka's Fierce Slide). Also, his startup hurtboxes are a lot smaller compared to the ones from the active part which makes this move very good for trading. It's a very good move for anticipating the opponent's jump-ins, since it also has a very fast startup. O.Zangief does a little more random damage with this move.
- Diagonal Jumping Roundhouse:
| Damage | 30[2] | 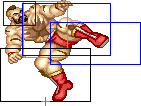 |
 |
 |
 |
 |

|
| Stun | 11~17(-1) | ||||||
| Stun Timer | 60(+20) | ||||||
| Frame Count | 3 | 8 | 8 | 6 | 4 | ∞ | |
| Simplified | 3 | 8 | ∞ | ||||
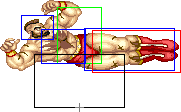
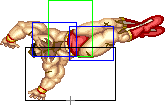
Yet another two foot kick. Good for anticipating jump ins, since it has very good startup and reach. While it's a bad move for trading (because of the premature projected hurtbox during startup), it's good for shenanigans: whiff it on purpose and do SPD exactly when Zangief lands. This is known by the japanese as a diet screw. It only really works with Roundhouse because it has a unique hurtbox during the first recovery part: Zangief's leg hurtbox is a lot smaller compared to his other aerial kicks. It's also worth to mention that this move can also be used as an instant overhead, but the timing is much more strict than the other kicks and it's also impossible to perform against a considerable amount of characters so it's not really practical. You should only favor it over Forward kick when facing DeeJay, since he has the tallest crouching hurtbox in the game, which makes Roundhouse way more viable. Lastly, know this move has 2px less horizontal range than Diagonal Jumping Fierce, but it also hits 7px lower, which makes it the best move to use when jumping over a Low Tiger Shot, but against the other projectiles favor Diagonal Jumping Fierce. O.Zangief does a little more random damage with this move.
--Born2SPD
Command Normals
- Headbutt: (Jump straight up, ↖/↑/↗ + Strong/Fierce)
- Strong Version:
| Damage | 26[2] |  |
 |

|
| Stun | 21~27 28~34(JP) | |||
| Stun Timer | 100 90(JP) | |||
| Frame Count | 3 | 8 | ∞ | |
- Fierce Version:
| Damage | 32[2] |  |
 |

|
| Stun | 21~27 28~34(JP) | |||
| Stun Timer | 100 90(JP) | |||
| Frame Count | 3 | 6 | ∞ | |
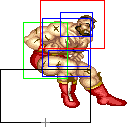
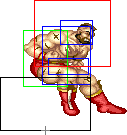
Zangief does a sort of headbutt thing. In the Japanese version it's often an instant dizzy, but in every other version it got nerfed, so it's not very useful. It still does a very high stun, but not enough to 1 hit dizzy. The Fierce version has better priority and does more damage but has less attacking frames. This may be the hardest move to land in the game on purpose. Train yourself to punish badly wiffed specials (think non-jab SRKs and the like) with this to get that instant dizzy. If you're feeling brave, try to use it against Dhalsim at max range to hit his limbs.
- Flying Body Attack a.k.a. Chest Splash: (Jump diagonally, ↙/↓/↘ + Fierce)
| Damage | 26[1] |  |
|
| Stun | 11~17(-1) | ||
| Stun Timer | 60(+20) | ||
| Frame Count | 5 | ∞ | |
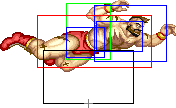
Zangief does a body press with his hairy chest. It's Zangief's only cross-up move and for that sole reason it's a valuable tool in Zangief's arsenal. Very important in cross-up combos or block strings into ticking. Its damage is a little nerfed for a Fierce move but the priority compensates it. It does a poor job in air to air but for air to ground it does OK against some flawed anti airs. Also, his legs are invulnerable which helps a lot when crossing up opponents as it allows Zangief to do it while being safe from certain special moves (e.g. Shoto's Shoryukens) when he is landing on the opposite side. There are some funny uses for this move: against N.Ryu, if he is about to die and you know he is reversal happy, you can just jump and do it late and it will trade with his Reversal Shoryuken for the win. It can also beat Sagat's Tiger Uppercut if timed to hit right after the invulnerable part. You can't rely on that kind of tactics though, since a experienced player can just delay his move a bit, which will then hit Zangief cleanly, for big damage.
- Double Knee Drop: (Jump diagonally, ↙/↓/↘ + Short/Forward)
- Short Version:
| Damage | 20[1] | 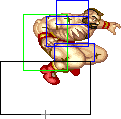 |
|
| Stun | 1~7(-2) | ||
| Stun Timer | 40 | ||
| Frame Count | 5 | ∞ | |
- Forward Version:
| Damage | 24[1] |  |
 |
 |
|
| Stun | 1~7(-2) | ||||
| Stun Timer | 40 | ||||
| Frame Count | 7 | 18 | 6 | ∞ | |
| Simplified | 7 | 18 | ∞ | ||
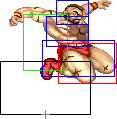
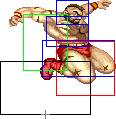
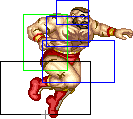
Zangief does a double knee attack in the air.
The Short version has two main uses: it's perfect as a safe jump attack since it's a weak attack (i.e. you don't have to care about hit and block stun differences) that stays active for the whole jump and as a tick into Super. I recommend to mix it up with Diagonal Jumping Short when going for Super just to make them think that you're going to tick into SPD or whatever. I say this because when folks know that Zangief is going for Super they try to counter throw, and they tend to be successful at it because Zangief's Super has a mediocre throw range.
The Forward version is better used as an air to ground tool due to its amazing vertical priority. It's very good against low hitting kicks and some other anti airs if right timed. The right timing must be stressed: Its active for a limited amount of time, and the recovery has hurtboxes projected out of place which makes it easily punishable. You can also use it to beat E.Honda's Headbutt, but keep in mind that you have to land on top of E.Honda or it will be beaten, cleanly. Also, you can use it as an instant overhead against some characters, but Zangief has better options for that. Note that Zangief inflicts very low dizzy stun with this move so limit the use for when you actually needs its particular "anti-anti-air" priorities.
For some reason O.Zangief does more damage with these moves.
--Born2SPD and UltraDavid
Normal Throws
As the prototypical grappler, Zangief has the most Normal Throws in the game and even a couple of the best in his Strong and Roundhouse grabs. That said, because of the SPD his Normal Throws go mostly unused. Note that Zangief's Normal Throws lose in range to E.Honda's, Blanka's and Dhalsim's Normal Throws. He does out range all these characters by a comfortable amount with his SPD though.
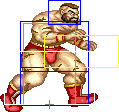
- Standing Normal Grabs Throwboxes:
| Throws | Holds | 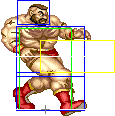 |
 |
| |||
| Damage | 32 | Damage | 26 + 4*n | ||||
| Stun | 7~13 | Set amount of hits | 4 | ||||
| Stun Timer | 100 | Holds do no stun | |||||
| Range | (from axis) | 69 | (from throwable box) | 24 | |||
- Pile Driver: (←/↖/↗/→ + Strong)
Zangief's most important Normal Throw, alongside the crouching one. Zangief sits on the opponent's head, opponent always stays in front of Zangief. Sets up a cross-up Chest Splash when unteched. Because of that, it's incredibly good against Old Characters (since they can't tech throws) because you can "loop" it. It works like this: after you grab them, do a Green Hand, cross-up Splash, and now you can mixup with 0~2 Crouching Jabs and then throw again.
- Iron Claw: (←/↖/↗/→ + Fierce)
Zangief does, I don't know, something to the opponent's face for multiple hits. This grab is totally outclassed by the Bite because it has more startup (i.e. it takes longer for Zangief to do the first hit), the opponent is released farther away from you and it has the same maximum theoretical amount of hits. Should never be used on purpose.
- Brain Buster: (←/↖/↗/→ + Forward)
Zangief throws the opponent over his head, opponent always ends up behind him. Not as useful as the Strong Throw because the opponent is Thrown too far for a cross-up, but if Zangief is in the corner and you want the opponent cornered, here ya go.
- Kamitsuki a.k.a. Bite: (←/↖/↗/→ + Roundhouse)
Zangief bites the opponent for multiple hits. For a normal throw this does great damage, and it would be awesome for any other character, but again, if you're going to grab, a SPD would be the right choice. It's possible to cross under some characters if you got them trapped in the corner.
- Stomach Claw: (↙/↓/↘ + Strong/Fierce)
| Damage | 26 + 4*n | 
| |
| Set amount of hits | 4 | ||
| Holds do no stun | |||
| Range | (from axis) | 69 | |
| (from throwable box) | 24 | ||
Crouching version of the Fierce grab. This sometimes comes out when you want a crouching strong poke, and that's fine because the grab does more damage. The damage on it is kinda bad though (long startup for the 1st hit, usually hits 2 to 3 times), but it's still a great defensive move, since it basically makes Zangief immune to low/grab mix-ups, since you can do it while crouching. This grab is also very good on the DeeJay match-up: it works as an OS on his wake up, since in case it whiffs, the Crouching Strong that will come out will beat his Jackinife Maximum (i.e. up kicks) as well as his Rolling Sobat.
- Deadly Driver: (Min activation height: 48/48 upwards/downwards, ←/↖/↙/↓/↘/↗/→ + Strong/Fierce)
| Damage | 42 | 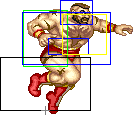
| |
| Stun | 7~13 | ||
| Stun Timer | 100 | ||
| Range | (from axis) | 61 | |
| (from throwable box) | 16 | ||
Zangief throws the opponent down in the direction pressed. Does more damage than the Kick Air Throw but the follow-up game is weaker.
- Leg Throw: (Min activation height: 48/48 upwards/downwards, ←/↖/↙/↓/↘/↗/→ + Forward/Roundhouse)
| Damage | 34 | 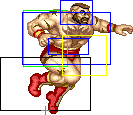
| |
| Stun | 7~13 | ||
| Stun Timer | 100 | ||
| Range | (from axis) | 61 | |
| (from throwable box) | 16 | ||
Zangief tosses over his head in the direction pressed. This is the better Air Throw because it leaves the opponent closer, but it's still very rarely used.
--Born2SPD and UltraDavid
Special Moves
- Spinning Pile Driver a.k.a. SPD: (360 P)
Detailed Input: (→ [7~14f] ↓ [7~14f] ← [7~14f] ↑ [12/9/7/4f] Jab/Strong/Fierce/any P if you are at a jumpable state and the last direction was ↑. The first direction and the side you spin is not fixed. You just need to input the 4 main directions in order. More explanation here)
| Jab | Strong | Fierce | 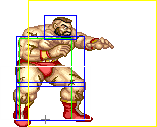
| |||
| Damage | 42[1] | 46[1] | 50[1] | |||
| Stun | 7~13 | |||||
| Stun Timer | 100 | |||||
| Range | (from axis) | 111 | ||||
| (from throwable box) | 66 | |||||
- Whiff:
 |
 |
 |
 |

| |
| Frame Count (Jab) | 5 | 5 | 16 | 3 | 3 |
| Simplified (Jab) | 32 | ||||
| Frame Count (Strong) | 5 | 5 | 18 | 3 | 3 |
| Simplified (Strong) | 34 | ||||
| Frame Count (Fierce) | 5 | 5 | 20 | 3 | 3 |
| Simplified (Fierce) | 36 | ||||
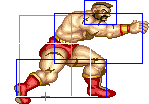
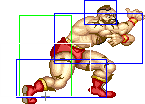
Zangief attempts to grab the opponent and after that remains stuck on an animation so that he can not block or move. This is a command throw with excellent range that does good damage; this is Zangief's most important move. All versions have the same range, unlike on later games of the series that have Jab with a better range and Fierce with a worse one. The Jab version does the worst damage and Fierce does the highest, this alone is enough reason for you to favor using the Fierce version most of the time. Fierce also covers more ground during the spinning animation and Jab covers less, that's another reason why Fierce is preferable most of the time since you always want to push the opponent to the nearest corner whenever possible. Another difference is that the Jab version has a whiff animation that doesnt last as long as Fierce, although it does not vary all that much: if the opponent manages to get a reversal out or if you do it incorrectly, you'll get hit either way. Also, Jab has a more lenient window for the P input, which as a consequence allows for more grabable frames during the whiff animation.
As stated above, you should be using the Fierce version on most cases, bu there are a few exceptions. Good uses for the Jab version are: when any SPD can win the round and you'd preffer to just get more active frames on your SPD to guarantee the tick or if you're doing a SPD in a situation in which the opponent's throwbox is delayed. Also, on a few matchups, when you already have the opponent cornered, a Jab/Strong SPD may be used instead because landing too close to the corner may result in the opponent getting knocked down in a strange way that may not allow you to follow up with anything (they get up faster), specially if the tick string leaves Zangief too close to the opponent(e.g. an aerial move linked into a single light attack). There's only 4 matchups that you really need to care about it though: against Guile and Dhalsim, as long the safe jump tick string spaces Zangief far enough then the problem is negated; agaisnt Claw it's apparently impossible to make he bounce high enough for you to be able to safe jump him, but if you do it right you can still safe tick; against Chun there isn't much you can do, unfortunatelly. Anyway, I personally do my reversals with triple taps so I end up never using the Strong version, but I know some players like to piano Strong and Fierce for reversals. If that's your case, keep in mind that you shouldn't piano all 3 P buttons to increase your reversal chances, because a Lariat may come out by accident.
If done after a tick and out of opponents throw range, the opponent can only escape by doing a reversal-timed instantly-invincible attack, like a dragon punch, or a move that puts the character in the air instantly, like Blanka's rolling attack.
- Atomic Suplex: (Close, 360 K)
Detailed Input: (→ [7~14f] ↓ [7~14f] ← [7~14f] ↑ [12/9/7/4f] Short/Forward/Roundhouse/any K if you are at a jumpable state and the last direction was ↑. The first direction and the side you spin is not fixed. You just need to input the 4 main directions in order. More explanation here)
| Short | Forward | Rh | Short | Forward | Roundhouse | ||
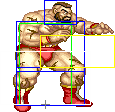
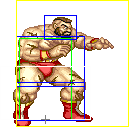
| Damage | 20 + 30[0] | 20 + 32[0] | 20 + 34[0] | 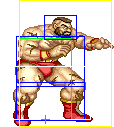 |
 |
| |
| Stun | 0 + 7~13 | ||||||
| Stun Timer | 0 + 100 | ||||||
| Range | (from axis) | 66 | 69 | 83 | |||
| (from throwable box) | 21 | 24 | 38 | ||||
This command throw is more damaging than the SPD, but its range is much smaller. If you are right up close, you can go for this instead of a SPD, for more guaranteed damage. But keep in mind that the follow up is usually worse: if done on any distance that won't corner the opponent (e.g. midscreen), doing a SPD instead will allow Zangief to get much more closer to the waking up opponent (around 30px closer) than if he did a Suplex. On the other hand, this move has better potential for moving the opponent to his own corner, specially the Rh version.
If done after a tick, the opponent can only escape by doing a reversal-timed instantly-invincible/airborne attack. If the grab attempt is not successful, this move turns into the Flying Power Bomb, also known as the Running Bear Grab. Always use the Roundhouse version because it has better throw range, damage potential and releases the opponent sligthly closer to his corner, while having meaningless downsides (smaller input window; built in OS with Rh Running Bear Grab, that has a slower startup than the other Running Bear Grabs). The best moves to tick this from are Close Standing Short and Crouching Strong because they both leave Zangief at very little or no frame advantage, this means that a Running Bear Grab will never come out or only rarely (unless the normal was meaty timed), with Crouching Strong leaving Zangief at optimal range for it. Something worth mentioning is that the Roundhouse version is Zangief's best command grab to use on a crossup before turning (the throwbox extends after the pushbox's back by some pixels).
On the WORLD version of the arcade game, this move has a very nasty bug: if the Rh version is performed as a Reversal, it will have a full screen sized throwbox. This allows O.Zangief to grab the opponent from as far as possible, as long the opponent is on a throw-able state. Because of this O.Zangief is often considered a banned character when playing with that particular version of the game.
- Flying Power Bomb a.k.a. Running Bear Grab: (Far, 360 K)
Detailed Input: (→ [7~14f] ↓ [7~14f] ← [7~14f] ↑ [12/9/7/4f] Short/Forward/Roundhouse/any K if you are at a jumpable state and the last direction was ↑. The first direction and the side you spin is not fixed. You just need to input the 4 main directions in order. More explanation here)
- Startup + Active:
- Whiff:
 |
 |
 |
 |

| |
| Frame Count (Short) | 5 | 5 | 16 | 3 | 3 |
| Simplified (Short) | 32 | ||||
| Frame Count (Forward) | 5 | 5 | 18 | 3 | 3 |
| Simplified (Forward) | 34 | ||||
| Frame Count (Rh) | 5 | 5 | 20 | 3 | 3 |
| Simplified (Rh) | 36 | ||||
Zangief runs a certain distance, and if he gets close enough, he grabs the opponent. This does less damage than SPD and SPD's range is only a little smaller than this move's max running range, but it's still useful in some match-ups and in surprise situations. All versions have the same range, but gradual running distances. The startup time means the opponent can jump or even hit Zangief out of it with a normal. It can also be triggered from a canceled normal (usually a crouching kick) for an almost granted grab, but from that range you should go for a SPD instead.
There's a little trick that most Zangief players don't know about which makes this move a little more efficient: a kara canceled Running Bear Grab will force the opponent to enter into blocking animation, this means that they will not be able to avoid it by just walking back, forcing them to actually have proper reactions and counter it with something.
- Double Lariat a.k.a. Punch Lariat: (3P)
Detailed Input: (Can be done crouching, all buttons must be pressed on the same frame, negative edge not possible)
| Damage | 30[3] | 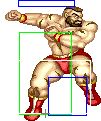 |
 |
 |
 |
 |
 |

|
| Stun | 9~15 | |||||||
| Stun Timer | 100 | |||||||
| Frame Count | 1 | 6 | 5 | 5 | 5 | 5 | 5 | |
 |
 |
 |
 |
 |

| |
| Frame Count | 5 | 5 | 5 | 5 | 5 | 3 |
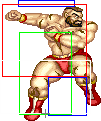
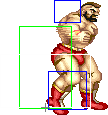
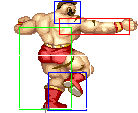
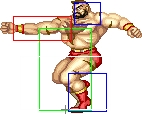
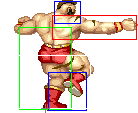
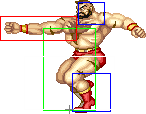
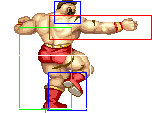
Zangief spins around with hands a-flailing, with mid body invulnerability. The attack range increases with each spin. This move goes through any projectile that is not a Low Tiger shot, and also through some supers and most high- and mid- level normals. The active hitbox extends to only one of Zangief's hands, so although the hand with the hitbox beats just about every non-invincible move in its range (Zangief's arm is fully invincible), the chance of that happening is a little less than 50%; as a result, while the Lariat can beat things like Honda's headbutt, it does so only occasionally.
- Quick Double Lariat a.k.a. Kick Lariat: (3K)
Detailed Input: (Can be done crouching, all buttons must be pressed on the same frame, negative edge not possible)
| Damage | 30[3] |  |
 |
 |
 |
 |
 |

|
| Stun | 9~15 | |||||||
| Stun Timer | 100 | |||||||
| Frame Count | 1 | 6 | 5 | 5 | 5 | 5 | 5 | |
 |
 |

| |
| Frame Count | 5 | 5 | 1 |
| Simplified | 5 | 6 | |
Like the punch Lariat, but this one has a shorter duration and range and doesn't move laterally as far. Unlike N.Zangief's version of this move, it has the same lower hurtbox as the punch lariat, which does not allow you to spin though Sagat's Low Tiger shots. That in my opinion makes the O.Zangief vs O.Sagat tied with the Zangief vs O.Boxer matchup as the worst matchups in the whole game, it is 1 - 9 or even 0.5 - 9.5, if you don't abuse O.Zangief's Reversal Suplex bug.
--Born2SPD and UltraDavid
Misc Animations
Jump Animations
- Prejump:
 |
 |
 |

| |
| Frame Count | 1 | 1 | 1 | 1 |
| Simplified | 4 | |||
- Airborne + Landing:
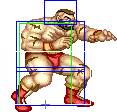
Zangief has one of the slowest prejumps on the game. This makes jumping over fireballs more difficult than it is for other characters, but also makes the SPD execution more lenient than T.Hawk's Typhoon.
Note that N.Zangief received a buff on the hurtboxes of the airborne part of the jump. That also ends up affecting all aerial normals as well as Close Standing Short, since that specific hurtbox is shared internally on all these animations.
The landing recovery has a special property which allows it to be canceled into certain actions. At the first landing frame, you can perform throws (including command throws), and on the second landing frame, you can start another jump, attack with a normal or special move, or block. Blocking not being until the second landing frame, as well as hitbox-hurtbox interactions having priority over throwbox-throw hurtbox is why sweeps work as anti airs in this game.
Things are different when jumping over your opponent, however. In that situation it's possible to walk back/forward, to jump again or to even block on the first landing frame! Strangely, if a throw is timed on the first landing frame of a jump that crosses over, a throwbox will never come out, even though that input will result in a normal coming out 2 frames later (like it normally would). Anyway, being able to block on the first landing frame can help a little bit on some safe jump crossup setups, or maybe in other situations as well if your character has a huge jump arc.
The Basics
Old Zangief is one of the worst Old Characters in the game, mainly for the worse normals (Far Standing Forward, Far Standing Roundhouse) as well as specials (worse leg hitbox on Kick Lariat - this makes the Sagat match-up basically impossible, and not having the Green Hand can be bad on a few match-ups). Not being able to tech throws is not very meaningful, since it will always be very dangerous for the opponent to get that close to you. Not having his super is not really problem either, since it's kinda useless due to the very small range it has.
Unless you're playing on the WORLD version of the game and you consider the Atomic Suplex glitch an advantage (you shouldn't, unless you want to troll your opponent), you'll be using an inferior version of Zangief. Some players preffer the Old version because doing SPDs is slightly easier, since there's no Green Hand. But this is only a problem if your execution is sloppy.
Do yourself a favor and use New Zangief instead.
