Introduction
Akuma, or Gouki, in Japan, is a secret boss which has been introduced in Super Street Fighter II Turbo/X. In order to face him, you have to either obtain a high score, reach the last stage quick or defeat many human opponents without losing a single credit. Akuma would appear on the screen, attack Dictator and face you in his place. A toned down version was made available for players to use, but it is still a too powerful character for competitive play. It featured a single air Hadouken instead of two and longer recovery on his projectiles.
Picking Akuma
Unlike his counterparts, Akuma is a secret character that requires a special input code. To choose him, do the following at the character selection screen:
- Start with the character selection cursor over Ryu or Ken. Wait atleast 60 frames (roughly 1 second);
- NOTE: you can move from Ryu to Ken and vice versa during that small period of time
- Move the cursor to T.Hawk. Wait in the same way (60f);
- Then move the cursor to Guile. Wait a short while again (60f);
- After that, move to Cammy. Wait (60f);
- Finally, move the cursor back to Ryu or Ken. Wait one last time (60f);
- NOTE: you can move from Ryu to Ken and vice versa during that small period of time
- At this point, you may optionally move the cursor to any character. There's no real reason to take this unnecessary step unless you're afraid you might get the code wrong and want to choose a specific backup character in such a case;
- Now press start (the cursor can be on any character), and then very quickly after pressing start (you have up to 30f - roughly half a second), press all 3 punch buttons simultaneously. They must be pressed on the same frame (like a Lariat) so it's possible to miss it. Mash the three punches to increase your chance of success.
| Normal | Secondary |
 |

|
--Born2SPD
Strengths And Weaknesses
Strengths
- High priority normals, and most are fast to come out.
- Great zoning game with two good ground fireballs that can knock down, as well as an air fireball that basically all the cast have no answer for.
- Can easily escape from corner traps or bad situations with teleport.
- High damage combos and specials, juggles well.
- Inescapable corner trap on some characters.
- Two good offensive reversals in srk and tatsu.
- Can play well offensively or defensively.
- Good combo ability.
- When dizzied he recovers instantly (so he will still fall for a dizzy and he's vulnerable to a meaty on waking up in his dizzy state but that's it).
Weaknesses
- Below average range on normals.
- No super.
- Banned from basically everything.
Tournament Illegality and Etiquette
Since Akuma is considered an overwhelmingly-strong character, he's banned in virtually every tournament. Choosing him outside of tournaments may also be frowned upon if the games are being played with any kind of seriousness. Playing as him should be done for entertainment value only. He was previously considered balanced in HD Remix, but due to Damdai entering and WINNING every tournament with Akuma, as well as inescapable super setups coming to light, he is now considered overpowered and banned from all sanctioned tournaments.
--Murderbydeath 02:26, 30 November 2009 (UTC)
Moves Analysis
Disclaimer: To better understand the diagrams, read this.
Normal Moves
Ground Normals
- Close Standing Jab: (Base max activation range: 25)
| Damage | 4[0] |  |
 |

|
| Stun | 0~5 | |||
| Stun Timer | 40 | |||
| Chain Cancel | No | |||
| Special Cancel | Yes | |||
| Super Cancel* | Yes | |||
| Frame Advantage | +4 | |||
| Frame Count | 2 | 4 | 5 | |
| Simplified | 1 + 2 | 4 | 5 | |
Akuma performs an elbow smash in front and above his head. Fast start-up anti-air up close, with just OK priority.
- Far Standing Jab:
| Damage | 4[0] |  |
 |
 |

|
| Stun | 0~5 | ||||
| Stun Timer | 40 | ||||
| Chain Cancel | Yes | ||||
| Special Cancel | Yes | ||||
| Super Cancel* | Yes | ||||
| Frame Advantage | +4 | ||||
| Frame Count | 2 | 4 | 4 | 1 | |
| Simplified | 1 + 2 | 4 | 5 | ||
Rapid-fire Jab that has very good priority (Akuma's arm is completely invulnerable) but just acceptable reach and very low damage. The hitbox is fat like the Old shotos and also has a little more range.
- Crouching Jab:
| Damage | 4[0] |  |
 |
 |

|
| Stun | 0~5 | ||||
| Stun Timer | 40 | ||||
| Chain Cancel | Yes | ||||
| Special Cancel | Yes | ||||
| Super Cancel* | Yes | ||||
| Frame Advantage | +4 | ||||
| Frame Count | 2 | 4 | 4 | 1 | |
| Simplified | 1 + 2 | 4 | 5 | ||
Rapid-fire ducking Jab with average reach and very good priority. Akuma's arm is completely invincible.
- Close Standing Strong: (Base max activation range: 31)
| Damage | 22[0] |  |
 |
 |
 |

| |
| Stun | 5~11 | ||||||
| Stun Timer | 60 | ||||||
| Chain Cancel | No | ||||||
| Special Cancel | Yes | ||||||
| Super Cancel* | Yes | ||||||
| Frame Advantage | +0 | ||||||
| Frame Count | 3 | 2 | 6 | 4 | 6 | ||
| Simplified | 1 + 3 | 2 | 16 | ||||
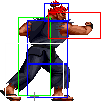
Akuma performs a hook. This move has a not very good recovery, so try canceling it into some special such as the hadouken to avoid punishment. This also recovers 1f faster than with the other shotos.
- Far Standing Strong:
| Damage | 22[0] |  |
 |
 |
 |
 |

|
| Stun | 5~11 | ||||||
| Stun Timer | 60 | ||||||
| Chain Cancel | No | ||||||
| Special Cancel | Yes | ||||||
| Super Cancel* | Yes | ||||||
| Frame Advantage | +7 | ||||||
| Frame Count | 1 | 2 | 4 | 3 | 3 | 1 | |
| Simplified | 1 + 3 | 4 | 7 | ||||
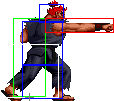
Akuma performs a straight punch. This move has very good recovery, reach and priority. Works as anti-air against moves whose extended limbs are vulnerable, but notice Akuma's body moves forward a bit, so you need some room to use it correctly. Akuma's whole arm is invincible in this attack.
- Crouching Strong:
| Damage | 22[0] |  |
 |
 |
 |
 |

|
| Stun | 5~11 | ||||||
| Stun Timer | 60 | ||||||
| Chain Cancel | No | ||||||
| Special Cancel | Yes | ||||||
| Super Cancel* | Yes | ||||||
| Frame Advantage | +7 | ||||||
| Frame Count | 1 | 2 | 4 | 3 | 3 | 1 | |
| Simplified | 1 + 3 | 4 | 7 | ||||
Akuma does a crouching straight. Good damage, stun, recovery and priority. Akuma's whole arm is completely invincible. This move can be used as a safe meaty against several invulnerable special attacks from the correct distance. However, this can be countered by standing still (which shrinks the hurtbox horizontally) and then either attacking or walking up and throwing. It is also unsafe against most supers, which is yet another reason to (always) have an eye on the enemy's super bar.
- Close Standing Fierce: (Base max activation range: 41)
| Damage | 28[1] |  |
 |
 |
 |

|
| Stun | 3~9 / 10~16 | |||||
| Stun Timer | 40 / 80 | |||||
| Chain Cancel | No | |||||
| Special Cancel | Yes / No | |||||
| Super Cancel* | Yes / Yes | |||||
| Frame Advantage | -9 / -7 | |||||
| Frame Count | 3 | 2 | 6 | 10 | 13 | |
| Simplified | 1 + 3 | 8 | 23 | |||
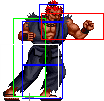
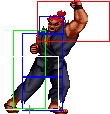
Akuma does a close upper. Good priority anti-air if the enemy is on top of you, and if he is close it can be canceled into any special attack for a basic but damaging combo. Bad recovery.
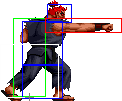
- Far Standing Fierce:
| Damage | 28[1] |  |
 |
 |
 |
 |

|
| Stun | 10~16 | ||||||
| Stun Timer | 80 | ||||||
| Chain Cancel | No | ||||||
| Special Cancel | No | ||||||
| Super Cancel* | Yes | ||||||
| Frame Advantage | -7 | ||||||
| Frame Count | 3 | 2 | 6 | 10 | 12 | 1 | |
| Simplified | 1 + 5 | 6 | 23 | ||||
Similar to far.strong, but with higher damage and longer reach, but the head hitbox moves forward just as much and the recovery is hideous. This move can not be canceled into specials, so make sure it hits or you will pay the price.
- Crouching Fierce:
| Damage | 28[1] / 22[1] |  |
 |
 |
 |
 |

|
| Stun | 3~9 / 10~16 | ||||||
| Stun Timer | 40 / 80 | ||||||
| Chain Cancel | No | ||||||
| Special Cancel | Yes / No | ||||||
| Super Cancel* | Yes / No | ||||||
| Frame Advantage | -12 / -9 | ||||||
| Frame Count | 3 | 3 | 8 | 10 | 12 | 1 | |
| Simplified | 1 + 3 | 11 | 23 | ||||
Uppercut from crouching position. It does good damage and has a deceptively long horizontal reach, but just average to low priority and quite long recovery. This move is unsafe on block or hit and is mainly used in combos or as close-up anti-air. Favor standing Fierce if you can for the latter.
- Close Standing Short: (Base max activation range: 0)
| Damage | 12[0] |  |
 |
 |
 |
 |

|
| Stun | 0~5 | ||||||
| Stun Timer | 40 | ||||||
| Chain Cancel | Yes | ||||||
| Special Cancel | No | ||||||
| Super Cancel* | Yes | ||||||
| Frame Advantage | +3 | ||||||
| Frame Count | 2 | 3 | 2 | 4 | 3 | 1 | |
| Simplified | 1 + 5 | 2 | 8 | ||||
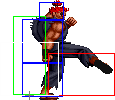
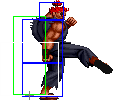
Akuma performs a low kick that can be canceled into a far Short or crouching Short. This move must be blocked low.
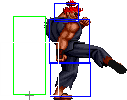
- Far Standing Short:
| Damage | 14[0] |  |
 |
 |
 |
 |
 |
 |

|
| Stun | 0~5 | ||||||||
| Stun Timer | 40 | ||||||||
| Chain Cancel | No | ||||||||
| Special Cancel | No | ||||||||
| Super Cancel* | No | ||||||||
| Frame Advantage | +3 | ||||||||
| Frame Count | 3 | 2 | 2 | 2 | 2 | 2 | 3 | 1 | |
| Simplified | 1 + 7 | 2 | 8 | ||||||
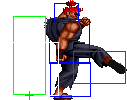
Like the Close version, but without cancels and worse priority. Hits low as well. Unlinke N.Ken's version, this move has 1f faster recovery.
- Crouching Short:
| Damage | 4[0] |  |
 |
 |

|
| Stun | 0~5 | ||||
| Stun Timer | 40 | ||||
| Chain Cancel | Yes | ||||
| Special Cancel | Yes | ||||
| Super Cancel* | Yes | ||||
| Frame Advantage | +4 | ||||
| Frame Count | 3 | 4 | 4 | 1 | |
| Simplified | 1 + 3 | 4 | 5 | ||
Rapid fire crouching low kick. Has awesome priority like Old Shotos.
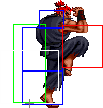
- Close Standing Forward: (Base max activation range: 0)
| Damage | 24[0] |  |
 |
 |
 |
 |

|
| Stun | 5~11 | ||||||
| Stun Timer | 60 | ||||||
| Chain Cancel | No | ||||||
| Special Cancel | Yes | ||||||
| Super Cancel* | Yes | ||||||
| Frame Advantage | +3 | ||||||
| Frame Count | 2 | 1 | 6 | 4 | 4 | 1 | |
| Simplified | 1 + 3 | 6 | 9 | ||||
Knee bash with a good recovery.
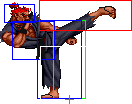
- Far Standing Forward:
| Damage | 24[0] |  |
 |
 |
 |

|
| Stun | 5~11 | |||||
| Stun Timer | 60 | |||||
| Chain Cancel | No | |||||
| Special Cancel | No | |||||
| Super Cancel* | No | |||||
| Frame Advantage | +3 | |||||
| Frame Count | 3 | 4 | 8 | 6 | 1 | |
| Simplified | 1 + 7 | 8 | 7 | |||
High side kick with good priority, but very slow start-up. Very good anti-air if you can hit the button early enough. The priority is better than Old Shotos (similar to HF's at front, but more extended backwards).
- Crouching Forward:
| Damage | 22[0] |  |
 |
 |
 |
 |

|
| Stun | 5~11 | ||||||
| Stun Timer | 60 | ||||||
| Chain Cancel | No | ||||||
| Special Cancel | Yes | ||||||
| Super Cancel* | Yes | ||||||
| Frame Advantage | +3 | ||||||
| Frame Count | 1 | 2 | 6 | 4 | 4 | 1 | |
| Simplified | 1 + 3 | 6 | 9 | ||||
Crouching side kick. This move has good reach and recovery, but is has projected vulnerable hitboxes before and after it becomes active. It is an important tool when closing the gap on the enemy and trying to push him into the corner as it can be canceled into Hadoukens. It is also used in bread and butter combos. It has good priority like Old Shotos.
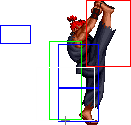
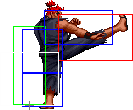
- Close Standing Roundhouse: (Base max activation range: 40)
| Damage | 30[1] + 4[1] |  |
 |
 |
 |
 |

|
| Stun | 10~16 + 1~7 | ||||||
| Stun Timer | 80 + 70 | ||||||
| Chain Cancel | No | ||||||
| Special Cancel | No | ||||||
| Super Cancel* | No | ||||||
| Frame Advantage | -1 / +7(+6) | ||||||
| Frame Count | 3 | 2 | 8 | 4 | 10 | 1 | |
| Simplified | 1 + 5 | 8 | 4 | 11 | |||
Akuma performs an axe kick that hits twice if the enemy is close enough. This is not a very useful move, but it is safe on block from point-blank range and often trades with aerial attacks. If you use it as a meaty, you can combo a crouching kick for two or three hits. you often have better options, though. Unlike other shotos, this move starts 2f faster, has the head hurtbox projected on his back and the hitbox on the second active part is bigger.
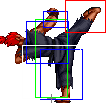
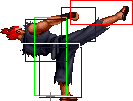
- Far Standing Roundhouse:
| Damage | 30[1] |  |
 |
 |
 |

|
| Stun | 10~16 | |||||
| Stun Timer | 80 | |||||
| Chain Cancel | No | |||||
| Special Cancel | Yes / Yes | |||||
| Super Cancel* | Yes / Yes | |||||
| Frame Advantage | -5 / -1 | |||||
| Frame Count | 2 | 2 | 8 | 10 | 7 | |
| Simplified | 1 + 2 | 10 | 17 | |||
Akuma's staple Roundhouse kick. Akuma's version of this move is actually a good anti air since the priority is a lot better and the move is also 2 frames faster, in comparison to the other shotos. The other shotos with this attack can only cancel it off the first active part, which is incredibly unlikely to hit a grounded opponent, however Akuma can cancel both parts, this makes it pretty reliable as a cancel, and will combo into fireball most of the time, which can lead to some high damage combos.
- Crouching Roundhouse:
| Damage | 30[1] |  |
 |
 |
 |

|
| Stun | 5~11 | |||||
| Stun Timer | 130 | |||||
| Chain Cancel | No | |||||
| Special Cancel | Yes | |||||
| Super Cancel* | Yes | |||||
| Frame Advantage | -9 | |||||
| Frame Count | 3 | 6 | 6 | 8 | 11 | |
| Simplified | 1 + 3 | 6 | 25 | |||
Akuma's sweep kick. This move generates a fast knockdown if it hits. It has good range and the priority is such that it beats or trades with a number of moves. The recovery, however, is very long, so good players will try to bait this move so as to punish it afterward. This can be canceled into Hadoukens so you can push the enemy towards his corner or Shoryukens and Short tatsus for super meter. Knowing the timing for walking up cr.Rounhouse xx Hadouken is an important skill for shoto players. It has the damage and priority of Old Shotos.
Aerial Normals
- Neutral Jumping Jab:
| Damage | 12[0] |  |

|
| Stun | 1~7(-2) | ||
| Stun Timer | 40 | ||
| Special Cancel | Yes | ||
| Frame Count | 2 | ∞ | |
Akuma performs a jumping jab that is active throughout the whole jump. Akuma's hand has a relatively large active hitbox around it, making this a good air-to-air move. It can be used for jumping on you opponent after a knockdown and not generate much push-back, allowing you to apply mix-ups such as throw, cr.forward xx Hadouken/super or delayed Jab SRK (to beat reversal throws).
- Diagonal Jumping Jab:
| Damage | 12[0] |  |

|
| Stun | 1~7(-2) | ||
| Stun Timer | 40 | ||
| Special Cancel | Yes | ||
| Frame Count | 2 | ∞ | |
Akuma performs a jumping jab that is active throughout the whole jump. Akuma's hand has a relatively large active hitbox around it, making this a good air-to-air move. It can be used for jumping on you opponent after a knockdown and not generate much push-back, allowing you to apply mix-ups such as throw, cr.forward xx Hadouken/super or delayed Jab SRK (to beat reversal throws). This beats Zangief's Lariats from the right distance and still hits him if he crouches.
- Neutral/Diagonal Jumping Strong:
| Damage | 22[0] |  |
 |
 |
 |
 |
 |

|
| Stun | 5~11 | |||||||
| Stun Timer | 50 | |||||||
| Special Cancel | Yes* | |||||||
| Frame Count | 2 | 2 | 20 | 4 | 4 | 4 | ∞ | |
| Simplified | 4 | 20 | ∞ | |||||
This aerial punch stays active for quite some time, for a Strong punch. It has very good horizontal reach and Akuma's arm is completely invincible. A move to be considered when afraid of wall dives crossing you or aerial attacks in general. This attack does not hit crouching opponents.
- Neutral Jumping Fierce:
| Damage | 28[0] |  |
 |
 |
 |
 |
 |

|
| Stun | 11~17(-1) | |||||||
| Stun Timer | 60(+20) | |||||||
| Special Cancel | Yes* | |||||||
| Frame Count | 2 | 2 | 8 | 4 | 4 | 4 | ∞ | |
| Simplified | 4 | 8 | ∞ | |||||
Same as diagonal jump fierce, but does more dizzy.
- Diagonal Jumping Fierce:
| Damage | 28[1] |  |
 |
 |
 |
 |
 |

|
| Stun | 3~9 | |||||||
| Stun Timer | 40 | |||||||
| Special Cancel | Yes* | |||||||
| Frame Count | 2 | 2 | 8 | 4 | 4 | 4 | ∞ | |
| Simplified | 4 | 8 | ∞ | |||||
This move has very good air to ground priority, and Akuma's arm is also completely invincible. It can be used as anti-air from certain distances, and also beats or trades most other aerial attacks.
- Neutral Jumping Short:
| Damage | 14[0] |  |
 |

|
| Stun | 1~7(-2) | |||
| Stun Timer | 40 | |||
| Special Cancel | Yes | |||
| Frame Count | 3 | 40 | ∞ | |
This stays out for quite some time, but it has a very short reach. Mostly useless.
- Diagonal Jumping Short:
| Damage | 12[0] |  |
 |

| |
| Stun | 1~7(-2) | ||||
| Stun Timer | 40 | ||||
| Special Cancel | No | ||||
| Frame Count | 2 | 3 | ∞ | ||
| Simplified | 5 | ∞ | |||
This stays out for quite some time, but safe jumps aside, this does not have many uses. Its main downside is the short reach. Unlike N.Ryu's and N.Ken's versions of this move, it has no foot hurtbox throughout the entire move.
- Neutral Jumping Forward:
| Damage | 22[0] |  |
 |
 |
 |

|
| Stun | 5~11 | |||||
| Stun Timer | 50 | |||||
| Special Cancel | No | |||||
| Frame Count | 5 | 13 | 6 | 6 | ∞ | |
| Simplified | 5 | 13 | ∞ | |||
OK kick that stays active for some time. It can be used in certain situations where the enemy has trouble knowing which way to block. That aside, prefer neutral Strong, Fierce or Roundhouse.
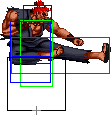
- Diagonal Jumping Forward:
| Damage | 22[0] |  |
 |
 |
 |
 |
 |

|
| Stun | 5~11 | |||||||
| Stun Timer | 50(+10) | |||||||
| Special Cancel | No | |||||||
| Frame Count | 2 | 3 | 13 | 3 | 3 | 3 | ∞ | |
| Simplified | 5 | 13 | ∞ | |||||
Rather long aerial kick with great priority. It can be used as a cross-up aerial attack, but diagonal Roundhouse is better for that. It can be used in safe jumps, to get less push-back if it gets blocked. It's like the Old Shotos Diagonal Jumping Forward since the foot hurtbox is actually placed below his body instead of his leg and also has a bigger hurtbox vertically, hitting lower and higher than O.Ryu's and O.Ken's.
- Neutral Jumping Roundhouse:
| Damage | 30[0] |  |
 |
 |
 |
 |
 |

|
| Stun | 11~17(-1) | |||||||
| Stun Timer | 60(+20) | |||||||
| Special Cancel | Yes / No | |||||||
| Frame Count | 2 | 4 | 4 | 4 | 3 | 3 | ∞ | |
| Simplified | 2 | 8 | ∞ | |||||
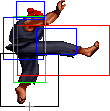
Neutral spin kick that has great reach and priority. The first active part becomes active very fast, saving you from some troublesome situations. Akuma's version of this move is a like a mix form Old and New shotos: the seocnd active part hitbox has a very big hitbox like on Old Shotos but he also has the nerfed priority, like New Shotos.
- Diagonal Jumping Roundhouse:
| Damage | 30[1] |  |
 |
 |
 |
 |
 |

|
| Stun | 3~9 | |||||||
| Stun Timer | 40 | |||||||
| Special Cancel | No | |||||||
| Frame Count | 2 | 3 | 7 | 3 | 3 | 3 | ∞ | |
| Simplified | 5 | 7 | ∞ | |||||
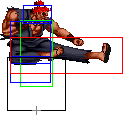
Akuma's best cross-up attack. This also has good reach and priority. From certain distances, this can also be used as anti-air, in the same fashion as diagonal jumping Fierce, hitting your enemy from above his attack or around the head. Akuma's version of this moves behaves like the one from Old Shotos: his leg is completelly invulnerable, but as a tradeoff he has a hurtbox below his body, which actually allows it to be countered by stuff that new shotos can beat easily, like Dictator's Psycho Crusher, for example.
Throws
Akuma can throw using Strong, Fierce, Forward, and Roundhouse. The direction of the joystick determines the direction the enemy gets thrown at. All his throws have the same range and do 32 points of damage (plus two more if behind in rounds).
- Normal Throws Throwboxes:
| Damage | 32 |  |
 |

| |
| Stun | 7~13 | ||||
| Stun Timer | 100 | ||||
| Range | (from axis) | 48 | |||
| (from throwable box) | 19 | ||||
- Shoulder Throw a.k.a. Seoi Nage: (←/↖/↗/→ + Strong/Fierce)
Both punch throws are the same, which allow Akuma to grab the enemy and throw him above his head.
- Circle Throw a.k.a. Tomoe Nage: (←/↖/↗/→ + Forward/Roundhouse)
The kick throws are also the same and have Akuma pull the enemy towards himself, lay down and throw them with the aid of his leg.
Special Moves
- Gou Hadouken a.k.a. Fireball: (↓↘→ P)
Detailed Input: (↓ [7~14f] ↘ [7~14f] → [10/9/7f] Jab/Strong/Fierce)
- Startup:
 |

| |
| Frame Count | 9 | 1 |
| Simplified | 10 | |
- Active:
- Jab Version:
| Damage | 18[2] |  |
 |
 |
 |

|
| Stun | 7~13 | |||||
| Stun Timer | 110 | |||||
| Super Meter* | 2 | |||||
| Frame Count | 1 | 2 | 3 | 3 | 3... | |
| Simplified | 41 | |||||
- Strong Version:
| Damage | 20[2] |  |
 |
 |
 |

|
| Stun | 7~13 | |||||
| Stun Timer | 110 | |||||
| Super Meter* | 2 | |||||
| Frame Count | 1 | 2 | 3 | 3 | 3... | |
| Simplified | 42 | |||||
- Fierce Version:
| Damage | 22[2] |  |
 |
 |
 |

|
| Stun | 7~13 | |||||
| Stun Timer | 110 | |||||
| Super Meter* | 2 | |||||
| Frame Count | 1 | 2 | 3 | 3 | 3... | |
| Simplified | 43 | |||||
NOTE: A lot of frames were omitted here, because in each frame the fb's hitbox move 1-3 pixels forward, the images are all uploaded though with the same name pattern, so you can still see them.
Akuma throws a blue ball of energy at his opponent. The strength of the punch determines its speed: Jab flies the slowest, while Fierce flies the fastest. Akuma's Hadouken has a slightly better startup than the other shotos', and it also causes a full knockdown that throws the enemy across the screen if it hits early. Only Akuma's Hadoukens and Ken's command roundhouse kick have this property.
Akuma's ground fireballs (blue or red) downgrade in strenght after some time, just like Ryu's, but they never disappear on their own, unlike Ryu's and Chun's projectiles.
- Shakunetsu Hadouken a.k.a. Red Fireball: (←↙↓↘→ P)
Detailed Input: (← [7~14f] ↙ [7~14f] ↓ [7~14f] ↘ [7~14f] → [10/9/7f] Jab/Strong/Fierce)
- Startup:
 |

| |
| Frame Count | 14 | 1 |
| Simplified | 15 | |
- Active:
- Jab Version:
| Damage | 18[2] |  |
 |
 |
 |

|
| Stun | 5~11 | |||||
| Stun Timer | 100 | |||||
| Super Meter* | 2 | |||||
| Frame Count | 1 | 2 | 3 | 3 | 3... | |
| Simplified | 42 | |||||
- Strong Version:
| Damage | 7[7] + 7[7] |  |
 |
 |
 |

|
| Stun | 0~4 + 0~4 | |||||
| Stun Timer | 20 + 20 | |||||
| Super Meter* | 2 | |||||
| Frame Count | 1 | 2 | 3 | 3 | 3... | |
| Simplified | 50 | |||||
- Fierce Version:
| Damage | 7[8] + 7[8] + 7[8] |  |
 |
 |
 |

|
| Stun | 0~4 + 0~4 + 0~4 | |||||
| Stun Timer | 20 + 20 + 20 | |||||
| Super Meter* | 2 | |||||
| Frame Count | 1 | 2 | 3 | 3 | 3... | |
| Simplified | 60 | |||||
NOTE: A lot of frames were omitted here, because in each frame the fb's hitbox move 1-3 pixels forward, the images are all uploaded though with the same name pattern, so you can still see them.
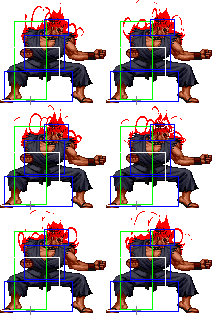
Akuma glows with some red energy, then throws a flaming ball of energy at his opponent. The strength of the punch determines its speed and number of hits: Jab flies the slowest and hits once, while Fierce flies the fastest and hits three times. The Fierce version can be used to lock the enemy forever in the corner and chip them to death while they are locked in blockstun. The recovery of the Strong and Fierce versions is much greater than that of any other projectile in the game, but if they connect, the opponent will be locked in blockstun for a longer period. To perform the corner trap, you have to use the recovery bug. Either kara a light normal into the initial hp red fireball, or make sure the last normal you used was a light one. The faster recovery will allow you to keep them in blockstun before they can recover. But keep in mind some characters have ways to safely get through the first fireball that's a meaty (like shoto jab srk etc).
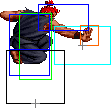
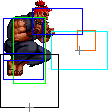
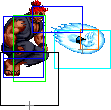
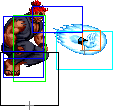
- Zankuu Hadouken a.k.a. Air Fireball: (In air, ↓↘→ P)
Detailed Input: (↓ [7~14f] ↘ [7~14f] → [10/9/7f] Jab/Strong/Fierce, can be done after the ?th jumping frame)
- Startup:
 |

| |
| Frame Count | 2 | 6 |
| Simplified | 8 | |
- Active:
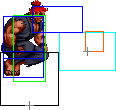
- Jab Version:
| Damage | 8[0] | 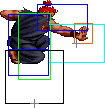 |
 |
 |
 |
 |
 |
 |

|
| Stun | 0~4 | ||||||||
| Stun Timer | 20 | ||||||||
| Super Meter* | 2 | ||||||||
| Frame Count | 1 | 1 | 1 | 1 | 1 | 1 | 1 | 1... | |
| Simplified | 8... | ||||||||
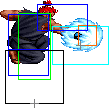
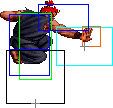
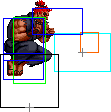
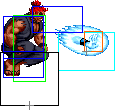
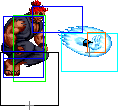
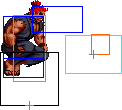
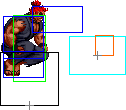
- Strong Version:
| Damage | 8[1] |  |
 |
 |
 |
 |
 |
 |
|
| Stun | 0~4 | ||||||||
| Stun Timer | 20 | ||||||||
| Super Meter* | 2 | ||||||||
| Frame Count | 1 | 1 | 1 | 1 | 1 | 1 | 1 | 1... | |
| Simplified | 8... | ||||||||
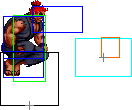
- Fierce Version:
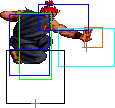
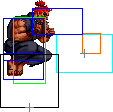
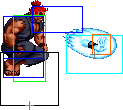
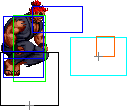
| Damage | 8[2] |  |
 |
 |
 |
 |
 |
 |
|
| Stun | 0~4 | ||||||||
| Stun Timer | 20 | ||||||||
| Super Meter* | 2 | ||||||||
| Frame Count | 1 | 1 | 1 | 1 | 1 | 1 | 1 | 1... | |
| Simplified | 8... | ||||||||
- Recovery:
 |
 |

| |
| Frame Count | 4 | ∞ | 0 |
| Simplified | ∞ | 0 | |
Akuma throws a small blue ball of energy that descends diagonally to the ground. This does less damage than his other projectiles, but has the advantage of allowing Akuma to recover as he lands (a.k.a. "trip guard"), being quite spammable, and hitting moves that otherwise would go through projectiles, such as Zangief's Lariats and O.Dee Jay's Machine Gun Upper. Akuma is vulnerable around his head, which characters with a high jump can exploit to counter the move, or trade in their favor - though taking a full knockdown in the process.
- Gou Shouryuken a.k.a. Dragon Punch: (→↓↘ P)
Detailed Input: (→ [7~14f] ↓ [7~14f] ↘ [10/9/7f] Jab/Strong/Fierce)
Akuma becomes completely invulnerable and performs a rising punch that hits up to three times, knocks down and juggles, then falls defenseless to the ground. The added stun timer is particularly good, since one can often either land three hits, or combo into a Tatsu.
- Tatsumaki Zankuu Kyaku: (↓↙← K)
Detailed Input: (↓ [7~14f] ↙ [7~14f] ← [10/9/7f] Short/Forward/Roundhouse)
- Startup:
- Active:
- Short Version: This happens only once.
- Forward Version: This happens twice.
- Roundhouse Version: This happens 3 times.
| Damage | 12[1]/12[0] |  |
 |
 |

|
| Stun | 3~9 | ||||
| Stun Timer | 90 | ||||
| Frame Count | 3 | 3 | 3 | 3 | |
- Recovery:
 |
 |
 |

| |
| Frame Count | 4 | 4 | 4 | 0 |
| Simplified | 12 | 0 | ||
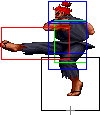
Akuma becomes completely invulnerable up until he attacks with spinning kicks. All versions cause a full knockdown on hit. The forward and roundhouse versions have active frames on the way up, hit multiple times, and juggle. This can be used to go through projectiles, punishing the enemy before he can recover (with the exception of Sagat's low Tiger shot). It will also evade any normal attack if done as a meaty, possible hitting them up to three times. This can also be used to evade any cross-up attempt.
Akuma cannot use this move as a reversal after you are hit by normal attacks while airborne, that is to say, after an air reset.
- Kuuchuu Tatsumaki Zankuu Kyaku: (In air, ↓↙← K)
Detailed Input: (↓ [7~14f] ↙ [7~14f] ← [10/9/7f] Short/Forward/Roundhouse)
- Active: (The Air version does not has a startup animation)
- Short Version: This happens only once.
- Forward Version: This happens twice.
- Roundhouse Version: This happens 3 times.
| Damage | 16[1] |  |
 |
 |

|
| Stun | 3~9 | ||||
| Stun Timer | 90 | ||||
| Super Meter* | 2 | ||||
| Frame Count | 3 | 3 | 3 | 3 | |
- Recovery:
 |
 |
 |
 |
 |

| |
| Frame Count | 4 | 4 | 4 | 4 | ∞ | 5 |
| Simplified | ∞ | 5 | ||||
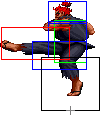
Akuma instantly attacks with spinning kicks that combo into themselves, knock down and juggle. If this attack connects on the first active frame, it will have a 50% chance of being unblockable.
- Ashura Senkuu a.k.a. Teleport: (→↓↘/←↓↙ 3P/3K)
Detailed Input: (→/← [7~14f] ↓ [7~14f] ↘/↙ [6f] 3P/3K)
| Super Meter* | 2 | 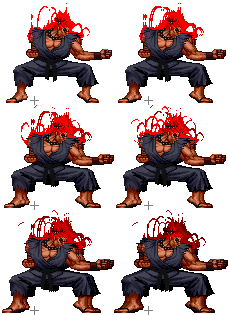 |
 |

|
| Frame Count (3P) | 14 | 52 | 9 | |
| Simplified (3P) | 66 | 9 | ||
| Frame Count (3K) | 14 | 37 | 9 | |
| Simplified (3K) | 51 | 9 | ||
Akuma becomes invulnerable while glowing, then teleports to other location on the screen. The direction of the SRK motion determines the direction he teleports to, and punches or kicks determine how far he moves, being that the punch version gives a longer distance.
Misc Animations
Jump Animations
- Neutral Jump:
 |
 |
 |
 |
 |
 |
 |
 |
 |

| |
| Frame Count | 2 | 1 | 8 | 8 | 8 | 8 | 8 | 4 | 1 | 7* |
| Simplified | 2 | 1 | 44 | 1 | 7* | |||||
- Back Jump:
 |
 |
 |
 |
 |
 |
 |
 |
 |

| |
| Frame Count | 2 | 1 | 15 | 3 | 3 | 3 | 3 | 18 | 1 | 7* |
| Simplified | 2 | 1 | 43 | 1 | 7* | |||||
- Forward Jump:
 |
 |
 |
 |
 |
 |
 |
 |
 |
 |

| |
| Frame Count | 2 | 1 | 13 | 5 | 3 | 3 | 3 | 5 | 11 | 1 | 7* |
| Simplified | 2 | 1 | 43 | 1 | 7* | ||||||
Akuma has the 1f faster prejump time from Old Shotos, this can be a considerable advantage on some situations.
You see the gap between the leg and body hurtboxes during the prejump frames on the back jump? That happens to be just enough to allow the shotos to evade Low Tiger Shots entirelly! You can even evade meaty Low Tiger Shots on wake up since the first wake up frame will be the first prejump frame if you wake up holding up-back. Mattsun does this frequently. Be aware though that if it's a meaty Short Low Tiger Shot you'll most likelly end up landing on it, unless you react with an air tatsu to alter your jump trajectory, of course.
The landing recovery has a special property which allows it to be canceled into certain actions. At the first landing frame, you can perform throws (including command throws), and on the second landing frame, you can start another jump, attack with a normal or special move, or block. Blocking not being until the second landing frame, as well as hitbox-hurtbox interactions having priority over throwbox-throw hurtbox is why sweeps work as anti airs in this game.
Things are different when jumping over your opponent, however. In that situation it's possible to walk back/forward, to jump again or to even block on the first landing frame! Strangely, if a throw is timed on the first landing frame of a jump that crosses over, a throwbox will never come out, even though that input will result in a normal coming out 2 frames later (like it normally would). Anyway, being able to block on the first landing frame can help a little bit on some safe jump crossup setups, or maybe in other situations as well if your character has a huge jump arc.
The Basics
Akuma has better projectiles than the rest of the cast, goes through other characters projectiles with his Tatsus and Teleports, controls distance better with his air Hadouken, is completely invulnerable to cross-ups due to invulnerable Tatsus and never dizzies (it looks like he gets dizzy, but Akuma recovers instantly, effectively saving him from longer combos and juggles but still leaves him vulnerable to meaties on wakeup). He is much stronger than other characters and should not be used for competitive play.
Combos
As you would expect, Akuma has access to high damage combos, and are generally very easy to do.
- J hk, cr mk/cr hp, qcf+punch (Will usually always knock them down thanks to the fireball)
- J hk, cr mk/cr hp, mk tatsu, tatsu/srk (Easy juggle for big damage)
- Meaty cr mk , sweep/cr mk>fireball/mk tatsu juggle
- Air tatsu, ground tatsu/srk (works off a crossup air tatsu, or if it hits from the front/air to air)
- Crossup j hk, st hp/cr mk, special move (srk might whiff on some characters, but fireball or mk/hk tatsu should work on everyone)
You can use another air normal, like j hp for instance, instead of j hk for the non crossup combos. And as a general rule, you can often do air fireball instead, in place of a jump in, but the timing is a little different.
Advanced Strategy
Akuma basically has all option selects from the old shotos, plus other advantages from the CPS-1 Ryu (invulnerable Tatsu in CE and HF) and inescapable projectile traps with air Hadouken and Fierce Shakunetsu Hadouken.
Additional Info
Differences with Shin Akuma (only selectable on Dreamcast version)
- Close s.HK has smaller head hurtbox on first active part. (Regular Akuma's head hurtbox is clearly glitched here, it's way back behind him. I'm guessing it was probably supposed to be the same as Ryu's.)
- Far s.HP has a fatter/taller hitbox.
- c.HP has smaller head hurtbox on first active part.
- All jumping punches, as well as neutral j.LK and j.MK have no leg hurtboxes for the entire duration of the moves, including recovery time spent falling.
- Neutral j.HK, and diagonal j.MK and j.HK only have a leg hurtbox during the active phase. It's missing during startup and recovery.
- Hadoukens have shorter startup (7 frames VS 10), 2 frames of startup invincibility, and hurtboxes don't move forward during startup (they stay the same as the idle pose)
- Shakunetsu Hadoukens have 4 frames of startup invincibility, hurtboxes don't move forward during startup, and the medium and hard versions do much more damage (over double that of normal Akuma's).
- Air Hadouken hurtbox is extended for a shorter time, it's only extended on the animation frames where his arms are actually extended. He throws two projectiles at once rather than just one, and the medium and hard versions do more damage.
- Medium and hard Tatsumakis have more spins (4 and 5 respectively, same as N. Ryu). They also do more damage than normal Akuma's, albeit only the spin part (startup knee does the same).
- Air Tatsumakis do less damage. Go figure.
- Medium and hard Shoryukens do more damage.
- Ashura Senku is invincible for the entire duration, no vulnerability on recovery.
--Ernest (talk) 17:13, 22 February 2014 (UTC) (Content from Felineki on SRK forum)
Exact requirements to fight CPU Akuma
The exact requirements to fight against Gouki at the end are to not continue AND:
1. Upon beating Sagat, game time is lower than 1500 seconds
OR
2. Upon beating Sagat, game score is higher than 1.2 million
It's usually a lot easier to satisfy the first requirement.
There's also a 3rd option: win against 12 human opponents in a row and then hold down any button except Start for 2 seconds at the win quote screen. This rarely mentioned option has an even less mentioned caveat, which is that dictator's stage must be next in 1-player mode. That means all 11 AI characters in 1-player mode before dictator must have been defeated and greyed out. In other words, Shin Gouki can only be fought in dictator's stage.
--Ernest (talk) 17:13, 22 February 2014 (UTC) (Content from Ganelon on SRK forum)


