Introduction
Picking Old Vega
To select O.Vega, choose Vega and then press ← → → ← Jab/Fierce, pressing Short simultaneously with the punch button for the alternate color.
| Normal | Secondary |
 |

|
--Born2SPD
Strengths & Weaknesses
Strengths
- Fastest walk speed in the game
- Second longest range behind Dhalsim
- Tall, narrow, fast jump is perfect to get around fireballers
- Great normals and useful specials
- Excellent at controlling distance
- Walldive is very difficult for a lot of the cast to consistently deal with, and can be used for safe 50/50 on most characters wakeup
Weaknesses
- He is weak - dizzies easily, low priority, trade-hits rarely in his favor
- Low damage, low combo ability unless at point blank range
- Long-range normals make him awkward up close
- You can't pick your claw back up, meaning if you take a certain amount of blocked/not blocked hits, some of your moveset has less priority and damage for the rest of the round
- Can't tech throws
- His only invulnerable reversals are his evasive backflips, which are hard to do as a reversal, and in a lot of cases he can still be punished if he does it
New & Old Versions Comparison
To select O.Vega, choose Vega and then press ← → → ← Jab/Fierce, pressing Short simultaneously with the punch button for the alternate color.
Here is the list of differences:
- Obvious stuff: O.Vega can not tech throws, does not have the Scarlet Terror special move and Super;
- O.Vega cannot pick his claw back up once it has been knocked off;
- O.Vega has some differences in some of his normals:
- Close Standing Strong can be special canceled;
- Close Standing Forward can be special canceled;
- Far Standing Forward can be special canceled;
- O.Vega's Flying Barcelona Attack have a buggy input detection: the kick button is ignored while on prejump frames;
- O.Vega's Flying Barcelona Attack have a "suck-in" property on hit: the opponent always falls in the direction of the wall O.Vega dived from;
O.Vega is not worthy, mainly because the loss of Scarlet Terror, which is Vega's dedicated anti air/counter move and the only proper reversal. His new cancels aren't that great, and his suck in Wall Dive isn't really beneficial because you normally don't want opponents to be pushed towards you, especially in the corner. Also, the opponent's body is still turned the correct way so you can't create any confusion on what side you hit. The only minor interesting bit to this glitch is that since the opponent's body sucks in towards you, you can force him to lose charge by sliding underneath but it's so obvious and inefficient that it can hardly be counted as a benefit.
Moves Analysis
Disclaimer: To better understand the diagrams, read this.
Losing the claw makes all punch attacks (including specials) to do less damage. Also, ground punch normals and some specials will have worse priority.
Normal Moves
Ground Normals
- Close/Far Standing Jab:
| Normal | Clawless |  |
 |
Normal | Clawless | 
| |
| Damage | 4[1] | 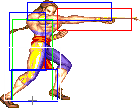 |
| ||||
| Stun | 0~5 | ||||||
| Stun Timer | 40 | ||||||
| Chain Cancel | No | ||||||
| Special Cancel | Yes | ||||||
| Frame Advantage | +4 | ||||||
| Frame Count | 2 | 2 | 4 | 5 | |||
| Simplified | 1 + 4 | 4 | 5 | ||||
Very short range, misses crouching opponents. Sometimes useful as quick anti-air against late crossups.
- Crouching Jab:
| Normal | Clawless |  |
 |
 |
Normal | Clawless | |
| Damage | 4[1] |  |

| ||||
| Stun | 0~5 | ||||||
| Stun Timer | 40 | ||||||
| Chain Cancel | No | ||||||
| Special Cancel | Yes | ||||||
| Frame Advantage | +4 | ||||||
| Frame Count | 1 | 1 | 1 | 4 | |||
| Simplified | 1 + 3 | 4 | |||||
 |
 |
 |

| |
| Frame Count | 1 | 1 | 2 | 1 |
| Simplified | 5 | |||
Very quick and long range. These do not combo, but the window to counter is very narrow. This move goes past the opponent and whiffs at point blank range.
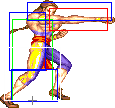
- Close Standing Strong: (Base max activation range: 49)
| Normal | Clawless |  |
 |
Normal | Clawless | 
| |
| Damage | 20[1] | 18[1] |  |

| |||
| Stun | 5~11 | ||||||
| Stun Timer | 60 | ||||||
| Chain Cancel | No | ||||||
| Special Cancel | Yes* | ||||||
| Frame Advantage | +5 | ||||||
| Frame Count | 2 | 3 | 4 | 9 | |||
| Simplified | 1 + 5 | 4 | 9 | ||||
A high claw that misses crouching characters. Unlike a normal Strong, you can combo after it. Note that only O.Vega can special cancel this move.
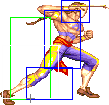
- Far Standing Strong:
| Normal | Clawless | 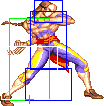 |
 |
Normal | Clawless |  |

| |
| Damage | 20[1] | 18[1] |  |

| ||||
| Stun | 5~11 | |||||||
| Stun Timer | 60 | |||||||
| Chain Cancel | No | |||||||
| Special Cancel | No | |||||||
| Frame Advantage | +2 | |||||||
| Frame Count | 3 | 4 | 6 | 5 | 5 | |||
| Simplified | 1 + 7 | 6 | 10 | |||||
Lunges forward with good range. Hitbox has a little more height than Far Standing Fierce, but less horizontal reach.
- Crouching Strong:
| Normal | Clawless |  |
 |
 |
Normal | Clawless | |
| Damage | 18[1] | 16[1] |  |

| |||
| Stun | 5~11 | ||||||
| Stun Timer | 60 | ||||||
| Chain Cancel | No | ||||||
| Special Cancel | Yes | ||||||
| Frame Advantage | +4 | ||||||
| Frame Count | 1 | 1 | 1 | 4 | |||
| Simplified | 1 + 3 | 4 | |||||
 |
 |
 |

| |
| Frame Count | 3 | 3 | 3 | 1 |
| Simplified | 10 | |||
Like the Crouching Jab, but slightly slower, with a bit more range & more damaging. Also misses at point blank range.
- Close Standing Fierce: (Base max activation range: 53)
| Normal | Clawless |  |
 |
 |
Normal | Clawless |  |

| |
| Damage | 26[1] | 24[1] | 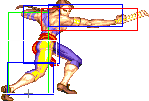 |
| |||||
| Stun | 10~16 | ||||||||
| Stun Timer | 80 | ||||||||
| Chain Cancel | No | ||||||||
| Special Cancel | No | ||||||||
| Frame Advantage | +6 | ||||||||
| Frame Count | 2 | 2 | 2 | 6 | 5 | 5 | |||
| Simplified | 1 + 6 | 6 | 10 | ||||||
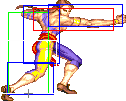
Somewhat like Close Standing Strong. Not really useful.
- Far Standing Fierce:
| Normal | Clawless |  |
 |
 |
Normal | Clawless | 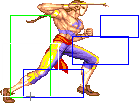 |

| |
| Damage | 26[1] | 24[1] |  |

| |||||
| Stun | 10~16 | ||||||||
| Stun Timer | 80 | ||||||||
| Chain Cancel | No | ||||||||
| Special Cancel | No | ||||||||
| Frame Advantage | +0 / +3 | ||||||||
| Frame Count | 4 | 4 | 3 | 6 | 6 | 7 | |||
| Simplified | 1 + 8 | 9 | 13 | ||||||
This is Vega's longest range move, and does good damage. It has a lot of startup time and stays out a long time. You can press it early from 1/2 screen and catch people walking in or trying to fireball.
- Crouching Fierce:
| Normal | Clawless |  |
 |
 |
Normal | Clawless | |
| Damage | 26[1] | 20[1] |  |

| |||
| Stun | 10~16 | ||||||
| Stun Timer | 80 | ||||||
| Chain Cancel | No | ||||||
| Special Cancel | No | ||||||
| Frame Advantage | +1 | ||||||
| Frame Count | 4 | 2 | 2 | 8 | |||
| Simplified | 1 + 8 | 8 | |||||
 |
 |
 |

| |
| Frame Count | 4 | 4 | 4 | 1 |
| Simplified | 13 | |||
A crouching upwards-angled claw. This is decent anti-air against people with low jumps like Zangief or Balrog, and you keep your charges too. After a blockstring, you can throw this out and catch the opponent jumping on the way up.
- Close Standing Short: (Base max activation range: 41)
| Normal | Clawless |  |
 |

| |
| Stun | 4[1] | ||||
| Stun | 0~5 | ||||
| Stun Timer | 40 | ||||
| Chain Cancel | No | ||||
| Special Cancel | Yes | ||||
| Frame Advantage | +4 | ||||
| Frame Count | 4 | 4 | 5 | ||
| Simplified | 1 + 4 | 4 | 5 | ||
A quick knee. Different animation than Far Short, but works the same.
- Far Standing Short:
| Normal | Clawless |  |
 |
 |
 |
 |

| |
| Stun | 4[1] | |||||||
| Stun | 0~5 | |||||||
| Stun Timer | 40 | |||||||
| Chain Cancel | No | |||||||
| Special Cancel | Yes | |||||||
| Frame Advantage | +4 | |||||||
| Frame Count | 2 | 2 | 4 | 3 | 1 | 1 | ||
| Simplified | 1 + 4 | 4 | 5 | |||||
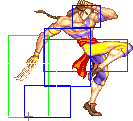
A very quick knee attack with good priority. Useful for tick throwing. This attack goes over a lot of low shorts and low medium kicks, making it very useful in footsie games.
- Crouching Short:
| Normal | Clawless |  |
 |
 |
 |
 |
 |

| |
| Stun | 12[1] | ||||||||
| Stun | 0~5 | ||||||||
| Stun Timer | 40 | ||||||||
| Chain Cancel | No | ||||||||
| Special Cancel | Yes | ||||||||
| Frame Advantage | +4 | ||||||||
| Frame Count | 1 | 1 | 1 | 1 | 4 | 4 | 1 | ||
| Simplified | 1 + 4 | 4 | 5 | ||||||
OK to push away someone that's too close.
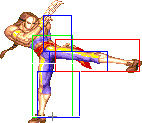
- Close Standing Forward: (Base max activation range: 49)
| Normal | Clawless |  |
 |

| |
| Damage | 20[1] | 18[1] | |||
| Stun | 5~11 | ||||
| Stun Timer | 60 | ||||
| Chain Cancel | No | ||||
| Special Cancel | Yes* | ||||
| Frame Advantage | +3 | ||||
| Frame Count | 5 | 6 | 9 | ||
| Simplified | 1 + 5 | 6 | 9 | ||
Vega does a different kick than Far Forward, but it works the same. Note that only O.Vega can special cancel this move.
- Far Standing Forward:
| Normal | Clawless | 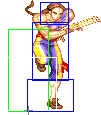 |
 |
 |
 |

| |
| Damage | 20[1] | 18[1] | |||||
| Stun | 5~11 | ||||||
| Stun Timer | 60 | ||||||
| Chain Cancel | No | ||||||
| Special Cancel | Yes* | ||||||
| Frame Advantage | +2 | ||||||
| Frame Count | 2 | 3 | 6 | 5 | 5 | ||
| Simplified | 1 + 5 | 6 | 10 | ||||
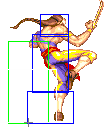
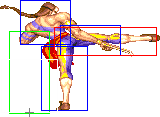
A straight kick with decent range. This beats some attacks that stuff your low claws, like Balrog's Crouching Forward. Note that only O.Vega can special cancel this move.
- Crouching Forward:
| Normal | Clawless |  |
 |
 |
 |
 |
 |

| |
| Stun | 16[1] | ||||||||
| Stun | 5~11 | ||||||||
| Stun Timer | 60 | ||||||||
| Chain Cancel | No | ||||||||
| Special Cancel | Yes | ||||||||
| Frame Advantage | +7 | ||||||||
| Frame Count | 1 | 1 | 1 | 1 | 4 | 6 | 1 | ||
| Simplified | 1 + 4 | 4 | 7 | ||||||
A very useful low kick. You can always link another Crouching Forward or a Crouching Strong after this to keep opponents at your preferred distance. You can whiff these on purpose if they like to Psychic DP your claw pokes.
- Close Standing Roundhouse: (Base max activation range: 33)
| Normal | Clawless |  |
 |
 |
 |

| |
| Stun | 24[1] | 22[1] | |||||
| Stun | 10~16 | ||||||
| Stun Timer | 80 | ||||||
| Chain Cancel | No | ||||||
| Special Cancel | No | ||||||
| Frame Advantage | +6 | ||||||
| Frame Count | 3 | 3 | 6 | 5 | 5 | ||
| Simplified | 1 + 6 | 6 | 10 | ||||
Animates the same as a normal Far Forward. Leaves Vega at frame advantage.
- Far Standing Roundhouse:
| Normal | Clawless |  |
 |
 |
 |
 |
 |
 |
 |

| |
| Stun | 24[1] | 18[1] | |||||||||
| Stun | 10~16 | ||||||||||
| Stun Timer | 80 | ||||||||||
| Chain Cancel | No | ||||||||||
| Special Cancel | No | ||||||||||
| Frame Advantage | -3 | ||||||||||
| Frame Count | 2 | 2 | 2 | 2 | 8 | 4 | 4 | 4 | 5 | ||
| Simplified | 1 + 8 | 8 | 17 | ||||||||
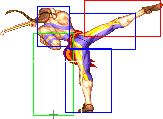
High anti-air kick with great range. Hits many air moves including T.Hawk's dive, Honda's butt slam, and Fei's chicken wing. It can beat a lot of different aerial moves but it has a fairly slow startup so you need to press it early.
- Crouching Roundhouse:
| Normal | Clawless |  |
 |
 |
 |
 |

| |
| Stun | 20[1] | |||||||
| Stun | 5~11 | |||||||
| Stun Timer | 130 | |||||||
| Chain Cancel | No | |||||||
| Special Cancel | No | |||||||
| Frame Advantage | -9 | |||||||
| Frame Count | 3 | 2 | 2 | 17 | 13 | 1 | ||
| Simplified | 1 + 7 | 17 | 14 | |||||
A Slide. This can be punished up close, but is safe at long distance. Often trades hits with fireballs.
Aerial Normals
- Neutral Jumping Jab:
| Normal | Clawless |  |
 |
 |

| ||
| Damage | 4[1] | ||||||
| Stun | 1~7(-2) | ||||||
| Stun Timer | 40 | ||||||
| Frame Count | 1 | 30 | 3 | ∞ | |||
| Simplified | 1 | 30 | ∞ | ||||
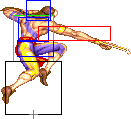
High claw attack with excellent startup.
- Diagonal Jumping Jab:
| Normal | Clawless |  |
 |
 |
 |
 |

| |
| Damage | 4[1] | |||||||
| Stun | 1~7(-2) | |||||||
| Stun Timer | 40 | |||||||
| Frame Count | 1 | 4 | 10 | 5 | 4 | ∞ | ||
| Simplified | 5 | 10 | ∞ | |||||
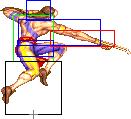
High claw attack. Not useful because it's totally outprioritized by neutral Jumping Strong.
- Neutral Jumping Strong:
| Normal | Clawless |  |
 |
 |
 |

| |
| Damage | 20[1] | 18[1] | |||||
| Stun | 5~11 | ||||||
| Stun Timer | 50(+10) | ||||||
| Frame Count | 3 | 14 | 4 | 4 | ∞ | ||
| Simplified | 3 | 14 | ∞ | ||||
Same animation as J.Jab. This has some use in air-to-air vs. high jumpers like Chun Li or M.Bison.
- Diagonal Jumping Strong:
| Normal | Clawless |  |
 |
 |
 |
 |

| |
| Damage | 20[1] | |||||||
| Stun | 5~11 | |||||||
| Stun Timer | 50(+10) | |||||||
| Frame Count | 1 | 4 | 10 | 5 | 4 | ∞ | ||
| Simplified | 5 | 10 | ∞ | |||||
Same animation as Diagonal Jumping Jab but with better damage potential. This move has the longest horizontal range of all Vega's jumping moves. When you're jumping shoto/sagat fireballs from long range, you can use this to catch the tip of their extended arms.
- Neutral Jumping Fierce:
| Normal | Clawless |  |
 |
 |
 |
 |

| |
| Damage | 26[1] | 24[1] | ||||||
| Stun | 11~17(-1) | |||||||
| Stun Timer | 60(+20) | |||||||
| Frame Count | 1 | 4 | 10 | 5 | 4 | ∞ | ||
| Simplified | 5 | 10 | ∞ | |||||
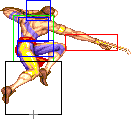
Vega's aerial move with better horizontal priority. Can beat a lot ait-to-air by anticipation.
- Diagonal Jumping Fierce:
| Normal | Clawless |  |
 |
 |
 |
 |
 |

| |
| Damage | 26[1] | ||||||||
| Stun | 3~9 | ||||||||
| Stun Timer | 40 | ||||||||
| Frame Count | 2 | 4 | 10 | 5 | 4 | 3 | ∞ | ||
| Simplified | 6 | 10 | ∞ | ||||||
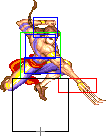
Good combo opener, very good priority and hits low to the ground, making it excellent for safe jumps.
- Neutral Jumping Short:
| Normal | Clawless |  |
 |
 |
 |
 |

| |
| Damage | 4[1] | |||||||
| Stun | 1~7(-2) | |||||||
| Stun Timer | 40 | |||||||
| Frame Count | 1 | 1 | 20 | 2 | 2 | ∞ | ||
| Simplified | 2 | 20 | ∞ | |||||
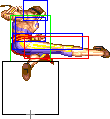
A worse version of Neutral Jumping Forward but with more attacking frames. Avoid this move.
- Diagonal Jumping Short:
| Normal | Clawless |  |
 |
 |
 |
 |

| ||
| Damage | 12[1] | ||||||||
| Stun | 1~7(-2) | ||||||||
| Stun Timer | 40 | ||||||||
| Frame Count | 1 | 1 | 20 | 2 | 2 | ∞ | |||
| Simplified | 2 | 20 | ∞ | ||||||
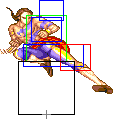
Low range, low damage, not very useful.
- Neutral Jumping Forward:
| Normal | Clawless |  |
 |
 |
 |
 |

| |
| Damage | 18[1] | |||||||
| Stun | 5~11 | |||||||
| Stun Timer | 50(+10) | |||||||
| Frame Count | 1 | 1 | 10 | 2 | 2 | ∞ | ||
| Simplified | 2 | 10 | ∞ | |||||
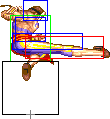
Counters a lot of special moves like Honda's Torpedo or Blanka's Horizontal Ball.
- Diagonal Jumping Forward:
| Normal | Clawless |  |
 |
 |
 |
 |

| |
| Damage | 16[1] | |||||||
| Stun | 5~11 | |||||||
| Stun Timer | 50(+10) | |||||||
| Frame Count | 1 | 2 | 10 | 2 | 2 | ∞ | ||
| Simplified | 3 | 10 | ∞ | |||||
It's not a bad move, it has a decent priority, but since Fierce is straight better then use that instead.
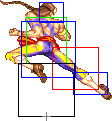
- Neutral Jumping Roundhouse:
| Normal | Clawless |  |
 |
 |
 |
 |
 |

| |
| Damage | 26[1] | ||||||||
| Stun | 11~17(-1) | ||||||||
| Stun Timer | 60(+20) | ||||||||
| Frame Count | 1 | 4 | 10 | 5 | 3 | 2 | ∞ | ||
| Simplified | 5 | 10 | ∞ | ||||||
Like the Diagonal Jumping Roundhouse but with bigger hitbox.
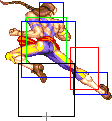
- Diagonal Jumping Roundhouse:
| Normal | Clawless |  |
 |
 |
 |
 |
 |

| |
| Damage | 26[1] | ||||||||
| Stun | 3~9 | ||||||||
| Stun Timer | 40 | ||||||||
| Frame Count | 1 | 4 | 12 | 4 | 3 | 2 | ∞ | ||
| Simplified | 5 | 12 | ∞ | ||||||
Best jumping attack with decent range. Vega can sometimes cross up with this but it's extremely difficult.
Throws
Vega can throw using Strong and Fierce. He can air throw that way as well. The direction of the joystick determines the direction the enemy gets thrown at. All his ground throws have the same range and do 32 points of damage (plus two more if behind in rounds).
- Rainbow Suplex: (←/↖/↗/→ + Strong/Fierce)
| Damage | 32 | 
| |
| Stun | 7~13 | ||
| Stun Timer | 100 | ||
| Range | (from axis) | 48 | |
| (from throwable box) | 20 | ||
In terms of range among the cast, it's around the middle. Claw's fast walk speed gives him a decent throw game.
- Stardust Drop: (Min activation height: 48/48 upwards/downwards, ←/↖/↙/↘/↗/→ + Strong/Fierce)
| Damage | 32 | 
| |
| Stun | 7~13 | ||
| Stun Timer | 100 | ||
| Range | (from axis) | 62 | |
| (from throwable box) | 34 | ||
This is kind of a double edged sword, your fast jump lets you use it quickly, however you don't have much time to actually use it. The throwbox also makes it awkward to space in some cases.
Special Moves
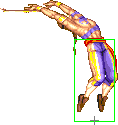
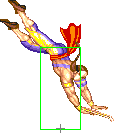
- Back Slash a.k.a. Punch Back Flip: (3P)
Detailed Input: (Can be done crouching, all buttons must be pressed on the same frame, negative edge not possible)
 |
 |
 |
 |
 |
 |
 |

| |
| Frame Count | 1 | 7 | 8 | 19 | 3 | 8 | 8 | 9 |
| Simplified | 54 | 9 | ||||||
The punch version is a double flip which lasts longer. It is completely invincible, but have a brief vulnerable period at the end. It is handy for getting out of tick situations, but if you over-use it, the opponent will catch on and sweep you as it's ending.
- Short Back Slash a.k.a. Kick Back Flip: (3K)
Detailed Input: (Can be done crouching, all buttons must be pressed on the same frame, negative edge not possible)
 |
 |
 |
 |
 |

| |
| Frame Count | 1 | 8 | 8 | 8 | 5 | 9 |
| Simplified | 30 | 9 | ||||
The kick version is great at the last second as your opponent is rising; you can bait them into missing a reversal or throw attempt.
- Rolling Crystal Flash: (Charge ←, → P)
Detailed Input: (Charge ←/↙/↖ for at least 71f, [7~14f] → [10/9/7f] Jab/Strong/Fierce. It is needed to wait at least 1 frame after leaving the charge direction to enter with the P button)
- Startup:
 |

| |
| Frame Count | 5 | 5 |
| Simplified | 10 | |
- Active part 1:
- Jab Version: This does not occur.
- Strong Version: This happens only once.
- Fierce Version: This happens twice.
| Damage | 4[1] |  |
 |
 |
 |

|
| Stun | 0~6 | |||||
| Stun Timer | 30 | |||||
| Frame Count | 4 | 3 | 3 | 1 | 2 | |
| Simplified | 4 | 6 | 1 | 2 | ||
- Active part 2 + Recovery:
| Damage | 4[1] |  |
 |
 |
 |
 |

|
| Stun | 0~6 | ||||||
| Stun Timer | 30 | ||||||
| Frame Count | 4 | 3 | 3 | 3 | 2 | 2 | |
| Simplified | 4 | 6 | 3 | 4 | |||
Fierce roll is 4 hits of chip damage and good for finishing off a low-life opponent (note pun). Fierce & Strong rolls are not reliable and will often not combo all the hits even at close range. Jab roll should be your only one used, and is nice at pressuring from long range. All rolls can be followed up with C.Jab or C.Strong which will combo.
Rolls have curious priority that is not common knowledge. When done from close, priority is bad and rolls can be easily countered with most normals & special moves. However, when done from maximum range so that just the tip of the extended claw hits, the priority is excellent and will stuff nearly anything, including a wakeup Dragon Punch. It's very important to learn the range and timing so you can Jab Roll a knocked down opponent and have your claw extended as his wake-up invincibility ends.
- Wall Dive: (Charge ↓, ↑ K)
Detailed Input: (Charge ↓/↙/↘ for at least 61f, [7~14f] ↑/↖/↗ [11/9/7/3f] Short/Forward/Roundhouse/any K if you are at a jumpable state. It is needed to wait at least 1 frame after leaving the charge direction to enter with the K button)
NOTE: O.Vega's Flying Barcelona Attack have a buggy input detection: the kick button is ignored while on prejump frames. To avoid this bug you can kara-cancel the kick button, by activating the dive on the kick button's release or by pianoing all kick buttons.
 |
 |
 |
 |
 |

| |
| Frame Count | 1 | 2 | 1 | 6+ | 5 | 40 |
| Simplified | 10+ | 5 | 40 | |||
- Flying Barcelona Attack: (P, while diving from Wall Dive)
- Izuna Drop: (←/↖/↙/↘/↗/→ + P, while diving from Wall Dive)
| Damage | 34 | 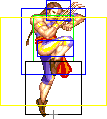
| |
| Stun | 7~13 | ||
| Stun Timer | 100 | ||
| Range | (from axis) | 53 | |
| (from throwable box) | 25 | ||
- Landing frames:
 |
 |
 |

| |
| Frame Count | 2 | 2 | 9 | 6* |
| Simplified | 13 | 6* | ||
By pressing ↖ or ↗, you control which wall Vega will jump to. With ↑ Vega will always go to the nearest wall.
Once airbourne, you have control over your speed by holding ← or →. With this, you can speed up and slow during the same jump, and 'curve' your flight around dragon punches / antiair normals.
Vega is slow when jumping towards the wall, then faster when he flies off it. You can minimize the delay by being at the very edge of the screen.
The Barcelona attack has a huge hitbox and moves very fast, making it an exceptional hard to block crossup. If you knock down your opponent, you can repeat it over and over.
Every character has basic standing & jumping normals that will counter the wall dive. Using it randomly is often countered, so save it for wakeup, against fireballs, to run away when you're leading in health, and to bait counter-attacks:
Ryu - at full screen, you can Wall Dive in anticipation, and safely hold back if he does nothing, or catch him with the throw if he does a fireball.
Ken - Ken's Fierce DP will hit you even if you're holding back, so limit to ambiguous crossups.
Honda - if he's being a defensive turtle, you can crossup dive to cancel his headbutt charge, then come in from straight above to avoid the butt slam.
Chun - J.Short easily stuffs dives from any range. Get her with fakes or on wake-up only.
Blanka - Vertical Ball destroys the dive in every possible situation.
Zangief - His 3P Lariat beats most attacks, but you can hit his head cleanly with the tip of your claw while flying over him.
Guile - Flash kick still hits you even when he's facing the wrong direction, so use fakes from max range and Slide him if he falls for it.
Dhalsim - His normals hit you out of dives easily, but he has no wakeup options besides teleporting away.
Fei Long - Like Guile, limit yourself to fakes to bait a Flame Kick.
Cammy - Roundhouse Cannon Spike will get you from very long range, but if you cross up and attack from on top, you can make it miss.
T. Hawk - Same as Cammy - angle your dive high and fast to get behind his long range Rising Hawk.
Dee Jay - His Triple Kick is weak if you're right on top of him, so try to get him in a corner then go off that corner wall, to fall right on his head.
Balrog - Headbutts and C.Fierce beat dives every time, and fakes are easy for him to dash punch. Use very sparingly.
Vega - 3K backflip through dives on wakeup. As long as you crossup, it's pretty safe to use.
Sagat - High fireballs tend to hit you if you're trying to ↗ cross him up. Stay on the ground against him.
Bison - He has no reversal and his air moves lose if you do the claw high and early. Dive on him all day long.
Vega has some recovery frames after he lands from the claw attack, but he's only really vulnerable during the "small hop" he does when landing. He recovers once he touches the ground again, meaning the frames with the * on the hitbox diagram above simply means thats the animation Vega will stay it in case he does nothing, but on the first grounded frame it's perfectly possible to do a move or to block, for example.
- Sky High Claw: (Charge ↓, ↑ P)
Detailed Input: (Charge ↓/↙/↘ for at least 61f, [7~14f] ↑/↖/↗ [11/9/7/3f] Jab/Strong/Fierce/any P if you are at a jumpable state. It is needed to wait at least 1 frame after leaving the charge direction to enter with the K button)
| Normal | Clawless |  |
 |
 |
 |
 |

| |
| Damage | 16[2] | 16[1] | ||||||
| Stun | 0~6 | |||||||
| Stun Timer | 30 | |||||||
| Frame Count | 1 | 2 | 1 | 6+ | 5 | 33- | ||
| Simplified | 10+ | 5 | 33- | |||||
- Claw attack: (P, while diving from Sky High Claw. The strength of the attack is determined by the P button you activated the Dive, not the one you're using to attack)
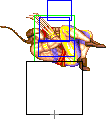
- Knockback/Vega dives full screen, crosses the opponent, but does not touches the end of screen, lands:
 |
 |
 |
 |
 |
 |

| |
| Frame Count | 5 | 4 | 3 | 4 | 5 | 23+/0 | 12 |
| Simplified | 44+/6+ | 12 | |||||
- Vega dives full screen, touches the end of screen and then lands:
 |

| |
| Frame Count (Jab) | 20 | 12 |
| Frame Count (Strong) | 13 | 12 |
| Frame Count (Fierce) | 8 | 12 |
By pressing ↖ or ↗, you control which wall Vega will jump to. With ↑ Vega will always go to the nearest wall.
Vega goes off the wall and shoots directly at the opponent with a claw. You do not have any control once in the air. Doing this with Jab will make him fly higher- this will hit jumpers, but completely miss someone on the ground. This move has a small chance of catching someone by surprise, but leaves you vulnerable if blocked. The best use of this move is against people who jump up to counter your Wall Dive, like Chun Li or M.Bison often do.
Misc Animations
Jump Animations
- Neutral/Back Jump:
 |
 |
 |
 |
 |
 |
 |

| |
| Frame Count (Neutral) | 2 | 1 | 1 | 22 | 4 | 10 | 1 | 7* |
| Simplified (Neutral) | 3 | 1 | 36 | 1 | 7* | |||
| Frame Count (Back) | 2 | 1 | 1 | 22 | 4 | 10 | 1 | 7* |
| Simplified (Back) | 3 | 1 | 36 | 1 | 7* | |||
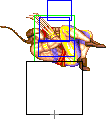
- Forward Jump:
 |
 |
 |
 |
 |
 |
 |
 |
 |
 |
 |

| |
| Frame Count | 2 | 1 | 1 | 14 | 5 | 4 | 3 | 4 | 5 | 0+ | 1 | 7* |
| Simplified | 3 | 1 | 35+ | 1 | 7* | |||||||
Claw's prejump is of average speed, but he has the overall fastest jump on the game. This makes Claw a very "slippery" character that is also very hard to be zoned out.
Claw, just like Chun, has the abillity to do wall jumps. Thats why the Forward Jump has a '+' on the final frame of the aerial jumping part: that animation will have longer duration in case it's a wall jump.
The landing recovery has a special property which allows it to be canceled into certain actions. At the first landing frame, you can perform throws (including command throws), and on the second landing frame, you can start another jump, attack with a normal or special move, or block. Blocking not being until the second landing frame, as well as hitbox-hurtbox interactions having priority over throwbox-throw hurtbox is why sweeps work as anti airs in this game.
Things are different when jumping over your opponent, however. In that situation it's possible to walk back/forward, to jump again or to even block on the first landing frame! Strangely, if a throw is timed on the first landing frame of a jump that crosses over, a throwbox will never come out, even though that input will result in a normal coming out 2 frames later (like it normally would). Anyway, being able to block on the first landing frame can help a little bit on some safe jump crossup setups, or maybe in other situations as well if your character has a huge jump arc.
- Wall Jump: (In air near corner/wall, any direction away from the corner/wall)

| |
| Frame Count | 6 |
It should be noted, that like Chun, Claw has a command wall jump, you can actually do this during an air normals startup, active, or recovery frames. And you can do another normal after jumping off the wall. Likewise, you can air throw, then jump off the wall, and attack or air throw again.
Overall this is not very useful, unlike Chun, Claw falls much slower when he jumps off the wall, so you stay in the air for quite a while. If you need to get out of the corner, or want to move in the air, then the walldive is usually way better for that.
Combos
- cr.Forward, cr.Forward, C.Strong: link combo that is easier on wakeup, but still works normally from point-blank range. (Doesn't work on Chun, Dee Jay)
- j.Fierce or j.Roundhouse, cr.Forward, cr.Strong: simple combo off an aerial attack. You may cancel the cr.Strong into a special for or pressure.
- j.Fierce, st.Roundhouse, cr. strong: Apparently max damage from a jump-in, might be useful as a stun combo (hard on Chun and Cammy since they're so short)
- cr.Jab xx Jab Roll, cr.Strong: another punish combo from point-blank range. (doesn't work on Chun [use st. jab instead] or Claw [Nothing works], cr.strong followup whiffs against Honda)
- cl.Fierce or cl.Roundhouse, cr.Strong: not a practical combo, but sometimes you get a cl.Fierce when you're trying to throw, and you can link the strong on reaction.
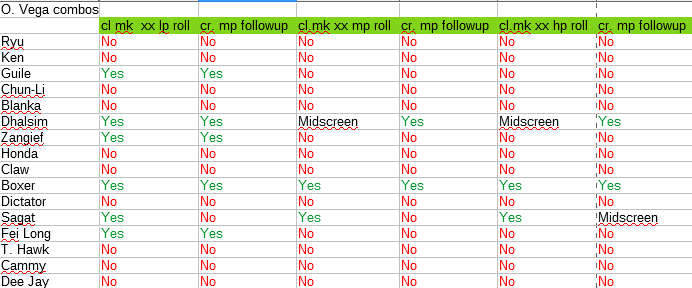
- cl.forward xx jab roll- works against certain characters. See below.
The Basics
You want to use your fast speed/normals, and walldive to pressure opponents. Ground game is pretty much the same as N.Claw, some close normals cancel that won't as N.Claw, but these are pretty meaningless. In a lot of matchups, walldive is still a great pressure tool, and he can still harass characters really well with his pokes. Just be careful vs jumps, and after a knockdown, you lose flip kick as old Claw, so you essentially have no true reversal vs throws/meaty attacks. Also it might be worth playing cautious in some matchups, once old Claw drops his claw, he can't pick it back up.
Punch Wall Dive / Sky High Claw
Punch Wall Dive (AKA. PWD) is a super-fast (under certain conditions), low priority (defeated by many normals), suprising (jumps all around the screen), long recovery (some chars can punish it even after a successful hit!), good damage (with claw extended does about same damage as a throw) and a generally speaking weird tool. Note that K button determines trajectory, and P button determines strength. Always use Fierce P.
Some sporadical uses:
- Chip Damage Finisher:
Special, super-fast, chaotic and “jumping all over the screen” are perfect features for dealing the last point of chip damage. Just PWD on the back wall and flight towards the opponent in a righteous blitz of glory. If the enemy expects this, he may go to a corner and start chaining nt.jump.attack/st.normal, or prepare for a DP.
To do this finisher against a ready opponent is too risky (much more if you are also almost dead). It may be better to change strategy to a claw roll finisher, wall dive finisher, or a normal poke-special cancel into any special.
- Fireball Counter:
If opponent launches a fireball, you can use PWD on your back wall to fly over the fireball and hit him. But it is tricky. Weak PWD will always go over the fireball, but it will also completely miss a non-jumping target. Heavy PWD is the "closest to the ground", and has the biggest chance of hitting the firewall. Medium PWD a good chance of success. The more far away Claw is from the back wall he is jumping, the easiest is to evade the fireball. Being just next to the back wall, Claw needs to react with perfect precision, jumping just when the fireball is about to hit him.
Since the hit stun and block stun have the same duration, and the recovery frames of this special are so many, some chars can recover from hit/block stun, launch a fireball, and hit vega during his own recovery frames. Ive seen do this to Sagat and Chun, dunno If other fireballers can also do it.
Wall Dive
Is important to understand that the essence of a successful wall dive (AKA. WD) is to catch the opponent by surprise. Try to do wall dives when the opponent doesnt expect a wall dive (for example, special cancel into a wall dive). Dont do wall dives when the opponent expects a wall dive (for example, both chars, each in a corner. And the enemy is waiting, sitting there, doing nothing. He has an anti-walldive ready). As with the Sky High Claw, always extend the claw with Fierce P.
For non-claw players there is only one "wall dive". But actually this special is very dynamic and allows for a lot of different variations:
- Back WD:
Vega jumps on his back wall, and goes for a straightforward wall dive claw attack on his opponent. In general, this can be countered with a nt.jp.anything or a DP.
- Crossup WD:
Vega jumps on his back wall, after touching the wall moves the directional input forward, flights over the enemy and crosses him, then goes for a claw attack that "backstab" the opponent. If the opponent was blocking for a Back WD, he will eat the Crossup WD.
- Forward WD:
Vega jumps on the opponent wall, and goes for a straightforward wall dive claw attack on his opponent (crossing him one time).
This thing can be safely punished on reaction when claw is homing for the opposite wall. I think it should mostly be done by special cancel a poke into forward wall dive (the poke's stun will protect Claw as he goes for the opposite wall). To cross the enemy like this depletes the enemy's back charges (Honda, Blanka, Dictador torpedos), and changes the direction input of non-symmetric DP (for Ryu/Ken adds some confusion, since now they have to do the DP input in the other direction. For characters with symmetric DP (Guile DP) his input is the same always, doesn't matter how many times you cross-up him).
This should never? be done vs Blanka or Guile, since they can charge down their DP during the walldive, and their DP will almost always defeat a Forward WD.
- Double Cross WD:
Vega jumps into the opponent wall, crossing him once, and then uses the directional input to move behind the enemy and crossing him a second time. It tries to mess with the opponent block direction when he expects to block a Forward WD.
- Fake WD:
Vega looks like is going to do a "Back Wall dive", but... after bouncing on the wall, Claw player moves the controller back and brakes. Certain opponents in opposite side of the screen (Ryu/Guile/Chun), if they make a DP they will miss miserably, and Claw can punish them during their recovery. Some chars (Ken/Blanka/DJ) have DP with so much horizontal range that they can hit fake wall dives from any range, so doing this is not a good idea.
Fake Back Wall dives can be chained and mixed with Normal Back Wall Dives. The opponent has to choose between different counters (if he fails the guess he is punished), or may just stop guessing and block, but that opens the door to be grabbed by the Izuna Drop.
A Fake Back Wall Dive can become a normal Back Wall Dive in the middle of the air (for example, if the opponent DP with too much anticipation and misses. Your initial "fake wall dive" can change course, go after him and claw/grab him during his recovery).
A good reaction vs Fake WD this is to throw a fireball to punish the Fake WD landing. Claw can respond by moving forward the controller just before landing the fake wall dive, and try to hit the head of the opponent during his fireball throwing frames.
- Fast WD:
Each char is sitting in a corner. And the enemy is a "fireballer". Vega has his Wall Dive Charge ready. The fireballer launches a fireball. Immediately (you may need to predict instead of react), Vega does a wall dive in his wall (Vega reaches the wall instantly because he is already in the corner), and then you move the controller forward to give the attack flight maximum speed. Go for a claw attack. Depending of your timing, you might even cross the opponent and hit him with the claw from behind (this is good if the enemy finishes recovery and blocks, since he will block from the wrong direction).
If you mess the timing, Claw will probably be received with a DP when he arrives.
- Anti-air WD:
Wall dives can be sometimes stopped by aerial normals. So Claw can decide to "intercept the interceptor".
Claw is expecting the opponent to jump and do an aerial normal to intercept the wall dive, so Claw still makes his wall dive, but he is going to extend the claw much earlier than normal. Maybe as soon as he is leaving the wall. This way, when the opponent tries to intercept Vega in the air, he will find that the claw is already extended and waiting for him
Of course, some opponents aerial normals have huge priority and defeat wall dive. The only chance here is to hit them early, during preparation frames of their aerial normal, or before their input. Or just dont do Anti-air WD vs them.
If the enemy doesn't try to intercept Vega in the air with a jump, Claw will hit the air and flight safely to the opposite side of the screen.
- Empty WD:
See the Claw hit boxes during walldive. Hit blue box becomes bigger when the claw is extended. Certain players react very well vs wall dives and can respond almost always with a DP, or something else with good priority. If your wall dives are always punished, instead of stop using wall dives, an empty wall dive may be the solution.
The idea is basically to do a Back WD, Forward WD, or Double Cross WD, but without extending the claw or going for a grab. If the enemy DP or reacts with a normal, he will probably miss. Then Vega can land close to him and punish him during his recovery frames.
- Escape WD:
Some players want to corner the opponent in order to maximice their offensive strategy. Claw can use the WD not for offensive, just to fly away from the corner.
A Forward WD will probably do the trick if it is executed as a special cancel cr.mp (Vega fly to opposite corner is protected by opponent block stun).
A Back WD may work just before Vega is cornered. By the time Vega is cornered, he is probably receiving hits or jump ins all the time, cannot even finish the Wall Dive charge, or he is punished while bouncing on the Back wall.
Advanced Strategy
Match-ups
Serious Advantage Match-ups
Vs. Guile:
- 7 - 3
Guile has mainly 2 strategies: turtle and offensive. Turtle doesn't work very well vs Claw, but offensive can be a problem. Both chars need to put pressure in the opponent, the one who puts more pressure wins. So, Claw needs to put constant pressure in Guile, but with a random component to evade been countered by a DP. Don't become predictable and change constantly between offensive tactics.
In footsie game vs Guile, Claw needs to remain at poke range. His poke tools are mixing cr.mp and short claw roll. The cr.mp is fast, but can be defeated by many Guile normals, short roll defeats all? Guile normals. So by mixing both you can put pressure in him from mid range, and meanwhile charge for rolls, or back wall dives. Defeat Guile jump ins with standing roundhouse. Chaining short rolls works very well, with sudden cr.mp and special cancel into back WD. If you jump in, always remember to combo the air attack with cr.mk, cr.mp, and then special cancel into short roll or fake wall dive.
Guile can set fireball baits in order to DP Claw if he tries to jump in. Learnt to identify this baits, and don¡t jump in. Claw can jump in in every moment except this.
Never forward WD guile (he can punish it very easily) And don't special cancel into forward WD. Special cancel into back WD. Guile is super vulnerable to Fakes WD when he is cornered or both chars are in opposite sides. If he starts blocking claw wall dives, go for Rolling Izuna Drop (walldive grab).
If Guile reaches close melee range, Vega is fucked at this distance, so you need to get away. What I use to do is smash backflips and hope it works. Just don't let Guile get this close and escape as fast as possible if it happens. He can really destroy Vega at this distance. Vega dominates at medium range, and he has to remain there.
Wall dive loop works so-so with Guile, since his DP input is symmetric and cross-ups don't mess with his input or deplete his charge. But, a "meaty" Fake wall dive work very well to make him believe you are going for wall dive loop, trick him into a DP and then punish him during his recovery. -Bimblis
If you do crossup walldive it sometimes works, not sure if it's due to player error or if it just beats the startup frames. --Scanman (talk) 11:10, 6 August 2020 (MSK)
Vs. Sagat/O. Sagat:
- 7.5 - 2.5
Vega's great jump gives him an easier time against fireball zoners. Stand half a screen away from him and wait. Jump over fireballs and punish. Watch for whiffed Tiger Knees and jumping roundhouse and be ready to stand roundhouse. There's not a whole lot else to worry about against him.
Interesting note: Sagat can always punish a ground-impact Sky High Claw with a fireball, doesn't matter if he blocks it or eats it, so never use Sky High Claw (except for tick-finish him). In general, Sagat becomes more vulnerable when attacking, so try to counter his incomings more than to put pressure on him. Short claw rolls work well in hitting him with the tip. -Bimblis
Vs. O. Sagat: Slide under high tigers or c.strong if you're close enough. You don't want to wall dive fireballs even in anticipation since he can always recover in time and DP. -MDV
Vs. T. Hawk/O. Hawk:
- 7 - 3
T Hawk is as strong as Zangief, uber-prioritised (all his normals and air normals are between the highest priority normals in the game, way beyond Claw ground and air normals), flying-jet (he can “almost instantly” get to grab distance using his weird falcon powers) bloodthirsty-killing-machine (once he gets into grab distance, he will splash Vega head against the pavement again and again).
So, the most important point is, don't let T.Hawk start a special grab loop on you. That means keeping a safe distance from him in all times. It also mean DONT LET T.HAWK TOUCH YOU WITH HIS PUNCHES!!!!. Doesn’t matter if the punches are blocked or not, after a punch both chars are already in grab distance for T.Hawk special grab. And that is game over for Claw. T.Hawk kicks are a little long range, so if he kicks Claw in the face, that is ok, Claw still has a chance of escape.
DONT TRY TO DEFEAT T.HAWK IN MELEE OR AIR!!!! If you are interchanging normals with T.Hawk, not only you are very close to punch distance and being special grabbed, you will probably receive more than you are giving. T.Hawk makes like 75% more damage with each attack, and they have more priority. Even in the air is the same. He is just better at everything in melee and air combat. With one exception: the claw attack from a claw roll defeats his normals due to his long range and priority.
Wall dive/Wall dive loop: His Falcon Rise reaches Fake wall dives the same way as Ken shoriuken, and his air normals can defeat wall dives if he reacts on time. After a countered wall dive/wall dive loop, T.Hawk can position at “grab-distance” from Claw, and as soon as Claw stands-up, T.Hawk will start his special grab loop game. In general, wall dives are not safe.
The basic claw strategy is that T.Hawk will try to get closer using several techniques, and Claw has to react with the appropriate counter for each technique. If Claw stops enough incoming attacks, he wins. Each time T.Hawk pierces though Claw defences, he has a chance of winning the game.
Lets see the T.Hawk strategy to get closer:
1 - He can walk in: Use st.HP/cr.MP as soon as he is in claw-range and keep him away.
2 - He can jump in: Use st.HK/cr.FP. His jump-in is a little slow and easy to counter. Sometimes T.Hawk players get berserk with jumps-ins, don't be afraid and use the same st.HK all the time.
3 - Falcon Rise (FR): This is a reversal-antiair, but it has so much horizontal displacement that is useful to move forward. During its beginning it counters Vega slide. Use st.HK without fear.
4 - Falcon Dive (FD): Super Dangerous. There are two classes of FD T.Hawk can use: "far FD" and "close FD". A "far FD" is done too far away and misses Claw (for example. T.Hawk is at long distance from Claw, and uses FD to reach medium distance). A far FD happens so far away from Claw that he cannot punish it with st.HK. The recovery of the "missed FD" is theoretically punishable, but if Claw punish is not well timed, T.Hawk can turn into a Falcon Rise and punish the intent of being punished. In addition, to reversal into a FR after the FD allows T.Hawk to travel more horizontal distance and get very close to Claw. The "far FD" is the beginning of a 2 step strategy, and it may be easier to counter the second part (a FR or a jump-in).
The "close FD" is the worst. It is super-fast and If he hits you with this, blocking or not, you are in his “special grab” area. Use st.HK, and be super-ready.
Now. What about if Claw wants to take the war to T.Hawk? Remember that in melee vs melee and air vs air T.hawk is better. The best tool to put a little of pressure in T.Hawk may be to tip him with the roll claw. Makes good damage, has more priority and range that his normals.
-Bimblis
Advantage Match-ups
Vs. Blanka:
- 6.5 - 3.5
Probably one of the most obvious matches for Claw: easy but you must avoid the walldive loop!
P - A - T - I - E - N - C - E
Here is the key word. Your best weapons are your powerful zoning and patience. Sit fullscreen, keep a finger on MP, another on HK, charge down-back and get some beer.
Here are classic attacks from Blanka and the behavior you must have against them.
j.LK: the famous cross up. If he is using it, it means you have let him come to close to you! Backflip will give you some fresh air and then try to use more anti-air like cr.HP, st.HK, or nj.LP. Do not forget this last one, its range is impressive.
Blanka's slide: this damn tool has 11 frames of start up and yours would beat it in terms of hit boxes, but you can't punish it on reaction even if yours is faster to come out (8 frames of start up). Stun timer is very long, so do not attempt to punish it on block. Block and wait, slide requires your opponent to make an aggressive move, be patient and punish the next one!
Electricity: another Blanka attack that knocks you down. Your options are:
At close range: st.LK. At mid range: Wait, and do not try to use cr.MK because it's too risky due to a potential trade which could result in a Blanka advantage on your wake up. At long range: Slide.
Horizontal ball: This is the key to the match, for both characters. This move can be stopped by any of your standing normal moves. You can even punish this move after blocking by walking a few pixels and then doing a st.HP. Huge damage, and despair for Blanka. On the other hand, be careful because Blanka can do a short range ball to get very close to you and then throw you when you're waiting to block one. cr.LP is pretty useful on reaction if Blanka does a fullscreen ball.
3rd Attack, Upball: This is what makes the walldive loop almost impossible to set up on Blanka. Nevertheless, if you press punch very early in the air after doing a walldive, you will win in the air - but do not try to attempt the loop at close range. If you want to bait Blanka into using upball, you should use forward jumping j.HP or nj.LP. This should make Blanka frustrated. This is the key to this match up, to make the opponent get MAD! The first one that loses his nerve will lose this match very quickly.
The backstep kick ball is a joke, just do st.HK or maybe cr.FP from certain distances.
This match up is evil. It's a waiting game, waiting for the opponent to make a mistake for both characters. --Hanasu, from ISIMORN here: [1]
Vs. Cammy:
- 6 - 4
This matchup is 6 - 4, it can be hard for Claw. The match is based on defense, reactions, and being patient.
Cammy's Strengths:
- High priority Normal Moves: st.LP, cr.MP, cr. MK
- The best airthrow in the game
- A lot of Invicible properties on various moves: DP active on the fourth frame. LP Spin Knuckle lower-body invincible for 33 frames. Super is invincible for 40 frames.
- Hooligan Throw is very quick, and does a lot of damage
- Good crossup stun combos on wake up (especially against Claw, who has a low stun value)
All these things may seem scary but Claw has powerful weapons, including his great ability to punish: Against DP? Punish with cr.MP. Against Drill? Punish with cr.MP. Against Hooligan? Punish with st.LP on reaction. When Cammy is knocked down? Do walldive loop. Cammy is poking at mid screen? Get ready to punish a potential Hooligan. Be patient. Against Spin Knuckle? Slide. Cammy tries to Spin Knuckle a poke? Block!
Cammy has no particularly good way to attack Claw, all she can do is bore you to death and try to Hooligan. --Hanasu from ISIMORN here: [2]
Vs. Dee Jay:
- 6 - 4
DJ's Up-Kicks is (are?) terrible against Vega. Jump in from close with early j.roundhouse to stuff it. Wall dive directly on top of him and you can claw stuff him or connect with the grab from behind. And wake up kicks whiff against c.medium, c.roundhouse, and rolls. Just abuse him with dives and put heavy wakeup pressure on him once he's down. -MDV
Vs. E. Honda:
- 6 - 4
Honda is like a bull. He obliterates everything in front of him, but is vulnerable if you get around. So, my take in this matchup is maximum offensive, maximum movement, always jump around Honda, hit him from every direction.
Footsie game: I think Honda is better at everything, except maybe claw roll. Short claw roll has huge range and can hit Honda from opposite sides of the screen if honda tries a normal. You can roll a wake-up honda for chip damage (good Hondas may Ochio during wake up).
Neutral jp.mk is the other technique for "footsie" game vs honda. It defeats almost every normal and special, so he is punished if he tries to attack.
Jump in: Honda is very vulnerable to jump-ins. You can combo the jump-in into cr.mk, cr.mp, and then special cancel into a wall dive. Another take is to jump-in with air.fierce, and then, during Honda stun, jump-in again crossing Honda. After the crossup you may go into a throw, or cr.mp/cr.mk, or crossup him again.
Don't worry about Claw jumping around Honda in a flurry of jump-ins, cross ups, neutral jumps with air.nt.mk, and lots of throws. This "cross up hell" allows Claw to do a constant pressure in a, otherwise, impossible character. Crossups can end into combos, wall dives, throws, or more crossups. It is very difficult for Honda to escape this trap while he is been hit from everywhere, as long as Claw doesnt become repetitive and predictable.
Some honda players use short torpedo to counter jump-ins (or even wall dives!). Be careful with that. Remember that cross ups or forward wall dives stop Honda charge.
Claw Forward WD depletes Honda torpedo charge. But honda can defeat forward wall dive very well by jumping and using a normal. To resolve this, claw can special cancel a cr.mp into forward wall dive (claw is protected during the first stage of forward wall dive thanks to block stun). Fakes are pretty useless vs honda. He can intercept them very easily with torpedos. As such, back wall dives are also kind of useless.
Sky High Claw works well from time to time, just don't use the to intercept an airborne honda (he may slap you out of it). And also remember torpedo defeats Sky High. For final chip killer, if this is expected, maybe is better to go with a claw roll.
If both players are in opposite sides of the screen... it may not be a good idea to start doing wall dives (Honda will be ready for that). Just walk closer and look up for the crossup, or poke with short roll claw.
Honda Torpedos are defeated by nt.jump.MK and diagonal jump HP.
Wall dive loop/meaty works very well vs honda. -Bimblis
Vs. Fei Long:
- 6.5 - 3.5
Avoid being in the corner since it's very hard to get out. Get him at sweep range and throw out a lot of c.medium which will stuff rekkas. If you're knocked down, always low block the meaty, it's not worth 40% + possible dizzy if you screw up against his powerful meaty game. Max range jab roll with stuff flame kicks with the tip of the claw. -MDV
Vs. Ken:
- 6 - 4
Because of Vega's foot speed and narrow jump, he can get through fireballs easier than most. Use that mobility to control the distance. Hold defensive crouch at max cr.strong range. You can jump a fireball and combo on reaction. You can st.RH a jump or a hurricane on reaction (watch out for short hurricanes which are bait). Poke c.jab and c.strong to hit normals and interrupt fireballs, but do so rarely and carefully to avoid DPs. Hold your zone and you're fine. If Ryu is playing annoying Air Hurricane games, you can hit 3K early and throw while they land. When you knockdown, do a meaty claw roll that hits with the tip on wakeup, this will stop a DP.
Once you learn wall dive momentum well enough, you can connect with a rolling Izuna Drop (grab) through anything. If you knockdown from far away - wall dive and hold towards the opponent when you hit the wall to speed up, then hold back at the last moment. You will sort of hover just in front them and can grab their DP right out of the air after its invincibility frames. -MDV
Ken Fierce DP (unlike Ryu's) can hit a fake wall dive. So don't try fake wall dives on him. -Bimblis
Vs. O. Ken:
- 6 - 4
People like to pick O. Ken as a counter to Claw, and I'm not sure why. Yes, his uppercuts have better invincibility, but losing the ability to tech throws, super (for chip death), and especially the knee bash are a big loss against claw. This is probably the same matchup as other shotos, just rely on walldive loop less. --Scanman (talk) 11:10, 6 August 2020 (MSK)
Vs. Ryu:
- 6 - 4
Very similar to the Ken matchup.
As a note: Ryu is vulnerable to Fakes WD, unlike Ken. -Bimblis
Vs. Zangief:
- 6.5 - 3.5
The essence of Zangief strategy consists in hard hitting pokes, small combos that hit hard, and going for the tick -> special grab. Claw strategy consists in keeping Zangief at medium melee distance. In order to accomplish this, first we need to understand how Zangief will try to get closer:
1 - Zangief pokes cr.HK: Zangief cr.HK is fast, medium range, excellent priority and knocks down. Claw st.mk has the same range, is equally fast, and both attacks miss each other completely. This is very important, because Zangief mixes cr.HK with lariats. Remember to hit with the tip of st.mk, getting closer is dangerous.
2 - Zangief walks in: Claw should St.mk. If Zangief tries to walk in, just kick him with this one or twice and he will change tactic.
3 - Short Lariat: Short Lariat is tricky, because it can be followed by a cr.HK (which defeats Claw Slide) or a jump in. The safe thing to do is st.mk (defeats short Lariat and is the best option vs Zangief cr.HK). Slide defeats short lariat, but Zangief likes to jump in and punish if the slide whiffs. Lariats are some kind of bait for this.
4 - Long Lariat: In its beginning, Long Lariat can be defeated by Claw's st.mk. But in Long lariat second half, it defeats st.mk (Long lariat red hitbox increases with time). So, stop it right in its beginning with Claw's st.mk, or in the ending with claw's slide.
5 - Zangief tries to jump in: He is very slow in his jumping. Use the st.HK/cr.FP to kick him out of the air. Zangief can be double easily. Zangief loves to jump in during the opponent recovery of a whiff normal (and during Claw slides). This means Zangief connects with a short combo + 360 + meaty (and maybe more!). You may try to escape with backflip.
Pdd: Claw's roll is defeated by all Lariats. If Zangief sees the roll coming, he Lariats and PUM!. -Bimblis
Fair Match-ups
Vs. Chun-Li:
- 5 - 5
Chun vs O. Claw is probably even. N. Claw barely beats her, but O.Claw can't tech her one-button SPD, and he can't anti-air her effectively (he pretty much has to Air-to-air her, in my opinion). Still, she can't zone with fireballs, and if you get her in the walldive loop she will have a tough time getting out. --Scanman (talk) 11:10, 6 August 2020 (MSK)
Chun has one zone where she can jump in at you, thats when she is near you and you're not charged, too close to jump straight up and fierce. What does this mean? Don't let her get you in that range. Stay close and charged, if she fireballs, jump at her. poke with low strongs. Slide to move in on her and sometimes hit her as she tries to fireball. Basically you play close turtle style if possible. Imo its advantage vega that matchup. (Graham)
I like to be ready to pounce on any kikoken she throws. I go for wall dives from across the screen when I see one, or if in close if she throws one hop it and go for a combo. Without having her upkicks charged, chun li has trouble stopping a jumping Claw with her ground moves. I play this match by being aggressive and just going at Chun. Her air moves beat yours, even though jump strong sometimes is effective. She also has some trouble stopping wall dives shenanigans, her upkick has to be perfect. Stay on offense. You lose this match if Chun can press you. (CapMaster)
Vs. Balrog (boxer):
- 4.5 - 5.5
It's actually not that different from the N. Claw matchup. You can't tech Boxer's throw regardless (since it's a hold), he's prolly not going to jump much so scarlet terror being gone doesn't matter, and landing a super on Boxer is almost impossible anyway. So I think O. Claw is about the same as N. Claw against Boxer. --Scanman (talk) 11:10, 6 August 2020 (MSK)
5 - 5 or maybe a light disadvantage for Claw.
You need to avoid absolutely getting throw looped. It will drive you crazy.
Do-not-Do list: DO NOT use punch backflip (54 invincible frames + 9 of recovery). If you are trying to escape throw loop or general pressure you might be tempted to use kick backflip (30 invincible frames and 9 of recovery) - you mus reversal throw!
DO NOT walldive when you are behind in life, because Boxer may start turtling with Headbutt and jumpback MP.
DO NOT Sky High Claw if Boxer has back charge, because Dash Straight could be a direct punish on block.
DO NOT attempt walldive loop because reversal Headbutt on wake up could give more space to Boxer or even worse: it could hit you.
DO NOT poke at all when Boxer has Super even if he is full screen.
Be careful about auto correct Super if you walldive.
So.. what options remain for Claw to fight Boxer?
Stay focused during throw loop to know on which side to block/charge. Reversal throw as an option after throw loop/crossunder.
Slide is a good tool!
cr.MP as well, but don't over-use it because of Headbutt or Super.
Headbutt is very susceptible to safe jumping, block it and punish! It has 11 frames of start up. --Hanasu 20:08, 5 January 2014 (UTC) from ISIMORN here: [3]
Disadvantage Match-ups
Vs. Dhalsim:
- 4 - 6
Adding this to disadvantage because of several things: O. Vega doesn't have scarlet terror (flip kick), doesn't have super, loses his claw, and can't tech throws (if Dhalsim ever accidentally does his fierce throw). I think it's disadvantage because if Dhalsim gets you in the noogie loop, it's basically impossible to escape. Vega is still super annoying for Dhalsim, but in this match it's just a lot easier to use N. Claw.--Scanman (talk) 11:10, 6 August 2020 (MSK)
Dhalsim is better at fullscreen and better at close range. Vega wants to be just outside sweep range. Spam him with c.strong to interrupt Fires & Flames and slow normals. Learn the different angles of Yoga Drill and when you can or can't counter/jump away. If you're stuck at far range, you can hit some limbs with S.Medium or J.Fierce. You can also provoke him by repeat 3K handspring. Once you knockdown, you can fierce roll, c.jab, jab roll for large chip pressure. Against wall dives, Dhalsim can Yoga Blast, j.roundhouse, Yoga Mummy or teleport. They're all effective but they all have openings. If your opponent always counters the same way, you can change your angle of approach and get in on him. -MDV
Vs. M. Bison (dictator):
- 3 - 7
Even N. Claw doesn't exactly dominate this match, despite Dicator's weakness to walldive. I believe O. Claw loses this handily, if Bison gets you in the scissor pressure there is NOTHING you can do to get out. Plus his throw range is better (seemingly) than yours and you can't tech throws. You probably won't have your claw for too long either if you block anything. You really have to be on your game in this match, because it feels like CE Bison to me. --Scanman (talk) 11:10, 6 August 2020 (MSK)
I still am struggling with this match, but here's what I can tell you. Bison has no reversal outside of super. So everytime you get him knocked down, that's a free claw roll or wall dive attempt for you. Bison's kicks (scissors, standing forward, crouching forward) will give you major trouble, and his jump strong will neutralize your air attacks. To me, this match goes the first one to get a knockdown wins. Keep Dictator on the floor. (CapMaster)
Air to air, he has a major advantage, but j.strong hits some of his attacks, and an early neutral jump j.medium hits him out of everything. All his moves bring him to you, so use that to your advantage. Walk back to the corner and stand 2 steps in front of it. Often times his moves will push himself past you into the corner. Then you can wail away on him with c.strongs and fierce roll chip. Just wail away on the c.strongs, they interrupt all his moves except super, and all his long range normal kicks. -MDV
Vs. Vega (claw-self):
4-6 Since O. Claw is pretty much a straight down-grade, by definition N. Claw must win the matchup. Pick N. Claw for mirrors. --Scanman (talk) 11:10, 6 August 2020 (MSK)
Major pain in the ass fight. Neutral J.Medium is good air-to-air, as is J.Strong. If you're getting wall dived on, do an early 3K handspring to go through the claw and throw as they land. -MDV
It is important to predict wall dives (exactly the stuff other chars do when playing vs claw). For example, If the opponent claw is ducked in a corner, or if he is low in health, or after a crouched combo. A very good way of reacting vs wall dives is nt.jump mp.
Also note that wall dive loop doesn't work in corners. So to be cornered may be a good idea. -Bimblis
