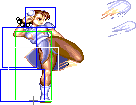
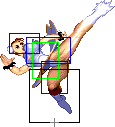
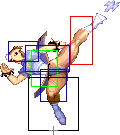
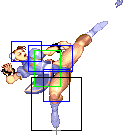
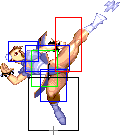
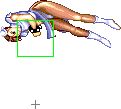
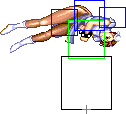
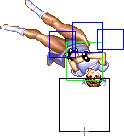
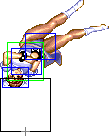
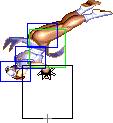
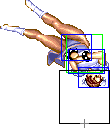
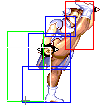
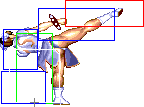
Super Street Fighter 2 Turbo/Chun-Li

From SuperCombo Wiki


Story

Date of Birth: 3/1/1968
Height: 5'8"
Weight: Secret!
Measurements: B34", W 22", H 35"
Blood Type: A
Likes: Crepes, fruits, candy
Dislikes: Crime, shady people, indecisiveness.

At the age of 5, Chun-Li saw her first Beijing opera, planting images of actors moving elegantly across the stage in her mind. Upon witnessing her father one day practicing his martial arts, those very same images came back to her, and she begged her father to teach her. Chun-Li's father would teach her a variety of Chinese martial arts, teaching her a style revolving around kicks with his renowned legs. These teachings would go on until his sudden disappearance.

Chun-Li would become a narcotics investigator at the age of 18 to both find her father and follow his footsteps. Despite hopes of reuniting with him, Chun-Li would learn of the worst possible outcome: Her father was dead, and the leader of the crime ring Shadaloo was responsible. After more investigation on her part, she would ultimately receive a direct invitation to the World Warrior tournament, hosted by Shadaloo, the ones responsible for her father's demise. Seeking revenge, Chun-Li gets ready to fight her way through the tournament...


Overview

Chun is ranked high tier. There are certain characters that she beats, certain characters she has even matches with, and certain characters who beat her. Some of her "even" matches are not even in the traditional sense. For example, against Fei she does really well as long as she's not in the corner. However, if Chun gets put in the corner and Fei starts doing st.Fierce xx Chicken Wing (his 3-hit spin kick), it is a nightmare for Chun, and she has no easy way out.

The same is true against Claw. Chun does well if she can keep the game on the ground, but if Claw can get his wall dive shenanigans going, Chun has no escape, and she must guess correctly which way to block, and that can be very difficult.

--NKI


Strengths Weaknesses
  • Great Normals: st.Strong is an amazing poke, cr.Forward is a multipurpose beast, and j.Forward is an amazing jumping move. She also has a few moves that cause Hard Knockdowns.
  • Storable Super: The Input Storing Glitch turns Chun-Li's Super from OK to absolutely oppressive.
  • Legs: Lightning Legs has amazing priority and will cleanly beat nearly every grounded move in the game.
  • Throws Aplenty: Chun-Li's throws have good range and deal incredible damage.
  • Dizzying: Chun-Li has a wide assortment of Dizzy combos.
  • Super Speedy: Chun-Li's fast walking speed combined with her wall jumps and headstomps give her many movement options.
  • Rush and Turtle: Chun-Li's kit allows her to switch between rushing her opponent down and turtling on the fly.
  • Air Vulnerable: Most of Chun-Li's anti-airs either require charge or are situational. In Tenshokyaku's case, it can whiff completely from point blank range.
  • Unable to Reverse: Chun-Li doesn't have a solid reversal to contest with attacks like Claw's walldive or Fei's Chicken Wing trap.
  • Fireball Trapped: Fireball Traps work especially well on Chun-Li.


New & Old Versions Comparison

To select O.Chun Li, choose Chun Li and then press ↓ ↓ ↓ ↑ Jab/Fierce, pressing Short simultaneously with the punch button for the alternate color.

Here is the list of differences:

  • System Changes: O.Chun Li cannot tech throws, or use a Super Combo;
  • Old Chun does not have access to Tenshokyaku;
  • O.Chun Li has some differences in some of her normals:
    • Close Standing Jab has a 1 frame slower startup;
    • Crouching Jab has a 1 frame slower startup;
    • Far Standing Strong hits high and so whiffs on crouching characters;
    • Far Standing Fierce has special cancel properties;
    • Close Standing Short has a 3 frames slower startup and can't be special canceled;
    • Far Standing Short hits high and so whiffs on crouching characters;
    • Crouching Short has a 2 frame slower startup and can't be special canceled;
    • Close Standing Forward has a 3 frame slower startup and can't be special canceled;
    • Far Standing Forward have better priority;
    • Diagonal Jumping Fierce has a much fatter hitbox, though the priority doesn't change much;
    • Diagonal Jumping Short has much better priority but do a little less damage;
    • Neutral Jumping Forward has much better priority plus 6 more active frames;
    • Diagonal Jumping Forward has much better priority but cannot be used as a cross up attack;
    • Neutral Jumping Roundhouse has much better priority;
    • Diagonal Jumping Roundhouse hits lower;
  • O.Chun Li's Head Stomp can be performed with any downward direction;
  • O.Chun Li's flip kick and neck breaker command normals have proximity requirements;
  • O.Chun Li's neckbreaker and flip kick are performed with forward/back/any upwards direction instead of df;
  • O.Chun Li's flip kick combo for two hits, the start-up is faster by 2 frames and can be special cancelled;
  • O.Chun Li can kara-cancel Kikoukens from Roundhouse easily (for the shorter recovery), where N.Chun Li has trouble with this due to the different command for the Spinning Bird Kick;
  • O.Chun's Spinning Bird Kick becomes active and knocks down before the spinning part during her handspring, and demands a "down" charge instead of a "back/away" one.

Basically, O.Chun Li has better aerial tools but worse ground ones, mainly for her standing strong whiffing on crouched characters and the lack of Super. Choose whichever version you think it's best suited for your style.


Color Options

Jab Strong Fierce Start Old
Chunli-lp.gif Chunli-mp.gif Chunli-hp.gif Chunli-start.gif Chunli-old1.gif
Chunli-lk.gif Chunli-mk.gif Chunli-hk.gif Chunli-hold.gif Chunli-old2.gif
Short Forward Roundhouse Hold Old Alternative

--Born2SPD

Video Overview

Chun-Li
Chun-Li's portrait in Super Turbo.
Character Data
Damage Scaling Factor 27/32
Forward Walk Speed 64
Backwards Walk Speed 48
Pre-Jump Frames 3
Forwards Jump Duration 44+
Backwards Jump Duration 46
Landing Frames 7*
Jump Height Apex 114
Forwards Jump Distance 166
Backwards Jump Distance 177
Soft Knockdown Recovery 35
Hard Knockdown Recovery 69


Normal Moves

Disclaimer: To better understand the diagrams, read this.

Standing Normals

cllp
Close Jab
Close Light Punch
5LP / cl.Lp.png
ChunLi stcljab3.png
Damage Dizzy Dizzy Time Cancel Guard Act. Range
18[0] 0~5 40 Chain, Special, Super Mid 0~21
Startup Active Recovery Total Frame Adv. Meter
4 4 4 12 +5 2/1

A quick rapid-fire jab.

  • Mainly used for combos and as a tick for characters who can't duck it.
  • This does massive damage for a mashable light attack.
  • Sometimes this can trade as an anti-air in Chun's favor.

Click to toggle detailed hitbox data.

ChunLi stcljab1&5.png ChunLi stcljab2&4.png ChunLi stcljab3.png ChunLi stcljab2&4.png ChunLi stcljab1&5.png
Frame Count 1 + 2 1 4 3 1
Simplified 4 4 4

frlp

Far Jab
Far Light Punch
5LP / cl.Lp.png
ChunLi stfarjab2.png
Damage Dizzy Dizzy Time Cancel Guard Act. Range
4[0] 0~5 40 Chain, Special, Super Mid 22+
Startup Active Recovery Total Frame Adv. Meter
3 2 8 13 +3 2/1

A rapid-fire slap.

  • Good priority lets you mash to deal with moves like Blanka's Roll and Honda's Headbutt.
  • Can work as a far away anti-air in some situations.

Click to toggle detailed hitbox data.

ChunLi stfarjab1&5.png ChunLi stfarjab2.png ChunLi stfarjab3.png ChunLi stfarjab4.png ChunLi stfarjab1&5.png
Frame Count 1 + 2 2 4 3 1
Simplified 3 2 8


clmp

Close Strong
Close Medium Punch
5MP / cl.Mp.png
ChunLi stclstrng3.png
It is now your turn, forever.
Damage Dizzy Dizzy Time Cancel Guard Act. Range
22[1] 5~11 60 Special, Super Mid 0~36
Startup Active Recovery Total Frame Adv. Meter
5 4 4 13 +10 4/3

A punch with huge frame advantage.

  • The huge frame advantage coupled with Chun's walking speed allows you to apply some nasty pressure. Mix them up with a throw or a low. You can also link into just about anything for combos.
  • Also OK as a trade anti-air.
  • Only Cammy and Blanka can crouch under this.

Click to toggle detailed hitbox data.

ChunLi stclstrng1&5.png ChunLi stclstrng2&4.png ChunLi stclstrng3.png ChunLi stclstrng2&4.png ChunLi stclstrng1&5.png
Frame Count 1 + 2 2 4 3 1
Simplified 5 4 4

frmp

Far Strong
Far Medium Punch
5MP / fr.Mp.png
ChunLi stfarstrng3.png
Damage Dizzy Dizzy Time Cancel Guard Act. Range
22[0] 5~11 60 Special, Super Mid 37+
Startup Active Recovery Total Frame Adv. Meter
5 4 4 13 +10 4/3

A poke with the same excellent frame advantage as the close version.

  • Hits the entire cast whether they crouch or stand.
  • Essentially an option select into Chun's damaging Strong throw.

Click to toggle detailed hitbox data.

ChunLi stfarstrng1&5.png ChunLi stfarstrng2&4.png ChunLi stfarstrng3.png ChunLi stfarstrng2&4.png ChunLi stfarstrng1&5.png
Frame Count 1 + 2 2 4 3 1 |
Simplified 5 4 4


clhp

Close Fierce
Close Heavy Punch
5HP / cl.Hp.png
ChunLi stclfrc2.png
Damage Dizzy Dizzy Time Cancel Guard Act. Range
24[1] 10~16 80 Special, Super Mid 0~41
Startup Active Recovery Total Frame Adv. Meter
4 20 11 35 -9 5/4

A double open palmed strike.

  • Can cancel into fireball or Super in combos.
  • You can also use this as a meaty for massive frame advantage, or for setting up frame traps. Otherwise, this move is pretty unsafe.
  • This can usually work as a ground crossup if you're behind your opponent, but it's not very useful in that aspect.

Click to toggle detailed hitbox data.

ChunLi stclfrc1&3.png ChunLi stclfrc2.png ChunLi stclfrc1&3.png
Frame Count 1 + 3 20 11
Simplified 4 20 11

frhp

Far Fierce
Far Heavy Punch
5HP / fr.Hp.png
ChunLi stfarfrc3.png
Damage Dizzy Dizzy Time Cancel Guard Act. Range
24[0] 10~16 80 Super Mid 42+
Startup Active Recovery Total Frame Adv. Meter
6 6 18 30 -2 5/4

A powered-up high punch.

  • Deceptively fast startup, decent for punishment, and a surprisingly good anti air.

Click to toggle detailed hitbox data.

ChunLi stfarfrc1.png ChunLi stfarfrc2&4.png ChunLi stfarfrc3.png ChunLi stfarfrc2&4.png ChunLi stfarfrc5.png ChunLi stfarfrc6.png
Frame Count 1 + 2 3 6 10 7 1
Simplified 6 6 18


cllk

Close Short
Close Light Kick
5LK / cl.Lk.png
ChunLi stclshrt3.png
Damage Dizzy Dizzy Time Cancel Guard Act. Range
20[1] 0~5 40 Special, Super Mid 0~36
Startup Active Recovery Total Frame Adv. Meter
4 5 5 14 +3 2/1

A knee strike.

  • Ok for ticks into throw, but Chun usually has better options for this.
  • Does unusually high damage for a light attack.

Click to toggle detailed hitbox data.

ChunLi stclshrt1&5 stclfrwrd1&7.png ChunLi stclshrt2&4.png ChunLi stclshrt3.png ChunLi stclshrt2&4.png ChunLi stclshrt1&5 stclfrwrd1&7.png
Frame Count 1 + 2 1 5 4 1
Simplified 4 5 5

frlk

Far Short
Far Light Kick
5LK / fr.Lk.png
ChunLi stfarshrt3.png
Damage Dizzy Dizzy Time Cancel Guard Act. Range
20[0] 0~5 40 None Mid 37+
Startup Active Recovery Total Frame Adv. Meter
7 5 5 17 +3 2/1

A straightforward kick.

  • Has decent priority, and hits at a nice angle.
  • Useful for setting up frame traps.
  • Does unusually high damage for a light attack.

Click to toggle detailed hitbox data.

ChunLi stfarshrt1&5 stfarfrwrd1&5.png ChunLi stfarshrt2&4.png ChunLi stfarshrt3.png ChunLi stfarshrt2&4.png ChunLi stfarshrt1&5 stfarfrwrd1&5.png
Frame Count 1 + 3 3 5 4 1
Simplified 7 5 5

clmk

Close Forward
Close Medium Kick
5MK / cl.Mk.png
ChunLi stclfrwrd3.png
First hitbox
ChunLi stclfrwrd4.png
Second hitbox
Damage Dizzy Dizzy Time Cancel Guard Act. Range
24[1] 5~11 60 1st part: Special, Super
2nd part: None
Mid 0~41
Startup Active Recovery Total Frame Adv. Meter
4 9 (3 / 6) 8 21 +1 / +4 4/3

A full split kick.

  • Good anti air if you are at the right range to use it, beating moves like New Ryu's jumping Roundhouse.
  • The first part can be cancelled, and is very easy to combo into legs, since you can just mash kick.

Click to toggle detailed hitbox data.

ChunLi stclshrt1&5 stclfrwrd1&7.png ChunLi stclfrwrd2&6.png ChunLi stclfrwrd3.png ChunLi stclfrwrd4.png ChunLi stclfrwrd5.png ChunLi stclfrwrd2&6.png ChunLi stclshrt1&5 stclfrwrd1&7.png
Frame Count 1 + 2 1 3 6 3 4 1
Simplified 4 9 8

frmk

Far Forward
Far Medium Kick
5MK / fr.Mk.png
ChunLi stfarfrwrd3.png
Damage Dizzy Dizzy Time Cancel Guard Act. Range
24[0] 5~11 60 None Mid 42+
Startup Active Recovery Total Frame Adv. Meter
7 5 8 20 +5 4/3

A kick straight to the face.

  • A mediocre anti-air, ok to counter some jumping attacks.
  • Deceptively good range, making it useful to stuff fireball startups.

Click to toggle detailed hitbox data.

ChunLi stfarshrt1&5 stfarfrwrd1&5.png ChunLi stfarfrwrd2&4.png ChunLi stfarfrwrd3.png ChunLi stfarfrwrd2&4.png ChunLi stfarshrt1&5 stfarfrwrd1&5.png
Frame Count 1 + 3 3 5 4 4
Simplified 7 5 8


clhk

Close Roundhouse
Close Standing Heavy Kick
5HK / Hk.png
ChunLi stclrh5.png
Damage Dizzy Dizzy Time Cancel Guard Act. Range
28[1] 10~16 80 None Mid 0~56
Startup Active Recovery Total Frame Adv. Meter
10 6 21 37 -5 5/4

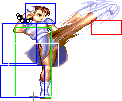
Chun's panty-slippin high sidekick.

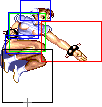
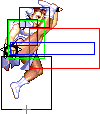
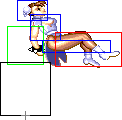
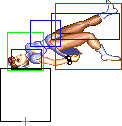
  • A trade anti-air (no pre projected hurtboxes before becoming active but poor priority with big hit/hurtboxes afterwards) so if you want to beat a move cleanly you have to use Close Forward instead, which has good priority up close. Against some high priority air normals however, your only option may be a trade so this move is useful, and it can be used that way against most air normals as long as you time it correctly, minus against some very high priority normals like Cammy's Aerial Strong or against characters with very low jumps, like Boxer.
  • The hitbox of this move is more centered than Close Forward, this is important against ambiguous crossup moves like a crossing up air tatsu for example. This also allows Chun to actually beat/trade with FeiLong's Chicken Wing corner trap, but it's difficult to use because the timing is very strict: you have a 1 frame window (with "reversal timing") for it to beat it cleanly and another 1 frame window to get a trade, anything slower than that and the move will come out too late and Chun will eat the Chicken Wing and probably a combo as well. And since you'll most likely be playing on a frame-skipping turbo speed, the timing becomes even more strict, leaving Chun with only one usable counter to the Chicken Wing corner trap: kara-cancelled low normal into Tenshokyaku.

Click to toggle detailed hitbox data.

ChunLi stclrh1.png ChunLi stclrh2.png ChunLi stclrh3.png ChunLi stclrh4.png ChunLi stclrh5.png ChunLi stclrh6.png ChunLi stclrh7.png ChunLi stclrh8.png ChunLi stclrh9.png
Frame Count 1 + 1 1 6 1 6 4 6 4 7
Simplified 10 6 21

frhk

Far Roundhouse
Far Standing Heavy Kick
5HK / Hk.png
ChunLi stfarrh4.png
Damage Dizzy Dizzy Time Cancel Guard Act. Range
28[0] 10~16 80 None Mid 57+
Startup Active Recovery Total Frame Adv. Meter
11 8 14 33 0 5/4

A heavy kick to the face.

  • Good anti air, but takes a while to come out. Requires fast reactions.

Click to toggle detailed hitbox data.

ChunLi stfarrh1.png ChunLi stfarrh2.png ChunLi stfarrh3.png ChunLi stfarrh4.png ChunLi stfarrh5.png ChunLi stfarrh6.png
Frame Count 1 + 3 3 4 8 7 7
Simplified 11 8 14

Crouching Normals

crlp

Crouching Jab
Crouching Light Punch
2LP / D.png+Lp.png
ChunLi crjab3.png
Damage Dizzy Dizzy Time Cancel Guard Act. Range
4[0] 0~5 40 Special, Super Mid N/A
Startup Active Recovery Total Frame Adv. Meter
4 4 5 13 +4 2/1

A short punch.

  • Good priority, but not mashable like other jabs.
  • As a tick, it's outclassed by moves like Crouching Forward kick and Standing Strong.
  • One nice trick is to kara cancel this into anti air Tenshokyaku to remove her standing frame.

Click to toggle detailed hitbox data.

ChunLi crjab1&5.png ChunLi crjab2&4.png ChunLi crjab3.png ChunLi crjab2&4.png ChunLi crjab1&5.png
Frame Count 1 + 2 1 4 4 1
Simplified 4 4 5


crmp

Crouching Strong
Crouching Medium Punch
2MP / D.png+Mp.png
ChunLi crstrng3.png
Damage Dizzy Dizzy Time Cancel Guard Act. Range
18[1] 5~11 60 Special, Super Mid N/A
Startup Active Recovery Total Frame Adv. Meter
5 4 5 14 +9 4/3

Far Standing Strong but crouching.

  • Good range and frame advantage, not much reason to use this over standing versions of Strong though.
  • The priority is also much worse than Crouching Jab.

Click to toggle detailed hitbox data.

ChunLi crstrng1&5 crfrc1&5.png ChunLi crstrng2&4.png ChunLi crstrng2&4.png ChunLi crstrng3.png ChunLi crstrng1&5 crfrc1&5.png
Frame Count 1 + 2 2 4 4 1
Simplified 5 4 5


crhp

Crouching Fierce
Crouching Heavy Punch
2HP / D.png+Hp.png
ChunLi crfrc3.png
Damage Dizzy Dizzy Time Cancel Guard Act. Range
22[2] 10~16 80 None Mid N/A
Startup Active Recovery Total Frame Adv. Meter
7 6 19 32 -3 5/4

Crouching Strong but bigger.

  • Good range with decent priority, but very sluggish, punishable if whiffed. Probably best to use safer attacks.

Click to toggle detailed hitbox data.

ChunLi crstrng1&5 crfrc1&5.png ChunLi crfrc2&4.png ChunLi crfrc3.png ChunLi crfrc2&4.png ChunLi crstrng1&5 crfrc1&5.png
Frame Count 1 + 3 3 6 8 11
Simplified 7 6 19


crlk
Crouching Short
Crouching Light Kick
2LK / D.png+Lk.png
ChunLi crshrt3.png
Damage Dizzy Dizzy Time Cancel Guard Act. Range
14[0] 0~5 40 Special, Super Low N/A
Startup Active Recovery Total Frame Adv. Meter
5 4 5 14 +4 2/1

A low split kick.

  • Good priority, and ok reach for a Crouching Short, but pretty slow.
  • Works ok as an occasional tick. Does above average damage for a light attack.

Click to toggle detailed hitbox data.

ChunLi crshrt1&5.png ChunLi crshrt2&4.png ChunLi crshrt3.png ChunLi crshrt2&4.png ChunLi crshrt1&5.png
Frame Count 1 + 3 1 4 4 1
Simplified 5 4 5


crmk
Crouching Forward
Crouching Medium Kick
2MK / D.png+Mk.png
ChunLi crfrwrd2.png
Damage Dizzy Dizzy Time Cancel Guard Act. Range
18[1] 5~11 60 Special, Super Low N/A
Startup Active Recovery Total Frame Adv. Meter
5 5 4 14 +9 4/3

Easily one of the best pokes in the game. One of the main reasons it's very annoying playing against a competent Chun.

  • Very spammable move. It has a very fast startup and recovery and very good priority while active. Also, it has no pre-projected hurtboxes during startup or recovery, making it very hard to be beaten cleanly when playing footsies.
  • Gives excellent frame advantage and can be inked into itself. It's also special/super cancelable.
  • It's also a very important anti air move in Chun-Li's arsenal.

Click to toggle detailed hitbox data.

ChunLi crfrwrd1.png ChunLi crfrwrd2.png ChunLi crfrwrd3.png
Frame Count 1 + 4 5 4
Simplified 5 5 4
crhk
Crouching Roundhouse
Crouching Heavy Kick
2HK / D.png+Hk.png
ChunLi crrh3.png
Damage Dizzy Dizzy Time Cancel Guard Act. Range
22[2] 5~11 130 None Low N/A
Startup Active Recovery Total Frame Adv. Meter
7 6 19 32 Hit: Soft KD
Block: -3
5/4

Chun's sweep.

  • Good range, useful for beating/trading with fireballs, and a good punish in general. Just try not to whiff it, as it leaves Chun quite open.
  • It also sets up a built-in safe jump against Sagat, and it will randomly also be a safe jump against Claw (sometimes Chun will land without hitting him).

Click to toggle detailed hitbox data.

ChunLi crrh1&5.png ChunLi crrh2&4.png ChunLi crrh3.png ChunLi crrh2&4.png ChunLi crrh1&5.png
Frame Count 1 + 3 3 6 8 11
Simplified 7 6 19

Jumping Normals

njlp
Neutral Jumping Jab
Neutral Jumping Light Punch
8LP / U.png+Lp.png
ChunLi njjab4.png
Damage Dizzy Dizzy Time Cancel Guard Act. Range
18[2] 1~7(-2) 40 None High N/A
Startup Active Recovery Total Frame Adv. Meter
8 N/A 8+∞ Dependent 2/1

A jumping chop.

  • Stays active the whole jump, ok to shield yourself from lower priority attacks.

Click to toggle detailed hitbox data.

ChunLi njjab1 njstrng1&7 njfrc1&7.png ChunLi njjab2 njstrng2&6 njfrc2&6.png ChunLi njjab3 njstrng3&5 njfrc3&5.png ChunLi njjab4.png
Frame Count 2 3 2
Simplified 8
djlp
Diagonal Jumping Jab
Diagonal Jumping Light Punch
7 or 9 LP
Ub.png or Uf.png+Lp.png
ChunLi djjab3.png
Damage Dizzy Dizzy Time Cancel Guard Act. Range
16[2] 1~7(-2) 40 None High N/A
Startup Active Recovery Total Frame Adv. Meter
6 40 6+∞ Dependent 2/1

Like the neutral jump version except it's a punch with worse priority.

  • Safejumps aside, this isn't much use, outclassed by Jumping Strong.

Click to toggle detailed hitbox data.

ChunLi djjab1&5 djstrng1&5 djfrc1&5.png ChunLi djjab2&4 djstrng2&4 djfrc2&4.png ChunLi djjab3.png ChunLi djjab2&4 djstrng2&4 djfrc2&4.png ChunLi djjab1&5 djstrng1&5 djfrc1&5.png ChunLi njstrng8 njfrc8 djjab6 djstrng6 djfrc6.png
Frame Count 3 3 40 3 4
Simplified 6 40


njmp
Neutral Jumping Strong
Neutral Jumping Medium Punch
8MP / U.png+Mp.png
ChunLi njstrng4.png
Damage Dizzy Dizzy Time Cancel Guard Act. Range
22[2] 5~11 50(+10) None High N/A
Startup Active Recovery Total Frame Adv. Meter
8 16 24+∞ Dependent 4/3

Another chop.

  • Good priority, but aside from having double the active frames, Neutral Jump Fierce outclasses this.

Click to toggle detailed hitbox data.

ChunLi njjab1 njstrng1&7 njfrc1&7.png ChunLi njjab2 njstrng2&6 njfrc2&6.png ChunLi njjab3 njstrng3&5 njfrc3&5.png ChunLi njstrng4.png ChunLi njjab3 njstrng3&5 njfrc3&5.png ChunLi njjab2 njstrng2&6 njfrc2&6.png ChunLi njjab1 njstrng1&7 njfrc1&7.png ChunLi njstrng8 njfrc8 djjab6 djstrng6 djfrc6.png
Frame Count 3 3 2 16 2 3 4
Simplified 8 16
djmp
Diagonal Jumping Strong
Diagonal Jumping Medium Punch
7 or 9 MP
Ub.png or Uf.png+Mp.png
ChunLi djstrng3.png
Damage Dizzy Dizzy Time Cancel Guard Act. Range
20[2] 5~11 50(+10) None High -
Startup Active Recovery Total Frame Adv. Meter
6 8 14+∞ Dependent 4/3

Another punch.

  • Good air to air, and good jump in from the right range. Can usually beat some normals that anti air your Jumping Forward kick.

Click to toggle detailed hitbox data.

ChunLi djjab1&5 djstrng1&5 djfrc1&5.png ChunLi djjab2&4 djstrng2&4 djfrc2&4.png ChunLi djstrng3.png ChunLi djjab2&4 djstrng2&4 djfrc2&4.png ChunLi djjab1&5 djstrng1&5 djfrc1&5.png ChunLi njstrng8 njfrc8 djjab6 djstrng6 djfrc6.png
Frame Count 3 3 8 3 4
Simplified 6 8


njhp
Neutral Jumping Fierce
Neutral Jumping Heavy Punch
8HP / U.png+Hp.png
ChunLi njfrc4.png
Damage Dizzy Dizzy Time Cancel Guard Act. Range
26[2] 11~17(-1) 60(+20) None High N/A
Startup Active Recovery Total Frame Adv. Meter
8 8 16+∞ Dependent 5/4

Yet another chop.

  • Great horizontal priority and reach, fantastic air to air, and works as an anti air in some situations if you react in time.

Click to toggle detailed hitbox data.

ChunLi njjab1 njstrng1&7 njfrc1&7.png ChunLi njjab2 njstrng2&6 njfrc2&6.png ChunLi njjab3 njstrng3&5 njfrc3&5.png ChunLi njfrc4.png ChunLi njjab3 njstrng3&5 njfrc3&5.png ChunLi njjab2 njstrng2&6 njfrc2&6.png ChunLi njjab1 njstrng1&7 njfrc1&7.png ChunLi njstrng8 njfrc8 djjab6 djstrng6 djfrc6.png
Frame Count 3 3 2 8 2 3 4
Simplified 8 8
djhp
Diagonal Jumping Fierce
Diagonal Jumping Heavy Punch
7 or 9 HP
Ub.png or Uf.png+Hp.png
ChunLi djfrc3.png
Damage Dizzy Dizzy Time Cancel Guard Act. Range
24[2] 11~17(-1) 60(+20) None High N/A
Startup Active Recovery Total Frame Adv. Meter
6 8 14+∞ Dependent 5/4

Yet another punch.

  • Like Diagonal Jumping Strong but with a different hitbox. In some situations, it may be better to use this instead.

Click to toggle detailed hitbox data.

ChunLi djjab1&5 djstrng1&5 djfrc1&5.png ChunLi djjab2&4 djstrng2&4 djfrc2&4.png ChunLi djfrc3.png ChunLi djjab2&4 djstrng2&4 djfrc2&4.png ChunLi djjab1&5 djstrng1&5 djfrc1&5.png ChunLi njstrng8 njfrc8 djjab6 djstrng6 djfrc6.png
Frame Count 3 3 8 3 4
Simplified 6 8


njlk
Neutral Jumping Short
Neutral Jumping Light Kick
8LK / U.png+Lk.png
ChunLi njshrt3.png
Damage Dizzy Dizzy Time Cancel Guard Act. Range
18[2] 1~7(-2) 40 None High N/A
Startup Active Recovery Total Frame Adv. Meter
6 N/A 6+∞ Dependent 2/1

A jumping split kick. Don't think too hard about how the hitbox works.

  • Good priority, beats a handful of moves, and is a great defensive tool.

Click to toggle detailed hitbox data.

ChunLi njshrt1 njfrwrd1&5 djrh1.png ChunLi njshrt2 njfrwrd2&4 djrh2.png ChunLi njshrt3.png
Frame Count 3 3
Simplified 6
djlk
Diagonal Jumping Short
Diagonal Jumping Light Kick
7 or 9 LK
Ub.png or Uf.png+Lk.png
ChunLi djshrt3.png
Damage Dizzy Dizzy Time Cancel Guard Act. Range
20[2] 1~7(-2) 40 None High N/A
Startup Active Recovery Total Frame Adv. Meter
6 40 6+∞ Dependent 2/1

A confident jumping kick.

  • Aside from safejumps, this isn't too special. It gives Dictator trouble, but otherwise favor Jumping Forward kick.
  • It may be counter intuitive, but this move actually does just as much damage as Diagonal Jumping Forward kick. It inflicts less dizzy damage though.

Click to toggle detailed hitbox data.

ChunLi djshrt1&5 djfrwrd1&5.png ChunLi djshrt2&4 djfrwrd2&4.png ChunLi djshrt3.png ChunLi djshrt2&4 djfrwrd2&4.png ChunLi djshrt1&5 djfrwrd1&5.png
Frame Count 3 3 40 3
Simplified 6 40
njmk
Neutral Jumping Forward
Neutral Jumping Medium Kick
8MK
U.png+Mk.png
ChunLi njfrwrd3.png
Damage Dizzy Dizzy Time Cancel Guard Act. Range
22[2] 5~11 50(+10) None High N/A
Startup Active Recovery Total Frame Adv. Meter
6 10 16+∞ Dependent 4/3

Another split kick. Don't think too hard about how the hurtbox works.

  • Ok range, but unlike Old Chun's version of this move the lowest hurtbox got stretched horizontaly so the overall priority is bad. Favor Neutral Jumping Short.
  • That hurtbox was also reduced downwards though, allowing this move to beat Honda's Headbutts, something none of her other neutral jump normals can (with the exception of Head Stomp, but that forces a bounce which can be very bad on a neutral jump). This requires Chun to land right top of him, because the horizontal priority is not enough to beat Headbutts from the front.

Click to toggle detailed hitbox data.

ChunLi njshrt1 njfrwrd1&5 djrh1.png ChunLi njshrt2 njfrwrd2&4 djrh2.png ChunLi njfrwrd3.png ChunLi njshrt2 njfrwrd2&4 djrh2.png ChunLi njshrt1 njfrwrd1&5 djrh1.png
Frame Count 3 3 10 3
Simplified 6 10
djmk
Diagonal Jumping Forward
Diagonal Jumping Medium Kick
7 or 9MK / Ub.png or Uf.png+Mk.png
ChunLi djfrwrd3.png
Damage Dizzy Dizzy Time Cancel Guard Act. Range
20[2] 5~11 50(+10) None High N/A
Startup Active Recovery Total Frame Adv. Meter
6 16 22+∞ Dependent 4/3

A stronger version of Diagonal Jumping Short.

  • Chun's crossup, and also her best jump in for the most part.
  • Outside of Head Stomp, this is the lowest hitting air normal Chun has, she can even beat Dhalsim's anti air slides with it.

Click to toggle detailed hitbox data.

ChunLi djshrt1&5 djfrwrd1&5.png ChunLi djshrt2&4 djfrwrd2&4.png ChunLi djfrwrd3.png ChunLi djshrt2&4 djfrwrd2&4.png ChunLi djshrt1&5 djfrwrd1&5.png
Frame Count 3 3 16 3
Simplified 6 16
njhk
Neutral Jumping Roundhouse
Neutral Jumping Heavy Kick
8HK / U.png+Hk.png
ChunLi njrh3.png
ChunLi njrh4.png
ChunLi njrh5.png
This move breaks all the rules.
Damage Dizzy Dizzy Time Cancel Guard Act. Range
26[2] 10~16 80 1st part: Special
2nd and 3rd parts: None
Mid N/A
Startup Active Recovery Total Frame Adv. Meter
3 13 (5/4/4) 16+∞ Hit: Hard KD
Block: Dependent
5/4

Essentially a jumping version of Chun's towards+Forward kick command normal.

  • This has a good horizontal range, and trades with most attacks if you time it right. It can also be used against grounded opponents on the way up.
  • This is a rare case of normal moves that cause a full knockdown.
  • This also doesn't require the opponent to be standing to be blocked, which is also unique (and bad for Chun).
  • It can be special canceled as well, but the only special move Chun can use in the air requires back charge, and you don't have enough airtime to get a charge before you land.

Click to toggle detailed hitbox data.

ChunLi njrh1.png ChunLi njrh2.png ChunLi njrh3.png ChunLi njrh4.png ChunLi njrh5.png ChunLi njrh6.png ChunLi njrh7.png ChunLi njrh8.png
Frame Count 1 2 5 4 4 4 6
Simplified 3 13
djhk
Diagonal Jumping Roundhouse
Diagonal Jumping Heavy Kick
7 or 9 HK
Ub.png or Uf.png+Hk.png
ChunLi djrh3.png
ChunLi djrh4.png
There's a REALLY small hitbox here, right around her waist.
ChunLi djrh5.png
Damage Dizzy Dizzy Time Cancel Guard Act. Range
24[2] 11~17(-1) 60(+20) None High N/A
Startup Active Recovery Total Frame Adv. Meter
6 16 22+∞ Dependent 5/4

Chun does 2 split kicks in a row. They don't combo.

  • Can be a decent air to air in some situations, just be careful as it leaves you quite vulnerable to air to airs, and anti airs.
  • Strangely enough, the frame in between kicks can hit too: if you look closely, you'll noticed a red dot around her waist, that's a 1x1 px hitbox!

Click to toggle detailed hitbox data.

ChunLi njshrt1 njfrwrd1&5 djrh1.png ChunLi njshrt2 njfrwrd2&4 djrh2.png ChunLi djrh3.png ChunLi djrh4.png ChunLi djrh5.png ChunLi djrh6.png ChunLi djrh7.png
Frame Count 3 3 6 4 6 6
Simplified 6 16

Command Normals

Sankaku Tobi (Wall Jump)
Sankaku Tobi
Wall Jump
Air 6 near a wall
Air F.png near a wall
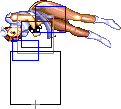
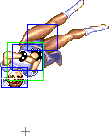
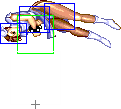
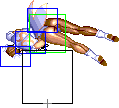
ChunLi wj.png
Chun-Li's wall jump.
  • The jumping animation is 6 frames long.
  • Useful for getting out of the corner or avoiding attacks.
  • The jump can be performed during an air normal. You can also do an air attack after wall jumping. You can bounce off someone with her Head Stomp normal, then walljump afterwards. You can even air throw, walljump, then attack or air throw again.
  • If you're quick enough, you can cancel the jump itself into a Spinning Bird Kick, retaining the directional momentum of your original jump arc.

Click to toggle detailed hitbox data.

ChunLi wj.png
Frame Count 6
Rear Spin Kick
Rear Spin Kick
Flip Kick
3MK / Df.png+Mk.png
ChunLi fk3.png
ChunLi fk4.png
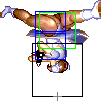
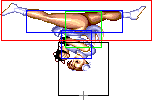
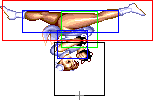
Fun fact: This move is so bad it was completely removed in HD Remix.
Damage Dizzy Dizzy Time Cancel Guard Act. Range
22[0] 0~5 40 None Mid N/A
Startup Active Recovery Total Frame Adv. Meter
7 9 (5/4) 43 59 Hit: Hard KD
Block: -39 / -34
2/1

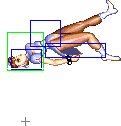
Chun-Li does a jump off the opponent (or thin air) into a flip.

  • Heavily nerfed from her Old version, being unable to combo.
  • The second hitbox knocks down, but it's very difficult to hit with it.
  • Gives the same meter on block/hit as a Short/Jab even though this move is performed with a Forward.
  • Avoid this move.

Click to toggle detailed hitbox data.

ChunLi fk1.png ChunLi fk2.png ChunLi fk3.png ChunLi fk4.png ChunLi fk5.png ChunLi fk6.png ChunLi fk7.png ChunLi fk8.png
Frame Count 1 + 3 3 5 4 4 4 6 29
Simplified 7 9 43
Kyakukyakuraku
Kyakukyakuraku
Neck Breaker
3HK / Df.png+Hk.png
ChunLi nb8.png
Damage Dizzy Dizzy Time Cancel Guard Act. Range
20[0] 10~16 80 None Mid/Low N/A
Startup Active Recovery Total Frame Adv. Meter
37 14 0 51 Hit: Hard KD
Block: Dependent
5/4

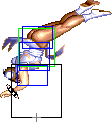
Chun-Li flips over her opponent and lands on top with a knee strike.

  • This move is good for shenanigans or to simply force the opponent to block on wake-up, since it can avoid a lot of reversal attacks.
  • It has high stun, but the timer bonus is very short, so odds are it will either dizzy or the enemy will recover from all dizzy damage by the time they get back up.
  • Despite Chun being airborne during the move, it hits Mid, and will hit Low if Chun hits deep enough.
  • Since Chun is airborne from frame 1, this move can be used to avoid tick throws.

Click to toggle detailed hitbox data.

ChunLi nb1.png ChunLi nb2.png ChunLi nb3.png ChunLi nb4.png ChunLi nb5.png ChunLi nb6.png ChunLi nb7.png ChunLi nb8.png
Frame Count 1 + 4 4 5 6 7 8 2 14
Simplified 37 14
Yosokyakus
Yosokyaku
Head Stomp
2MK midair
D.png+Mk.png midair
ChunLi hs3.png
Damage Dizzy Dizzy Time Cancel Guard Act. Range
20[0] 2~8 60 Special High N/A
Startup Active Recovery Total Frame Adv. Meter
3 16 19+∞ Dependent 4/3

Chun-Li stomps on her opponent midair.

  • It is possible to use this move as an instant overhead. Simply jump and immediately do a head stomp, and the enemy will have to block high to avoid getting hit.
  • This move has "trip guard", meaning if you use it and someone tries to sweep or Low Tiger Shot you, you'll either beat it or land in a blocking position.
  • For New Chun-Li this move can only be activated with D.png, that is, Db.png or Df.png will give you her normal Jumping Forward kick instead.

Click to toggle detailed hitbox data.

ChunLi hs1&4.png ChunLi hs2&5.png ChunLi hs3.png ChunLi hs1&4.png ChunLi hs2&5.png ChunLi hs6.png ChunLi hs7.png
Frame Count 1 2 16 8 4 5
Simplified 3 16

Throws

Chun-Li can throw with Mp.png and Hp.png. She also has an air throw, performed with the same buttons.

Koshuto
cl. 4/6 + MP/HP
cl. B.png or F.png+Mp.png/Hp.png
Ssf2t chunli pthrow.png
Damage Dizzy Dizzy Time Cancel Guard Act. Range
38 (Strong)
32 (Fierce)
7~13 100 - Grab 48 (from axis)
23 (from throwable box)
Startup Active Recovery Total Frame Adv. Meter
0 1 Dependent 2 N/A -

Chun-Li's throw.

  • The Strong version does more damage than the Fierce version for some reason, so prefer the Strong version when you're not trying to throw tech.
  • The direction held when throwing determines the direction you'll throw at.
  • Be careful when throwing cornered opponents towards the corner, since most characters can actually punish Chun-Li's recovery if they tech.
  • If facing a charge character, know that if the throw is teched the opponent will not have enough back charge for his specials right after recovering from being thrown. This happens because there's a side switch during the throw animation. This means that Chun-Li can try to follow it up with a meaty without having to fear certain reversals (e.g. Boxer's or Dictator's Super), but know that they may have enough down charge since it's possible to tech throws with Db.png or Df.png.


Ryuseiraku
Any direction but 8 midair + MP/HP
Any direction but U.png midair + Mp.png/Hp.png
Ssf2t chunli pthrow.png
Damage Dizzy Dizzy Time Cancel Guard Act. Range
34 7~13 100 - Grab 58 (from axis)
33 (from throwable box)
Minimum height: 48/48
Startup Active Recovery Total Frame Adv. Meter
0 1 Dependent 2 N/A -

Same sprite and basic function as Chun's grounded throw.

  • Very good range for an air throw.

Click to toggle throwbox data.

  • Ground Throw:
ChunLi throwb.png ChunLi throw.png ChunLi throwf.png
  • Air Throw:
ChunLi airthrow.png

--Raisin (March 12, 2007), some info courtesy T.Akiba

Special Moves

Kikoken

Kikoken
Fireball
[4]6P / Cb.pngF.png+P.png
ChunLi fb11jab.png
Lp.png Damage Dizzy Dizzy Time Cancel Guard Act. Range
17[1] 5~11 90 None Mid N/A
Startup Active Recovery Total Frame Adv. Meter
5 75 42* 47 Dependent 5


Mp.png Damage Dizzy Dizzy Time Cancel Guard Act. Range
18[1] 7~13 90 None Mid N/A
Startup Active Recovery Total Frame Adv. Meter
5 45 40* 45 Dependent 5


Hp.png Damage Dizzy Dizzy Time Cancel Guard Act. Range
20[1] 7~13 90 None Mid N/A
Startup Active Recovery Total Frame Adv. Meter
5 31 38* 43 Dependent 5

Chun-Li puts her back into a fireball.

  • Damage and speed increases with strength.
  • The fireball will travel a set distance, which decreases with strength (along with Chun's recovery frames).
  • This move has the best startup for a fireball in the game by far, which helps tremendously stopping advancing moves like Honda's Headbutt.
  • This move works very well as an anti-air tool. Even if it trades, you score a full knockdown, which you can use to apply your strong wake-up game.
  • Due to a glitch, it's possible to change the recovery of any Kikoken to that of a Fierce by either whiffing or kara-canceling a Fierce or Roundhouse normal. You can read more about it here.

Click to toggle detailed hitbox data.

Startup:

ChunLi fb1.png ChunLi fb2.png ChunLi fb3.png ChunLi fb4.png ChunLi fb5.png
Frame Count 1 1 1 1 1
Simplified 5

Active:

  • Jab Version:
ChunLi fb6.png ChunLi fb7jab.png ChunLi fb8jab.png ChunLi fb9jab.png ChunLi fb10jab.png ChunLi fb11jab.png
Frame Count 1 1 1 1 1 1...
Simplified 42
  • Strong Version:
ChunLi fb6.png ChunLi fb7strng.png ChunLi fb8strng.png ChunLi fb9strng.png ChunLi fb10strng.png ChunLi fb11strng.png
Frame Count 1 1 1 1 1 1...
Simplified 40
  • Fierce Version:
ChunLi fb6.png ChunLi fb7frc.png ChunLi fb8frc.png ChunLi fb9frc.png ChunLi fb10frc.png ChunLi fb11frc.png
Frame Count 1 1 1 1 1 1...
Simplified 38


Total Distance Traveled:

Jab: 222 pixels after 75 frames Strong: 176 pixels after 45 frames Fierce: 150 pixels after 31 frames
ChunLi fbjab.png ChunLi fbstrng.png ChunLi fbfrc.png

Hyakuretsukyaku

Hyakuretsukyaku
Lightning Legs
Press K.png Repeatedly
ChunLi ll3.png
ChunLi ll5.png
ChunLi ll7.png
ChunLi ll9.png
Lk.png Damage Dizzy Dizzy Time Cancel Guard Act. Range
28[2] 5~11 100 None Mid N/A
Startup Active Recovery Total Frame Adv. Meter
4 (4(4) x 5) + 3 minimum
4(4) x 4 every cycle
4 51 minimum Dependent 4


Mk.png Damage Dizzy Dizzy Time Cancel Guard Act. Range
30[2] 5~11 100 None Mid N/A
Startup Active Recovery Total Frame Adv. Meter
7 (2(2) x 7) + 1 minimum
2(2) x 4 every cycle
8 44 minimum Dependent 4


Hk.png Damage Dizzy Dizzy Time Cancel Guard Act. Range
32[2] 5~11 100 None Mid N/A
Startup Active Recovery Total Frame Adv. Meter
10 1(1) x 11 minimum
1(1) x 4 every cycle
13 45 minimum Dependent 4

Chun-Li unleashes a flurry of kicks at lightning speed.

  • Continuing to mash the button after the move comes out will keep the move going indefinitely.
  • Will never combo into itself. Once this attack hits, subsequent hitboxes will whiff until your opponent can block.
  • Chun's legs are fully invulnerable, giving the move excellent priority.

General Strategies

  • Since your legs are invunlerable and your hurtboxes are moved backwards, this move will beat most other attacks in melee range. An important strategy is to use Lightning Legs to whiff punish attacks from afar, when your opponent is worried about throws, Strong punches, and Forward kicks.
  • This move also works great as an okizeme option, provided you space your move properly to avoid a reversal.

Click to toggle detailed hitbox data.

Startup:

ChunLi ll1&12.png ChunLi ll2&11.png
Frame Count (Short) 1 3
Simplified (Short) 4
Frame Count (Forward) 3 4
Simplified (Forward) 7
Frame Count (Rh) 4 6
Simplified (Rh) 10

Active:

ChunLi ll3.png ChunLi ll4.png ChunLi ll5.png ChunLi ll6&10.png
Frame Count (Short) 4 4 4 4
Frame Count (Forward) 2 2 2 2
Frame Count (Rh) 1 1 1 1
ChunLi ll7.png ChunLi ll8.png ChunLi ll9.png ChunLi ll6&10.png
Frame Count (Short) 4 4 4 4
Frame Count (Forward) 2 2 2 2
Frame Count (Rh) 1 1 1 1

NOTE: The diagram shown refers to one complete cycle of the Lightning Legs animation. The minimal durations for each are as follows:

  • The LK version will make a full cycle once, then will stop at frame 3 of the third cell. (35 frames in total)
  • The MK version will make a full cycle once, then will stop at frame 1 of the 7th cell. (29 frames in total)
  • The HK version will make 2 full cycles, then stop at the 6th cell. (22 frames in total)

Recovery:

ChunLi ll2&11.png ChunLi ll1&12.png
Frame Count (Short) 2 2
Simplified (Short) 4
Frame Count (Forward) 4 4
Simplified (Forward) 8
Frame Count (Rh) 6 6
Simplified (Rh) 12

Tenshokyaku

Tenshokyaku
Upkicks
[2]8K / Cd.pngU.png+K.png
ChunLi upk2.png
ChunLi upk6shrt 6frwrd 5&15rh.png
ChunLi upk11shrt 11frwrd 10&20rh.png
They go up, and they kick. That's why everyone calls 'em Upkicks.
Lk.png Damage Dizzy Dizzy Time Cancel Guard Act. Range
12[2] x 3 0~4 x 3 20 x 3 None Mid N/A
Startup Active Recovery Total Frame Adv. Meter
6 4(4)4(8)4 37 67 Hit: Hard KD
Block: -39 (First Hit)
8
  • Invincible on frames 1-10.
Mk.png Damage Dizzy Dizzy Time Cancel Guard Act. Range
12[2] x 3 0~4 x 3 20 x 3 None Mid N/A
Startup Active Recovery Total Frame Adv. Meter
4 4(4)4(8)4(8)4 34 74 Hit: Hard KD
Block: -48 (First Hit)
8
  • Invincible on frames 1-8.
Hk.png Damage Dizzy Dizzy Time Cancel Guard Act. Range
12[2] x 3 0~4 x 3 20 x 3 None Mid N/A
Startup Active Recovery Total Frame Adv. Meter
2 2(4)4(8)4(8)4(8)4 23 71 Hit: Hard KD
Block: -47 (First Hit)
8
  • Invincible on frames 1-4.


Chun-Li rises into the air, unleashing a torrent of tornado kicks.

  • This move causes a 3 hit juggle state. Despite Forward and Roundhouse having more than 3 hitboxes, it can still only juggle 3 times in the air.
  • Chun is considered airborne for the entire move. Due to a programing mistake this move does not have any grounded recovery frames, allowing for blocking and counter throws as soon as you land.

General Strategies

  • Lk.png version:
    • Has the slowest startup but also the most invincibility, which is optimal for various situations (e.g. anti airs). But, even on this version the invincibility does not last for very long, which often forces Chun to activate the move at the very last moment for it to anti air successfully. The problem is that Chun-Li will have standing up hurtboxes right before the move coming out (because the transition from ↓ to ↑ doesn't happen instantly), which may result in Chun-Li being hit before her move can come out. To alleviate that problem, it's recommended to kara cancel a crouching normal into this move, so Chun-Li can transition from her crouching stance into this move's invincible startup without having standing hurtboxes in between.
  • Mk.png version:
    • Has slightly less invincibility than the Short version, but if the kara cancel method is used then its invincibility will often be just enough to anti-air most air moves, with the added benefit of having more horizontal reach than the Short version. Basically, this is the more rounded version of the move, which is to be used whenever you don't particularly need the extra invincibility of the Short version, nor the extremely fast startup of the Roundhouse version.
  • Hk.png version:
    • Is your go-to reversal outside of Super. It can't be safe jumped due to the 2 frame startup and can also thwart meaty crossups. The invincibility on it is very short so the other versions should be favored for anti-air situations.
    • Don't be too over confident on its anti safe-jump capabilities though. The move has poor priority and reach overall, this means that air moves with very good priority can be used as "fake" safe jumps by spacing the jump so they don't land too close to Chun, making her move whiff completely or even straight out beaten (since right after the invulnerability ends, Chun is vulnerable and NOT attacking - and this is even more of a problem with the Roundhouse version, since its invulnerability doesn't last very long). Also, the poor upwards reach must be emphasized: there are a some air moves that don't even have good priority at the front that can still be used as "fake" safe jumps due to their leg hurtboxes being out of reach. These moves are Ken's Jumping Forward and Roundhouse, E.Honda's Jumping Forward and Roundhouse, Claw's Neutral Jumping Short and Forward, Sagat's Jumping Forward and Roundhouse, Dictator's Jumping Fierce, T.Hawk's Jumping Roundhouse and Fei's Jumping Roundhouse.

Click to toggle detailed hitbox data.

  • Short Version:
ChunLi upk1.png ChunLi upk2.png ChunLi upk3shrt 3frwrd.png ChunLi upk4shrt 4frwrd 3&13rh.png ChunLi upk5shrt 5frwrd 4&14rh.png ChunLi upk6shrt 6frwrd 5&15rh.png ChunLi upk7shrt 7frwrd 6&16rh.png ChunLi upk8shrt 8frwrd 7&17rh.png ChunLi upk9shrt 9&14frwrd 8&18rh.png ChunLi upk10shrt 10&15frwrd 9&19rh.png
Frame Count 6 4 1 1 2 4 2 2 2 2
Simplified 6 4 4 4 8
ChunLi upk11shrt 11frwrd 10&20rh.png ChunLi upk12shrt 12&17frwrd 11&21rh.png ChunLi upk13shrt 13&18frwrd 12&22rh.png ChunLi upk14shrt 19frwrd 23rh.png ChunLi upk15shrt 20frwrd 24rh.png ChunLi upk16shrt 21frwrd 25rh.png
Frame Count 4 3 3 3 24 4
Simplified 4 37


  • Forward Version:
ChunLi upk1.png ChunLi upk2.png ChunLi upk3shrt 3frwrd.png ChunLi upk4shrt 4frwrd 3&13rh.png ChunLi upk5shrt 5frwrd 4&14rh.png ChunLi upk6shrt 6frwrd 5&15rh.png ChunLi upk7shrt 7frwrd 6&16rh.png ChunLi upk8shrt 8frwrd 7&17rh.png ChunLi upk9shrt 9&14frwrd 8&18rh.png ChunLi upk10shrt 10&15frwrd 9&19rh.png
Frame Count 4 4 1 1 2 4 2 2 2 2
Simplified 4 4 4 4 8
ChunLi upk11shrt 11frwrd 10&20rh.png ChunLi upk12shrt 12&17frwrd 11&21rh.png ChunLi upk13shrt 13&18frwrd 12&22rh.png ChunLi upk9shrt 9&14frwrd 8&18rh.png ChunLi upk10shrt 10&15frwrd 9&19rh.png ChunLi upk16frwrd.png
Frame Count 4 2 2 2 2 4
Simplified 4 8 4
ChunLi upk12shrt 12&17frwrd 11&21rh.png ChunLi upk13shrt 13&18frwrd 12&22rh.png ChunLi upk14shrt 19frwrd 23rh.png ChunLi upk15shrt 20frwrd 24rh.png ChunLi upk16shrt 21frwrd 25rh.png
Frame Count 2 2 3 21 6
Simplified 34


  • Roundhouse Version:
ChunLi upk1.png ChunLi upk2.png ChunLi upk4shrt 4frwrd 3&13rh.png ChunLi upk5shrt 5frwrd 4&14rh.png ChunLi upk6shrt 6frwrd 5&15rh.png ChunLi upk7shrt 7frwrd 6&16rh.png ChunLi upk8shrt 8frwrd 7&17rh.png ChunLi upk9shrt 9&14frwrd 8&18rh.png ChunLi upk10shrt 10&15frwrd 9&19rh.png ChunLi upk11shrt 11frwrd 10&20rh.png
Frame Count 2 2 2 2 4 2 2 2 2 4
Simplified 2 2 4 4 8 4
ChunLi upk12shrt 12&17frwrd 11&21rh.png ChunLi upk13shrt 13&18frwrd 12&22rh.png ChunLi upk4shrt 4frwrd 3&13rh.png ChunLi upk5shrt 5frwrd 4&14rh.png ChunLi upk6shrt 6frwrd 5&15rh.png ChunLi upk7shrt 7frwrd 6&16rh.png ChunLi upk8shrt 8frwrd 7&17rh.png ChunLi upk9shrt 9&14frwrd 8&18rh.png ChunLi upk10shrt 10&15frwrd 9&19rh.png
Frame Count 2 2 2 2 4 2 2 2 2
Simplified 8 4 8
ChunLi upk11shrt 11frwrd 10&20rh.png ChunLi upk12shrt 12&17frwrd 11&21rh.png ChunLi upk13shrt 13&18frwrd 12&22rh.png ChunLi upk14shrt 19frwrd 23rh.png ChunLi upk15shrt 20frwrd 24rh.png ChunLi upk16shrt 21frwrd 25rh.png
Frame Count 4 3 3 3 7 7
Simplified 4 23

Spinning Bird Kick

Spinning Bird Kick
[4]6K
Cb.pngF.png + K.png
ChunLi sbk12&20shrt 12&20&28frwrd 12&20&28&36&44rh.png
ChunLi sbk16&24shrt 16&24&32frwrd 16&24&32&40rh.png
There's an additional 1x1 hitbox near Chun's thighs in between these frames.
Lk.png Damage Dizzy Dizzy Time Cancel Guard Act. Range
14[1] / 12[1] 7~13 90 None Mid N/A
Startup Active Recovery Total Frame Adv. Meter
32* 2(3)1(5)2(11)2* 21 79 Dependent 8
  • Invincible from frames 1-17, 22-23, and 59-73.
Mk.png Damage Dizzy Dizzy Time Cancel Guard Act. Range
16[1] / 14[1] 7~13 90 None Mid N/A
Startup Active Recovery Total Frame Adv. Meter
34* 3(5)1(3)1(3)1(4)2(8)4* 23 92 Dependent 8
  • Invincible from frames 1-17, 22-23, and 71-86.
Hk.png Damage Dizzy Dizzy Time Cancel Guard Act. Range
18[1] / 16[1] 7~13 90 None Mid N/A
Startup Active Recovery Total Frame Adv. Meter
36* 3(7)2(3)1(3)1(3)1(3)1(3)1(4)1(7)3* 31* 114 Dependent 8
  • Invincible from frames 1-17, 22-23, and 89-108.


Chun-Li flips onto her hands, pushes back up into the air, and spins forward.

  • The spins where Chun-Li faces backwards do more damage than the ones where she faces forwards.
  • For some reason there's a 1x1 hitbox inside of Chun-Li's pushbox during the frames between the bigger, actually useful hitboxes (with the exception of some of the animation frames of the Forward version.) See the detailed hitbox information for more detail.
  • This could be used as an anti-tick throw special since most of the startup is invulnerable, but you're likely better off using Tenshokyaku or Super due to this move's unpredictable nature.

Click to toggle detailed hitbox data.

Startup:

ChunLi sbk1.png ChunLi sbk2.png ChunLi sbk3.png ChunLi sbk4.png ChunLi sbk5&8.png ChunLi sbk6.png ChunLi sbk7.png ChunLi sbk5&8.png
Frame Count 1 4 3 2 3 4 4 2
Simplified 23

Active/Recovery:

  • Short Version:
ChunLi sbk9&17shrt 9&17&25&33&41rh.png ChunLi sbk10&18shrt 10&18&26frwrd 10&18&26&34&42rh.png ChunLi sbk11&19shrt 11&19&27frwrd 11&19&27&35&43rh.png ChunLi sbk12&20shrt 12&20&28frwrd 12&20&28&36&44rh.png ChunLi sbk13&21shrt 13&21&29frwrd 13&21&29&37&45rh.png ChunLi sbk14&22shrt 14&22&30frwrd 14&22&30&38&46rh.png ChunLi sbk15&23shrt 15&23&31frwrd 15&23&31&39rh.png ChunLi sbk16&24shrt 16&24&32frwrd 16&24&32&40rh.png
Frame Count 4 3 2 2 1 1 1 1
Simplified 15
ChunLi sbk9&17shrt 9&17&25&33&41rh.png ChunLi sbk10&18shrt 10&18&26frwrd 10&18&26&34&42rh.png ChunLi sbk11&19shrt 11&19&27frwrd 11&19&27&35&43rh.png ChunLi sbk12&20shrt 12&20&28frwrd 12&20&28&36&44rh.png ChunLi sbk13&21shrt 13&21&29frwrd 13&21&29&37&45rh.png ChunLi sbk14&22shrt 14&22&30frwrd 14&22&30&38&46rh.png ChunLi sbk15&23shrt 15&23&31frwrd 15&23&31&39rh.png ChunLi sbk16&24shrt 16&24&32frwrd 16&24&32&40rh.png
Frame Count 2 1 2 2 3 4 4 2
Simplified 20
ChunLi sbk25&27shrt 34&36frwrd 47&49rh.png ChunLi sbk26shrt.png ChunLi sbk25&27shrt 34&36frwrd 47&49rh.png ChunLi sbk28shrt 36frwrd 50rh.png ChunLi sbk29shrt 37frwrd 51rh.png ChunLi sbk30shrt 38frwrd 52rh.png ChunLi sbk31shrt 39frwrd 54rh.png
Frame Count 2 3 2 2 3 3 6
Simplified 21


  • Forward Version:
ChunLi sbk9&17&25&33frwrd.png ChunLi sbk10&18shrt 10&18&26frwrd 10&18&26&34&42rh.png ChunLi sbk11&19shrt 11&19&27frwrd 11&19&27&35&43rh.png ChunLi sbk12&20shrt 12&20&28frwrd 12&20&28&36&44rh.png ChunLi sbk13&21shrt 13&21&29frwrd 13&21&29&37&45rh.png ChunLi sbk14&22shrt 14&22&30frwrd 14&22&30&38&46rh.png ChunLi sbk15&23shrt 15&23&31frwrd 15&23&31&39rh.png ChunLi sbk16&24shrt 16&24&32frwrd 16&24&32&40rh.png
Frame Count 4 4 3 3 2 2 1 1
Simplified 4 16
ChunLi sbk9&17&25&33frwrd.png ChunLi sbk10&18shrt 10&18&26frwrd 10&18&26&34&42rh.png ChunLi sbk11&19shrt 11&19&27frwrd 11&19&27&35&43rh.png ChunLi sbk12&20shrt 12&20&28frwrd 12&20&28&36&44rh.png ChunLi sbk13&21shrt 13&21&29frwrd 13&21&29&37&45rh.png ChunLi sbk14&22shrt 14&22&30frwrd 14&22&30&38&46rh.png ChunLi sbk15&23shrt 15&23&31frwrd 15&23&31&39rh.png ChunLi sbk16&24shrt 16&24&32frwrd 16&24&32&40rh.png
Frame Count 1 1 1 1 1 1 1 1
Simplified 1 7
ChunLi sbk9&17&25&33frwrd.png ChunLi sbk10&18shrt 10&18&26frwrd 10&18&26&34&42rh.png ChunLi sbk11&19shrt 11&19&27frwrd 11&19&27&35&43rh.png ChunLi sbk12&20shrt 12&20&28frwrd 12&20&28&36&44rh.png ChunLi sbk13&21shrt 13&21&29frwrd 13&21&29&37&45rh.png ChunLi sbk14&22shrt 14&22&30frwrd 14&22&30&38&46rh.png ChunLi sbk15&23shrt 15&23&31frwrd 15&23&31&39rh.png ChunLi sbk16&24shrt 16&24&32frwrd 16&24&32&40rh.png
Frame Count 2 1 1 2 2 3 3 4
Simplified 2 16
ChunLi sbk9&17&25&33frwrd.png
Frame Count 2
ChunLi sbk25&27shrt 34&36frwrd 47&49rh.png ChunLi sbk35frwrd 48rh.png ChunLi sbk25&27shrt 34&36frwrd 47&49rh.png ChunLi sbk28shrt 36frwrd 50rh.png ChunLi sbk29shrt 37frwrd 51rh.png ChunLi sbk30shrt 38frwrd 52rh.png ChunLi sbk31shrt 39frwrd 54rh.png
Frame Count 2 3 2 2 3 3 6
Simplified 21


  • Roundhouse Version:
ChunLi sbk9&17shrt 9&17&25&33&41rh.png ChunLi sbk10&18shrt 10&18&26frwrd 10&18&26&34&42rh.png ChunLi sbk11&19shrt 11&19&27frwrd 11&19&27&35&43rh.png ChunLi sbk12&20shrt 12&20&28frwrd 12&20&28&36&44rh.png ChunLi sbk13&21shrt 13&21&29frwrd 13&21&29&37&45rh.png ChunLi sbk14&22shrt 14&22&30frwrd 14&22&30&38&46rh.png ChunLi sbk15&23shrt 15&23&31frwrd 15&23&31&39rh.png ChunLi sbk16&24shrt 16&24&32frwrd 16&24&32&40rh.png
Frame Count 5 4 4 3 3 2 2 2
2 25
ChunLi sbk9&17shrt 9&17&25&33&41rh.png ChunLi sbk10&18shrt 10&18&26frwrd 10&18&26&34&42rh.png ChunLi sbk11&19shrt 11&19&27frwrd 11&19&27&35&43rh.png ChunLi sbk12&20shrt 12&20&28frwrd 12&20&28&36&44rh.png ChunLi sbk13&21shrt 13&21&29frwrd 13&21&29&37&45rh.png ChunLi sbk14&22shrt 14&22&30frwrd 14&22&30&38&46rh.png ChunLi sbk15&23shrt 15&23&31frwrd 15&23&31&39rh.png ChunLi sbk16&24shrt 16&24&32frwrd 16&24&32&40rh.png
Frame Count 1 1 1 1 1 1 1 1
Simplified 8
ChunLi sbk9&17shrt 9&17&25&33&41rh.png ChunLi sbk10&18shrt 10&18&26frwrd 10&18&26&34&42rh.png ChunLi sbk11&19shrt 11&19&27frwrd 11&19&27&35&43rh.png ChunLi sbk12&20shrt 12&20&28frwrd 12&20&28&36&44rh.png ChunLi sbk13&21shrt 13&21&29frwrd 13&21&29&37&45rh.png ChunLi sbk14&22shrt 14&22&30frwrd 14&22&30&38&46rh.png ChunLi sbk15&23shrt 15&23&31frwrd 15&23&31&39rh.png ChunLi sbk16&24shrt 16&24&32frwrd 16&24&32&40rh.png
Frame Count 1 1 1 1 1 2 1 1
Simplified 9
ChunLi sbk9&17shrt 9&17&25&33&41rh.png ChunLi sbk10&18shrt 10&18&26frwrd 10&18&26&34&42rh.png ChunLi sbk11&19shrt 11&19&27frwrd 11&19&27&35&43rh.png ChunLi sbk12&20shrt 12&20&28frwrd 12&20&28&36&44rh.png ChunLi sbk13&21shrt 13&21&29frwrd 13&21&29&37&45rh.png ChunLi sbk14&22shrt 14&22&30frwrd 14&22&30&38&46rh.png
Frame Count 2 2 3 3 3 3
Simplified 16
ChunLi sbk25&27shrt 34&36frwrd 47&49rh.png ChunLi sbk35frwrd 48rh.png ChunLi sbk25&27shrt 34&36frwrd 47&49rh.png ChunLi sbk28shrt 36frwrd 50rh.png ChunLi sbk29shrt 37frwrd 51rh.png ChunLi sbk30shrt 38frwrd 52rh.png ChunLi sbk53rh.png ChunLi sbk31shrt 39frwrd 54rh.png
Frame Count 2 3 2 2 3 3 4 6
Simplified 25

Aerial Spinning Bird Kick

Aerial Spinning Bird Kick
Air [4]6K
Air Cb.pngF.png + K.png
ChunLi asbk9.png
ChunLi asbk13.png
There's an additional 1x1 hitbox near Chun's thighs in between these frames.
Lk.png Damage Dizzy Dizzy Time Cancel Guard Act. Range
12[1] 7~13 90 None High N/A
Startup Active Recovery Total Frame Adv. Meter
24* 3(9)2* 38+∞ Dependent 8


Mk.png Damage Dizzy Dizzy Time Cancel Guard Act. Range
12[1] 7~13 90 None High N/A
Startup Active Recovery Total Frame Adv. Meter
24* 3(9)2* 38+∞ Dependent 8


Hk.png Damage Dizzy Dizzy Time Cancel Guard Act. Range
12[1] 7~13 90 None High N/A
Startup Active Recovery Total Frame Adv. Meter
21* 2(6)2* 31+∞ Dependent 8

The Spinning Bird Kick but in the air.

  • Landing before this move finishes its last active frame will stick you in a 25 frame long landing animation. If the animation completes, it's only 10 frames long.
  • Cannot be used after a head stomp like in SF2 Hyper Fighting.
  • This move has the 1x1 hitbox during most of its inbetween frames like the grounded version.
  • Due to the long charge time required, this move is near impossible to perform during a neutral or forward jump. As a result this move is mostly used for meter building or avoiding specific attacks.
  • You can use this move during or just after a wall jump however. Using it before the walljump animation ends will retain your original jump arc, while doing it just after you walljump will have you use the walljump's trajectory.

Click to toggle detailed hitbox data.

Startup:

ChunLi asbk1.png ChunLi asbk2.png ChunLi asbk3.png ChunLi asbk4.png ChunLi asbk5&14.png
Frame Count 2 4 3 2 4
Simplified 15

Active/Recovery:

ChunLi asbk6.png ChunLi asbk7.png ChunLi asbk8.png ChunLi asbk9.png ChunLi asbk10.png ChunLi asbk11.png ChunLi asbk12.png ChunLi asbk13.png
Frame Count (Short) 3 3 3 3 3 3 3 2
Simplified (Short) 3 20
Frame Count (Forward) 3 3 3 3 3 3 3 2
Simplified (Forward) 3 20
Frame Count (Rh) 2 2 2 2 2 2 2 2
Simplified (Rh) 2 14
ChunLi asbk5&14.png ChunLi asbk15.png ChunLi asbk16.png ChunLi asbk17.png ChunLi asbk18.png
Frame Count 3 2 3 3
Simplified
  • Landing, partial: (When Chun lands before the last hitting frame)
ChunLi asbkl1&3.png ChunLi asbkl2.png ChunLi asbkl1&3.png ChunLi asbkl4.png ChunLi asbkl5.png ChunLi asbkl6.png ChunLi asbkl7.png ChunLi asbkl8.png
Frame Count 3 3 2 2 3 3 4 5
Simplified 25
  • Landing, complete: (When Chun lands after the last hitting frame)
ChunLi asbkcl1&3.png ChunLi asbkcl2.png ChunLi asbkcl1&3.png
Frame Count 2 5 3
Simplified 10

Super Combo

Senretsukyaku
[4]646K
Cb.pngF.pngB.pngF.png + K.png
ChunLi super6.png
ChunLi super12.png
ChunLi super15.png
ChunLi super17.png
ChunLi super19.png
ChunLi super21.png
Damage Dizzy Dizzy Time Cancel Guard Act. Range
16[0] x 6 0~4 x 6 20 x 6 None Mid N/A
Startup Active Recovery Total Frame Adv. Meter
10 4(9)6(6)1(1)1(1)1(1)1 14 56 Hit: Hard KD
Block: +9
-

Chun-Li goes full power with a non-stop barrage of kicks. Often considered one of if not the best Super Combo in the game.

  • Affected by the Input Storing glitch. The second towards can be held as long as you need before performing the move. You can also stop holding towards for up to 12 frames and still keep the Super stored.
    • NOTE: The Input Storing Glitch was fixed in Hyper Street Fighter 2. An alternate version of Chun-Li with the glitch restored can be selected by holding Start on Version Select, selecting the Super Turbo/Super X version, and then picking Chun-Li.
  • Invincible on frames 1-14.
  • Since this move starts a juggle state, you can use a Tenshokyaku afterwards to get an additional 2 hits in. This is useful if you can't hit every hit of the super (due to an early anti-air, for example).

Click to toggle detailed hitbox data.

Invincible part:

ChunLi super1.png ChunLi super2.png ChunLi super3.png ChunLi super4.png ChunLi super5.png ChunLi super6.png
Frame Count 1 + [18] + 1 2 2 2 2 4
Simplified 10 4

Non-invincible part:

ChunLi super7.png ChunLi super8.png ChunLi super9.png ChunLi super10.png ChunLi super11&13.png ChunLi super12.png
Frame Count 1 2 2 2 2 6
Simplified 9 6
ChunLi super11&13.png ChunLi super14.png ChunLi super15.png ChunLi super16.png ChunLi super17.png ChunLi super18&22.png
Frame Count 3 3 1 1 1 1
Simplified 6 1 1 1 1
ChunLi super19.png ChunLi super20.png ChunLi super21.png ChunLi super18&22.png ChunLi super23.png ChunLi super24.png
Frame Count 1 1 1 1 6 7
Simplified 1 1 1 14

Misc Animations

Jump Animations

  • Neutral Jump:
ChunLi bj1&13 nj1&11 fj1&13.png ChunLi bj2 nj2 fj2.png ChunLi bj3&11 nj3&9 fj3&11.png ChunLi nj4&8.png ChunLi nj5&7.png ChunLi nj6.png ChunLi nj5&7.png ChunLi nj4&8.png ChunLi bj3&11 nj3&9 fj3&11.png ChunLi bj12 nj10 fj12.png ChunLi bj1&13 nj1&11 fj1&13.png
Frame Count 2 1 12 5 4 8 4 5 7 1 7*
Simplified 2 1 45 1 7*
  • Back Jump:
ChunLi bj1&13 nj1&11 fj1&13.png ChunLi bj2 nj2 fj2.png ChunLi bj3&11 nj3&9 fj3&11.png ChunLi bj4 fj10.png ChunLi bj5 fj9.png ChunLi bj6 fj8.png ChunLi bj7 fj7.png ChunLi bj8 fj6.png ChunLi bj9 fj5.png ChunLi bj10 fj4.png ChunLi bj3&11 nj3&9 fj3&11.png ChunLi bj12 nj10 fj12.png ChunLi bj1&13 nj1&11 fj1&13.png
Frame Count 2 1 10 6 5 4 3 4 5 6 3 1 7*
Simplified 2 1 46 1 7*
  • Forward Jump:
ChunLi bj1&13 nj1&11 fj1&13.png ChunLi bj2 nj2 fj2.png ChunLi bj3&11 nj3&9 fj3&11.png ChunLi bj10 fj4.png ChunLi bj9 fj5.png ChunLi bj8 fj6.png ChunLi bj7 fj7.png ChunLi bj6 fj8.png ChunLi bj5 fj9.png ChunLi bj4 fj10.png ChunLi bj3&11 nj3&9 fj3&11.png ChunLi bj12 nj10 fj12.png ChunLi bj1&13 nj1&11 fj1&13.png
Frame Count 2 1 10 6 5 4 3 4 5 6 1+ 1 7*
Simplified 2 1 44+ 1 7*

Chun has a considerably fast prejump. In contrast, she has a huge jump arc that's easy to react to. This is especially true against characters with DP moves; Ryu for instance can punish her with his DP most of the time.
Chun-Li, just like Claw, has the ability to do wall jumps. That's why the Forward Jump has a '+' on the final frame of the aerial jumping part: that animation will have longer duration in case it's a wall jump.

The landing recovery has a special property which allows it to be canceled into certain actions. At the first landing frame, you can perform throws (including command throws), and on the second landing frame, you can start another jump, attack with a normal or special move, or block. Blocking not being until the second landing frame, as well as hitbox-hurtbox interactions having priority over throwbox-throw hurtbox is why sweeps work as anti airs in this game.
Things are different when jumping over your opponent, however. In that situation it's possible to walk back/forward, to jump again or to even block on the first landing frame! Strangely, if a throw is timed on the first landing frame of a jump that crosses over, a throwbox will never come out, even though that input will result in a normal coming out 2 frames later (like it normally would). Anyway, being able to block on the first landing frame can help a little bit on some safe jump crossup setups, or maybe in other situations as well if your character has a huge jump arc.



Game Navigation

General
Controls and Notation
System
HUD
FAQ
New Characters
Balrog
Blanka
Cammy
Chun-Li
Dee Jay
Dhalsim
E. Honda
Fei Long
Guile
Ken
M. Bison
Ryu
Sagat
T. Hawk
Vega
Zangief
Akuma
Old Characters
O. Balrog
O. Blanka
O. Cammy
O. Chun-Li
O. Dee Jay
O. Dhalsim
O. E. Honda
O. Fei Long
O. Guile
O. Ken
O. M. Bison
O. Ryu
O. Sagat
O. T. Hawk
O. Vega
O. Zangief