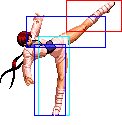
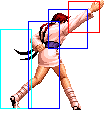
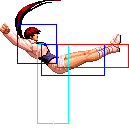
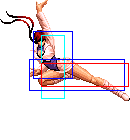
No edit summary |
|||
| Line 18: | Line 18: | ||
=Combos= | =Combos= | ||
=In-depth Analysis= | ==In-depth Analysis== | ||
== | ===[[The_King_of_Fighters_2002/Normals_Guide|Movelist]]=== | ||
{|border="1" | |||
! width="9%"| | |||
! Frames | |||
! Advantage | |||
! Cancel | |||
! Block | |||
!colspan="4"| Hitbox | |||
! Notes | |||
|- | |||
|colspan="10" align="center"| '''Standing Close''' | |||
|- | |||
! [[image:snka.gif]] | |||
|align="center"| 5/2/6 | |||
|align="center"| +4/+2 | |||
|align="center"| | |||
|align="center"| HL | |||
|colspan="4" | [[image:Shermie98_stA.png|center]] | |||
| Identical to far A | |||
|- | |||
! [[image:snkb.gif]] | |||
|align="center"| 5/3(5)9/5 | |||
|align="center"| -2/-4 | |||
|align="center"| | |||
|align="center"| HL | |||
|colspan="2" valign="bottom" style="border-right:0px;"| [[image:Shermie98_stB1.png|center]] | |||
|colspan="2" valign="bottom" style="border-left:0px;"| [[image:Shermie98_stB2.png|center]] | |||
| Identical to far B | |||
|- | |||
! [[image:snkc.gif]] | |||
|align="center"| 4/6/16 | |||
|align="center"| -2/-4 | |||
|align="center"| | |||
|align="center"| HL | |||
|colspan="4" | [[image:Shermie98_clC.png|center]] | |||
| | |||
|- | |||
! [[image:snkd.gif]] | |||
|align="center"| 8/5/30 | |||
|align="center"| -15/-17 | |||
| | |||
|align="center"| HL | |||
|colspan="4" | [[image:Shermie98_stD.png|center]] | |||
| Identical to far D | |||
|- | |||
|colspan="10" align="center"| '''Standing Far''' | |||
|- | |||
! [[image:snka.gif]] | |||
|align="center"| 5/2/6 | |||
|align="center"| +4/+2 | |||
|align="center"| | |||
|align="center"| HL | |||
|colspan="4" | [[image:Shermie98_stA.png|center]] | |||
| A standard anti-air normal. Shorter horizontal range than other characters. In most situations that Standing A could be used, Crouching C would be preferable but this move still has its uses. | |||
|- | |||
! [[image:snkb.gif]] | |||
|align="center"| 5/3(5)9/5 | |||
|align="center"| -2/-4 | |||
|align="center"| | |||
|align="center"| HL | |||
|colspan="2" valign="bottom" style="border-right:0px;"| [[image:Shermie98_stB1.png|center]] | |||
|colspan="2" valign="bottom" style="border-left:0px;"| [[image:Shermie98_stB2.png|center]] | |||
| The first hit is cancelable. This move could link from cr.A and cr.B. It's more difficult to link from cr.B but being able to threaten with a low hitting, hit-confirm combo is well worth learning to help break alternate guarding opponents. It's a decent anti air to use from mid-range to stop a hop but it stays out for quite a bit of time so it's relatively easy to sweep. | |||
|- | |||
! [[image:snkc.gif]] | |||
|align="center"| 14/2+3/27 | |||
|align="center"| -12/-14 | |||
| | |||
|align="center"| HL | |||
|colspan="2" valign="bottom" style="border-right:0px;"| [[image:Shermie98_stC1.png|center]] | |||
|colspan="2" valign="bottom" style="border-left:0px;"| [[image:Shermie98_stC2.png|center]] | |||
| An outstretched palm attack that covers the area above Shermie's head and stop about right in front of her face. It's a move that is in the same spirit of E. Honda's far Fierce punch. This move isn't too reliable in hitting opponents let alone for pressuring and there are better anti-air options than it. It's used occasionally to frame trap an opponent by making the opponent to block a normal and if the opponent was mashing a reversal hop or tried to approach on the ground, the opponent will just be struck by the Standing C. | |||
|- | |||
! [[image:snkd.gif]] | |||
|align="center"| 8/5/30 | |||
|align="center"| -15/-17 | |||
| | |||
|align="center"| HL | |||
|colspan="4" | [[image:Shermie98_stD.png|center]] | |||
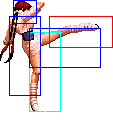
| A high kick that is similar to Goro's Standing D. What this move lacks is the horizontal range that Goro's Standing D has and it's very situational in anti-airing with. | |||
|- | |||
! [[image:snkc.gif]]+[[image:snkd.gif]] | |||
|align="center"| 11/6/17 | |||
|align="center"| KD/-1 | |||
|align="center"| S,Su | |||
|align="center"| HL | |||
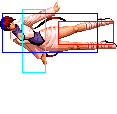
|colspan="4"| [[image:Shermie98_stCD.png|center]] | |||
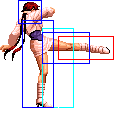
| Shermie defies gravity and positions her pelvic area in a stationary space and performs a drop kick without dropping. Acts like a sobat kick and it goes over most crouching attacks. Also functions as an anti air from a jump that was spaced far upon landing. | |||
|- | |||
|colspan="10" align="center"| '''Crouching''' | |||
|- | |||
! [[image:snka.gif]] | |||
|align="center"| 5/2/6 | |||
|align="center"| +4/+2 | |||
|align="center"| | |||
|align="center"| HL | |||
|colspan="4" | [[image:Shermie98_crA.png|center]] | |||
| A fast slap without much horizontal range. Could be used to do a meaty frame trap such as Crouching A > Close C. Generally it doesn't have much uses. Hits mid. | |||
|- | |||
! [[image:snkb.gif]] | |||
|align="center"| 5/5/9 | |||
|align="center"| -2/-4 | |||
|align="center"| | |||
|align="center"| L | |||
|colspan="4" | [[image:Shermie98_crB.png|center]] | |||
| A low poke that isn't terribly fast. Good to use occasionally to break alternate guarding. Links into Standing B. | |||
|- | |||
! [[image:snkc.gif]] | |||
|align="center"| 4/3+7/17 | |||
|align="center"| -7/-9 | |||
|align="center"| | |||
|align="center"| HL | |||
|colspan="2" valign="bottom" style="border-right:0px;"| [[image:Shermie98_crC1.png|center]] | |||
|colspan="2" valign="bottom" style="border-left:0px;"| [[image:Shermie98_crC2.png|center]] | |||
| This is Shermie's best anti-air normal. Beats out most jump-ins. Easily whiff cancelable into Forward B for whatever kind of zoning/gimmick. | |||
|- | |||
! [[image:snkd.gif]] | |||
|align="center"| 10/8/19 | |||
|align="center"| KD/-9 | |||
| | |||
|align="center"| L | |||
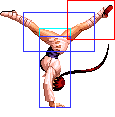
|colspan="4" | [[image:Shermie98_crD.png|center]] | |||
| A relatively good sweep. It's good in that it shrinks Shermie's hitbox extremely low and it's hard to properly hop or jump onto her with a jump in. One would have to do a deep jump in to punish it; otherwise, this move easily acts like an anti-air since many jumps get caught by it. This sweep is also slower than most other sweeps and it's not as good to play footsies with. | |||
|- | |||
|colspan="10" align="center"| '''Jump''' | |||
|- | |||
! [[image:snka.gif]] | |||
|align="center"| 6/8/- | |||
|align="center"| -/- | |||
| | |||
|align="center"| H | |||
|colspan="4" | [[image:Shermie98_jA.png|center]] | |||
| An air to air. Mainly used during a hop to air to air a full/super jump. | |||
|- | |||
! [[image:snkb.gif]] | |||
|align="center"| 6/6/- | |||
|align="center"| -/- | |||
| | |||
|align="center"| H | |||
|colspan="4" | [[image:Shermie98_jB.png|center]] | |||
| Has a similar application to Jumping A. | |||
|- | |||
! [[image:snkc.gif]] | |||
|align="center"| 6/8/- | |||
|align="center"| -/- | |||
| | |||
|align="center"| H | |||
|colspan="4" | [[image:Shermie98_jC.png|center]] | |||
| One of Shermie's best jump-in attacks. It's an extremely good ambiguous cross up with a good hitbox. This is a key component of her okizeme game. It can air to air to an extent but it's not as good as her others. | |||
|- | |||
! [[image:snkd.gif]] | |||
|align="center"| 9/8/- | |||
|align="center"| -/- | |||
| | |||
|align="center"| H | |||
|colspan="4" | [[image:Shermie98_jD.png|center]] | |||
| An air-to-ground jump-in attack that's hard for a number of the cast to anti-air. It's similar to Goro's Jumping D. It's cross up hitbox is not as big as Jumping C but it's still pretty big for a KOF cross up. It also functions as an air-to-air attack against an airborne opponent that is about at the same height in the jump. | |||
|- | |||
! [[image:snkc.gif]]+[[image:snkd.gif]] | |||
|align="center"| 13/4/- | |||
|align="center"| KD/- | |||
| | |||
|align="center"| HL | |||
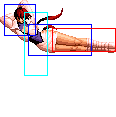
|colspan="4"| [[image:Shermie98_jCD.png|center]] | |||
| This move is similar to Shermie's Neutral Jumping D but her legs are further apart, signifying that her hitbox on this move is also wider. As a Jumping CD move, it doesn't have overhead properties but can control space like Neutral Jumping D from multiple angles and jumping/hopping trajectories. | |||
|- | |||
|colspan="10" align="center"| '''Neutral Jump''' | |||
|- | |||
! [[image:snkd.gif]] | |||
|align="center"| 6/10/- | |||
|align="center"| -/- | |||
| | |||
|align="center"| H | |||
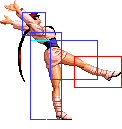
|colspan="4" | [[image:Shermie98_njD.png|center]] | |||
| One of Shermie's best tools when going on the defense or trying to keep someone out during her neutral game. Shermie does a drop kick that directly hits horizontally and it beats out most aerial approaches as well as some grounded ones. Shermie could also keep herself safe from preemptive air-to-air attacks that are trying to stuff this attack by just Air Guarding during a Full Neutral Jump. Best not to use it too generously or the opponent could adapt and run under the full jump and meaty/anti-air Shermie on the other side. | |||
''' | |- | ||
|colspan="10" align="center"| '''Command Normals''' | |||
''' | |- | ||
! <br>f+[[image:snkb.gif]]<br><br> | |||
== | |align="center"| 15/4(4)4+4+4/11 | ||
|align="center"| -3/-5 | |||
| | |||
|align="center"| HL,H | |||
== | |colspan="2" valign="bottom" style="border-right:0px; border-bottom:0px;"| [[image:Shermie98_fB1.png|center]] | ||
|colspan="2" valign="bottom" style="border-left:0px; border-bottom:0px;"| [[image:Shermie98_fB2.png|center]] | |||
|rowspan="2"|'''Shermie Stand - f + B'''<br> | |||
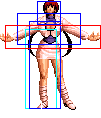
A two hit move. The first hit has a mid property while the second hit has an overhead property (unless Shermie cancels into Shermie Stand from a normal move). Although not to be used too much, the first hit of Shermie Stand could be used as a means of anti-air. When canceled into, the second hit of this move becomes cancelable into a special or super although there isn't anything that combos afterwards. | |||
|- | |||
! f+[[image:snkb.gif]]<br>(cancel) | |||
|align="center"| 15/4(4)4+4+4/11 | |||
|align="center"| -3/-5 | |||
|align="center"| S,Su | |||
|align="center"| HL | |||
|colspan="2" valign="bottom" style="border-right:0px; border-top:0px;"| [[image:Shermie98_fB3.png|center]] | |||
|colspan="2" valign="bottom" style="border-left:0px; border-top:0px;"| [[image:Shermie98_fB4.png|center]] | |||
|} | |||
{{Template:The King of Fighters '98: The Slugfest}} | {{Template:The King of Fighters '98: The Slugfest}} | ||
[[Category:The King of Fighters '98: The Slugfest]] | [[Category:The King of Fighters '98: The Slugfest]] | ||
