m (→Combos) |
No edit summary |
||
| Line 36: | Line 36: | ||
|align="center"| 3/4/5 | |align="center"| 3/4/5 | ||
|align="center"| +3/+1 | |align="center"| +3/+1 | ||
| | |align="center"| C | ||
|align="center"| HL | |align="center"| HL | ||
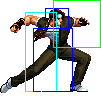
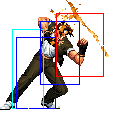
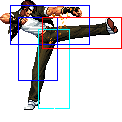
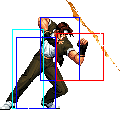
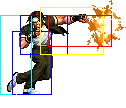
|colspan="4" | [[image:Kyo98_clA.png|center]] | |colspan="4" | [[image:Kyo98_clA.png|center]] | ||
| Line 44: | Line 44: | ||
|align="center"| 5/4/8 | |align="center"| 5/4/8 | ||
|align="center"| 0/-2 | |align="center"| 0/-2 | ||
| | |align="center"| C | ||
|align="center"| L | |align="center"| L | ||
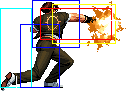
|colspan="4" | [[image:Kyo98_clB.png|center]] | |colspan="4" | [[image:Kyo98_clB.png|center]] | ||
| Line 52: | Line 52: | ||
|align="center"| 2/3+9/9 | |align="center"| 2/3+9/9 | ||
|align="center"| -1/-3 | |align="center"| -1/-3 | ||
| | |align="center"| C (1st part) | ||
|align="center"| HL | |align="center"| HL | ||
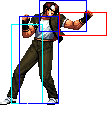
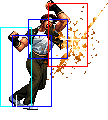
|valign="bottom" colspan="2" style="border-right:0px;"| [[image:Kyo98_clC1.png|center]] | |valign="bottom" colspan="2" style="border-right:0px;"| [[image:Kyo98_clC1.png|center]] | ||
| Line 61: | Line 61: | ||
|align="center"| 4/3/22 | |align="center"| 4/3/22 | ||
|align="center"| -5/-7 | |align="center"| -5/-7 | ||
| | |align="center"| C | ||
|align="center"| HL | |align="center"| HL | ||
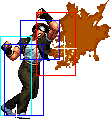
|colspan="4" | [[image:Kyo98_clD.png|center]] | |colspan="4" | [[image:Kyo98_clD.png|center]] | ||
| Line 71: | Line 71: | ||
|align="center"| 3/4/5 | |align="center"| 3/4/5 | ||
|align="center"| +3/+1 | |align="center"| +3/+1 | ||
| | |align="center"| C | ||
|align="center"| HL | |align="center"| HL | ||
|colspan="4" | [[image:Kyo98_stA.png|center]] | |colspan="4" | [[image:Kyo98_stA.png|center]] | ||
| Line 79: | Line 79: | ||
|align="center"| 7/3/13 | |align="center"| 7/3/13 | ||
|align="center"| -5/-7 | |align="center"| -5/-7 | ||
| | |align="center"| - | ||
|align="center"| HL | |align="center"| HL | ||
|colspan="4" | [[image:Kyo98_stB.png|center]] | |colspan="4" | [[image:Kyo98_stB.png|center]] | ||
| Line 87: | Line 87: | ||
|align="center"| 12/2/17 | |align="center"| 12/2/17 | ||
|align="center"| +1/-1 | |align="center"| +1/-1 | ||
| | |align="center"| C | ||
|align="center"| HL | |align="center"| HL | ||
|colspan="4" | [[image:Kyo98_stC.png|center]] | |colspan="4" | [[image:Kyo98_stC.png|center]] | ||
| Line 95: | Line 95: | ||
|align="center"| 14/5/12 | |align="center"| 14/5/12 | ||
|align="center"| +3/+1 | |align="center"| +3/+1 | ||
| | |align="center"| - | ||
|align="center"| HL | |align="center"| HL | ||
|colspan="4" | [[image:Kyo98_stD.png|center]] | |colspan="4" | [[image:Kyo98_stD.png|center]] | ||
| Line 103: | Line 103: | ||
|align="center"| 19/4/16 | |align="center"| 19/4/16 | ||
|align="center"| KD/+2 | |align="center"| KD/+2 | ||
| | |align="center"| S | ||
|align="center"| HL | |align="center"| HL | ||
|colspan="4"| [[image:Kyo98_stCD.png|center]] | |colspan="4"| [[image:Kyo98_stCD.png|center]] | ||
| Line 113: | Line 113: | ||
|align="center"| 3/4/5 | |align="center"| 3/4/5 | ||
|align="center"| +3/+1 | |align="center"| +3/+1 | ||
| | |align="center"| C | ||
|align="center"| HL | |align="center"| HL | ||
|colspan="4" | [[image:Kyo98_crA.png|center]] | |colspan="4" | [[image:Kyo98_crA.png|center]] | ||
| Line 121: | Line 121: | ||
|align="center"| 3/4/5 | |align="center"| 3/4/5 | ||
|align="center"| +3/+1 | |align="center"| +3/+1 | ||
| | |align="center"| - | ||
|align="center"| L | |align="center"| L | ||
|colspan="4" | [[image:Kyo98_crB.png|center]] | |colspan="4" | [[image:Kyo98_crB.png|center]] | ||
| Line 129: | Line 129: | ||
|align="center"| 4/3+3/20 | |align="center"| 4/3+3/20 | ||
|align="center"| -6/-8 | |align="center"| -6/-8 | ||
| | |align="center"| C (1st part) | ||
|align="center"| HL | |align="center"| HL | ||
|valign="bottom" colspan="2" style="border-right:0px;"| [[image:Kyo98_crC1.png|center]] | |valign="bottom" colspan="2" style="border-right:0px;"| [[image:Kyo98_crC1.png|center]] | ||
| Line 138: | Line 138: | ||
|align="center"| 11/3/19 | |align="center"| 11/3/19 | ||
|align="center"| KD/-4 | |align="center"| KD/-4 | ||
| | |align="center"| C | ||
|align="center"| L | |align="center"| L | ||
|colspan="4" | [[image:Kyo98_crD.png|center]] | |colspan="4" | [[image:Kyo98_crD.png|center]] | ||
| Line 148: | Line 148: | ||
|align="center"| 5/8/- | |align="center"| 5/8/- | ||
|align="center"| -/- | |align="center"| -/- | ||
| | |align="center"| - | ||
|align="center"| H | |align="center"| H | ||
|colspan="4" | [[image:Kyo98_jA.png|center]] | |colspan="4" | [[image:Kyo98_jA.png|center]] | ||
| Line 156: | Line 156: | ||
|align="center"| 5/9/- | |align="center"| 5/9/- | ||
|align="center"| -/- | |align="center"| -/- | ||
| | |align="center"| - | ||
|align="center"| H | |align="center"| H | ||
|colspan="4" | [[image:Kyo98_jB.png|center]] | |colspan="4" | [[image:Kyo98_jB.png|center]] | ||
| Line 164: | Line 164: | ||
|align="center"| 6/4/- | |align="center"| 6/4/- | ||
|align="center"| -/- | |align="center"| -/- | ||
| | |align="center"| - | ||
|align="center"| H | |align="center"| H | ||
|colspan="4" | [[image:Kyo98_jC.png|center]] | |colspan="4" | [[image:Kyo98_jC.png|center]] | ||
| Line 172: | Line 172: | ||
|align="center"| 9/5/- | |align="center"| 9/5/- | ||
|align="center"| -/- | |align="center"| -/- | ||
| | |align="center"| - | ||
|align="center"| H | |align="center"| H | ||
|colspan="4" | [[image:Kyo98_jD.png|center]] | |colspan="4" | [[image:Kyo98_jD.png|center]] | ||
| Line 180: | Line 180: | ||
|align="center"| 17/4/- | |align="center"| 17/4/- | ||
|align="center"| KD/- | |align="center"| KD/- | ||
| | |align="center"| - | ||
|align="center"| HL | |align="center"| HL | ||
|colspan="4"| [[image:Kyo98_jCD.png|center]] | |colspan="4"| [[image:Kyo98_jCD.png|center]] | ||
| Line 190: | Line 190: | ||
|align="center"| 5/8/- | |align="center"| 5/8/- | ||
|align="center"| -/- | |align="center"| -/- | ||
|align="center"| | |align="center"| - | ||
|align="center"| H | |align="center"| H | ||
|colspan="4" | [[image:Kyo98_jA.png|center]] | |colspan="4" | [[image:Kyo98_jA.png|center]] | ||
| Line 198: | Line 198: | ||
|align="center"| 5/9/- | |align="center"| 5/9/- | ||
|align="center"| -/- | |align="center"| -/- | ||
| | |align="center"| - | ||
|align="center"| H | |align="center"| H | ||
|colspan="4" | [[image:Kyo98_juB.png|center]] | |colspan="4" | [[image:Kyo98_juB.png|center]] | ||
| Line 206: | Line 206: | ||
|align="center"| 6/4/- | |align="center"| 6/4/- | ||
|align="center"| -/- | |align="center"| -/- | ||
| | |align="center"| - | ||
|align="center"| H | |align="center"| H | ||
|colspan="4" | [[image:Kyo98_jC.png|center]] | |colspan="4" | [[image:Kyo98_jC.png|center]] | ||
| Line 214: | Line 214: | ||
|align="center"| 7/8/- | |align="center"| 7/8/- | ||
|align="center"| -/- | |align="center"| -/- | ||
| | |align="center"| - | ||
|align="center"| H | |align="center"| H | ||
|colspan="4" | [[image:Kyo98_juD.png|center]] | |colspan="4" | [[image:Kyo98_juD.png|center]] | ||
| Line 224: | Line 224: | ||
|align="center"| 11/7(3)7/18 | |align="center"| 11/7(3)7/18 | ||
|align="center"| -5/-7 | |align="center"| -5/-7 | ||
| | |align="center"| -/- | ||
|align="center"| HL | |align="center"| HL/H | ||
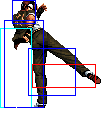
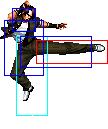
|valign="bottom" rowspan="2" colspan="2" style="border-right:0px;"| [[image:Kyo98_fB1.png|center]] | |valign="bottom" rowspan="2" colspan="2" style="border-right:0px;"| [[image:Kyo98_fB1.png|center]] | ||
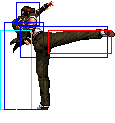
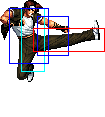
|valign="bottom" rowspan="2" colspan="2" style="border-left:0px;"| [[image:Kyo98_fB2.png|center]] | |valign="bottom" rowspan="2" colspan="2" style="border-left:0px;"| [[image:Kyo98_fB2.png|center]] | ||
| Line 233: | Line 233: | ||
|align="center"| 11/7(3)7/18 | |align="center"| 11/7(3)7/18 | ||
|align="center"| -5/-7 | |align="center"| -5/-7 | ||
|align="center"| S | |align="center"| -/S | ||
|align="center"| HL | |align="center"| HL/HL | ||
|- | |- | ||
! df+[[image:snkd.gif]] | ! df+[[image:snkd.gif]] | ||
|align="center"| 2/3(12)4/24 | |align="center"| 2/3(12)4/24 | ||
|align="center"| -8/-10 | |align="center"| -8/-10 | ||
| | |align="center"| -/- | ||
|align="center"| L | |align="center"| L/L | ||
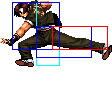
|valign="bottom" colspan="2" style="border-right:0px;"| [[image:Kyo98_dfD1.png|center]] | |valign="bottom" colspan="2" style="border-right:0px;"| [[image:Kyo98_dfD1.png|center]] | ||
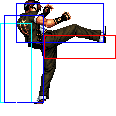
|valign="bottom" colspan="2" style="border-left:0px;"| [[image:Kyo98_dfD2.png|center]] | |valign="bottom" colspan="2" style="border-left:0px;"| [[image:Kyo98_dfD2.png|center]] | ||
| Line 248: | Line 248: | ||
|align="center"| 6/5/- | |align="center"| 6/5/- | ||
|align="center"| -/- | |align="center"| -/- | ||
| | |align="center"| - | ||
|align="center"| H | |align="center"| H | ||
|colspan="4"| [[image:Kyo98_jdC.png|center]] | |colspan="4"| [[image:Kyo98_jdC.png|center]] | ||
Revision as of 13:30, 7 May 2018
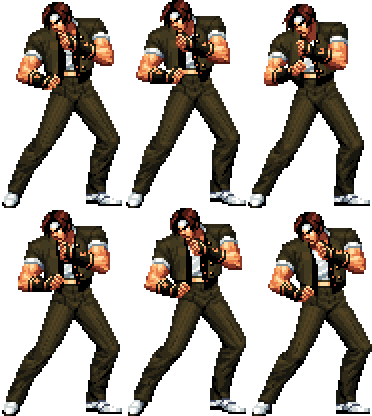
Kyo Kusanagi
Kyo is a cool guy. He is a professional male model, and his sexy looks and money get him all the popular chicks. This makes him a top tier player. But like P. Diddy say, mo money mo problems!
In a nutshell
Kyo is an extremely strong top-tier character, focusing around mid/close range poking and rushdown. He does not have a command throw, but his mixups are very good thanks to high priority on his air (j.B, j.d+C) and ground moves (close C, crouching B, qcf+A). His meterless combos do a lot of damage and dizzy quickly, and can do around 50% easily with meter. He requires a medium level of execution; mostly dealing with hit-checking into qcf,qcf+A consistently, and being very familiar with doing short/hyper hops in execution and recognizing the appropriate range and situations to use them in.
Colors

|

|

|

|
Movelist
Throws
- b or f + C - Breakable, forward knockdown, face forward, rollable.
- b or f + D - Breakable, reverse knockdown, back turned, un-rollable.
D throw preferable unless you have them in the corner for better wakeups.
Special Moves
Counter/Uppercut Thing (qcb+P) - Not really used for the uppercut, but can catch moves if they connect right after it starts up. This is actually not a bad move, and you'll find a ton of setups for it if you experiment. Here's one I already mentioned: qcf+C (blocked), qcb+A.
Desperation Moves
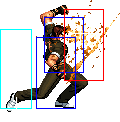
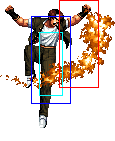
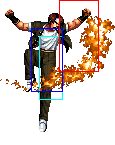
Orochinagi (qcb,hcf+P) - A version is slower and has lower-body invincibility, C version is faster and has upper-body invincibility. C version can combo from Kyo's hard attacks or a chained f+B. It can connect after qcf+D~D for max damage. Can be charged. The MAX version surrounds him in flame, and has a reduced hitbox size (you're probably going to run into flames before you hit him).
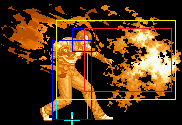
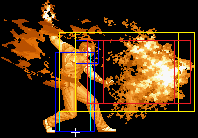
Final Showdown (qcf,qcf+P) - C version has a tiny bit more invincibility. Creates a huge hitbox in front of his feet spanning about 1.5 character spaces. Comboable off lights (which means comboable off a low cr.B,cr.A, etc.), and is Kyo's scariest source of damage, as it does quite a chunk more than the average DM. Since it's so fast, it serves as a punisher for many laggy moves, like Iori's 1/3 or 2/3 rekka's, or Iori's sweep. Can be used as an anti-air as well. MAX version does more damage.
Combos
Here are some important combos with Kyo. I tried to list the most important combos at the top.
- cl.C xx qcf+C~hcb+C~f+C
- cr.B,cr.A/cl.A/cl.B xx qcf,qcf+P (PRACTICE this and get as consistent as you can with it to play an effective Kyo; Sometimes you can get f.A/B depending of your distance, so cr.A is the safest, but hardest option, and is the one you should practice the most.)
- cr.B,cr.A/cl.A,d/f+D
- cl.C xx qcf+D~D (note: only works from very close or from a crossup, or in the corner), rdp+B (for stun)/qcb,hcf+P (for damage)/qcf+A~hcb+A~A (for max corner damage)
- cr.B,crA/cl.A/cl.B xx dp+A
- cl.C,f+B (2 hits) xx qcb,hcf+C (good against back turned, big characters, or when the opponent is dizzied)
Anytime you land D Hopkicks (qcf+D~D), you have a few options. The most common/useful are:
- B RED Kick (rdp+B) for tons of stun damage + un-rollable wakeups.
- Orochinagi (qcb,hcf+P) for the best damage.
- Bald Eagle~overhead~OTG hit (qcf+A~hcb+A~A) in the corner only for the maximum meterless damage.
Note that you can link close C from cr.B. It is a 1-frame link, but more if you perform the cr.B meaty.
The cr.B to qcf,qcf+P combo can be done as cr.B, qcf+A/B, qcf+A. This is because cr.B isn't cancelable, but is naturally chainable into standing A or B, so you can buffer without holding any buttons to keep qcf+A from coming out.
