No edit summary |
|||
| Line 197: | Line 197: | ||
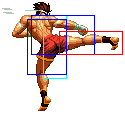
|colspan="2" | [[image:Joe98_dfB.png|center]] | |colspan="2" | [[image:Joe98_dfB.png|center]] | ||
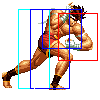
|align="left"| Low slide kick. Crappy recovery, but you can use it to go under all non-ground fireballs. | |align="left"| Low slide kick. Crappy recovery, but you can use it to go under all non-ground fireballs. | ||
|- | |||
|colspan="8" align="center"| '''Special Moves''' | |||
|- | |||
! hcf+[[image:snka.gif]] | |||
|align="center"| 13/-/36 | |||
|align="center"| -4/-6 | |||
| | |||
|align="center"| HL | |||
|colspan="2" | [[image:Joe02_hcfA.png|center]] | |||
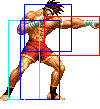
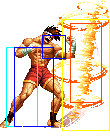
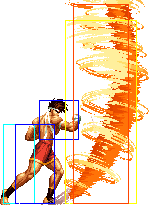
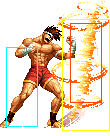
|rowspan="2"|'''Hurricane Upper - hcf+P''' | |||
* Joe releases one or two hurricane projectiles (depending on the button used) | |||
* hcf+A sends out one projectile, while hcf+C sends out two | |||
* the projectiles are tall and cannot be jumped by most characters. It's difficult to punish hcf+A but hcf+C is easy to punish by rolling the second projectile | |||
* hcf+A fireball stays active for 19 frames. both hcf+C fireballs stay active for 11 frames. | |||
|- | |||
! hcf+[[image:snkc.gif]] | |||
|align="center"| 19/-(22)-/36 | |||
|align="center"| KD/-6 | |||
| | |||
|align="center"| HL | |||
|valign="bottom" style="border-right:0px;"| [[image:Joe02_hcfC1.png|center]] | |||
|valign="bottom" style="border-left:0px;"| [[image:Joe02_hcfC2.png|center]] | |||
|- | |||
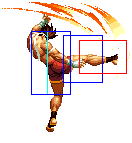
! hcf+[[image:snkb.gif]] | |||
|align="center"| 14/4/4+22 | |||
|align="center"| KD/-12 | |||
|align="center"| Fi | |||
|align="center"| HL | |||
|colspan="2" | [[image:Joe02_hcfB.png|center]] | |||
|rowspan="2"|'''Slash Kick - hcf+K''' | |||
* Joe performs a horizontal kick moving across the screen, which does good damage | |||
* hcf+B version goes about 1/3 screen length while hcf+D goes 3/4 length | |||
* has some recovery time if blocked, though if done from far away it's usually difficult to punish on block | |||
* Depending on the distance, the startup of the D version is longer. The longer the startup, the shorter the recovery. | |||
* free cancellable into | |||
|- | |||
! hcf+[[image:snkd.gif]] | |||
|align="center"| 14+0~5/7/4~9+24 | |||
|align="center"| KD/-22 | |||
|align="center"| Fi | |||
|align="center"| HL | |||
|colspan="2" | [[image:Joe02_hcfD.png|center]] | |||
|- | |||
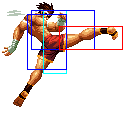
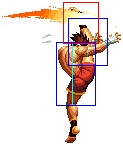
! dp+[[image:snkb.gif]] | |||
|align="center"| 5/3*18/17+13 | |||
|align="center"| KD/-30 | |||
|align="center"| Su,Fi,Fo | |||
|align="center"| HL | |||
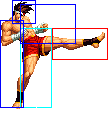
|valign="bottom" style="border-right:0px;"| [[image:Joe02_dpB1.png|center]] | |||
|valign="bottom" style="border-left:0px;"| [[image:Joe02_dpB2.png|center]] | |||
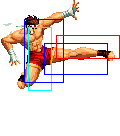
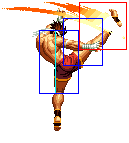
|rowspan="2"|'''Tiger Kick - dp+K''' | |||
* Joe does a very fast rising kick attack that does two hits | |||
* dp+B does more damage than dp+D but has less priority | |||
* Invincible: B: Complete startup, D: Complete startup and first active period. Upper body invincible: First active period fo B version. | |||
* supercancellable on the first hit | |||
* free cancellable into | |||
* free cancellable out of on the first hit | |||
|- | |||
! dp+[[image:snkd.gif]] | |||
|align="center"| 5/3*22/21+13 | |||
|align="center"| KD/-38 | |||
|align="center"| Su,Fi,Fo | |||
|align="center"| HL | |||
|valign="bottom" style="border-right:0px;"| [[image:Joe02_dpD1.png|center]] | |||
|valign="bottom" style="border-left:0px;"| [[image:Joe02_dpD2.png|center]] | |||
|- | |||
!rowspan="2"| qcb+[[image:snkb.gif]] | |||
|align="center" rowspan="2"|9+3/3*3*2*2/5+14 | |||
|align="center" rowspan="2"| -1/-3 | |||
|align="center" rowspan="2"| Fi | |||
|align="center" rowspan="2" align="center"| HL | |||
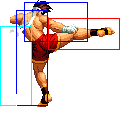
|valign="bottom" style="border-right:0px; border-bottom:0px;"| [[image:Joe02_qcbB1.png|center]] | |||
|valign="bottom" style="border-left:0px; border-bottom:0px;"| [[image:Joe02_qcbB2.png|center]] | |||
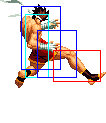
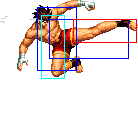
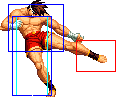
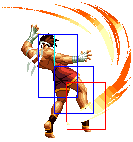
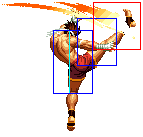
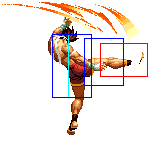
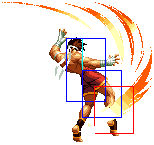
|rowspan="4"|'''Ougon no Kakato - qcb+K''' | |||
* Joe executes a jumping spinning kick that does two hits and has very good recovery, usually being unpunishable | |||
* the move takes some time to come out but has a large hitbox that will almost always catch the opponent out of the air | |||
* it's possible to juggle the opponent if this move hits them airborne | |||
* free cancellable into | |||
|- | |||
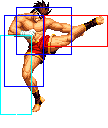
|valign="bottom" style="border-right:0px; border-top:0px;"| [[image:Joe02_qcbB3.png|center]] | |||
|valign="bottom" style="border-left:0px; border-top:0px;"| [[image:Joe02_qcbB4.png|center]] | |||
|- | |||
!rowspan="2"| qcb+[[image:snkd.gif]] | |||
|align="center" rowspan="2"| 11+5/3*2*2*2/5+16 | |||
|align="center" rowspan="2"| -3/-5 | |||
|align="center" rowspan="2"| Fi | |||
|align="center" rowspan="2" align="center"| HL | |||
|valign="bottom" style="border-right:0px; border-bottom:0px;"| [[image:Joe02_qcbD1.png|center]] | |||
|valign="bottom" style="border-left:0px; border-bottom:0px;"| [[image:Joe02_qcbD2.png|center]] | |||
|- | |||
|valign="bottom" style="border-right:0px; border-top:0px;"| [[image:Joe02_qcbD3.png|center]] | |||
|valign="bottom" style="border-left:0px; border-top:0px;"| [[image:Joe02_qcbD4.png|center]] | |||
|- | |||
|- | |||
! mash [[image:snka.gif]] | |||
|align="center"| 9/2(7)2(9)2(10)1(11)2(6)1(16)2(7)2(8)2(10)1(11)2(5)1/28 | |||
|align="center"| variable | |||
|align="center"| >qcf+A, >qcf+C, Fo | |||
|align="center"| HL | |||
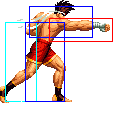
|colspan="2" style="border-bottom:0px;"| [[image:Joe02_MashP1-3.png|center]] | |||
|rowspan="2"|'''Bakuretsu Ken - mash P''' | |||
* Joe performs a series of punches while moving forward slightly during the move | |||
* he'll do about 10 punches, though after about 5 hits, Joe will be out of range and the next hits will not combo | |||
* each of those punches have a large hitbox, making it difficult to counter, though can be easily guard rolled and punished from behind | |||
* it's possible to juggle the opponent if this move hits them airborne | |||
* can be followed up by qcf+A or qcf+C after any punch, whether that punch connected or whiffed | |||
* free cancellable out of | |||
|- | |||
! mash [[image:snkc.gif]] | |||
|align="center"| 11/2(7)2(9)1(10)1(11)2(6)1(18)2(7)2(9)1(10)1(11)2(6)1/30 | |||
|align="center"| variable | |||
|align="center"| >qcf+A, >qcf+C, Fo | |||
|align="center"| HL | |||
|colspan="2" style="border-top:0px;" align="center"| [[image:Joe02_MashP4-6.png|center]]<br>entire sequence repeats once | |||
|- | |||
! > qcf+[[image:snka.gif]] | |||
|align="center"| 20/3/28 | |||
|align="center"| -11/-13 | |||
|align="center"| Su,Fo | |||
|align="center"| H | |||
|colspan="2" | [[image:Joe02_mashPqcfA.png|center]] | |||
|'''Bakuretsu Finish - qcf+A''' | |||
* Joe performs an overhead punch that deals good damage and is safe on block | |||
* overhead | |||
* supercancellable | |||
* free cancellable out of | |||
|- | |||
! > qcf+[[image:snkc.gif]] | |||
|align="center"| 14/12/24 | |||
|align="center"| KD/-18 | |||
| | |||
|align="center"| L | |||
|colspan="2" | [[image:Joe02_mashPqcfC.png|center]] | |||
|'''Shijou Saikyou no Low Kick - qcf+C''' | |||
* Joe does a kick similar to his f+B, except that he slides forward a good distance (about 1/3 screen) while doing it | |||
* the recovery on this move isn't good, it's riskier to do it as opposed to the qcf+A followup | |||
* hits low | |||
|- | |||
|colspan="8" align="center"| '''DMs''' | |||
|- | |||
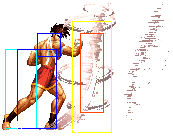
! <br>qcf,hcb+[[image:snka.gif]]<br><br> | |||
|align="center"| 2/2(5)2(5)2(9)2(7)2(3)2(14)-(19)-(16)4*8(12)3/17+18 | |||
|align="center"| KD/-40 | |||
|align="center"| | |||
|align="center"| HL | |||
|align="center" rowspan="2" colspan="2" | [[image:Joe02_qcfhcbP.png|center]]<br>etc. | |||
|rowspan="2" | '''Bakuretsu Hurricane Tiger Kakato - qcf hcb+P''' | |||
* Joe dashes forward with a series of punches and tornados, followed with a rising attack | |||
* this DM comes out very fast, so it can be comboed into easily and used to punish things like blocked cd counters | |||
* Joe will perform the entire move regardless of whether it hits, gets blocked or whiffs. This makes it extremely punishable if it doesn't hit | |||
* the final hit does a hard knockdown | |||
* Fireballs stay active for 18 frames. | |||
* Invincible: Complete startup. | |||
|- | |||
! qcf,hcb+[[image:snkc.gif]] | |||
|align="center"| 2/2(5)2(5)2(9)2(7)2(3)2(14)-(19)-(16)4*8(12)3/17+20 | |||
|align="center"| KD/-42 | |||
|align="center"| | |||
|align="center"| HL | |||
|- | |||
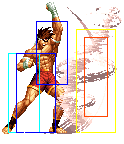
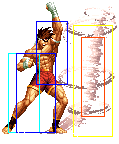
! <br>qcfx2+[[image:snka.gif]]<br><br> | |||
|align="center"| 8/-(24)-/67 | |||
|align="center"| KD/+9 | |||
|align="center"| | |||
|align="center"| HL | |||
|rowspan="2" valign="bottom" style="border-right:0px;"| [[image:Joe02_qcfx2P1.png|center]] | |||
|rowspan="2" valign="bottom" style="border-left:0px;"| [[image:Joe02_qcfx2P2.png|center]] | |||
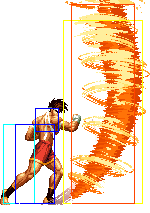
|rowspan="2"|'''Screw Upper - qcfx2+P''' | |||
* Joe creates a vertical wall of tornados that moves forward a slight bit, maybe 1/3 screen | |||
* can be rolled easily and punished | |||
* Invincible: A: Frame 1-7, C: Frame: 9-14. | |||
* First fireball is active for 24 frames. Second fireball is active for 48 frames and hits multiple times. | |||
|- | |||
! qcfx2+[[image:snkc.gif]] | |||
|align="center"| 15/-(24)-/71 | |||
|align="center"| KD/+5 | |||
|align="center"| | |||
|align="center"| HL | |||
|- | |||
|colspan="8" align="center"| '''SDM''' | |||
|- | |||
! qcfx2+[[image:snka.gif]]+[[image:snkc.gif]] | |||
|align="center"| 8/-(24)-/88 | |||
|align="center"| KD/-39 | |||
|align="center"| | |||
|align="center"| HL | |||
|valign="bottom" style="border-right:0px;"| [[image:Joe02_qcfx2AC1.png|center]] | |||
|valign="bottom" style="border-left:0px;"| [[image:Joe02_qcfx2AC2.png|center]] | |||
| '''Screw Upper - qcfx2+AC''' | |||
* Joe sends out a vertical wall of tornados similar to the DM version, except doing much more damage and traveling all the way across the screen | |||
* Invincibility: Frame 1-18. | |||
|- | |||
|} | |} | ||
===Special Moves=== | ===Special Moves=== | ||
Revision as of 09:38, 22 August 2017
Introduction
Colors

|

|

|

|
