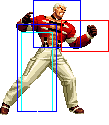
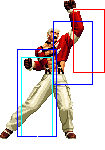
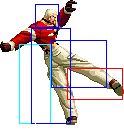
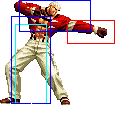
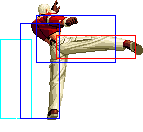
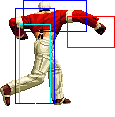
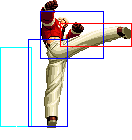
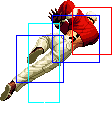
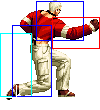
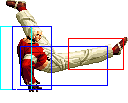
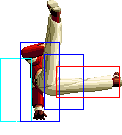
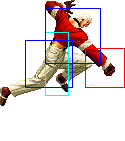
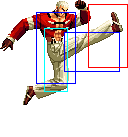
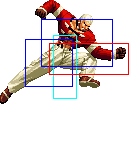
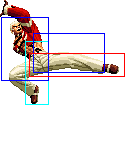
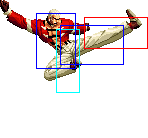
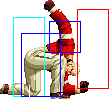
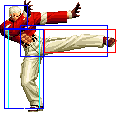
No edit summary |
|||
| Line 24: | Line 24: | ||
=In-depth Analysis= | =In-depth Analysis= | ||
==[[The_King_of_Fighters_2002/Normals_Guide|Movelist]]== | |||
{|border="1" | |||
!width="8%"| | |||
! Frames | |||
! Advantage | |||
! Cancel | |||
! Block | |||
!colspan="2"| Hitbox | |||
! Notes | |||
|- | |||
|colspan="8" align="center"| '''Standing Close''' | |||
|- | |||
! [[image:snka.gif]] | |||
|align="center"| 3/4/4 | |||
|align="center"| +4/+2 | |||
|align="center"| | |||
|align="center"| HL | |||
|colspan="2" | [[image:Yash98_clA.png|center]] | |||
| | |||
|- | |||
! [[image:snkb.gif]] | |||
|align="center"| 3/5/9 | |||
|align="center"| -2/-4 | |||
|align="center"| | |||
|align="center"| HL | |||
|colspan="2" | [[image:Yash98_clB.png|center]] | |||
| | |||
|- | |||
! [[image:snkc.gif]] | |||
|align="center"| 3/3+4/15 | |||
|align="center"| -2/-4 | |||
|align="center"| | |||
|align="center"| HL | |||
|valign="bottom" style="border-right:0px;"| [[image:Yash98_clC1.png|center]] | |||
|valign="bottom" style="border-left:0px;"| [[image:Yash98_clC2.png|center]] | |||
| Fast, cancelable. | |||
|- | |||
! [[image:snkd.gif]] | |||
|align="center"| 3/5/21 | |||
|align="center"| -6/-8 | |||
|align="center"| | |||
|align="center"| HL | |||
|colspan="2" | [[image:Yash98_clD.png|center]] | |||
| Same as above except does more damage but pushes back further. | |||
|- | |||
|colspan="8" align="center"| '''Standing Far''' | |||
|- | |||
! [[image:snka.gif]] | |||
|align="center"| 3/4/7 | |||
|align="center"| +1/-1 | |||
| | |||
|align="center"| HL | |||
|colspan="2" | [[image:Yash98_stA.png|center]] | |||
| Good long range poke. Generally Standing B is better, but this one is cancelable, so you can cancel into f+A to bait someone mashing. | |||
|- | |||
! [[image:snkb.gif]] | |||
|align="center"| 4/8/13 | |||
|align="center"| -9/-11 | |||
| | |||
|align="center"| HL | |||
|colspan="2" | [[image:Yash98_stB.png|center]] | |||
| One of the godliest pokes in the game. Fast, long range, stops short hop...stops a lot of other shit too! | |||
|- | |||
! [[image:snkc.gif]] | |||
|align="center"| 10/3/32 | |||
|align="center"| -15/-17 | |||
| | |||
|align="center"| HL | |||
|colspan="2" | [[image:Yash98_stC.png|center]] | |||
| Slow recovery, but it is whiff cancelable (f+B preferred) and connects against crouchers. Still, crouching C has all this move's got and more. | |||
|- | |||
! [[image:snkd.gif]] | |||
|align="center"| 8/4/33 | |||
|align="center"| -17/-19 | |||
| | |||
|align="center"| HL | |||
|colspan="2"| [[image:Yash98_stD.png|center]] | |||
| Uncancelable and super slow recovery, but it is notable that it beats some things. I see Chinese players use it sometimes in specific situations. Mess around with it if you're feeling experimental. | |||
|- | |||
! [[image:snkc.gif]]+[[image:snkd.gif]] | |||
|align="center"| 15/5/24 | |||
|align="center"| KD/-7 | |||
|align="center"| S,Su | |||
|align="center"| HL | |||
|colspan="2"| [[image:Yash98_stCD.png|center]] | |||
| Great long range poke with nice priority, cancelable of course. | |||
|- | |||
|colspan="8" align="center"| '''Crouching''' | |||
|- | |||
! [[image:snka.gif]] | |||
|align="center"| 3/4/6 | |||
|align="center"| +2/0 | |||
|align="center"| | |||
|align="center"| HL | |||
|colspan="2" | [[image:Yash98_crA.png|center]] | |||
| Nice and long range for a cr.A. Cancelable into f+A as an anti-mash setup. | |||
|- | |||
! [[image:snkb.gif]] | |||
|align="center"| 6/3/10 | |||
|align="center"| -1/-3 | |||
|align="center"| | |||
|align="center"| L | |||
|colspan="2" | [[image:Yash98_crB.png|center]] | |||
| It's a fast low! And it's chainable into other lights other than itself as you'd expect (timing is a little slower than other characters). | |||
|- | |||
! [[image:snkc.gif]] | |||
|align="center"| 3/2+3/28 | |||
|align="center"| -13/-15 | |||
|align="center"| | |||
|align="center"| HL | |||
|valign="bottom" style="border-right:0px;"| [[image:Yash98_crC1.png|center]] | |||
|valign="bottom" style="border-left:0px;"| [[image:Yash98_crC2.png|center]] | |||
| One of the best ground pokes and a fantastic anti-air. The first part when his arm isn't fully extended is cancelable. | |||
|- | |||
! [[image:snkd.gif]] | |||
|align="center"| 9/3(5)5/22 | |||
|align="center"| KD/-9 | |||
|align="center"| | |||
|align="center"| L | |||
|valign="bottom" style="border-right:0px;"| [[image:Yash98_crD1.png|center]] | |||
|valign="bottom" style="border-left:0px;"| [[image:Yash98_crD2.png|center]] | |||
| Very long range sweep, cancelable and easily cancelable on whiff for safety. | |||
|- | |||
|colspan="8" align="center"| '''Jump''' | |||
|- | |||
! [[image:snka.gif]] | |||
|align="center"| 6/9/- | |||
|align="center"| -/- | |||
| | |||
|align="center"| H | |||
|colspan="2" | [[image:Yash98_jA.png|center]] | |||
| Awesome jump-in. Similar to Kyo's j.B. Can be used as an instant overhead on large characters (short hop only). | |||
|- | |||
! [[image:snkb.gif]] | |||
|align="center"| 7/9 | |||
|align="center"| -/- | |||
| | |||
|align="center"| H | |||
|colspan="2" | [[image:Yash98_jB.png|center]] | |||
| Okay air-to-air or as a jump-in I guess. There are better jump attacks for those specific uses, though. | |||
|- | |||
! [[image:snkc.gif]] | |||
|align="center"| 8/5 | |||
|align="center"| -/- | |||
| | |||
|align="center"| H | |||
|colspan="2" | [[image:Yash98_jC.png|center]] | |||
| Good jump-in, excellent crossup. Experiment to find the crossup hitbox, it's a little weird. | |||
|- | |||
! [[image:snkd.gif]] | |||
|align="center"| 7/7 | |||
|align="center"| -/- | |||
| | |||
|align="center"| H | |||
|colspan="2"| [[image:Yash98_jD.png|center]] | |||
| Awesome air-to-air and air-to-ground from long range. Short hop up/back with this is a great poke. | |||
|- | |||
! [[image:snkc.gif]]+[[image:snkd.gif]] | |||
|align="center"| 11/4 | |||
|align="center"| KD/- | |||
| | |||
|align="center"| HL | |||
|colspan="2"| [[image:Yash98_jCD.png|center]] | |||
| Great air-to-air when they are slightly above you obviously. Good anti-air vs Choi. | |||
|- | |||
|colspan="8" align="center"| '''Command Normals''' | |||
|- | |||
! <br>f+[[image:snka.gif]]<br><br> | |||
|align="center"| 22/3/24 | |||
|align="center"| KD/-9 | |||
|align="center"| | |||
|align="center"| H | |||
|rowspan="2" colspan="2"| [[image:Yash98_fA.png|center]] | |||
|rowspan="2"| Overhead and knocks down when done alone. Fast, cancelable, and non-overhead when chained. | |||
|- | |||
! f+[[image:snka.gif]] (cancel) | |||
|align="center"| 12/3/24 | |||
|align="center"| -7/-9 | |||
|align="center"| S,Su | |||
|align="center"| HL | |||
|- | |||
! f+[[image:snkb.gif]] | |||
|align="center"| 11/5/28 | |||
|align="center"| -13/-15 | |||
|align="center"| S,Su | |||
|align="center"| HL | |||
|colspan="2"| [[image:Yash98_fB.png|center]] | |||
| Always fast and cancelable, does more damage than f+A but doesn't travel as far. This is the move of choice to cancel into on your opponent's wakeup, since if they reversal roll backwards, you can still whiff cancel into f+B with the same timing (close C/D~f+B) and catch their roll anyway. | |||
|} | |||
==Normal Throws== | ==Normal Throws== | ||
| Line 29: | Line 218: | ||
'''b or f+D''' - Breakable, reverse knockdown, back turned, un-rollable. | '''b or f+D''' - Breakable, reverse knockdown, back turned, un-rollable. | ||
==Special Moves== | ==Special Moves== | ||
Revision as of 03:36, 27 April 2014
Yashiro Nanakase
N/A
In a nutshell
Colors

|

|

|

|
Gameplay Overview
Combos
In-depth Analysis
Movelist
Normal Throws
b or f+C - Breakable, forward knockdown, face forward, rollable.
b or f+D - Breakable, reverse knockdown, back turned, un-rollable.
Special Moves
- Upper Duel (dp+P) -
- Missile Might Bash (hcb+P) -
- Sledgehammer (qcb+K) -
- Jet Counter (hcf+P) -
- Jet Counter: Still (hcf+P~qcf+P) -
Desperation Moves
- Million Bash Stream (qcb,hcf+P) - Can mash P to deal more hits.
- Final Impact (qcf,qcf+P) - Can hold P to charge and deal a lot more of damage, though impractical in matches.
