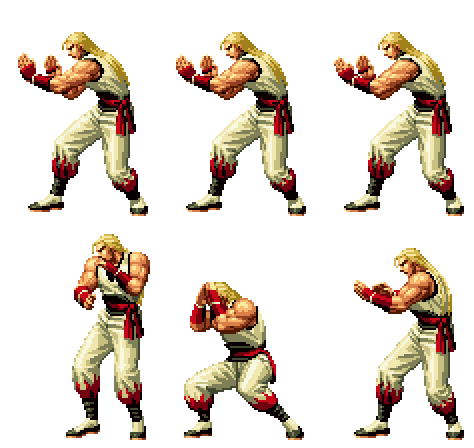
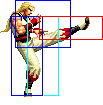
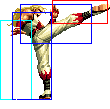
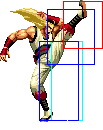
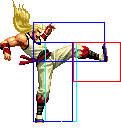
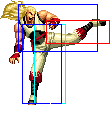
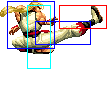
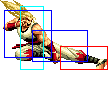
(→Combos) |
(→Combos) |
||
| Line 306: | Line 306: | ||
** SDM qcb hcf + K (Timming required out of the corner. DM can be used but will not do full hits.) | ** SDM qcb hcf + K (Timming required out of the corner. DM can be used but will not do full hits.) | ||
** run, df + A (2 hits) > | ** run, df + A (2 hits) > | ||
*** j.CD | *** j.CD (Timming required) | ||
*** j.C (Timming required) | *** j.C (Timming required) | ||
*** hcf + D | *** hcf + D | ||
Revision as of 20:52, 4 November 2018
Introduction
andy sucks don't play him
Colors

|

|

|

|
Gameplay Overview
In-depth Analysis
Movelist
Fastest Attacks
- 0F: C throw; D throw
- 1F: -
- 2F: cl.C
- 3F: cl.A; cl.B; cr.A
- 4F: cr.B
- 5F: st.A; st.B; cr.C
- 6F: -
- 7F: st.C; df+A
- 8F: cl.D
- 9F: cr.D
- 10F: -
Special Moves
Hishou Ken (qcb + P) - Andy shoots some energy from his palm, short range.
Zan'ei Ken (db,f + P) - Andy performs a dashing attack forward. db f+A comes out faster than dp+C,db f+A goes less than half screen distance, while db f+C goes full screen an alternate motion for this move is to just do hcf+P. If you are not in throw range, this move will come out instead of the hcf+P proximity unblockable,on whiff, this move recovers extremely fast, though it is very punishable if it hits or is blocked,can be followed up with qcf+P on hit or block
Gadan Kou (Zan'ei Ken hits, then qcf + P - This is a Zan-ei Ken finisher, and is a must for safety reasons. The moves comes from RB2 Fatal Fury, although the motion is different,and he even performs it better!
Shouryuu Dan (dp + P) - Andy performs a rising uppercut attack with good startup priority,dp+A doesn't rise as high and has much better recovery than dp+C, though technically both are punishable
Kuuha Dan (hcf + K) - Andy performs a very high priority spiraling kick that travels in a parabolic motion. The arc on hcf+D is bigger than hcf+B,only sometimes punishable on block by throws or fast normals but can be rolled behind and punished easily. It is also possible for the move to go over the opponent, allowing them to just run behind and combo you in the back.
Gekiheki Haisui Shou (When close, hcf + P) - a proximity unblockable attack that only comes out if Andy is in throw range and opponent is not in blockstun. Otherwise, a close A/close C comes out instead last hit knocks the opponent into the air where they can be juggled
Gen'ei Shiranui (In air, qcf + K, can follow up with P or K) - Andy performs a diagonal "dive" downwards which has a very large hitbox
P follow up - Andy performs a low kick that comes out fairly quick and has good recovery if blocked,low attack
K follow up - Andy does a hop kick that comes out fairly quick though not as fast as the P followup,has horrible recovery time if blocked, so it's a risk to use it
Desperation Moves
Chou Reppa Dan (qcb,db,f + K) - A powered up version of the Kuuha Dan, the DM version its useful only on midscreen,but the SDM version its a nice corner combo ender from a Gekiheki Haisui Shou and cheap damage maker, in mid screen use both version as an anti air, but it have a bad recovery.
Hishou Ryuusei Ken (qcf x 2 + P) - Andy does a series of chops and then a power palm (Hisho Ken) in his opponent's chest, its a better combo ender for midscreen.
Attack Info and Frame Data
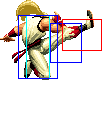
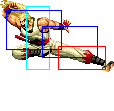
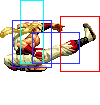
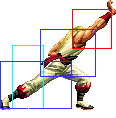
Hitboxes
Combos
- cl.B / cr.B > hcb + P, [junggler]
- cr.C / cl.C (1 hit) >
- qcf qcf + P
- hcf + P, [junggler] (From cr.C only at blank point.)
- f + B > air qcf + K > P (Corner)
- db f + A > qcf + A
- qcb + A
- cr.B, cr.A / cr.B > df + A (2 hits) >
- db f + A > qcf + P
- qcb + A
- cl.C (2 hits) / (cl.C (1 hit) > df + A (2 hits)) >
- db f + A > qcf + A
- qcb + A
- ... hcf + P,
- air qcf + K (miss) > P, dp + P, j.CD / j.C (Corner) (MAX only) (Timming required)
- SDM qcb hcf + K (Timming required out of the corner. DM can be used but will not do full hits.)
- run, df + A (2 hits) >
- j.CD (Timming required)
- j.C (Timming required)
- hcf + D
- hcf + D
- run, dp + C
- qcb + C
