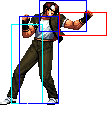
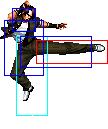
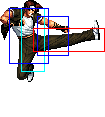
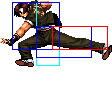
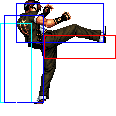
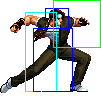
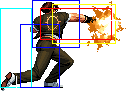
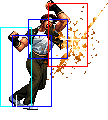
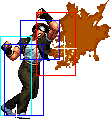
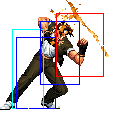
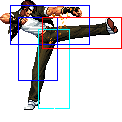
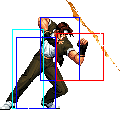
|
|
| Line 56: |
Line 56: |
| |valign="bottom" colspan="2" style="border-right:0px;"| [[image:Kyo98_clC1.png|center]] | | |valign="bottom" colspan="2" style="border-right:0px;"| [[image:Kyo98_clC1.png|center]] |
| |valign="bottom" colspan="2" style="border-left:0px;"| [[image:Kyo98_clC2.png|center]] | | |valign="bottom" colspan="2" style="border-left:0px;"| [[image:Kyo98_clC2.png|center]] |
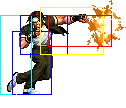
| |The best close-range poke in KOF98. Not only is it extremely fast, but it activates from very far away for a 'close' attack. This makes Kyo very hard to stop when he runs in, because he can usually attack earlier than most characters | | |main close poke. Not only is it extremely fast, but it activates from very far away for a 'close' attack. This makes Kyo very hard to stop when he runs in, because he can usually attack earlier than most characters |
| |- | | |- |
| ! [[image:snkd.gif]] | | ! [[image:snkd.gif]] |
| Line 74: |
Line 74: |
| |align="center"| HL | | |align="center"| HL |
| |colspan="4" | [[image:Kyo98_stA.png|center]] | | |colspan="4" | [[image:Kyo98_stA.png|center]] |
| |align="left"| Great anti-air against short hop, and cancelable | | |align="left"| anti-air vs short hop and cancelable |
| |- | | |- |
| ! [[image:snkb.gif]] | | ! [[image:snkb.gif]] |
| Line 82: |
Line 82: |
| |align="center"| HL | | |align="center"| HL |
| |colspan="4" | [[image:Kyo98_stB.png|center]] | | |colspan="4" | [[image:Kyo98_stB.png|center]] |
| |Great long range poke | | |long range poke |
| |- | | |- |
| ! [[image:snkc.gif]] | | ! [[image:snkc.gif]] |
| Line 124: |
Line 124: |
| |align="center"| L | | |align="center"| L |
| |colspan="4" | [[image:Kyo98_crB.png|center]] | | |colspan="4" | [[image:Kyo98_crB.png|center]] |
| |One of the best 'footsie' moves in the game. Beats a lot of moves at its max range. Use this when running in. Links into cl.C and can combo into C Rekka series or block string with qcf+A or f+B into qcf+A/qcf+C | | | 'footsie' moves. main combo starter. Links into cl.C and can combo into C Rekka series or block string with qcf+A or f+B into qcf+A/qcf+C |
| |- | | |- |
| ! [[image:snkc.gif]] | | ! [[image:snkc.gif]] |
| Line 133: |
Line 133: |
| |valign="bottom" colspan="2" style="border-right:0px;"| [[image:Kyo98_crC1.png|center]] | | |valign="bottom" colspan="2" style="border-right:0px;"| [[image:Kyo98_crC1.png|center]] |
| |valign="bottom" colspan="2" style="border-left:0px;"| [[image:Kyo98_crC2.png|center]] | | |valign="bottom" colspan="2" style="border-left:0px;"| [[image:Kyo98_crC2.png|center]] |
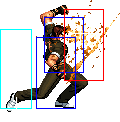
| |One of the best normal anti-airs in the game (notice a trend?). Cancelable on the first part (when his arm isn't fully extended). Very fast and high-priority. Beware as it lacks much horizontal range compared to cl.C | | |normal anti-airs. Cancelable on the first part (when his arm isn't fully extended). |
| |- | | |- |
| ! [[image:snkd.gif]] | | ! [[image:snkd.gif]] |
| Line 159: |
Line 159: |
| |align="center"| H | | |align="center"| H |
| |colspan="4" | [[image:Kyo98_jB.png|center]] | | |colspan="4" | [[image:Kyo98_jB.png|center]] |
| |The best jump-in in the game. Cuts through almost ever normal anti-air like a knife through something that can't stop a knife. Stays out long enough to do it relatively early (not XI early you scrub) and reaches low enough to be one of the harder to block short hop attacks around. Crosses up | | |main jump-in. Cuts through almost ever normal anti-air like a knife through something that can't stop a knife. Stays out long enough to do it relatively early (not XI early you scrub) and reaches low enough to be one of the harder to block short hop attacks around. Crosses up |
| |- | | |- |
| ! [[image:snkc.gif]] | | ! [[image:snkc.gif]] |
| Line 167: |
Line 167: |
| |align="center"| H | | |align="center"| H |
| |colspan="4" | [[image:Kyo98_jC.png|center]] | | |colspan="4" | [[image:Kyo98_jC.png|center]] |
| |Usually no reason to use this over j.B, but it does cross up, mostly on bigger characters. Problem is that this move has a higher hitbox and tends to whiff where j.B wouldn't | | |other jump-in,can cross-up mostly on bigger characters. |
| |- | | |- |
| ! [[image:snkd.gif]] | | ! [[image:snkd.gif]] |
| Line 175: |
Line 175: |
| |align="center"| H | | |align="center"| H |
| |colspan="4" | [[image:Kyo98_jD.png|center]] | | |colspan="4" | [[image:Kyo98_jD.png|center]] |
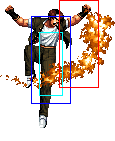
| |Long range and very good priority for air-to-air or long range air-to-ground. For example neutral h.D can beat Ralf's st.C clean from range. Great in conjunction with qcf+A in a blockstring. | | |Long range air-to-air and long range air-to-ground. For example neutral h.D can beat Ralf's st.C clean from range. Great in conjunction with qcf+A in a blockstring. |
| |- | | |- |
| ! [[image:snkc.gif]]+[[image:snkd.gif]] | | ! [[image:snkc.gif]]+[[image:snkd.gif]] |
| Line 217: |
Line 217: |
| |align="center"| H | | |align="center"| H |
| |colspan="4" | [[image:Kyo98_juD.png|center]] | | |colspan="4" | [[image:Kyo98_juD.png|center]] |
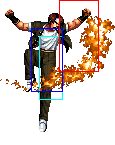
| | | | |air-to-air move. |
| |- | | |- |
| |colspan="10" align="center"| '''Command Normals''' | | |colspan="10" align="center"| '''Command Normals''' |
Kyo Kusanagi
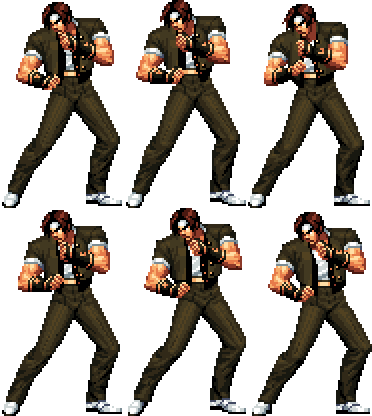
Kyo is a cool guy. He is a professional male model, and his sexy looks and money get him all the popular chicks. This makes him a top tier player. But like P. Diddy say, mo money mo problems!
In a nutshell
Kyo is top-tier character in extra mode but up mid-tier in advanced mode, focusing around mid/close range poking and rushdown. He does not have a command throw, but his mixups are good enough thanks to high priority on his air (j.B, j.d+C) and ground moves (close C, crouching B, qcf+A). His meterless combos do a lot of damage and dizzy quickly, and can do around 50% easily with meter. He requires a medium level of execution; mostly dealing with hit-checking into qcf,qcf+A consistently, and being very familiar with doing short/hyper hops in execution and recognizing the appropriate range and situations to use them in.
Colors
|
|
Frames
|
Advantage
|
Cancel
|
Block
|
Hitbox
|
Notes
|
| Standing Close
|

|
3/4/5
|
+3/+1
|
C
|
HL
|
|
Like most cl.A attacks, this hits mid and is cancelable. Can't really pressure or do much with this move due to the small activation range. Mainly this or st.A will combo after a cr.B and is used to hit-confirm into Final Showdown
|

|
5/4/8
|
0/-2
|
C
|
L
|
|
Note that this is low and cancelable. Combos into cr.B and cr.A.
|

|
2/3+9/9
|
-1/-3
|
C (1st part)
|
HL
|
|
|
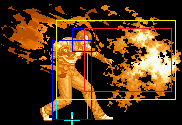
main close poke. Not only is it extremely fast, but it activates from very far away for a 'close' attack. This makes Kyo very hard to stop when he runs in, because he can usually attack earlier than most characters
|

|
4/3/22
|
-5/-7
|
C
|
HL
|
|
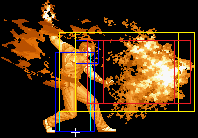
Not nearly as useful or as fast as cl.C. Used more in specific frame-trap situations but overall not a frequently used move by any means
|
| Standing Far
|

|
3/4/5
|
+3/+1
|
C
|
HL
|
|
anti-air vs short hop and cancelable
|

|
7/3/13
|
-5/-7
|
-
|
HL
|
|
long range poke
|

|
12/2/17
|
+1/-1
|
C
|
HL
|
|
A slower version of far Standing A, not that useful as the risk isn't worth the reward but if need be this move could anti-air a hop and is cancelable
|

|
14/5/12
|
+3/+1
|
-
|
HL
|
|
Can go over lows, but the range/hitbox speed is not what it is in CvS2, so don't think about using it like you would in that game. Still could be used in a block string such as cl.C > st.D > qcf+A
|
 + +
|
19/4/16
|
KD/+2
|
S
|
HL
|
|
|
| Crouching
|

|
3/4/5
|
+3/+1
|
C
|
HL
|
|
Standard cr.A attack. Mainly used to after a cr.B to cancel into Final Showdown or a command normal/special attack/command normal canceled into a special attack for block-stringing
|

|
3/4/5
|
+3/+1
|
-
|
L
|
|
'footsie' moves. main combo starter. Links into cl.C and can combo into C Rekka series or block string with qcf+A or f+B into qcf+A/qcf+C
|

|
4/3+3/20
|
-6/-8
|
C (1st part)
|
HL
|
|
|
normal anti-airs. Cancelable on the first part (when his arm isn't fully extended).
|

|
11/3/19
|
KD/-4
|
C
|
L
|
|
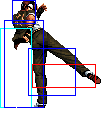
Slow, but easily whiff cancelable (preferably into qcf+A) if someone short hops it. Makes his hitbox shrink vertically, and he can use it to 'duck' under Takuma/old characters (O.Robert/O.Ryo/O.Yuri) fireballs completely
|
| Jump
|

|
5/8/-
|
-/-
|
-
|
H
|
|
An air-to-air attack but is greatly overshadowed by Kyo's other jumping normals
|

|
5/9/-
|
-/-
|
-
|
H
|
|
main jump-in. Cuts through almost ever normal anti-air like a knife through something that can't stop a knife. Stays out long enough to do it relatively early (not XI early you scrub) and reaches low enough to be one of the harder to block short hop attacks around. Crosses up
|

|
6/4/-
|
-/-
|
-
|
H
|
|
other jump-in,can cross-up mostly on bigger characters.
|

|
9/5/-
|
-/-
|
-
|
H
|
|
Long range air-to-air and long range air-to-ground. For example neutral h.D can beat Ralf's st.C clean from range. Great in conjunction with qcf+A in a blockstring.
|
 + +
|
17/4/-
|
KD/-
|
-
|
HL
|
|
Not bad, a lot of blockstun like all jumping CDs. Has pretty good priority even when messing up a safe-jump set up as it will eat most attacks
|
| Neutral Jump
|

|
5/8/-
|
-/-
|
-
|
H
|
|
|

|
5/9/-
|
-/-
|
-
|
H
|
|
|

|
6/4/-
|
-/-
|
-
|
H
|
|
|

|
7/8/-
|
-/-
|
-
|
H
|
|
air-to-air move.
|
| Command Normals
|
f+
|
11/7(3)7/18
|
-5/-7
|
-/-
|
HL/H
|
|
|
Ge Shiki: Goufu You - (f+B) - 2 hits, second hit is overhead if done alone. 2nd hit is not overhead but cancelable when chained from a normal, but will only fully combo if you're close enough for both hits to connect. The canceled into version is great for staggered blockstrings from Close C or Crouching A and frametraps relatively well and confirm into rekkas/fireball for a combo if staggered from light attacks
|
f+
(cancel)
|
11/7(3)7/18
|
-5/-7
|
-/S
|
HL/HL
|
df+
|
2/3(12)4/24
|
-8/-10
|
-/-
|
L/L
|
|
|
88 Shiki - (df+D) - There are certain moves this thing can hit, like Ralf's st.C. Otherwise only use it in a combo
|
j.d+
|
6/5/-
|
-/-
|
-
|
H
|
|
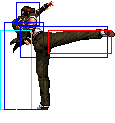
Ge Shiki: Naraku Otoshi - (j.d+C) - A very good jump-in. Has long hit stun, so it can be performed early and still combo into things. Great as a crossup. Slams when used air-to-air. Since it is a command move, you can use it during a backdash and you will travel much further as well as decrease recovery. In Extra mode it can be done during a front dash, and can be comboed into itself this way as an infinite. If done on a crouching opponent or late, it will combo at best into a cr.A rather than be able to do a cr.B into cr.A and cl.C will whiff most of the time due to push back. This move tends to whiff on characters that could shrink their hitboxes by crouching or doing a crouching attack so keep that in mind
|
| Special Moves
|
qcf+
|
11/8/20
|
|
|
HL
|
|
|
114 Shiki: Aragami - (qcf+A)
- One of the best mid-range pokes in the game. Has auto-guard, fast startup, fast recovery, good damage.
|
> qcf+
|
7/8/28
|
|
|
HL
|
|
|
128 Shiki: Kono Kizu - (qcf+P after qcf+A)
- You can use this as an anti-air if someone jumps over your qcf+A. This is really cheap and your opponent will probably want to murder you and your entire family if you hit them with this as an anti-air. No I'm joking it's awesome. Mainly unsafe on block and could be hit in between this and the next move mentioned.
|
>> 
|
10/3/27
|
|
|
H
|
|
Ge Shiki: Migiri Ugachi - (P after qcf+A~qcf+P)
- It's overhead and not too bad on block but you can get punish like by Iori's rekka's or Chris's f+A etc. and shit like that.
|
>> 
|
14/6/20
|
|
|
HL
|
|
125 Shiki: Nanase - (K after qcf+A~qcf+P/hcb+P)
- If the first rekka hits deeply, this is the preferred sequence of rekkas for damage and knockdown. Doing this kick move on block is punishable 100% by a full combo so doing this is not recommended. Could follow up qcf+A~hcb+P but you have to be extremely high to ever think of doing such a thing.
|
> hcb+
|
21/4/30
|
|
|
H
|
|
127 Shiki: Yano Sabi - (hcb+P after qcf+A)
- An overhead follow up that's not really fast or safe at all. Mainly used after D Version Hop Kicks to hard knockdown the opponent and do Kyo's most damaging, meterless hopkick follow up.
|
>> 
|
21/14/17
|
|
|
L
|
|
|
Light rekka ground punch (P after qcf+A~hcb+P)
- Hits low and shouldn't be used in a blockstring. Mainly used as an OTG finisher for Kyo's most damaging, meterless hopkick follow up. Hard Knockdown.
|
qcf+
|
17/6/17
|
|
|
HL
|
|
|
115 Shiki: Dokugami - (qcf+C)
- Not safe on block (punishable by fast moves), and be careful canceling into it on block; it can be hit by an invincible move or rolled out of between close C and the qcf+C. If it does get blocked, it is an okay setup for qcb+P. You can also poke with faster moves against opponents who are not fast to attack back. One setup I've seen Dakou use is qcf+C (blocked), cr.A xx Final Showdown. Risky! It's generally safer on block if spaced by the tip of the move. Otherwise if this move is blocked in deep it's really punishable unless you do a gimmicky follow up frame-trap. Use this after a jump-in attack > close C at mid screen and do the follow ups for Kyo's best mid-screen bnb.
|
> hcb+
|
10/3/34
|
|
|
HL
|
|
401 Shiki: Tsumi Yomi - (hcb+P after qcf+C)
|
>> f+
|
10/5/39
|
|
|
HL
|
|
402 Shiki: Batsu Yomi - (f+P after qcf+C~hcb+P)
|
dp+
|
5/4+13/27
|
|
|
HL
|
|
|
|
100 Shiki: Oniyaki - (dp+P)
- It's a DP! Light version has no auto-guard and will at best trade with meaties as it is not fully invincible. C version has full auto-guard, but it is 2 hits and doesn't knock down on the first, so it is anti-air (or extremely deep hit but not recommended) only.
|
dp+
|
5/4+16/35
|
|
|
HL
|
|
|
|
qcf+
|
13/5/27
|
|
|
HL
|
|
75 Shiki Kai - (qcf+K,K)
- D version preferred since you can combo off of it. Advantage on block, so it's not bad for pressure. Used for combos mostly. In the corner, you could delay the second hit on block to do a safe block string into Close C and do the blockstring
|
qcf+
|
17/5/27
|
|
|
HL
|
> 
|
7/9/14
|
|
|
HL
|
|
> 
|
7/9/14
|
|
|
HL
|
hcb+ 
|
5/16/12
|
|
|
HL
|
|
114 Shiki: Aragami - (hcb+K)
- Can combo off his qcf+D~D but there's way better options. Punishable but not as badly punishable as it looks. It looks cool. Sometimes if the opponent is knocked far away, this move may be used on whiff and the elbow follow up will not come out and Kyo will run quickly across the screen even faster than his normal running speed.
|
hcb+ 
|
5/24/12
|
|
|
HL
|
rdp+ 
|
16/2+2+2/18
|
|
|
HL
|
|
114 Shiki: Aragami - (hcb+K)
- Not overhead like in some games you might be familiar with. Instead it is very fast and very safe on block (perhaps advantage?). It can be crouched under by many characters though. Used mostly as a combo ender that does a lot of stun damage, but is also a very very good preventative anti-air since is also very nice on block.
|
rdp+ 
|
26/3+2+2+2/17
|
|
|
HL
|
| DM
|
qcb,hcf+
|
20/16/28
|
KD/-15
|
|
HL
|
|
Ura 108 Shiki: Orochi Nagi - qcb,hcf+P
- 28 frames of blockstun.
- Can combo off a heavy attack if charged slightly.
- Invincibility: Frame 1-8 Charged: Frame: 1-2 and 4 frames after charge. Lower body invincible during charge.
|
qcb,hcf+
|
18/16/32
|
KD/-19
|
|
HL
|
qcb,hcf+
|
2+0~90+17/36/16
|
KD/-15
|
|
HL
|
|
|
|
qcf,qcf+
|
7/15+16+31/45
|
KD/-15
|
|
HL
|
|
- qcf,qcf+P
- 28 frames of blockstun.
- Can combo off a heavy attack if charged slightly.
- Invincibility: Frame 1-8 Charged: Frame: 1-2 and 4 frames after charge. Lower body invincible during charge.
|
qcf,qcf+
|
9/15+16+31/48
|
KD/-19
|
|
HL
|
qcf,qcf+
|
9/87/45
|
KD/-19
|
|
HL
|
|
Throws
- b or f + C - Breakable, forward knockdown, face forward, rollable.
- b or f + D - Breakable, reverse knockdown, back turned, un-rollable.
D throw preferable unless you have them in the corner for better wakeups.
Special Moves
Counter/Uppercut Thing (qcb+P) - Not really used for the uppercut, but can catch moves if they connect right after it starts up. This is actually not a bad move, and you'll find a ton of setups for it if you experiment. Here's one I already mentioned: qcf+C (blocked), qcb+A.
Desperation Moves
Orochinagi (qcb,hcf+P) - A version is slower and has lower-body invincibility, C version is faster and has upper-body invincibility. C version can combo from Kyo's hard attacks or a chained f+B. It can connect after qcf+D~D for max damage. Can be charged. The MAX version surrounds him in flame, and has a reduced hitbox size (you're probably going to run into flames before you hit him).
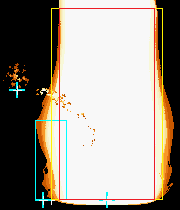
Final Showdown (qcf,qcf+P) - C version has a tiny bit more invincibility. Creates a huge hitbox in front of his feet spanning about 1.5 character spaces. Comboable off lights (which means comboable off a low cr.B,cr.A, etc.), and is Kyo's scariest source of damage, as it does quite a chunk more than the average DM. Since it's so fast, it serves as a punisher for many laggy moves, like Iori's 1/3 or 2/3 rekka's, or Iori's sweep. Can be used as an anti-air as well. MAX version does more damage.
Combos
Here are some important combos with Kyo. I tried to list the most important combos at the top.
- cr.B,cr.A/cl.A/cl.B xx qcf,qcf+P (PRACTICE this and get as consistent as you can with it to play an effective Kyo; Sometimes you can get f.A/B depending of your distance, so cr.A is the safest, but hardest option, and is the one you should practice the most.)
- cl.C xx qcf+D~D (note: only works from very close or from a crossup, or in the corner), rdp+B (for stun)/qcb,hcf+P (for damage)/qcf+A~hcb+A~A (for max corner damage)
- cr.B,crA/cl.A/cl.B xx dp+A
- cl.C,f+B (2 hits) xx qcb,hcf+C (good against back turned, big characters, or when the opponent is dizzied)
Anytime you land D Hopkicks (qcf+D~D), you have a few options. The most common/useful are:
- B RED Kick (rdp+B) for tons of stun damage + un-rollable wakeups.
- Orochinagi (qcb,hcf+P) for the best damage.
- Bald Eagle~overhead~OTG hit (qcf+A~hcb+A~A) in the corner only for the maximum meterless damage.
Note that you can link close C from cr.B. It is a 1-frame link, but more if you perform the cr.B meaty.
The cr.B to qcf,qcf+P combo can be done as cr.B, qcf+A/B, qcf+A. This is because cr.B isn't cancelable, but is naturally chainable into standing A or B, so you can buffer without holding any buttons to keep qcf+A from coming out.


