mNo edit summary |
|||
| Line 33: | Line 33: | ||
! [[image:snka.gif]] | ! [[image:snka.gif]] | ||
|align="center"| 3/4/4 | |align="center"| 3/4/4 | ||
|align="center"| | |align="center"| -/- | ||
|align="center"| | |align="center"| C | ||
|align="center"| HL | |align="center"| HL | ||
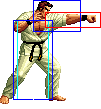
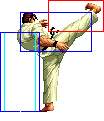
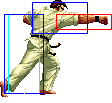
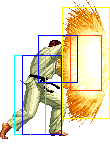
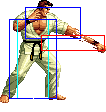
|colspan="2" | [[image:Takuma98_clA.png|center]] | |colspan="2" | [[image:Takuma98_clA.png|center]] | ||
| Line 41: | Line 41: | ||
! [[image:snkb.gif]] | ! [[image:snkb.gif]] | ||
|align="center"| 4/4/9 | |align="center"| 4/4/9 | ||
|align="center"| | |align="center"| -/- | ||
|align="center"| | |align="center"| C | ||
|align="center"| HL | |align="center"| HL | ||
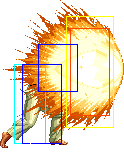
|colspan="2" | [[image:Takuma98_clB.png|center]] | |colspan="2" | [[image:Takuma98_clB.png|center]] | ||
| Line 49: | Line 49: | ||
! [[image:snkc.gif]] | ! [[image:snkc.gif]] | ||
|align="center"| 3/4/17 | |align="center"| 3/4/17 | ||
|align="center"| | |align="center"| -/- | ||
|align="center"| | |align="center"| C | ||
|align="center"| HL | |align="center"| HL | ||
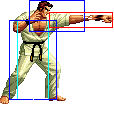
|colspan="2" | [[image:Takuma98_clC.png|center|I'M ANGRY ABOUT PUNCHING]] | |colspan="2" | [[image:Takuma98_clC.png|center|I'M ANGRY ABOUT PUNCHING]] | ||
| Line 57: | Line 57: | ||
! [[image:snkd.gif]] | ! [[image:snkd.gif]] | ||
|align="center"| 7/4/17 | |align="center"| 7/4/17 | ||
|align="center"| | |align="center"| -/- | ||
|align="center"| | |align="center"| - | ||
|align="center"| HL | |align="center"| HL | ||
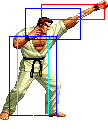
|colspan="2" | [[image:Takuma98_clD.png|center]] | |colspan="2" | [[image:Takuma98_clD.png|center]] | ||
| Line 67: | Line 67: | ||
! [[image:snka.gif]] | ! [[image:snka.gif]] | ||
|align="center"| 3/4/6 | |align="center"| 3/4/6 | ||
|align="center"| | |align="center"| -/- | ||
| | |align="center"| - | ||
|align="center"| HL | |align="center"| HL | ||
|colspan="2" | [[image:Takuma98_stA.png|center]] | |colspan="2" | [[image:Takuma98_stA.png|center]] | ||
| Line 75: | Line 75: | ||
! [[image:snkb.gif]] | ! [[image:snkb.gif]] | ||
|align="center"| 4/3/13 | |align="center"| 4/3/13 | ||
|align="center"| | |align="center"| -/- | ||
| | |align="center"| - | ||
|align="center"| HL | |align="center"| HL | ||
|colspan="2" | [[image:Takuma98_stB.png|center]] | |colspan="2" | [[image:Takuma98_stB.png|center]] | ||
| Line 83: | Line 83: | ||
! [[image:snkc.gif]] | ! [[image:snkc.gif]] | ||
|align="center"| 8/4/18 | |align="center"| 8/4/18 | ||
|align="center"| | |align="center"| -/- | ||
| | |align="center"| - | ||
|align="center"| HL | |align="center"| HL | ||
|colspan="2" | [[image:Takuma98_stC.png|center]] | |colspan="2" | [[image:Takuma98_stC.png|center]] | ||
| Line 91: | Line 91: | ||
! [[image:snkd.gif]] | ! [[image:snkd.gif]] | ||
|align="center"| 14/4/19 | |align="center"| 14/4/19 | ||
|align="center"| | |align="center"| -/- | ||
| | |align="center"| - | ||
|align="center"| HL | |align="center"| HL | ||
|colspan="2"| [[image:Takuma98_stD.png|center]] | |colspan="2"| [[image:Takuma98_stD.png|center]] | ||
| Line 99: | Line 99: | ||
! [[image:snkc.gif]]+[[image:snkd.gif]] | ! [[image:snkc.gif]]+[[image:snkd.gif]] | ||
|align="center"| 11/5/23 | |align="center"| 11/5/23 | ||
|align="center"| | |align="center"| -/- | ||
|align="center"| | |align="center"| S | ||
|align="center"| HL | |align="center"| HL | ||
|colspan="2"| [[image:Takuma98_stCD.png|center]] | |colspan="2"| [[image:Takuma98_stCD.png|center]] | ||
| Line 109: | Line 109: | ||
! [[image:snka.gif]] | ! [[image:snka.gif]] | ||
|align="center"| 3/3/9 | |align="center"| 3/3/9 | ||
|align="center"| | |align="center"| -/+ | ||
|align="center"| | |align="center"| C | ||
|align="center"| HL | |align="center"| HL | ||
|colspan="2" | [[image:Takuma98_crA.png|center]] | |colspan="2" | [[image:Takuma98_crA.png|center]] | ||
| Line 117: | Line 117: | ||
! [[image:snkb.gif]] | ! [[image:snkb.gif]] | ||
|align="center"| 3/4/6 | |align="center"| 3/4/6 | ||
|align="center"| | |align="center"| -/+ | ||
| | |align="center"| C | ||
|align="center"| L | |align="center"| L | ||
|colspan="2" | [[image:Takuma98_crB.png|center]] | |colspan="2" | [[image:Takuma98_crB.png|center]] | ||
| Line 125: | Line 125: | ||
! [[image:snkc.gif]] | ! [[image:snkc.gif]] | ||
|align="center"| 3/2+4/25 | |align="center"| 3/2+4/25 | ||
|align="center"| | |align="center"| -/- | ||
|align="center"| | |align="center"| C | ||
|align="center"| HL | |align="center"| HL | ||
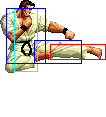
|valign="bottom" style="border-right:0px;"| [[image:Takuma98_crC1.png|center]] | |valign="bottom" style="border-right:0px;"| [[image:Takuma98_crC1.png|center]] | ||
| Line 134: | Line 134: | ||
! [[image:snkd.gif]] | ! [[image:snkd.gif]] | ||
|align="center"| 7/4/21 | |align="center"| 7/4/21 | ||
|align="center"| | |align="center"| -/- | ||
| | |align="center"| C | ||
|align="center"| L | |align="center"| L | ||
|colspan="2" | [[image:Takuma98_crD.png|center]] | |colspan="2" | [[image:Takuma98_crD.png|center]] | ||
| Line 145: | Line 145: | ||
|align="center"| 3/11 | |align="center"| 3/11 | ||
|align="center"| -/- | |align="center"| -/- | ||
| | |align="center"| - | ||
|align="center"| H | |align="center"| H | ||
|colspan="2" | [[image:Takuma98_jA.png|center]] | |colspan="2" | [[image:Takuma98_jA.png|center]] | ||
| Line 153: | Line 153: | ||
|align="center"| 3/9 | |align="center"| 3/9 | ||
|align="center"| -/- | |align="center"| -/- | ||
| | |align="center"| - | ||
|align="center"| H | |align="center"| H | ||
|colspan="2" | [[image:Takuma98_jB.png|center]] | |colspan="2" | [[image:Takuma98_jB.png|center]] | ||
| Line 161: | Line 161: | ||
|align="center"| 7/4 | |align="center"| 7/4 | ||
|align="center"| -/- | |align="center"| -/- | ||
| | |align="center"| - | ||
|align="center"| H | |align="center"| H | ||
|colspan="2" | [[image:Takuma98_jC.png|center]] | |colspan="2" | [[image:Takuma98_jC.png|center]] | ||
| Line 169: | Line 169: | ||
|align="center"| 8/4 | |align="center"| 8/4 | ||
|align="center"| -/- | |align="center"| -/- | ||
| | |align="center"| - | ||
|align="center"| H | |align="center"| H | ||
|colspan="2"| [[image:Takuma98_jD.png|center]] | |colspan="2"| [[image:Takuma98_jD.png|center]] | ||
| Line 177: | Line 177: | ||
|align="center"| 12/4 | |align="center"| 12/4 | ||
|align="center"| KD/- | |align="center"| KD/- | ||
| | |align="center"| - | ||
|align="center"| HL | |align="center"| HL | ||
|colspan="2"| [[image:Takuma98_jCD.png|center]] | |colspan="2"| [[image:Takuma98_jCD.png|center]] | ||
| Line 187: | Line 187: | ||
|align="center"| 6/9 | |align="center"| 6/9 | ||
|align="center"| -/- | |align="center"| -/- | ||
| | |align="center"| - | ||
|align="center"| H | |align="center"| H | ||
|colspan="2" | [[image:Takuma98_njB.png|center]] | |colspan="2" | [[image:Takuma98_njB.png|center]] | ||
| Line 197: | Line 197: | ||
|align="center"| 7/2/26 | |align="center"| 7/2/26 | ||
|align="center"| KD/-10 | |align="center"| KD/-10 | ||
|align="center"| S | |align="center"| S | ||
|align="center"| HL | |align="center"| HL | ||
|rowspan="2" colspan="2" | [[image:Takuma98_fA.png|center]] | |rowspan="2" colspan="2" | [[image:Takuma98_fA.png|center]] | ||
| Line 205: | Line 205: | ||
|align="center"| 7/2/26 | |align="center"| 7/2/26 | ||
|align="center"| -8/-10 | |align="center"| -8/-10 | ||
|align="center"| S | |align="center"| S | ||
|align="center"| HL | |align="center"| HL | ||
|- | |- | ||
! <br>f+[[image:snkb.gif]]<br><br> | ! <br>f+[[image:snkb.gif]]<br><br> | ||
|align="center"| 15/3+4/19 | |align="center"| 15/3+4/19 | ||
|align="center"| | |align="center"| -/- | ||
| | |align="center"| - | ||
|align="center"| H | |align="center"| H | ||
|rowspan="2" valign="bottom" style="border-right:0px;"| [[image:Takuma98_fB1.png|center]] | |rowspan="2" valign="bottom" style="border-right:0px;"| [[image:Takuma98_fB1.png|center]] | ||
| Line 219: | Line 219: | ||
! f+[[image:snkb.gif]] (cancel) | ! f+[[image:snkb.gif]] (cancel) | ||
|align="center"| 9/3+4/19 | |align="center"| 9/3+4/19 | ||
|align="center"| | |align="center"| -/- | ||
|align="center"| S | |align="center"| S | ||
|align="center"| HL | |align="center"| HL | ||
|- | |- | ||
Revision as of 21:34, 7 May 2018
Introduction
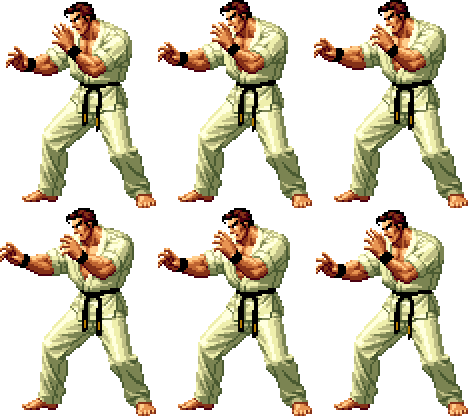
He's old. That's why he's on the team with all the other old guys.
Colors

|

|

|

|
Gameplay Overview
Takuma is a poking/zoning character with some very nice combo/mixup options as well. His Ranbu is one of the better sups in the game property-wise, and allows him to catch jumps/rolls on reaction as well as get great combo damage. His fireballs are of the highest traveling type, which means Leona/Heidern/Chris can run under them, and Iori can super under them, among other things. He still remains high-mid in the tier list, because he has a good variety of tools other than his fireballs and basic zoning.
In-Depth Analysis
Movelist
Normal Throws
b or f+C - Breakable, front knockdown, face forward, un-rollable.
b or f+D - Breakable, front knockdown, back turned, un-rollable.
D throw preferred, but they are both un-rollable so just use whichever one you need for positioning or preference.
Special Moves
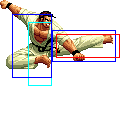
Running Kneebash Grab (hcb+K) - D version runs further. You can use this if you get a really meaty fireball on top of them to make it unblockable. Catch epople trying to roll through fireballs. You might be able to tick into one (note you have to so it after a light hit, not cancel it) if you get someone scared enough, but it's pretty risky. Has invincibility to lows near the end.
Desperation Moves
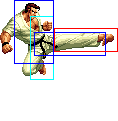
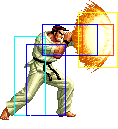
Ryuuko Ranbu (qcf,hcb+P) - A version is extremely fast and safe on block from 99% of everything, but it is possible to trade with attacks that are already out. C version is completely invincible on startup, but he freezes for a bit longer. Can go through fireballs, too. One of the scariest supers in the game. Use it as anti-air, anti-roll, etc. If your opponent doesn't tech roll after this, you can go for a qcf+A, hcb+B unblockable fireball setup. Fun fact: the C version can be thrown on reaction. So if you think someone will wakeup with it, you can be a dick and throw them out of it. No real point to that, since that one is punishable anyway. Max version is totally invincible and punishable.
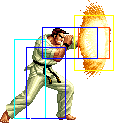
Super O.L.D. Punch (qcf,qcf+P) - Proximity unblockable. A version is faster, C version can be thrown on reaction. It's kind of hard to land with Takuma since he doesn't have the setups that some other characters have. Not necessarily a bad super, they just gave it to the wrong character. Still, empty short hop into this, etc. can work. Experiment and read your opponent!
Combos
Takuma has a few different variations that lead into super, so experiment and find the one you're most comfortable with.
- cr.A/Bx2,f+A xx C Fireball (qcf+C)
- cr.A/Bx3,f+A (optional) xx A Ryuuko Ranbu (qcf,hcb+A)
- cr.A/Bx2,f+b (optional) xx A Ryuuko Ranbu (qcf,hcb+A)
- cr.C xx D Flying Kick (charge d/b,f+D), Rapid Punches (f,b,f+P)/st.CD xx A Fireball (qcf+A), B Running Kneebash Grab (hcb+B) (unblockable fireball setup if they roll)
Always use cr.B to start, then switch to cr.A if you want for the last light hit, but you can also just use cr.B for all the hits. Remember to use the hold buffering method if you use f+A (ie hold down B and use qcf+A for f+A input, then hcb+A to super). That way you won't get a fireball. Using f+B won't require this, but it has less range. Personally I just use cr.Bx3 xx super.
